maintenance - Polaris
maintenance - Polaris
maintenance - Polaris

Create successful ePaper yourself
Turn your PDF publications into a flip-book with our unique Google optimized e-Paper software.
Pantone 426C<br />
Improper vehicle use can result in SEVERE INJURY or DEATH.<br />
NEVER Operate:<br />
At speeds too fast for your skills or the conditions.<br />
After or while using Alcohol or Drugs.<br />
On hills steeper than 15 degrees 15 .<br />
On public roads. A collision can occur with another vehicle.<br />
With more than ONE passenger, or with a passenger under age<br />
twelve or who cannot comfortably reach the floor and hand holds.<br />
On paved surfaces - pavement may seriously affect handling<br />
and control.<br />
With non-<strong>Polaris</strong> approved accessories - they may seriously affect<br />
stability.<br />
ALWAYS:<br />
Wear your seat belt. Vehicle rollover could cause severe injury or<br />
death.<br />
Wear a helmet and eye protection and keep hands and feet in vehicle<br />
at all times.<br />
Reduce speed and use extra caution when carrying passengers.<br />
Avoid sharp turns or turns while applying heavy throttle.<br />
Operate slowly in reverse - avoid sharp turns or sudden braking.<br />
Make sure passenger reads and understands all safety labels.<br />
Watch for branches or other hazards that could enter vehicle.<br />
READ OWNER'S MANUAL.<br />
FOLLOW ALL INSTRUCTIONS AND WARNINGS.<br />
For your nearest <strong>Polaris</strong> dealer,<br />
call 1-800-POLARIS<br />
or visit www.polarisindustries.com<br />
<strong>Polaris</strong> Sales Inc.,<br />
2100 Hwy. 55, Medina, MN 55340<br />
Phone 1-888-704-5290<br />
Part No. 9922123 Rev 03<br />
Printed in USA
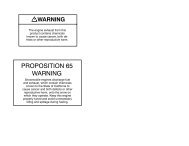
WARNING<br />
Read, understand, and follow all of the instructions and safety precautions in<br />
this manual and on all product labels.<br />
Failure to follow the safety precautions could result in serious injury or death.<br />
WARNING<br />
The engine exhaust from this product contains chemicals known to the State<br />
of California to cause cancer, birth defects or other reproductive harm.
The text is printed on 100% recycled<br />
with 40% post-consumer waste (PCW).
WELCOME<br />
Thank you for purchasing a <strong>Polaris</strong> vehicle, and welcome to our worldwide<br />
family of <strong>Polaris</strong> owners. We proudly produce an exciting line of<br />
utility and recreational products.<br />
• Snowmobiles<br />
• All-terrain vehicles (ATVs)<br />
• RANGER ® utility vehicles<br />
• Victory Motorcycles ®<br />
We believe <strong>Polaris</strong> sets a standard of excellence for all utility and recreational<br />
vehicles manufactured in the world today. Many years of experience<br />
have gone into the engineering, design, and development of your<br />
<strong>Polaris</strong> vehicle, making it the finest machine we’ve ever produced.<br />
For safe and enjoyable operation of your vehicle, be sure to follow the<br />
instructions and recommendations in this owner’s manual. Your manual<br />
contains instructions for minor <strong>maintenance</strong>, but information about<br />
major repairs is outlined in the <strong>Polaris</strong> Service Manual and should be<br />
performed only by a factory certified Master Service Dealer ® (MSD)<br />
technician.<br />
Your <strong>Polaris</strong> dealer knows your vehicle best and is interested in your<br />
total satisfaction. Be sure to return to your dealership for all of your service<br />
needs during, and after, the warranty period.<br />
We also take great pride in our complete line of apparel, parts and accessories,<br />
available through our online store at www.purepolaris.com. Have<br />
your accessories and clothing delivered right to your door!<br />
1
POLARIS, THE WAY OUT and RANGER are registered trademarks of <strong>Polaris</strong> Industries<br />
Inc.<br />
Copyright 2009 <strong>Polaris</strong> Sales Inc. All information contained within this publication is<br />
based on the latest product information at the time of publication. Due to constant<br />
improvements in the design and quality of production components, some minor discrepancies<br />
may result between the actual vehicle and the information presented in this publication.<br />
Depictions and/or procedures in this publication are intended for reference use<br />
only. No liability can be accepted for omissions or inaccuracies. Any reprinting or reuse<br />
of the depictions and/or procedures contained within, whether whole or in part, is<br />
expressly prohibited.<br />
Printed in U.S.A.<br />
2010 RANGER 400 HO Owner’s Manual<br />
P/N 9922123<br />
2
TABLE OF CONTENTS<br />
Introduction . . . . . . . . . . . . . . . . . . . . . . . . . . . . 4<br />
Safety . . . . . . . . . . . . . . . . . . . . . . . . . . . . . . . . . 7<br />
Features and Controls . . . . . . . . . . . . . . . . . . . 18<br />
Operation . . . . . . . . . . . . . . . . . . . . . . . . . . . . . 27<br />
Emission Control Systems . . . . . . . . . . . . . . . 47<br />
Maintenance . . . . . . . . . . . . . . . . . . . . . . . . . . . 48<br />
Specifications. . . . . . . . . . . . . . . . . . . . . . . . . . 98<br />
<strong>Polaris</strong> Products. . . . . . . . . . . . . . . . . . . . . . . 100<br />
Troubleshooting . . . . . . . . . . . . . . . . . . . . . . . 101<br />
Declaration of Conformity . . . . . . . . . . . . . . . 105<br />
Warranty . . . . . . . . . . . . . . . . . . . . . . . . . . . . . 106<br />
Maintenance Log . . . . . . . . . . . . . . . . . . . . . . 112<br />
Index . . . . . . . . . . . . . . . . . . . . . . . . . . . . . . . . 115<br />
3
INTRODUCTION<br />
The RANGER is an off-road vehicle. Familiarize yourself with all laws<br />
and regulations concerning the operation of this vehicle in your area.<br />
The following signal words and symbols appear throughout this manual<br />
and on your vehicle. Your safety is involved when these words and symbols<br />
are used. Become familiar with their meanings before reading the<br />
manual.<br />
The safety alert symbol indicates a potential personal injury hazard.<br />
WARNING<br />
A WARNING indicates a hazardous situation which, if not avoided, may result in<br />
death or serious injury.<br />
CAUTION<br />
A CAUTION indicates a hazardous situation which, if not avoided, may result in<br />
minor or moderate injury.<br />
NOTICE<br />
A NOTICE indicates a situation that may result in property damage.<br />
The Prohibition Safety Sign indicates an action NOT to take in order<br />
to avoid a hazard.<br />
The Mandatory Action Sign indicates an action that NEEDS to be<br />
taken to avoid a hazard.<br />
4
WARNING<br />
INTRODUCTION<br />
Failure to follow the warnings contained in this manual can result in severe<br />
injury or death.<br />
A <strong>Polaris</strong> RANGER is not a toy and can be hazardous to operate. This vehicle<br />
handles differently than other vehicles, such as motorcycles and cars. A collision<br />
or rollover can occur quickly, even during routine maneuvers like turning, or<br />
driving on hills or over obstacles, if you fail to take proper precautions.<br />
• Read this owner’s manual. Understand all safety warnings, precautions and<br />
operating procedures before operating the vehicle. Keep this manual with the<br />
vehicle.<br />
• This vehicle is an ADULT VEHICLE ONLY. NEVER operate this vehicle if you<br />
are under age 16 and NEVER operate without a valid driver’s license.<br />
• No person under the age of 12 may ride as a passenger in this vehicle. Any<br />
passenger must be able to comfortably reach the floor and hand holds.<br />
• Never permit a guest to operate this vehicle unless the guest has read this<br />
manual and all product labels.<br />
5
INTRODUCTION<br />
Vehicle Identification Numbers<br />
Record your vehicle's identification numbers and key number in the<br />
spaces provided. Remove the spare key and store it in a safe place. An<br />
ignition key can be duplicated only by ordering a <strong>Polaris</strong> key blank<br />
(using your key number) and mating it with one of your existing keys.<br />
The ignition switch must be replaced if all keys are lost.<br />
####<br />
Key<br />
Number<br />
VIN<br />
Vehicle Model Number: ___________________________________________________<br />
Frame VIN: ____________________________________________________________<br />
Engine Serial Number: ___________________________________________________<br />
(label on side of engine)<br />
Key Number ____________________________________________________________<br />
6
SAFETY<br />
Safety Labels and Locations<br />
Warning labels have been placed on the vehicle for your protection.<br />
Read and follow the instructions of the labels on the vehicle carefully. If<br />
any of the labels depicted in this manual differ from the labels on your<br />
vehicle, always read and follow the instructions of the labels on the<br />
vehicle.<br />
If any label becomes illegible or comes off, contact your <strong>Polaris</strong> dealer<br />
to purchase a replacement. Replacement safety labels are provided by<br />
<strong>Polaris</strong> at no charge. The part number is printed on the label.<br />
Container/Passenger/Tire Pressure Warning<br />
WARNING<br />
• Passengers can be thrown off. This can cause<br />
serious injury or death.<br />
<br />
• Never carry passengers in cargo box.<br />
Maximum Box Load 500 lbs. (227 kg)<br />
IMPROPER TIRE PRESSURE OR<br />
OVERLOADING can cause loss of control<br />
resulting in SEVERE INJURY OR DEATH.<br />
TIRE PRESSURE IN PSI (KPa):<br />
FRONT TIRE - INFLATE TO 10 psi (68.9 kPa)<br />
REAR TIRE - INFLATE TO 10 psi (68.9 kPa)<br />
MAXIMUM WEIGHT CAPACITY INCLUDES<br />
WEIGHT OF OPERATOR, PASSENGER,<br />
CARGO AND ACCESSORIES. 1000 LBS. (455 kg)<br />
Reduce speed and allow greater distance for braking when carrying cargo.<br />
Overloading or carrying tall, off-center, or unsecured loads will increase your risk<br />
of losing control. Loads should be centered and carried as low as possible in<br />
box. For stability on rough or hilly terrain, reduce speed and cargo. Be careful if<br />
load extends over the side of the box.<br />
Read Owner's Manual for more detailed loading information.<br />
7175941<br />
7
SAFETY<br />
Safety Labels and Locations<br />
Age 16 Warning<br />
Operating this vehicle if you are<br />
under the age of 16 increases your<br />
chance of severe injury or death.<br />
NEVER operate this vehicle if you<br />
are under age 16 and NEVER<br />
operate this vehicle without a valid<br />
driver’s license.<br />
7175566<br />
Shift Caution<br />
CAUTION<br />
To avoid transmission damage, shift<br />
only when vehicle is stationary and<br />
at idle.<br />
APPLY BRAKE TO START. When<br />
this vehicle is not in operation, or<br />
unattended, place shift in the park<br />
position.<br />
7176170<br />
Clutch Cover Warning<br />
WARNING<br />
• Moving parts hazard under belt-clutch<br />
guard. To prevent serious injury, do<br />
not operate vehicle with guard<br />
removed.<br />
• Do not modify engine or clutch. Doing<br />
so can cause part failure, possible<br />
imbalance, and excessive engine<br />
RPM which can result in serious injury<br />
or death.<br />
7175488<br />
Age 16<br />
Warning<br />
Discretionary<br />
Warning<br />
Shift Caution<br />
Clutch Cover<br />
Warning<br />
8
Safety Labels and Locations<br />
Discretionary Warning<br />
SAFETY<br />
WARNING<br />
Improper vehicle use can result in Severe Injury or Death.<br />
NEVER Operate:<br />
• At speeds too fast for your skills or the conditions.<br />
• After or while using Alcohol or Drugs.<br />
• On hills steeper than 15 degrees 15°.<br />
• On public roads, a collision can occur with a another vehicle.<br />
• With more than ONE passenger, or a passenger under age twelve or who cannot<br />
comfortably reach the floor and hand holds.<br />
• On paved surfaces - pavement may seriously affect handling and control.<br />
• With non-<strong>Polaris</strong> approved accessories - they may seriously affect stability.<br />
ALWAYS:<br />
• Wear your seat belt. Vehicle rollover could cause severe injury or death.<br />
• Wear a helmet and eye protection and keep hands and feet in vehicle at all<br />
times.<br />
• Reduce speed and use extra caution when carrying a passenger.<br />
• Avoid sharp turns or turns while applying heavy throttle.<br />
• Operate slowly in reverse - avoid sharp turns or sudden braking.<br />
• Make sure passenger reads and understands all safety labels.<br />
• Watch for branches or other hazards that could enter vehicle.<br />
LOCATE AND READ OWNER’S MANUAL. FOLLOW ALL INSTRUCTIONS<br />
AND WARNINGS.<br />
7176169<br />
9
SAFETY<br />
Operator Safety<br />
WARNING<br />
Serious injury or death can result if you do not follow these instructions and<br />
procedures, which are outlined in further detail within your owner's manual.<br />
• Read this manual and all labels carefully. Follow the operating<br />
procedures described.<br />
• Never allow anyone under age 16 to operate this vehicle and never<br />
allow anyone without a valid driver's license to operate this vehicle.<br />
• Do not carry a passenger until you have at least two hours of driving<br />
experience with this vehicle.<br />
• No person under the age of 12 may ride as a passenger in this vehicle.<br />
Any passenger must be able to comfortably reach the floor and hand<br />
holds.<br />
• The driver and any passenger must wear helmet, eye protection and<br />
seat belt at all times.<br />
• Always keep arms and legs inside the cab frame while the vehicle is<br />
in motion.<br />
• Always keep both hands on the steering wheel and both feet on the<br />
floorboards of the vehicle during operation.<br />
• Never permit a guest to operate this vehicle unless the guest has read<br />
this manual and all product labels.<br />
• To reduce tipover risk, be especially careful when encountering<br />
obstacles and slopes and when braking on hills or during turns.<br />
• This vehicle is for off road use only. Never operate on public roads.<br />
Always avoid paved surfaces.<br />
• Never consume alcohol or drugs before or while operating this<br />
vehicle.<br />
• Never operate at excessive speeds. Always travel at a speed proper<br />
for the terrain, visibility and operating conditions, and your<br />
experience.<br />
• Never attempt jumps or other stunts.<br />
10
SAFETY<br />
Operator Safety<br />
• Always inspect your vehicle each time you use it to make sure it's in<br />
safe operating condition. Always follow the inspection and<br />
<strong>maintenance</strong> procedures and schedules described in this manual.<br />
• Always travel slowly and use extra caution when operating on<br />
unfamiliar terrain. Be alert to changing terrain.<br />
• Never operate on excessively rough, slippery or loose terrain.<br />
• Always follow proper procedures for turning. Practice turning at slow<br />
speeds before attempting to turn at faster speeds. Never turn at excessive<br />
speeds.<br />
• Always have this vehicle checked by an authorized <strong>Polaris</strong> dealer if it<br />
has been involved in an accident.<br />
• Never operate this vehicle on hills too steep for the vehicle or for your<br />
abilities. Practice on smaller hills before attempting larger hills.<br />
• Always follow proper procedures for climbing hills as described in<br />
this manual. Check the terrain carefully before attempting to climb a<br />
hill. Never climb hills with excessively slippery or loose surfaces.<br />
Never open the throttle suddenly or make sudden gear changes. Never<br />
go over the top of a hill at high speed.<br />
• Always follow the proper procedures outlined in this manual for traveling<br />
downhill and for braking on hills. Check the terrain carefully<br />
before descending a hill. Never travel downhill at high speed. Avoid<br />
going downhill at an angle, which would cause the vehicle to lean<br />
sharply to one side. Travel straight down the hill where possible.<br />
• Always check for obstacles before operating in a new area. Never<br />
attempt to operate over large obstacles such as rocks or fallen trees.<br />
Always follow the proper procedures outlined in this manual when<br />
operating over obstacles.<br />
• Always be careful of skidding or sliding. On slippery surfaces such as<br />
ice, travel slowly and exercise caution to reduce the chance of skidding<br />
or sliding out of control.<br />
11
SAFETY<br />
Operator Safety<br />
• Never operate your vehicle in fast-flowing water or in water deeper<br />
than that specified in this manual. Wet brakes may have reduced stopping<br />
ability. Test your brakes after leaving water. If necessary, apply<br />
them lightly several times to let friction dry out the pads.<br />
• Always be sure there are no obstacles or people behind your vehicle<br />
when operating in reverse. When it's safe to proceed in reverse, move<br />
slowly. Avoid turning at sharp angles in reverse.<br />
• Always use the proper size and type of tires specified in this manual.<br />
Always maintain proper tire pressure as specified on safety labels.<br />
• Never modify this vehicle through improper installation or use of<br />
accessories.<br />
• Never exceed the stated load capacity for this vehicle. Cargo should<br />
be properly distributed and securely attached. Reduce speed and follow<br />
the instructions in this manual for hauling cargo or pulling a<br />
trailer. Allow a greater distance for braking.<br />
• Always place the transmission in PARK before getting out of the<br />
vehicle.<br />
• Always stop the engine before refueling. Make sure the refueling area<br />
is well ventilated and free of any source of flame or sparks. Gasoline<br />
is extremely flammable. See page 15 for fuel safety warnings.<br />
• Always remove the ignition key when the vehicle is not in use to prevent<br />
unauthorized use or accidental starting.<br />
FOR MORE INFORMATION ABOUT SAFETY, call <strong>Polaris</strong> at 1-800-<br />
342-3764.<br />
12
SAFETY<br />
Operator Safety<br />
Equipment Modifications<br />
We strongly recommend that consumers do not install on a <strong>Polaris</strong><br />
RANGER any equipment that may increase the speed or power of the<br />
vehicle, or make any other modifications to the vehicle for these purposes.<br />
Any modifications to the original equipment of the vehicle create<br />
a substantial safety hazard and increase the risk of bodily injury.<br />
The warranty on your <strong>Polaris</strong> RANGER is terminated if any equipment<br />
has been added to the vehicle, or if any modifications have been made to<br />
the vehicle, that increase its speed or power.<br />
The addition of certain accessories, including (but not limited to) mowers,<br />
blades, tires, sprayers, or large racks, may change the handling characteristics<br />
of the vehicle. Use only <strong>Polaris</strong>-approved accessories, and<br />
familiarize yourself with their function and effect on the vehicle.<br />
13
SAFETY<br />
Operator Safety<br />
WARNING<br />
Failure to operate the RANGER properly can result in a collision, loss of control,<br />
accident or overturn, which may result in serious injury or death. Heed all safety<br />
warnings outlined in this section of the owner’s manual. See the OPERATION<br />
section of the owner’s manual for proper operating procedures.<br />
Age Restrictions<br />
This vehicle is an ADULT VEHICLE ONLY.<br />
NEVER operate this vehicle if you are under<br />
age 16 and NEVER operate without a valid<br />
driver’s license.<br />
No person under the age of 12 may ride as a<br />
passenger in this vehicle. Any passenger<br />
must be able to comfortably reach the floor<br />
and hand holds.<br />
Operating Without Instruction<br />
Operating this vehicle without proper<br />
instruction increases the risk of an accident.<br />
The operator must understand how to<br />
operate the vehicle properly in different<br />
situations and on different types of terrain.<br />
All operators must read and understand the<br />
Owner's Manual and all warning and<br />
instruction labels before operating the<br />
vehicle.<br />
Seat Belts<br />
Riding in this vehicle without wearing the seat belt increases the risk of serious<br />
injury in the event of an accident or sudden stop. Riders must wear seat belts at<br />
all times. Always make sure the seat belts are secured for both the operator and<br />
passenger before riding.<br />
Using Alcohol or Drugs<br />
Operating the vehicle after consuming alcohol<br />
or drugs could adversely affect operator<br />
judgment, reaction time, balance and<br />
perception.<br />
Never drink alcohol or use drugs or medications<br />
before or while operating this vehicle.<br />
14
SAFETY<br />
Operator Safety<br />
Failure to Inspect Before Operating<br />
Failure to inspect and verify that the vehicle is in safe operating condition before<br />
operating increases the risk of an accident.<br />
Always inspect your RANGER before each use to make sure it's in safe<br />
operating condition. Always follow all inspection and <strong>maintenance</strong> procedures<br />
and schedules described in the owner's manual.<br />
Handling Gasoline<br />
Gasoline is highly flammable and explosive under certain conditions.<br />
• Always exercise extreme caution whenever handling gasoline.<br />
• Always stop the engine when refueling.<br />
• Always refuel outdoors or in a well ventilated area.<br />
• Remove flammable material containers from box before filling.<br />
• Do not smoke or allow open flames or sparks in or near the area where refueling<br />
is performed or where gasoline is stored.<br />
• Do not overfill the tank. Do not fill the tank neck.<br />
• If gasoline spills on your skin or clothing, immediately wash it off with soap<br />
and water and change clothing.<br />
• Turn the fuel valve off whenever the vehicle is stored or parked.<br />
Exposure to Exhaust<br />
Engine exhaust fumes are poisonous and can cause loss of consciousness or<br />
death in a short time. Never start the engine or let it run in an enclosed area.<br />
The engine exhaust from this product contains chemicals known to cause<br />
cancer, birth defects or other reproductive harm. Operate this vehicle only<br />
outdoors or in well-ventilated areas.<br />
Operating a Damaged Vehicle<br />
Operating a damaged vehicle can result in an accident. After any overturn or<br />
accident, have a qualified service dealer inspect the entire machine for possible<br />
damage, including (but not limited to) brakes, throttle and steering systems.<br />
Operating at Excessive Speeds<br />
Operating this vehicle at excessive speeds increases the operator's risk of<br />
losing control. Always operate at a speed that's appropriate for the terrain, the<br />
visibility and operating conditions, your skills and your passenger’s skills.<br />
15
SAFETY<br />
Operator Safety<br />
Operating on Pavement<br />
This vehicle's tires are designed for off-road use only, not for use on pavement.<br />
Operating this vehicle on paved surfaces (including sidewalks, paths, parking<br />
lots and driveways) may adversely affect the handling of the vehicle and could<br />
result in loss of control and accident or overturn.<br />
Avoid operating the vehicle on pavement. If it's unavoidable, travel slowly and<br />
avoid sudden turns or stops.<br />
Operating on Public Roads<br />
Operating this vehicle on public streets, roads or highways could result in a<br />
collision with another vehicle.<br />
Never operate this vehicle on any public street, road or highway, including dirt<br />
and gravel roads. In some areas it's unlawful to operate this vehicle on public<br />
streets, roads and highways.<br />
Turning Improperly<br />
Turning improperly could cause loss of traction, loss of control, accident or<br />
overturn. Always follow proper procedures for turning. Never turn abruptly or at<br />
sharp angles. Never turn at high speeds. Practice turning at slow speeds before<br />
attempting to turn at faster speeds.<br />
Jumps and Stunts<br />
Attempting wheelies, jumps and other stunts increases the risk of an accident or<br />
overturn. Never attempt wheelies, jumps, or other stunts. Avoid exhibition<br />
driving.<br />
Operating in Unfamiliar Terrain<br />
Failure to use extra caution when operating on unfamiliar terrain could result in<br />
an accident or overturn. Unfamiliar terrain may contain hidden rocks, bumps, or<br />
holes that could cause loss of control or overturn.<br />
Travel slowly and use extra caution when operating on unfamiliar terrain. Always<br />
be alert to changing terrain conditions.<br />
Operating on Slippery Terrain<br />
Failure to use extra caution when operating on excessively rough, slippery or<br />
loose terrain could cause loss of traction, loss of control, accident or overturn.<br />
Do not operate on excessively slippery surfaces. Always reduce speed and use<br />
additional caution when operating on slippery surfaces.<br />
16
SAFETY<br />
Operator Safety<br />
Improper Hill Climbing<br />
Climbing hills improperly can cause loss of control or vehicle overturn. Always<br />
follow proper procedures for climbing hills as described in the owner's manual.<br />
See page 34.<br />
Stalling While Climbing a Hill<br />
Stalling or rolling backwards while climbing a hill could cause an overturn.<br />
Always maintain a steady speed when climbing a hill.<br />
If all forward speed is lost:<br />
• Apply the brakes.<br />
• Place the transmission in reverse and slowly allow the vehicle to roll straight<br />
downhill while applying light brake pressure to control speed.<br />
If you begin rolling downhill:<br />
• Never apply engine power.<br />
• Apply the brakes gradually until the vehicle is fully stopped.<br />
• Place the transmission in reverse and slowly allow the vehicle to roll straight<br />
downhill while applying light brake pressure to control speed.<br />
Improper Tire Maintenance<br />
Operating this vehicle with improper tires or with improper or uneven tire<br />
pressure could cause loss of control or accident.<br />
Always use the size and type of tires specified for your vehicle. Always maintain<br />
proper tire pressure as described in the owner's manual and on safety labels.<br />
Operating on Frozen Bodies of Water<br />
Severe injury or death can result if the vehicle and/or the operator fall through<br />
the ice. Never operate the vehicle on a frozen body of water.<br />
Unauthorized Use of the Vehicle<br />
Leaving the keys in the ignition can lead to unauthorized use of the vehicle,<br />
which could result in an accident or overturn. Always remove the ignition key<br />
when the vehicle is not in use.<br />
Hot Exhaust Systems<br />
Exhaust system components are very hot during and after use of the vehicle.<br />
Hot components can cause burns and fire. Do not touch hot exhaust system<br />
components. Always keep combustible materials away from the exhaust<br />
system. Use caution when traveling through tall grass, especially dry grass.<br />
17
FEATURES AND CONTROLS<br />
Component Locations<br />
ROPS Cab<br />
Frame<br />
Cargo Box<br />
Hip Bar<br />
Console<br />
Fuel Tank Cap<br />
Headlights<br />
Radiator<br />
Front Bumper/Brush Guard<br />
18
FEATURES AND CONTROLS<br />
Component Locations<br />
Tailgate<br />
Latch<br />
Releases<br />
Tailgate<br />
Receiver<br />
Hitch<br />
Muffler<br />
(Spark Arrestor)<br />
CV Boot/Rear Caliper<br />
Trailer Hitch Bracket<br />
This vehicle is equipped with a receiver hitch bracket for a trailer hitch.<br />
Trailer towing equipment is not supplied with this vehicle.<br />
To avoid injury and property damage, always heed the warnings and<br />
towing capacities outlined on pages 40-43.<br />
19
FEATURES AND CONTROLS<br />
Console<br />
Indicator<br />
Lights<br />
Gear Selector<br />
(Shifter)<br />
Storage<br />
Compartment<br />
Storage<br />
Tray<br />
12V Auxiliary<br />
Outlets<br />
Cup<br />
Holder<br />
Auxiliary Outlets<br />
The 12-volt receptacles have spade connections on the back that may be<br />
used to power an auxiliary light or other optional accessories or lights.<br />
The connections are behind the console, under the hood.<br />
Indicator Lights<br />
High<br />
Temperature<br />
Reverse<br />
Gear<br />
Low Gear<br />
Park Gear<br />
Neutral Gear<br />
High Gear<br />
20
FEATURES AND CONTROLS<br />
Switches<br />
Ignition Switch/Light Switch<br />
The ignition switch is a four-position,<br />
key-operated switch. The key can be<br />
removed from the switch when it is in<br />
the OFF position.<br />
OFF<br />
LIGHTS ON<br />
LIGHTS OFF<br />
START<br />
The engine is off. Electrical circuits are off, except Acc,<br />
12V.<br />
Lights are on. Electrical circuits are on. Electrical equipment<br />
can be used.<br />
Lights are off. Electrical circuits are on. Electrical equipment<br />
can be used.<br />
Turn the key to the START position to engage the electric<br />
starter. Turn the key to the LIGHTS ON position after starting<br />
the engine.<br />
AWD/Differential Lock Switch<br />
The AWD/Differential Switch<br />
has three positions: All Wheel<br />
Drive (AWD), Differential Lock/<br />
Two Wheel Drive (2WD) and Off<br />
(1WD/Turf Mode).<br />
Press the top of the switch to<br />
engage All Wheel Drive (AWD).<br />
See page 45 for AWD operating<br />
instructions.<br />
Move the switch to the center<br />
position to lock the differential<br />
and operate in two wheel drive<br />
(2WD). Press the bottom of the<br />
switch to unlock the differential<br />
and allow the rear drive wheels to<br />
Ignition Switch<br />
Light Switch<br />
AWD/Differential Switch<br />
Choke<br />
Knob<br />
operate independently (1WD). This mode of operation is well suited to<br />
turf driving or when active traction is not needed.<br />
See page 46 for Differential Lock operating instructions.<br />
21
FEATURES AND CONTROLS<br />
Gear Selector<br />
H: High Gear<br />
Gear Selector<br />
L: Low Gear<br />
N: Neutral<br />
R: Reverse<br />
P: Park<br />
Low gear is the primary driving<br />
range for the RANGER.<br />
High gear is intended for use<br />
on hard-packed surfaces with<br />
light loads.<br />
Whenever the vehicle is left unattended, always place the transmission<br />
in PARK.<br />
To change gears, stop the vehicle, and with the engine idling, move the<br />
lever to the desired gear. Do not attempt to shift gears with engine speed<br />
above idle or while the vehicle is moving.<br />
Tip: Maintaining shift linkage adjustment is important to assure proper transmission<br />
function. See your dealer if you experience any shifting problems.<br />
NOTICE: Do not attempt to shift the transmission while the vehicle is moving or<br />
damage to the transmission could result. Always shift when the<br />
vehicle is stationary and the engine is at idle.<br />
22
FEATURES AND CONTROLS<br />
Brake Pedal<br />
Depress the brake pedal to slow or stop the vehicle. Apply the brakes<br />
while starting the engine.<br />
Throttle Pedal<br />
Push the pedal down to increase<br />
engine speed. Spring pressure<br />
returns the pedal to the rest position<br />
when released. Always check<br />
that the throttle pedal returns normally<br />
before starting the engine.<br />
Make sure there's adequate throttle<br />
pedal freeplay. See page 77 for<br />
throttle pedal adjustment procedures.<br />
Brake<br />
Pedal<br />
Throttle<br />
Pedal<br />
23
FEATURES AND CONTROLS<br />
Seat Belts<br />
This <strong>Polaris</strong> vehicle is equipped with<br />
three-point lap and diagonal seat belts for<br />
the operator and passenger. Always make<br />
sure the seat belts are secured for all riders<br />
before operating.<br />
The center of the seat is NOT equipped<br />
with a seat belt. Never allow a passenger<br />
to ride between the operator and passenger<br />
seats.<br />
Latch Plate<br />
Buckle<br />
WARNING! Falling from a moving vehicle<br />
could result in serious injury or death. Always<br />
fasten your seat belt securely before<br />
operating or riding in the RANGER.<br />
To wear the seat belt properly, follow this<br />
procedure:<br />
1. For 3-point belts, pull the seat belt<br />
latch downward and across your<br />
chest toward the buckle at the inner<br />
edge of the seat. The belt should fit<br />
snugly across your hips and diagonally<br />
across your chest. Make sure<br />
the belt is not twisted.<br />
2. Push the latch plate into the buckle until it clicks.<br />
3. Release the strap, it will self tighten.<br />
4. To release the seat belt, press the square red button in the buckle's<br />
center.<br />
24
FEATURES AND CONTROLS<br />
Seat Belts<br />
Seat Belt Inspection<br />
Inspect all seat belts for proper operation before each use of the vehicle.<br />
1. Push the latch plate into the buckle until it clicks. The latch plate<br />
must slide smoothly into the buckle. A click indicates that it's<br />
securely latched.<br />
2. Push the red release latch in the middle of the buckle to make sure it<br />
releases freely.<br />
3. Pull each seat belt completely out and inspect the full length for any<br />
damage, including cuts, wear, fraying or stiffness. If any damage is<br />
found, or if the seat belt does not operate properly, have the seat belt<br />
system checked and/or replaced by an authorized <strong>Polaris</strong> dealer.<br />
4. To clean dirt or debris from the seat belts, sponge the straps with<br />
mild soap and water. Do not use bleach, dye or household detergents.<br />
25
FEATURES AND CONTROLS<br />
Roll-Over Protection System (ROPS)<br />
The Rollover Protective<br />
Structure (ROPS) on this<br />
vehicle meets OSHA 1928.53<br />
rollover performance requirements.<br />
Always have your<br />
authorized <strong>Polaris</strong> dealer thoroughly<br />
inspect the ROPS if it<br />
ever becomes damaged in any<br />
way.<br />
No device can assure occupant<br />
protection in the event of<br />
a rollover. Always follow all<br />
safe operating practices outlined<br />
in this manual to avoid<br />
vehicle rollover.<br />
ROPS Cab<br />
Frame<br />
WARNING! Vehicle rollover could cause severe injury or death. Always avoid<br />
operating in a manner that could result in vehicle rollover.<br />
Seat Removal<br />
Pull up on the front of the seat and slide it toward the front of the vehicle.<br />
Install the seat by sliding the tabs into the rear of the seat base. Push<br />
down firmly on the front of the seat until the pins are fully seated into<br />
the grommets.<br />
Fuel Cap<br />
The fuel tank filler cap is located<br />
on the right-hand side of the vehicle<br />
near the passenger seat. When<br />
refueling, always use either leaded<br />
or unleaded gasoline with a minimum<br />
pump octane number of 87<br />
R+M/2 octane. Do not use fuel<br />
with ethanol content greater than<br />
10 percent, such as E-85 fuel.<br />
26
OPERATION<br />
WARNING<br />
Failure to operate the vehicle properly can result in a collision, loss of control,<br />
accident or overturn, which may result in serious injury or death. Read and<br />
understand all safety warnings outlined in the safety section of this owner’s<br />
manual.<br />
Break-In Period<br />
The break-in period for your new <strong>Polaris</strong> RANGER is the first twenty<br />
hours of operation, or the time it takes to use the first two tanks full of<br />
gasoline. No single action on your part is as important as a proper breakin<br />
period. Careful treatment of a new engine will result in more efficient<br />
performance and longer life for the engine. Perform the following procedures<br />
carefully.<br />
NOTICE: Excessive heat build-up during the first three hours of operation will<br />
damage close-fitted engine parts. Do not operate at full throttle or<br />
high speeds for extended periods during the first three hours of use.<br />
27
OPERATION<br />
Break-In Period<br />
Engine and Drivetrain Break-in<br />
1. Fill the fuel tank with gasoline. Heed the gasoline warnings on page<br />
15.<br />
2. Check the oil level. See page 55. Add the recommended oil as<br />
needed to maintain the oil level between the safe and add marks.<br />
3. Drive slowly at first. Select an open area that allows room to familiarize<br />
yourself with vehicle operation and handling.<br />
4. Vary throttle positions. Do not operate at sustained idle.<br />
5. Perform regular checks on fluid levels, controls and areas outlined<br />
on the daily pre-ride inspection checklist. See page 29.<br />
6. Pull only light loads.<br />
7. During the break-in period, change both the oil and the filter at 25<br />
hours.<br />
PVT Break-in (Clutches/Belt)<br />
A proper break-in of the clutches and drive belt will ensure a longer life<br />
and better performance. Break in the clutches and belt by operating at<br />
slower speeds during the break-in period as recommended. Pull only<br />
light loads. Avoid aggressive acceleration and high speed operation during<br />
the break-in period.<br />
28
OPERATION<br />
Pre-Ride Inspection<br />
Failure to inspect and verify that the vehicle is in safe operating condition<br />
before operating increases the risk of an accident. Always inspect<br />
the vehicle before each use to make sure it's in safe operating condition.<br />
Item Remarks Page<br />
Brake system/pedal travel Ensure proper operation 23<br />
78<br />
Brake fluid Ensure proper level 78<br />
Park gear<br />
Ensure vehicle does not roll when in<br />
PARK. Ensure PARK light illuminates.<br />
-<br />
Front suspension Inspect, lubricate if necessary 53<br />
Rear suspension Inspect, lubricate if necessary 53<br />
Steering Ensure free operation 79<br />
Tires Inspect condition and pressure 7<br />
81<br />
Wheels/fasteners Inspect, ensure fastener tightness 81<br />
Frame nuts, bolts, fasteners Inspect, ensure tightness -<br />
Fuel and oil Ensure proper levels 26<br />
55<br />
Coolant level Ensure proper level 66<br />
67<br />
Coolant hoses Inspect for leaks -<br />
Throttle Ensure proper operation 76<br />
Indicator lights/switches Ensure operation 20<br />
Air filter, pre-filter Inspect, clean 71<br />
Air box sediment tube Drain deposits whenever visible 71<br />
Headlamp<br />
Check operation, apply <strong>Polaris</strong> dielectric<br />
grease when lamp is replaced<br />
83<br />
Brake light/tail lamp Check operation, apply <strong>Polaris</strong> dielectric<br />
grease when lamp is replaced<br />
85<br />
Seat Belts<br />
Check length of belt for damage,<br />
check latches for proper operation<br />
25<br />
29
OPERATION<br />
Starting the Engine<br />
1. Always start the engine outdoors or in a well-ventilated area.<br />
2. Turn the fuel valve on.<br />
3. Sit in the driver's seat and fasten the seat belt.<br />
4. Apply the brakes. Place the transmission in PARK.<br />
5. Do not use the choke if starting<br />
a warm engine. Excessive use<br />
of the choke can cause spark<br />
plugs to become wet fouled.<br />
6. If the engine is cold, pull the<br />
choke knob out until it stops.<br />
7. Turn the ignition key to START.<br />
Engage the starter for a maximum<br />
of five seconds. Release<br />
the key when the engine starts.<br />
Turn the key to the LIGHTS<br />
ON position before driving.<br />
8. Do not press the throttle pedal<br />
while starting the engine. If the<br />
engine does not start within five<br />
seconds, release the ignition<br />
switch and wait five seconds.<br />
Repeat steps 7 and 8 until the<br />
engine starts.<br />
Choke<br />
Knob<br />
FULL ON<br />
HALF ON<br />
OFF<br />
30
OPERATION<br />
Starting the Engine<br />
9. If a warm engine has cooled to a point where it does not readily<br />
start, intermittent use of the choke (half way out) may be necessary.<br />
If the engine is over-choked when warm, depress the throttle pedal<br />
fully while cranking to aid in starting. Release the throttle pedal<br />
immediately after the engine starts. If the engine does not start and<br />
all conditions are favorable, change the spark plug and try again.<br />
10. After the engine starts, push the choke knob in half way.<br />
11. Vary the engine RPM slightly with the throttle to aid in warm up<br />
until the engine idles smoothly.<br />
12. Push the choke knob in.<br />
NOTICE: Operating the vehicle immediately after starting could cause engine<br />
damage. Allow the engine to warm up for several minutes before<br />
operating the vehicle.<br />
Stopping the Engine<br />
1. Release the throttle pedal completely and brake to a complete stop.<br />
2. Place the transmission in PARK.<br />
3. Turn the engine off.<br />
WARNING! A rolling vehicle can cause serious injury. Always place the<br />
transmission in PARK when stopping the engine.<br />
Braking<br />
1. Release the throttle pedal completely.<br />
2. Press on the brake pedal evenly and firmly.<br />
3. Practice starting and stopping (using the brakes) until you're familiar<br />
with the controls.<br />
Tip: When the throttle pedal is released completely and the engine speed drops<br />
near an idle, the vehicle has no engine braking.<br />
31
OPERATION<br />
Driving Procedure<br />
1. Wear a helmet and eye protection.<br />
2. Sit in the driver's seat and fasten the seat belt.<br />
3. Start the engine and allow it to warm up.<br />
4. Apply the service brakes and shift the transmission into gear.<br />
5. Check your surroundings and determine your path of travel.<br />
6. Keeping both hands on the steering wheel, slowly release the brakes<br />
and depress the throttle with your right foot to begin driving.<br />
7. Drive slowly. Practice maneuvering and using the throttle and<br />
brakes on level surfaces.<br />
8. Do not carry a passenger until you have at least two hours of driving<br />
experience with this vehicle. Never carry more than one passenger<br />
in this vehicle. Never allow a passenger to ride in the cargo box.<br />
32
Driving On Slippery Surfaces<br />
OPERATION<br />
WARNING<br />
Skidding or sliding can cause loss of control or overturn (if tires regain traction<br />
unexpectedly). When operating on slippery surfaces such as ice or loose gravel,<br />
reduce speed and use extra caution to reduce the chance of skidding or sliding<br />
out of control. Do not operate on excessively slippery surfaces.<br />
Whenever riding on slippery surfaces such as wet trails or loose gravel,<br />
or during freezing weather, follow these precautions:<br />
1. Do not operate on excessively rough, slippery or loose terrain.<br />
2. Slow down before entering slippery areas.<br />
3. Maintain a high level of alertness, reading the trail and avoiding<br />
quick, sharp turns, which can cause skids.<br />
4. Engage all-wheel drive before wheels begin to lose traction.<br />
NOTICE: Severe damage to the drive train may occur if the AWD is engaged<br />
while the wheels are spinning. Always allow the wheels to stop<br />
spinning before engaging AWD.<br />
5. Correct a skid by turning the steering wheel in the direction of the<br />
skid. Never apply the brakes during a skid.<br />
Sideways<br />
skid<br />
Turn in<br />
direction of<br />
skid<br />
33
OPERATION<br />
Driving Uphill<br />
Whenever traveling<br />
uphill, follow these precautions:<br />
1. Always travel<br />
straight uphill.<br />
2. Avoid steep hills<br />
(15° maximum).<br />
3. Keep both feet on<br />
the floor.<br />
4. Always check the<br />
terrain carefully<br />
before ascending<br />
any hill.<br />
15° maximum<br />
5. Never climb hills with excessively slippery or loose surfaces.<br />
6. Proceed at a steady rate of speed and throttle opening. Never open<br />
the throttle suddenly.<br />
7. Never go over the crest of a hill at high speed. An obstacle, a sharp<br />
drop, or another vehicle or person could be on the other side of the<br />
hill.<br />
34
OPERATION<br />
Driving on a Sidehill (Sidehilling)<br />
Driving on a sidehill is not recommended. Improper procedure could<br />
cause loss of control or overturn. Avoid crossing the side of any hill<br />
unless absolutely necessary.<br />
If crossing a sidehill is unavoidable, follow these precautions:<br />
1. Slow down.<br />
2. Exercise extreme caution.<br />
3. Avoid crossing the side of a steep hill (15° maximum).<br />
Driving Downhill<br />
When driving downhill,<br />
follow these precautions:<br />
1. Avoid steep hills (15°<br />
maximum).<br />
2. Drive straight downhill.<br />
Avoid descending<br />
a hill at an angle,<br />
which would cause the<br />
vehicle to lean sharply<br />
to one side. Travel<br />
straight downhill when<br />
possible.<br />
3. Slow down.<br />
4. Apply the brakes slightly to aid in slowing.<br />
15° maximum<br />
35
OPERATION<br />
Driving Through Water<br />
Your <strong>Polaris</strong> RANGER can operate through water up to a maximum recommended<br />
depth equal to the floorboards.<br />
NOTICE: Immersion can result in major damage if the vehicle isn't serviced<br />
correctly and promptly. After immersion, always take the vehicle to<br />
your dealer service. Do not start the engine! If it's impossible to bring<br />
the vehicle to your dealer before starting the engine, perform the<br />
service outlined on page 70, and take the vehicle to your dealer at<br />
the first opportunity.<br />
Follow these procedures<br />
when operating through<br />
water:<br />
1. Determine water<br />
depths and current<br />
before entering water.<br />
2. Choose a crossing<br />
where both banks<br />
have gradual inclines.<br />
3. Proceed slowly,<br />
avoiding rocks and<br />
obstacles.<br />
4. Avoid operating<br />
through deep or fastflowing<br />
water.<br />
Floorboard<br />
WARNING! The large tires on your RANGER may cause the vehicle to float in<br />
deep or fast-flowing water, which could result in loss of control and lead to<br />
serious injury or death. Never cross deep or fast-flowing water with your<br />
RANGER.<br />
5. After leaving water, always dry the brakes by applying light pressure<br />
to the pedal repeatedly until braking action is normal.<br />
NOTICE: After running your vehicle in water, it's critical that you perform the<br />
services outlined in the Periodic Maintenance Chart beginning on<br />
page 48. Give special attention to engine oil, transmission oil, front<br />
and rear gearcases (if equipped) and all grease fittings.<br />
36
Driving Over Obstacles<br />
OPERATION<br />
Follow these precautions when operating over obstacles:<br />
1. Always check for obstacles before operating in a new area.<br />
2. Look ahead and learn to read the terrain. Be constantly alert for hazards<br />
such as logs, rocks and low hanging branches.<br />
3. Travel slowly and use extra caution when operating on unfamiliar<br />
terrain. Not all obstacles are immediately visible.<br />
37
OPERATION<br />
Driving in Reverse<br />
Follow these precautions when operating in reverse:<br />
1. Always check for obstacles or people behind the vehicle. Always<br />
inspect left and right fields of vision before backing.<br />
2. Always avoid backing downhill.<br />
3. Back slowly.<br />
4. Apply the brakes lightly for stopping.<br />
5. Avoid turning at sharp angles.<br />
6. Never open the throttle suddenly.<br />
38
Parking on an Incline<br />
OPERATION<br />
15° maximum<br />
Avoid parking on an incline if possible. If it's unavoidable, follow these<br />
precautions:<br />
1. Apply the brakes.<br />
2. Place the transmission in PARK.<br />
3. Turn the engine off.<br />
4. Block the rear wheels on the downhill side.<br />
39
OPERATION<br />
Hauling Cargo<br />
WARNING<br />
Hauling cargo improperly can alter vehicle handling and may cause loss of<br />
control or brake instability, which can result in serious injury or death. Always<br />
follow these precautions when hauling cargo:<br />
Never exceed the maximum weight capacity of the vehicle. When determining<br />
the weight you are adding to the vehicle, include the weight of the operator,<br />
passenger, accessories, loads in the rack or box and the load on the trailer<br />
tongue. The combined weight of these items must not exceed the maximum<br />
weight capacity.<br />
REDUCE SPEED AND ALLOW GREATER DISTANCES FOR BRAKING<br />
WHEN HAULING CARGO.<br />
Always load the cargo box with the load as far forward and as low as possible.<br />
When operating over rough or hilly terrain, reduce speed and cargo to maintain<br />
stable driving conditions.<br />
Always operate the vehicle with extreme care when hauling or towing loads.<br />
Slow down and drive in the lowest gear available.<br />
SECURE ALL LOADS BEFORE OPERATING. Unsecured loads can create<br />
unstable operating conditions, which could result in loss of control of the vehicle.<br />
OPERATE ONLY WITH STABLE AND SAFELY ARRANGED LOADS. When<br />
handling off-centered loads that cannot be centered, securely fasten the load<br />
and operate with extra caution. Always attach the tow load to the hitch point<br />
designated for your vehicle.<br />
HEAVY LOADS CAN CAUSE BRAKING AND CONTROL PROBLEMS. Use<br />
extreme caution when applying brakes with a loaded vehicle. Avoid terrain or<br />
situations that may require backing downhill.<br />
USE EXTREME CAUTION when operating with loads that extend over the rack<br />
sides. Stability and maneuverability may be adversely affected, causing the<br />
vehicle to overturn.<br />
DO NOT TRAVEL FASTER THAN THE RECOMMENDED SPEEDS. Vehicle<br />
should never exceed 10 mph (16 kph) while towing a load on a level grass<br />
surface. Vehicle speed should never exceed 5 mph (8 kph) when towing loads in<br />
rough terrain, while cornering, or while ascending or descending a hill.<br />
40
OPERATION<br />
Hauling Cargo<br />
The RANGER has been designed to carry or tow specific capacities.<br />
Always read and understand the load distribution warnings listed on the<br />
warning labels. The total load (operator, passenger, accessories, cargo<br />
and weight on hitch) must not exceed the maximum weight capacity of<br />
the vehicle. Never exceed the following capacities.<br />
Model<br />
WARNING! Driving with<br />
passengers in the cargo box<br />
can result in severe injury or<br />
death. Never allow passengers<br />
to ride in the cargo box. A<br />
passengers must always ride<br />
in the cab with seat belt<br />
fastened securely.<br />
Maximum Capacities<br />
(Level Ground)<br />
Cargo Box<br />
RANGER 400 HO 1000 lbs. (454 kg) 500 lbs. (227 kg)<br />
41
OPERATION<br />
Dumping the Cargo Box<br />
1. Select a level site to dump the<br />
cargo box. Do not attempt to<br />
dump or unload the vehicle<br />
while parked on an incline.<br />
2. Apply the brakes.<br />
3. Place the transmission in<br />
PARK.<br />
4. Dismount the vehicle.<br />
5. Ensure that the cargo is positioned<br />
evenly or toward the<br />
front of the cargo box.<br />
6. Release the tailgate latches.<br />
Release<br />
Lever<br />
WARNING! If the weight distribution on the box is located toward the rear of the<br />
box when the release lever is pulled forward, the box may dump unexpectedly<br />
and cause serious injury to the operator or bystanders. Never operate the dump<br />
lever without ensuring that the load is positioned evenly or at the front of the<br />
box.<br />
7. Stand clear and pull up on the cargo box release lever.<br />
8. Lift the front of the cargo box to dump the cargo.<br />
9. Lower the cargo box and push down securely to latch.<br />
10. Close the tailgate and secure both tailgate latches.<br />
WARNING! Operating the vehicle while the cargo box is raised could result in<br />
severe injury. The box could close unexpectedly and cause injury to the driver or<br />
passenger. The rear tires will also catch the rear of a raised box, damaging the<br />
vehicle and creating hazardous driving conditions. Never operate this vehicle<br />
with the cargo box in the raised position.<br />
42
OPERATION<br />
Towing Loads<br />
Towing improperly can alter vehicle handling and may cause loss of<br />
control or brake instability. Always follow these precautions when towing:<br />
1. Never load more than 150 lbs. (68.1 kg) tongue weight on the towing<br />
bracket.<br />
2. Do not operate the vehicle faster than 10 mph (16 km/h) when towing.<br />
See page 40. Towing a trailer increases braking distance.<br />
3. Do not tow more than the recommended weight for the vehicle. See<br />
the towing capacity chart below and the specifications charts beginning<br />
on page 98.<br />
4. Attach a trailer to the trailer hitch bracket only. Do not attach a<br />
trailer to any other location or you may lose control of the vehicle.<br />
5. Never tow a trailer on a grade steeper than 15°.<br />
Model<br />
RANGER 400<br />
HO<br />
Total Towed<br />
Load Weight<br />
(Level Ground)<br />
1000 lbs.<br />
(454 kg)<br />
Total Towed<br />
Load Weight<br />
(15° grade)<br />
850 lbs.<br />
(386 kg)<br />
Total Hitch<br />
Vertical<br />
Weight<br />
150 lbs.<br />
(68.1 kg)<br />
Maximum<br />
Towing<br />
Speed<br />
10 mph<br />
(16 kph)<br />
Belt Life<br />
To extend belt life, use the lowest gear possible when hauling or towing<br />
heavy cargo.<br />
43
OPERATION<br />
Parking the Vehicle<br />
1. Apply the brakes. Stop the vehicle on a level surface.<br />
2. When parking inside a garage or other structure, be sure that the<br />
structure is well ventilated and that the vehicle is not close to any<br />
source of flame or sparks, including any appliance with pilot lights.<br />
3. Place the transmission in PARK.<br />
4. Turn the engine off.<br />
5. Remove the ignition switch key to prevent unauthorized use.<br />
44
All Wheel Drive (AWD)<br />
Press the top of the rocker switch to engage All<br />
Wheel Drive (AWD). The illuminated amber AWD<br />
switch indicates that the vehicle is in AWD.<br />
When the AWD switch is on, the front gearcase<br />
will automatically engage any time the rear wheels<br />
lose traction. When the rear wheels regain traction,<br />
the front gearcase will automatically disengage.<br />
There is no limit to the length of time the vehicle<br />
may remain in AWD.<br />
OPERATION<br />
Tip: The AWD switch may be turned on or off while the vehicle is moving.<br />
Initially, the vehicle's electronic system will not enable the AWD until<br />
the engine RPM is below 3100. Once enabled, the AWD remains<br />
enabled until the AWD switch is turned off.<br />
Engage the AWD before getting into conditions where front wheel drive<br />
may be needed. If the rear wheels are spinning, release the throttle<br />
before switching to AWD.<br />
NOTICE: Switching to AWD while the rear wheels are spinning may cause<br />
severe drive shaft and clutch damage. Always switch to AWD while<br />
the rear wheels have traction or are at rest.<br />
Disengaging AWD<br />
Move the AWD switch to the center or bottom position to disengage<br />
AWD.<br />
If the switch is turned off while the front gearcase is moving, it will not<br />
disengage until the rear wheels regain traction.<br />
In some situations, the front gearcase may remain locked after turning<br />
the AWD switch off. If this occurs, you may notice increased steering<br />
effort and some vehicle speed restriction. Perform the following procedure<br />
to unlock the front gearcase.<br />
1. Stop the vehicle.<br />
2. Operate in reverse for at least 10 feet (3 m).<br />
3. Stop completely.<br />
4. Shift into low gear and drive forward.<br />
5. If the front gearcase remains locked after following these instructions,<br />
return the vehicle to your dealer for service.<br />
45
OPERATION<br />
All Wheel Drive (AWD)<br />
Locking the Differential<br />
NOTICE: Damage to the differential can occur if it is engaged while the vehicle<br />
is traveling at high speeds or while the rear wheels are spinning.<br />
Slow the vehicle to nearly stopped before engaging the differential.<br />
Locking the differential in slippery or<br />
low traction conditions helps improve<br />
traction. Move the rocker switch to<br />
the center position (2WD) to lock the<br />
differential and operate in rear wheel<br />
drive.<br />
Press the bottom of the switch to<br />
unlock the differential and allow the<br />
rear drive wheels to operate independently.<br />
This mode of operation is well<br />
suited to turf driving or whenever<br />
aggressive traction is not required.<br />
46
EMISSION CONTROL SYSTEMS<br />
Noise Emission Control System<br />
Do not modify the engine, intake or exhaust components, as doing so<br />
may affect compliance with U.S.A. EPA noise control requirements (40<br />
CFR 205) and local noise level requirements.<br />
Operation on Public Lands in the U.S.A.<br />
Your <strong>Polaris</strong> vehicle has a spark arrestor that was tested and qualified to<br />
be in accordance with the USFS standard 5100-1c. Federal law requires<br />
that this spark arrestor be installed and functional when the vehicle is<br />
operated on public lands.<br />
Operation of off-road vehicles on public lands in the U.S.A. is regulated<br />
by 43 CFR 420. Violations are subject to monetary penalties. Federal<br />
regulations can be viewed online at www.gpoaccess.gov/ecfr/.<br />
Crankcase Emission Control System<br />
This engine is equipped with a closed crankcase system. Blow-by gases<br />
are forced back to the combustion chamber by the intake system. All<br />
exhaust gases exit through the exhaust system.<br />
Exhaust Emission Control System<br />
The emissions from the exhaust of this vehicle are controlled by engine<br />
design, including factory-set fuel delivery and ignition. The engine and<br />
related components must be maintained at <strong>Polaris</strong> specifications to<br />
achieve optimal performance.<br />
Engine idle speed is the only adjustment <strong>Polaris</strong> recommends that the<br />
operator perform. Any other adjustments should be performed by an<br />
authorized <strong>Polaris</strong> dealer.<br />
The emissions label is located on the frame under the seat.<br />
Electromagnetic Interference<br />
This spark ignition system complies with Canadian ICES-002.<br />
This vehicle complies with the EMC requirements of European directives<br />
97/24/EC and 2004/108/EC.<br />
47
MAINTENANCE<br />
Periodic Maintenance Chart<br />
Careful periodic <strong>maintenance</strong> will help keep your vehicle in the safest,<br />
most reliable condition. Inspection, adjustment and lubrication of<br />
important components are explained in the periodic <strong>maintenance</strong> chart.<br />
Inspect, clean, lubricate, adjust and replace parts as necessary. When<br />
inspection reveals the need for replacement parts, use genuine <strong>Polaris</strong><br />
parts available from your <strong>Polaris</strong> dealer.<br />
Record <strong>maintenance</strong> and service in the Maintenance Log beginning on<br />
page 112.<br />
Tip: Service and adjustments are important for proper vehicle operation. If<br />
you're not familiar with safe service and adjustment procedures, have a<br />
qualified dealer perform these operations.<br />
Maintenance intervals in the following chart are based upon average<br />
riding conditions and an average vehicle speed of approximately ten<br />
(10) miles per hour. Vehicles subjected to severe use must be inspected<br />
and serviced more frequently.<br />
Severe Use Definition<br />
• Frequent immersion in mud, water or sand<br />
• Racing or race-style high RPM use<br />
• Prolonged low speed, heavy load operation<br />
• Extended idle<br />
• Short trip cold weather operation<br />
Pay special attention to the oil level. A rise in oil level during cold<br />
weather can indicate contaminants collecting in the oil sump or crankcase.<br />
Change oil immediately if the oil level begins to rise. Monitor the<br />
oil level, and if it continues to rise, discontinue use and determine the<br />
cause or see your dealer.<br />
48
MAINTENANCE<br />
Periodic Maintenance Chart<br />
Maintenance Chart Key<br />
Perform these operations more often for vehicles subjected to<br />
severe use.<br />
E Emission-related service (Failure to conduct this <strong>maintenance</strong> will<br />
not void the emissions warranty but may affect emissions.)<br />
Have an authorized <strong>Polaris</strong> dealer perform these services.<br />
WARNING! Improperly performing the procedures marked with a could result<br />
in component failure and lead to serious injury or death. Have an authorized<br />
<strong>Polaris</strong> dealer perform these services.<br />
49
MAINTENANCE<br />
Periodic Maintenance Chart<br />
Perform all services at whichever <strong>maintenance</strong> interval is reached first.<br />
Item<br />
Maintenance Interval<br />
(whichever comes first)<br />
Remarks<br />
Hours Calendar Miles<br />
(Km)<br />
Steering - Pre-Ride - Make adjustments as need<br />
Front suspension - Pre-Ride -<br />
ed. See Pre-Ride Checklist<br />
on page 29.<br />
Rear suspension - Pre-Ride -<br />
Tires - Pre-Ride -<br />
Brake fluid level - Pre-Ride -<br />
Brake pedal travel<br />
Brake system - Pre-Ride -<br />
Wheels/fasteners - Pre-Ride -<br />
Frame fasteners - Pre-Ride -<br />
Engine oil level - Pre-Ride -<br />
<br />
E<br />
<br />
E<br />
<br />
E<br />
Air filter, pre-filter - Daily - Inspect; clean often; replace<br />
as needed<br />
Air box sediment<br />
tube<br />
Coolant<br />
(if applicable)<br />
Headlamp/tail<br />
lamp<br />
Air filter,<br />
main element<br />
- Daily - Drain deposits when visible<br />
- Daily - Check level daily, change<br />
coolant every 2 years<br />
- Daily - Check operation; apply<br />
dielectric grease if replacing<br />
- Weekly - Inspect; replace as needed<br />
Brake pad wear 10 H Monthly - Inspect periodically<br />
<br />
Battery 20 H Monthly - Check terminals; clean; test<br />
Front Gearcase Oil 25 H Monthly - Inspect level; change yearly<br />
(if equipped)<br />
Middle Gearcase 25 H Monthly - Inspect level; change yearly<br />
Oil (if equipped)<br />
Rear gearcase oil 25 H Monthly - Inspect level; change yearly<br />
(if equipped)<br />
Transmission oil 25 H Monthly - Inspect level; change yearly<br />
Perform these procedures more often for vehicles subjected to severe use.<br />
E Emission-Related Service.<br />
Have an authorized <strong>Polaris</strong> dealer perform these services.<br />
50
Periodic Maintenance Chart<br />
<br />
E<br />
Item<br />
Engine breather<br />
filter (if equipped)<br />
Engine oil change<br />
(break-in)<br />
General<br />
lubrication<br />
Maintenance Interval<br />
(whichever comes first)<br />
Hours Calendar Miles<br />
(Km)<br />
MAINTENANCE<br />
Remarks<br />
25 H Monthly - Inspect; replace if necessary<br />
25 H 1 M - Perform a break-in oil change<br />
at one month<br />
50 H 3 M - Lubricate all fittings, pivots,<br />
cables, etc.<br />
Shift Linkage 50 H 6 M - Inspect, lubricate, adjust<br />
Steering 50H 6 M - Lubricate<br />
Front Suspension 50 H 6 M - Lubricate<br />
Rear Suspension 50 H 6 M - Lubricate<br />
<br />
E<br />
<br />
E<br />
Carburetor float<br />
bowl<br />
50 H 6 M - Drain bowl periodically and<br />
prior to storage<br />
Throttle cable 50 H 6 M - Inspect; adjust; lubricate;<br />
replace if necessary<br />
Choke cable 50 H 6 M - Inspect; adjust; lubricate;<br />
replace if necessary<br />
E Carburetor air<br />
intake ducts/flange<br />
50 H 6 M - Inspect ducts for proper sealing/air<br />
leaks<br />
Drive belt 50 H 6 M - Inspect; adjust; replace as<br />
needed<br />
Cooling system<br />
(if applicable)<br />
50 H 6 M - Inspect coolant strength<br />
seasonally; pressure test<br />
system yearly<br />
Engine oil change 100 H 6 M - Perform a break-in oil change<br />
at one month<br />
Oil filter change 100 H 6 M - Replace with oil change<br />
Perform these procedures more often for vehicles subjected to severe use.<br />
E Emission-Related Service.<br />
Have an authorized <strong>Polaris</strong> dealer perform these services.<br />
51
MAINTENANCE<br />
Periodic Maintenance Chart<br />
<br />
E<br />
Item<br />
Maintenance Interval<br />
(whichever comes first)<br />
Hours Calendar Miles<br />
(Km)<br />
Remarks<br />
Fuel system 100 H 12 M - Check for leaks at tank cap,<br />
lines, fuel valve, filter, pump,<br />
carburetor; replace lines<br />
every two years<br />
Fuel filter 100 H 12 M - Replace yearly<br />
Radiator<br />
(in applicable)<br />
100 H 12 M - Inspect; clean external<br />
surfaces<br />
Cooling Hoses 100 H 12 M - Inspect for leaks<br />
Engine mounts 100 H 12 M - Inspect<br />
Exhaust muffler/ 100 H 12 M - Inspect<br />
pipe<br />
<br />
E<br />
Spark plug 100 H 12 M - Inspect; replace as needed<br />
Ignition timing<br />
E<br />
100 H 12 M - Inspect<br />
Wiring 100 H 12 M - Inspect for wear, routing,<br />
security; apply dielectric<br />
grease to connectors<br />
subjected to water, mud, etc.<br />
<br />
<br />
Clutches (drive<br />
and driven)<br />
Front wheel<br />
bearings<br />
100 H 12 M - Inspect; clean; replace worn<br />
parts<br />
100 H 12 M - Inspect; replace as needed<br />
Brake fluid 200 H 24 M - Change every two years<br />
Spark arrestor 300 H 36 M - Clean out<br />
Idle speed - Adjust as needed<br />
Toe adjustment - Inspect periodically; adjust<br />
when parts are replaced<br />
<br />
<br />
Auxiliary brake (if<br />
equipped)<br />
- Inspect daily; adjust as<br />
needed<br />
Headlight aim - Adjust as needed<br />
Perform these procedures more often for vehicles subjected to severe use.<br />
E Emission-Related Service.<br />
Have an authorized <strong>Polaris</strong> dealer perform these services.<br />
52
MAINTENANCE<br />
Lubrication Recommendations<br />
Check and lubricate all components at the intervals outlined in the Periodic<br />
Maintenance Chart beginning on page 48, or more often under<br />
severe use, such as wet or dusty conditions. Items not listed in the chart<br />
should be lubricated at the general lubrication interval.<br />
Item Lube Method<br />
Engine Oil<br />
PS-4 PLUS Performance See page 55.<br />
Synthetic 2W-50<br />
Brake Fluid DOT 4 See page 78.<br />
Main Gearcase Oil<br />
(Transmission)<br />
Front Gearcase Oil<br />
Front Prop Shaft Yoke<br />
Premium AGL Synthetic<br />
Gearcase Lube<br />
Premium Demand Drive Hub<br />
Fluid<br />
<strong>Polaris</strong> Premium U-Joint<br />
Lube<br />
See page 59.<br />
See page 61.<br />
Locate fittings and grease<br />
(3 pumps maximum).<br />
Prop Shaft U-Joint<br />
53
MAINTENANCE<br />
Engine Oil<br />
Always check and change the engine oil at the intervals outlined in the<br />
Periodic Maintenance Chart beginning on page 48. Always change the<br />
oil filter whenever changing oil.<br />
WARNING! Vehicle operation with insufficient, deteriorated, or contaminated<br />
engine oil will cause accelerated wear and may result in engine seizure,<br />
accident, and injury. Always perform the <strong>maintenance</strong> procedures as outlined in<br />
the Periodic Maintenance Chart.<br />
Oil Recommendations<br />
<strong>Polaris</strong> recommends the use of <strong>Polaris</strong> PS-4 PLUS Performance Synthetic<br />
2W-50 4-cycle oil or a similar oil for this engine. Oil may need to<br />
be changed more frequently if <strong>Polaris</strong> oil is not used. Always use 2W-50<br />
oil. Follow the manufacturer's recommendations for ambient temperature<br />
operation. See page 100 for the part numbers of <strong>Polaris</strong> products.<br />
NOTICE: Mixing brands or using a non-recommended oil may cause serious<br />
engine damage. Always use the recommended oil. Never substitute<br />
or mix oil brands.<br />
54
MAINTENANCE<br />
Engine Oil<br />
Always check and change the oil at the intervals outlined in the Periodic<br />
Maintenance Chart beginning on page 48. See page 54 for oil recommendations.<br />
Oil Check<br />
The oil tank is located under<br />
the seat.<br />
1. Position the vehicle on a<br />
level surface. Place the<br />
transmission in PARK.<br />
2. Start the engine and allow<br />
it to idle for 20-30 seconds.<br />
Stop the engine.<br />
3. Remove the seat. See page<br />
26.<br />
4. Remove the dipstick. Wipe<br />
it dry with a clean cloth.<br />
5. Reinstall the dipstick.<br />
Screw it in completely.<br />
6. Remove the dipstick. Make<br />
sure that the oil level is in<br />
the safe range. Add oil if<br />
necessary. Do not overfill.<br />
7. Reinstall the dipstick.<br />
Add Oil<br />
Safe Range<br />
{<br />
Safe<br />
55
MAINTENANCE<br />
Engine Oil<br />
Oil and Filter Change<br />
Always change the oil and filter at the intervals outlined in the Periodic<br />
Maintenance Chart beginning on page 48. Always change the oil filter<br />
whenever changing oil.<br />
1. Position the vehicle on a level<br />
surface.<br />
2. Place the transmission in<br />
PARK.<br />
3. Start the engine. Allow it to<br />
idle for two to three minutes.<br />
Stop the engine.<br />
4. Clean the area around the oil<br />
tank drain plug.<br />
5. Place a drain pan under the oil<br />
tank.<br />
Drain<br />
Plug<br />
Sealing Washer<br />
Screen<br />
Fitting<br />
CAUTION! Hot oil can cause burns<br />
to skin. Do not allow hot oil to contact<br />
skin.<br />
6. Remove the drain plug. Allow<br />
the oil to drain completely.<br />
7. Install a new sealing washer<br />
on the drain plug. The sealing<br />
Alignment Mark<br />
surfaces on drain plug and oil<br />
tank should be clean and free<br />
of burrs, nicks or scratches.<br />
8. Reinstall the drain plug. Torque to 14 ft. lbs. (19 Nm).<br />
9. Disconnect the lower oil delivery hose and remove the screen fitting<br />
from the oil tank. Clean the fitting.<br />
Tip: The fitting threads must be sealed with LOCTITE PST 505 or PTFE seal<br />
tape.<br />
10. Reinstall the screen fitting and rotate the fitting clockwise a minimum<br />
of 2 1/2 turns into the tank threads. Continue to rotate the fitting<br />
until the nipple of the fitting aligns with the mark on the tank.<br />
Tip: Do not over-tighten. Maximum torque for the screen fitting is 25 ft. lbs. (34<br />
Nm).<br />
11. Reattach the oil line.<br />
56
MAINTENANCE<br />
Engine Oil<br />
Oil and Filter Change<br />
12. Place shop towels under the<br />
oil filter. Using an oil filter<br />
wrench, turn the filter<br />
counter-clockwise to<br />
remove it.<br />
13. Using a clean dry cloth,<br />
clean the filter sealing surface<br />
on the engine.<br />
14. Lubricate the gasket on the<br />
new filter with a film of new<br />
engine oil. Make sure the<br />
gasket is in good condition.<br />
Make sure the gasket from the old filter is not still on the engine.<br />
15. Install the new filter and turn by hand until the filter gasket contacts<br />
the sealing surface, then turn and additional 1/2 turn.<br />
16. Approximately one cup of engine oil will remain in the crankcase.<br />
To drain, remove the drain plug on the lower right side of the crankcase.<br />
Tip: The sealing surfaces on the drain plug and crankcase should be clean and<br />
free of burrs, nicks or scratches.<br />
17. Reinstall the drain plug. Torque to 14 ft. lbs. (19 Nm).<br />
18. Remove the dipstick. Add two quarts (1.9 l) of recommended oil. If<br />
the sump is not drained, add about 1 3/4 quarts (1.6 l) initially.<br />
19. Reinstall the dipstick.<br />
20. Prime the oil pump using the procedure on page 58. Then stop<br />
the engine and inspect for leaks.<br />
21. Check the oil level on the dipstick. Add oil as necessary to bring the<br />
level to the upper mark on the dipstick.<br />
22. Dispose of used filter and oil properly.<br />
57
MAINTENANCE<br />
Engine Oil<br />
Oil and Filter Change<br />
Oil Pump Priming<br />
This priming procedure must be<br />
performed whenever the oil hose<br />
connection between the oil tank and<br />
pump inlet has been disconnected.<br />
1. Clamp or pinch off the vent line<br />
approximately 2" (5 cm) from<br />
the oil tank, between the end of<br />
the oil tank vent fitting and the<br />
vent line's pressure relief slit.<br />
2. Start the engine. Allow it to idle<br />
for 10-20 seconds.<br />
Tank<br />
2"<br />
(5 cm)<br />
Clamp<br />
Pressure<br />
Relief Slit<br />
3. Remove the vent line clamp. If the line is bled properly, you should<br />
hear a rush of air, indicating that the line is properly primed and<br />
ready for operation.<br />
Tip: If you do not hear air, the line has not bled. Repeat the priming procedure.<br />
58
Gearcases<br />
Gearcase Specification Chart<br />
Gearcase Lubricant Capacity Fill Plug<br />
Torque<br />
Main Gearcase<br />
(Transmission)<br />
Front Gearcase<br />
Premium AGL<br />
Synthetic<br />
Gearcase Lube<br />
Premium Demand<br />
Drive Hub Fluid<br />
43.6 oz.<br />
(1290 ml)<br />
9.3 oz.<br />
(275 ml)<br />
MAINTENANCE<br />
14 ft. lbs.<br />
(19.4 Nm)<br />
8-10 ft. lbs.<br />
(11-13.6 Nm<br />
Drain Plug<br />
Torque<br />
14 ft. lbs.<br />
(19.4 Nm)<br />
11 ft. lbs.<br />
(15 Nm)<br />
Transmission (Main Gearcase)<br />
Always check and change the transmission oil at the intervals outlined<br />
in the Periodic Maintenance Chart beginning on page 48. Maintain the<br />
oil level even with the bottom thread of the fill plug hole.<br />
Refer to the Gearcase Specifications Chart for recommended lubricants,<br />
capacities and torque specifications. See page 100 for the part numbers<br />
of <strong>Polaris</strong> products.<br />
Oil Check<br />
The fill plug is located at the<br />
rear of the vehicle.<br />
1. Position the vehicle on a<br />
level surface.<br />
2. Remove the fill plug.<br />
3. Check the oil level.<br />
4. Add the recommended<br />
oil as needed.<br />
Fill Plug<br />
5. Reinstall the fill plug.<br />
Torque to specification.<br />
59
MAINTENANCE<br />
Gearcases<br />
Transmission (Main Gearcase)<br />
Oil Change<br />
The drain plug is located on the bottom of the transmission. Access the<br />
drain plug through the drain hole in the skid plate. Refer to the Gearcase<br />
Specifications Chart on page 59 for recommended lubricants, capacities<br />
and torque specifications.<br />
1. Remove the fill<br />
plug.<br />
2. Place a drain pan<br />
under the drain<br />
plug.<br />
3. Remove the drain<br />
plug. Drain the oil.<br />
4. Wipe the magnetic<br />
end of the drain<br />
Drain Plug<br />
plug clean to<br />
remove accumulated<br />
metallic filings.<br />
5. After the oil has drained completely, install a new sealing washer.<br />
6. Reinstall the drain plug. Torque to specification.<br />
7. Add the recommended oil as needed. Do not overfill.<br />
8. Reinstall the fill plug. Torque to specification.<br />
9. Check for leaks.<br />
10. Dispose of used oil properly.<br />
60
MAINTENANCE<br />
Gearcases<br />
Front Gearcase<br />
Always check and change the front gearcase oil at the intervals outlined<br />
in the Periodic Maintenance Chart beginning on page 48. Maintain the<br />
oil level even with the bottom thread of the fill plug hole.<br />
Refer to the Gearcase Specifications Chart on page 59 for recommended<br />
lubricants, capacities and torque specifications. See page 100 for the<br />
part numbers of <strong>Polaris</strong> products.<br />
Oil Check<br />
The front gearcase fill plug is located on<br />
the right side of the front gearcase.<br />
1. Position the vehicle on a level surface.<br />
2. Remove the fill plug. Check the oil<br />
level.<br />
3. Add the recommended oil as needed.<br />
4. Reinstall the fill plug. Torque to specification.<br />
Oil Change<br />
1. Support the vehicle securely with a<br />
jackstand.<br />
2. Remove the front tire on the driver's<br />
side.<br />
3. Remove the fill plug.<br />
Drain Plug<br />
Fill Plug<br />
4. Place a drain pan under the drain plug on the bottom right-hand<br />
side.<br />
5. Remove the drain plug. Drain the oil.<br />
6. Clean the drain plug. Reinstall the drain plug. Torque to specification.<br />
7. Add the recommended oil.<br />
8. Reinstall the fill plug. Torque to specification.<br />
9. Check for leaks.<br />
10. Discard used oil properly.<br />
61
MAINTENANCE<br />
Spark Plugs<br />
Spark Plug Recommendations<br />
Refer to the specifications section beginning on page 98 for the recommended<br />
spark plug type for your vehicle. Always torque spark plugs to<br />
specification.<br />
NOTICE: Using non-recommended spark plugs can result in serious engine<br />
damage. Always use <strong>Polaris</strong>-recommended spark plugs.<br />
Spark Plug Gap/Torque<br />
Model Electrode Gap New Plug<br />
Torque<br />
RANGER 400<br />
HO<br />
.036" (.9 mm) 9-11 ft. lbs.<br />
(12-15 Nm)<br />
Used Plug<br />
Torque<br />
9-11 ft. lbs.<br />
(12-15 Nm)<br />
Spark Plug Inspection<br />
Spark plug condition is indicative of engine operation. The spark plug<br />
firing end condition should be read after the engine is warmed up and<br />
the vehicle is driven at higher speeds. Immediately check the spark plug<br />
for correct color. See page 62.<br />
CAUTION! A hot exhaust system and engine can cause burns. Wear<br />
protective gloves when removing a spark plug for inspection.<br />
1. Remove the seat to access the engine compartment.<br />
2. Remove the spark plug cap. Using the spark plug wrench provided<br />
in the tool kit, remove the plug by rotating it counter-clockwise.<br />
3. Reverse the procedure for spark plug installation. Torque to specification.<br />
62
MAINTENANCE<br />
Spark Plugs<br />
Spark Plug Inspection<br />
Normal Plug<br />
The normal insulator tip is gray, tan or light brown. There will be few<br />
combustion deposits. The electrodes are not burned or eroded. This indicates<br />
the proper type and heat range for the engine and the service.<br />
The tip should not be white. A white insulator tip indicates overheating,<br />
caused by use of an improper spark plug or incorrect carburetion adjustments.<br />
Wet Fouled Plug<br />
The wet fouled insulator tip is black. A damp oil film covers the firing<br />
end. There may be a carbon layer over the entire nose. Generally, the<br />
electrodes are not worn. General causes of fouling are excessive oil, use<br />
of non-recommended oil, improper use of the choke, or incorrect throttle<br />
body/carburetor adjustments.<br />
63
MAINTENANCE<br />
Cooling System<br />
The engine coolant level is controlled or maintained by the recovery<br />
system. The recovery system components are the overflow bottle, radiator<br />
filler neck, radiator pressure cap and connecting hose.<br />
As coolant operating temperature increases, the expanding (heated)<br />
excess coolant is forced out of the radiator, past the pressure cap, and<br />
into the overflow bottle. As engine coolant temperature decreases, the<br />
contracting (cooled) coolant is drawn back up from the tank, past the<br />
pressure cap, and into the radiator.<br />
Some coolant level drop on new vehicles is normal as the system is<br />
purging itself of trapped air. Observe coolant levels and maintain as recommended<br />
by adding coolant to the overflow bottle.<br />
64
MAINTENANCE<br />
Cooling System<br />
Adding or Changing Coolant<br />
To ensure that the coolant maintains its ability to protect the engine, we<br />
recommend that the system be completely drained every two years and a<br />
fresh mixture of antifreeze and water added. <strong>Polaris</strong> recommends the<br />
use of <strong>Polaris</strong> Premium 60/40 anti-freeze/coolant or a 50/50 mixture of<br />
high quality aluminum compatible anti-freeze/coolant and distilled<br />
water. <strong>Polaris</strong> Premium 60/40 is already premixed and ready to use. Do<br />
not dilute with water. See page 100 for the part numbers of <strong>Polaris</strong> products.<br />
Always follow the manufacturer's mixing recommendations for the<br />
freeze protection required in your area.<br />
Any time the cooling system has been drained for <strong>maintenance</strong> or repair,<br />
replace the coolant. If the recovery bottle has run dry, the level in the<br />
radiator should be inspected. Add coolant as needed.<br />
Radiator and Cooling Fan<br />
Always check and clean the screen and radiator fins at the intervals outlined<br />
in the Periodic Maintenance Chart beginning on page 48. Do not<br />
obstruct or deflect air flow through the radiator by installing unauthorized<br />
accessories in front of the radiator or behind the cooling fan. Interference<br />
with the radiator air flow can lead to overheating and<br />
consequent engine damage.<br />
NOTICE: Washing the vehicle with a high-pressure hose could damage the<br />
radiator fins and impair the radiator's effectiveness. Using a highpressure<br />
system is not recommended.<br />
65
MAINTENANCE<br />
Cooling System<br />
Overflow Bottle Coolant Level<br />
Always check and change the coolant at the intervals outlined in the<br />
Periodic Maintenance Chart beginning on page 48. Maintain the coolant<br />
level between the minimum and maximum marks on the bottle (when<br />
the fluid is cool).<br />
The overflow bottle is located in front of the right front wheel.<br />
1. Position the vehicle on a level surface.<br />
2. View the coolant level in the overflow bottle.<br />
3. If the coolant level is below the safe operating range, lift the hood<br />
and locate the overflow bottle lid. Remove the cap and use a funnel<br />
to add coolant through the filler opening. Reinstall the cap.<br />
Tip: If coolant must be added often, or if the overflow bottle runs completely dry,<br />
there may be a leak in the system. Have the cooling system inspected by<br />
your <strong>Polaris</strong> dealer.<br />
Overflow Bottle<br />
Radiator Cap<br />
66
MAINTENANCE<br />
Cooling System<br />
Radiator Coolant Level<br />
Always check and clean the screen and radiator fins at the intervals outlined<br />
in the Periodic Maintenance Chart beginning on page 48. Do not<br />
obstruct or deflect air flow through the radiator by installing unauthorized<br />
accessories in front of the radiator or behind the cooling fan. Interference<br />
with the radiator air flow can lead to overheating and<br />
consequentially, engine damage.<br />
1. Lift the hood.<br />
CAUTION! Escaping steam can cause burns. Never remove the pressure cap<br />
while the engine is warm or hot. Always allow the engine to cool before<br />
removing the pressure cap.<br />
2. Slowly remove the radiator cap.<br />
3. View the coolant level through the opening.<br />
4. Use a funnel and slowly add coolant as needed.<br />
Tip: This procedure is required only if the cooling system has been drained for<br />
<strong>maintenance</strong> and/or repair. But if the overflow bottle has run dry, the level in<br />
the radiator should also be inspected.<br />
5. Reinstall the pressure cap. Use of a non-standard pressure cap will<br />
not allow the recovery system to function properly. See your dealer<br />
for the correct replacement part.<br />
67
MAINTENANCE<br />
<strong>Polaris</strong> Variable Transmission (PVT) System<br />
WARNING<br />
Failure to comply with the instructions in this warning can result in severe injury<br />
or death.<br />
Do not modify any component of the PVT system. Doing so may reduce its<br />
strength so that a failure may occur at a high speed. The PVT system has been<br />
precision balanced. Any modification will cause the system to be out of balance,<br />
creating vibration and additional loads on components.<br />
The PVT system rotates at high speeds, creating large amounts of force on<br />
clutch components. Extensive engineering and testing has been conducted to<br />
ensure the safety of this product. However, as the owner, you have the following<br />
responsibilities to make sure this system remains safe:<br />
• Always follow all recommended <strong>maintenance</strong> procedures. See your dealer as<br />
outlined in the owner's manual.<br />
• This PVT system is intended for use on <strong>Polaris</strong> products only. Do not install it in<br />
any other product.<br />
• Always make sure the PVT housing is securely in place during operation.<br />
When To Use Low Range vs. High Range<br />
Belt slip is responsible for creating excessive heat that destroys belts,<br />
wears clutch components and causes outer clutch covers to fail. Switch<br />
to low range while operating at slower speeds to extend the life of the<br />
PVT components (belt, cover, etc.).<br />
Condition<br />
Operating at speeds less than 7 MPH (11 km/h)<br />
Towing heavy loads<br />
Operating in rough terrain (swamps, mountains, etc.)<br />
Operating at speeds greater than 7 MPH (11 km/h)<br />
Range to Use<br />
Low<br />
Low<br />
Low<br />
High<br />
68
MAINTENANCE<br />
PVT System<br />
PVT Drying<br />
There may be some instances when water is ingested into the PVT system.<br />
Use the following instructions to dry it out before operating.<br />
1. Position the vehicle on a level surface.<br />
2. Remove the drain plug. Allow the water to drain completely. Reinstall<br />
the drain plug.<br />
3. Place the transmission in PARK.<br />
4. Start the engine.<br />
5. Apply varying throttle for 10-15 seconds to expel the moisture and<br />
air-dry the belt and clutches. Do not hold the throttle wide open for<br />
more than 10 seconds.<br />
6. Allow the engine RPM to settle to idle speed. Apply the brakes.<br />
Shift the transmission to the lowest available range.<br />
7. Test for belt slippage. If the belt slips, repeat the process.<br />
8. Take the vehicle to your dealer for service as soon as possible.<br />
69
MAINTENANCE<br />
Vehicle Immersion<br />
NOTICE: If your vehicle becomes immersed, major engine damage can result<br />
if the machine is not thoroughly inspected. Take the vehicle to your<br />
dealer before starting the engine.<br />
If it's impossible to take your RANGER to a dealer before starting it, follow<br />
the steps outlined below.<br />
1. Move the vehicle to dry land or at the<br />
very least, to water below the footrests.<br />
2. Disconnect the fuel pump wires.<br />
3. Remove the spark plug.<br />
4. Place a clean container under the<br />
engine and loosen the carburetor drain<br />
screw two turns.<br />
5. Dry any water present in the air box.<br />
Filter replacement is required if water<br />
is present.<br />
6. Thoroughly dry the air pre-cleaner<br />
located under the hood.<br />
Drain Screw<br />
7. Turn the engine over several times<br />
using the electric start.<br />
8. Inspect the drained fuel for water or sediment.<br />
9. Dry the spark plug and reinstall it, or install a new plug.<br />
10. Tighten the carburetor drain screw.<br />
11. Reconnect the fuel pump wires.<br />
12. Attempt to start the engine. If necessary, repeat the drying procedure.<br />
13. Take the vehicle to your dealer for service as soon as possible,<br />
whether you succeed in starting it or not.<br />
14. If water has been ingested into the PVT follow the procedure on<br />
page 69 for drying.<br />
70
MAINTENANCE<br />
Filter Systems<br />
Air Filter<br />
Always change the air filter at the intervals outlined in the Periodic<br />
Maintenance Chart beginning on page 48. Service the air filter more frequently<br />
if the vehicle is operated in wet conditions or at high throttle<br />
openings for extended periods.<br />
1. Lift the cargo box to<br />
access the air box.<br />
2. Remove the air box<br />
cover and inspect the<br />
gasket. It should adhere<br />
tightly to the cover and<br />
seal all the way around.<br />
Air Filter<br />
3. Remove the air filter.<br />
4. Do not attempt to clean<br />
the main element.<br />
Install a new air filter.<br />
Tip: Apply a small amount of<br />
general purpose grease to<br />
the sealing edges of the<br />
filter before installing.<br />
5. Inspect the air box for<br />
oil or water deposits. If present, drain them into a suitable container.<br />
Fuel Filter<br />
Your <strong>Polaris</strong> vehicle is equipped with an in-line fuel filter. Have your<br />
dealer replace it after every 100 hours of operation. Do not attempt to<br />
clean the fuel filter.<br />
71
MAINTENANCE<br />
Filter Systems<br />
Breather Filter and Hoses<br />
1. Lift the cargo box and<br />
locate the air box.<br />
2. Follow the right-hand<br />
breather line out the side<br />
of the air box and locate<br />
the filter.<br />
3. Remove and inspect the<br />
filter for debris. Blow<br />
gently through the filter<br />
in the direction of the<br />
arrow to check for clogging.<br />
Replace as needed.<br />
4. Check hoses for cracks, deterioration, abrasion, or leaks. Replace as<br />
needed.<br />
5. Reinstall the filter with the arrow pointing toward the engine.<br />
Secure the clamps.<br />
NOTICE: Operation of the vehicle without a breather filter can cause engine<br />
damage. Always reinstall the breather filter after removing it for<br />
service.<br />
72
MAINTENANCE<br />
Carburetor<br />
The idle speed adjustment should be performed as outlined in the Periodic<br />
Maintenance Chart, or whenever the idle speed is changed. Recommended<br />
engine idle RPM is 1200 +/- 200.<br />
Carburetor/Engine Idle RPM Adjustment<br />
If the engine idle speed is unsatisfactory and all other conditions are<br />
favorable, the carburetor can be adjusted.<br />
1. Apply the brakes.<br />
2. Place the transmission in PARK.<br />
3. Start the engine and allow it to warm<br />
up for approximately five minutes.<br />
4. Remove the seat. Locate the idle adjust<br />
screw.<br />
5. Place the transmission in gear.<br />
6. Turn the screw in (clockwise) to raise<br />
RPM. Turn the screw out (counterclockwise)<br />
to lower RPM.<br />
Idle Adjust Screw<br />
73
MAINTENANCE<br />
Spark Arrestor<br />
WARNING<br />
Failure to heed the following warnings while servicing the spark arrestor could<br />
result in serious injury or death.<br />
Do not perform service on the spark arrestor while the system is hot. Exhaust<br />
system temperatures can reach 1000° F. Allow components to cool sufficiently<br />
before proceeding.<br />
Remove any combustible materials from the area.<br />
Wear eye protection and gloves.<br />
Do not stand behind or in front of the vehicle while purging.<br />
Never run the engine in an enclosed area. Exhaust contains poisonous carbon<br />
monoxide gas that can cause loss of consciousness or death in a very short<br />
time.<br />
Never go under the vehicle while it's inclined.<br />
74
MAINTENANCE<br />
Spark Arrestor<br />
Use the following procedure to periodically purge accumulated carbon<br />
from the exhaust pipe.<br />
1. Remove the arrestor<br />
clean-out plug located on<br />
the bottom of the muffler.<br />
2. Place the transmission in<br />
PARK.<br />
3. Start the engine.<br />
4. Purge accumulated carbon<br />
from the system by<br />
momentarily revving the<br />
engine several times.<br />
Clean-Out<br />
Plug<br />
Exhaust Outlet<br />
5. If carbon is expelled, cover or plug the exhaust outlet and rap on the<br />
pipe around the clean-out plug while revving the engine several<br />
more times.<br />
6. If particles are still suspected to be in the muffler, elevate the rear of<br />
the vehicle one foot higher than the front. Block the wheels.<br />
7. Repeat steps 4 and 5 until no more particles are expelled when the<br />
engine is revved.<br />
8. Stop the engine. Allow the arrestor to cool.<br />
9. Reinstall the arrestor plug and remove the outlet cover or plug.<br />
75
MAINTENANCE<br />
Throttle System<br />
WARNING<br />
Failure to check or maintain proper operation of the throttle system can result in<br />
an accident and lead to serious injury or death if the throttle pedal sticks during<br />
operation.<br />
Always check the pedal for free movement and return before starting the engine<br />
and occasionally during operation. Never start or operate this vehicle if it has a<br />
sticking or improperly operating throttle pedal. Immediately contact your dealer<br />
for service if throttle problems arise.<br />
Throttle Freeplay<br />
If the throttle pedal has excessive<br />
play due to cable stretch or misadjustment,<br />
it will cause a delay<br />
in throttle response, especially at<br />
low engine speed. The throttle<br />
may also not open fully. If the<br />
throttle pedal has no freeplay, the<br />
throttle may be hard to control,<br />
and the idle speed may be erratic.<br />
Check the throttle pedal freeplay<br />
at the intervals outlined in the<br />
Periodic Maintenance Chart<br />
beginning on page 48. Adjust the<br />
freeplay if necessary.<br />
Throttle<br />
Pedal<br />
Throttle Freeplay Inspection<br />
1. Place the transmission in PARK.<br />
2. Start the engine. Allow it to warm up thoroughly.<br />
3. Measure the distance the throttle pedal moves before the engine<br />
begins to pick up speed. Freeplay should be 1/16 to 1/8 inches (1.6-<br />
3.2 mm).<br />
76
Throttle System<br />
Throttle Freeplay Adjustment<br />
1. Remove the seat.<br />
2. Locate the throttle cable<br />
adjuster.<br />
3. Squeeze the end of the rubber<br />
boot and slide it far<br />
enough to expose the end<br />
of the inline cable adjuster.<br />
4. Loosen the adjuster lock<br />
nut.<br />
5. Rotate the boot to turn the<br />
adjuster until 1/16" to 1/8"<br />
(1.5-3 mm) of freeplay is<br />
achieved at the throttle<br />
pedal. See page 76.<br />
Boot<br />
Lock Nut<br />
MAINTENANCE<br />
Adjuster<br />
Tip: While adjusting, lightly flip the throttle pedal up and down.<br />
6. Tighten the lock nut.<br />
7. Squeeze the end of the rubber boot and slide it over the cable<br />
adjuster to its original position.<br />
Cylinder Head/Cylinder Base Fastener Torque<br />
Have your dealer check the cylinder head and cylinder base fasteners for<br />
proper torque at the first service or after 25 hours.<br />
77
MAINTENANCE<br />
Brakes<br />
The front and rear brakes are hydraulic disc type brakes. Press down on<br />
the brake pedal to engage the brakes. See page 23.<br />
Brake Fluid<br />
Inspect the brake system routinely. Inspect the level of the brake fluid<br />
before each operation.<br />
WARNING! After opening a bottle of brake fluid, always discard any unused<br />
portion. Never store or use a partial bottle. Brake fluid is hygroscopic, meaning it<br />
rapidly absorbs moisture from the air. The moisture causes the boiling<br />
temperature of the brake fluid to drop, which can lead to early brake fade and<br />
the possibility of accident or severe injury.<br />
Change the brake fluid every two years and any time the fluid becomes<br />
contaminated, the fluid level is below the minimum, or if the type and<br />
brand of the fluid in the reservoir are unknown. See page 53 for fluid<br />
recommendations.<br />
1. Position the vehicle on a level<br />
surface.<br />
Maximum<br />
Minimum<br />
2. View the brake fluid level at the<br />
reservoir in the driver’s side<br />
wheel well. The level should be<br />
between the upper (MAX) and<br />
lower (MIN) level lines.<br />
3. If the fluid level is lower than<br />
the upper level line, add brake<br />
fluid to the upper (MAX) line.<br />
4. Apply the brake forcefully for a<br />
few seconds and check for fluid<br />
leakage around the fittings.<br />
78
Brakes<br />
Brake Inspection<br />
1. Check the brake system for<br />
fluid leaks.<br />
2. Check the brake pedal for<br />
excessive travel or a spongy<br />
feel.<br />
3. Check the friction pads for<br />
wear, damage and looseness.<br />
4. Inspect the brake disc spline<br />
and pad wear surface for<br />
excessive wear.<br />
5. Change pads when worn to<br />
3/64" (1 mm).<br />
MAINTENANCE<br />
3/64" (1mm)<br />
Steering Wheel Inspection<br />
Check the steering wheel for specified freeplay and smooth operation at<br />
the intervals outlined in the Periodic Maintenance Chart beginning on<br />
page 48.<br />
1. Position the vehicle on a level surface.<br />
2. Lightly turn the steering wheel left and right.<br />
3. There should be 0.8"-1.0" (20-25 mm) of freeplay.<br />
4. If there is excessive freeplay or strange noises, or the steering feels<br />
rough or "catchy," have the steering system inspected by an authorized<br />
<strong>Polaris</strong> dealer.<br />
79
MAINTENANCE<br />
Suspension Adjustments<br />
The front and rear suspensions can be adjusted to provide a stiffer suspension,<br />
if necessary.<br />
1. Remove the top shock mounting bolts from the inside mounting<br />
holes.<br />
2. Reposition the shocks to the outside mounting holes.<br />
3. Reinstall the shock mounting bolts. Torque to 30 ft. lbs. (40 Nm).<br />
Spring Adjustment<br />
Adjust the front and rear shock absorber springs by rotating the adjustment<br />
cam either clockwise or counter-clockwise to increase or decrease<br />
spring tension.<br />
Rear Suspension Shown<br />
Adjustment is similar for Front Suspension<br />
Cam<br />
80
Tires<br />
WARNING<br />
MAINTENANCE<br />
Operating your vehicle with worn tires, improperly inflated tires, non-standard<br />
tires or improperly installed tires will affect vehicle handling and could cause an<br />
accident resulting in serious injury or death. Always follow all tire <strong>maintenance</strong><br />
procedures as outlined in this manual and on the labels on the vehicle. Always<br />
use original equipment size and type when replacing tires.<br />
Tire Tread Depth<br />
Always replace tires<br />
when tread depth is<br />
worn to 1/8" (3 mm)<br />
or less.<br />
1/8" (3 mm)<br />
Axle and Wheel Nut Torque Specifications<br />
Inspect the following items occasionally for tightness, and if they've<br />
been loosened for <strong>maintenance</strong> service.<br />
Do not lubricate the stud or the lug nut.<br />
Nut Type Location Nut Torque<br />
Lug Nut Front and Rear 90 ft. lbs. (122 Nm)<br />
2-Piece Flange<br />
Nut<br />
Front and Rear<br />
35 ft. lbs. (47 Nm)<br />
Spindle Nut Front 70 ft. lbs. (95 Nm)<br />
Hub Retaining Nuts Center and Rear 110 ft. lbs. (150 Nm)<br />
81
MAINTENANCE<br />
Tires<br />
Wheel Removal<br />
1. Apply the brakes.<br />
2. Place the transmission in PARK.<br />
3. Stop the engine.<br />
4. Loosen the wheel nuts slightly.<br />
5. Elevate the side of the vehicle by placing a suitable stand under the<br />
frame.<br />
6. Remove the wheel nuts and washers. Remove the wheel.<br />
Wheel Installation<br />
1. Place the transmission<br />
in PARK.<br />
2. Place the wheel in the<br />
correct position on the<br />
wheel hub. Be sure<br />
the valve stem is<br />
toward the outside<br />
and rotation arrows<br />
on the tire point<br />
toward forward rotation.<br />
WARNING! Improperly<br />
installed wheels can<br />
adversely affect tire wear and<br />
vehicle handling, which can result in serious injury or death. Always ensure that<br />
all nuts are torqued to specification. Do not service axle nuts that have a cotter<br />
pin installed. See your <strong>Polaris</strong> dealer.<br />
3. Attach the wheel nuts and washers and finger tighten.<br />
4. Carefully lower the vehicle to the ground.<br />
5. Torque the wheel nuts to specification. See page 81.<br />
82
MAINTENANCE<br />
Lights<br />
Poor lighting can result in reduced visibility when driving. Headlight<br />
and taillight lenses become dirty during normal operation. Clean lights<br />
frequently and replace burned out lamps promptly. Always make sure<br />
lights are adjusted properly for best visibility.<br />
When servicing a halogen lamp, don't touch the lamp with bare fingers.<br />
Oil from your skin leaves a residue, causing a hot spot that will shorten<br />
the life of the lamp.<br />
Headlight Lamp Replacement<br />
1. Open the hood.<br />
Wiring Harness<br />
CAUTION! Hot components<br />
can cause burns to skin. Allow<br />
lamps to cool before servicing.<br />
2. Unplug the headlamp<br />
from the wiring harness.<br />
Be sure to pull on the<br />
connector, not on the<br />
wiring.<br />
3. Turn the lamp counterclockwise<br />
to remove it.<br />
4. Install the new lamp.<br />
Tip: Make sure the tab on the lamp locates properly in the housing.<br />
5. Reinstall the harness assembly into the headlight assembly.<br />
83
MAINTENANCE<br />
Lights<br />
Headlight Beam Adjustment<br />
X<br />
X<br />
8" (20 cm)<br />
25 ft.<br />
(7.6 m)<br />
1. Place the vehicle on a level surface with the headlight approximately<br />
25 ft. (7.6 m) from a wall.<br />
2. Measure the distance from the floor to the center of the headlight<br />
and make a mark on the wall at the same height.<br />
3. Apply the brakes. Start the engine. Turn on the headlights.<br />
4. Observe the headlight aim. The most intense part of the headlight<br />
beam should be aimed 8" (20 cm) below the mark placed on the<br />
wall. Include the weight of a rider on the seat while performing this<br />
step.<br />
5. If a headlight needs adjustment, access the adjustment screw under<br />
the hood or through the wheel well.<br />
6. Loosen the screw, adjust the headlight, and tighten the screw.<br />
7. Repeat steps 4-6 until the lamp is properly adjusted.<br />
84
MAINTENANCE<br />
Lights<br />
Brake Lights<br />
When the brake pedal is depressed, the console brake light comes on.<br />
Check the brake light before each ride.<br />
1. Turn the ignition switch to the ON position.<br />
2. Depress the brake pedal. The brake light should come on after about<br />
10mm (0.4 in.) of pedal travel. If the light doesn't come on, check<br />
the bulb.<br />
Indicator Lamp Replacement<br />
1. Lift the hood.<br />
2. Reach in behind the console<br />
Release<br />
Tab<br />
panel and lift the release to<br />
unplug the light from the<br />
harness.<br />
3. Using a flathead screwdriver,<br />
press on the tab on the top of<br />
the light to remove the indicator<br />
light assembly from the<br />
console panel.<br />
4. Locate the expired lamp. Using a screwdriver, rotate the lamp 1/4<br />
turn counter-clockwise.<br />
5. Grip the lamp with a needle-nose pliers and remove it from the<br />
assembly.<br />
6. Install the new lamp. Using a screwdriver, rotate the lamp 1/4 turn<br />
clockwise to seat it.<br />
7. Snap the assembly back into the console panel. Reconnect the harness.<br />
8. Close the hood.<br />
85
MAINTENANCE<br />
Battery<br />
WARNING<br />
Battery electrolyte is poisonous. It contains sulfuric acid. Serious burns can<br />
result from contact with skin, eyes or clothing.<br />
Antidote:<br />
External: Flush with water.<br />
Internal: Drink large quantities of water or milk. Follow with milk of magnesia,<br />
beaten egg, or vegetable oil. Call physician immediately.<br />
Eyes: Flush with water for 15 minutes and get prompt medical attention.<br />
Batteries produce explosive gases. Keep sparks, flame, cigarettes, etc. away.<br />
Ventilate when charging or using in an enclosed space. Always shield eyes<br />
when working near batteries. KEEP OUT OF REACH OF CHILDREN.<br />
Your vehicle may have either a sealed battery, which requires little<br />
<strong>maintenance</strong>, or a conventional battery. A sealed battery can be identified<br />
by its flat covers on the top of the battery. A conventional battery<br />
has six filler caps on the top of the battery.<br />
Always keep battery terminals and connections free of corrosion. If<br />
cleaning is necessary, remove the corrosion with a stiff wire brush.<br />
Wash with a solution of one tablespoon baking soda and one cup water.<br />
Rinse well with tap water and dry off with clean shop towels. Coat the<br />
terminals with dielectric grease or petroleum jelly. Be careful not to<br />
allow cleaning solution or tap water into the battery.<br />
Tip: If accessories are using power constantly while the vehicle is operated in<br />
colder temperatures (below 30° F./-1° C.), a 30 amp/hour battery will provide<br />
the best performance, including improved starting performance.<br />
86
Battery<br />
Battery Removal<br />
MAINTENANCE<br />
WARNING<br />
Improperly connecting or disconnecting battery cables can result in an explosion<br />
and cause serious injury or death. When removing the battery, always<br />
disconnect the negative (black) cable first. When reinstalling the battery, always<br />
connect the negative (black) cable last.<br />
1. Remove the seat.<br />
2. On conventional batteries,<br />
remove the battery vent tube.<br />
3. Disconnect the black (-) battery<br />
cable first.<br />
4. Disconnect the red (+) battery<br />
cable last.<br />
5. Lift the battery out of the vehicle.<br />
Be careful not to tip a conventional<br />
battery sideways,<br />
Battery<br />
which could spill electrolyte.<br />
NOTICE: If electrolyte spills, immediately wash it off with a solution of one<br />
tablespoon baking soda and one cup water to prevent damage to the<br />
vehicle.<br />
87
MAINTENANCE<br />
Battery<br />
Battery Installation<br />
NOTICE: Using a new battery that has not been fully charged can damage the<br />
battery and result in a shorter life. It can also hinder vehicle<br />
performance. Always install a fully charged battery.<br />
1. Ensure that the battery is<br />
fully charged.<br />
2. Place the battery in the<br />
battery holder. Make sure<br />
the positive terminal is<br />
toward the passenger side<br />
of the vehicle.<br />
3. Install the battery vent<br />
tube and route it down in<br />
front of the shift cable,<br />
into the left front wheel<br />
well.<br />
4. Route the vent tube<br />
through the hole in the<br />
frame support from the<br />
back side and place it<br />
behind the wheel well<br />
panel.<br />
NOTICE: Route the vent tube as<br />
shown to prevent<br />
electrolyte from<br />
damaging critical<br />
components such as<br />
the wire harness, brake lines and throttle cable.<br />
5. Coat the terminals with dielectric grease or petroleum jelly.<br />
6. Connect and tighten the red positive (+) cable first.<br />
7. Connect and tighten the black negative (-) cable last.<br />
8. Verify that cables are properly routed.<br />
9. Install the hold-down strap.<br />
Vent<br />
Tube<br />
Shift<br />
Cable<br />
Through<br />
hole in<br />
frame<br />
Behind<br />
Panel<br />
88
MAINTENANCE<br />
Battery<br />
Battery Storage<br />
Whenever the vehicle is not used for a period of three months or more,<br />
remove the battery from the vehicle, ensure that it's fully charged, and<br />
store it out of the sun in a cool, dry place. Check battery voltage each<br />
month during storage and recharge as needed to maintain a full charge.<br />
See page 90.<br />
<strong>Polaris</strong> recommends maintaining battery charge by using a <strong>Polaris</strong> Battery<br />
Tender charger or by charging about once a month to make up for<br />
normal self-discharge. Battery Tender can be left connected during the<br />
storage period, and will automatically charge the battery if the voltage<br />
drops below a pre-determined point. See page 100 for the part numbers<br />
of <strong>Polaris</strong> products.<br />
Battery Fluid (Conventional Battery)<br />
A poorly maintained battery will<br />
deteriorate rapidly. Check the battery<br />
fluid level often. Maintain the<br />
fluid level between the upper and<br />
lower level marks.<br />
Add only distilled water. Tap water<br />
contains minerals that are harmful<br />
to a battery.<br />
Lower<br />
Mark<br />
Upper<br />
Mark<br />
89
MAINTENANCE<br />
Battery<br />
Battery Charging (Conventional Battery)<br />
1. Remove the battery from the vehicle to prevent damage from leaking<br />
or spilled electrolyte during charging. See page 87.<br />
2. Charge the battery with a charging output no larger than 1/10 of the<br />
battery’s amp/hr rating. Charge as needed to raise the specific gravity<br />
to 1.270 or greater.<br />
3. Reinstall the battery. See page 88. Make sure the positive terminal is<br />
toward the driver’s side of the vehicle.<br />
Battery Charging (Sealed Battery)<br />
The following battery charging instructions apply only to the installation<br />
of a sealed battery. Read all instructions before proceeding with the<br />
installation of this battery.<br />
The sealed battery is already filled with electrolyte and has been sealed<br />
and fully charged at the factory. Never pry the sealing strip off or add<br />
any other fluid to this battery.<br />
The single most important thing about maintaining a sealed battery is to<br />
keep it fully charged. Since the battery is sealed and the sealing strip<br />
cannot be removed, you must use a voltmeter or multimeter to measure<br />
DC voltage.<br />
WARNING! An overheated battery may explode, causing severe injury or<br />
death. Always watch charging times carefully. Stop charging if the battery<br />
becomes very warm to the touch. Allow it to cool before resuming charging.<br />
For a refresh charge, follow all instructions carefully.<br />
1. Check the battery voltage with a voltmeter or multimeter. A fully<br />
charged battery will register 12.8 V or higher.<br />
2. If the voltage is less than 12.8 volts, recharge the battery at 1.2 amps<br />
or less until battery voltage is 12.8 or greater.<br />
3. When using an automatic charger, refer to the charger manufacturer's<br />
instructions for recharging. When using a constant current<br />
charger, use the guidelines on the next page for recharging.<br />
90
MAINTENANCE<br />
Battery<br />
Battery Charging (Sealed Battery)<br />
Always verify battery condition before and 1-2 hours after the end of<br />
charging.<br />
State of<br />
Charge<br />
Voltage<br />
Action<br />
Charge Time<br />
(Using constant current<br />
charger @ standard amps<br />
specified on top of battery)<br />
100% 12.8-13.0 volts None, check at 3 None required<br />
mos. from date of<br />
manufacture<br />
75%-100% 12.5-12.8 volts May need slight 3-6 hours<br />
charge, if no<br />
charge given,<br />
check in 3 months<br />
50%-75% 12.0-12.5 volts Needs charge 5-11 hours<br />
25%-50% 11.5-12.0 volts Needs charge At least 13 hours,<br />
verify state of charge<br />
0%-25% 11.5 volts or less Needs charge with<br />
desulfating charger<br />
At least 20 hours<br />
91
MAINTENANCE<br />
Cleaning and Storage<br />
Washing the Vehicle<br />
Keeping your <strong>Polaris</strong> vehicle clean will not only improve its appearance<br />
but it can also extend the life of various components.<br />
NOTICE: High water pressure may damage components. <strong>Polaris</strong> recommends<br />
washing the vehicle by hand or with a garden hose, using mild soap.<br />
NOTICE: Certain products, including insect repellents and chemicals, will<br />
damage plastic surfaces. Do not allow these types of products to<br />
contact the vehicle.<br />
The best and safest way to clean your <strong>Polaris</strong> vehicle is with a garden<br />
hose and a pail of mild soap and water.<br />
1. Use a professional-type washing cloth, cleaning the upper body first<br />
and the lower parts last.<br />
2. Rinse with clean water frequently.<br />
3. Dry surfaces with a chamois to prevent water spots.<br />
Washing Tips<br />
• Avoid the use of harsh cleaners, which can scratch the finish.<br />
• Do not use a power washer to clean the vehicle.<br />
• Do not use medium to heavy duty compounds on the finish.<br />
• Always use clean cloths and pads for cleaning and polishing. Old or<br />
reused cloths and pads may contain dirt particles that will scratch the<br />
finish.<br />
92
MAINTENANCE<br />
Cleaning and Storage<br />
Washing the Vehicle<br />
If a high pressure water system is used for cleaning (not recommended),<br />
exercise extreme caution. The water may damage components and could<br />
remove paint and labels. Avoid directing the water stream at the following<br />
items:<br />
• Wheel bearings<br />
• Radiator<br />
• Transmission seals<br />
• Brakes<br />
• Cab and body panels<br />
• Labels and decals<br />
• Switches and controls<br />
• Electrical components and wiring<br />
If an informational or graphic label becomes illegible or comes off, contact<br />
your <strong>Polaris</strong> dealer to purchase a replacement. Replacement safety<br />
labels are provided by <strong>Polaris</strong> at no charge.<br />
Grease all zerk fittings immediately after washing. Allow the engine to<br />
run for a while to evaporate any water that may have entered the engine<br />
or exhaust system.<br />
Polishing the Vehicle<br />
<strong>Polaris</strong> recommends the use of common household aerosol furniture<br />
polish for polishing the finish on your <strong>Polaris</strong> vehicle. Follow the<br />
instructions on the container.<br />
Polishing Tips<br />
• Avoid the use of automotive products, some of which can scratch the<br />
finish of your vehicle.<br />
• Always use clean cloths and pads for cleaning and polishing. Old or<br />
reused cloths and pads may contain dirt particles that will scratch the<br />
finish.<br />
93
MAINTENANCE<br />
Cleaning and Storage<br />
Chrome Wheel Care (if equipped)<br />
Proper <strong>maintenance</strong> will protect chrome wheels from corrosion, preserve<br />
wheel life and ensure a “like new” appearance for many years.<br />
Chrome wheels exposed to road salt (or salt in the air in coastal areas)<br />
are more susceptible to corrosion if not properly cleaned. Clean chrome<br />
wheels more often if they're exposed to salt or other corrosive elements.<br />
1. Wash chrome wheels frequently. Use a mild detergent. Never use<br />
abrasive cleaners on plated or painted surfaces.<br />
2. Rinse well with clear water. Soap, detergents, salt, dirt, mud and<br />
other elements can cause corrosion.<br />
3. Polish the clean chrome wheels periodically. Use an automotive<br />
grade chrome polish.<br />
4. Routinely and liberally apply a weather resistant wax to each polished<br />
chrome wheel. Choose a product suitable for chrome finishes.<br />
Read and follow the product labels and instructions.<br />
Removing Corrosion<br />
If light rust is found on the chrome finish, use steel wool (#0000-OTT<br />
grade) to remove it. Gently rub the affected areas with the steel wool<br />
until the corrosion has been removed. Clean and polish the wheel as outlined<br />
above.<br />
94
Cleaning and Storage<br />
Storage Tips<br />
MAINTENANCE<br />
NOTICE: Starting the engine during the storage period will disturb the<br />
protective film created by fogging and damage could occur. Never<br />
start the engine during the storage period.<br />
Clean the Exterior<br />
Make any necessary repairs and clean the vehicle as recommended. See<br />
page 92.<br />
Stabilize the Fuel<br />
1. Fill the fuel tank.<br />
2. Add <strong>Polaris</strong> Carbon Clean Fuel Treatment or <strong>Polaris</strong> Fuel Stabilizer.<br />
Follow the instructions on the container for the recommended<br />
amount. Carbon Clean removes water from fuel systems, stabilizes<br />
fuel and removes carbon deposits from pistons, rings, valves and<br />
exhaust systems.<br />
3. Allow the engine to run for 15-20 minutes to allow the stabilizer to<br />
disperse through the fuel in the tank and carburetor.<br />
4. Drain the carburetor bowl.<br />
Oil and Filter<br />
Change the oil and filter. See page 56.<br />
Air Filter / Air Box<br />
1. Inspect and clean or replace the pre-cleaner and air filter. See page<br />
71.<br />
2. Clean the air box.<br />
3. Drain the sediment tube.<br />
Inspect and Lubricate<br />
Inspect all cables and lubricate all areas of the vehicle as recommended<br />
in the Periodic Maintenance Chart beginning on page 48.<br />
Battery Maintenance<br />
See pages 89-91 for storage and charging procedures.<br />
95
MAINTENANCE<br />
Cleaning and Storage<br />
Storage Tips<br />
Fluid Levels<br />
Inspect the fluid levels. Add or change fluids as recommended in the<br />
Periodic Maintenance Chart beginning on page 48.<br />
• Front and rear gearcase fluid (if equipped)<br />
• Transmission fluid<br />
• Brake fluid (change every two years and any time the fluid looks dark<br />
or contaminated)<br />
• Coolant (test strength/fill)<br />
Fog the Engine<br />
1. Remove the spark plug and add 2-3 tablespoons (30-45 ml) of<br />
engine oil.<br />
2. Reinstall the spark plug. Torque to specification. See page 62.<br />
3. Apply dielectric grease to the inside of the spark plug cap. Reinstall<br />
the cap.<br />
4. Turn the engine over several times. Oil will be forced in and around<br />
the piston rings and ring lands, coating the cylinder with a protective<br />
film of fresh oil.<br />
5. Treat the fuel system with <strong>Polaris</strong> Carbon Clean. See page 95. If<br />
<strong>Polaris</strong> fuel system additive is not used, fuel tank, fuel lines, and<br />
carburetor should be completely drained of gasoline.<br />
6. To eliminate any fuel remaining in the carburetor, run the engine<br />
until it stops.<br />
Storage Area/Covers<br />
Be sure the storage area is well ventilated. Cover the vehicle with a genuine<br />
<strong>Polaris</strong> cover. Do not use plastic or coated materials. They do not<br />
allow enough ventilation to prevent condensation, and may promote<br />
corrosion and oxidation.<br />
96
MAINTENANCE<br />
Removal from Storage<br />
1. Check the battery electrolyte level and charge the battery if necessary.<br />
Install it in the vehicle. Make sure the battery vent hose is<br />
routed properly and that it's not pinched or restricted in any way.<br />
2. Make sure the spark plug is tight.<br />
3. Fill the fuel tank with fuel.<br />
4. Check all the points listed in the Daily Pre-Ride Inspection section<br />
on page 29. Tightness of the bolts, nuts and other fasteners should<br />
be checked by an authorized <strong>Polaris</strong> dealer.<br />
5. Lubricate at the intervals outlined in the Periodic Maintenance<br />
Chart beginning on page 48.<br />
Transporting the RANGER<br />
Follow these procedures when transporting the vehicle.<br />
1. Apply the brakes.<br />
2. Place the transmission in PARK.<br />
3. Stop the engine.<br />
4. Secure the fuel cap, oil cap and seat.<br />
5. Always tie the frame of the RANGER to the transporting unit<br />
securely with suitable straps or rope. Do not attach tie straps to the<br />
front A-arm bolt pockets.<br />
6. Remove the key to prevent loss during transporting.<br />
97
SPECIFICATIONS<br />
RANGER 400 HO<br />
Maximum Weight Capacity 1000 lbs. (454 kg) (includes weight of operator,<br />
passenger, cargo, accessories)<br />
Dry Weight<br />
1050 lbs. (476 kg)<br />
Fuel Capacity 8.8 gal. (33.3 l)<br />
Engine Oil Capacity 2 qts. (1.9 l)<br />
Coolant Capacity 2.25 qts. (2.4 l)<br />
Overall Length<br />
108 in. (274.3 cm)<br />
Overall Width<br />
56.5 in. (143.5 cm)<br />
Overall Height<br />
73 in. (185 cm)<br />
Wheelbase<br />
72 in. (183 cm)<br />
Cargo Box (L x W x H) 58 x 42 x 10 in. (147 x 106.7 x 25.4 cm)<br />
Ground Clearance<br />
10 in. (25.4 cm)<br />
Min. Turning Radius<br />
150 in. (381 cm)<br />
Towing Capacity<br />
1250 lbs. (567 kg)<br />
Max. Cargo Box Load<br />
500 lbs. (227 kg)<br />
Engine<br />
4 valve 4 stroke single cylinder with<br />
counter balance<br />
Lubrication System<br />
Dry Sump<br />
Cooling<br />
Liquid<br />
Engine Oil 0W/40<br />
Displacement<br />
455 cc<br />
Bore x Stroke (mm) 87.9 x 75<br />
Pilot Jet 42.5<br />
Main Jet 150<br />
Needle Jet P-6 (829)<br />
Jet Needle<br />
4IB33<br />
Air Screw 2.75<br />
Alternator Output<br />
250 W<br />
Compression Ratio 9.7:1<br />
Starting System<br />
Electric<br />
Carburetor<br />
34 mm<br />
Ignition System<br />
CDI<br />
Ignition Timing<br />
30° @5000 RPM<br />
Spark Plug<br />
NGK BKR6E<br />
Front Suspension<br />
Strut w/8 in. (20.3 cm) of travel<br />
Rear Suspension<br />
Independent w/9 in. (23 cm) of travel<br />
98
RANGER 400 HO<br />
Clutching<br />
See your <strong>Polaris</strong> dealer for clutching specifications.<br />
SPECIFICATIONS<br />
Driving System Type<br />
PVT<br />
Shift Type<br />
Single Lever (console)<br />
Gear Reduction - Low 7.70:1<br />
Gear Reduction - Reverse 7.00:1<br />
Gear Reduction - High 4.12:1<br />
Drive Ratio - Front 3.818:1<br />
Tire Size - Front 25 x 8 - 12<br />
Tire Size - Rear 25 x 11 - 12<br />
Tire Pressure - Front<br />
10 psi (68.9 kPa)<br />
Tire Pressure - Rear<br />
10 psi (68.9 kPa)<br />
Brakes, Front/Rear<br />
Foot Activated, 4 wheel hydraulic disc<br />
Hood Headlights<br />
2 single beam, 50W, quartz/halogen<br />
Taillights<br />
10 L.E.D. (.28W)<br />
Brake Light<br />
10 L.E.D. (3.1W)<br />
Indicator Light<br />
1.0 W<br />
99
POLARIS PRODUCTS<br />
Part<br />
Number<br />
Description<br />
Engine Lubricant<br />
2870791 Fogging Oil (12 oz. Aerosol)<br />
2876244 PS-4 PLUS Performance Synthetic 2W-50 4-Cycle Oil (qt.)<br />
2876245 PS-4 PLUS Performance Synthetic 2W-50 4-Cycle Oil (gal.)<br />
Gearcase / Transmission Lubricants<br />
2873602 Premium AGL Synthetic Gearcase Lubricant (qt.)<br />
2873603 Premium AGL Synthetic Gearcase Lube (gal.)<br />
2871653 Premium ATV Angle Drive Fluid (8 oz.)<br />
2872276 Premium ATV Angle Drive Fluid (2.5 gal.)<br />
2870465 Pump for Gallon Jug<br />
2871654 Premium Demand Drive Hub Fluid (8 oz.)<br />
2872277 Premium Demand Drive Hub Fluid (2.5 gal.)<br />
Coolant<br />
2871323 60/40 Coolant (gal.)<br />
2871534 60/40 Coolant (qt.)<br />
Grease / Specialized Lubricants<br />
2871312 Grease Gun Kit, Premium All Season (3 oz.)<br />
2871322 Premium All Season Grease (3 oz. cartridge)<br />
2871423 Premium All Season Grease (14 oz. cartridge)<br />
2871460 Starter Drive Grease (2 oz.)<br />
2871515 Premium U-Joint Lube (3 oz.)<br />
2871551 Premium U-Joint Lube (14 oz.)<br />
2871329 Dielectric Grease (Nyogel TM )<br />
2872073 Chain Lube, Aerosol (6.25 oz.)<br />
2872348 Chain Lube, Aerosol (16 oz.)<br />
Additives / Miscellaneous<br />
2871326 Carbon Clean Plus (12 oz.)<br />
2870652 Fuel Stabilizer (16 oz.)<br />
2872189 DOT 4 Brake Fluid<br />
2872893 Engine Degreaser (12 oz.)<br />
2871956 Loctite TM 565 Thread Sealant<br />
2871076 <strong>Polaris</strong> Battery Tender TM Charger<br />
100
Drive Belt Wear/Burn<br />
TROUBLESHOOTING<br />
Possible Cause<br />
Driving onto a pickup or<br />
tall trailer in high range<br />
Starting out going up a<br />
steep incline<br />
Driving at low RPM or<br />
ground speed (3-7 MPH)<br />
Insufficient warm-up at<br />
low ambient temperatures<br />
Slow/easy clutch engagement<br />
Towing/pushing at low<br />
RPM/low ground speed<br />
Utility use/plowing<br />
Stuck in mud or snow<br />
Climbing over large<br />
objects from a stopped<br />
position<br />
Belt slippage from water<br />
or snow ingestion into the<br />
PVT system<br />
Clutch malfunction<br />
Poor engine performance<br />
Slippage from failure to<br />
warm up belt<br />
Wrong or missing belt<br />
Solution<br />
Use low range during loading.<br />
Use low range. See warnings on page 34.<br />
Drive at a higher speed or use low range more frequently.<br />
See page 68.<br />
Warm the engine at least 5 minutes. With the transmission<br />
in neutral, advance the throttle to about 1/8 throttle in<br />
short bursts, 5 to 7 times. The belt will become more flexible<br />
and prevent belt burning.<br />
Use the throttle quickly and effectively.<br />
Use low range only.<br />
Use low range only.<br />
Shift the transmission to low range and carefully use fast,<br />
aggressive throttle application to engage clutch.<br />
WARNING: Excessive throttle may cause loss of control<br />
and vehicle overturn.<br />
Shift the transmission to low range and carefully use fast,<br />
brief, aggressive throttle application to engage clutch.<br />
WARNING: Excessive throttle may cause loss of control<br />
and vehicle overturn.<br />
Dry out the PVT. See page 69. Inspect clutch seals for<br />
damage if repeated leaking occurs.<br />
See your <strong>Polaris</strong> dealer.<br />
Check for fouled plugs or foreign material in fuel tank or<br />
fuel lines. See your dealer.<br />
Always warm up the belt by operating below 30 mph for<br />
one mile (5 miles or more when temperature is below<br />
freezing).<br />
Install the recommended belt.<br />
Improper break-in Always break in a new belt and/or clutch. See pages 27<br />
and 68.<br />
101
TROUBLESHOOTING<br />
Engine Doesn't Turn Over<br />
Possible Cause<br />
Low battery voltage<br />
Loose battery connections<br />
Loose solenoid connections<br />
Loose electronic control box connections<br />
Solution<br />
Recharge the battery to 12.8 VDC<br />
Check all connections and tighten<br />
Check all connections and tighten<br />
Inspect, clean, reinstall connectors<br />
Engine Turns Over, Fails to Start<br />
Possible Cause<br />
Out of fuel<br />
Water is present in fuel<br />
Old or non-recommended fuel<br />
Fouled or defective spark plugs<br />
No spark to spark plug<br />
Water or fuel in crankcase<br />
Overuse of choke<br />
Low battery voltage<br />
Mechanical failure<br />
Solution<br />
Refuel<br />
Drain the fuel system and refuel<br />
Replace with fresh recommended fuel<br />
Inspect plugs and replace if necessary<br />
Inspect plugs and replace if necessary<br />
Immediately see your <strong>Polaris</strong> dealer<br />
Inspect, clean and/or replace spark plug<br />
Recharge the battery to 12.8 VDC<br />
See your dealer<br />
Engine Backfires<br />
Possible Cause<br />
Weak spark from spark plug<br />
Incorrect spark plug gap or heat range<br />
Old or non-recommended fuel<br />
Incorrectly installed spark plug wires<br />
Incorrect ignition timing<br />
Mechanical failure<br />
Loose ignition connections<br />
Water present in fuel<br />
Solution<br />
Inspect, clean and/or replace spark plugs<br />
Set gap to specs or replace plugs<br />
Replace with fresh recommended fuel<br />
See your dealer<br />
See your dealer<br />
See your dealer<br />
Check all connections and tighten<br />
Replace with fresh recommended fuel<br />
102
Engine Pings or Knocks<br />
Possible Cause<br />
Poor quality or low octane fuel<br />
Incorrect ignition timing<br />
Incorrect spark plug gap or heat range<br />
TROUBLESHOOTING<br />
Solution<br />
Replace with recommended fuel<br />
See your dealer<br />
Set gap to specs or replace plugs<br />
Engine Runs Irregularly, Stalls or Misfires<br />
Possible Cause<br />
Fouled or defective spark plugs<br />
Worn or defective spark plug wires<br />
Incorrect spark plug gap or heat range<br />
Loose ignition connections<br />
Water present in fuel<br />
Low battery voltage<br />
Kinked or plugged fuel tank vent line<br />
Incorrect fuel<br />
Clogged air filter<br />
Other mechanical failure<br />
Possible Lean Fuel Cause<br />
Overuse of choke<br />
Low or contaminated fuel<br />
Low octane fuel<br />
Possible Rich Fuel Cause<br />
Fuel is very high octane<br />
Solution<br />
Inspect, clean and/or replace spark plugs<br />
See your dealer<br />
Set gap to specs or replace plugs<br />
Check all connections and tighten<br />
Replace with new fuel<br />
Recharge battery to 12.8 VDC<br />
Inspect and replace<br />
Replace with recommended fuel<br />
Inspect and clean or replace<br />
See your dealer<br />
Solution<br />
Inspect, clean and/or replace spark plug<br />
Add or change fuel, clean the fuel system<br />
Replace with recommended fuel<br />
Solution<br />
Replace with lower octane fuel<br />
103
TROUBLESHOOTING<br />
Engine Stops or Loses Power<br />
Possible Cause<br />
Out of fuel<br />
Kinked or plugged fuel vent line<br />
Overuse of choke<br />
Water is present in fuel<br />
Fouled or defective spark plugs<br />
Worn or defective spark plug wires<br />
Incorrect spark plug gap or heat range<br />
Loose ignition connections<br />
Low battery voltage<br />
Incorrect fuel<br />
Clogged air filter<br />
Other mechanical failure<br />
Overheated engine<br />
Solution<br />
Refuel<br />
Inspect and replace<br />
Inspect, clean and/or replace spark plug<br />
Replace with new fuel<br />
Inspect, clean and/or replace spark plug<br />
See your dealer<br />
Set gap to specs or replace plug<br />
Check all connections and tighten<br />
Recharge the battery to 12.8 VDC<br />
Replace with fresh recommended fuel<br />
Inspect and clean or replace<br />
See your dealer<br />
Clean radiator screen and core, clean<br />
engine exterior, see your dealer<br />
104
DECLARATION OF CONFORMITY<br />
<strong>Polaris</strong> Industries Inc.,<br />
2100 Hwy 55, Medina, MN 55340 U.S.A.<br />
Telephone 763-542-0500<br />
We, <strong>Polaris</strong> Industries Inc., declare that the vehicles listed below conform to the<br />
essential health and safety requirements applicable to off-road all-terrain vehicles.<br />
APPLICABLE EUROPEAN DIRECTIVES<br />
98/37/EC as amended (Machinery Directive)<br />
PRODUCT IDENTIFICATION<br />
TEST / EVALUATION METHODS<br />
EN 1050 hazard analysis<br />
CD 77/311/EEC driver-perceived noise level<br />
2004/108/EC as amended (EMC Directive) CISPR 12:2001<br />
CAN/CSA-C108.4-M92<br />
VEHICLE SERIES TRADE NAME MODEL<br />
YEARS<br />
EN 55012:2002<br />
EN 61000-6-2:2001<br />
SOUND<br />
PRESSURE<br />
dB (A)<br />
___KA05__ OUTLAW 50 2008, 2009, 2010 76.8<br />
___KA09__ OUTLAW 90 2008, 2009, 2010 76.8<br />
___FA09__ SPORTSMAN 90 2008, 2009, 2010 76.8<br />
___VA17__ RZR 170 2009, 2010 81.3<br />
___PB20__ PHOENIX 200 2008, 2009, 2010 76.8<br />
___BA32__ TRAIL BLAZER 330 2008, 2009, 2010 76.8<br />
___CA32__ TRAIL BOSS 330 2008, 2009, 2010 76.8<br />
___BA50__ SCRAMBLER 500 2008, 2009, 2010 79.6<br />
___GJ45__ OUTLAW 450 2008, 2009, 2010 80.7<br />
___GJ52__, ___GP52__ OUTLAW 525 2008, 2009, 2010 80.7<br />
___LH27__ SPORTSMAN 300 2008, 2009, 2010 81.1<br />
___LH46__ SPORTSMAN 400 2008, 2009, 2010 80.2<br />
___MN50__ SPORTSMAN 500 EFI 2008, 2009, 2010 80.4<br />
___ZN55__ ___ZX55__ SPORTSMAN 550 EFI 2009, 2010 80.8<br />
___TN55__, ___DN55__ SPORTSMAN X2/TOURING 550 2010 77.2<br />
___MN76__ SPORTSMAN 800 2008, 2009, 2010 83.6<br />
___TN85__, ___DN85__ SPORTSMAN X2/TOURING 850 2010 77.2<br />
___CL76__ SPORTSMAN 800 6X6 2009, 2010 80.1<br />
___ZN85__, ___ZX85__ SPORTSMAN 850 EFI 2009, 2010 80.4<br />
___RH50__, ___HH50__ RANGER 500 EFI 4X4 2009, 2010 76.5<br />
___HH76__ RANGER 800 EFI 4X4 2010 76.5<br />
___WH76__ RANGER 800 EFI CREW 2010 76.5<br />
___HR__ RANGER 800 6X6 2010 76.5<br />
___HY__ RANGER HD 800 4X4 2010 76.5<br />
___VH76__ RANGER RZR 2008, 2009, 2010 85.8<br />
Authorized Signatory:<br />
__________________________________<br />
Alexander A. Kennedy, Product Compliance<br />
<strong>Polaris</strong> Industries Inc., Engineering Operations<br />
301 5th Avenue SW, Roseau, MN 56751<br />
105
WARRANTY<br />
LIMITED WARRANTY<br />
<strong>Polaris</strong> Sales Inc., 2100 Highway 55, Medina, MN 55340, gives a SIX MONTH LIM-<br />
ITED WARRANTY on all components of the <strong>Polaris</strong> RANGER against defects in material<br />
or workmanship. <strong>Polaris</strong> also gives a one year limited warranty on the final drive<br />
chain (if equipped) for failure due to defects. This warranty covers the parts and labor<br />
charges for repair or replacement of defective parts which are covered by this warranty.<br />
This warranty begins on the date of purchase. This warranty is transferable to another<br />
consumer during the warranty period through a <strong>Polaris</strong> dealer.<br />
REGISTRATION<br />
At the time of sale, the Warranty Registration Form must be completed by your dealer<br />
and submitted to <strong>Polaris</strong> within ten days. Upon receipt of this registration, <strong>Polaris</strong> will<br />
record the registration for warranty. No verification of registration will be sent to the<br />
purchaser as the copy of the Warranty Registration Form will be the warranty entitlement.<br />
If you have not signed the original registration and received the customer copy,<br />
please contact your dealer immediately. NO WARRANTY COVERAGE WILL BE<br />
ALLOWED UNLESS YOUR VEHICLE IS REGISTERED WITH POLARIS.<br />
Initial dealer preparation and set-up of your vehicle is very important in ensuring trouble-free<br />
operation. Purchasing a machine in the crate or without proper dealer set-up will<br />
void your warranty coverage.<br />
WARRANTY COVERAGE AND EXCLUSIONS:<br />
LIMITATIONS OF WARRANTIES AND REMEDIES<br />
The <strong>Polaris</strong> limited warranty excludes any failures that are not caused by a defect in<br />
material or workmanship. This warranty does not cover accidental damage, normal wear<br />
and tear, abuse or improper handling. This warranty also does not cover any vehicle that<br />
has been altered structurally, modified, neglected, improperly maintained, used for racing,<br />
or used for purposes other than for which it was manufactured, or for any damages<br />
which occur during trailer transit or as a result of unauthorized service or the use of<br />
unauthorized parts. In addition, this warranty does not cover physical damage to paint or<br />
finish, stress cracks, tearing or puncturing of upholstery material, corrosion, or defects in<br />
parts, components or the vehicle due to fire, explosions or any other cause beyond<br />
<strong>Polaris</strong>' control.<br />
Warranty does not apply to parts exposed to friction surfaces, stresses, environmental<br />
conditions and/or contamination for which they were not designed or not intended,<br />
including but not limited to the following items:<br />
• Wheels and tires • Finished and unfinished surfaces<br />
• Suspension components • Carburetor/Throttle body components<br />
• Brake components • Engine components<br />
• Seat components • Drive belts<br />
• Clutches and components • Hydraulic components<br />
• Steering components • Circuit breakers/Fuses<br />
• Batteries • Electronic components<br />
• Light bulbs/Sealed beam lamps<br />
106
WARRANTY<br />
LIMITATIONS OF WARRANTIES AND REMEDIES<br />
Warranty applies to the product only and does not allow for coverage of personal loss.<br />
Some items are considered "consumable," meaning they are considered part of normal<br />
<strong>maintenance</strong> or part of completing an effective repair. The following items are excluded<br />
from warranty coverage in the event of a warranty claim:<br />
• Spark Plugs • Lubricants such as oil, grease, etc.<br />
• Filters • Batteries (unless defective)<br />
• Fuel • Cosmetic damage/repair<br />
• Sealants • Coolants<br />
• Hotel fees • Meals<br />
• Towing charges • Shipping/ handling fees<br />
• Mileage • Product pick-up/delivery<br />
• Rentals/Loss of product use • Loss of vacation/personal time<br />
This warranty also excludes failures resulting from improper lubrication; improper<br />
engine timing; improper fuel; surface imperfections caused by external stress, heat, cold<br />
or contamination; operator error or abuse; improper component alignment, tension,<br />
adjustment or altitude compensation; failure due to snow, water, dirt or other foreign<br />
substance ingestion/contamination; improper <strong>maintenance</strong>; modified components; use<br />
of aftermarket components resulting in failure; unauthorized repairs; repairs made after<br />
the warranty period expires or by an unauthorized repair center; use of the product in<br />
competition or for commercial purposes. Warranty will not apply to any product which<br />
has been damaged by abuse, accident, fire or any other casualty not determined a defect<br />
of materials or workmanship.<br />
This warranty does not cover the use of unauthorized lubricants, chemicals, or fuels that<br />
are not compatible with the vehicle. The exclusive remedy for breach of this warranty<br />
shall be, at <strong>Polaris</strong>' exclusive option, repair or replacement of any defective materials, or<br />
components or products. THE REMEDIES SET FORTH IN THIS WARRANTY ARE<br />
THE ONLY REMEDIES AVAILABLE TO ANY PERSON FOR BREACH OF THIS<br />
WARRANTY. POLARIS SHALL HAVE NO LIABILITY TO ANY PERSON FOR<br />
INCIDENTAL, CONSEQUENTIAL OR SPECIAL DAMAGES OF ANY DESCRIP-<br />
TION, WHETHER ARISING OUT OF EXPRESS OR IMPLIED WARRANTY OR<br />
ANY OTHER CONTRACT, NEGLIGENCE, OR OTHER TORT OR OTHERWISE.<br />
Some states do not permit the exclusion or limitation of incidental or consequential<br />
damages or implied warranties, so the above limitations or exclusions may not apply to<br />
you if inconsistent with controlling state law.<br />
107
WARRANTY<br />
LIMITATIONS OF WARRANTIES AND REMEDIES<br />
ALL IMPLIED WARRANTIES (INCLUDING BUT NOT LIMITED TO THE<br />
IMPLIED WARRANTIES OF MERCHANTABILITY AND FITNESS FOR A PAR-<br />
TICULAR PURPOSE) ARE LIMITED IN DURATION TO THE ABOVE SIX<br />
MONTH WARRANTY PERIOD. POLARIS FURTHER DISCLAIMS ALL EXPRESS<br />
WARRANTIES NOT STATED IN THIS WARRANTY. Some states do not allow limitations<br />
on how long an implied warranty lasts, so the above limitation may not apply to<br />
you if inconsistent with controlling state law.<br />
HOW TO OBTAIN WARRANTY SERVICE<br />
If your vehicle requires warranty service, you must take it to a <strong>Polaris</strong> Servicing Dealer.<br />
When requesting warranty service you must present your copy of the Warranty Registration<br />
form to the dealer. (THE COST OF TRANSPORTATION TO AND FROM THE<br />
DEALER IS YOUR RESPONSIBILITY). <strong>Polaris</strong> suggests that you use your original<br />
selling dealer; however, you may use any <strong>Polaris</strong> Servicing Dealer to perform warranty<br />
service.<br />
Please work with your dealer to resolve any warranty issues. Should your dealer require<br />
any additional assistance they will contact the appropriate person at <strong>Polaris</strong>.<br />
This warranty gives you specific legal rights, and you may also have other rights which<br />
vary from state to state.<br />
If any of the above terms are void because of state or federal law, all other warranty<br />
terms will remain in effect.<br />
Lubricants<br />
1. Mixing oil brands or using non-recommended oil may cause engine damage. We recommend<br />
the use of <strong>Polaris</strong> engine oil.<br />
2. Damage resulting from the use of non-recommended lubricants may not be covered<br />
by warranty.<br />
SPARK ARRESTOR<br />
<strong>Polaris</strong> warrants that the spark arrestor in this vehicle will meet the efficiency requirements<br />
of USFS standard 5100-1c for at least 1000 hours when subjected to normal use<br />
and when <strong>maintenance</strong> and installation are in accordance with <strong>Polaris</strong> recommendations.<br />
108
WARRANTY<br />
Exported Vehicles<br />
EXCEPT WHERE SPECIFICALLY REQUIRED BY LAW, THERE IS NO WAR-<br />
RANTY OR SERVICE BULLETIN COVERAGE ON THIS VEHICLE IF IT IS SOLD<br />
OUTSIDE THE COUNTRY OF THE SELLING DEALER'S AUTHORIZED LOCA-<br />
TION.<br />
This policy does not apply to vehicles that have received authorization for export from<br />
<strong>Polaris</strong> Industries. Dealers may not give authorization for export. You should consult an<br />
authorized dealer to determine this vehicle's warranty or service bulletin coverage if you<br />
have any questions.<br />
This policy does not apply to vehicles registered to government officials or military personnel<br />
on assignment outside the country of the selling dealer's authorized location.<br />
This policy does not apply to Safety Recalls.<br />
How to Get Service<br />
In the Country where your vehicle was purchased:<br />
Warranty or Service Bulletin repairs must be done by an authorized <strong>Polaris</strong> dealer. If you<br />
move or are traveling within the country where your vehicle was purchased, Warranty or<br />
Service Bulletin repairs may be requested from any authorized <strong>Polaris</strong> dealer who sells<br />
the same line as your vehicle.<br />
Outside the Country where your vehicle was purchased:<br />
If you are traveling temporarily outside the country where your vehicle was purchased,<br />
you should take your vehicle to an authorized <strong>Polaris</strong> dealer. You must show the dealer<br />
photo identification from the country of the selling dealer's authorized location as proof<br />
of residence. Upon residence verification, the servicing dealer will be authorized to perform<br />
the warranty repair.<br />
If You Move:<br />
If you move to another country, be sure to contact <strong>Polaris</strong> Customer Assistance and the<br />
customs department of the destination country before you move. Vehicles importation<br />
rules vary considerably from country to country. You may be required to present documentation<br />
of your move to <strong>Polaris</strong> Industries in order to continue your warranty coverage.<br />
You may also be required to obtain documentation from <strong>Polaris</strong> Industries in order<br />
to register your vehicle in your new country.<br />
If Purchased From A Private Party:<br />
If you purchase a <strong>Polaris</strong> product from a private citizen, to be kept and used outside of<br />
the country in which the vehicle was originally purchased, all warranty coverage will be<br />
denied.<br />
Notice<br />
If your vehicle is registered outside of the country where it was purchased, and you have<br />
not followed the procedure set out above, your vehicle will no longer be eligible for warranty<br />
or service bulletin coverage of any kind. (Vehicles registered to Government officials<br />
or military personnel on assignment outside of the country where the vehicle was<br />
purchased will continue to be covered by the basic warranty.)<br />
For questions call <strong>Polaris</strong> Customer Assistance:<br />
United States: 1-888-704-5290<br />
Canada: 1-204-925-7100<br />
109
WARRANTY<br />
U.S.A. EPA Emissions Limited Warranty<br />
This emissions limited warranty is in addition to the <strong>Polaris</strong> standard limited warranty<br />
for your vehicle. <strong>Polaris</strong> Industries Inc. warrants that at the time it is first purchased, this<br />
emissions-certified vehicle is designed, built and equipped so it conforms with applicable<br />
U.S. Environmental Protection Agency emission regulations. <strong>Polaris</strong> warrants that<br />
the vehicle is free from defects in materials and workmanship that would cause it to fail<br />
to meet these regulations.<br />
The warranty period for this emissions-certified vehicle starts on the date the vehicle is<br />
first purchased and continues for a period of 500 hours of engine operation, 5000 kilometers<br />
(3100 miles) of vehicle travel, or 30 calendar months from the date of purchase,<br />
whichever comes first.<br />
This emissions limited warranty covers components whose failure increases the vehicle’s<br />
regulated emissions, and it covers components of systems whose only purpose is to<br />
control emissions. Repairing or replacing other components not covered by this warranty<br />
is the responsibility of the vehicle owner. This emissions limited warranty does not<br />
cover components whose failure does not increase the vehicle’s regulated emissions.<br />
For exhaust emissions, emission-related components include any engine parts related to<br />
the following systems:<br />
• Air-induction system • Ignition system<br />
• Fuel system • Exhaust gas recirculation systems<br />
The following parts are also considered emission-related components for exhaust emissions:<br />
• Aftertreatment devices • Sensors<br />
• Crankcase ventilation valves • Electronic control units<br />
The following parts are considered emission-related components for evaporative emissions:<br />
• Fuel Tank • Vacuum Control Diaphragms*<br />
• Fuel Cap • Control Cables*<br />
• Fuel Line • Control Linkages*<br />
• Fuel Line Fittings • Purge Valves<br />
• Clamps* • Vapor Hoses<br />
• Pressure Relief Valves* • Liquid/Vapor Separator<br />
• Control Valves* • Carbon Canister<br />
• Control Solenoids* • Canister Mounting Brackets<br />
• Electronic Controls* • Carburetor Purge Port Connector<br />
*As related to the evaporative emission control system.<br />
110
U.S.A. EPA Emissions Limited Warranty<br />
WARRANTY<br />
The exclusive remedy for breach of this limited warranty shall be, at the exclusive<br />
option of <strong>Polaris</strong>, repair or replacement of any defective materials, components or products.<br />
THE REMEDIES SET FORTH IN THIS LIMITED WARRANTY ARE THE<br />
ONLY REMEDIES AVAILABLE TO ANY PERSON FOR BREACH OF THIS WAR-<br />
RANTY. POLARIS SHALL HAVE NO LIABILITY TO ANY PERSON FOR INCI-<br />
DENTAL, CONSEQUENTIAL OR SPECIAL DAMAGES OF ANY<br />
DESCRIPTION,WHETHER ARISING OUT OF EXPRESS OR IMPLIED WAR-<br />
RANTY OR ANY OTHER CONTRACT, NEGLIGENCE OR OTHER TORT OR<br />
OTHERWISE.<br />
ALL IMPLIED WARRANTIES (INCLUDING BUT NOT LIMITED TO ANY<br />
IMPLIED WARRANTIES OF MERCHANTABILITY AND FITNESS FOR A PAR-<br />
TICULAR PURPOSE) ARE LIMITED IN DURATION TO THE WARRANTY<br />
PERIOD DESCRIBED HEREIN. POLARIS DISCLAIMS ALL EXPRESS WARRAN-<br />
TIES NOT STATED IN THIS WARRANTY. Some states do not allow limitations on<br />
how long an implied warranty lasts, so the above limitation may not apply if it is inconsistent<br />
with the controlling state law.<br />
This limited warranty excludes failures not caused by a defect in material or workmanship.This<br />
limited warranty does not cover damage due to accidents, abuse or improper<br />
handling, <strong>maintenance</strong> or use. This limited warranty also does not cover any engine that<br />
has been structurally altered, or when the vehicle has been used in racing competition.<br />
This limited warranty also does not cover physical damage, corrosion or defects caused<br />
by fire, explosions or other similar causes beyond the control of <strong>Polaris</strong>.<br />
Owners are responsible for performing the scheduled <strong>maintenance</strong> identified in the<br />
owner's manual. <strong>Polaris</strong> may deny warranty claims for failures that have been caused by<br />
the owner’s or operator’s improper <strong>maintenance</strong> or use, by accidents for which <strong>Polaris</strong><br />
has no responsibility, or by acts of God.<br />
Any qualified repair shop or person may maintain, replace, or repair the emission control<br />
devices or systems on your vehicle. <strong>Polaris</strong> recommends that you contact an authorized<br />
<strong>Polaris</strong> dealer to perform any service that may be necessary for your vehicle.<br />
<strong>Polaris</strong> also recommends that you use only Pure <strong>Polaris</strong> parts. It is a potential violation<br />
of the Clean Air Act if a part supplied by an aftermarket parts manufacturer reduces the<br />
effectiveness of the vehicle's emission controls. Tampering with emission controls is<br />
prohibited by federal law.<br />
If you have any questions regarding your warranty rights and responsibilities, please<br />
contact the <strong>Polaris</strong> Warranty Department at 1-888-704-5290.<br />
111
MAINTENANCE LOG<br />
Use the following chart to record periodic <strong>maintenance</strong>.<br />
DATE<br />
MILES (KM)<br />
OR HOURS<br />
TECHNICIAN<br />
SERVICE PERFORMED / COMMENTS<br />
112
MAINTENANCE LOG<br />
DATE<br />
MILES (KM)<br />
OR HOURS<br />
TECHNICIAN<br />
SERVICE PERFORMED / COMMENTS<br />
113
MAINTENANCE LOG<br />
DATE<br />
MILES (KM)<br />
OR HOURS<br />
TECHNICIAN<br />
SERVICE PERFORMED / COMMENTS<br />
114