FSG 90 PC - AEROSHOP.eu
FSG 90 PC - AEROSHOP.eu
FSG 90 PC - AEROSHOP.eu

You also want an ePaper? Increase the reach of your titles
YUMPU automatically turns print PDFs into web optimized ePapers that Google loves.
FCC ID:<br />
BVY<strong>FSG</strong><strong>90</strong><br />
FAA:<br />
TSO C37d<br />
TSO C38d<br />
No. LBA.O.10.911/98 JTSO<br />
replaced by:<br />
ETSO: EASA.21O.1305<br />
DFS-No.: B-7850/97<br />
e1<br />
KBA:<br />
03 5042<br />
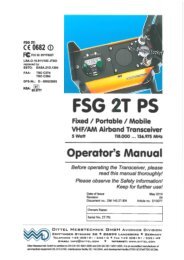
<strong>FSG</strong> <strong>90</strong> <strong>PC</strong><br />
Dual Mode VHF/AM<br />
FIXED/PORTABLE/MOBILE<br />
AIRBAND TRANSCEIVER<br />
OPERATOR'S MANUAL<br />
Before operating the Transceiver, please read<br />
this manual thoroughly!<br />
Please observe the Safety Information!<br />
Keep for further use!<br />
Date of Issue May 2010<br />
Document no.: BA 154.<strong>90</strong>-EN<br />
Article no. D10075<br />
Dittel Messtechnik GmbH Avionics Division<br />
Erpftinger Straße 36 86899 Landsberg Germany<br />
Telephone +49 (0)8191/ 3351-0 Fax +49 (0)8191/ 3351-49<br />
E-Mail: info@dittel.com<br />
Internet: www.dittel.com<br />
Dittel Messtechnik GmbH is certified to DIN EN ISO <strong>90</strong>01:2000 and DIN EN ISO 14001:2005. It is an accredited manufacturer of aeronautical equipment<br />
DE.21G.0100, maintenance facility DE.145.0245, and development facility ETSO-2C37e/ETSO-2C38e.
PORTABLE TRANSCEIVER <strong>FSG</strong> <strong>90</strong><strong>PC</strong><br />
Operator's Manual<br />
Copyright - Service<br />
Copyright 2010<br />
Dittel Messtechnik GmbH<br />
All rights reserved. This document contains proprietary information and such<br />
information may not be disclosed to others for any purpose nor used for<br />
manufacturing purposes without prior written permission of the manufacturer<br />
Dittel Messtechnik GmbH, 86899 Landsberg am Lech, Germany.<br />
In this document no mention is made of patents, trademark rights, or other<br />
proprietary rights which may attach to certain words or entries. The absence<br />
of such mention, however, in no way implies that the words or entries in<br />
question are exempt from such rights.<br />
Service Information Should any unusual problem arise or further information be desired, please<br />
contact your nearest DITTEL representative or the Dittel Messtechnik<br />
GmbH, Avionics Division, Erpftinger Strasse 36, 86899 Landsberg,<br />
Germany.<br />
The information in this Operator's Manual does not profess to include all the details of<br />
design, production, or variation of the equipment, or to cover all the possible<br />
contingencies which may arise during operation or maintenance. We welcome your<br />
comments concerning this Manual. Although every effort has been made to keep it<br />
free of errors, some may occur. When reporting a specific problem, please describe it<br />
briefly and include the Operator's Manual article number, paragraph or figure<br />
number, and the page number.<br />
Send your comments to<br />
or via e-mail to:<br />
Publications Department<br />
Dittel Messtechnik GmbH<br />
Erpftinger Strasse 36<br />
86899 Landsberg am Lech<br />
Germany<br />
info@dittel.com<br />
Subject to technical changes<br />
Printed in Germany<br />
2 DITTEL D10075 May 2010
PORTABLE TRANSCEIVER <strong>FSG</strong> <strong>90</strong><strong>PC</strong><br />
Safety Information<br />
Safety Information<br />
Every radio, when transmitting, radiates energy into the atmosphere<br />
that may, under certain conditions, cause the generation of sparks. All<br />
users of our radios should be aware of the following warning:<br />
Do not operate this radio in an explosive atmosphere (petrol<strong>eu</strong>m<br />
fuels, solvents, dust, etc.)!<br />
During normal use, the radio will subject you to radio energy<br />
substantially below the level where any kind of harm is reported.<br />
TO ENSURE<br />
PERSONAL SAFETY<br />
Please observe the following simple rules:<br />
Only persons entitled may operate the <strong>FSG</strong> <strong>90</strong> <strong>PC</strong>!<br />
DO NOT lean over the equipment when opening the cover! If not<br />
properly tightened the spring steel band antenna may bounce out!<br />
DO NOT transmit when the antenna is very close to, or touching,<br />
exposed parts of the body, especially the face and eyes.<br />
DO NOT transmit on a busy channel!<br />
DO NOT transmit in closed vehicles, aircraft or inside buildings<br />
with the spring steel band antenna! This may cause malfunction of<br />
the avionics, trigger the airbag or confuse electronic equipment!<br />
Always operate the radio with a suitable external antenna! Assure<br />
appropriate lightning protection where elevated outdoor antennas<br />
are used.<br />
DO NOT press the transmit (PTT) key when not actually desiring<br />
to transmit.<br />
DO NOT allow children to play with any radio equipment<br />
containing a transmitter.<br />
DO NOT operate the radio whilst driving. It should also be noticed<br />
that the use of a hand held microphone while driving could<br />
constitute an offence under the Road Traffic Regulations in certain<br />
countries.<br />
DO NOT dispose worn out lead batteries with the household<br />
garbage.<br />
Always switch OFF the radio when plugging or unplugging the<br />
receptacle!<br />
Always switch OFF the radio first when starting an engine or<br />
vehicle!<br />
The <strong>FSG</strong> <strong>90</strong> <strong>PC</strong> may be used exclusively for communication on the<br />
airband frequencies.<br />
Unauthorized modifications and changes of the system are<br />
forbidden.<br />
When replacing defective parts use only original spare parts or<br />
standard parts recommended by the manufacturer!<br />
May 2010 DITTEL D10075 3
PORTABLE TRANSCEIVER <strong>FSG</strong> <strong>90</strong><strong>PC</strong><br />
Safety Information<br />
Used Symbols<br />
In this manual the following symbols are used:<br />
DANGER!<br />
describes an immediate threatening danger! Failing to observe the<br />
note may cause death or heaviest injuries.<br />
WARNING!<br />
This warning note describes a dangerous high voltage. Failing to<br />
observe the note may cause death or severe injury!<br />
CAUTION!<br />
describes a special note for operation. Failing to observe the note<br />
may cause damage of the transceiver and/or stored data may be<br />
deleted!<br />
IMPORTANT!<br />
describes explanations and other useful hints. Failing to observe<br />
the note may cause degraded performance and/or unsatisfying<br />
operation!<br />
Environmental Protection<br />
After the implementation of the European Directive 2002/96/EU in the<br />
national legal system, the following applies:<br />
Electrical and electronic devices may not be disposed of with<br />
domestic waste. Consumers are obliged by law to return electrical<br />
and electronic devices at the end of their service lives to the public<br />
collecting points set up for this purpose or point of sale. Details to this<br />
are defined by the national law of the respective country. This symbol<br />
on the product, the instruction manual or the package indicates that a<br />
product is subject to these regulations. By recycling, r<strong>eu</strong>sing the<br />
materials or other forms of utilizing old devices, you are making an<br />
important contribution to protecting our environment.<br />
Pb<br />
The portable airband transceiver <strong>FSG</strong> <strong>90</strong> <strong>PC</strong> contains a sealed<br />
lead-acid battery (identification "Pb").<br />
In most countries it is illegal to discard a lead-acid battery except<br />
by delivery to a retailer, a distributor, a manufacturer, or a<br />
collection, recycling, or smelting facility approved by the<br />
department.<br />
NEVER dispose worn out lead-acid batteries with the household<br />
garbage.<br />
4 DITTEL D10075 May 2010
PORTABLE TRANSCEIVER <strong>FSG</strong> <strong>90</strong><strong>PC</strong><br />
Table of Contents<br />
Table of Contents<br />
Copyright - Service ................................................................2<br />
Safety Information .................................................................3<br />
Table of Contents ..................................................................5<br />
1 General Description ............................................................7<br />
1.1 Introduction.................................................................................................7<br />
1.2 Application & Description of the <strong>FSG</strong> <strong>90</strong> <strong>PC</strong>...............................................7<br />
1.3 Scope of Delivery .......................................................................................8<br />
1.4 Operating License ......................................................................................7<br />
1.5 System and Type Approval Information.....................................................8<br />
1.6 Optional Accessories................................................................................10<br />
2 Functional Description......................................................11<br />
2.1 Introduction...............................................................................................11<br />
2.2 Operator's Controls and Indicators...........................................................11<br />
3 Set-up Procedure...............................................................19<br />
3.1 Calling SET-UP without password ...........................................................20<br />
3.2 Calling SET-UP with password ................................................................20<br />
3.3 Interrupt the SET-UP procedure ..............................................................21<br />
3.4 SET-UP procedure...................................................................................21<br />
3.4.1 Adjusting the automatic squelch threshold ............................................. 22<br />
3.4.2 Adjusting the microphone sensitivity....................................................... 22<br />
3.4.3 Adjusting the Intercom volume................................................................ 23<br />
3.4.4 Adjusting the Sidetone volume................................................................ 23<br />
3.4.5 Adjusting the headset volume (receive) .................................................. 24<br />
3.4.6 Selecting '25 kHz only' or combined 8.33/25 kHz channel spacing........ 24<br />
3.4.7 Deleting occupied channel memories ..................................................... 25<br />
3.4.8 Selecting AF EXTERNAL (ON/OFF)....................................................... 25<br />
3.4.9 Selecting 'CHANNEL MODE ONLY' or 'NO RESTRICTION'.................. 26<br />
3.4.10 Selecting 'TX disabled' during receive (ON/OFF) ................................... 26<br />
3.4.11 Service (ON/OFF) ................................................................................... 27<br />
3.4.12 Optional module (ON/OFF) ..................................................................... 27<br />
3.4.13 Entering a password................................................................................ 27<br />
3.4.14 Reset ....................................................................................................... 28<br />
4 Operation............................................................................29<br />
4.1 Introduction...............................................................................................29<br />
4.2 Battery Check...........................................................................................29<br />
4.3 Battery Charging ......................................................................................30<br />
4.4 Antenna - Antenna Jack SO 239..............................................................31<br />
4.5 Microphone...............................................................................................31<br />
4.6 Switching ON - Selecting Frequency/Channel Name - Volume...............32<br />
4.7 Receive (Listen) Operation ......................................................................34<br />
4.8 Transmit (Talk) Operation ........................................................................34<br />
4.9 Storing a new Frequency/Channel Name ................................................36<br />
4.10 Recall of stored frequencies/channel names: ..........................................36<br />
May 2010 DITTEL D10075 5
PORTABLE TRANSCEIVER <strong>FSG</strong> <strong>90</strong><strong>PC</strong><br />
Table of Contents<br />
Table of Contents<br />
4.11 Lighting the Frequency Display............................................................... 37<br />
4.12 Turning OFF the radio ............................................................................. 37<br />
4.13 External Power Supply ............................................................................ 37<br />
4.14 Removing & Installing the Transceiver.................................................... 37<br />
4.15 Battery Operating Times ......................................................................... 38<br />
4.16 Siting........................................................................................................ 38<br />
4.17 Base Operation........................................................................................ 38<br />
4.18 Functional Checks................................................................................... 39<br />
5 ICAO Frequency / Channel Name Assignment in the<br />
combined 8.33 kHz / 25 kHz Operation ........................... 40<br />
6 Technical Summary <strong>FSG</strong> <strong>90</strong> <strong>PC</strong>........................................ 41<br />
6.1 General.................................................................................................... 41<br />
6.2 Approvals................................................................................................. 42<br />
6.3 Detailed Receiver Characteristics ........................................................... 42<br />
6.4 Detailed Transmitter Characteristics ....................................................... 44<br />
6.5 Environmental Performance Classification ............................................. 45<br />
Certificates ........................................................................ 49<br />
6 DITTEL D10075 May 2010
PORTABLE TRANSCEIVER <strong>FSG</strong> <strong>90</strong><strong>PC</strong><br />
1 General Description<br />
Section 1<br />
General Description<br />
1.1 Introduction<br />
This operator's manual contains operating instructions for the fixed/<br />
portable/ mobile VHF/AM Airband Transceiver <strong>FSG</strong> <strong>90</strong> <strong>PC</strong> of<br />
Dittel Messtechnik GmbH, 86899 Landsberg am Lech, Germany.<br />
1.2 Application & Description of the <strong>FSG</strong> <strong>90</strong> <strong>PC</strong><br />
The portable VHF/AM Airband Transceiver <strong>FSG</strong> <strong>90</strong> <strong>PC</strong> allows<br />
independent operation as an airborne or ground radio. Stationary,<br />
portable or mobile applications are possible. It consists of a portable<br />
case <strong>PC</strong> <strong>90</strong> and a Dual Mode VHF/AM COM Transceiver <strong>FSG</strong> <strong>90</strong> or<br />
<strong>FSG</strong> <strong>90</strong>-H1, which can be simply inserted and positioned.<br />
This radio is working within the airband frequency range of 118.000<br />
MHz to 136.975 MHz in either combined 8.33 kHz/25 kHz increments<br />
(2,278 channels) or '25 kHz only' increments (760 channels). The<br />
operating mode is Simplex, i.e. transmitting or receiving only in turns<br />
(two way communication). The RF output power of the radio <strong>FSG</strong> <strong>90</strong><br />
is 6 Watt into 50 Ohms at 13.8 Vdc, the <strong>FSG</strong> <strong>90</strong>-H1 is transmitting<br />
with 10 Watt into 50 Ohms at a power supply of 14.0 Vdc.<br />
The built-in rechargeable battery allows an independent operation of<br />
up to 85 hours (refer to paragraph 4.15, Battery Operating Times).<br />
Continuous operation is possible by the built-in charging unit or,<br />
externally, from a vehicle or aircraft DC supply. Microphone and<br />
antenna are retractable. External antennas, too, can be<br />
advantageously used.<br />
The unit features 99 non-volatile channel memories each in combined<br />
8.33/25 kHz and in '25 kHz only' operation, 3 display modes, true<br />
Sidetone via headphone, TX and supply voltage indicator at the backlit<br />
display, TX time-out timer (2 minutes), a battery supply test, and a<br />
built-in loudspeaker. The lock-in type carrying handle and a protecting<br />
hood completes our <strong>PC</strong> <strong>90</strong> unit.<br />
May 2010 DITTEL D10075 7
PORTABLE TRANSCEIVER <strong>FSG</strong> <strong>90</strong><strong>PC</strong><br />
1 General Description<br />
1.3 Scope of Delivery<br />
A complete Portable VHF/AM Airband Base Station <strong>FSG</strong> <strong>90</strong> <strong>PC</strong><br />
consists of:<br />
A portable case <strong>PC</strong> <strong>90</strong> (A/N F10387), containing 12 Vdc/7.2 Ah<br />
lead calcium battery, charger for 115 Vac/230 Vac, 50 - 60 Hz, DC<br />
supply indicator, DC supply socket, microphone socket, antenna<br />
socket, loudspeaker, Snap-On cover - fits on top or bottom, and a<br />
Operator's Manual.<br />
a Dual Mode VHF/AM COM Transceiver <strong>FSG</strong> <strong>90</strong> or <strong>FSG</strong> <strong>90</strong>-H1.<br />
a suitable, vertically polarized VHF airband antenna, frequency<br />
range minimum 118 to 137 MHz, 50 Ohm, e.g., spring steel band<br />
antenna A/N F10345, and<br />
a microphone, e.g., hand-hold dynamic microphone with PTTswitch<br />
A/N F10041.<br />
When operating on 24 Vdc sources a suitable 24 Vdc/12 Vdc<br />
Converter of at least 4 Amps must be used!<br />
1.4 Operating License<br />
IMPORTANT!<br />
Ground operation always requires an individual<br />
operating license. Depending on national regulations,<br />
such license must be applied for at appropriate National<br />
Authorities, using suitable application forms.<br />
1.5 System and Type Approval Information<br />
The Dual Mode VHF/AM Airband Transceiver <strong>FSG</strong> <strong>90</strong>(X) complies for<br />
both the 8.33 kHz/25 kHz as well as 25 kHz channel spacing with all<br />
applicable National and International Type Approval requirements, for<br />
any airborne and ground operation.<br />
JTSO Authorization No. LBA.O.10.911/98 JTSO (LBA Luftfahrt-<br />
Bundesamt) based on *EUROCAE ED-23B Airborne requirement<br />
is met besides 8.33 kHz requirements also for the 25 kHz ONLY<br />
channel spacing. This JTSO Authorisation was replaced by ETSO<br />
Authorization EASA.21O.1305 in July 2009.<br />
This also includes Immunity according to ICAO ANNEX 10 against<br />
FM Broadcast Interference.<br />
This also includes fulfillment of specific audio filtering required in<br />
areas with CLIMAX operation in 25 kHz channel spacing.<br />
* Associated EUROCAE ED-14C / RTCA DO-160C Environmental<br />
requirements.<br />
* Associated EUROCAE ED-12B Software requirements based on<br />
ED-23B.<br />
8 DITTEL D10075 May 2010
PORTABLE TRANSCEIVER <strong>FSG</strong> <strong>90</strong><strong>PC</strong><br />
1 General Description<br />
Reg TP No. A132937J, stringent German Type Approval<br />
requirements Reg TP 321 ZV 034 (airborne) and Reg TP 321 ZV<br />
039 (ground).<br />
DFS (D<strong>eu</strong>tsche Flugsicherung) No. B-7850/97 (ground) German<br />
Type Approval requirements.<br />
BZT No. B132705J, CE Conformity,<br />
* Associated with DIN/ISO 7637-1 DC supply in 12 V vehicle.<br />
FCC Compliance with Part 15 (receiver) and Part 87 (transmitter).<br />
EC-Type-Approval of a type of component with regard to Directive<br />
72/245/EEC, as last amended by Directive 2006/28/EG.<br />
IMPORTANT!<br />
For the first time after one year, then every 2 nd year, ground<br />
applications using 8.33 kHz channel spacing require checking<br />
of the high precision reference frequency (tolerance less than<br />
± 1.5 ppm) and recalibration, if necessary!<br />
Every 4 th year, airborne applications using 8.33 kHz channel<br />
spacing require checking of the high precision reference<br />
frequency (tolerance less than ± 5 ppm) and recalibration, if<br />
necessary!<br />
All applications in the 25 kHz channel spacing require no<br />
recalibration (frequency accuracy tolerance less than ± 20<br />
ppm).<br />
All tolerances include the full operating temperature range of<br />
-20°C ... +55°C / -4°F ... +131°F.<br />
Checking and recalibration must be performed by the<br />
equipment manufacturer or through authorized and approved<br />
avionics services. This requires use of specified test<br />
equipment as well as applicable test procedures (software)<br />
released by the manufacturer.<br />
May 2010 DITTEL D10075 9
PORTABLE TRANSCEIVER <strong>FSG</strong> <strong>90</strong><strong>PC</strong><br />
1 General Description<br />
1.6 Optional Accessories<br />
Article-No.<br />
F10345<br />
W00043<br />
Description<br />
Spring steel band antenna, swivel type, PL-259 connector<br />
Magnet mount vehicle rod antenna, incl. 4 m/13 ft cable, and UHF<br />
connector PL-259<br />
W00066 Mobile Whip Antenna with shock spring, 118 - 137 MHz, incl. 5 m/<br />
16.5 ft cable, w/out UHF connector PL-259<br />
F10314<br />
W00013<br />
E57328<br />
Balloon antenna, 118-137 MHz, weatherproof - flexible - high<br />
efficiency, including 3 m/10 ft cable and UHF connector PL-259<br />
Roof mounted weatherproof folded-top fiberglass antenna, UHFconnector,<br />
anti static, 1" mount<br />
UHF antenna connector PL-259 for antenna cable RG-213/U<br />
B01116 Antenna cable RG-213/U, low loss, for roof antenna W00013,<br />
please state length (in meters)<br />
F10041<br />
F10042<br />
F10125<br />
W00048<br />
F10393<br />
S20000<br />
E61933<br />
E08834<br />
E58411<br />
Dyn. hand-held microphone incl. PTT-switch, coiled cord and<br />
5-pole plug<br />
Dyn. hand-microphone/loudspeaker with PTT-switch, coiled cord<br />
and 5-pole plug<br />
Inline PTT-switch (U-94 A/U), coiled cord, 5-pole plug, to connect<br />
headset W00048, clip allows attaching to clothing<br />
Dynamic headset with PJ-plug, fits inline PTT-switch<br />
Car Cable, coiled cord, incl. 3-pole plug to supply station from<br />
12 Vdc car battery (fits cigarette lighter socket, minus = ground)<br />
Converter 24 Vdc to 12 Vdc, 4 Amps, to operate the base Station<br />
from 24 Vdc sources like truck batteries etc.<br />
3-pole twist-lock DIN Connector, to fit into "12 V DC EXT." socket of<br />
carrying case <strong>PC</strong> <strong>90</strong>.<br />
5-pole twist-lock DIN Connector, to fit into "MIC" socket of carrying<br />
case <strong>PC</strong> <strong>90</strong>.<br />
Sealed lead accumulator, nominal 7.2 Ah, 12 VDC<br />
10 DITTEL D10075 May 2010
PORTABLE TRANSCEIVER <strong>FSG</strong> <strong>90</strong><strong>PC</strong><br />
2 Functional Description<br />
Section 2<br />
Functional Description<br />
2.1 Introduction<br />
This section includes a functional description of each switch, push<br />
button, knob, socket, indicator and display located on the front or rear<br />
panel of the <strong>FSG</strong> <strong>90</strong> <strong>PC</strong>, together with operating instructions.<br />
After removing the Snap-On cover all controls to operate the<br />
transceiver are accessible. The cover can be pushed onto the rear<br />
side of the carrying case.<br />
DANGER!<br />
DO NOT lean over the equipment when opening the cover! If<br />
not properly tightened the spring steel band antenna may<br />
bounce out!<br />
2.2 Operator's Controls and Indicators<br />
A front and back view of the <strong>FSG</strong> <strong>90</strong> <strong>PC</strong> is given on the last page of<br />
this manual. Please fold out the back flap when reading the operating<br />
instructions. Each position number of a control, knob, switch, etc.,<br />
corresponds to the number of control, knob, switch, etc., given below.<br />
1<br />
2<br />
ON/OFF-VOL<br />
STO<br />
Rotary step switch<br />
To turn ON the radio rotate the ON/OFF-VOL knob clockwise from the<br />
OFF position (dot).<br />
When power is activated<br />
all segments of the display are momentarily visible,<br />
he automatic squelch is activated<br />
the display shows the frequency/ channel name in that operating<br />
mode, which was used before last turning OFF.<br />
Rotating the ON/OFF-VOL knob clockwise increases - turning counterclockwise<br />
decreases the audio volume audible in the built-in<br />
loudspeaker (Receive only) or connected headphone (TX Sidetone<br />
and Receive).<br />
To turn OFF the radio rotate the ON/OFF-VOL knob fully counterclockwise<br />
(ccw) to the OFF position (dot). Blank display.<br />
Push button<br />
With the VHF/AM COM Transceiver <strong>FSG</strong> <strong>90</strong>(X), up to 99<br />
frequencies/channel names in each operating mode (combined<br />
8.33/25 kHz mode or '25 kHz only' mode) may be stored in a nonvolatile<br />
memory. The channel memory numbers (1<br />
programmable.<br />
99) are user<br />
May 2010 DITTEL D10075 11
PORTABLE TRANSCEIVER <strong>FSG</strong> <strong>90</strong><strong>PC</strong><br />
2 Functional Description<br />
2<br />
3<br />
STO<br />
continued<br />
SQ (SQUELCH)<br />
Programming a frequency:<br />
1. Set the frequency or channel name to be stored in the upper line<br />
at the display!<br />
2. Initialize storing by pressing the STO button.<br />
3. The last used channel memory number is displayed in the lower<br />
line.<br />
4. A flashing "CH" shows "ready to store".<br />
5. Select appropriate (new) channel memory number (1 to 99) by<br />
rotating the F/CH knob.<br />
6. On a free channel memory an additional "F" (free) is displayed.<br />
7. To enter the new frequency/channel name press the STO-button.<br />
The frequency/channel name will be stored under the adjusted<br />
channel memory number.<br />
8. A previously stored frequency/ channel name will be overwritten.<br />
9. The last used display mode is displayed.<br />
Programming in the SET-UP mode:<br />
In the SET-UP mode all settings must individually be confirmed by<br />
pressing the STO button. Otherwise the settings are not permanently<br />
stored.<br />
Push button<br />
After turning ON the radio <strong>FSG</strong> <strong>90</strong>(X) the automatic squelch is always<br />
active.<br />
Momentarily pressing the SQ-Button<br />
puts the radio in the SQ-OFF mode (overrides the automatic<br />
squelch). Basic receiving noise is also audible during standby.<br />
Maximum receiving range. Increased current consumption.<br />
'TX Disabled' is inactive, i.e. transmitting is possible even if the<br />
channel is busy.<br />
Momentarily pressing the SQ-Button once more<br />
puts the radio in the standard display mode, automatic squelch is<br />
active. No receiving noise during standby. Only reception of<br />
signals above SQ threshold to be heard.<br />
When the squelch is active 'TX Disabled' is active, i.e. transmitting<br />
is only possible if the channel is not busy.<br />
Note: For certain purposes 'TX Disabled' may be permanently<br />
switched OFF during SET-UP procedure.<br />
12 DITTEL D10075 May 2010
PORTABLE TRANSCEIVER <strong>FSG</strong> <strong>90</strong><strong>PC</strong><br />
2 Functional Description<br />
4<br />
MD<br />
Push button<br />
Repeatedly pressing the MD (mode)-button alters the display mode<br />
and display respectively:<br />
Use/STBY Mode: upper line USE frequency<br />
lower line STBY frequency<br />
Channel Mode: upper line USE frequency<br />
lower line channel memory number<br />
Direct Tune Mode: upper line USE frequency<br />
lower line blank<br />
5 TRANSFER Push button<br />
Momentarily pressing the Transfer button<br />
while in CHANNEL or DIRECT TUNE mode will return the radio to<br />
USE/STBY mode, or<br />
while in USE/STBY mode the last USE frequency will become the<br />
new STBY frequency and the last STBY frequency will become the<br />
new USE frequency, or<br />
while in the SET-UP mode will return the radio to the operation<br />
mode used before without power down. Only programmed settings<br />
stored previously by pressing the STO-button will be active.<br />
6 F/CH Rotary control and push-button = dual function<br />
Momentarily pressing the F/CH knob<br />
while in the USE/STBY or DIRECT TUNE mode changes the<br />
access from kHz to MHz or vice versa.<br />
If there is no activity for 30 seconds the F/CH knob will return to<br />
the kHz access.<br />
While in the CHANNEL mode pressing the F/CH knob is without<br />
function.<br />
Rotating the F/CH knob<br />
while in the USE/STBY mode will increment or decrement the MHz<br />
or kHz portion of the STBY frequency with rollover at each band<br />
edge,<br />
while in the CHANNEL mode changes the channel memory<br />
number and corresponding frequency. Only channel numbers<br />
which were programmed before will appear,<br />
while in the DIRECT TUNE mode will increment or decrement the<br />
MHz or kHz portion of the USE frequency with rollover at each<br />
band edge.<br />
May 2010 DITTEL D10075 13
PORTABLE TRANSCEIVER <strong>FSG</strong> <strong>90</strong><strong>PC</strong><br />
2 Functional Description<br />
7<br />
Frequency Display 5-digit or 6-digit liquid crystal display (LCD), two lines, may be back-lit<br />
by pressing the "Test" button.<br />
Examples:<br />
IMPORTANT!<br />
When the <strong>FSG</strong> <strong>90</strong>(X) is operating in the combined 8.33/25 kHz<br />
mode the channel name is displayed with 6 digits.<br />
When the <strong>FSG</strong> <strong>90</strong>(X) is operating in the '25 kHz only' mode the<br />
frequency is displayed with 5 digits.<br />
Display of frequency and channel name corresponds to ICAO<br />
recommendations!<br />
Transceiver operates in the combined<br />
8.33/25 kHz mode (6-digit display)<br />
Upper line: USE channel name (display 135.0<strong>90</strong> = 135.0916<br />
MHz transmit and receive frequency)<br />
Lower line: STBY channel name (display 118.065 = 118.0666<br />
MHz transmit and receive frequency)<br />
Supply indicator: 3 segments: 12.7 Vdc, supply OK<br />
TX indicator: OFF, radio receives.<br />
Transceiver operates in the '25 kHz only' mode<br />
(5-digit display)<br />
Upper line: USE frequency (display<br />
135.87 = 135.875 MHz transmit and receive<br />
frequency)<br />
Lower line: STBY frequency (display 118.02 =<br />
118.025 MHz transmit and receive frequency)<br />
Supply indicator: 3 segments: 12.7 Vdc, supply OK<br />
TX indicator: OFF, radio receives.<br />
Transceiver operates in the combined<br />
8.33/25 kHz mode (6-digit display)<br />
Upper line: USE channel name (display 127.460 = 127.4583<br />
MHz transmit and receive frequency)<br />
Lower line: Channel memory number (19) associated with the<br />
above USE channel name<br />
Supply indicator: 2 segments: 12.0 Vdc, battery ½ charged<br />
TX indicator: ON, radio transmits.<br />
Transceiver operates in the '25 kHz only' mode (5-digit display)<br />
Upper line: USE frequency (display 124.77 = 124.775 MHz<br />
transmit and receive frequency)<br />
Lower line: Channel memory number (75) associated with the<br />
above USE frequency<br />
Supply indicator: 2 segments: 12.0 Vdc, battery ½ charged<br />
TX indicator: ON, radio transmits.<br />
14 DITTEL D10075 May 2010
PORTABLE TRANSCEIVER <strong>FSG</strong> <strong>90</strong><strong>PC</strong><br />
2 Functional Description<br />
8<br />
9<br />
10<br />
DC supply<br />
Indicator<br />
Loudspeaker<br />
Antenna socket<br />
STO button was pressed.<br />
Upper line: Channel name to be stored<br />
Lower line: Free channel memory number 07 (CH is flashing)<br />
After pressing the STO button once more the channel name 121.875<br />
(= 121.875 MHz) will be stored in the channel memory 07.<br />
The last used display mode is displayed.<br />
STO button was pressed.<br />
Upper line: Channel name to be stored<br />
Lower line: Channel memory number 17 (CH is flashing)<br />
After pressing the STO button once more the channel name 121.375<br />
(= 121.375 MHz) will be stored in the channel memory 17. A<br />
previously stored channel name will be overwritten.<br />
The last used display mode is displayed.<br />
LED indicator to check the capacity of the built-in battery or external<br />
DC supply.<br />
When the red push-button is pressed<br />
at least 3 LEDs should light up to indicate sufficient capacity of the<br />
battery or DC supply.<br />
and only two or less LEDs light up either the battery should be<br />
recharged or the station should be powered by an external DC<br />
source of sufficient capacity (e.g. vehicle battery).<br />
the display of the transceiver is back-lit.<br />
8 Ohm, 3 Watt, tropics-proof.<br />
To make received signals audible; volume adjustable with ON/OFF-VOL<br />
control 1 . Is not switched OFF when using a headset connected to<br />
13 .<br />
DANGER!<br />
NEVER TRANSMIT inside airplanes, vehicles or<br />
buildings without external antenna! Otherwise<br />
electronic equipment can be interfered.<br />
CAUTION!<br />
NEVER operate the radio without any antenna!<br />
UHF type antenna socket SO 239, 50 Ohms.<br />
Any 50 Ohms antenna with UHF type cable plug PL-259 and a<br />
frequency range of 118<br />
this antenna jack.<br />
137 MHz minimum may be connected to<br />
For portable use in the open field we recommend our spring steel<br />
band antenna.<br />
In aircraft or ground vehicles, an external antenna must be used.<br />
For long range operation a base station folded top antenna,<br />
grounded for lightning protection, is recommended.<br />
May 2010 DITTEL D10075 15
PORTABLE TRANSCEIVER <strong>FSG</strong> <strong>90</strong><strong>PC</strong><br />
2 Functional Description<br />
11<br />
Antenna<br />
compartment<br />
When using our spring steel band antenna, A/N F10345, this antenna<br />
can be kept there without disconnecting.<br />
12 Microphone<br />
compartment<br />
When using our hand-hold microphone with built-in push-to-talk<br />
switch, A/N F10041, this microphone can be kept there without<br />
disconnecting.<br />
13<br />
Microphone socket<br />
(2) (3) (4)<br />
(1)<br />
(5)<br />
5-pole twist-lock DIN socket to connect microphone, headphone and<br />
PTT-switch.<br />
Mating plug: article No. E08834<br />
Any dynamic microphone (200 to 600 Ohms), headphone (ca.<br />
300 Ohms), push-to-talk key, or dynamic type head-set can be<br />
connected to this socket. Wiring refer to Section 6, "<strong>90</strong> <strong>PC</strong>, Circuit<br />
Diagram".<br />
(1) Common Ground (PTT switch/Headphone)<br />
(2) Dynamic microphone<br />
(3) Headphone<br />
(4) Microphone Ground<br />
(5) Push-to-talk key<br />
14<br />
NEW SOCKET!<br />
External Supply<br />
(1) (3)<br />
3-pole twist-lock DIN socket to supply the radio by external 12 Vdc<br />
sources.<br />
Mating plug: article No. E61933<br />
The capacity of the built-in battery may not be adequate due to<br />
frequent transmitting operations or very long operating times without<br />
possibility to recharge. Radio operation can be enabled through an<br />
external 12 Vdc power source such as an automobile battery via our<br />
Car Cable F10393 which fits into the cigarette lighter socket of most<br />
cars (minus on common ground).<br />
(1) Plus 12 Vdc<br />
(3) Minus 12 Vdc (Ground)<br />
15<br />
Fixing screws Three cross recessed screws, M 3 8, to fix the transceiver in the<br />
case.<br />
16 DITTEL D10075 May 2010
PORTABLE TRANSCEIVER <strong>FSG</strong> <strong>90</strong><strong>PC</strong><br />
2 Functional Description<br />
16<br />
17<br />
Rear panel:<br />
Mains cable<br />
compartment<br />
DC Fuse<br />
WARNING!<br />
Risk of electric shock!<br />
DO NOT OPEN!<br />
WARNING!<br />
Changing the plug may only carried out by a<br />
trained specialist -electrician-! Please observe<br />
national safety regulations!<br />
Contains the mains cable of the built-in battery charger, length of<br />
cable: ca. 1.2 m.<br />
WARNING!<br />
Always turn OFF radio and disconnect mains plug<br />
when replacing fuses!<br />
Fuse to protect the transceiver in case of heavy current.<br />
Contains 1 glass cartridge fuse, 5 20 mm, 6,3 Amps, time-lag.<br />
18<br />
Mains Fuses<br />
WARNING!<br />
Always turn OFF radio and disconnect mains plug<br />
when replacing fuses!<br />
Fuses to protect the charging unit.<br />
Contains 1 glass cartridge fuse each, 5 20 mm, 0.04 A time-lag.<br />
The fuses fit for both mains voltages, no change required.<br />
19<br />
Mains selector<br />
switch<br />
WARNING!<br />
Always turn OFF radio and disconnect mains plug<br />
when changing the mains voltage!<br />
20<br />
Ejector knob<br />
The charging unit is factory set to 230 Vac mains voltage (position<br />
230).<br />
When 110 115 Vac mains is available, set the mains selector<br />
switch by means of a coin or screwdriver t<br />
CAUTION!<br />
Always turn OFF the radio first when removing<br />
from its case!<br />
After removing three cross-recessed screws 15 and the matching<br />
plate on the front, the transceiver may be dismounted from its case by<br />
pressing this ejector knob.<br />
May 2010 DITTEL D10075 17
PORTABLE TRANSCEIVER <strong>FSG</strong> <strong>90</strong><strong>PC</strong><br />
2 Functional Description<br />
18 DITTEL D10075 May 2010
PORTABLE TRANSCEIVER <strong>FSG</strong> <strong>90</strong><strong>PC</strong><br />
3 Set-up Procedure<br />
Section 3<br />
Set-up Procedure<br />
This section contains a description of the Set-Up procedure to be<br />
carried out only once by an experienced avionics technician. To<br />
carry out the Set-Up procedure the radio must be installed into the<br />
Carrying Case and ready to use.<br />
DANGER!<br />
NEVER carry out a SET-UP during flight, important missions<br />
or applications!<br />
During SET-UP procedure the radio can neither receive nor<br />
transmit!<br />
IMPORTANT!<br />
The <strong>FSG</strong> <strong>90</strong>(X) is factory pre-set for check and testing purposes.<br />
To achieve maximum performance it is therefore absolutely<br />
necessary to optimize the radio and to adapt the accessories used.<br />
Set-up should be performed only by an experienced technician.<br />
To carry out the set-up the radio must be ready for operation<br />
(antenna connected, power supply OK, operational microphone).<br />
If headsets are used turn volume control to maximum, if<br />
applicable.<br />
All frequencies, channel names, channel memory numbers etc.,<br />
shown in the following illustrations, are examples!<br />
The following settings can be selected or adjusted (order):<br />
1. Adjusting the automatic squelch threshold<br />
2. Adjusting the microphone sensitivity<br />
3. Adjusting the Intercom volume (headset)<br />
4. Adjusting the Transmit Sidetone volume (headset)<br />
5. Adjusting the headset volume (during Receive<br />
independent from speaker volume)<br />
6. Selecting '25 kHz only' channel spacing or combined<br />
8.33/25 kHz channel spacing. Confirmation with STO<br />
starts new mode at once.<br />
7. Deleting occupied channel memories (one after the other)<br />
8. Selecting AF External via loudspeaker ON = 1 or OFF =<br />
0.<br />
9. Selecting 'CHANNEL MODE' only = 1 or 'FREE<br />
FREQUENCY SELECTION' = 0<br />
May 2010 DITTEL D10075 19
PORTABLE TRANSCEIVER <strong>FSG</strong> <strong>90</strong><strong>PC</strong><br />
3 Set-up Procedure<br />
10. Selecting 'TX disabled' ON = 1 or OFF = 0 during receive<br />
11. Service, ON = 1 or OFF = 0<br />
12. Optional module, ON = 1 or OFF = 0<br />
13. Entering a password: protects against unauthorized<br />
changes of the radio parameters.<br />
3.1 Calling SET-UP without password<br />
Calling the SET-UP procedure without password is possible:<br />
a) at factory-new radios <strong>FSG</strong> <strong>90</strong>(X), or<br />
b) at radios which are reset to a factory basic setting (refer to §<br />
3.4.14, RESET), or<br />
c) at radios which are not protected by a password against<br />
unauthorized changes of the set-up adjustments.<br />
Turn OFF the radio (ON/OFF-VOL knob fully ccw).<br />
PRESS AND HOLD both MD and STO buttons, then turn ON<br />
the radio (rotate ON/OFF-VOL knob clockwise, approximately mid<br />
position).<br />
All segments of the display appear for a short moment then the<br />
display gets blank.<br />
Release the buttons.<br />
After releasing the buttons the display shows in the upper line<br />
alternately »<strong>FSG</strong><strong>90</strong>« and »SET-UP«.<br />
If there is no activity for 60 seconds the radio will return to the<br />
mode used before.<br />
Momentarily pressing the MD button once will open the set-up<br />
menu to adjust the squelch threshold.<br />
Repeatedly pressing the MD button will open all other set-up<br />
menus in the order described before.<br />
3.2 Calling SET-UP with password<br />
Calling the SET-UP procedure with password must be carried out at<br />
radios which are protected by a password against unauthorized<br />
changes of the set-up adjustments.<br />
Turn OFF the radio (ON/OFF-VOL knob fully ccw).<br />
PRESS AND HOLD both MD and STO buttons, then turn ON<br />
the radio (rotate ON/OFF-VOL knob clockwise, approximately mid<br />
position).<br />
All segments of the display appear for a short moment then the<br />
display gets blank.<br />
20 DITTEL D10075 May 2010
PORTABLE TRANSCEIVER <strong>FSG</strong> <strong>90</strong><strong>PC</strong><br />
3 Set-up Procedure<br />
Release the buttons.<br />
After releasing the buttons the display shows in the upper line<br />
alternately »<strong>FSG</strong><strong>90</strong>« and »SET-UP«, in the lower line 5 dashes.<br />
If there is no activity for 60 seconds the radio will return to the<br />
mode used before.<br />
With the F/CH knob set the first digit of your password (the first<br />
dash changes to digit). Confirm the first digit by pressing the F/CH<br />
knob. The second digit is ready to be adjusted.<br />
With the F/CH knob set the second digit of your password (the<br />
second dash changes to digit). Confirm the second digit by<br />
pressing the F/CH knob.<br />
Continue till all five digits of your password are entered.<br />
Confirm the last digit input by pressing the STO button. This will<br />
open the set-up menu to adjust the squelch threshold. Repeatedly<br />
pressing the MD button will open all other set-up menus in the<br />
order described before.<br />
Entering a wrong password will return the set-up to the initial<br />
status (5 dashes).<br />
After the fourth attempt to open the set-up with a wrong password<br />
the radio returns to the operation mode used before trying to open<br />
the set-up. The <strong>FSG</strong> <strong>90</strong>(X) is operational.<br />
3.3 Interrupt the SET-UP procedure<br />
The SET-UP procedure may be interrupted any time:<br />
Usually by turning OFF the power (ON/OFF-VOL knob fully ccw). All<br />
changed and individually stored adjustments (by pressing the<br />
STO button) are permanently stored and effective after turning<br />
ON the radio again.<br />
or by pressing the Transfer button ( ). The radio returns to the<br />
operation mode used before. All changed and individually stored<br />
adjustments up to now (by pressing the STO button) are<br />
permanently stored and effective.<br />
3.4 SET-UP procedure<br />
IMPORTANT!<br />
The settings can be done in any order!<br />
Repeatedly pressing the MD button opens the menus step by step.<br />
Only settings confirmed by finally pressing the STO key are<br />
permanently stored and effective.<br />
When pressing the STO button the upper segment of the Onboard<br />
May 2010 DITTEL D10075 21
PORTABLE TRANSCEIVER <strong>FSG</strong> <strong>90</strong><strong>PC</strong><br />
3 Set-up Procedure<br />
supply indicator will light up to confirm storing visually.<br />
3.4.1 Adjusting the automatic squelch threshold<br />
The display shows in the upper line alternately »SET« and »SQUEL«,<br />
in the lower line »LO«, »MED1«, »MED2« or »HI«.<br />
Adjust by rotating the F/CH knob the squelch threshold as<br />
required. The lower line shows:<br />
LO<br />
MED1<br />
MED2<br />
HI<br />
ca. 1.0 µV / -107 dBm (Standard setting)<br />
ca. 2.5 µV / -99 dBm<br />
ca. 5.0 µV / -93 dBm<br />
ca. 8.0 µV / -89 dBm (this setting exceeds the required<br />
minimum sensitivity; adjust only for test purposes at very<br />
strong interference levels!)<br />
Confirm your adjustment by pressing the STO button!<br />
If you want to carry on with the SET-UP procedure press once or<br />
repeatedly the MD button till the desired menu appears.<br />
3.4.2 Adjusting the microphone sensitivity<br />
IMPORTANT!<br />
This adjustment is important particularly when <strong>FSG</strong> <strong>90</strong> <strong>PC</strong> is used<br />
in noisy environment like turboprop airplanes or vehicles:<br />
Turn your radio OFF (ON/OFF-VOL knob fully ccw).<br />
The <strong>FSG</strong> <strong>90</strong>(X) should be turned ON only after engine or motor<br />
start-up.<br />
Select a free frequency/channel name (no communication<br />
audible). Then call the SET-UP procedure.<br />
During this adjustment the transmitter is in operation. Carry out<br />
adjustment quickly!<br />
Up to two microphones of the same type may be connected<br />
parallel to the MIC input (dynamic type).<br />
Parallel operated microphones must have the same specifications.<br />
This adjustment has to be repeated when changing microphones<br />
(brand, type or number)<br />
The display shows in the upper line alternately »SET« and »MICRO«.<br />
ONLY FOR ENGINE POWERED AIRPLANES AND VEHICLES:<br />
RUN THE ENGINE IN IDLE (because of noise level).<br />
Press and hold the PTT key. Talk in a loud, clear voice with the<br />
22 DITTEL D10075 May 2010
PORTABLE TRANSCEIVER <strong>FSG</strong> <strong>90</strong><strong>PC</strong><br />
3 Set-up Procedure<br />
microphone one or two inches from your lips.<br />
While talking the microphone level is measured. By turning the<br />
F/CH knob left or right set the upper dash line to three to four<br />
segments (the lower dash line shows only informative the actual<br />
range).<br />
Release the PTT key and stop talking.<br />
RUN THE ENGINE IN CRUISING SPEED.<br />
Press and hold the PTT key for at least 5 seconds, do not talk!<br />
The upper dash line should show not more than one segment.<br />
If the display shows more than one segment the mic input is too<br />
sensitive. Repeat adjustment with less sensitivity (only two to three<br />
segments visible when talking).<br />
Confirm your adjustment by pressing the STO button!<br />
If you want to carry on with the SET-UP procedure press once or<br />
repeatedly the MD button till the desired menu appears.<br />
3.4.3 Adjusting the Intercom volume<br />
NOT APPLICABLE WHEN THE <strong>FSG</strong> <strong>90</strong>(X) IS OPERATED IN A<br />
CARRYING CASE <strong>PC</strong> <strong>90</strong>!<br />
3.4.4 Adjusting the Sidetone volume<br />
IMPORTANT!<br />
Sidetone audible during transmit is only possible via headphones<br />
(if applicable set maximum volume at the headset)<br />
During this adjustment the transmitter is in operation. Carry out<br />
adjustment quickly!<br />
The microphone(s) sensitivity has to be adjusted properly (refer to<br />
paragraph 3.4.2)<br />
The display shows in the upper line alternately »SET« and »SIDE«.<br />
Press and hold PTT key, Talk in a loud, clear voice with the<br />
microphone one or two inches from your lips.<br />
While talking adjust with the F/CH knob a convenient volume in<br />
your headphone (the segments show the actual range). If more<br />
than four segments are shown overmodulation occurs.<br />
Release the PTT key.<br />
Confirm your adjustment by pressing the STO button!<br />
If you want to carry on with the SET-UP procedure press once or<br />
repeatedly the MD button till the desired menu appears.<br />
May 2010 DITTEL D10075 23
PORTABLE TRANSCEIVER <strong>FSG</strong> <strong>90</strong><strong>PC</strong><br />
3 Set-up Procedure<br />
3.4.5 Adjusting the headset volume (receive)<br />
IMPORTANT!<br />
Receiving is possible via built-in loudspeaker and headphone.<br />
First set with the ON/OFF-VOL knob loudspeaker volume to a<br />
convenient level, and then adjust with the set-up procedure a<br />
suitable headphone volume.<br />
The display shows in the upper line alternately »SET« and<br />
»PHONE«.<br />
With the speaker noise or communication is audible.<br />
With the ON/OFF-VOL knob set speaker output to a convenient<br />
level, leave ON/OFF-VOL knob as it is.<br />
Put on headphone.<br />
By rotating the F/CH knob adjust headphone level to a suitable<br />
volume. The dashes show the range.<br />
If the adjustment range is not sufficient increase or decrease with<br />
the ON/OFF-VOL knob.<br />
Confirm your adjustment by pressing the STO button!<br />
If you want to carry on with the SET-UP procedure press once or<br />
repeatedly the MD button till the desired menu appears.<br />
3.4.6 Selecting '25 kHz only' or combined 8.33/25 kHz channel spacing<br />
The display shows flashing in the upper line »SET«,<br />
in the lower line either »25« or »8.33«.<br />
By rotating the F/CH knob select the required channel spacing:<br />
»25« = '25 kHz only' channel spacing<br />
»8.33« = combined 8.33 and 25 kHz channel spacing.<br />
IMPORTANT!<br />
Confirm the new channel spacing by pressing the STO button! The<br />
selected channel spacing becomes active and simultaneously<br />
SET-UP procedure will automatically be finished.<br />
The radio returns to the last used display mode and the settings<br />
confirmed with the STO button became effective.<br />
If you want to carry on with the SET-UP procedure call again SET-<br />
UP. Press once or repeatedly the MD button till the required menu<br />
appears.<br />
24 DITTEL D10075 May 2010
PORTABLE TRANSCEIVER <strong>FSG</strong> <strong>90</strong><strong>PC</strong><br />
3 Set-up Procedure<br />
3.4.7 Deleting occupied channel memories<br />
IMPORTANT!<br />
Only channel memory numbers from 5 99 can be deleted.<br />
Channel memories 1 to 4 may only be overwritten.<br />
On an occupied channel memory the channel memory number is<br />
displayed in the upper line, the associated frequency/channel<br />
name in the lower line.<br />
On a free channel memory the channel memory number is<br />
displayed in the upper line, the lower line shows »FREE«.<br />
EXAMPLE:<br />
The display shows in the upper line alternately »CLR 05« and<br />
»CH 05« and in the lower line the associated frequency.<br />
EXAMPLE: Channel memory number »39« (with the channel name<br />
132.765) should be deleted.<br />
By rotating the F/CH knob adjust the channel memory number<br />
»39« at the display.<br />
If this channel memory should really be deleted confirm by pressing<br />
the STO button. In the lower line the frequency/channel name<br />
disappears, it appears »FREE«.<br />
If further memory channels should be deleted adjust with the<br />
F/CH knob the channel memory number concerned and delete<br />
each by pressing the STO button.<br />
If you want to carry on with the SET-UP procedure press once or<br />
repeatedly the MD button till the desired menu appears.<br />
3.4.8 Selecting AF EXTERNAL (ON/OFF)<br />
NOT APPLICABLE IF <strong>FSG</strong> <strong>90</strong>(X) IS OPERATED IN A CARRYING<br />
CASE <strong>PC</strong> <strong>90</strong>!<br />
May 2010 DITTEL D10075 25
PORTABLE TRANSCEIVER <strong>FSG</strong> <strong>90</strong><strong>PC</strong><br />
3 Set-up Procedure<br />
3.4.9 Selecting 'CHANNEL MODE ONLY' or 'NO RESTRICTION'<br />
IMPORTANT!<br />
For certain applications (usually ground operation only) selecting all<br />
frequencies by the operator may be restricted. Then transmitting<br />
and receiving is only possible in the CHANNEL MODE, preprogrammed<br />
before by authorized personnel.<br />
The display shows in the upper line alternately »SET« and »FREQ«,<br />
in the lower line »0« or »1«.<br />
Adjust by rotating the F/CH knob lower line to "0" or "1".<br />
0 = Standard operation, no restriction.<br />
1 = CHANNEL MODE only, no other frequencies/channel<br />
names adjustable by operator.<br />
Confirm your adjustment by pressing the STO button!<br />
Carry on with the SET-UP procedure by pressing once or<br />
repeatedly the MD button till the desired menu appears.<br />
3.4.10 Selecting 'TX disabled' during receive (ON/OFF)<br />
IMPORTANT!<br />
Whenever 'TX disabled' is ON and squelch is ON transmitting is<br />
disabled as long as the frequency/channel name is busy<br />
(communication audible). In addition TX Sidetone is OFF.<br />
Whenever the squelch is OFF the 'TX disabled' is OFF and<br />
transmitting is possible even on a busy channel.<br />
The display shows in the upper line alternately »SET« and »BLOC«,<br />
in the lower line »0« or »1«.<br />
Adjust by rotating the F/CH knob the lower line to »0« or »1«.<br />
0 = 'TX disabled' is OFF. Transmitting is always possible, even<br />
on a busy channel.<br />
1 = 'TX disabled' is ON. With squelch ON transmitting is only<br />
possible on a free channel.<br />
Confirm your adjustment by pressing the STO button!<br />
Carry on with the SET-UP procedure by pressing once or<br />
repeatedly the MD button till the desired menu appears.<br />
26 DITTEL D10075 May 2010
PORTABLE TRANSCEIVER <strong>FSG</strong> <strong>90</strong><strong>PC</strong><br />
3 Set-up Procedure<br />
3.4.11 Service (ON/OFF)<br />
IMPORTANT!<br />
For approved Avionics Shops only! No regular operation in<br />
this mode!<br />
The display shows in the upper line alternately »SET« and »SERV«,<br />
in the lower line »0«.<br />
0 = STANDARD MODE, Service OFF.<br />
If required, confirm adjustment by pressing the STO button!<br />
Carry on with the SET-UP procedure by pressing the MD button.<br />
3.4.12 Optional module (ON/OFF)<br />
IMPORTANT!<br />
In this radio without function.<br />
The display shows in the upper line alternately »SET« and »OPTI«, in<br />
the lower line »0«.<br />
0 = STANDARD MODE, Optional module OFF.<br />
Carry on with the SET-UP procedure by pressing the MD button.<br />
3.4.13 Entering a password<br />
IMPORTANT!<br />
When the SET-UP of your radio is protected by a password it<br />
cannot be changed by any unauthorized persons without<br />
knowledge of the password.<br />
Your password consists of five digits!<br />
The display shows in the upper line alternately »SET« and »PASS«,<br />
in the lower line »00000«.<br />
If you don't want to enter a password and your SET-UP procedure is<br />
finished leave the SET-UP menu by pressing the TRANSFER ( )<br />
button, or turn OFF the radio (ON/OFF-VOL knob).<br />
If you want to enter a password proceed as follows:<br />
Rotate the F/CH knob. Adjust the first digit (0 . 9). Confirm the<br />
first digit by pressing the F/CH knob.<br />
Adjust the second digit of your password by rotating the F/CH<br />
knob. Confirm again by pressing the F/CH knob.<br />
The third digit is ready now. Continue as described above for the<br />
third, fourth and fifth digit.<br />
Make sure the complete password corresponds to your idea.<br />
Confirm the password by pressing the STO button!<br />
From now on a new SET-UP may be called only after entering<br />
the password first!<br />
May 2010 DITTEL D10075 27
PORTABLE TRANSCEIVER <strong>FSG</strong> <strong>90</strong><strong>PC</strong><br />
3 Set-up Procedure<br />
3.4.14 Reset<br />
CAUTION!<br />
Every RESET to the factory setting<br />
deletes all your pre-set memory channels 5 to 99 (in both<br />
8.33/25 kHz and 25 kHz only mode)! Memory channels 1 - 4 get<br />
programmed with 118.00 or 118.005 respectively<br />
deletes your password!<br />
delete all your individual SET-UP adjustments!<br />
To reset all adjustments proceed as follows:<br />
Turn OFF the radio (ON/OFF-VOL knob fully ccw).<br />
PRESS AND HOLD simultaneously the buttons MD, STO and<br />
SQ, then turn ON the radio (rotate ON/OFF-VOL knob clockwise,<br />
approximately mid position).<br />
All segments of the display appear for a short moment then the<br />
display gets blank.<br />
Release the buttons.<br />
After releasing the three buttons the display shows in the upper line<br />
alternately »SET« and »RESET«, in the lower line »0«.<br />
If there is no activity for 60 seconds the radio will return to the mode<br />
used before.<br />
With the F/CH knob set lower line to "1".<br />
Confirm RESET by pressing the STO button.<br />
The upper segment of the Onboard Supply Indicator will light up<br />
momentarily.<br />
The VHF radio <strong>FSG</strong> <strong>90</strong>(X) is now operable in the factory setting.<br />
28 DITTEL D10075 May 2010
PORTABLE TRANSCEIVER <strong>FSG</strong> <strong>90</strong><strong>PC</strong><br />
4 Operation<br />
Section 4<br />
Operation<br />
4.1 Introduction<br />
This section contains a basic operation procedure for the <strong>FSG</strong> <strong>90</strong> <strong>PC</strong><br />
portable airband transceiver. This instruction is only applicable for a<br />
radio which is already optimized by the Set-Up procedure (refer to<br />
Section 3, SET-UP PROCEDURE).<br />
DANGER!<br />
DO NOT OPERATE THIS RADIO IN AN EXPLOSIVE ATMOS-<br />
PHERE (PETROLEUM FUELS, SOLVENTS, DUST, ETC.).<br />
DO NOT lean over the equipment when opening the cover! If not<br />
properly tightened the spring steel band antenna may bounce out!<br />
After removing the Snap-On cover all controls to operate the<br />
transceiver are accessible. The cover can be pushed onto the rear<br />
side of the carrying case.<br />
A front and back view of the <strong>FSG</strong> <strong>90</strong> <strong>PC</strong> is given on the last page of<br />
this manual. Please fold out the back flap when reading the operation<br />
instructions.<br />
4.2 Battery Check<br />
If applicable, disconnect built-in charger from mains first, before<br />
checking the battery supply.<br />
Press the red test button of the battery indicator 8 .<br />
The LED indicators 8 will light up.<br />
5 LEDs ON = battery fully charged, supply OK!<br />
3 to 4 LEDs ON = battery partially discharged; reduced<br />
operation time when powered only from<br />
the battery.<br />
2 or less LEDs ON = battery discharged. The battery should<br />
be recharged or the radio should be<br />
powered by an external 12 Vdc<br />
source of adequate capacity (e.g.<br />
automobile battery).<br />
May 2010 DITTEL D10075 29
PORTABLE TRANSCEIVER <strong>FSG</strong> <strong>90</strong><strong>PC</strong><br />
4 Operation<br />
Additionally the supply is permanently monitored when the radio<br />
is switched ON:<br />
3 segments 12.7 Vdc Battery fully charged<br />
2 segments 12.0 Vdc Battery charged approx. ½,<br />
reduced operating time<br />
1 segment 11.0 Vdc Battery almost empty, cease<br />
transmitting!<br />
3 segments flashing 10 - 11 Vdc Emergency operation<br />
Continuous flashing<br />
during STBY<br />
8.59.5 Radio Vdc will soon switch OFF<br />
itself!<br />
IMPORTANT!<br />
If the Supply Indicator even blinks continuously in STANDBY mode<br />
it indicates a discharged battery. The radio should then be<br />
switched OFF at once and the battery recharged as soon as<br />
possible.<br />
The battery must always be recharged immediately after an<br />
extensive discharge because this incurs the risk of deterioration<br />
and permanent damage - this risk is increased if a discharged<br />
battery is stored in that state.<br />
4.3 Battery Charging<br />
Charging should be done within the ambient temperature range of<br />
+10°C to +40°C.<br />
First check the line voltage and set it with the voltage selector<br />
switch 19 on the back, if necessary.<br />
Take out the mains cord from its compartment 16 and connect it<br />
to a wall socket.<br />
The transceiver may be operated while charging.<br />
Charging lasts up to 30 hours depending on the state of the<br />
battery.<br />
Overcharging the battery is not possible due to automatic<br />
controlled charging function. For trickle charging or buffer<br />
operation the charger can be left unattended continuously<br />
connected to mains. A fully charged battery can be stored for<br />
several months.<br />
30 DITTEL D10075 May 2010
PORTABLE TRANSCEIVER <strong>FSG</strong> <strong>90</strong><strong>PC</strong><br />
4 Operation<br />
4.4 Antenna - Antenna Jack SO 239<br />
DANGER!<br />
NEVER TRANSMIT in vehicles, aircraft or inside buildings with<br />
the spring steel band antenna! This may cause malfunction of<br />
the avionics, trigger the airbag or mix-up electronic<br />
equipment! Always operate the radio with a suitable external<br />
antenna!<br />
NEVER OPERATE the radio without any antenna!<br />
The spring steel band antenna (Article-No. F10345), connected to the<br />
SO 239 antenna jack 10 , can be replaced by any other 50 Ohm<br />
antenna with UHF type PL-259 cable plug and a frequency range of<br />
118 137 MHz minimum. For long range operation a base station<br />
folded top antenna, grounded for lightning protection, is<br />
recommended. To operate the radio in aircraft or ground vehicles a<br />
suitable external antenna should always be used.<br />
Ensure the plug of your antenna or antenna cable is securely<br />
tightened.<br />
If the spring steel band antenna is used, pull it out of its<br />
compartment 11 and adjust it in a vertical position by tightening<br />
the screwed cap and wing screw.<br />
4.5 Microphone<br />
The hand-held dynamic microphone with push-to-talk switch (Article-<br />
No. F10041) can be replaced by any other dynamic microphone (200<br />
to 600 Ohms) with PTT switch or a head-set for dynamic type<br />
systems with additional PTT switch (mating 5pole plug: Article-No.<br />
E08834, wiring to station, refer to Section 6, Circuit Diagram <strong>90</strong> <strong>PC</strong>).<br />
Connect microphone; ensure the plug is secured by the twist-lock<br />
cap.<br />
May 2010 DITTEL D10075 31
PORTABLE TRANSCEIVER <strong>FSG</strong> <strong>90</strong><strong>PC</strong><br />
4 Operation<br />
4.6 Switching ON - Selecting Frequency/Channel Name - Volume<br />
CAUTION!<br />
The <strong>FSG</strong> <strong>90</strong> <strong>PC</strong> should be turned on after engine start-up. This<br />
is a simple precaution which helps to protect the solid state<br />
circuitry and extends the operating life of your avionics<br />
equipment.<br />
IMPORTANT!<br />
»Frequency« (25 kHz spacing) and »Channel Name«<br />
(combined 8.33/25 kHz spacing) are ICAO terms!<br />
Frequent transmissions as well as large receiving volume<br />
reduce the operating time when radio is only powered by the<br />
built-in battery!<br />
Turn the radio <strong>FSG</strong> <strong>90</strong>(X) ON by rotating the ON/OFF-VOL knob 1<br />
clockwise. Momentarily all segments of the display are visible.<br />
Last used display mode and frequency are displayed.<br />
A warm-up period for the transmitter is not required. However, at<br />
temperatures of -20°C, the LC display needs approximately one<br />
second until it is fully visible when the frequency or display mode is<br />
changed.<br />
To change the display mode: Push once or twice the MD button<br />
4 .<br />
Selecting the appropriate USE (active) frequency/channel name<br />
depends on display mode:<br />
EXAMPLE:<br />
STANDARD: USE/STBY (Standby) Mode<br />
Upper line:<br />
Lower line:<br />
USE/active frequency/channel name<br />
Standby frequency/channel name<br />
Selecting another frequency/channel name than indicated:<br />
At the lower line select appropriate kHz portion by rotating F/CHknob<br />
6 . A clockwise rotation will increment the previous frequency<br />
while a counterclockwise rotation will decrement the previous<br />
frequency with rollover at each band edge.<br />
Push F/CH knob 6 ; this changes the access to MHz.<br />
At the lower line select appropriate MHz portion by rotating F/CHknob<br />
6 . A clockwise rotation will increment the previous frequency<br />
while a counterclockwise rotation will decrement the previous<br />
frequency with rollover at each band edge.<br />
Push the Transfer Button 5 .<br />
The last standby frequency/channel name (lower line) will become the<br />
new active frequency/channel name (upper line) and the last active<br />
frequency/ channel name will become the new STBY<br />
32 DITTEL D10075 May 2010
PORTABLE TRANSCEIVER <strong>FSG</strong> <strong>90</strong><strong>PC</strong><br />
4 Operation<br />
frequency/channel name (lower line).<br />
IMPORTANT!<br />
If there is no activity for 30 seconds the F/CH knob will return<br />
to the kHz access.<br />
EXAMPLE:<br />
Channel Mode:<br />
Upper line: USE/active frequency/channel name<br />
Lower line: Channel memory number, associated<br />
Selecting another frequency/channel name than indicated:<br />
IMPORTANT!<br />
The appropriate operating frequency/channel name must be stored<br />
already in a channel memory (refer to paragraph 4.9, Storing a<br />
new Frequency/ Channel Name).<br />
Select appropriate channel memory number together with the<br />
associated frequency/channel name by rotating the F/CH knob<br />
6 .<br />
EXAMPLE:<br />
Direct tune Mode:<br />
Upper line:<br />
Lower line:<br />
USE/active frequency/channel name<br />
blank<br />
Selecting another frequency/channel name than indicated:<br />
Select appropriate kHz portion by rotating F/CH-knob 6 . A<br />
clockwise rotation will increment the previous frequency while a<br />
counterclockwise rotation will decrement the previous frequency with<br />
rollover at each band edge.<br />
Push F/CH knob 6 ; this changes the access to MHz.<br />
Select appropriate MHz portion by rotating F/CH-knob. A clockwise<br />
rotation will increment the previous frequency while a counterclockwise<br />
rotation will decrement the previous frequency with rollover at<br />
each band edge.<br />
The setting is the new active frequency/channel name.<br />
IMPORTANT!<br />
If there is no activity for 30 seconds the F/CH knob will return<br />
to the kHz access.<br />
Rotate ON/OFF-VOL knob 1 clockwise, about half way.<br />
Continue with either Receive or Transmit Operation<br />
May 2010 DITTEL D10075 33
PORTABLE TRANSCEIVER <strong>FSG</strong> <strong>90</strong><strong>PC</strong><br />
4 Operation<br />
4.7 Receive (Listen) Operation<br />
After switching ON the radio the automatic squelch is always ON.<br />
If the display mode shall be changed: Push once or twice the MDbutton<br />
4 .<br />
If the active frequency shall be changed: refer to paragraph 4.6,<br />
Switching ON - Selecting Frequency/ Channel Name - Volume<br />
DO NOT press the PTT (push to talk) key if you want to receive!<br />
Transmit Indicator at the display must not appear!<br />
Normal signals are received, weak signals and interfering pulses<br />
are disabled. Set the volume of the built-in loudspeaker or<br />
headphone to a comfortable level by rotating ON/OFF-VOL knob 1<br />
in 15 steps.<br />
Weak signals can be received if the squelch circuit is switched<br />
OFF by pressing the SQ button 3 . Then typical RX noise is<br />
heard during communication breaks.<br />
Pressing the SQ button 3 switches the squelch circuit ON again.<br />
IMPORTANT!<br />
Switching OFF the squelch only makes sense if long range<br />
reception shall take place. Thus the radio is noisy during<br />
Standby operation, but no weak signals are suppressed and<br />
the full receiving range is available!<br />
Notice increased current consumption when Squelch is<br />
switched OFF!<br />
4.8 Transmit (Talk) Operation<br />
DANGER!<br />
Every radio, when transmitting, radiates energy into the<br />
atmosphere, therefore:<br />
Do not operate this radio in an explosive atmosphere<br />
(petrol<strong>eu</strong>m fuels, solvents, dust, etc.)! Danger by generation<br />
of sparks.<br />
NEVER TRANSMIT in vehicles, aircraft or inside buildings with<br />
the spring steel band antenna! This may cause malfunction of<br />
the avionics, trigger the airbag or mix up domestic electronic<br />
equipment!<br />
Never place the radio such as the antenna gets very close to,<br />
or touching, exposed parts of the body, especially the face,<br />
shoulder or the eyes.<br />
34 DITTEL D10075 May 2010
PORTABLE TRANSCEIVER <strong>FSG</strong> <strong>90</strong><strong>PC</strong><br />
4 Operation<br />
IMPORTANT!<br />
Please keep radio discipline!<br />
Transmit only on a clear channel.<br />
Care for an all-round obstacle free location of your antenna; the<br />
called station should be within "line-of-sight" distance.<br />
Volume is very important. Increasing speaking levels while the lips<br />
are facing the microphone (distance 1" to 2") will increase clarity.<br />
Talk slow, make each word a precise and individual entity.<br />
The radio is equipped with a TX time-out-timer (2 minutes). This is<br />
used to limit the duration of calls and to guard against accidental<br />
PTT locking.<br />
If the display mode shall<br />
be changed: Push once or twice the MD-button 4 .<br />
If the active frequency<br />
shall be changed: Refer to 4.6 Switching ON - Selecting Frequency/Channel Name -<br />
Volume.<br />
Transmitting is only possible on a free channel (no communication<br />
audible).<br />
If you have to transmit (e.g. in case of emergency) although the<br />
channel is busy, the Transmit Disabled circuit may be turned OFF<br />
by pressing the SQ button 3 .<br />
When the DITTEL hand-held microphone, article-no. F10041 is<br />
used, take it out of its compartment 12 . Press and hold the<br />
orange colored PTT (push to talk) key.<br />
Talk in a loud, clear voice with the microphone one or two inches<br />
from your lips. Make each transmission as brief as possible. As<br />
long as the PTT key is pressed the Transmit Indicator at the<br />
display appears!<br />
Release the PTT key to end the transmission and to open the<br />
channel for reception; the Transmit Indicator must disappear.<br />
Switch Squelch ON again, if applicable.<br />
The radio is equipped with a TX time-out-timer. This is used to<br />
limit the duration of transmissions to two minutes. When the<br />
transmitter is keyed continuously longer than 2 minutes the<br />
display of the <strong>FSG</strong> <strong>90</strong>(X) starts flashing and transmission is<br />
disabled. If you have to make calls longer than 2 minutes<br />
momentarily release the PTT key and press again. The TX timeout-timer<br />
starts for another 2 minutes.<br />
May 2010 DITTEL D10075 35
PORTABLE TRANSCEIVER <strong>FSG</strong> <strong>90</strong><strong>PC</strong><br />
4 Operation<br />
4.9 Storing a new Frequency/Channel Name<br />
In each active operating mode (8.33/25 kHz mode or '25 kHz only'<br />
mode) up to 99 non-volatile channel memories can be user<br />
programmed. Channel memories of the non-active mode remain<br />
stored in the background. They are accessible after calling up the<br />
respective mode.<br />
IMPORTANT!<br />
Free selection of frequencies/channel names and new storing may<br />
be restricted due to Set-Up adjustment (refer to paragraph 3.4.9)!<br />
Channel memories 1 to 4 are always pre-set and may be used<br />
when called. They can only be changed but not deleted. Ex works<br />
and after Master Reset channel memories 1 to 4 are pre-set with<br />
either 118.00 MHz or 118.005 MHz!<br />
Storing can be initialized in all three display modes.<br />
The USE frequency/channel name in the upper line of the display<br />
can be stored to any of the 99 channel memories.<br />
Set the frequency or channel name to be stored in the upper line<br />
at the display!<br />
Initialize storing by pressing the STO button 2 .<br />
The last used channel memory number appears, "CH" flashes.<br />
Select appropriate channel memory number (1 to 99) by turning<br />
the F/CH knob 6 . On a free memory channel an "F" appears<br />
before "CH" and the memory number.<br />
To enter the new frequency/channel name press the STO-button<br />
2 . The frequency/channel name will be stored under the<br />
selected channel memory number. A previously stored frequency/<br />
channel name will be overwritten.<br />
4.10 Recall of stored frequencies/channel names:<br />
By pushing once or twice the MD-button 4 select the CHANNEL<br />
mode.<br />
By rotating the F/CH knob 6 set appropriate channel memory<br />
number with its associated frequency/channel name at the<br />
display. Only channel numbers that have been programmed<br />
before will appear.<br />
Now the radio operates on that frequency/channel name indicated at<br />
the display.<br />
36 DITTEL D10075 May 2010
PORTABLE TRANSCEIVER <strong>FSG</strong> <strong>90</strong><strong>PC</strong><br />
4 Operation<br />
4.11 Lighting the Frequency Display<br />
Lighting of the frequency display 7 is activated by pressing the<br />
red test button of the battery indicator 8 .<br />
4.12 Turning OFF the radio<br />
Always turn OFF the radio after use by rotating the ON/OFF-VOL<br />
switch 1 to the fully ccw position to prevent unnecessary<br />
discharge of the battery.<br />
Place the microphone in its compartment 12 .<br />
Loosen screwed cap and wing screw of the spring steel band<br />
antenna and push the upper part into its compartment 11 . Bend<br />
the remaining portion so, that the Snap-On cover can be placed in<br />
position.<br />
DANGER!<br />
Always tighten the antenna's screwed cap and wing screw<br />
before closing the cover; otherwise the spring steel band<br />
antenna will bounce out, when the cover is lifted again!<br />
4.13 External Power Supply<br />
The capacity of the built-in battery may not be adequate due to<br />
frequent transmitting operations or very long operating times without<br />
possibility to recharge. Radio operation can be enabled through an<br />
external 12 Vdc power source such as an automobile battery via our<br />
Car Cable F10393 which fits into the cigarette lighter socket of most<br />
cars (minus on common ground). Mating plug: article No. E61933.<br />
4.14 Removing & Installing the Transceiver<br />
IMPORTANT!<br />
Switch OFF the radio first! This is a simple precaution which<br />
helps protect the solid state circuitry and extends the<br />
operating life of your avionics equipment.<br />
To dismount the transceiver <strong>FSG</strong> <strong>90</strong>(X) from its case, remove the<br />
three cross-recessed screws 15 and lift off the matching plate.<br />
Eject the transceiver from the rear connector of the case by<br />
pressing ejector knob 20 on the rear. Pull out transceiver.<br />
To install the transceiver, carefully insert it into the case. The<br />
plugs mate automatically to the case's wiring. Put on the matching<br />
plate and fix it by the three cross-recessed screws 15 . Check<br />
fixing and function.<br />
May 2010 DITTEL D10075 37
PORTABLE TRANSCEIVER <strong>FSG</strong> <strong>90</strong><strong>PC</strong><br />
4 Operation<br />
4.15 Battery Operating Times<br />
Prerequisite: Maximum RX audio volume<br />
Max. current drain .11 A 2.5 A 1.0 A .11 A 2.5 A 1.0 A .11 A 2.5 A 1.0 A .11 A<br />
Lead Accumulator<br />
12 Volts 7.2 Ah<br />
STBY,<br />
w/out RX<br />
5%<br />
TX<br />
5%<br />
RX<br />
<strong>90</strong>%<br />
STBY<br />
10%<br />
TX<br />
20%<br />
RX<br />
70%<br />
STBY<br />
20%<br />
TX<br />
40%<br />
RX<br />
40%<br />
STBY<br />
Temperature - 20°C 38 h 12.30 h 6.00 h 3.10 h<br />
Temperature +20°C 62 h 20.10 h 10.00 h 5.20 h<br />
Temperature +50°C 66 h 22.10 h 11.10 h 6.00 h<br />
Prerequisite: Minimum RX audio volume<br />
Max. current drain .085 A 2.5 A .25 A .08 A 2.5 A .25 A .08 A 2.5 A .25 A .08 A<br />
Lead Accumulator<br />
12 Volts 7.2 Ah<br />
STBY,<br />
w/out RX<br />
5%<br />
TX<br />
5%<br />
RX<br />
<strong>90</strong>%<br />
STBY<br />
10%<br />
TX<br />
20%<br />
RX<br />
70%<br />
STBY<br />
20%<br />
TX<br />
40%<br />
RX<br />
40%<br />
STBY<br />
Temperature -20°C 57 h 15.50 h 8.50 h 4.40 h<br />
Temperature +20°C 85 h 26.10 h 14.30 h 7.50 h<br />
Temperature +50°C <strong>90</strong> h 28.40 h 16.20 h 8.40 h<br />
4.16 Siting<br />
The radio operates in the VHF frequency band, this is a Line-Of-Sight<br />
(LOS) frequency; therefore, siting of the radio greatly affects its<br />
operating range. The longest range is normally obtained when a<br />
direct LOS is maintained between the radios. Use of hilltop, roof or<br />
tower locations will increase the LOS range. Location in valleys with<br />
intervening hills, behind vehicles or buildings or in dense woods may<br />
reduce or prevent communications. If possible, avoid antenna<br />
locations near electrical interference sources, such as computers,<br />
power and telephone lines, radar, welders and electrical generators.<br />
4.17 Base Operation<br />
To operate the radio as a base station, a weather-proof anti static and<br />
lightning protected folded-top antenna is ideally suited. The antenna<br />
should be mounted vertically and elevated as high as possible on a<br />
roof, horizontally free of obstacles. The antenna mast has to be<br />
grounded and anchored, as necessary. For a distance of up to 15 m<br />
the antenna cable may be a RG 58 C/U type, for longer distances<br />
always use the cable type RG 213/U (low loss).<br />
In general, the antenna cable should not be longer than necessary.<br />
38 DITTEL D10075 May 2010
PORTABLE TRANSCEIVER <strong>FSG</strong> <strong>90</strong><strong>PC</strong><br />
4 Operation<br />
4.18 Functional Checks<br />
If the transceiver <strong>FSG</strong> <strong>90</strong> <strong>PC</strong> does not operate correctly, check the<br />
following:<br />
Is the required frequency/channel name visible in the upper line<br />
Adjust required frequency/channel name!<br />
Is battery supply sufficient Observe onboard supply indicator<br />
particularly during transmit, at least one segment must be shown!<br />
Weak RX signal Press SQ button = switch OFF squelch circuit!<br />
Weak TX signal Check microphone, mic SET-UP, radio, or<br />
antenna system! Is the voice volume too low Speak loud and<br />
clear while the lips are facing the microphone! Try another<br />
location!<br />
Make sure that transceiver's antenna is vertically positioned and is<br />
not screened by nearby placed metallic objects or buildings.<br />
Singing during transmit Adjust Sidetone more quietly; put on<br />
headset; keep microphone in other position!<br />
Rattles when receiving Metal propellers between transmitting<br />
airborne radio and base station antenna!<br />
Called station hears carrier, but no voice Check microphone and<br />
contacts on microphone jack!<br />
Noisy - distorted - garbled Suppress electrical interference of<br />
motorized aircraft or vehicle (generator, regulator), check antenna<br />
system; check antenna-, microphone- and radio- connector for<br />
proper seat! Change location!<br />
Flashing display, transmitter switches off itself PTT key sticks!<br />
Check PTT key and cables. Transmitter was keyed longer than 2<br />
minutes. Release PTT key, normal operating is possible again.<br />
In case of emergency turn radio OFF and switch ON again,<br />
permits another two minutes to transmit.<br />
In case of doubt, compare operation of the transceiver with another<br />
transceiver on the same location or call another station. If service is<br />
necessary please consult your authorized dealer or an approved<br />
avionics workshop.<br />
May 2010 DITTEL D10075 39
PORTABLE TRANSCEIVER <strong>FSG</strong> <strong>90</strong><strong>PC</strong><br />
5 ICAO Frequency / Channel Name<br />
Section 5<br />
ICAO Frequency / Channel Name Assignment in the<br />
combined 8.33 kHz / 25 kHz Operation<br />
The following table shows transmit and receive frequency, the<br />
respective channel spacing and the associated display of the <strong>FSG</strong> <strong>90</strong><br />
in the range from 118.000 MHz to 118.1000 MHz.<br />
This assignment also applies of course to all other frequencies<br />
between 118.1000 MHz and 136.9750 MHz.<br />
Transmit and Receive<br />
frequency (MHz)<br />
Channel spacing<br />
8.33/25 kHz Mode<br />
Channel Name =<br />
Display at <strong>FSG</strong> <strong>90</strong><br />
25 kHz Mode<br />
Frequency =<br />
Display at <strong>FSG</strong> <strong>90</strong><br />
118.0000 25 118.000 118.00<br />
118.0000 8.33 118.005<br />
118.0083 8.33 118.010<br />
118.0166 8.33 118.015<br />
118.0250 25 118.025 118.02<br />
118.0250 8.33 118.030<br />
118.0333 8.33 118.035<br />
118.0416 8.33 118.040<br />
118.0500 25 118.050 118.05<br />
118.0500 8.33 118.055<br />
118.0583 8.33 118.060<br />
118.0666 8.33 118.065<br />
118.0750 25 118.075 118.07<br />
118.0750 8.33 118.080<br />
118.0833 8.33 118.085<br />
118.0916 8.33 118.0<strong>90</strong><br />
118.1000 25 118.100 118.10<br />
118.1000 8.33 118.105<br />
and so on etc etc<br />
40 DITTEL D10075 May 2010
PORTABLE TRANSCEIVER <strong>FSG</strong> <strong>90</strong><strong>PC</strong><br />
6 Technical Summary<br />
Section 6<br />
Technical Summary <strong>FSG</strong> <strong>90</strong> <strong>PC</strong><br />
6.1 General<br />
Frequency Range : 118.000 MHz ... 136.975 MHz, 8.33 kHz and/or<br />
25 kHz increments<br />
Number of Channels : 2,278 in the combined 8.33/25 kHz channel spacing,<br />
free selectable, or<br />
selectable<br />
Transmitter Output <strong>FSG</strong> <strong>90</strong><br />
Transmitter Output <strong>FSG</strong> <strong>90</strong>-H1<br />
:<br />
:<br />
6 Watt / 50 ; ca 20 W PEP @ 13.8 Vdc<br />
5 Watt / 50 ; ca 16 W PEP @ 12.0 Vdc<br />
10 Watt / 50 ; ca 30 W PEP @ 14.0 Vdc<br />
8 Watt / 50 ; ca 25 W PEP @ 12.0 Vdc<br />
Receiver Sensitivity,<br />
m = 30%/ 1 kHz : 2.0 µV EMF/ 107 dBm/50 Ohms for 6 dB (S+N/N)<br />
Frequency Accuracy : < ± 1 ppm at 0°C +40°C,<br />
< ± 1.5 ppm at -20°C +55°C<br />
AF Output (K 10%) : 2 Watts into 8 Ohms and 100 mW into 600 Ohms<br />
Nominal Voltage Battery Charger : 115 Vac / 230 Vac, 50 60 Hz<br />
Nominal Voltage Transceiver : 11 16.5 Vdc, Emergency 10 11 Vdc<br />
less 9 Vdc automatic disabling<br />
Built-in Battery : Sealed lead accumulator, 12 Vdc / 7.2 Ah<br />
Power Consumption Charger : 9 VA / 39 mA<br />
Power Consumption : Stand-by:<br />
Receive (Voice):<br />
Transmit (Voice):<br />
Lighting and Supply Check:<br />
85 mA (typical)<br />
less than 1 A<br />
less than 2.5 A/4.0 A<br />
30 mA additional<br />
Duty Cycle : 2 min Transmit (time-out-timer)<br />
Operating Temperature : -20°C ... +55°C / +70°C<br />
Dimensions : 277 mm × 86 mm × 345 mm (incl. handle)<br />
Weight : 6.1 kg incl. mic & spring steel band antenna<br />
ADDITIONAL FEATURES<br />
99 user-programmable, non-volatile memory channels<br />
each in combined 8.33/25 kHz and in "25 kHz only"<br />
operation; true sidetone via headphone; TX time-outtimer;<br />
TX disabled when channel busy<br />
Sockets to connect : External DC Supply, Dynamic Microphone, Push-totalk<br />
Switch, Headphone, Headset, 50 Ohms Antenna,<br />
Lighting of frequency display : By two LEDs, built-in<br />
Fusing : DC: 1 x 6.3 amps, time-lag<br />
AC: 2 0.04 amps, time-lag<br />
IMPORTANT!<br />
The portable ground station<br />
may only be used after<br />
permission by the respective authorities.<br />
May 2010 DITTEL D10075 41
PORTABLE TRANSCEIVER <strong>FSG</strong> <strong>90</strong><strong>PC</strong><br />
6 Technical Summary<br />
6.2 Approvals, applies for Transceiver <strong>FSG</strong> <strong>90</strong>(X)<br />
Ground Operation (Regulatory Authority<br />
For Telecommunications and Posts)<br />
Ground Operation (DFS)<br />
EC Type-Examination icate no. Certif B132705J, and<br />
TYPE-EXAMINATION CERTIFICATE no. A1<br />
No. B-7850/97<br />
Requirements for ground operated radios Reg TP 321 ZV 039 (issue March 1998)<br />
ETSI ETS 300 676 (8.33 kHz CH spacing, ground<br />
operation)<br />
DIN / ISO 6737-1 (12 V Vehicle Power System)<br />
Airborne Radio (Regulatory Authority For<br />
Telecommunications and Posts)<br />
Airborne Radio (Regulatory Authority For<br />
Telecommunications and Posts, and LBA)<br />
ETSO-Authorization (LBA, airborne)<br />
Software<br />
EC Type-Examination icate no. Certif B132705J, and<br />
TYPE-EXAMINATION CERTIFICATE no. A1<br />
Reg TP 321 ZV 034 (issue July 1998)<br />
EUROCAE ED-23B:<br />
Receiver Class C 25 kHz spacing CLIMAX<br />
operation, and<br />
Receiver Class E 8.33 kHz spacing<br />
Transmitter Class 4 100 NM with 25 kHz spacing,<br />
and<br />
Transmitter Class 6 100 NM with 8.33 kHz spacing<br />
Environmental Requirements EUROCAE ED-14C / RTCA<br />
DO-160C:<br />
Categories D1-AA(BMN)XXXXXXZBBBATZ(A3C2X)XXX<br />
ETSO-2C37e and ETSO-2C38e<br />
No. LBA.O.10.911/98 JTSO,<br />
replaced by EASA.21O.1305<br />
EUROCAE ED-12B / RTCA DO-178B, Level D<br />
6.3 Detailed Receiver Characteristics<br />
Receiver Type<br />
IF Frequencies<br />
Sensitivity (m = 30% / 1,000 Hz)<br />
Selectivity<br />
a) Reference level m = 60%/1,000 Hz for<br />
12 dB SINAD<br />
b) Interference level m = 60%/400 Hz<br />
(additional)<br />
Squelch Type<br />
AGC Characteristic<br />
Dual Superhet<br />
First IF 10.0 MHz, second IF 455 kHz, high injection<br />
2 µV EMF ( -107 dBm/50 ) for 6 dB S+N/N<br />
Condition: 1 kHz SINAD decreased from 12 dB to 6 dB<br />
6 dB for ± 8 kHz (25 kHz CH spacing)<br />
60 dB for ± 17 kHz (25 kHz CH spacing)<br />
70 dB for ± 25 kHz (25 kHz CH spacing)<br />
6 dB for ± 3 kHz (8.33 kHz CH spacing)<br />
60 dB for ± 7.37 kHz (8.33 kHz CH spacing)<br />
Automatic (FM/AM), adjustable (SETUP); manual<br />
override.<br />
6 dB, 2 µV EMF (-107 dBm) ... 2 V EMF (+13 dBm/<br />
50 ), m = 30%/1,000 Hz<br />
AGC Delay (RX) 0.1 sec, 200 mV EMF (-1 dBm) 2 µV EMF (-107<br />
dBm / 50 ), m = 30%/1,000 Hz)<br />
AGC Recovery after TX 0.1 sec at 10 µV EMF (-93 dBm / 50 ), after TX end<br />
Transfer time TX / RX<br />
50 msec<br />
Modulation distortion (AF Processor OFF) 10%, 350 ... 2,500 Hz (m = 85%)<br />
42 DITTEL D10075 May 2010
PORTABLE TRANSCEIVER <strong>FSG</strong> <strong>90</strong><strong>PC</strong><br />
6 Technical Summary<br />
Audio Frequency Response / AF Fidelity<br />
+2 dB and -4 dB, 350 ... 2,500 Hz, 25 kHz and<br />
8.33 kHz CH spacing<br />
-20 dB, 4,000 Hz, 25 kHz CH spacing (Climax Offset<br />
Operation)<br />
Audio Frequency AGC 1.5 dB, m = 30% <strong>90</strong>%<br />
Nominal AF Output (Speaker) 4 Watt / 4 , or 8 Watt / 2 (at 13.8 Vdc)<br />
1.5 Watt / 4 (at 10 Vdc)<br />
Nominal AF Output (Phone) 100 mW / 600 (at 13.8 Vdc)<br />
50 mW / 600 (at 10 Vdc)<br />
AF Noise Level<br />
40 dB, m = 30%/1,000 Hz<br />
200 µV EMF (-67 dBm/50 ) ... 10 mV EMF (-33 dBm/<br />
50 )<br />
AF External Input 1 Volt into 600 for rated AF output (13.8 Vdc supply)<br />
Spurious Response<br />
10 mV EMF (-33 dBm), m = 30%/1 kHz, for S+N/N<br />
6 dB<br />
a) 108 - 156 MHz (of any Test Channel ± 8 kHz), at<br />
other than the assigned channel and the adjacent<br />
channels<br />
b) 50 kHz 1,215 MHz (except 108 - 156<br />
Cross Modulation (AF Processor OFF) Max. AF output level 10 dB below nominal AF output<br />
level:<br />
a) Wanted signal 20 µV EMF (-87 dBm) ... 500 µV EMF<br />
(-59 dBm/50 ), unmodulated at RX frequency,<br />
additional<br />
b) Unwanted signal 10 mV EMF (-33 dBm), m =<br />
30%/1,000 Hz, frequency 100 - 156 MHz<br />
(frequency ± 2 RX channels)<br />
Intermodulation (AF Processor OFF) 6 dB AF Quieting (-5 dBm/50 , 87.5 107.9 MHz),<br />
2 signals<br />
Desensitization<br />
Receiver Spurious Emission<br />
Channel Selection Time<br />
Receiver Muting, Squelch (CLIMAX)<br />
Wanted signal 20 µV EMF (-87 dBm), m = 30%/1,000 Hz,<br />
at RX frequency, for S+N/N 6 dB, in the presence of<br />
Unwanted signal A 10 mV EMF (-33 dBm/50 ),<br />
unmodulated, frequency 108 ... 156 MHz, except used<br />
CH, but includes 1 RX CH, or<br />
Unwanted signal B 200 mV EMF (-7 dBm/50 );<br />
minimum 10 mV EMF (-87 dBm), unmodulated,<br />
frequency 50 kHz z, except 1,215 87.5 MHz ... MH<br />
156 MHz, or<br />
Unwanted signal C 250 mV EMF (-5 dBm), unmodulated,<br />
frequency 87.5 ... 107.9 MHz<br />
400 pW / -64 dBm (50 kHz ... 1,215 MHz)<br />
0.4 sec, AF level within 3 dB, max. 99 Channel<br />
memories<br />
Simultaneous input at RX frequency:<br />
a) Wanted Signal A: 10 µV EMF (-93 dBm) +8 kHz (m =<br />
30%/1,000 Hz), Squelch is open.<br />
b) Unwanted Signal B: More than 24 µV EMF (-85 dBm),<br />
m = 30% / 1,000 Hz, vary this frequency slowly from<br />
-8 kHz to +4 kHz. Squelch must remain open.<br />
May 2010 DITTEL D10075 43
PORTABLE TRANSCEIVER <strong>FSG</strong> <strong>90</strong><strong>PC</strong><br />
6 Technical Summary<br />
6.4 Detailed Transmitter Characteristics<br />
<strong>FSG</strong> <strong>90</strong>: Nominal TX RF Output Power<br />
(normal operation)<br />
<strong>FSG</strong> <strong>90</strong>: Nominal TX RF Output Power<br />
(emergency operation)<br />
<strong>FSG</strong> <strong>90</strong>-H1: Nominal TX RF Output Power<br />
(normal operation)<br />
<strong>FSG</strong> <strong>90</strong>-H1: Nominal TX RF Output Power<br />
(emergency operation)<br />
TX Duty Cycle<br />
TX Time Out Timer<br />
Modulation<br />
Depth of Modulation<br />
Modulation Distortion<br />
Modulation Audio Frequency Response<br />
6 Watt / 50 (carrier), 20 Watt PEP, @ 13.8 Vdc<br />
1.5 Watt / 50 (carrier) @ 10 Vdc supply<br />
10 Watt / 50 (carrier), 30 Watt PEP, @ 14.0 Vdc<br />
3.5 Watt / 50 (carrier) @ 10 Vdc supply<br />
1 : 4 (1 minute TX / 4 minutes RX)<br />
After 2 minutes continuous TX. Transmitter is unkeyed<br />
automatically and the radio display flashes as a warning.<br />
Amplitude modulation, AM (A3E)<br />
75% (Voice processor with dynamic compression)<br />
10% (m = 70% / 1,000 Hz)<br />
15% (m = 70% / 350 ... 2,500 Hz)<br />
+2 dB and -4 dB (350 ... 2,500 Hz)<br />
Modulation AF Input for m = 70% Dynamic Microphone: 0.5 ... 10 mV symmetrical,<br />
sensitivity adjustable in SETUP.<br />
True Transmit Sidetone (derived from<br />
modulated TX RF signal)<br />
Carrier Noise Level<br />
100 mW / 600 (at 13.8 Vdc supply),<br />
50 mW / 600 (at 10 Vdc), volume adjustable in<br />
SETUP, independent from speaker volume<br />
45 dB (m = 70%/1,000 Hz)<br />
Emission of RF Energy ( 1000 MHz) 0,25 µW (-36 dBm) / 71 dB µV / 3.54 mV / 50<br />
4 nW (-54 dBm) / 53 dB µV / 446 µV / 50 , from<br />
47 ... 68, 87.5 ... 137, 162 ... 244, 328 ... 336,<br />
470 ... 862 MHz<br />
Emission of RF Energy 1000 MHz) 1 µW / -30 dBm / 77 dB µV / 7 mV / 50<br />
Transmitter Spectrum Mask Max. +2 / -4 dB at 350 2,5<br />
spacing)<br />
45 dB at 3,200 Hz modulation (8.33 kHz spacing)<br />
60 dB at 5,000 Hz modulation (8.33 kHz spacing)<br />
Channel Selection Time<br />
Frequency Tolerance<br />
Unwanted FM (Frequency modulation)<br />
TX Intermodulation<br />
0.5 sec<br />
1 ppm (0°C ... + 40°C / 32°F ... 104°F),<br />
1.5 ppm (-20°C ... + 55°C / -4°F ... + 131°F)<br />
1.0 kHz at m = 70% / 1,000 Hz<br />
45 dB<br />
Antenna Mismatching VSWR 3 : 1, normal operation<br />
At VSWR 3 : 1 the requirements for modulation distortion,<br />
spurious and harmonics output as well as frequency<br />
stability are met. In addition, the RF output is 40 %<br />
<strong>FSG</strong> <strong>90</strong>: 2.4 Watt into 50 at 13.8 Vdc.<br />
<strong>FSG</strong> <strong>90</strong>-H1: 4 Watt into 50 at 14.0 Vdc.<br />
At VSWR<br />
5 : 1 still functional.<br />
44 DITTEL D10075 May 2010
PORTABLE TRANSCEIVER <strong>FSG</strong> <strong>90</strong><strong>PC</strong><br />
6 Technical Summary<br />
6.5 Environmental Performance Classification (Transceiver only)<br />
Compliance measurements according to EUROCAE ED-14C / RTCA DO-160 C were<br />
performed and the following Environmental Categories fulfilled.<br />
Environmental Conditions ED-14C<br />
Description of conducted tests Category<br />
DO-160C<br />
Temperature and Altitude 4.0 Equipment tested to category D1<br />
Low Temperature 4.5.1 Operation -20°C (-4°F)<br />
Storage -55°C (-67°F)<br />
High Temperature 4.5.2 Operation +55°C (131°F)<br />
Storage +85°C (185°F)<br />
in-flight Loss of Cooling 4.5.3 No auxiliary cooling required -<br />
Low Pressure (Altitude) 4.6.1 50,000 ft /15,240 m<br />
Decompression 4.6.2 No test required in category D1<br />
High Pressure 4.6.3 No test required in category D1<br />
Temperature Variation 5.0 10°C/min (18°F/min),<br />
Equipment tested to category<br />
Humidity 6.0 Equipment tested to category A<br />
Shock 7.0 Equipment tested to<br />
Operational shocks 7.2 6 g<br />
Crash safety 7.3 15 g<br />
Vibration 8.0 Equipment tested to category BMN<br />
Explosion 9.0 No test required X<br />
Waterproofness 10.0 No test required X<br />
Fluids Susceptibility 11.0 No test required X<br />
Sand and Dust 12.0 No test required X<br />
Fungus 13.0 No test required X<br />
Salt Spray 14.0 No test required X<br />
Magnetic Effect 15.0 13 cm/1°, Equipment tested to<br />
category<br />
Power Input 16.0 Equipment tested to category B<br />
Voltage Spike 17.0 Equipment tested to category B<br />
Audio Frequency Susceptibility 18.0 Equipment tested to category B<br />
Induced Signal Susceptibility 19.0 Equipment tested to category A<br />
Radio Frequency Susceptibility 20.0 Equipment tested to category T<br />
Radio Frequency Emission 21.0 Equipment tested to category Z<br />
Lightning Induced Susceptibility 22.0 Equipment tested to category A3C2X<br />
Lightning effects 23.0 No test required X<br />
Icing 24.0 No test required X<br />
Other Test --- No test required X<br />
A<br />
Z<br />
May 2010 DITTEL D10075 45
PORTABLE TRANSCEIVER <strong>FSG</strong> <strong>90</strong><strong>PC</strong><br />
6 Technical Summary<br />
All dimensions in Millimeter<br />
Carrying Case <strong>PC</strong> <strong>90</strong><br />
Dimensions<br />
46 DITTEL D10075 May 2010
PORTABLE TRANSCEIVER <strong>FSG</strong> <strong>90</strong><strong>PC</strong><br />
6 Technical Summary<br />
Carrying Case <strong>PC</strong> <strong>90</strong><br />
Circuit Diagram<br />
May 2010 DITTEL D10075 47
PORTABLE TRANSCEIVER <strong>FSG</strong> <strong>90</strong><strong>PC</strong><br />
6 Technical Summary<br />
THIS PAGE<br />
INTENTIONALLY<br />
LEFT BLANK<br />
48 DITTEL D10075 May 2010
PORTABLE TRANSCEIVER <strong>FSG</strong> <strong>90</strong><strong>PC</strong><br />
Certificates<br />
Certificates<br />
May 2010 DITTEL D10075 49
PORTABLE TRANSCEIVER <strong>FSG</strong> <strong>90</strong><strong>PC</strong><br />
Certificates<br />
50 DITTEL D10075 May 2010
PORTABLE TRANSCEIVER <strong>FSG</strong> <strong>90</strong><strong>PC</strong><br />
Certificates<br />
May 2010 DITTEL D10075 51
PORTABLE TRANSCEIVER <strong>FSG</strong> <strong>90</strong><strong>PC</strong><br />
Certificates<br />
52 DITTEL D10075 May 2010
PORTABLE TRANSCEIVER <strong>FSG</strong> <strong>90</strong><strong>PC</strong><br />
Certificates<br />
May 2010 DITTEL D10075 53
PORTABLE TRANSCEIVER <strong>FSG</strong> <strong>90</strong><strong>PC</strong><br />
Certificates<br />
54 DITTEL D10075 May 2010
PORTABLE TRANSCEIVER <strong>FSG</strong> <strong>90</strong><strong>PC</strong><br />
Certificates<br />
May 2010 DITTEL D10075 55
PORTABLE TRANSCEIVER <strong>FSG</strong> <strong>90</strong><strong>PC</strong><br />
Certificates<br />
56 DITTEL D10075 May 2010