View / Download Cocheco Mills Collection II
View / Download Cocheco Mills Collection II
View / Download Cocheco Mills Collection II

Create successful ePaper yourself
Turn your PDF publications into a flip-book with our unique Google optimized e-Paper software.
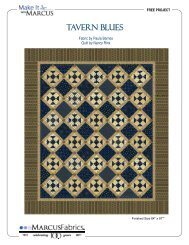
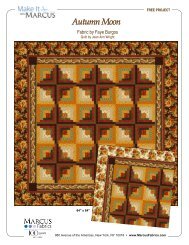
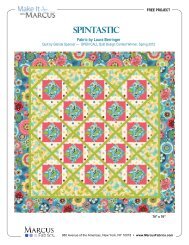
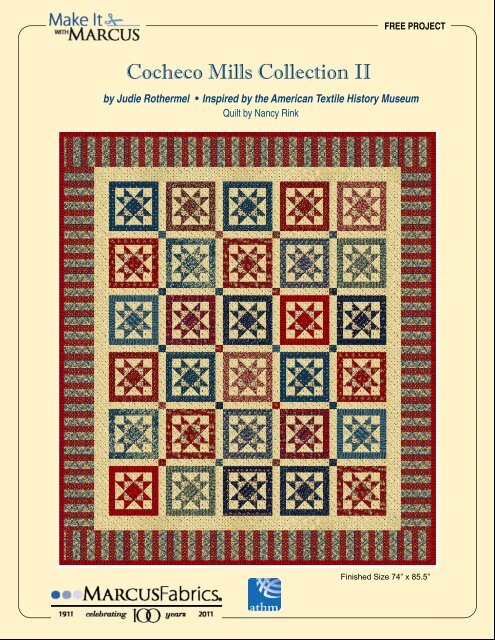
FREE PROJECT<br />
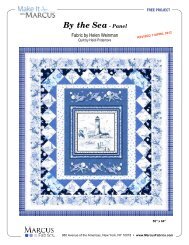
<strong>Cocheco</strong> <strong>Mills</strong> <strong>Collection</strong> <strong>II</strong><br />
by Judie Rothermel • Inspired by the American Textile History Museum<br />
Quilt by Nancy Rink<br />
Finished Size 74” x 85.5”
<strong>Cocheco</strong> <strong>Mills</strong> <strong>Collection</strong> <strong>II</strong><br />
Fabric by Judie Rothermel, Inspired by the American Textile History Museum<br />
Quilt by Nancy Rink Page 2 of 3<br />
Skill Level: Confident Beginner • Quilt size: 74” x 85.5" • FQ = Fat Quarter • WOF = Width of Fabric<br />
FABRIC REQUIREMENTS & CUTTING GUIDE<br />
14 assorted Red & Blue <strong>Cocheco</strong> <strong>II</strong> Prints 1 FQ each *From each FQ cut 2 (A), 16 (B), 4 (E), 4 (F)<br />
3023-0163; 3266-0150; 3266-0163; 3267-0163; 3268-0150;<br />
3269-0163; 3270-0150; 3271-0163; 3272-0150; 3273-0150;<br />
3275-0150; 3276-0150; 3276-0163; 3277-0150<br />
Red 3273-0163 1 yd 9 (2 ¼” X WOF) strips, pieced together end-to-end<br />
for binding.<br />
2 (A), 16 (B), 4 (E), 4 (F), 2 (G)<br />
Beige Floral 3275-0142 ½ yd 120 (B)<br />
Beige Dot 3268-0142 3 yards 8 (3 ½” X WOF) strips, pieced and recut into<br />
2 (3½” x 62½”) top/bottom borders and<br />
2 (3½” x 68”) side borders<br />
2 (10 ½” x WOF) strips, cross cut into<br />
2” x 10½”) sashing strips<br />
120 (C)<br />
120 (D)<br />
Stripe 3265-0150 1 7/8 yds 8 (6½”X WOF strips) pieced together end to end and<br />
and recut into 2(6½” x 74”) side borders<br />
and 2 (6½” x 74½”) borders<br />
Backing 5 1/3 yards 2 (91” X WOF) panels<br />
B<br />
B<br />
2 ¾ ”<br />
A<br />
3 1/8 “<br />
2 ¾ ”<br />
3 1/8 “<br />
D 2 3/8 “<br />
2<br />
3/8<br />
E 1 ¾”<br />
8”<br />
F 1 ¾”<br />
B<br />
B<br />
B<br />
B<br />
A<br />
B<br />
B<br />
B<br />
B<br />
B<br />
B<br />
B<br />
B<br />
B<br />
B<br />
G G<br />
E<br />
E<br />
E<br />
E<br />
F F F F<br />
20”<br />
C<br />
C<br />
C<br />
C<br />
5”<br />
10 ½”<br />
G 2”<br />
A<br />
B<br />
B<br />
18”<br />
5”<br />
2”<br />
*Fat Quarter Cutting Diagram<br />
980 Avenue of the Americas, New York, NY 10018 www.MarcusFabrics.com
<strong>Cocheco</strong> <strong>Mills</strong> <strong>Collection</strong> <strong>II</strong><br />
Fabric by Judie Rothermel, Inspired by the American Textile History Museum<br />
Quilt by Nancy Rink Page 3 of 3<br />
Block Directions<br />
To make one block, sew four beige floral (B) triangles to a print fabric (A)<br />
square to create a square-in-a-square as shown in Diagram A. Press seams<br />
toward center of block.<br />
B<br />
A<br />
Diagram A<br />
B<br />
C<br />
Diagram B<br />
B<br />
Sew a print fabric (B) triangle on to either side of a beige dot (C) triangle to<br />
create a flying geese unit as shown in Diagram B. Make a total of four identical<br />
flying geese units.<br />
D<br />
Lay out units made in steps one and two and 4 beige dot (D) patches as<br />
shown in Diagram C. Sew together into rows, then sew together the rows.<br />
Add two print fabric (E) rectangles to opposite sides of block. Press seams<br />
toward rectangles. Add the (F) print fabric rectangles to the remaining sides<br />
of the block (Diagram D). Make a total of 30 blocks.<br />
Diagram C<br />
Quilt Assembly<br />
Referring to quilt assembly diagram, lay out blocks alternately with sashing<br />
strips. You should have six rows of five blocks each. Layout out sash rows by<br />
alternating various colored (G)s and sashing strips. Sew together the block<br />
rows alternately with the sashing rows. Press all seams toward sashing.<br />
2. Sew the beige dot (3½” x 68”) borders to the sides of the quilt. Press<br />
seams toward borders. Add the remaining cream dot borders to top and bottom<br />
of quilt, again pressing seams toward borders.<br />
E<br />
F<br />
E<br />
3. Sew the stripe (6½” x 74”) borders to quilt sides; add the remaining stripe<br />
borders to top and bottom of quilt. Press all seams toward outside edge.<br />
F<br />
Diagram D<br />
Finishing<br />
1. Layer quilt top, batting, and backing; quilt<br />
as desired. Trim batting and backing even with<br />
edge of quilt.<br />
2. Bind with red fabric.<br />
Quilt Assembly Diagram