

'Factory Team' RC10R5 1/10th Electric Pan Car - CML Distribution
'Factory Team' RC10R5 1/10th Electric Pan Car - CML Distribution
'Factory Team' RC10R5 1/10th Electric Pan Car - CML Distribution

You also want an ePaper? Increase the reach of your titles
YUMPU automatically turns print PDFs into web optimized ePapers that Google loves.
<strong>RC10R5</strong><br />
By keith robertson<br />
grand tourer<br />
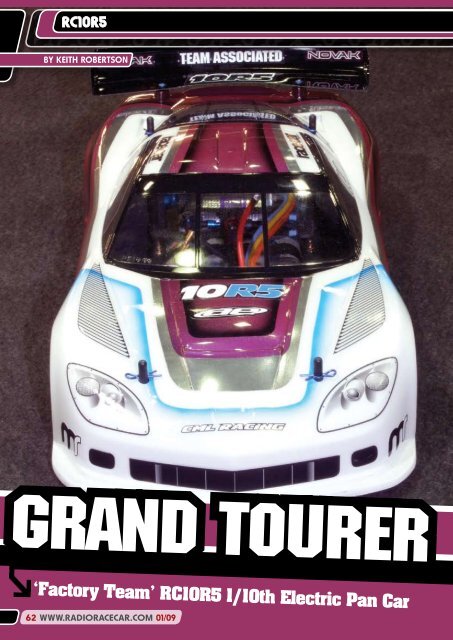
‘Factory Team’ <strong>RC10R5</strong> 1/<strong>10th</strong> <strong>Electric</strong> <strong>Pan</strong> <strong>Car</strong><br />
62 WWW.RADIORACECAR.COM 01/09
ci feature<br />
PRO 10 REVIVED!<br />
World GT. Sounds great doesn’t it, but what is it This is an<br />
emerging class and invokes thoughts of fast, powerful and classy<br />
cars – but will they be able to live up to the billing RRCi builds and<br />
tests the new Associated <strong>RC10R5</strong> to find out.<br />
Not so long ago a class known as ‘Pro-10’ was the pinnacle of<br />
tarmac electric racing around the World with Britain nurturing<br />
European Champions such as Andy Moore and David Spashett (who<br />
was also World Champ). During the late ‘80s and ‘90s it was raced<br />
alongside the old ‘wide’ touring cars (based on buggy designs) until<br />
the revolution that brought about the ‘Scale Saloons’ we now know<br />
as 1/<strong>10th</strong> touring cars. The popularity of scale saloons rocketed,<br />
unfortunately at the expense of the other two classes. But now, as<br />
with many things in this sport it has been reborn, in the guise of<br />
‘World GT’.<br />
Associated were involved with Pro-10 and won one of their 22<br />
World Championships with Mike Swauger in 1996 so they know what<br />
they’re doing. The Pro-10 design has been refined by narrowing the<br />
track from 235 mm to 200 m, dropping from 6-cell to 4-cell and<br />
creating some wonderful Sports car shells to top them off with. All of<br />
which creates an impressive scale appearance.<br />
The ‘R5’ range of cars has seen a change in philosophy at<br />
Associated away from the ‘T-bar’ design to the ‘pivot-ball link’ style<br />
we see here. This allows the cells to sit more central in the car for<br />
better weight distribution whilst allowing more set-up options. With<br />
the <strong>RC10R5</strong> essentially the bigger brother of the latest 12th circuit<br />
car released earlier this year, the RC12R5, they share many of the<br />
same components although there are of course some necessary<br />
differences.<br />
As with other recent Associated releases this kit is to ‘Factory<br />
Team’ specification so there are no ‘hop-ups’ needed – it’s all in the<br />
box!<br />
The build of the 10R5 is similar to its smaller brother the 12R5, and<br />
we always recommend that you make sure to read the instructions<br />
carefully and pay attention to the detail in the pictures (advice you<br />
should follow for any kit build). One handy point is just inside the<br />
back is a 1:1 chart of all the hardware used during the build, if you<br />
can’t instantly spot the correct screw size amongst the pile on your<br />
bench, just measure them up and you can be sure you get it right.<br />
All the carbon parts, good<br />
quality and well cut<br />
First on the list of design innovations are the shock absorbers.<br />
Since being released the ‘through-shaft’ design incorporated by<br />
Associated has been praised and I can see why. They are easy to<br />
build (much easier than the previous micro shock used on pan cars)<br />
and it is easy to build them with no perceptible air trapped within, for<br />
much better dampening consistency. The centre shock and the side<br />
shock are similar in build but not the same, so pay attention and be<br />
careful not to tighten the ball-end cap too much as it can deform.<br />
The spring used on the centre shock can actually be changed for one<br />
of the option parts available without removing the shock from the<br />
car – just loosen a simple grub screw and voilà!<br />
Next we pick up the chassis. As with any carbon fibre chassis it is<br />
important to file the edges, and I prefer to seal with glue to protect<br />
against delaminating during any accidents. Take note when doing<br />
the cell slots and check your batteries as you do it to make sure you<br />
get them as low as you can without risking any damage by having<br />
them hang below the level of the chassis. The new pivot-ball links<br />
are then fitted to the chassis and it is worth taking some time here to<br />
make sure you don’t clamp these too much as it will restrict the free<br />
movement of the car’s rear end.<br />
The front suspension is all new for the R5 cars but follows the same<br />
principles as the previous all-conquering ‘Dynamic-strut’ design.<br />
When threading the upper turnbuckle into the ball-ends and upper<br />
wishbones it is vital to make sure they go in straight. It sounds<br />
simple, but once you have the car complete remember to check your<br />
caster just to be certain. This can be done easily by using a camber<br />
gauge placed up against the kingpin from the front – they should of<br />
course measure the same on both sides.<br />
A big plus on the front-end are the new threaded axles, a pleasure<br />
to see and a big improvement over the e-clip used on the older cars.<br />
When assembled, if the kingpins feel tight apply a little diff grease<br />
to the point where they slide into the ball on the lower wishbone, to<br />
help keep things smooth.<br />
When fitting the completed front suspension onto the chassis<br />
you actually have the tuning option of a different wheelbase.<br />
Unfortunately the instructions don’t mention this, or the effect it<br />
will have on the handling, so I mounted them in the middle holes for<br />
starters.<br />
The latest ‘thrushock’.<br />
Nice and<br />
simple to build<br />
You can see the end of the shock<br />
shaft as it slides through the ball end<br />
01/09 WWW.RADIORACECAR.COM 63
<strong>RC10R5</strong><br />
The front mount for the centre shock is a nice little piece of kit. It<br />
has a carbon plate that gives the option to change the angle of the<br />
shock, giving a subtle adjustment in handling, and instead of a push<br />
fit for the aerial tube there is a grub screw to secure it in place for<br />
extra peace of mind.<br />
The rear axle design has been around for a few years now, and<br />
there is a reason for that. It works, and it works well! You don’t need<br />
to apply loads of lube to the diff balls, just a small amount onto<br />
each ball, and make sure to get the diff setting correct. Adjust it as<br />
explained in the instructions, something I have been doing for years<br />
and find it spot on.<br />
The rear pod has plenty of room to slide in any motor without<br />
dismantling the car in any way and is even ‘balance-optimised’ for<br />
brushless motors.<br />
The rest of the build is straight forward and the car slots together<br />
well. There is minimal flash to remove from the mouldings and I found<br />
the tolerances to be good.<br />
With the car build completed it was time to fit the radio gear. For<br />
motive power, I already had some SMC Ener-G 4600 cells from my<br />
12th racing built-in 4-cell configuration (and cell tape to secure<br />
them) so that part was easy and there is plenty of space on the chassis<br />
so pretty much any receiver will fit.<br />
With brushless being ‘where it’s at’ just now, I got my grubby mitts<br />
on the tried and tested Novak GTB system (with a 13.5T motor for<br />
starters). Fitting it was a breeze; just make sure that all the wires that<br />
attach to the motor do not hinder the pod movement in any way.<br />
Move the pod forwards, backwards and side-to-side to make sure it<br />
can move freely. If it binds in any way, re-do the wiring until it is free,<br />
otherwise it will adversely affect the handling.<br />
The only downside was that a ‘standard’ size servo is too big for<br />
the provided servo posts and of course the mounting holes in the<br />
chassis. I went to check on the Associated website as to why this<br />
might be, and it appears they see the market for the 10R5 coming<br />
primarily from those already racing 12th so have tailored the car<br />
to take equipment used in 12th circuit (which use a smaller servo).<br />
Perhaps I see it as strange because the Pro-10’s we used to race had<br />
a standard size servo in them and that’s simply what I was expecting. I<br />
would recommend something with reasonable speed to maximise the<br />
grip levels the car will produce and all the well known manufacturers<br />
make suitable sized servos so have a look and choose your weapon.<br />
When fitting the chosen servo there are spacers to adjust how far<br />
forward it sits, so you can adjust the amount of Ackerman gained<br />
during steering, but to start with set the steering turnbuckles straight<br />
(i.e. in line with each other).<br />
As personal transponders are high on everyone’s shopping list, they<br />
have been catered for with a specific place to fit it on the car. The<br />
carbon plate between the two front bulkheads has some mounting<br />
holes in just the right place to mount your PT where you need it, at<br />
the front!<br />
The shell used for this review was a Corvette C6-R GT, one of a<br />
new batch of designs being pioneered by Protoform for this class.<br />
The side springs rest on the side ball joints<br />
Combined with another fantastic TelsShells paintjob, putting his<br />
personal slant on my usual colour scheme it really looks the part.<br />
Check out those fades, thanks Terry!<br />
All that was left now was a set of boots to provide the grip. <strong>CML</strong><br />
kindly supplied me with a set of Jaco ‘Lilac’ trued and glued tyres.<br />
These were used at the recent race meeting in Las Vegas as a control<br />
tyre so I knew they would be just fine, and they come on the ‘blingest’<br />
wheels I have ever seen, a carbon effect print makes them look<br />
absolutely TOP! An issue did arise upon fitting the wheels however<br />
– they gave too much ride height (I don’t think that has even been<br />
a problem with a pan car before…) I changed the rear axle height<br />
adjusters to lower the axle as far as possible and added some more<br />
shims under the front bulkheads to bring the ride height down to 7<br />
mm, still a couple of mm higher than I would have liked but with the<br />
weekend rapidly approaching I didn’t have the chance to true the<br />
tyres down any.<br />
For a track test I took the 10R5 to the friendly Swindon RCMCC.<br />
Having just moved indoors for the winter and with Primafelt GT carpet to<br />
race on, this was the perfect opportunity to see just what this little baby<br />
could do. A quick shakedown checked the steering was straight and that<br />
the diff didn’t slip, then with the turning circles set we were ready to go.<br />
I played it safe with the additive, applying Jack-the-Gripper to the rear<br />
tyres for 15 minutes and to just over half of the front tyres for 10 minutes.<br />
The timing and amount of front additive used is a major tuning point<br />
of a pan-car and comes down to track surface and tyre compounds<br />
chosen.<br />
It was apparent during practice that racing against touring cars<br />
using 13.5t motors and 7.4 V 2-cell LiPo batteries, the 10R5 didn’t<br />
have quite enough zip with its 13.5t motor and 4.8 V 4-cell NiMH for<br />
me. Although the car is lighter than a tourer, the extra voltage they<br />
carried definitely helped them, and to be honest I’m a bit of a speed<br />
freak and wanted more, more, MORE!<br />
So I changed motor to a 10.5Tt, this was the logical choice and<br />
proved to be spot on. Making an educated guess on gearing I went<br />
with 60 mmpr, which with the new tyres is a 30T pinion on the kit 96T<br />
spur. The car felt slightly over-geared for the track layout but now I<br />
definitely had the edge on speed over the tourers. The chaps I was<br />
racing with were very accommodating to this strange beast amongst<br />
them so thanks go to them.<br />
The first run proper started nice and easy, as I was afraid of<br />
damaging that lovely shell, but I soon got into a good groove as<br />
the car proved easy to drive and well behaved, albeit with some<br />
high speed understeer. For the next couple of runs I didn’t change<br />
anything other than to turn the brakes up as there were a couple of<br />
hairpins with fast entries that I REALLY needed to slow the car down<br />
for. Running a brushless system in such a light car as the R5 with very<br />
little rolling resistance, it took me a while to get the hang of braking,<br />
but when I got it right the car was definitely sharper and lapped<br />
quicker.<br />
For the final run I applied a bit of my 12th scale experience and<br />
moved the cells to the front which I find gives the car a more<br />
The built rear end clearly shows the side damping<br />
shock, and note the chamfered, CA sealed edges to the<br />
cell slots<br />
64 WWW.RADIORACECAR.COM 01/09
ci feature<br />
New front threaded axles are<br />
firmly held in place with a screw<br />
Front carbon plate showing the choice of wheelbase mounting<br />
holes. Note the three point Personal Transponder mount, right<br />
at the front<br />
No problems wiring in a brushless motor; just<br />
make sure the wires don’t compromise the<br />
movement of the pod<br />
From underneath you choose<br />
your wheelbase by relocating the<br />
front suspension<br />
Keep it simple – the <strong>RC10R5</strong><br />
steering arrangement<br />
All ready to go, with plenty of room<br />
for the radio gear<br />
01/09 WWW.RADIORACECAR.COM 65
<strong>RC10R5</strong><br />
QUICK SPEC<br />
Back on track. Another stunning paint job<br />
from Telsshells with the carbon effect Jaco<br />
wheels looks just awesome!<br />
consistent feel throughout the whole corner, and<br />
so it proved to be. It is a simple change that only<br />
takes a few seconds, just a case of moving two<br />
plastic blocks that are mounted in the cell slots. This<br />
change combined with the stabilising of the carpet<br />
grip levels left me feeling much more confident that<br />
I wasn’t going to splatter the ‘Vette all over the hall<br />
wall. It could bite me if I was too aggressive into a<br />
tight corner but I could now drive smooth and hard<br />
for the complete run. The ride height I’d set didn’t<br />
cause an issue, even so it was noticeable how sharp<br />
the car was through the change of direction in<br />
chicanes and S-bends, a definite advantage of the<br />
link-car chassis design.<br />
The Associated <strong>RC10R5</strong> both looks and<br />
feels right on track, the huge wing keeping<br />
it planted<br />
There are proposals to create an official BRCA<br />
class for a World GT class and by the time you<br />
read this the AGM will have taken place so fingers<br />
crossed! Even after this short test I feel the <strong>RC10R5</strong><br />
will definitely be able to cut the proverbial mustard<br />
in competition, and the great thing is it’s so simple<br />
to use, maintain and tune compared to a 4WD<br />
touring car, that having it just for fun makes even<br />
more sense!<br />
Associated have proven time and time again that<br />
they don’t have to re-invent the wheel to make<br />
successful and popular cars, and with the <strong>RC10R5</strong><br />
they have done it again. Pro - 10 is BACK! RRCi<br />
Class: 1/<strong>10th</strong> <strong>Electric</strong> Circuit<br />
Type: Self-assembly Chassis Kit<br />
Manufacturer: Associated <strong>Electric</strong><br />
Price: £199.99 RRP<br />
Required AND<br />
Recommended<br />
Motor: Novak 10.5 SS<br />
ESC: Novak GTB<br />
Cells: SMC Ener-G 4600 NiMH<br />
Charger: Robitronic Overloader 2<br />
Tyres: Jaco Lilac<br />
Bodyshell: Protoform Corvette C6-R<br />
Paint: TelsShells<br />
Radio: KO Universe/Spektrum<br />
Receiver: Spektrum Micro<br />
Servo: KO 947<br />
Dislikes<br />
Lack of set-up information<br />
No thrust race for the differential<br />
Likes<br />
Quality of components<br />
Super smooth shocks<br />
Easy to adjust<br />
Part commonality with RC12R5<br />
CONTACT<br />
<strong>CML</strong> <strong>Distribution</strong>, Tel: 01527 575349 or<br />
visit www.cmldistribution.co.uk<br />
66 WWW.RADIORACECAR.COM 01/09


