- Page 1: CR1000 Measurement and Control Syst
- Page 5: Assistance Products may not be retu
- Page 8 and 9: Table of Contents Section 5. System
- Page 10 and 11: Table of Contents 7.7.3.4 Single-Li
- Page 12 and 13: Table of Contents 7.8.13.4 Insertin
- Page 14 and 15: Table of Contents 8.3.1.1 Data Stor
- Page 16 and 17: Table of Contents Section 10. Troub
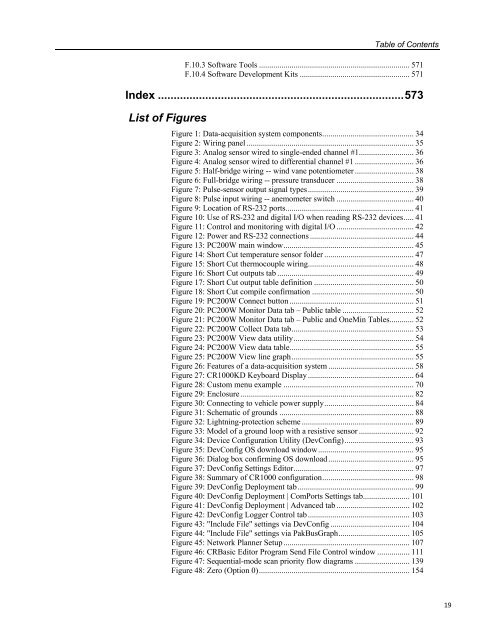
- Page 20 and 21: Table of Contents Figure 49: Quarte
- Page 22 and 23: Table of Contents Table 19. Binary
- Page 24 and 25: Table of Contents Table 125. Standa
- Page 26 and 27: Table of Contents CRBasic Example 6
- Page 28 and 29: Section 1. Introduction Italic —
- Page 30 and 31: Section 2. Cautionary Statements 30
- Page 32 and 33: Section 3. Initial Inspection 32
- Page 34 and 35: Section 4. Quickstart Tutorial mode
- Page 36 and 37: Section 4. Quickstart Tutorial 4.1.
- Page 38 and 39: Section 4. Quickstart Tutorial Figu
- Page 40 and 41: Section 4. Quickstart Tutorial chan
- Page 42 and 43: Section 4. Quickstart Tutorial Figu
- Page 44 and 45: Section 4. Quickstart Tutorial Figu
- Page 46 and 47: Section 4. Quickstart Tutorial Tabl
- Page 48 and 49: Section 4. Quickstart Tutorial Figu
- Page 50 and 51: Section 4. Quickstart Tutorial Figu
- Page 52 and 53: Section 4. Quickstart Tutorial CR10
- Page 54 and 55: Section 4. Quickstart Tutorial Figu
- Page 56 and 57: Section 4. Quickstart Tutorial 13.
- Page 58 and 59: Section 5. System Overview Figure 2
- Page 60 and 61: Section 5. System Overview 5.1.3 CR
- Page 62 and 63: Section 5. System Overview 5.1.3.3
- Page 64 and 65: Section 5. System Overview CRBasic
- Page 66 and 67: Section 5. System Overview 5.1.6.2
- Page 68 and 69:
Section 5. System Overview Data sto
- Page 70 and 71:
Section 5. System Overview 5.1.9.4
- Page 72 and 73:
Section 5. System Overview LoggerNe
- Page 74 and 75:
Section 5. System Overview 5.1.10.2
- Page 76 and 77:
Section 5. System Overview 5.1.11 M
- Page 78 and 79:
Section 5. System Overview 78
- Page 80 and 81:
Section 6. CR1000 Specifications 80
- Page 82 and 83:
Section 7. Installation Figure 29:
- Page 84 and 85:
Section 7. Installation with the la
- Page 86 and 87:
Section 7. Installation Note Table
- Page 88 and 89:
Section 7. Installation Figure 31:
- Page 90 and 91:
Section 7. Installation grounds ( )
- Page 92 and 93:
Section 7. Installation Figure 33:
- Page 94 and 95:
Section 7. Installation Note Beginn
- Page 96 and 97:
Section 7. Installation Program Sen
- Page 98 and 99:
Section 7. Installation Figure 38:
- Page 100 and 101:
Section 7. Installation • Beacon
- Page 102 and 103:
Section 7. Installation • Files M
- Page 104 and 105:
Section 7. Installation Campbell Sc
- Page 106 and 107:
Section 7. Installation '
- Page 108 and 109:
Section 7. Installation • It does
- Page 110 and 111:
Section 7. Installation 7.7.1.2.1 I
- Page 112 and 113:
Section 7. Installation 7.7.3 Synta
- Page 114 and 115:
Section 7. Installation 'Define pub
- Page 116 and 117:
Section 7. Installation variables c
- Page 118 and 119:
Section 7. Installation BeginProg S
- Page 120 and 121:
Section 7. Installation Table 10. D
- Page 122 and 123:
Section 7. Installation Variable In
- Page 124 and 125:
Section 7. Installation Table 11. P
- Page 126 and 127:
Section 7. Installation • name of
- Page 128 and 129:
Section 7. Installation 'Define Dat
- Page 130 and 131:
Section 7. Installation lapse occur
- Page 132 and 133:
Section 7. Installation 7.7.3.5.2 S
- Page 134 and 135:
Section 7. Installation the sequenc
- Page 136 and 137:
Section 7. Installation Table 17. P
- Page 138 and 139:
Section 7. Installation measurement
- Page 140 and 141:
Section 7. Installation PanelTemp i
- Page 142 and 143:
Section 7. Installation CRBasic Exa
- Page 144 and 145:
Section 7. Installation BeginProg F
- Page 146 and 147:
Section 7. Installation TRUE is saf
- Page 148 and 149:
Section 7. Installation 'Program Be
- Page 150 and 151:
Section 7. Installation 7.7.3.11 Sy
- Page 152 and 153:
Section 7. Installation 7.8.1.3 Cal
- Page 154 and 155:
Section 7. Installation "offset" =
- Page 156 and 157:
Section 7. Installation Table 23. C
- Page 158 and 159:
Section 7. Installation Calibration
- Page 160 and 161:
Section 7. Installation 4. When var
- Page 162 and 163:
Section 7. Installation Scan(100,mS
- Page 164 and 165:
Section 7. Installation CRBasic Exa
- Page 166 and 167:
Section 7. Installation Figure 52:
- Page 168 and 169:
Section 7. Installation Figure 54:
- Page 170 and 171:
Section 7. Installation CRBasic Exa
- Page 172 and 173:
Section 7. Installation 7.8.2.9 Mic
- Page 174 and 175:
Section 7. Installation 7.8.3.1.1 S
- Page 176 and 177:
Section 7. Installation Serial numb
- Page 178 and 179:
Section 7. Installation is programm
- Page 180 and 181:
Section 7. Installation Scan(5,Sec,
- Page 182 and 183:
Section 7. Installation Else 'C!/C
- Page 184 and 185:
Section 7. Installation CRBasic Exa
- Page 186 and 187:
Section 7. Installation Example: Pr
- Page 188 and 189:
Section 7. Installation 'Global var
- Page 190 and 191:
Section 7. Installation Standard de
- Page 192 and 193:
Section 7. Installation Standard De
- Page 194 and 195:
Section 7. Installation SubMenu() /
- Page 196 and 197:
Section 7. Installation Figure 67:
- Page 198 and 199:
Section 7. Installation 'Measure Tw
- Page 200 and 201:
Section 7. Installation #ElseIf Log
- Page 202 and 203:
Section 7. Installation 7.8.8.2 I/O
- Page 204 and 205:
Section 7. Installation Marks and S
- Page 206 and 207:
Section 7. Installation • Buffer-
- Page 208 and 209:
Section 7. Installation 7.8.8.5.3 O
- Page 210 and 211:
Section 7. Installation • String
- Page 212 and 213:
Section 7. Installation Figure 69:
- Page 214 and 215:
Section 7. Installation 7.8.8.6.2 C
- Page 216 and 217:
Section 7. Installation 'One Minute
- Page 218 and 219:
Section 7. Installation Case Is < 1
- Page 220 and 221:
Section 7. Installation 7.8.8.7 Q &
- Page 222 and 223:
Section 7. Installation A: A common
- Page 224 and 225:
Section 7. Installation produce a t
- Page 226 and 227:
Section 7. Installation 'Declaratio
- Page 228 and 229:
Section 7. Installation Variable al
- Page 230 and 231:
Section 7. Installation 'If bit in
- Page 232 and 233:
Section 7. Installation Table 32. T
- Page 234 and 235:
Section 7. Installation 7.8.12.2.1
- Page 236 and 237:
200 Section 7. Installation Table 3
- Page 238 and 239:
Section 7. Installation Table 39. S
- Page 240 and 241:
Section 7. Installation 7.8.13.7 Fo
- Page 242 and 243:
Section 7. Installation 7.8.16 Prog
- Page 244 and 245:
Section 7. Installation 'Declare Pu
- Page 246 and 247:
Section 7. Installation 'Count how
- Page 248 and 249:
Section 7. Installation 'Declare Va
- Page 250 and 251:
Section 7. Installation EndIf EndPr
- Page 252 and 253:
Section 7. Installation 'Declare Un
- Page 254 and 255:
Section 7. Installation non-standar
- Page 256 and 257:
Section 7. Installation Table 47. P
- Page 258 and 259:
Section 7. Installation Figure PT10
- Page 260 and 261:
Section 7. Installation Example PRT
- Page 262 and 263:
Section 7. Installation where, V S
- Page 264 and 265:
Section 7. Installation where X N i
- Page 266 and 267:
Section 7. Installation Figure 84:
- Page 268 and 269:
Section 7. Installation CRBasic Exa
- Page 270 and 271:
Section 7. Installation • better
- Page 272 and 273:
Section 7. Installation 272
- Page 274 and 275:
Section 8. Operation basic code req
- Page 276 and 277:
Section 8. Operation is reduced to
- Page 278 and 279:
Section 8. Operation Table 51. CRBa
- Page 280 and 281:
Section 8. Operation 8.1.2.5 Voltag
- Page 282 and 283:
Section 8. Operation 8.1.2.6 Offset
- Page 284 and 285:
Section 8. Operation duration. Cons
- Page 286 and 287:
Section 8. Operation Table 56. ac N
- Page 288 and 289:
Section 8. Operation steady-state c
- Page 290 and 291:
Section 8. Operation Unless a Calib
- Page 292 and 293:
Section 8. Operation Table 59. Stat
- Page 294 and 295:
Section 8. Operation Table 60. Cali
- Page 296 and 297:
Section 8. Operation Table 61. Resi
- Page 298 and 299:
Section 8. Operation Other sensors,
- Page 300 and 301:
Section 8. Operation 8.1.3.3 Strain
- Page 302 and 303:
Section 8. Operation reference junc
- Page 304 and 305:
Section 8. Operation Figure 93: Pan
- Page 306 and 307:
Section 8. Operation Resolution (p.
- Page 308 and 309:
Section 8. Operation Error Calculat
- Page 310 and 311:
Section 8. Operation Table 66. Limi
- Page 312 and 313:
Section 8. Operation greater than t
- Page 314 and 315:
Section 8. Operation 8.1.5.1 Pulse-
- Page 316 and 317:
Section 8. Operation 8.1.5.2.1 High
- Page 318 and 319:
Section 8. Operation Using a pull-u
- Page 320 and 321:
Section 8. Operation 8.1.5.4 Pulse
- Page 322 and 323:
Section 8. Operation 8.1.5.4.3 Swit
- Page 324 and 325:
Section 8. Operation Figure 103: Ci
- Page 326 and 327:
Section 8. Operation each CR1000 ca
- Page 328 and 329:
Section 8. Operation Figure 105: Co
- Page 330 and 331:
Section 8. Operation cutting the ou
- Page 332 and 333:
Section 8. Operation Table 76. CR10
- Page 334 and 335:
Section 8. Operation Note Placing a
- Page 336 and 337:
Section 8. Operation Table 78. Tabl
- Page 338 and 339:
Section 8. Operation Example: "sign
- Page 340 and 341:
Section 8. Operation 8.3.3.2 Progra
- Page 342 and 343:
Section 8. Operation Table 79. File
- Page 344 and 345:
Section 8. Operation Power-up funct
- Page 346 and 347:
' Section 8. Operation • Command
- Page 348 and 349:
Section 8. Operation Table 82. File
- Page 350 and 351:
Section 8. Operation Digital Displa
- Page 352 and 353:
Section 8. Operation 8.5.2.1 Router
- Page 354 and 355:
Section 8. Operation 8.5.3.1 Hello-
- Page 356 and 357:
Section 8. Operation 8.5.4.2 Ping L
- Page 358 and 359:
Section 8. Operation Figure 111: Co
- Page 360 and 361:
Section 8. Operation Figure 114: De
- Page 362 and 363:
Section 8. Operation Figure 116: Lo
- Page 364 and 365:
Section 8. Operation Note Setting t
- Page 366 and 367:
Section 8. Operation Syntax DNPUpda
- Page 368 and 369:
Section 8. Operation 8.6.2.2 Termin
- Page 370 and 371:
Section 8. Operation Syntax MoveByt
- Page 372 and 373:
Section 8. Operation Scan(1,Sec,0,0
- Page 374 and 375:
Section 8. Operation Table 91. API
- Page 376 and 377:
Section 8. Operation Table 92. Brow
- Page 378 and 379:
Section 8. Operation BallastLinedl:
- Page 380 and 381:
Section 8. Operation Table 94. Data
- Page 382 and 383:
Section 8. Operation 2012-08-21 22
- Page 384 and 385:
Section 8. Operation "2012-05-03 19
- Page 386 and 387:
Section 8. Operation SetValueEx Res
- Page 388 and 389:
Section 8. Operation ClockSet Respo
- Page 390 and 391:
Section 8. Operation time descripti
- Page 392 and 393:
Section 8. Operation 8.6.3.7.2 File
- Page 394 and 395:
Section 8. Operation FileControl Re
- Page 396 and 397:
Section 8. Operation HTML page sour
- Page 398 and 399:
Section 8. Operation 8.6.3.7.4 Newe
- Page 400 and 401:
Section 8. Operation Table 107. Spe
- Page 402 and 403:
Section 8. Operation 8.8.1 Data Dis
- Page 404 and 405:
Section 8. Operation Figure 121: Re
- Page 406 and 407:
Section 8. Operation 8.8.2 Run/Stop
- Page 408 and 409:
Section 8. Operation Figure 125: Fi
- Page 410 and 411:
Section 8. Operation Figure 127: Po
- Page 412 and 413:
Section 8. Operation A: Compressing
- Page 414 and 415:
Section 8. Operation 8.10 CF Cards
- Page 417 and 418:
Section 9. Maintenance 9.1 Moisture
- Page 419 and 420:
Section 9. Maintenance Figure 131:
- Page 421 and 422:
Section 9. Maintenance For all retu
- Page 423 and 424:
Section 10. Troubleshooting 10.1 St
- Page 425 and 426:
Section 10. Troubleshooting Table 1
- Page 427 and 428:
Section 10. Troubleshooting 10.3.1.
- Page 429 and 430:
Section 10. Troubleshooting 10.3.4.
- Page 431 and 432:
Section 10. Troubleshooting CRBasic
- Page 433 and 434:
Section 10. Troubleshooting mid = (
- Page 435 and 436:
Section 10. Troubleshooting 10.5 Po
- Page 437 and 438:
Section 10. Troubleshooting Battery
- Page 439 and 440:
Section 10. Troubleshooting 10.5.3.
- Page 441 and 442:
Section 10. Troubleshooting Adjusti
- Page 443 and 444:
Section 10. Troubleshooting As show
- Page 445 and 446:
Section 10. Troubleshooting Figure
- Page 447 and 448:
Section 11. Glossary 11.1 Terms ac
- Page 449 and 450:
Section 11. Glossary Cache Data The
- Page 451 and 452:
Section 11. Glossary CR10X Older ge
- Page 453 and 454:
Section 11. Glossary dimension To c
- Page 455 and 456:
Section 11. Glossary FLOAT Four‐b
- Page 457 and 458:
Section 11. Glossary integer A numb
- Page 459 and 460:
Section 11. Glossary MSB Most signi
- Page 461 and 462:
Section 11. Glossary output interva
- Page 463 and 464:
Section 11. Glossary Public A CRBas
- Page 465 and 466:
Section 11. Glossary Seebeck Effect
- Page 467 and 468:
Section 11. Glossary Station Status
- Page 469 and 470:
Section 11. Glossary terminal emula
- Page 471 and 472:
Section 11. Glossary watchdog timer
- Page 473 and 474:
Appendix A. CRBasic Programming Ins
- Page 475 and 476:
Appendix A. CRBasic Programming Ins
- Page 477 and 478:
Appendix A. CRBasic Programming Ins
- Page 479 and 480:
Appendix A. CRBasic Programming Ins
- Page 481 and 482:
Appendix A. CRBasic Programming Ins
- Page 483 and 484:
Appendix A. CRBasic Programming Ins
- Page 485 and 486:
Appendix A. CRBasic Programming Ins
- Page 487 and 488:
Appendix A. CRBasic Programming Ins
- Page 489 and 490:
Appendix A. CRBasic Programming Ins
- Page 491 and 492:
Appendix A. CRBasic Programming Ins
- Page 493 and 494:
Appendix A. CRBasic Programming Ins
- Page 495 and 496:
Appendix A. CRBasic Programming Ins
- Page 497 and 498:
Appendix A. CRBasic Programming Ins
- Page 499 and 500:
Appendix A. CRBasic Programming Ins
- Page 501 and 502:
Appendix A. CRBasic Programming Ins
- Page 503 and 504:
Appendix A. CRBasic Programming Ins
- Page 505 and 506:
Appendix A. CRBasic Programming Ins
- Page 507 and 508:
Appendix A. CRBasic Programming Ins
- Page 509 and 510:
Appendix A. CRBasic Programming Ins
- Page 511 and 512:
Appendix A. CRBasic Programming Ins
- Page 513 and 514:
Appendix A. CRBasic Programming Ins
- Page 515 and 516:
Appendix A. CRBasic Programming Ins
- Page 517 and 518:
Appendix A. CRBasic Programming Ins
- Page 519 and 520:
Appendix A. CRBasic Programming Ins
- Page 521 and 522:
Appendix A. CRBasic Programming Ins
- Page 523 and 524:
Appendix A. CRBasic Programming Ins
- Page 525 and 526:
Appendix A. CRBasic Programming Ins
- Page 527 and 528:
Appendix B. Status Table and Settin
- Page 529 and 530:
Appendix B. Status Table and Settin
- Page 531 and 532:
Appendix B. Status Table and Settin
- Page 533 and 534:
Appendix B. Status Table and Settin
- Page 535 and 536:
Appendix B. Status Table and Settin
- Page 537 and 538:
Appendix B. Status Table and Settin
- Page 539 and 540:
Appendix B. Status Table and Settin
- Page 541 and 542:
Appendix B. Status Table and Settin
- Page 543 and 544:
Appendix B. Status Table and Settin
- Page 545 and 546:
Appendix B. Status Table and Settin
- Page 547 and 548:
Appendix B. Status Table and Settin
- Page 549 and 550:
Appendix C. Serial Port Pinouts C.1
- Page 551 and 552:
Appendix C. Serial Port Pinouts Tab
- Page 553 and 554:
Appendix D. ASCII / ANSI Table Amer
- Page 555 and 556:
Appendix D. ASCII / ANSI Table Dec
- Page 557 and 558:
Appendix E. FP2 Data Format FP2 dat
- Page 559 and 560:
Appendix F. Other Campbell Scientif
- Page 561 and 562:
Appendix F. Other Campbell Scientif
- Page 563 and 564:
Appendix F. Other Campbell Scientif
- Page 565 and 566:
Appendix F. Other Campbell Scientif
- Page 567 and 568:
Appendix F. Other Campbell Scientif
- Page 569 and 570:
Appendix F. Other Campbell Scientif
- Page 571 and 572:
Appendix F. Other Campbell Scientif
- Page 573 and 574:
Index 1 12V Terminal...............
- Page 575 and 576:
Index Communications Memory Errors
- Page 577 and 578:
Index Expression...................
- Page 579 and 580:
Index IP Information...............
- Page 581 and 582:
Index PanelTemp....................
- Page 583 and 584:
Index Runtime Errors...............
- Page 585 and 586:
Index TCDiff ......................
- Page 588:
Campbell Scientific Companies Campb


