IC-M323 Manual - Icom UK
IC-M323 Manual - Icom UK IC-M323 Manual - Icom UK
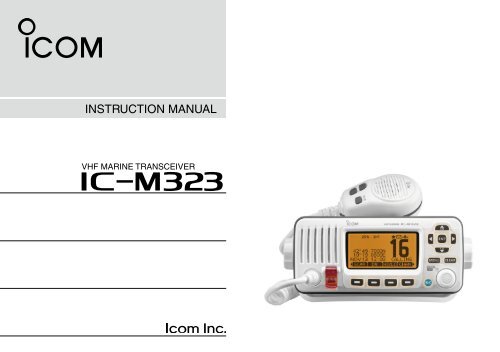
INSTRUCTION MANUAL VHF MARINE TRANSCEIVER iM323
- Page 2 and 3: FOREWORD Thank you for purchasing t
- Page 4 and 5: PRECAUTIONS RWARNING! NEVER connect
- Page 6 and 7: TABLE OF CONTENTS (Continued) ■
- Page 8 and 9: 2 PANEL DESCRIPTION ■■Front pan
- Page 10 and 11: 2 PANEL DESCRIPTION ■■Function
- Page 12 and 13: 2 PANEL DESCRIPTION ■■Microphon
- Page 14 and 15: 3 PREPARATION ■ ■ATIS code prog
- Page 16 and 17: 4 BASIC OPERATION DDChannel group s
- Page 18 and 19: 4 BASIC OPERATION ■■Call channe
- Page 20 and 21: 4 BASIC OPERATION ■■Adjusting t
- Page 22 and 23: 5 SCAN OPERATION ■■Scan types S
- Page 24 and 25: 6 DUALWATCH/TRI-WATCH ■■Descrip
- Page 26 and 27: 7 DSC OPERATION DDProgramming Group
- Page 28 and 29: 7 DSC OPERATION ■■Position and
- Page 30 and 31: 7 DSC OPERATION DDRegular call The
- Page 32 and 33: 7 DSC OPERATION DDDistress cancel c
- Page 34 and 35: 7 DSC OPERATION DD Transmitting an
- Page 36 and 37: 7 DSC OPERATION DDTransmitting an I
- Page 38 and 39: 7 DSC OPERATION DDTransmitting a Gr
- Page 40 and 41: 7 DSC OPERATION DDTransmitting an A
- Page 42 and 43: 7 DSC OPERATION DD Transmitting a T
- Page 44 and 45: 7 DSC OPERATION DD Transmitting a T
- Page 46 and 47: 7 DSC OPERATION DD Transmitting a P
- Page 48 and 49: 7 DSC OPERATION DD Transmitting a P
- Page 50 and 51: 7 DSC OPERATION Manual Reply: qqEnt
INSTRUCTION MANUAL<br />
VHF MARINE TRANSCEIVER<br />
i<strong>M323</strong>
FOREWORD<br />
Thank you for purchasing this <strong>Icom</strong> product. The <strong>IC</strong>-<strong>M323</strong><br />
vhf marine transceiver is designed and built with <strong>Icom</strong>’s<br />
state of the art technology and craftsmanship. With proper<br />
care, this product should provide you with years of troublefree<br />
operation.<br />
We appreciate you making the <strong>IC</strong>-<strong>M323</strong> your radio of choice,<br />
and hope you agree with <strong>Icom</strong>’s philosophy of “technology<br />
first.” Many hours of research and development went into the<br />
de sign of your <strong>IC</strong>-<strong>M323</strong>.<br />
DDFEATURES<br />
❍ Simple operation with large keys<br />
❍ Easy to hear speaker<br />
❍ Built-in DSC meets ITU Class D requirement<br />
❍ Rugged waterproof construction<br />
❍ Easy to make an individual DSC calls using the<br />
optional MA-500TR Class B AIS Transponder<br />
IMPORTANT<br />
READ ALL INSTRUCTIONS carefully and completely<br />
before using the transceiver.<br />
SAVE THIS INSTRUCTION MANUAL — This instruction<br />
manual contains important operating instructions<br />
for the <strong>IC</strong>-<strong>M323</strong>.<br />
EXPL<strong>IC</strong>IT DEFINITIONS<br />
WORD<br />
RWARNING!<br />
CAUTION<br />
NOTE<br />
DEFINITION<br />
Personal injury, fire hazard or electric<br />
shock may occur.<br />
Equipment damage may occur.<br />
If disregarded, inconvenience only. No risk<br />
of personal injury, fire or electric shock.<br />
CLEAN THE TRANSCEIVER AND M<strong>IC</strong>ROPHONE THOR-<br />
OUGHLY WITH FRESH WATER after exposure to water<br />
including salt, otherwise, the keys and switch may become<br />
inoperable due to salt crystallization.<br />
i
IN CASE OF EMERGENCY<br />
If your vessel requires assistance, contact other vessels and<br />
the Coast Guard by sending a Distress call on Channel 16.<br />
USING CHANNEL 16<br />
DISTRESS CALL PROCEDURE<br />
1. “MAYDAY MAYDAY MAYDAY.”<br />
2. “THIS IS ...............” (name of vessel).<br />
3. Say your call sign or other description of the vessel (AND<br />
9 digit DSC ID if you have one).<br />
4. “LOCATED AT ...............” (your position).<br />
5. State the nature of the distress and assistance required.<br />
6. Give any other information which might facilitate the rescue.<br />
Or, transmit your Distress call using digital selective calling<br />
on Channel 70.<br />
USING DIGITAL SELECTIVE CALLING (Ch 70)<br />
DISTRESS CALL PROCEDURE<br />
1. While lifting up the key cover, hold down [DISTRESS]<br />
for 3 seconds until you hear 3 short beeps and then one<br />
long beep.<br />
2. Wait for an acknowledgment on Channel 70 from a coast<br />
station.<br />
• After the acknowledgement is received, Channel 16 is automatically<br />
selected.<br />
3. Hold down [PTT], then transmit the appropriate information<br />
as listed above.<br />
INSTALLATION NOTE<br />
The installation of this equipment should be made in such a<br />
manner as to respect the EC recommended electromagnetic<br />
field exposure limits (1999/519/EC).<br />
The maximum RF power available from this device is 25 watts.<br />
The antenna should be installed as high as possible for maximum<br />
efficiency and that this installation height should be at<br />
least 5 meters above ground (or accessible) level. In the case<br />
where an antenna cannot be installed at a reasonable height,<br />
then the transmitter should neither be continuously operated for<br />
long periods if any person is within 5 meters of the antenna, nor<br />
operated at all if any person is touching the antenna.<br />
In all cases any possible risk depends on the transmitter being<br />
activated for long periods. (actual recommendation limits are<br />
specified as an average of 6 minutes) Normally the transmitter<br />
is not active for long periods of time. Some radio licenses<br />
will require that a timer circuit automatically cuts the transmitter<br />
after 1–2 minutes etc.<br />
Similarly some types of transmitter, SSB, CW, AM, etc. have<br />
a lower ‘average’ output power and the perceived risk is even<br />
lower.<br />
ii
PRECAUTIONS<br />
RWARNING! NEVER connect the transceiver to an AC<br />
outlet. This may pose a fire hazard or result in an electric shock.<br />
RWARNING! NEVER connect the transceiver to a power<br />
source of more than 16 V DC or use reverse polarity. This<br />
will ruin the transceiver.<br />
RWARNING! NEVER cut the DC power cable between<br />
the DC plug at the back of the transceiver and fuse holder. If<br />
an incorrect connection is made after cutting, the transceiver<br />
may be damaged.<br />
CAUTION: NEVER place the transceiver where normal<br />
operation of the vessel may be hindered or where it could<br />
cause bodily injury.<br />
KEEP the transceiver and microphone at least 1 m away<br />
from the vessel’s magnetic navigation compass.<br />
DO NOT use or place the transceiver in areas with temperatures<br />
below –20°C or above +60°C or, in areas subject to<br />
direct sunlight, such as the dashboard.<br />
DO NOT use harsh solvents such as benzine or alcohol to<br />
clean the transceiver, as they will damage the transceiver’s<br />
surfaces. If the transceiver becomes dusty or dirty, wipe it<br />
clean with a soft, dry cloth.<br />
DO NOT disassemble or modify the transceiver for any reason.<br />
BE CAREFUL! The transceiver rear panel will become<br />
hot when operating continuously for long periods of time.<br />
Place the transceiver in a secure place to avoid inadvertent<br />
use by children.<br />
BE CAREFUL! The transceiver meets IPX7 requirements<br />
for waterproof protection. However, once the transceiver has<br />
been dropped, waterproof protection cannot be guaranteed<br />
because of possible damage to the transceiver’s case or the<br />
waterproof seal.<br />
* Except for the DC power connector, NMEA In/Out leads and AF<br />
Out leads.<br />
iii<br />
<strong>Icom</strong>, <strong>Icom</strong> Inc. and the <strong>Icom</strong> logo are registered trademarks of <strong>Icom</strong> Incorporated<br />
(Japan) in Japan, the United States, the United Kingdom, Germany,<br />
France, Spain, Russia and/or other countries.
COUNTRY CODE LIST<br />
• ISO 3166-1<br />
1<br />
2<br />
3<br />
4<br />
5<br />
6<br />
7<br />
8<br />
9<br />
10<br />
11<br />
12<br />
13<br />
14<br />
15<br />
16<br />
17<br />
Country Codes Country Codes<br />
Austria<br />
Belgium<br />
Bulgaria<br />
Croatia<br />
Czech Republic<br />
Cyprus<br />
Denmark<br />
Estonia<br />
Finland<br />
France<br />
Germany<br />
Greece<br />
Hungary<br />
Iceland<br />
Ireland<br />
Italy<br />
Latvia<br />
AT<br />
BE<br />
BG<br />
HR<br />
CZ<br />
CY<br />
DK<br />
EE<br />
FI<br />
FR<br />
DE<br />
GR<br />
HU<br />
IS<br />
IE<br />
IT<br />
LV<br />
18<br />
19<br />
20<br />
21<br />
22<br />
23<br />
24<br />
25<br />
26<br />
27<br />
28<br />
29<br />
30<br />
31<br />
32<br />
33<br />
Liechtenstein<br />
Lithuania<br />
Luxembourg<br />
Malta<br />
Netherlands<br />
Norway<br />
Poland<br />
Portugal<br />
Romania<br />
Slovakia<br />
Slovenia<br />
Spain<br />
Sweden<br />
Switzerland<br />
Turkey<br />
United Kingdom<br />
LI<br />
LT<br />
LU<br />
MT<br />
NL<br />
NO<br />
PL<br />
PT<br />
RO<br />
SK<br />
SI<br />
ES<br />
SE<br />
CH<br />
TR<br />
GB<br />
TABLE OF CONTENTS<br />
FOREWORD.......................................................................... i<br />
IMPORTANT.......................................................................... i<br />
EXPL<strong>IC</strong>IT DEFINITIONS....................................................... i<br />
IN CASE OF EMERGENCY.................................................. ii<br />
INSTALLATION NOTE........................................................... ii<br />
PRECAUTIONS................................................................... iii<br />
COUNTRY CODE LIST........................................................ iv<br />
TABLE OF CONTENTS....................................................... iv<br />
1 OPERATING RULES.......................................................1<br />
2 PANEL DESCRIPTION................................................2–6<br />
■ ■Front panel....................................................................2<br />
■ ■Function display............................................................4<br />
■ ■Microphone...................................................................6<br />
■ ■Softkey function............................................................6<br />
3 PREPARATION............................................................7–8<br />
■ ■MMSI code programming.............................................7<br />
■ ■ATIS code programming (For Dutch version transceivers).8<br />
4 BAS<strong>IC</strong> OPERATION..................................................9–15<br />
■ ■Channel selection.........................................................9<br />
■ ■Receiving and transmitting.........................................11<br />
■ ■Call channel programming..........................................12<br />
■ ■Channel name programming......................................12<br />
■ ■Microphone Lock function...........................................13<br />
1<br />
2<br />
3<br />
4<br />
5<br />
6<br />
7<br />
8<br />
9<br />
10<br />
11<br />
12<br />
13<br />
14<br />
15<br />
16<br />
iv
TABLE OF CONTENTS (Continued)<br />
■ ■Adjusting the volume level..........................................14<br />
■ ■Adjusting the squelch level.........................................14<br />
■ ■Adjusting the display backlight level...........................15<br />
■ ■AquaQuake water draining function............................15<br />
5 SCAN OPERATION.................................................16–17<br />
■ ■Scan types..................................................................16<br />
■ ■Setting Favorite channels...........................................17<br />
■ ■Starting a scan...........................................................17<br />
6 DUALWATCH/TRI-WATCH............................................18<br />
■ ■Description..................................................................18<br />
■ ■Operation....................................................................18<br />
7 DSC OPERATION....................................................19–65<br />
■ ■DSC address ID .........................................................19<br />
■ ■Position and time programming..................................22<br />
■ ■Distress call................................................................23<br />
■ ■Transmitting DSC calls...............................................27<br />
■ ■Receiving DSC calls...................................................45<br />
■■Transmitted Call log....................................................57<br />
■■Received Call log........................................................58<br />
■ ■DSC Settings..............................................................60<br />
■ ■Making an Individual call using an AIS transponder...64<br />
8 MENU SCREEN OPERATION.................................66–71<br />
■ ■Menu screen operation...............................................66<br />
■ ■Menu screen items.....................................................67<br />
■ ■Radio Settings items...................................................68<br />
■ ■Configuration items.....................................................69<br />
9 CONNECTIONS AND MAINTENANCE...................72–76<br />
■ ■Connections................................................................72<br />
■ ■Antenna......................................................................74<br />
■ ■Fuse replacement.......................................................74<br />
■ ■Cleaning.....................................................................74<br />
■ ■Supplied accessories..................................................74<br />
■ ■Mounting the transceiver............................................75<br />
■ ■MB-132 installation.....................................................76<br />
10 SPECIF<strong>IC</strong>ATIONS AND OPTIONS..........................77–78<br />
■ ■Specifications.............................................................77<br />
■ ■Options.......................................................................78<br />
11 CHANNEL LIST.......................................................79–80<br />
12 TEMPLATE...............................................................81–82<br />
13 TROUBLE SHOOTING..................................................83<br />
v
OPERATING RULES<br />
1<br />
DDPriorities<br />
• Read all rules and regulations pertaining to call priorities,<br />
and keep an up-to-date copy handy. Safety and distress<br />
calls take priority over all others.<br />
• You must monitor Channel 16 when you are not operating<br />
on another channel.<br />
• False or fraudulent distress calls are prohibited under law.<br />
DDPrivacy<br />
• Information overheard, but not intended for you, cannot lawfully<br />
be used in any way.<br />
• Indecent or profane language is prohibited.<br />
DDRadio licenses<br />
(1) SHIP STATION L<strong>IC</strong>ENSE<br />
You may require a current radio station license before using<br />
the transceiver. It is unlawful to operate a ship station which is<br />
not licensed, but required to be.<br />
If required, contact your dealer or the appropriate government<br />
agency for a Ship-Radiotelephone license application.<br />
This government-issued license states the call sign which is<br />
your craft’s identification for radio purposes.<br />
(2) OPERATOR’S L<strong>IC</strong>ENSE<br />
A Restricted Radiotelephone Operator Permit is the license<br />
most often held by small vessel radio operators when a radio<br />
is not required for safety purposes.<br />
If required, the Restricted Radiotelephone Operator Permit<br />
must be posted or kept with the operator. If required, only a<br />
licensed radio operator may operate a transceiver.<br />
However, non-licensed individuals may talk over a transceiver<br />
if a licensed operator starts, supervises, ends the call and<br />
makes the necessary log entries.<br />
A current copy of the applicable government rules and regulations<br />
is only required to be on hand for vessels in which<br />
a radio telephone is compulsory. However, even if you are<br />
not required to have these on hand it is your responsibility to<br />
be thoroughly acquainted with all pertinent rules and regulations.<br />
1<br />
2<br />
3<br />
4<br />
5<br />
6<br />
7<br />
8<br />
9<br />
10<br />
11<br />
12<br />
13<br />
14<br />
15<br />
16<br />
1
2<br />
PANEL DESCRIPTION<br />
■■Front panel<br />
Speaker<br />
q Function display (p. 4)<br />
w<br />
e<br />
r<br />
r UP AND DOWN/CHANNEL SELECT KEYS [∫•CH]/[√•CH]<br />
➥➥ Push to select the operating channels, Menu items,<br />
Menu settings, and so on. (pp. 11, 66)<br />
➥➥ Push to check Favorite channels, change the scanning<br />
direction or manually resume a scan. (p. 17)<br />
q DISTRESS KEY [DISTRESS] (pp. 23, 24)<br />
Hold down for 3 seconds to transmit a Distress call.<br />
w ENTER KEY [ENT] (pp. 7, 10, 66)<br />
Push to set the input data, selected item, and so on.<br />
o<br />
e LEFT AND RIGHT KEYS [Ω]/[≈]<br />
➥➥ Push to switch to the previous or next key function that<br />
is assigned to the softkeys. (p. 6)<br />
➥➥ Push to select the desired character or number in the<br />
table while in the channel name, position, MMSI code<br />
programming mode, and so on. (pp. 7, 12, 22)<br />
i<br />
t<br />
y<br />
u<br />
t CLEAR KEY [CLEAR] (pp. 7, 12, 66)<br />
Push to cancel the entered data, or to return to the previous<br />
screen.<br />
y MENU KEY [MENU] (p. 66)<br />
Push to enter or exit the Menu screen.<br />
u VOLUME AND SQUELCH SWITCH/POWER SWITCH<br />
[VOL/SQL•PWR]<br />
➥➥ When the power is OFF, hold down for 1 second to turn<br />
ON power. (p. 11)<br />
➥➥ Hold down for 1 second to turn OFF power.<br />
➥➥ When the power is ON, push to enter the volume level<br />
adjustment mode.* (p. 14)<br />
• Each push of this switch toggles the mode between the volume<br />
level adjustment, squelch threshold level adjustment,<br />
operating channel selection and the LCD and key backlight<br />
brightness adjustment, if assigned.<br />
➥➥ Rotate to adjust the volume level.* (p. 14)<br />
*The desired function can be assigned in the Menu screen.<br />
2
PANEL DESCRIPTION<br />
2<br />
i CHANNEL 16/CALL CHANNEL KEY [16/C]<br />
➥➥ Push to select Channel 16. (p. 9)<br />
➥➥ Hold down for 1 second to select the Call channel. (p. 9)<br />
• “CALL” appears when the Call channel is selected.<br />
➥➥ Hold down for 3 seconds to enter Call channel programming<br />
mode when the Call channel is selected. (p. 12)<br />
o SOFTKEYS<br />
The desired functions as described below can be assigned<br />
in the Menu screen.<br />
Scan [ ] (p. 17)<br />
Push to start or stop a Normal or Priority scan.<br />
Dualwatch/Tri-watch [ ] (p. 18)<br />
➥➥ Push to start a Dualwatch or Tri-watch.<br />
➥➥ Push to stop a Dualwatch or Tri-watch when either is<br />
activated.<br />
High/Low [ ] (p. 11)<br />
Push to set the power to high or low.<br />
• Some channels are set to only low power.<br />
Channel [ ] (p. 9)<br />
Push to select a regular channel.<br />
AquaQuake [ ] (p. 15)<br />
While holding down, the AquaQuake function is activated<br />
to clear water away from the speaker grill.<br />
Favorite channel [ ] (p. 17)<br />
➥➥ Push to set or clear the displayed channel as a Favorite<br />
(Tag) channel.<br />
➥➥ Hold down for 3 seconds to clear or set all Favorite<br />
channels in the selected channel group.<br />
Name [ ] (p. 12)<br />
Push to enter the channel name programming mode.<br />
Backlight [ ] (p. 15)<br />
Push to enter the LCD and key backlight brightness adjustment<br />
mode.<br />
• While in the adjustment mode, push [∫]/[√]/[Ω]/[≈] or rotate Dial<br />
to adjust the brightness of the LCD and key backlight.<br />
Log [ ] (p. 58)<br />
Push to enter “RCVD CALL LOG” in the DSC CALLS menu.<br />
1<br />
2<br />
3<br />
4<br />
5<br />
6<br />
7<br />
8<br />
9<br />
10<br />
11<br />
12<br />
13<br />
14<br />
15<br />
16<br />
3
2 PANEL DESCRIPTION<br />
■■Function display<br />
!6<br />
!5<br />
!4<br />
!3<br />
q w e r t y u i<br />
q BUSY/TRANSMIT <strong>IC</strong>ON (p. 11)<br />
➥ ➥ “ ” appears when receiving a signal or when the<br />
squelch is open.<br />
➥ ➥ “ ” appears while transmitting.<br />
w POWER <strong>IC</strong>ON (p. 11)<br />
➥➥ “25W” appears when high power is selected.<br />
➥➥ “1W” appears when low power is selected.<br />
e CHANNEL GROUP <strong>IC</strong>ON (p. 10)<br />
Shows which channel group is selected, a U.S.A. “USA,”<br />
International “INT,” ATIS “ATIS” or DSC “DSC”, depending<br />
on the version.<br />
o<br />
!0<br />
!1<br />
!2<br />
r CALL CHANNEL <strong>IC</strong>ON (p. 9)<br />
Appears when the Call channel is selected.<br />
t DUPLEX <strong>IC</strong>ON (p. 10)<br />
Appears when a duplex channel is selected.<br />
y FAVORITE CHANNEL <strong>IC</strong>ON (p. 17)<br />
Appears when a Favorite (Tag) channel is selected.<br />
u MESSAGE <strong>IC</strong>ON (p. 58)<br />
Blinks when there is an unread DSC message.<br />
i GPS <strong>IC</strong>ON<br />
➥➥ Stays ON when the connected GPS receiver is activated<br />
and valid position data is received.<br />
➥➥ Blinks when invalid position data is being received.<br />
o SWITCH <strong>IC</strong>ON (p. 61)<br />
Appears when the “CH 16 SWITCH” in DSC Settings is set<br />
to ‘OFF.’<br />
!0 LOW BATTERY <strong>IC</strong>ON<br />
Blinks when the battery voltage drops to approximately<br />
10 V DC or less.<br />
!1 CHANNEL NUMBER READOUT<br />
Shows the selected operating channel number.<br />
• When a simplex channel is selected, “A” appears.<br />
!2 CHANNEL NAME FIELD<br />
The channel name appears, if programmed. (p. 12)<br />
4
PANEL DESCRIPTION<br />
2<br />
!3 KEY <strong>IC</strong>ON (p. 6)<br />
Shows the programmed function of the softkeys on the<br />
front panel.<br />
!4 TIME ZONE IND<strong>IC</strong>ATOR<br />
➥➥ Shows the current time when a GPS receiver is connected,<br />
or the time is manually programmed.<br />
• When the GPS current time is invalid, “” will blink every 2<br />
seconds instead of current time. After 23.5 hours has passed,<br />
“NO TIME” will appear.<br />
• “” will blink every 2 seconds instead of the current time,<br />
after 4 hours have passed from the time when the time was<br />
manually programmed. The manually programmed time is<br />
held for only 23.5 hours, and after that, “NO TIME” will appear.<br />
➥➥ “LOCAL” appears when the offset time is set.<br />
➥➥<br />
“MNL” appears when the time is manually programmed.<br />
➥➥<br />
“UTC” appears when the GGA, GLL and GNS GPS sentence<br />
format is included in the GPS signal.<br />
➥➥<br />
The date information appears when the RMC GPS sentence<br />
format is included in the GPS signal.<br />
➥➥ “NO TIME” appears when no GPS receiver is connected,<br />
and no time is manually input.<br />
!5 POSITION IND<strong>IC</strong>ATOR<br />
➥➥<br />
Shows the current position when a GPS receiver is<br />
connected, or the position is manually programmed.<br />
• When the GPS position is invalid, “” may blink every 2 seconds<br />
instead of position. The last position is held for only<br />
23.5 hours, and after that, “NO POSITION” will appear.<br />
• “” will blink every 2 seconds instead of position, after 4 hours<br />
have passed from the time when the position is manually programmed.<br />
The manually programmed position is held for only<br />
23.5 hours, and after that, “NO POSITION” will appear.<br />
➥ ➥ “NO POSITION” appears when no GPS receiver is<br />
connected, and no position is manually input.<br />
!6 SCAN IND<strong>IC</strong>ATOR<br />
➥➥ “SCAN 16” appears during a Priority scan; “SCAN” appears<br />
during a Normal scan. (p. 17)<br />
➥➥ “DUAL 16” appears during Dualwatch; “TRI 16” appears<br />
during Tri-watch. (p. 18)<br />
1<br />
2<br />
3<br />
4<br />
5<br />
6<br />
7<br />
8<br />
9<br />
10<br />
11<br />
12<br />
13<br />
14<br />
15<br />
16<br />
5
2 PANEL DESCRIPTION<br />
■■Microphone<br />
q<br />
w<br />
e<br />
Microphone<br />
■■Softkey function<br />
Various functions can be assigned to the softkeys.<br />
When the key function is assigned, the key icon is displayed<br />
above the softkey, as shown below.<br />
DDSoftkey function selection<br />
➥➥When “ Ω” or “≈” is displayed beside the key icon, pushing<br />
[Ω] or [≈] sequentially shows the previous or next key<br />
function that is assigned to the softkey.<br />
q PTT SWITCH [PTT]<br />
Hold down to transmit, release to receive. (p. 11)<br />
Push<br />
Push<br />
w CHANNEL UP/DOWN KEYS [Y]/[Z]<br />
➥➥ Push either key to check Favorite channels. (p. 11)<br />
➥➥ Push either key to change scanning direction or manually<br />
resumes a scan. (p. 17)<br />
e TRANSMIT POWER KEY [HI/LO]<br />
➥➥ Push to toggle the power high or low. (p. 11)<br />
• Some channels are set to only low power.<br />
➥➥ While holding down [HI/LO], turn ON the power to turn<br />
the Microphone Lock function ON or OFF. (p. 13)<br />
*<br />
*Push this key to start or stop scan.<br />
The order of the key icons may differ, depending on the<br />
preprogramming.<br />
6
PREPARATION<br />
3<br />
■■MMSI code programming<br />
The 9 digit MMSI (Maritime Mobile Service Identity: DSC self<br />
ID) code can be programmed at power ON.<br />
This initial code setting can be performed only once.<br />
After being set, it can be changed by only your dealer<br />
or distributor. If your MMSI code has already been programmed,<br />
this programming is not necessary.<br />
qqHold down [PWR](Dial) to turn ON the power.<br />
• Three short beeps sound, and “NO DSC MMSI” is displayed.<br />
wwPush [ENT] to start the MMSI code programming.<br />
• Push [CLEAR] twice to cancel the programming, and go to the<br />
normal operating screen. In this case, the transceiver cannot<br />
make a DSC call. To program the MMSI code, turn OFF the<br />
power, then turn it ON again.<br />
eeEnter your MMSI code in the following manner:<br />
• Select a desired number using Dial, or [∫]/[√]/[Ω]/[≈].<br />
• Push [ENT] or Dial to set it.<br />
• To move the cursor, select either arrow, “←” or “→,” then push<br />
[ENT] or Dial.<br />
rrRepeat step e to enter all 9 digits.<br />
ttAfter entering the 9 digit code, “FINISH” is automatically<br />
selected, and then push [ENT] or Dial to set it.<br />
yyThe “MMSI CONFIRMATION” screen is displayed.<br />
uuEnter your MMSI code again for confirmation.<br />
• Enter in the same manner as steps e through t.<br />
iiWhen your MMSI code programming is successfully completed,<br />
the screen as shown below is briefly displayed.<br />
• After that, the normal operating screen is displayed.<br />
The programmed MMSI code can be checked in the MENU<br />
screen. (p. 67)<br />
NOTE: Depending on the transceiver version, the ATIS<br />
code programming may be required after programming the<br />
MMSI code. See the next page for details.<br />
1<br />
2<br />
3<br />
4<br />
5<br />
6<br />
7<br />
8<br />
9<br />
10<br />
11<br />
12<br />
13<br />
14<br />
15<br />
16<br />
7
3 PREPARATION<br />
■ ■ATIS code programming (For Dutch version transceivers)<br />
The 10 digit ATIS (Automatic Transmitter Identification System)<br />
code can be programmed at power ON.<br />
This initial code setting can be performed only once.<br />
After being set, it can be changed by only your dealer<br />
or distributor. If your ATIS code has already been programmed,<br />
this programming is not necessary.<br />
qqAfter programming the MMSI code, “Push [ENT] to Register<br />
Your ATIS” is displayed.<br />
wwPush [ENT] to start the ATIS code programming.<br />
• Push [CLEAR] twice to cancel the programming, and go to the<br />
normal operating mode. In this case, the ATIS function is disabled.<br />
To program the ATIS code, turn OFF the power, then turn<br />
it ON again.<br />
eeEnter your ATIS code in the following manner:<br />
• Select a desired number using Dial, or [∫]/[√]/[Ω]/[≈].<br />
• Push [ENT] or Dial to set it.<br />
• To move the cursor, select either arrow, “←” or “→,” then push<br />
[ENT] or Dial.<br />
rrRepeat step e to enter all 10 digits.<br />
ttAfter entering the 10 digit code, “FINISH” is automatically<br />
selected, and then push [ENT] or Dial to set it.<br />
yyThe “ATIS CONFIRMATION” screen is displayed.<br />
uuEnter your ATIS code again for confirmation.<br />
• Enter in the same manner as steps e through t.<br />
iiWhen your ATIS code programming is successfully completed,<br />
the screen as shown below is briefly displayed.<br />
• After that, the normal operating screen is displayed.<br />
The programmed ATIS code can be checked in the MENU<br />
screen. (p. 67)<br />
8
BAS<strong>IC</strong> OPERATION<br />
4<br />
■■Channel selection<br />
DDChannel 16<br />
Channel 16 is the distress and safety channel. It is used for<br />
establishing initial contact with a station and for emergency<br />
communications. Channel 16 is monitored during both Dualwatch<br />
and Tri-watch. While standing by, you must monitor<br />
Channel 16.<br />
➥➥Push [16/C] to select Channel 16.<br />
➥➥Push [CHAN] to return to the screen displayed before you<br />
selected Channel 16, or push [∫](CH) or [√](CH) to select<br />
an operating channel.<br />
DDCall channel<br />
Each regular channel group has a separate leisure use Call<br />
channel. The Call channel is monitored during Tri-watch. The<br />
Call channels can be programmed, and are used to store<br />
your most often used channel in each channel group, for<br />
quick recall. (p. 12)<br />
➥➥Hold down [16/C] for 1 second to select the Call channel of<br />
the selected channel group.<br />
• “CALL” and the Call channel number appear.<br />
• Each channel group has an independent call channel after programming.<br />
(p. 12)<br />
➥➥Push [CHAN] to return to the screen displayed before you<br />
selected Call channel, or push [∫](CH) or [√](CH) to select<br />
an operating channel.<br />
1<br />
2<br />
3<br />
4<br />
5<br />
6<br />
7<br />
8<br />
9<br />
10<br />
11<br />
12<br />
13<br />
14<br />
15<br />
16<br />
9
4 BAS<strong>IC</strong> OPERATION<br />
DDChannel group selection<br />
There are preprogrammed international channels for the<br />
<strong>IC</strong>-<strong>M323</strong>. For U.K. version transceivers, there are preprogrammed<br />
U.S.A. channels in addition to International channels.<br />
In addition to the International channels, there are preprogrammed<br />
ATIS channels for the Dutch, and DSC channels<br />
for the German version transceivers.<br />
Except for the Europe version, you can select a channel group<br />
suitable for your operating area, as described below.<br />
qqPush [MENU].<br />
wwRotate Dial or push [ ∫]/[√] to select “Radio Settings,” and<br />
then push [ENT].<br />
eeRotate Dial or push [ ∫]/[√] to select “CHAN Group,” and<br />
then push [ENT].<br />
rrRotate Dial or push [ ∫]/[√] to select the desired channel<br />
group, and then push [ENT].<br />
• U.S.A., (USA) International (INT), ATIS or DSC* channel groups<br />
may be selected, depending on the version.<br />
ttPush [EXIT] to exit the Menu screen.<br />
yyPush [ ∫](CH) or [√](CH) to select a channel.<br />
• Pushing [Y]/[Z] on the microphone selects only Favorite channels.<br />
• “DUP” appears when a duplex channel is selected.<br />
• “A” appears when a simplex channel is selected.<br />
Channel group icon appears<br />
When the U.S.A. channel<br />
group is selected.<br />
10
BAS<strong>IC</strong> OPERATION<br />
4<br />
■■Receiving and transmitting<br />
CAUTION: Transmitting without an antenna will damage<br />
the transceiver.<br />
qqHold down [PWR](Dial) to turn ON the power.<br />
wwSet the audio and squelch levels. (p. 14)<br />
➥➥ First, open the squelch. Then, adjust the audio output<br />
level. After that, adjust the squelch level until the noise<br />
just disappears.<br />
eeChange the channel group. (p. 10)<br />
rrPush [ ∫](CH) or [√](CH) to select a channel. (pp. 9, 10)<br />
• Pushing [Y]/[Z] on the microphone also selects a channel.<br />
• When receiving a signal, “ ” appears and audio is heard.<br />
• Further adjustment of the volume level may be necessary.<br />
ttPush [HI/LO] to select the output power, if necessary.<br />
• Pushing [HI/LO] on the microphone also selects the output power.<br />
• “25W” appears when high power is selected, and “1W” appears<br />
when low power is selected.<br />
• Choose low power for short range communications, choose high<br />
power for longer distance communications.<br />
• Some channels are for only low power.<br />
yyHold down [PTT] to transmit, then speak at your normal<br />
voice level.<br />
• “ ” appears.<br />
• Channel 70 cannot be used for transmission other than DSC.<br />
uuRelease [PTT] to receive.<br />
IMPORTANT: To maximize the readability of your transmitted<br />
signal, pause a few seconds after pushing [PTT], hold<br />
the microphone 5 to 10 cm from your mouth and speak at<br />
a normal voice level.<br />
✓✓ NOTE for the TOT (Time-out Timer) function<br />
The TOT function inhibits continuous transmission beyond a<br />
preset time period after the transmission starts.<br />
10 seconds before transmission is cutoff, a beep sounds to<br />
indicate the transmission will be shut down and “TOT” appears<br />
in the channel name field. Transmission is not possible for 10<br />
seconds after this shut down.<br />
r<br />
t<br />
w q<br />
yu<br />
r<br />
Microphone<br />
t<br />
1<br />
2<br />
3<br />
4<br />
5<br />
6<br />
7<br />
8<br />
9<br />
10<br />
11<br />
12<br />
13<br />
14<br />
15<br />
16<br />
11
4 BAS<strong>IC</strong> OPERATION<br />
■■Call channel programming<br />
You can program the Call channel with your most often-used<br />
channel in each channel group for quick recall.<br />
qqSelect the desired channel group (INT, USA, ATIS or DSC)<br />
to be programmed. (p. 10)<br />
wwHold down [16/C] for 1 second to select the Call channel of<br />
the selected channel group.<br />
• “CALL” and the Call channel number appear.<br />
eeHold down [16/C] again for 3 seconds (until a long beep<br />
changes to 2 short beeps) to enter the Call channel programming<br />
mode.<br />
rrRotate Dial or push [ ∫](CH)/[√](CH) to select a channel.<br />
ttPush [ENT] to program the displayed channel as the Call<br />
channel.<br />
• Push [CLEAR] to cancel.<br />
■■Channel name programming<br />
Each channel can be assigned a unique alphanumeric ID of<br />
up to 10 characters.<br />
Capital letters, 0 to 9, some symbols (! " # $ % & ' ( ) * + , – .<br />
/ [ \ ] ^ _ : ; < = > ) and a space can be input.<br />
qqPush [ ∫](CH) or [√](CH) to select a channel.<br />
• First, cancel the Dualwatch, Tri-watch or Scan function, if activated.<br />
wwPush [NAME] to open the channel name programming<br />
screen.<br />
• A black box is displayed on the first character.<br />
eeEnter the desired channel name in the following manner:<br />
• Select a desired character using Dial, or [∫]/[√]/[Ω]/[≈].<br />
• Push [ENT] or Dial to set it.<br />
• To move the cursor, select either arrow, “←” or “→,” then push<br />
[ENT] or Dial.<br />
• Select “SPACE,” then push [ENT] to input a space.<br />
• Select “DELETE,” then push [ENT] to delete a character.<br />
• Push [CLEAR] to cancel and return to the previous screen.<br />
12
BAS<strong>IC</strong> OPERATION<br />
4<br />
rrRepeat step<br />
e to input all characters.<br />
ttPush [ Ω], [≈], [∫] or [√] to select “FINISH,” then push<br />
[ENT] to set the name and return to the previous screen.<br />
■■Microphone Lock function<br />
The Microphone Lock function electrically locks [∫], [√] and<br />
the [HI/LO] keys on the supplied microphone. This prevents<br />
accidental channel changes and function access.<br />
➥➥While holding down [HI/LO] on the microphone, hold down<br />
[PWR](Dial) to turn ON the transceiver and turn the Microphone<br />
Lock function ON or OFF.<br />
[Y]/[Z]<br />
[HI/LO]<br />
1<br />
2<br />
3<br />
4<br />
5<br />
6<br />
7<br />
8<br />
9<br />
10<br />
11<br />
12<br />
13<br />
14<br />
15<br />
16<br />
13
4 BAS<strong>IC</strong> OPERATION<br />
■■Adjusting the volume level<br />
The volume level can be adjusted with [VOL/SQL](Dial).<br />
qqRotate [VOL/SQL](Dial), or push [VOL/SQL](Dial) one or<br />
more times to display the volume adjustment screen.<br />
wwRotate [VOL/SQL](Dial) to adjust the volume level.<br />
• The transceiver has 20 volume levels and OFF.<br />
• If no key operation is performed for about 5 seconds, the transceiver<br />
sets the selected volume level, and returns to the normal<br />
mode.<br />
eePush [ENT] to set the level, and exit the volume adjustment<br />
mode.<br />
• Push [CLEAR] to cancel.<br />
■■Adjusting the squelch level<br />
The squelch level can be adjusted with [VOL/SQL](Dial).<br />
In order to receive signals properly, as well as for the scan<br />
to function effectively, the squelch must be adjusted to the<br />
proper level.<br />
qqPush [VOL/SQL](Dial) one or more times to display the<br />
squelch adjustment screen.<br />
wwRotate [VOL/SQL](Dial) to adjust the squelch level.<br />
• The transceiver has 11 squelch levels: OPEN is completely<br />
open; 10 is tight squelch; 1 is loose squelch.<br />
• If no key operation is performed for about 5 seconds, the transceiver<br />
sets the selected squelch level, and returns to the normal<br />
mode.<br />
eePush [ENT] to set the level, and exit the squelch adjustment<br />
mode.<br />
• Push [CLEAR] to cancel.<br />
The desired function can be assigned to Dial. See page 70<br />
for details.<br />
The desired function can be assigned to Dial. See page 70<br />
for details.<br />
14
BAS<strong>IC</strong> OPERATION<br />
4<br />
■■Adjusting the display<br />
backlight level<br />
The function display and keys can be backlit for better visibility<br />
under low light conditions.<br />
The backlight is adjustable in 7 levels and OFF.<br />
Depending on the preprogramming, the adjustment method<br />
differs, as described below.<br />
➥➥Push [BKLT] to show the backlight adjustment screen. Rotate<br />
Dial to adjust the brightness of the LCD and key backlight,<br />
and then, push [ENT].<br />
• If no key operation is performed for about 5 seconds, the transceiver<br />
sets the selected backlight level, and returns to the normal mode.<br />
When the Backlight function is assigned to the [VOL/<br />
SQL](Dial):<br />
qqPush [VOL/SQL](Dial) one or more times to display the<br />
backlight adjustment screen.<br />
wwRotate [VOL/SQL](Dial) to adjust the brightness of the<br />
LCD and key backlight, and then, push [ENT].<br />
■■AquaQuake water draining<br />
function<br />
The AquaQuake water draining function clears water away<br />
from the speaker grill. Without this function, water may muffle<br />
the sound coming from the speaker. A buzzing sound is heard<br />
when this function is activated.<br />
➥➥While holding down [AQUA], the AquaQuake function is<br />
activated to clear water away from the speaker grill.<br />
• While holding down [AQUA], a low buzzing sounds to drain water,<br />
regardless of the volume level setting.<br />
• The transceiver keys, except [DISTRESS], are disabled while<br />
the AquaQuake function is activated.<br />
When the AquaQuake function is activated.<br />
1<br />
2<br />
3<br />
4<br />
5<br />
6<br />
7<br />
8<br />
9<br />
10<br />
11<br />
12<br />
13<br />
14<br />
15<br />
16<br />
The desired function can be assigned to Dial. See page 70<br />
for details.<br />
15
5<br />
SCAN OPERATION<br />
■■Scan types<br />
Scanning is an efficient way to locate signals quickly over a<br />
wide frequency range. The transceiver has a Priority scan<br />
and a Normal scan.<br />
PRIORITY SCAN<br />
Set the Favorite channels (scanned channel) before scanning.<br />
Clear the Favorite channels which inconveniently stop<br />
scanning, such as those for digital communication use. (Refer<br />
to the next page for details.)<br />
Choose Priority or Normal scan in the Menu screen. (p. 68)<br />
CH 01<br />
CH 02<br />
NORMAL SCAN<br />
CH 06<br />
CH 16<br />
CH 03<br />
CH 01 CH 02<br />
CH 05 CH 04<br />
CH 06<br />
CH 03<br />
The Priority scan sequentially searches through all Favorite<br />
channels while monitoring Channel 16. When a signal is<br />
detected on Channel 16, the scan pauses until the signal<br />
disappears. When a signal is detected on a channel other<br />
than Channel 16, the scan becomes a Dualwatch until the<br />
signal disappears.<br />
CH 05 CH 04<br />
The Normal scan, like the Priority scan, sequentially<br />
searches through all Favorite channels. However, unlike<br />
the Priority scan, Channel 16 is not checked unless it is set<br />
as a Favorite channel.<br />
16
SCAN OPERATION<br />
5<br />
■■Setting Favorite channels<br />
For more efficient scanning, add desired channels as Favorite<br />
channels, or clear the Favorite on unwanted channels.<br />
Channels that are not tagged will be skipped while scanning.<br />
Favorite channels can be independently assigned to each<br />
channel group (INT, USA, ATIS or DSC).<br />
qqSelect the desired channel group. (p. 10)<br />
wwSelect the desired channel to be set as a Favorite channel.<br />
eePush [ ] to set the displayed channel as a Favorite channel.<br />
• “” appears on the display.<br />
rrTo cancel the Favorite channel setting, repeat step e.<br />
• “” disappears.<br />
✓✓ Clearing (or setting) all Favorite channels<br />
Hold down [] for 3 seconds (until a long beep changes to<br />
2 short beeps) to clear all Favorite channel settings in the<br />
selected channel group.<br />
• Repeat above procedure to set all channels as Favorite channels.<br />
[Example]: Starting a Normal scan.<br />
Push<br />
[SCAN]<br />
■■Starting a scan<br />
First, set the scan type (Priority or Normal scan) and scan<br />
resume timer in the Menu screen. (p. 68)<br />
qqSelect the desired channel group. (p. 10)<br />
wwSet the Favorite channels, as described to the left.<br />
eeMake sure the squelch is closed to start a scan.<br />
rrPush [SCAN] to start a Priority or Normal scan.<br />
• “SCAN 16” appears during a Priority scan; “SCAN” appears during<br />
a Normal scan.<br />
• When a signal is detected, the scan pauses until the signal disappears,<br />
or resumes after pausing 5 seconds, depending on the<br />
setting. (Channel 16 is still monitored during a Priority scan.)<br />
• Push [Y]/[Z] on either transceiver or microphone, to check the<br />
scanning Favorite channels, change the scanning direction or<br />
manually resume the scan.<br />
• A beep tone sounds and “16” blinks when a signal is received on<br />
Channel 16 during a Priority scan.<br />
ttTo stop the scan, push [CLEAR] or repeat step r.<br />
Scan starts.<br />
When a signal is received.<br />
1<br />
2<br />
3<br />
4<br />
5<br />
6<br />
7<br />
8<br />
9<br />
10<br />
11<br />
12<br />
13<br />
14<br />
15<br />
16<br />
17
6<br />
DUALWATCH/TRI-WATCH<br />
■■Description<br />
Dualwatch monitors Channel 16 while you are receiving<br />
on another channel; Tri-watch monitors Channel 16 and the<br />
Call channel while receiving another channel. Dualwatch and<br />
Tri-watch are convenient for monitoring Channel 16 when you<br />
are operating on another channel.<br />
DUALWATCH/TRI-WATCH SIMULATION<br />
Call channel<br />
Ch 16 Ch 88 Ch 88 Ch 16 Ch 88 Ch 9<br />
■■Operation<br />
qqSelect Dualwatch or Tri-watch in the Menu screen. (p. 68)<br />
wwPush [ Y](CH) or [Z](CH) to select the desired operating<br />
channel.<br />
eePush [DW] to start a Dualwatch or Tri-watch scan.<br />
• “DUAL 16” appears during Dualwatch; “TRI 16” appears during<br />
Tri-watch.<br />
• A beep tone sounds when a signal is received on Channel 16.<br />
rrTo cancel Dualwatch or Tri-watch, push [DW] again.<br />
[Example]: Operating Tri-watch on INT Channel 25.<br />
Tri-watch starts.<br />
Signal is received on<br />
Call channel.<br />
Dualwatch<br />
Tri-watch<br />
• If a signal is received on Channel 16, Dualwatch and Triwatch<br />
pause on Channel 16 until the signal disappears.<br />
• If a signal is received on the Call channel during Tri-watch,<br />
Tri-watch becomes Dualwatch until the signal disappears.<br />
• To transmit on the selected channel during a Dualwatch or<br />
Tri-watch scan, hold down [PTT].<br />
Tri-watch resumes after the<br />
signal disappears.<br />
Signal received on Channel<br />
16 takes priority.<br />
18
DSC OPERATION<br />
7<br />
■■DSC address ID<br />
DDProgramming Individual ID<br />
A total of 100 DSC address IDs can be programmed and assigned<br />
a name of up to 10 characters.<br />
qqEnter “INDIVIDUAL ID” in the DSC SETTINGS menu.<br />
MENU ➪ DSC Settings ➪ Individual ID<br />
(Push [MENU]) (Rotate Dial, then push [ENT].)<br />
wwPush [ADD].<br />
• The “INDIVIDUAL ID” program screen is displayed.<br />
eeEnter a desired individual ID in the following way:<br />
• Select a desired number using Dial, or [Y]/[Z]/[Ω]/[≈].<br />
• Push [ENT] or Dial to set it.<br />
• To move the cursor, select either arrow, “←” or “→,” then push<br />
[ENT] or Dial.<br />
The first digit is specified as ‘0’ for a Group ID.<br />
The first two digits are ‘0’ for any Coast station ID.<br />
rrRepeat step<br />
e to enter all 9 digits.<br />
ttAfter entering the 9 digit code, push [ENT] or Dial to set it.<br />
• ID name programming screen is displayed.<br />
yyEnter a desired 10 digit ID name in the following way:<br />
• Select a desired character using Dial, or [Y]/[Z]/[Ω]/[≈].<br />
• Push [ENT] or Dial to set it.<br />
• To move the cursor, select either arrow, “←” or “→,” then push<br />
[ENT] or Dial.<br />
• Push [123] then [!$] then [ABC] to select a character group.<br />
uuAfter entering the ID name, select “FINISH” using Dial, or<br />
[Y]/[Z]/[Ω]/[≈], then push [ENT] or Dial to program it.<br />
• The “INDIVIDUAL ID” list screen is displayed.<br />
iiPush [MENU] to exit the MENU screen.<br />
1<br />
2<br />
3<br />
4<br />
5<br />
6<br />
7<br />
8<br />
9<br />
10<br />
11<br />
12<br />
13<br />
14<br />
15<br />
16<br />
19
7 DSC OPERATION<br />
DDProgramming Group ID<br />
qqEnter “GROUP ID” in the DSC SETTINGS menu.<br />
MENU ➪ DSC Settings ➪ Group ID<br />
(Push [MENU]) (Rotate Dial, then push [ENT].)<br />
ttAfter entering the 9 digit code, push [ENT] or Dial to set it.<br />
• Group ID name programming screen is displayed.<br />
wwPush [ADD].<br />
• The “GROUP ID” program screen is displayed.<br />
eeEnter a desired group ID in the following way:<br />
• Select a desired number using Dial, or [Y]/[Z]/[Ω]/[≈].<br />
• Push [ENT] or Dial to set it.<br />
• To move the cursor, select either arrow, “←” or “→,” then push<br />
[ENT] or Dial.<br />
The first digit is fixed as ‘0’ for a Group ID.<br />
The first two digits are ‘0’ for any Coast station ID.<br />
yyEnter a desired 10 digit ID name in the following way:<br />
• Select a desired character using Dial, or [Y]/[Z]/[Ω]/[≈].<br />
• Push [ENT] or Dial to set it.<br />
• To move the cursor, select either arrow, “←” or “→,” then push<br />
[ENT] or Dial.<br />
• Push [123], [!$] or [ABC] to select a character group.<br />
uuAfter entering the ID name, select “FINISH” using Dial, or<br />
[Y]/[Z]/[Ω]/[≈], then push [ENT] or Dial to program it.<br />
• The “GROUP ID” list screen is displayed.<br />
rrRepeat step<br />
e to input the specific 9 digits group code.<br />
iiPush [MENU] to exit the MENU screen.<br />
20
DSC OPERATION<br />
7<br />
DDDeleting Individual/Group ID<br />
qqEnter “INDIVIDUAL ID” or “GROUP ID” in the DSC SET-<br />
TINGS menu.<br />
MENU ➪ DSC Settings ➪ Individual ID/Group ID<br />
(Push [MENU]) (Rotate Dial, then push [ENT].)<br />
• When no address ID is programmed, “No ID” is displayed. In this<br />
case, push [MENU] to exit the MENU screen.<br />
wwRotate Dial or push [ Y]/[Z] to select a desired ID name,<br />
then push [DEL].<br />
eePush [OK] to delete the ID, and return to the “INDIVIDUAL<br />
ID” or “GROUP ID” list screen.<br />
• Push [CANCEL] to cancel it.<br />
rrPush [MENU] to exit the MENU screen.<br />
1<br />
2<br />
3<br />
4<br />
5<br />
6<br />
7<br />
8<br />
9<br />
10<br />
11<br />
12<br />
13<br />
14<br />
15<br />
16<br />
21
7 DSC OPERATION<br />
■■Position and time programming<br />
A Distress call should include the ship’s position and time. If<br />
no GPS is connected, your position and UTC (Universal Time<br />
Coordinated) time should be manually input. They are automatically<br />
included when a GPS receiver compatible with the<br />
NMEA0183 ver. 2.0 or 3.01 format is connected.<br />
• <strong>Manual</strong> programming is disabled when a GPS receiver is<br />
connected.<br />
• <strong>Manual</strong>ly programmed position and time will be held for<br />
only 23.5 hours.<br />
qqEnter “POSITION INPUT” in the DSC SETTINGS menu.<br />
MENU ➪ DSC Settings ➪ Position Input<br />
(Push [MENU]) (Rotate Dial, then push [ENT].)<br />
wwEdit your latitude and longitude position using Dial, or [ Y]/<br />
[Z]/[Ω]/[≈].<br />
• Select a desired number using Dial, or [Y]/[Z]/[Ω]/[≈].<br />
• Push [ENT] or Dial to set it.<br />
• To move the cursor, select either arrow, “←” or “→,” then push<br />
[ENT] or Dial.<br />
• Select N (North latitude) or S (South latitude) when the cursor is<br />
on the ‘N’ or ‘S’ position.<br />
• Select W (West longitude) or E (East longitude) when the cursor<br />
is on the ‘W’ or ‘E’ position.<br />
eeAfter entering the position, push [ENT] to program it.<br />
rrThe UTC time programming screen is displayed, enter the<br />
UTC time in the following way:<br />
• Select a desired number using Dial, or [Y]/[Z]/[Ω]/[≈].<br />
• Push [ENT] or Dial to set it.<br />
• To move the cursor, select either arrow, “←” or “→,” then push<br />
[ENT] or Dial.<br />
ttPush [ENT] or Dial to program your position and time.<br />
• Return to the “DSC SETTINGS” screen.<br />
22
DSC OPERATION<br />
7<br />
■■Distress call<br />
A Distress call should be transmitted if, in the opinion of the<br />
Master, the ship or a person is in distress and requires immediate<br />
assistance.<br />
NEVER MAKE A DISTRESS CALL IF YOUR SHIP OR A<br />
PERSON IS NOT IN AN EMERGENCY. A DISTRESS<br />
CALL SHOULD BE MADE ONLY WHEN IMMEDIATE<br />
HELP IS NEEDED.<br />
DDSimple call<br />
qqConfirm no Distress call is being received.<br />
wwWhile lifting up the key cover, hold down [DISTRESS] for 3<br />
seconds to transmit the Distress call.<br />
• While holding down [DISTRESS], count down beeps sound and<br />
both the key and display backlighting blink.<br />
• DSC channel (Channel 70) is automatically selected and the<br />
Distress call is transmitted.<br />
eeAfter transmitting the call, the transceiver waits for an acknowledgment<br />
call.<br />
• The Distress call is automatically transmitted every 3.5 to 4.5<br />
minutes, until an acknowledgement is received (‘Call repeat’<br />
mode), or DSC Cancel call is made (p. 26).<br />
• Push [RESEND] to manually transmit the Distress repeat call.<br />
• Push [Ω]/[≈] then push [INFO] to display the transmitted Distress<br />
call information.<br />
• Push [Ω]/[≈] then push [PAUSE] to pause the ‘Call repeat’ mode,<br />
push [RESUME] to resume it.<br />
rrAfter receiving the acknowledgment, push [ALARM OFF]<br />
then reply using the microphone.<br />
➥➥A distress alert default contains:<br />
• Nature of distress : Undesignated distress<br />
• Position information : The latest GPS or manual input position<br />
is held for 23.5 hours, or until the power is<br />
turned OFF.<br />
1<br />
2<br />
3<br />
4<br />
5<br />
6<br />
7<br />
8<br />
9<br />
10<br />
11<br />
12<br />
13<br />
14<br />
15<br />
16<br />
23
7 DSC OPERATION<br />
DDRegular call<br />
The nature of the Distress call should be included in the Distress<br />
call.<br />
qqEnter “DISTRESS CALL” in the DSC CALLS menu.<br />
MENU ➪ DSC Calls ➪ Distress Call<br />
(Push [MENU]) (Rotate Dial, then push [ENT].)<br />
rrHold down [DISTRESS] for 3 seconds to transmit the Distress<br />
call.<br />
• While holding down [DISTRESS], count down beeps sound and<br />
both the key and display backlighting blink.<br />
• The selected nature of the distress is stored for 10 minutes.<br />
wwSelect the nature of the distress using Dial or [ Y]/[Z], then<br />
push Dial or [ENT].<br />
• ‘Undesignated,’ ‘Fire,Explosion,’ ‘Flooding,’ ‘Collision,’ ‘Grounding,’<br />
‘Capsizing,’ ‘Sinking,’ ‘Adrift,’ ‘Abandoning ship,’ ‘Piracy’ or ‘Man<br />
Overboard’ is selectable.<br />
• The nature of the distress is stored for 10 minutes after a selection<br />
is made.<br />
eeThe Distress call confirmation screen is displayed.<br />
• Rotate Dial or push [Y]/[Z] to see the hidden lines.<br />
24
DSC OPERATION<br />
7<br />
ttAfter transmitting the call, the transceiver waits for an acknowledgment<br />
call.<br />
• The Distress call is automatically transmitted every 3.5 to 4.5<br />
minutes, until an acknowledgement is received (‘Call repeat’<br />
mode), or DSC cancel call is made (p. 26).<br />
• Push [RESEND] to manually transmit the Distress repeat call.<br />
• Push [Ω]/[≈] then push [INFO] to display the transmitted Distress<br />
call information.<br />
• Push [Ω]/[≈] then push [PAUSE] to pause the ‘Call repeat’ mode,<br />
push [RESUME] to resume it.<br />
yyAfter receiving an acknowledgment call, push [ALARM<br />
OFF] then reply using the microphone.<br />
➥➥A distress alert contains:<br />
• Nature of distress : Selected in step w.<br />
• Position information : The latest GPS or manual input position<br />
is held for 23.5 hours, or until the power is<br />
turned OFF.<br />
When no GPS receiver is connected, and both position<br />
and time have been manually programmed, the screen as<br />
shown below appears. Edit your latitude and longitude position<br />
and UTC time as follows:<br />
➥➥Push [CHG], then edit your latitude and longitude position<br />
and UTC time.<br />
• Select a desired number using Dial, or [Y]/[Z]/[Ω]/[≈].<br />
• Push [ENT] or Dial to set it.<br />
• To move the cursor, select either arrow, “←” or “→,” then push<br />
[ENT] or Dial.<br />
• Select N (North latitude) or S (South latitude) when the cursor<br />
is on the ‘N’ or ‘S’ position.<br />
• Select W (West longitude) or E (East longitude) when the cursor<br />
is on the ‘W’ or ‘E’ position.<br />
1<br />
2<br />
3<br />
4<br />
5<br />
6<br />
7<br />
8<br />
9<br />
10<br />
11<br />
12<br />
13<br />
14<br />
15<br />
16<br />
25
7 DSC OPERATION<br />
DDDistress cancel call<br />
qqWhile waiting for an acknowledgment call, push [CAN-<br />
CEL].<br />
rrThe Distress cancel call is transmitted.<br />
wwPush [CONTINUE].<br />
• Push [BACK] to return to waiting for an acknowledgement call.<br />
ttChannel 16 is automatically selected.<br />
• Report your situation using the microphone.<br />
• After the report, push [EXIT] to return to the normal operating<br />
mode.<br />
eePush [FINISH].<br />
• Push [EXIT] to return to waiting for an acknowledgement call.<br />
26
DSC OPERATION<br />
7<br />
■■Transmitting DSC calls<br />
To ensure correct operation of the DSC function, make<br />
sure you correctly set the CH70 SQL LEVEL. (p. 63)<br />
DDTransmitting an individual call<br />
The Individual call function allows you to transmit a DSC signal<br />
to only a specific station.<br />
qqEnter “INDIVIDUAL CALL” in the DSC CALLS menu.<br />
MENU ➪ DSC Calls ➪ Individual Call<br />
(Push [MENU]) (Rotate Dial, then push [ENT].)<br />
wwSelect the desired preprogrammed individual address, or<br />
“<strong>Manual</strong> Input,” using Dial or [Y]/[Z], then push Dial or<br />
[ENT].<br />
• The ID code for the Individual call can be set first. (p. 19)<br />
• When “<strong>Manual</strong> Input” is selected, set a desired 9 digit MMSI ID<br />
code for the individual you wish to call.<br />
About <strong>Manual</strong> Inputting:<br />
Enter a desired individual ID in the following way:<br />
• Select a desired number using Dial, or [Ω]/[≈].<br />
• Push [ENT] or Dial to set it.<br />
• To move the cursor, select either arrow, “←” or “→,” then push<br />
[ENT] or Dial.<br />
• The first digit is specified as ‘0’ for a Group ID. If a Group ID is<br />
entered, an error beep sounds after pushing [FINISH].<br />
• The first two digits are ‘0’ for any coast station ID.<br />
NOTE: When a coast station is selected in this step, the<br />
voice channel is automatically specified by the coast station.<br />
Therefore, skip step e and go directly to step r.<br />
eeSelect a desired intership channel using Dial or [ Y](CH)/<br />
[Z](CH), then push [ENT].<br />
• Intership channels are already preset into the transceiver in the<br />
recommended order.<br />
1<br />
2<br />
3<br />
4<br />
5<br />
6<br />
7<br />
8<br />
9<br />
10<br />
11<br />
12<br />
13<br />
14<br />
15<br />
16<br />
<br />
+ Continued on the next page.<br />
27
7 DSC OPERATION<br />
DD Transmitting an Individual call (continued)<br />
rrA confirmation screen appears.<br />
• Confirm the call contents.<br />
uuWhen the acknowledgement ‘Able to comply’ is received,<br />
beeps sound and the screen below is displayed.<br />
ttPush [CALL] to transmit the Individual call.<br />
• If Channel 70 is busy, the transceiver stands by until the channel<br />
becomes clear.<br />
Push [ALARM OFF] to stop the beeps and then select the<br />
intership channel specified in step e.<br />
• A different intership channel will be selected if the station you<br />
called cannot use the channel.<br />
• Reply using the microphone. And go to step i.<br />
yyStandby on Channel 70 until an acknowledgement is received.<br />
<br />
Or, when the acknowledgement ‘Unable to comply’ is received,<br />
beeps sound and the screen below is displayed.<br />
28
DSC OPERATION<br />
7<br />
Push [ALARM OFF] to stop the beeps. Then push [EXIT]<br />
to return to the operating channel (before you entered the<br />
MENU screen).<br />
iiAfter communicating, push [EXIT] to return to the normal<br />
operating mode.<br />
Convenient!<br />
✓✓<br />
When the optional MA-500TR class b ais transponder is<br />
connected to your transceiver, you can transmit individual<br />
DSC calls to selected AIS targets on the transponder without<br />
needing to enter the target’s MMSI code.<br />
See pages 64 and 65 for more details.<br />
1<br />
2<br />
3<br />
4<br />
5<br />
6<br />
7<br />
8<br />
9<br />
10<br />
11<br />
12<br />
13<br />
14<br />
15<br />
16<br />
29
7 DSC OPERATION<br />
DDTransmitting an Individual Acknowledgement<br />
When receiving an Individual call, you can transmit an acknowledgement<br />
(‘Able to Comply,’ ‘Propose New Channel’ or<br />
‘Unable to Comply’) by using the on-screen prompts (Quick<br />
ACK.) Also, you can send an acknowledgement through the<br />
MENU system (Man ual ACK.)<br />
Quick ACK:<br />
qqWhen an Individual call is received, beeps sound and the<br />
screen below is displayed.<br />
Push [ALARM OFF] to stop the beeps.<br />
wwPush [ACK].<br />
eeSelect one of three options, then push [ENT].<br />
• Able to Comply : Make an acknowledgment call without<br />
any changes.<br />
• Unable to Comply : You cannot make a communication.<br />
The Acknowledgement call (‘Unable to<br />
Comply’) can be automatically transmitted,<br />
if set. See page 60 for details.<br />
• Propose New Channel : You can make an acknowledgement<br />
call, but you specify the intership channel.<br />
Select a desired intership channel,<br />
using Dial, or [Y](CH)/[Z](CH), then<br />
push [ENT].<br />
30
DSC OPERATION<br />
7<br />
rrThe Individual ACK confirmation screen is displayed.<br />
Push [CALL] to transmit an acknowledgement call.<br />
ttThe screens shown below are displayed.<br />
yyReply to the call using the microphone.<br />
uuPush [EXIT] to return to the normal operating mode.<br />
<strong>Manual</strong> ACK:<br />
qqEnter “INDIVIDUAL ACK” in the DSC CALLS menu.<br />
MENU ➪ DSC Calls ➪ Individual ACK<br />
(Push [MENU]) (Rotate Dial, then push [ENT].)<br />
• When no Individual call has been received, “Individual ACK” item<br />
will not be displayed.<br />
wwSelect a desired individual address or ID code to reply to,<br />
using Dial or [Y]/[Z], then push [ENT].<br />
eePerform steps e to u, as described in “Quick ACK:,” beginning<br />
on the previous page.<br />
1<br />
2<br />
3<br />
4<br />
5<br />
6<br />
7<br />
8<br />
9<br />
10<br />
11<br />
12<br />
13<br />
14<br />
15<br />
16<br />
31
7 DSC OPERATION<br />
DDTransmitting a Group call<br />
The Group call function allows you to transmit a DSC signal<br />
to only a specific group.<br />
qqEnter “GROUP CALL” in the DSC CALLS menu.<br />
MENU ➪ DSC Calls ➪ Group Call<br />
(Push [MENU]) (Rotate Dial, then push [ENT].)<br />
wwSelect the desired preprogrammed group address or “<strong>Manual</strong><br />
Input,” using Dial or [Y]/[Z], then push Dial or [ENT].<br />
• The ID code for the Group call can be set first. (p. 20)<br />
• When “<strong>Manual</strong> Input” is selected, set the 8 digit ID code for the<br />
group you wish to call.<br />
About <strong>Manual</strong> Inputting:<br />
Enter a desired group ID in the following way:<br />
• Select a desired number using Dial, or [Ω]/[≈].<br />
• Push [ENT] or Dial to set it.<br />
• To move the cursor, select either arrow, “←” or “→,” then push<br />
[ENT] or Dial.<br />
• The first digit is specified as ‘0’ for a Group ID.<br />
• The first two digits are ‘0’ for any Coast station ID.<br />
rrA confirmation screen appears.<br />
• Confirm the call contents.<br />
eeSelect a desired intership channel using Dial or [ Y](CH)/<br />
[Z](CH), then push [ENT].<br />
• Intership channels are already preset into the transceiver in the<br />
recommended order.<br />
32
DSC OPERATION<br />
7<br />
ttPush [CALL] to transmit the Group call.<br />
• If Channel 70 is busy, the transceiver stands by until the channel<br />
becomes clear.<br />
yyAfter the Group call has been transmitted, the following<br />
screen is displayed.<br />
uuAnnounce the information using the microphone.<br />
iiAfter the announcement, push [EXIT] to return to the normal<br />
operating mode.<br />
1<br />
2<br />
3<br />
4<br />
5<br />
6<br />
7<br />
8<br />
9<br />
10<br />
11<br />
12<br />
13<br />
14<br />
15<br />
16<br />
33
7 DSC OPERATION<br />
DDTransmitting an All Ships call<br />
All ships, that have DSC transceiver, use Channel 70 as their<br />
‘listening channel.’ When you want to announce a message to<br />
these ships within range, use the ‘All Ships Call’ function.<br />
rrA confirmation screen appears.<br />
• Confirm the call contents.<br />
qqEnter “ALL SHIPS CALL” in the DSC CALLS menu.<br />
MENU ➪ DSC Calls ➪ All Ships Call<br />
(Push [MENU]) (Rotate Dial, then push [ENT].)<br />
wwSelect a desired category, using Dial or [ Y]/[Z], then push<br />
Dial or [ENT].<br />
• The selectable category may differ, depending on the programmed<br />
setting. Ask your dealer for the selectable categories.<br />
ttPush [CALL] to transmit the All Ships call.<br />
• If Channel 70 is busy, the transceiver stands by until the channel<br />
becomes clear.<br />
eeSelect a desired traffic channel, using Dial or [ Y]/[Z], then<br />
push Dial or [ENT].<br />
• The selected channel is displayed.<br />
yyAfter the All Ships call has been transmitted, the following<br />
screen is displayed.<br />
34<br />
uuAnnounce the message using the microphone.<br />
iiAfter the announcement, push [EXIT] to return to the normal<br />
operating mode.
DSC OPERATION<br />
7<br />
DDTransmitting a Test call<br />
Testing on the exclusive DSC distress and safety calling channels<br />
should be avoided as much as possible. When testing on<br />
a distress/safety channel is unavoidable, you should indicate<br />
that these are test transmissions.<br />
Normally the test call would require no further communications<br />
between the two stations involved.<br />
qqEnter “TEST CALL” in the DSC CALLS menu.<br />
MENU ➪ DSC Calls ➪ Test Call<br />
(Push [MENU]) (Rotate Dial, then push [ENT].)<br />
wwSelect a desired preprogrammed individual address, or<br />
“<strong>Manual</strong> Input,” then push Dial or [ENT].<br />
• The ID code for the Individual call can be set first. (p. 19)<br />
• When “<strong>Manual</strong> Input” is selected, set the 9 digit MMSI ID code for<br />
the individual you wish to call.<br />
About <strong>Manual</strong> Inputting:<br />
Enter a desired address ID in the following way:<br />
• Select a desired number using Dial, or [Ω]/[≈].<br />
• Push [ENT] or Dial to set it.<br />
• To move the cursor, select either arrow, “←” or “→,” then push<br />
[ENT] or Dial.<br />
• The first digit is specified as ‘0’ for a Group ID. If a Group ID is<br />
entered, an error beep sounds after pushing [FINISH].<br />
• The first two digits are ‘0’ for any Coast station ID.<br />
eeA confirmation screen appears.<br />
• Confirm the call contents.<br />
<br />
+ Continued on the next page.<br />
1<br />
2<br />
3<br />
4<br />
5<br />
6<br />
7<br />
8<br />
9<br />
10<br />
11<br />
12<br />
13<br />
14<br />
15<br />
16<br />
35
7 DSC OPERATION<br />
DD Transmitting a Test call (continued)<br />
rrPush [CALL] to transmit the Test call.<br />
• If Channel 70 is busy, the transceiver stands by until the channel<br />
becomes clear.<br />
uuPush [ALARM OFF] to stop the beeps, and then the screen<br />
as shown below is displayed.<br />
ttAfter the Test call has been transmitted, the following<br />
screen is displayed.<br />
iiPush [EXIT] to return to the normal operating mode.<br />
yyWhen the acknowledgement call is received, beeps sound<br />
and the following screen is displayed.<br />
36
DSC OPERATION<br />
7<br />
DDTransmitting a Test Acknowledgement call<br />
When the “TEST ACK” in DSC settings is set to ‘Auto TX’<br />
(p. 60), the transceiver automatically transmits a reply call<br />
when receiving a Test call.<br />
Quick ACK:<br />
qqWhen a Test call is received, beeps sound and the screen<br />
shown below is displayed.<br />
Push [ALARM OFF] to stop the beeps.<br />
wwPush [ACK].<br />
• Push [INFO] to display the Test call information.<br />
Push [BACK] to return to the previous screen, or push [ACK].<br />
eeThe Test ACK confirmation screen is displayed.<br />
Push [CALL] to transmit the acknowledgement call.<br />
rrWhile transmitting the acknowledgement call, the screen<br />
shown below is displayed, and then returns to the normal<br />
operating mode.<br />
1<br />
2<br />
3<br />
4<br />
5<br />
6<br />
7<br />
8<br />
9<br />
10<br />
11<br />
12<br />
13<br />
14<br />
15<br />
16<br />
37
7 DSC OPERATION<br />
DD Transmitting a Test Acknowledgement call (continued)<br />
<strong>Manual</strong> ACK:<br />
qqEnter “TEST ACK” in the DSC CALLS menu.<br />
MENU ➪ DSC Calls ➪ Test ACK<br />
(Push [MENU]) (Rotate Dial, then push [ENT].)<br />
• If no Test call has been received, the “TEST ACK” item will not<br />
be displayed.<br />
eeThe Test ACK confirmation screen is displayed.<br />
Push [CALL] to transmit the acknowledgement call.<br />
rrWhile transmitting the acknowledgement call, the screen<br />
shown below is displayed, and then returns to the normal<br />
operating mode.<br />
wwSelect a desired Test call to reply to, using Dial or [ Y]/[Z],<br />
then push Dial or [ENT].<br />
38
DSC OPERATION<br />
7<br />
DDTransmitting a Position Reply call<br />
Transmit a Position Reply call when a Position Request call<br />
is received.<br />
When the “POSITION ACK” in DSC Settings is set to ‘Auto<br />
TX’ (p. 60), the transceiver automatically transmits a reply call<br />
when receiving a Position Request call.<br />
Quick Reply:<br />
qqWhen a Position Request call is received, beeps sound<br />
and the screen shown below is displayed.<br />
Push [ALARM OFF] to stop the beeps.<br />
wwPush [ACK].<br />
• Push [INFO] to display the Position Request call information.<br />
Push [BACK] to return to the previous screen, or push [ACK].<br />
eeThe Position Reply confirmation screen is displayed.<br />
Push [CALL] to transmit the reply call.<br />
rrWhile transmitting the reply call, the screen shown below<br />
is displayed, and then returns to the normal operating<br />
mode.<br />
1<br />
2<br />
3<br />
4<br />
5<br />
6<br />
7<br />
8<br />
9<br />
10<br />
11<br />
12<br />
13<br />
14<br />
15<br />
16<br />
39
7 DSC OPERATION<br />
DD Transmitting a Position Reply call (continued)<br />
<strong>Manual</strong> Reply:<br />
qqEnter “POSITION REPLY” in the DSC CALLS menu.<br />
MENU ➪ DSC Calls ➪ Position Reply<br />
(Push [MENU]) (Rotate Dial, then push [ENT].)<br />
• If no Position Request call has been received, the “POSITION<br />
REPLY” item will not be displayed.<br />
rrWhile transmitting the reply call, the screen shown below<br />
is displayed, and then returns to the normal operating<br />
mode.<br />
wwSelect a desired Position Request call to reply to, using<br />
Dial or [Y]/[Z], then push Dial or [ENT].<br />
When no GPS receiver is connected, and both position and<br />
time have been manually programmed, the screen shown<br />
below appears. Edit your latitude and longitude position and<br />
UTC time as follows:<br />
40<br />
eeThe Position Reply call confirmation screen is displayed.<br />
Push [CALL] to transmit the acknowledgement call.<br />
➥➥Push [CHG], then edit your latitude and longitude position<br />
and UTC time.<br />
• Select a desired number using Dial, or [Y]/[Z]/[Ω]/[≈].<br />
• Push [ENT] or Dial to set it.<br />
• To move the cursor, select either arrow, “←” or “→,” then push<br />
[ENT] or Dial.<br />
• Select N (North latitude) or S (South latitude) when the cursor<br />
is on the ‘N’ or ‘S’ position.<br />
• Select W (West longitude) or E (East longitude) when the cursor<br />
is on the ‘W’ or ‘E’ position.
DSC OPERATION<br />
7<br />
DDTransmitting a Position Report Reply call<br />
Transmit a Position Report Reply call when a Position Report<br />
Request call is received.<br />
Quick Reply:<br />
qqWhen a Position Report Request call is received, beeps<br />
sound and the screen as shown below is displayed.<br />
Push [ALARM OFF] to stop the beeps.<br />
wwPush [ACK].<br />
• Push [INFO] to display the Position Report Request call information.<br />
Push [BACK] to return to the previous screen, or push [ACK].<br />
eeThe Position Report Reply confirmation screen is displayed.<br />
Push [CALL] to transmit the reply call.<br />
rrWhile transmitting the reply call, the screen shown below<br />
is displayed, and then returns to the normal operating<br />
mode.<br />
1<br />
2<br />
3<br />
4<br />
5<br />
6<br />
7<br />
8<br />
9<br />
10<br />
11<br />
12<br />
13<br />
14<br />
15<br />
16<br />
41
7 DSC OPERATION<br />
DD Transmitting a Position Report Reply call (continued)<br />
<strong>Manual</strong> Reply:<br />
qqEnter “POSITION REPORT REPLY” in the DSC CALLS<br />
menu.<br />
MENU ➪ DSC Calls ➪ Position Report Reply<br />
(Push [MENU]) (Rotate Dial, then push [ENT].)<br />
• If no Position Report Request call has been received, the “POSI-<br />
TION REPORT REPLY” item will not be displayed.<br />
eeThe Position Report Reply call confirmation screen is displayed.<br />
Push [CALL] to transmit the acknowledgement call.<br />
wwSelect a desired Position Report Request call to reply to,<br />
using Dial or [Y]/[Z], then push Dial or [ENT].<br />
rrWhile transmitting the reply call, the screen shown below<br />
is displayed, and then returns to the normal operating<br />
mode.<br />
42
DSC OPERATION<br />
7<br />
DDTransmitting a Polling Reply call<br />
Transmit a Polling Reply call when a Polling Request call is<br />
received.<br />
When the “POSITION ACK” in DSC Settings is set to ‘Auto<br />
TX’ (p. 60), the transceiver automatically transmits a reply call<br />
when receiving a Polling Request call.<br />
Quick Reply:<br />
qqWhen a Polling Request call is received, beeps sound and<br />
the screen as shown below is displayed.<br />
Push [ALARM OFF] to stop the beeps.<br />
wwPush [ACK].<br />
• Push [INFO] to display the Polling Request call information.<br />
Push [BACK] to return to the previous screen, or push [ACK].<br />
eeThe Polling Reply confirmation screen is displayed.<br />
Push [CALL] to transmit the reply call.<br />
rrWhile transmitting the reply call, the screen shown below<br />
is displayed, and then returns to the normal operating<br />
mode.<br />
1<br />
2<br />
3<br />
4<br />
5<br />
6<br />
7<br />
8<br />
9<br />
10<br />
11<br />
12<br />
13<br />
14<br />
15<br />
16<br />
43
7 DSC OPERATION<br />
<strong>Manual</strong> Reply:<br />
qqEnter “POLLING REPLY” in the DSC CALLS menu.<br />
MENU ➪ DSC Calls ➪ Polling Reply<br />
(Push [MENU]) (Rotate Dial, then push [ENT].)<br />
• If no Polling Request call has been received, the “POLLING RE-<br />
PLY” item will not be displayed.<br />
rrWhile transmitting the reply call, the screen shown below<br />
is displayed, and then returns to the normal operating<br />
mode.<br />
wwSelect a desired Polling Request call to be replied, using<br />
Dial or [Y]/[Z], then push Dial or [ENT].<br />
eeThe Polling Reply call confirmation screen is displayed.<br />
Push [CALL] to transmit the acknowledgement call.<br />
44
DSC OPERATION<br />
7<br />
■■Receiving DSC calls<br />
DDReceiving a Distress Call<br />
When a Distress Call is received:<br />
➥➥The emergency alarm sounds for 2 minutes.<br />
➥➥“RCVD DISTRESS” pops up and the LCD backlight<br />
blinks.<br />
qqPush [ALARM OFF] to stop the alarm and the blinking<br />
backlight.<br />
wwPush a softkey to select your desired action.<br />
[IGN]<br />
➥ Push to return to the normal operating mode.<br />
• The transceiver exits the DSC mode.<br />
• By pushing [PTT], the transceiver also exits the DSC mode.<br />
• “ ” continues to blink and the Call is stored in the Received<br />
Call Log.<br />
[INFO]<br />
➥ Push to display the Received call information. (p. 58)<br />
[ACPT]<br />
➥➥ Push to accept the call.<br />
And then, push [CH 16] to switch the operating channel<br />
to Channel 16, and then monitor it, as a coast station<br />
may require assistance.<br />
• If you haven’t pushed [CH 16] within 10 seconds, the operating<br />
channel automatically switches to Channel 16. (p. 61)<br />
Push<br />
1<br />
2<br />
3<br />
4<br />
5<br />
6<br />
7<br />
8<br />
9<br />
10<br />
11<br />
12<br />
13<br />
14<br />
15<br />
16<br />
45
7 DSC OPERATION<br />
DDReceiving a Distress Acknowledgement<br />
When a Distress Acknowledgement sent to another ship is<br />
received:<br />
➥➥The emergency alarm sounds for 2 minutes.<br />
➥➥“RCVD DISTRESS ACK” pops up and the LCD backlight<br />
blinks.<br />
qqPush [ALARM OFF] to stop the alarm and the blinking<br />
backlight.<br />
wwPush a softkey to select your desired action.<br />
[INFO]<br />
➥ Push to display the Received call information. (p. 58)<br />
[ACPT]<br />
➥➥ Push to accept the call.<br />
And then, push [CH 16] to switch the operating channel<br />
to Channel 16, and then monitor it, as a coast station<br />
may require assistance.<br />
• If you haven’t pushed [CH 16] within 10 seconds, the operating<br />
channel automatically switches to Channel 16. (p. 61)<br />
[IGN]<br />
➥ Push to return to the normal operating mode.<br />
• The transceiver exits the DSC mode.<br />
• By pushing [PTT], the transceiver also exits the DSC mode.<br />
• “ ” continues to blink and the Call is stored in the Received<br />
Call Log.<br />
Push<br />
46
DSC OPERATION<br />
7<br />
D DReceiving a Distress Relay Call<br />
When a Distress Relay call is received:<br />
➥➥The emergency alarm sounds for 2 minutes.<br />
➥➥“RCVD DISTRESS RELAY” pops up and the LCD backlight<br />
blinks.<br />
qqPush [ALARM OFF] to stop the alarm and the blinking<br />
backlight.<br />
wwPush a softkey to select your desired action.<br />
[IGN]<br />
➥ Push to return to the normal operating mode.<br />
• The transceiver exits the DSC mode.<br />
• By pushing [PTT], the transceiver also exits the DSC mode.<br />
• “ ” continues to blink and the Call is stored in the Received<br />
Call Log.<br />
[INFO]<br />
➥ Push to display the Received call information. (p. 58)<br />
[ACPT]<br />
➥➥ Push to accept the call.<br />
And then, push [CH 16] to switch the operating channel<br />
to Channel 16, and then monitor it, as a coast station<br />
may require assistance.<br />
• If you haven’t pushed [CH 16] within 10 seconds, the operating<br />
channel automatically switches to Channel 16. (p. 61)<br />
Push<br />
1<br />
2<br />
3<br />
4<br />
5<br />
6<br />
7<br />
8<br />
9<br />
10<br />
11<br />
12<br />
13<br />
14<br />
15<br />
16<br />
47
7 DSC OPERATION<br />
D DReceiving a Distress Relay Acknowledgement<br />
When a Distress Relay Acknowledgement is received:<br />
➥➥The emergency alarm sounds for 2 minutes.<br />
➥➥“RCVD DIST RELAY ACK” pops up and the LCD backlight<br />
blinks.<br />
qqPush [ALARM OFF] to stop the alarm and the blinking<br />
backlight.<br />
[INFO]<br />
➥ Push to display the Received call information. (p. 58)<br />
[ACPT]<br />
➥➥ Push to accept the call.<br />
And then, push [CH 16] to switch the operating channel<br />
to Channel 16, and then monitor it, as a coast station<br />
may require assistance.<br />
• If you haven’t pushed [CH 16] within 10 seconds, the operating<br />
channel automatically switches to Channel 16. (p. 61)<br />
wwPush a softkey to select your desired action.<br />
Push<br />
[IGN]<br />
➥ Push to return to the normal operating mode.<br />
• The transceiver exits the DSC mode.<br />
• By pushing [PTT], the transceiver also exits the DSC mode.<br />
• “ ” continues to blink and the Call is stored in the Received<br />
Call Log.<br />
48
DSC OPERATION<br />
7<br />
DDReceiving an Individual Call<br />
When an Individual Call is received:<br />
➥ The alarm sounds for 2 minutes.<br />
➥ “RCVD INDIVIDUAL CALL” pops up. The LCD backlight<br />
may blink for 2 minutes, depending on the received Category.<br />
qqPush [ALARM OFF] to stop the alarm and the blinking<br />
backlight.<br />
• If [ALARM OFF] is not pushed within 2 minutes, the next screen<br />
may appear, depending on the received Category.<br />
wwPush a softkey to select your desired action.<br />
<br />
<br />
[IGN]<br />
➥ Push to ignore the Call and return to the normal operating<br />
mode.<br />
• The transceiver exits the DSC mode.<br />
• The Call is stored in the Received Call Log.<br />
• “ ” continues to blink and the Call is stored in the Received<br />
Call Log.<br />
[INFO]<br />
➥ Push to display the Received call information. (p. 58)<br />
[ACK]<br />
➥ Push to display the “INDIVIDUAL ACK” screen to reply<br />
to the Call, and select the channel specified by the<br />
calling station for voice communication, depending on<br />
your situation. See page 30 for details of the Individual<br />
Acknowledgement procedure.<br />
When “INDIVIDUAL ACK” is set to “Auto ACK (Unable),”<br />
the transceiver automatically replies to the Call. In that<br />
case, both the TX and RX calls are stored in the Transmitted<br />
and Received Call Logs.<br />
1<br />
2<br />
3<br />
4<br />
5<br />
6<br />
7<br />
8<br />
9<br />
10<br />
11<br />
12<br />
13<br />
14<br />
15<br />
16<br />
49
7 DSC OPERATION<br />
DDReceiving a Group Call<br />
When a Group Call is received:<br />
➥ The alarm sounds for 2 minutes.<br />
➥ “RCVD GROUP CALL” pops up. The LCD backlight may<br />
blink for 2 minutes, depending on the received Category.<br />
qqPush [ALARM OFF] to stop the alarm and the blinking<br />
backlight.<br />
• If [ALARM OFF] is not pushed within 2 minutes, the next screen<br />
may appear, depending on the received Category.<br />
[IGN]<br />
➥ Push to ignore the Call and return to the normal operating<br />
mode.<br />
• The transceiver exits the DSC mode.<br />
• “ ” continues to blink and the Call is stored in the Received<br />
Call Log.<br />
[INFO]<br />
➥ Push to display the Received call information. (p. 58)<br />
[ACPT]<br />
➥ Push to monitor the channel specified by the calling station<br />
(Example: 08) for an announcement from the calling<br />
station.<br />
wwPush a softkey to select your desired action.<br />
50
DSC OPERATION<br />
7<br />
DDReceiving an All Ships Call<br />
When an All Ships Call is received:<br />
➥ The alarm sounds for 2 minutes.<br />
➥ “RCVD ALL SHIPS CALL” pops up. The LCD backlight may<br />
blink for 2 minutes, depending on the received Category.<br />
qqPush [ALARM OFF] to stop the alarm and the blinking<br />
backlight.<br />
• If [ALARM OFF] is not pushed within 2 minutes, the next screen<br />
may appear, depending on the received Category.<br />
wwPush a softkey to select your desired action.<br />
[IGN]<br />
➥ Push to ignore the Call and return to the normal operating<br />
mode.<br />
• The transceiver exits the DSC mode.<br />
• “ ” continues to blink and the Call is stored in the Received<br />
Call Log.<br />
[INFO]<br />
➥ Push to display the Received call information. (p. 58)<br />
[ACPT]<br />
➥ Push to monitor the channel specified by the calling station<br />
(Example: 16) for an announcement from the calling<br />
station.<br />
1<br />
2<br />
3<br />
4<br />
5<br />
6<br />
7<br />
8<br />
9<br />
10<br />
11<br />
12<br />
13<br />
14<br />
15<br />
16<br />
51
7 DSC OPERATION<br />
DDReceiving a Geographical Area Call<br />
When a Geographical Area Call (for the area you are in) is<br />
received:<br />
➥ The alarm sounds for 2 minutes.<br />
➥ “RCVD GEOGRAPH<strong>IC</strong>AL CALL” pops up. The LCD backlight<br />
may blink for 2 minutes, depending on the received<br />
Category.<br />
qqPush [ALARM OFF] to stop the alarm and the blinking<br />
backlight.<br />
• If [ALARM OFF] is not pushed within 2 minutes, the next screen<br />
may appear, depending on the received Category.<br />
[IGN]<br />
➥ Push to ignore the Call and return to the normal operating<br />
mode.<br />
• The transceiver exits the DSC mode.<br />
• “ ” continues to blink and the Call is stored in the Received<br />
Call Log.<br />
[INFO]<br />
➥ Push to display the Received call information. (p. 58)<br />
[ACPT]<br />
➥ Push to monitor the channel specified by the calling station<br />
(Example: 08) for an announcement from the calling<br />
station.<br />
wwPush a softkey to select your desired action.<br />
When no GPS receiver is connected or if there is a problem<br />
with the connected receiver, all Geographical Area<br />
Calls are received, regardless of your position.<br />
52
DSC OPERATION<br />
7<br />
DDReceiving a Position Request Call<br />
When a Position Request Call is received:<br />
➥ The alarm sounds for 2 minutes.<br />
➥ “RCVD POS REQUEST” pops up. The LCD backlight<br />
blinks for 2 minutes.<br />
qqPush [ALARM OFF] to stop the alarm and the blinking<br />
backlight.<br />
• If [ALARM OFF] is not pushed within 2 minutes, the next screen<br />
may appear, depending on the received Category.<br />
wwPush a softkey to select your desired action.<br />
[IGN]<br />
➥ Push to ignore the Call and return to the normal operating<br />
mode.<br />
• The transceiver exits the DSC mode.<br />
• “ ” continues to blink and the Call is stored in the Received<br />
Call Log.<br />
[INFO]<br />
➥ Push to display the Received call information. (p. 58)<br />
[ACK]<br />
➥ Push to display the “POSITION REPLY” screen and<br />
send a reply to the Call. (p. 39)<br />
When “POSITION ACK” is set to “Auto TX,” the transceiver<br />
automatically replies to the Call. In that case, both the TX<br />
and RX calls are stored in the Transmitted and Received<br />
Call Logs.<br />
1<br />
2<br />
3<br />
4<br />
5<br />
6<br />
7<br />
8<br />
9<br />
10<br />
11<br />
12<br />
13<br />
14<br />
15<br />
16<br />
53
7 DSC OPERATION<br />
DDReceiving a Position Report Call<br />
When a Position Report Call is received:<br />
➥ The alarm sounds for 2 minutes.<br />
➥ “RCVD POSITION REPORT” pops up. The LCD backlight<br />
blinks for 2 minutes.<br />
qqPush [ALARM OFF] to stop the alarm and the blinking<br />
backlight.<br />
• If [ALARM OFF] is not pushed within 2 minutes, the next screen<br />
may appear, depending on the received Category.<br />
[EXIT]<br />
➥ Push to ignore the Call and return to the normal operating<br />
mode.<br />
• The transceiver exits the DSC mode.<br />
• “ ” continues to blink and the Call is stored in the Received<br />
Call Log.<br />
[INFO]<br />
➥ Push to display the Received call information. (p. 58)<br />
wwPush a softkey to select your desired action.<br />
54
DSC OPERATION<br />
7<br />
D Receiving a Polling Request call<br />
When a Polling Request call is received:<br />
➥ The alarm sounds for 2 minutes.<br />
➥ “RCVD POLLING REQUEST” pops up. The LCD backlight<br />
blinks for 2 minutes.<br />
qqPush [ALARM OFF] to stop the alarm and the blinking<br />
backlight.<br />
• If [ALARM OFF] is not pushed within 2 minutes, the next screen<br />
may appear, depending on the received Category.<br />
wwPush a softkey to select your desired action.<br />
[IGN]<br />
➥ Push to ignore the Call and return to the normal operating<br />
mode.<br />
• The transceiver exits the DSC mode.<br />
• “ ” continues to blink and the Call is stored in the Received<br />
Call Log.<br />
[INFO]<br />
➥ Push to display the Received call information. (p. 58)<br />
[ACK]<br />
➥ Push to display the “POLLING REPLY” screen to reply<br />
to the Call. (p. 43)<br />
When “POSITION ACK” is set to “Auto TX,” the transceiver<br />
automatically replies to the Call. In that case, both the TX<br />
and RX calls are stored in the Transmitted and Received<br />
Call Logs.<br />
1<br />
2<br />
3<br />
4<br />
5<br />
6<br />
7<br />
8<br />
9<br />
10<br />
11<br />
12<br />
13<br />
14<br />
15<br />
16<br />
55
7 DSC OPERATION<br />
D Receiving a Test Call<br />
When a Test Call is received:<br />
➥ The alarm sounds for 2 minutes.<br />
➥ “RCVD TEST CALL” pops up. The LCD backlight blinks for<br />
2 minutes.<br />
qqPush [ALARM OFF] to stop the alarm and the blinking<br />
backlight.<br />
• If [ALARM OFF] is not pushed within 2 minutes, the next screen<br />
may appear, depending on the received Category.<br />
[IGN]<br />
➥ Push to ignore the Call and return to the normal operating<br />
mode.<br />
• The transceiver exits the DSC mode.<br />
• “ ” continues to blink and the Call is stored in the Received<br />
Call Log.<br />
[INFO]<br />
➥ Push to display the Received call information. (p. 58)<br />
[ACK]<br />
➥ Push to display the “TEST ACK” screen to reply to the<br />
Call. (p. 37)<br />
wwPush a softkey to select your desired action.<br />
When “TEST ACK” is set to “Auto TX,” the transceiver automatically<br />
replies to the Call. In that case, both the TX and<br />
RX calls are stored in the Transmitted and Received Call<br />
Logs.<br />
56
DSC OPERATION<br />
7<br />
DDReceiving a Test Acknowledgement Call<br />
When a Test Acknowledgement Call is received:<br />
➥ The alarm sounds for 2 minutes.<br />
➥ “RCVD TEST ACK” pops up. The LCD backlight blinks for<br />
2 minutes.<br />
qqPush [ALARM OFF] to stop the alarm and the blinking<br />
backlight.<br />
• If [ALARM OFF] is not pushed within 2 minutes, the next screen<br />
may appear, depending on the received Category.<br />
wwPush a softkey to select your desired action.<br />
[EXIT]<br />
➥ Push to return to the normal operating mode.<br />
• The transceiver exits the DSC mode.<br />
• “ ” continues to blink and the Call is stored in the Received<br />
Call Log.<br />
■■Transmitted Call log<br />
The transceiver automatically stores up to 50 transmitted<br />
calls, and the logs can be used as a supplement to your logbook.<br />
qqEnter “TX CALL LOG” in the DSC CALLS menu.<br />
MENU ➪ DSC Calls ➪ Transmitted Call Log<br />
(Push [MENU]) (Rotate Dial, then push [ENT].)<br />
wwPush [ Y] or [Z] to select the desired item, then push<br />
[ENT].<br />
eeRotate Dial to scroll the DSC message contents.<br />
Rotate<br />
rrTo delete the displayed DSC message, push [DEL].<br />
• The confirmation screen appears, then push [OK] to delete.<br />
ttPush [EXIT] to return to the normal operating mode.<br />
1<br />
2<br />
3<br />
4<br />
5<br />
6<br />
7<br />
8<br />
9<br />
10<br />
11<br />
12<br />
13<br />
14<br />
15<br />
16<br />
57
7 DSC OPERATION<br />
■■Received Call log<br />
The transceiver automatically stores up to 50 distress messages<br />
and 50 other messages, and they can be used as a<br />
supplement to your logbook.<br />
• While in the normal operating mode, “ ” blinks in the upper right<br />
corner of the LCD when there is an unread DSC message.<br />
DDDistress message<br />
qqPush [LOG] to enter “RCVD CALL LOG” in the DSC CALLS<br />
menu, or you can enter it through the Menu screen.<br />
MENU ➪ DSC Calls ➪ Received Call Log<br />
(Push [MENU]) (Rotate Dial, then push [ENT].)<br />
wwPush [ Y] or [Z] to select “Distress,” then push [ENT].<br />
• The Distress messages are stored in “Distress.”<br />
• “ ” appears when there are unread DSC messages.<br />
• “ ” appears when there are no unread DSC messages.<br />
• No icon appears when there are no DSC messages.<br />
eePush [ Y] or [Z] to select the desired item, then push<br />
[ENT].<br />
• The message in the unopened file has not been read.<br />
rrRotate Dial to scroll the DSC message contents.<br />
Rotate<br />
ttTo delete the displayed DSC message, push [DEL].<br />
• The confirmation screen appears, then push [OK] to delete.<br />
yyPush [EXIT] to return to the normal operating mode.<br />
58
DSC OPERATION<br />
7<br />
DDOther messages<br />
qqPush [LOG] to enter “RCVD CALL LOG” in the DSC CALLS<br />
menu, or you can enter it through the Menu screen.<br />
MENU ➪ DSC Calls ➪ Received Call Log<br />
(Push [MENU]) (Rotate Dial, then push [ENT].)<br />
wwPush [ Y] or [Z] to select “Others,” then push [ENT].<br />
• The messages other than the Distress are stored in “Others.”<br />
• “ ” appears when there are unread DSC messages.<br />
• “ ” appears when there are no unread DSC messages.<br />
• No icon appears when there are no DSC messages.<br />
eePush [ Y] or [Z] to select the desired item, then push<br />
[ENT].<br />
• The message in the unopened file has not been read.<br />
rrRotate Dial to scroll the DSC message contents.<br />
• The stored message has various information, depending on the<br />
DSC call type.<br />
Rotate<br />
ttTo delete the displayed DSC message, push [DEL].<br />
• The confirmation screen appears, then push [OK] to delete.<br />
yyPush [EXIT] to return to the normal operating mode.<br />
1<br />
2<br />
3<br />
4<br />
5<br />
6<br />
7<br />
8<br />
9<br />
10<br />
11<br />
12<br />
13<br />
14<br />
15<br />
16<br />
59
7 DSC OPERATION<br />
■■DSC Settings<br />
D Position Input (See page 22)<br />
D Add Individual ID/Group ID (See pages 19, 20)<br />
D Delete Individual ID/Group ID (See page 21)<br />
DDAutomatic Acknowledgement<br />
These items set the Automatic Acknowledgement function to<br />
“Auto TX” or “<strong>Manual</strong> TX.”<br />
When an Individual, Position Request, Polling Request or<br />
Test Call is received, the transceiver automatically transmits<br />
an Individual Acknowledgement, Position Reply, Polling Reply<br />
or Test Acknowledgement Call, respectively.<br />
When “INDIVIDUAL ACK” is set to “Auto TX,” the transceiver<br />
automatically transmits the Acknowledgment call<br />
including “Unable to Comply” (No Reason Given) after receiving<br />
the Individual call.<br />
qqEnter either “INDIVIDUAL ACK,” “POSITION ACK” or<br />
“TEST ACK” in the DSC Settings menu.<br />
MENU ➪ DSC Settings ➪ Individual ACK<br />
(Push [MENU]) (Rotate Dial, then push [ENT].)<br />
MENU ➪ DSC Settings ➪ Position ACK<br />
MENU ➪ DSC Settings ➪ Test ACK<br />
wwRotate Dial to select “Auto TX” or “<strong>Manual</strong> TX,” then push<br />
[ENT].<br />
• Push [BACK] to cancel and return to the DSC Settings menu.<br />
(default)<br />
(default)<br />
(default)<br />
eePush [EXIT] to return to the normal operating mode.<br />
60
DSC OPERATION<br />
7<br />
DDChannel 16 Switch function<br />
By regulation, after receiving a Distress call, the transceiver<br />
switches the operating channel to Channel 16. However,<br />
when this setting is set to “OFF,” the function enables the<br />
transceiver to remain on the operating channel, even after<br />
receiving a Distress call.<br />
qqEnter “CH 16 SWITCH” in the DSC Settings menu.<br />
MENU ➪ DSC Settings ➪ CH 16 Switch<br />
(Push [MENU]) (Rotate Dial, then push [ENT].)<br />
wwRotate Dial to set the Channel 16 Switch function to “Auto<br />
(No Delay),” “10 Second Delay” or “OFF,” then push [ENT].<br />
• Push [BACK] to cancel and return to the DSC Settings menu.<br />
(default)<br />
Auto (No Delay) : After receiving a Distress call, and<br />
[ACPT] is pushed on the confirmation<br />
screen, the transceiver immediately<br />
switches to Channel 16.<br />
10 Second Delay : After receiving a Distress call, and<br />
[ACPT] is pushed on the confirmation<br />
screen, the transceiver remains on the<br />
current operating channel for 10 seconds.<br />
After that, the transceiver automatically<br />
switches to Channel 16.<br />
OFF<br />
(default)<br />
: Even after receiving a Distress call,<br />
the transceiver remains on the operating<br />
channel.<br />
• “ ” appears.<br />
eePush [EXIT] to return to the normal operating mode.<br />
1<br />
2<br />
3<br />
4<br />
5<br />
6<br />
7<br />
8<br />
9<br />
10<br />
11<br />
12<br />
13<br />
14<br />
15<br />
16<br />
61
7 DSC OPERATION<br />
DDDSC Data Output<br />
Select an option for the DSC Data Output function.<br />
When receiving a DSC call, this function makes the transceiver<br />
send the DSC data from its NMEA Output port to a<br />
connected device.<br />
qqEnter “DSC DATA OUTPUT” in the DSC Settings menu.<br />
MENU ➪ DSC Settings ➪ DSC Data Output<br />
(Push [MENU]) (Rotate Dial, then push [ENT].)<br />
wwRotate Dial to set the DSC Data Output function to “All Station,”<br />
“List Station” or “OFF,” then push [ENT].<br />
• Push [BACK] to cancel and return to the DSC Settings menu.<br />
DDAlarm<br />
Set the Alarm function ON or OFF, depending on the Category<br />
or Status.<br />
qqEnter “ALARM” in the DSC Settings menu.<br />
MENU ➪ DSC Settings ➪ Alarm<br />
(Push [MENU]) (Rotate Dial, then push [ENT].)<br />
wwRotate Dial to select the status, then push [ENT].<br />
• Push [BACK] to cancel and return to the DSC Settings menu.<br />
• “Safety,” “Routine,” “Warning,” “Self-Terminate” and “Discrete” are<br />
selectable. (default: ON )<br />
(default)<br />
All Station : Outputs the call from any vessel from the<br />
NMEA Output port.<br />
List Station : Outputs the call from any vessels listed on<br />
the Individual ID screen.<br />
OFF : Does not output any call to the external<br />
equipment.<br />
eePush [EXIT] to return to the normal operating mode.<br />
eeRotate Dial to set the Alarm setting to “ON” or “OFF.”<br />
rrPush [EXIT] to return to the normal operating mode.<br />
62
DSC OPERATION<br />
7<br />
D Channel 70 Squelch level<br />
Set the squelch level on Channel 70.<br />
The transceiver has 11 squelch levels between 1 (loose<br />
squelch) and 10 (tight squelch) and OPEN.<br />
OPEN is completely open.<br />
q Enter “CH 70 SQL LEVEL” in the DSC Settings menu.<br />
MENU ➪ DSC Settings ➪ CH 70 SQL Level<br />
(Push [MENU]) (Rotate Dial, then push [ENT].)<br />
w Rotate Dial to adjust the squelch level until the noise just<br />
disappears, then push [ENT].<br />
• Push [BACK] to cancel and return to the DSC Settings menu.<br />
(default)<br />
eePush [EXIT] to return to the normal operating mode.<br />
D DSC Loop Test<br />
The DSC loop test function sends transmit DSC signals to<br />
the receive AF circuit to compare and check the TX and RX<br />
signals at the AF level.<br />
q Enter “DSC LOOP TEST” in the DSC Settings menu.<br />
MENU ➪ DSC Settings ➪ DSC Loop Test<br />
(Push [MENU]) (Rotate Dial, then push [ENT].)<br />
w Push [ENT] to start the DSC loop test.<br />
• Push [BACK] to cancel and return to the DSC Settings menu.<br />
• When the transmit DSC and receive DSC signals are matched,<br />
“OK” appears.<br />
eePush [EXIT] to return to the normal operating mode.<br />
If “NG” appears in step w, either or both TX and RX DSC<br />
circuits has a problem. In that case, you will have to send<br />
the transceiver to your nearest dealer for repair.<br />
1<br />
2<br />
3<br />
4<br />
5<br />
6<br />
7<br />
8<br />
9<br />
10<br />
11<br />
12<br />
13<br />
14<br />
15<br />
16<br />
63
7 DSC OPERATION<br />
■■Making an Individual call using an AIS transponder<br />
When the optional MA-500TR CLASS B AIS TRANSPONDER is<br />
connected to your transceiver, an individual DSC call can be<br />
transmitted to a selected AIS target, without needing to enter<br />
the target’s MMSI code. In this case, the call type is automatically<br />
set to Routine.<br />
See page 73 for connecting instructions.<br />
To ensure correct operation of the DSC function, make<br />
sure you correctly set the CH70 SQL LEVEL. (p. 63)<br />
Transponder’s display<br />
Transceiver’s display<br />
Step 1: Transponder’s operation<br />
qqSelect a desired AIS target on the plotter, target list or danger<br />
list display.<br />
• You can also go to the next step whenever the detail screen of<br />
the AIS target is displayed.<br />
• Make sure the transceiver is in the normal operating mode. Otherwise,<br />
you cannot make an individual DSC call using the transponder.<br />
wwPush [DSC] to display the voice channel selection screen,<br />
and then push [Y] or [Z] to select a desired voice channel*.<br />
• Voice channels are already preset into the transponder in recommended<br />
order.<br />
*When a coast station is selected in step q, a voice channel will<br />
be specified by the coast station, therefore you cannot change<br />
the channel. The transponder will display “Voice Channel is<br />
specified by the Base station,” in this case.<br />
eePush [DSC] to transmit an individual DSC call to the AIS<br />
target.<br />
• If Channel 70 is busy, the transceiver stands by until the channel<br />
becomes clear.<br />
• If the transceiver cannot make the call, the transponder will display<br />
“DSC Transmission FAILED.”<br />
Transponder’s display<br />
Transceiver’s display<br />
64
DSC OPERATION<br />
7<br />
rrAfter making the individual DSC call, the transponder will<br />
display “DSC Transmission COMPLETED.”<br />
• Push [CLEAR] to return to the screen displayed before you entered<br />
the voice channel selection screen in step w.<br />
• The transceiver stands by on Channel 70 until an acknowledgement<br />
is received.<br />
Transponder’s display<br />
Transceiver’s display<br />
Step 2: Transceiver’s operation<br />
ttWhen the acknowledgement is received, beeps sound.<br />
➥➥ If the acknowledgement ‘Able to comply’ is received,<br />
push [ALARM OFF] to stop the beeps, and then select<br />
the intership channel specified in step w.<br />
• A different intership channel will be selected if the station you<br />
called cannot use the channel.<br />
• To reply, push [PTT] and speak at a normal voice level.<br />
• You can check the MMSI code or the name, if programmed,<br />
of the AIS target on the display.<br />
➥➥ If the acknowledgement ‘Unable to comply’ is received,<br />
push [ALARM OFF] to stop the beeps, and then return<br />
to the operating channel before you entered the MENU<br />
screen.<br />
‘Able to comply’ is received<br />
‘Unable to comply’ is received<br />
yy<br />
After the communication is finished, push [EXIT] to return<br />
to the normal operating mode.<br />
TRANSPONDER<br />
[Y]<br />
[Z]<br />
[CLEAR]<br />
[DSC]<br />
1<br />
2<br />
3<br />
4<br />
5<br />
6<br />
7<br />
8<br />
9<br />
10<br />
11<br />
12<br />
13<br />
14<br />
15<br />
16<br />
65
8<br />
MENU SCREEN OPERATION<br />
■■Menu screen operation<br />
The Menu screen is used for programming infrequently<br />
changed values, function settings or sending DSC calls.<br />
In addition to this page, see pages 67 through 71 for details.<br />
DD<br />
Entering the Menu screen and operation<br />
Example: Set the channel group to “USA.”<br />
qqPush [MENU].<br />
Menu lists<br />
[Y]/[Z]<br />
[ENT]<br />
wwRotate Dial or push [ ∫]/[√] to select<br />
the root item (Radio Settings), and<br />
then push [ENT].<br />
• If [∫] or [√] is continuously held down,<br />
the items are sequentially highlighted.<br />
eeRotate Dial or push [ ∫]/[√] to select<br />
“CHAN Group,” and then push<br />
[ENT].<br />
rrRotate Dial or push [ ∫]/[√] to select<br />
“USA,” and then push [ENT] to set it.<br />
• “✔” is displayed next to “USA.”<br />
66<br />
[EXIT] [BACK]<br />
[ENT]<br />
[MENU]<br />
Dial<br />
[CLEAR]<br />
ttPush [EXIT] to exit the Menu<br />
screen.<br />
• Push [CLEAR] or [BACK] to return to<br />
the previous screen.
MENU SCREEN OPERATION<br />
8<br />
■■Menu screen items<br />
The Menu screen contains the following items.<br />
DDDSC Calls<br />
Item Ref. Item Ref.<br />
• Individual Call p. 27 • Transmitted Call Log p. 57<br />
• Individual ACK* 1 p. 31 • Received Call Log p. 58<br />
• Group Call p. 32 • Test Call p. 35<br />
• All Ships Call p. 34 • Test ACK* 1 p. 37<br />
• Distress Call p. 24<br />
* 1 Appears only after receiving a corresponding call.<br />
DDDSC Settings<br />
Item Ref. Item Ref.<br />
• Position Input* 2 p. 22 • CH 16 Switch p. 61<br />
• Individual ID p. 19 • DSC Data Output p. 62<br />
• Group ID p. 20 • Alarm p. 62<br />
• Individual ACK p. 60 • CH 70 SQL Level p. 63<br />
• Position ACK p. 60 • DSC Loop Test p. 63<br />
• Test ACK p. 60<br />
* 2 Appears only when no GPS information is received.<br />
DDRadio Settings<br />
Item Ref. Item Ref.<br />
• Scan Type p. 68 • Dual/Tri-Watch p. 68<br />
• Scan Timer p. 68 • Channel Group p. 68<br />
DDConfiguration<br />
Item Ref. Item Ref.<br />
• Backlight p. 69 • UTC Offset p. 70<br />
• Display Contrast p. 69 • Inactivity Timer p. 71<br />
• Key Beep p. 69 • Remote ID p. 71<br />
• Key Assignment p. 69<br />
DDMMSI/GPS Info<br />
The transceiver shows the programmed MMSI and ATIS* 3<br />
codes and GPS information* 4 .<br />
If the code is not programmed, “NO DSC MMSI” or “NO ATIS<br />
MMSI”* 3 is displayed.<br />
* 3 Appears only for the Dutch version transceivers.<br />
* 4 When a GPS receiver (NMEA0183 ver. 2.0 or 3.01) is connected.<br />
Rotate<br />
1<br />
2<br />
3<br />
4<br />
5<br />
6<br />
7<br />
8<br />
9<br />
10<br />
11<br />
12<br />
13<br />
14<br />
15<br />
16<br />
67
8 MENU SCREEN OPERATION<br />
■■Radio Settings items<br />
D DScan type<br />
(Default: Priority Scan)<br />
The transceiver has two scan types; Normal scan and Priority<br />
scan. A Normal scan searches all Favorite channels in the<br />
selected channel group. A Priority scan sequentially searches<br />
all Favorite channels, while monitoring Channel 16.<br />
D DDual/Tri-watch<br />
(Default: Dualwatch)<br />
This item can be selected as Dualwatch or Tri-watch. (p. 18)<br />
<br />
D DScan resume timer<br />
(Default: OFF)<br />
The scan resume timer can be selected as a pause (OFF)<br />
or timer scan (ON). When OFF is selected, the scan pauses<br />
until the signal disappears.<br />
• Normal scan When ON is selected, the scan pauses for 5<br />
seconds and then resumes, even if a signal has<br />
been received on any channel.<br />
• Priority scan When ON is selected, the scan pauses for 5<br />
seconds and then resumes, even if a signal has<br />
been received on any channel other than Channel<br />
16.<br />
D DChannel Group<br />
(Default: INT)<br />
Except for the Europe version, a channel group suitable for<br />
your operating area can be selected. Depending on the transceiver<br />
version, INT, USA, ATIS or DSC may be selectable.<br />
See page 10 for details.<br />
• The screen below shows the U.K. version.<br />
68
MENU SCREEN OPERATION<br />
8<br />
■■Configuration items<br />
D DBacklight<br />
(Default: 7)<br />
The function display and keys can be backlit for better visibility<br />
under low light conditions.<br />
The backlight can be set to 7 levels and OFF.<br />
D DDisplay contrast<br />
(Default: 5)<br />
This item adjusts the contrast of the LCD in 8 steps.<br />
Level 1 is the lowest contrast, and level 8 is the highest contrast.<br />
D DKey Beep<br />
(Default: ON)<br />
You can turn OFF beep tones for silent operation, or you can<br />
turn ON the tones to have confirmation beeps sound when a<br />
key is pushed.<br />
DDKey Assignment<br />
Desired functions can be assigned to Dial and the softkeys.<br />
qqWhen the “KEY ASSIGNMENT” screen is displayed, rotate<br />
Dial or push [∫]/[√] to select “Dial” or “Softkeys,” and then<br />
push [ENT].<br />
wwRotate Dial or push [ ∫]/[√] to select the desired position,<br />
and then push [ENT].<br />
• To return to the default, select “Set default” and push [ENT].<br />
For “Dial” assignment<br />
For “Softkeys” assignment<br />
eeRotate Dial or push [ ∫]/[√] to select the option, and then<br />
push [ENT] to set it.<br />
• “✔” is displayed next to the selected option.<br />
1<br />
2<br />
3<br />
4<br />
5<br />
6<br />
7<br />
8<br />
9<br />
10<br />
11<br />
12<br />
13<br />
14<br />
15<br />
16<br />
For “Dial” assignment<br />
For “Softkeys” assignment<br />
69
8 MENU SCREEN OPERATION<br />
rrPush [EXIT] to exit the Menu screen.<br />
• Push [CLEAR] or [BACK] to return to the previous screen.<br />
• Dial assignment<br />
The Audio volume (VOL), squelch (SQL), channel selection<br />
(CHAN) and LCD backlight level (Backlight) functions can be<br />
assigned to any one of 4 sequential positions on Dial. Pushing<br />
Dial 1 to 4 times sequentially selects the desired function,<br />
and rotating Dial adjusts the level or selects a value or<br />
number.<br />
• Softkeys assignment<br />
The desired function can be assigned as the softkey function.<br />
The assigned function can be used when its key icon is<br />
displayed.<br />
See page 3 for details of the assignable key functions.<br />
DUTC Offset<br />
D (Default: 00:00)<br />
Set the offset time between the UTC (Universal Time Coordinated)<br />
and your local time to between –14:00 and +14:00 (in<br />
1 minute steps).<br />
For example:<br />
- VOL is assigned the 1st position, and pushing Dial once<br />
selects VOL. The VOL screen adjust screen is displayed and<br />
rotating Dial adjusts the audio volume.<br />
- CH is assigned to the 3rd position, and pushing Dial three<br />
times selects CH. The channel number is displayed and rotating<br />
Dial will select the desired channel.<br />
You can assign VOL, SQL, CHAN and Backlight to any one of<br />
the 1st, 2nd, 3rd, or 4th sequential positions.<br />
Repeatedly pushing Dial sequentially displays all the functions<br />
in the order they are assigned, and skips any functions<br />
assigned as Not Used.<br />
70
MENU SCREEN OPERATION<br />
8<br />
DDInactivity Timer<br />
Set the inactivity timer to between 1 and 10 minutes (in 1<br />
minute steps) or OFF for the “Not DSC Related” item, and set<br />
to between 1 and 15 minutes (in 1 minute steps) or OFF for<br />
the “DSC Related” item.<br />
qqWhen the “INACTIVITY TIMER” screen is displayed, rotate<br />
Dial or push [∫]/[√] to select “Not DSC Related” or “DSC<br />
Related,” and then push [ENT].<br />
wwRotate Dial or push [ ∫]/[√] to select the option, and then<br />
push [ENT] to set it.<br />
• “✔” is displayed next to the selected option.<br />
eePush [EXIT] to exit the Menu screen.<br />
• Push [CLEAR] or [BACK] to return to the previous screen.<br />
• Not DSC Related<br />
(Default: 10 min)<br />
When the LCD displays a screen other than the normal operation<br />
screen, or one not related to the DSC, and no key<br />
operation occurs for this set period, the transceiver automatically<br />
returns to the normal operating screen.<br />
• DSC Related<br />
(Default: 15 min)<br />
When the LCD displays the screen related to the DSC, and<br />
no key operation occurs for this set period, except during distress<br />
operation, the transceiver automatically returns to the<br />
normal operating screen.<br />
<br />
DRemote ID<br />
D (Default: 15)<br />
Set a Remote ID number to between 1 and 69.<br />
The Remote ID is included in the sentence of the <strong>Icom</strong> original<br />
NMEA format.<br />
1<br />
2<br />
3<br />
4<br />
5<br />
6<br />
7<br />
8<br />
9<br />
10<br />
11<br />
12<br />
13<br />
14<br />
15<br />
16<br />
<br />
71
9<br />
CONNECTIONS AND MAINTENANCE<br />
■■Connections<br />
q<br />
t<br />
Green: Listener B (Data-L)<br />
Connects to an NMEA Out Negative line of a GPS receiver<br />
for position data.<br />
• A NMEA0183 ver. 2.0 or 3.01 RMC, GGA, GNS, GLL and VTG<br />
sentence format compatible GPS receiver is required. Ask your<br />
dealer about suitable GPS receivers.<br />
72<br />
w<br />
q ANTENNA CONNECTOR<br />
Connects to a marine VHF antenna cable’s PL-259 connector.<br />
CAUTION: Transmitting without an antenna may damage<br />
the transceiver.<br />
w NMEA IN/OUT LEADS<br />
Brown: Talker B (Data-L)<br />
Connects to an NMEA In Negative line of a PC or<br />
NMEA0183 ver. 3.01 sentence format DSC, DSE compatible<br />
navigation equipment, to receive position data from<br />
other ships.<br />
White: Talker A (Data-H)<br />
Connects to an NMEA In Positive line of a PC or NMEA0183<br />
ver. 3.01 sentence format DSC, DSE compatible navigation<br />
equipment, to receive position data from other ships.<br />
r<br />
e<br />
Yellow: Listener A (Data-H)<br />
Connects to an NMEA Out Positive line of a GPS receiver<br />
for position data.<br />
• A NMEA0183 ver. 2.0 or 3.01 RMC, GGA, GNS, GLL and VTG<br />
sentence format compatible GPS receiver is required. Ask your<br />
dealer about suitable GPS receivers.<br />
e AF OUT LEADS<br />
Blue: External Speaker (+)<br />
Black: External Speaker (–)<br />
Connects to an external speaker.<br />
Orange: Data line<br />
Gray: Data line<br />
Used only for maintenance purpose.<br />
NOTE for NMEA In/Out and AF Out leads:<br />
The connectors are attached to keep the leads together.<br />
Before connecting to a piece of equipment, you should cut<br />
the leads to remove the connector.
CONNECTIONS AND MAINTENANCE<br />
9<br />
r DC POWER CONNECTOR<br />
Connects to a 13.8 V DC power source.<br />
CAUTION: After connecting the DC power cable, NMEA<br />
leads or external speaker leads, cover the connector and<br />
leads with an adhesive tape, as shown below, to prevent<br />
water seeping into the connection.<br />
Rubber vulcanizing<br />
tape<br />
t GROUND TERMINAL<br />
Connects to a vessel ground to prevent electrical shocks<br />
and interference from other equipment occurring. Use a<br />
PH M3 × 6 screw (not supplied).<br />
DDConnect to the MA-500TR<br />
Connect the transceiver to the high-density D-Sub 15-pin<br />
connector of the MA-500TR using the OPC-2014* cable. After<br />
connecting, an Individual DSC call can be made to the<br />
AIS target using the transponder without entering the target’s<br />
MMSI code.<br />
* The OPC-2014 is supplied with the MA-500TR<br />
• Listener A (Data-H) lead (Yellow):<br />
Connects to lead 3 of the OPC-2014.<br />
• Listener B (Data-L) lead (Green):<br />
Connects to lead 2 of the OPC-2014.<br />
• Talker A (Data-H) lead (White):<br />
Connects to lead 5 of the OPC-2014.<br />
• Talker B (Data-L) lead (Brown):<br />
Connects to lead 4 of the OPC-2014.<br />
1<br />
2<br />
3<br />
4<br />
5<br />
6<br />
7<br />
8<br />
9<br />
10<br />
11<br />
12<br />
13<br />
14<br />
15<br />
16<br />
73
9 CONNECTIONS AND MAINTENANCE<br />
■■Antenna<br />
■■Supplied accessories<br />
A key element in the performance of any communication system<br />
is the antenna. Ask your dealer about antennas and the<br />
best place to mount them.<br />
Mounting bracket<br />
For mounting bracket<br />
Knob bolts Flat washers (M5)<br />
■■Fuse replacement<br />
Screws (5×20 mm) Spring washers (M5)<br />
One fuse is installed in the supplied DC power cable. If the<br />
fuse blows or the transceiver stops functioning, track down<br />
the source of the problem, repair it, and replace the damaged<br />
fuse with a new one of the proper rating.<br />
Microphone hanger<br />
and screws (3×16 mm)<br />
DC power cable<br />
(OPC-891A)<br />
Fuse rating: 10 A<br />
■■Cleaning<br />
If the transceiver becomes dusty or dirty, wipe it clean with a<br />
soft, dry cloth.<br />
DO NOT use harsh solvents such as benzine or<br />
alcohol, as they will damage transceiver surfaces.<br />
74
CONNECTIONS AND MAINTENANCE<br />
9<br />
■■Mounting the transceiver<br />
DDUsing the supplied mounting bracket<br />
The universal mounting bracket supplied with your transceiver<br />
allows overhead or dashboard mounting.<br />
qqMount the bracket securely to a surface which is more than<br />
10 mm thick and can support more than 5 kg using the 2<br />
supplied screws (5 × 20 mm).<br />
ww<br />
Attach the transceiver to the bracket so that the face of the<br />
transceiver is at 90° to your line of sight when operating it.<br />
KEEP the transceiver and microphone at least 1 meter<br />
away from the vessel’s magnetic navigation compass.<br />
NOTE: Check the installation angle; the function display<br />
may not be easy-to-read at some angles.<br />
• OVERHEAD MOUNTING<br />
• MOUNTING ON THE BOARD<br />
These bolts are shown a<br />
mounting example only.<br />
Not supplied with accessories.<br />
1<br />
2<br />
3<br />
4<br />
5<br />
6<br />
7<br />
8<br />
9<br />
10<br />
11<br />
12<br />
13<br />
14<br />
15<br />
16<br />
75
9 CONNECTIONS AND MAINTENANCE<br />
■■MB-132 installation<br />
An optional MB-132 flush mount is available for mounting the<br />
transceiver to a flat surface, such as an instrument panel.<br />
KEEP the transceiver and microphone at least 1 meter<br />
away from your vessel’s magnetic navigation compass.<br />
eeAttach the clamps on either side of the transceiver with 2<br />
M5 × 8 mm supplied bolts.<br />
• Make sure that the clamps align parallel to the transceiver body.<br />
qqUsing the template on page 81, carefully cut a hole into<br />
the instrument panel, or wherever you plan to mount the<br />
transceiver.<br />
wwSlide the transceiver through the hole, as shown below.<br />
rrTighten the end bolts on the clamps (clockwise) so that the<br />
clamps press firmly against the inside of the instrument<br />
control panel.<br />
ttTighten the locking nuts (counterclockwise) so that the transceiver<br />
is securely mounted in position, as shown below.<br />
yyConnect the antenna and power cable, then return the instrument<br />
control panel to its original place.<br />
t<br />
r<br />
76
SPECIF<strong>IC</strong>ATIONS AND OPTIONS<br />
10<br />
■■Specifications<br />
DDGeneral<br />
• Frequency coverage : Tx 156.000–161.450 MHz<br />
Rx 156.000–163.425 MHz<br />
• Mode<br />
: FM (16K0G3E),<br />
DSC (16K0G2B)<br />
• Channel spacing<br />
: 25 kHz<br />
• Operating temp. range : –20°C to +60°C<br />
• Current drain (at 13.8 V) : TX high 5.5 A maximum<br />
Max. audio 1.5 A maximum<br />
• Power supply requirement : 13.8 V DC nominal<br />
(negative ground)<br />
• Frequency stability : ±1.5 kHz (–20°C to +60°C)<br />
• Antenna impedance : 50 ˘ nominal<br />
• Dimensions (approximately) : 180(W) × 82(H) × 135(D) mm<br />
(Projections not included)<br />
• Weight (approximately) : 1.2 kg<br />
DDTransmitter<br />
• Output power<br />
: 25 W/1 W<br />
• Modulation system : Variable reactance frequency<br />
modulation<br />
• Max. frequency deviation : ±5.0 kHz<br />
• Spurious emissions : Less than 0.25 µW<br />
DDReceiver<br />
• Receive system<br />
: Double conversion<br />
superheterodyne<br />
: –5 dBµ emf (typical)<br />
: Less than –2 dBµ emf<br />
• Sensitivity (20 dB SINAD)<br />
• Squelch sensitivity<br />
• Intermodulation rejection ratio : More than 68 dB<br />
• Spurious response rejection ratio:<br />
More than 70 dB<br />
• Adjacent channel selectivity : More than 70 dB<br />
• Audio output power<br />
: More than 2 W at 10% distortion<br />
with a 4 ˘ load<br />
All stated specifications are subject to change without notice<br />
or obligation.<br />
1<br />
2<br />
3<br />
4<br />
5<br />
6<br />
7<br />
8<br />
9<br />
10<br />
11<br />
12<br />
13<br />
14<br />
15<br />
16<br />
77
10 SPECIF<strong>IC</strong>ATIONS AND OPTIONS<br />
DDDimensions<br />
164.1<br />
61.4<br />
■■Options<br />
• MB-132 flush mount kit<br />
To mount the transceiver to a panel.<br />
119.9<br />
82<br />
25.3<br />
109.7<br />
• MA-500TR class b ais transponder<br />
To transmit individual DSC calls to a selected AIS targets.<br />
Approved <strong>Icom</strong> optional equipment is designed for optimal performance<br />
when used with an <strong>Icom</strong> transceiver.<br />
<strong>Icom</strong> is not responsible for the destruction or damage to an <strong>Icom</strong><br />
transceiver in the event the <strong>Icom</strong> transceiver is used with equipment<br />
that is not manufactured or approved by <strong>Icom</strong>.<br />
180<br />
Unit: mm<br />
78
CHANNEL LIST<br />
11<br />
• International channels<br />
CH<br />
Frequency (MHz) Frequency (MHz) Frequency (MHz) Frequency (MHz) Frequency (MHz) Frequency (MHz)<br />
CH<br />
CH<br />
CH<br />
CH<br />
CH<br />
Transmit Receive Transmit Receive Transmit Receive Transmit Receive Transmit Receive Transmit Receive<br />
01 156.050 160.650 11 156.550 156.550 21 157.050 161.650 61 156.075 160.675 71 156.575 156.575 81 157.075 161.675<br />
02 156.100 160.700 12 156.600 156.600 22 157.100 161.700 62 156.125 160.725 72 156.625 156.625 82 157.125 161.725<br />
03 156.150 160.750 13 156.650 156.650 23 157.150 161.750 63 156.175 160.775 73 156.675 156.675 83 157.175 161.775<br />
04 156.200 160.800 14 156.700 156.700 24 157.200 161.800 64 156.225 160.825 74 156.725 156.725 84 157.225 161.825<br />
05 156.250 160.850 15* 2 156.750 156.750 25 157.250 161.850 65 156.275 160.875 75* 4 156.775 156.775 85 157.275 161.875<br />
06 156.300 156.300 16 156.800 156.800 26 157.300 161.900 66 156.325 160.925 76* 4 156.825 156.825 86 157.325 161.925<br />
07 156.350 160.950 17* 2 156.850 156.850 27 157.350 161.950 67 156.375 156.375 77 156.875 156.875 87 157.375 157.375<br />
08 156.400 156.400 18 156.900 161.500 28 157.400 162.000 68 156.425 156.425 78 156.925 161.525 88 157.425 157.425<br />
09 156.450 156.450 19 156.950 161.550 37A* 3 157.850 157.850 69 156.475 156.475 79 156.975 161.575 P4* 3 161.425 161.425<br />
10 156.500 156.500 20 157.000 161.600 60 156.025 160.625 70* 1 156.525 156.525 80 157.025 161.625<br />
* 1 DSC operation only.<br />
* 2 Channels 15 and 17 may also be used for on-board communications provided the effective radiated power does not exceed 1 W,<br />
and subject to the national regulations of the administration concerned when these channels are used in its territorial waters.<br />
* 3 <strong>UK</strong> Marina Channels: M1=37A (157.850 MHz), M2=P4 (161.425 MHz) for U.K. version only<br />
* 4 The output power of channels 75 and 76 are limited to low power (1 W) only. The use of these channels should be restricted to<br />
navigation-related communications only and all precautions should be taken to avoid harmful interference to channel 16, e.g.<br />
by means geographical separation.<br />
1<br />
2<br />
3<br />
4<br />
5<br />
6<br />
7<br />
8<br />
9<br />
10<br />
11<br />
12<br />
13<br />
14<br />
15<br />
16<br />
79
11 CHANNEL LIST<br />
• USA channels (for U.K. version only)<br />
CH<br />
Frequency (MHz) Frequency (MHz) Frequency (MHz) Frequency (MHz) Frequency (MHz) Frequency (MHz)<br />
CH<br />
CH<br />
CH<br />
CH<br />
CH<br />
Transmit Receive Transmit Receive Transmit Receive Transmit Receive Transmit Receive Transmit Receive<br />
01A 156.050 156.050 12 156.600 156.600 22A 157.100 157.100 64A 156.225 156.225 75* 1 156.775 156.775<br />
- - - - - - - - 13* 2 156.650 156.650 23A 157.150 157.150 65A 156.275 156.275 76* 1 156.825 156.825<br />
03A 156.150 156.150 14 156.700 156.700 24 157.200 161.800 66A 156.325 156.325<br />
- -<br />
- - - - - - 15* 2 156.750 156.750 25 157.250 161.850 67* 2 156.375 156.375<br />
05A 156.250 156.250 16 156.800 156.800 26 157.300 161.900 68 156.425 156.425<br />
06<br />
156.300 156.300 17* 1 156.850 156.850 27 157.350 161.950 69 156.475 156.475<br />
07A 156.350 156.350 18A 156.900 156.900 28 157.400 162.000 70* 3 156.525 156.525<br />
08 156.400 156.400 19A 156.950 156.950 37A* 4 157.850 157.850 71 156.575 156.575<br />
09 156.450 156.450 20 157.000 161.600 61A 156.075 156.075 72 156.625 156.625<br />
10 156.500 156.500 20A 157.000 157.000 - - - - - - - - 73 156.675 156.675<br />
11 156.550 156.550 21A 157.050 157.050 63A 156.175 156.175 74 156.725 156.725<br />
* 1 Low power only.<br />
* 2 Momentary high power.<br />
* 3 DSC operation only.<br />
* 4 <strong>UK</strong> Marina Channels: M1=37A (157.850 MHz), M2=P4 (161.425 MHz) for U.K. version only<br />
83A<br />
84<br />
84A<br />
157.175 157.175<br />
157.225 161.825<br />
157.225 157.225<br />
157.275 161.875<br />
157.275 157.275<br />
77* 1 156.875 156.875 86 157.325 161.925<br />
78A 156.925 156.925 86A 157.325 157.325<br />
79A 156.975 156.975 87 157.375 161.975<br />
80A 157.025 157.025 87A 157.375 157.375<br />
81A 157.075 157.075 88 157.425 162.025<br />
82A 157.125 157.125 88A 157.425 157.425<br />
NOTE: Simplex channels, 3, 21, 23, 61, 64, 81, 82 and 83 CANNOT be lawfully used by the general public in U.S.A. waters.<br />
85<br />
85A<br />
P4* 4<br />
161.425 161.425<br />
80
TEMPLATE<br />
12<br />
62.4<br />
R12 (Max.)<br />
180<br />
165.1<br />
Unit: mm<br />
82<br />
1<br />
2<br />
3<br />
4<br />
5<br />
6<br />
7<br />
8<br />
9<br />
10<br />
11<br />
12<br />
13<br />
14<br />
15<br />
16<br />
Cut here<br />
81
TROUBLE SHOOTING<br />
13<br />
PROBLEM POSSIBLE CAUSE SOLUTION REF.<br />
The transceiver does • Bad connection to the power supply. • Check the connection to the transceiver and p. 72<br />
not turn ON.<br />
power supply.<br />
Little or no sound comes<br />
from the speaker.<br />
Transmitting is impossible,<br />
or high power cannot<br />
be selected.<br />
• Squelch level is set too high.<br />
• Volume level is set too low.<br />
• Speaker has been exposed to water.<br />
• Some channels are programmed for low<br />
power or receive only by regulations.<br />
• The output power is set to low.<br />
• Set the squelch to the threshold point.<br />
• Set the volume to a suitable level.<br />
• Remove the water with the AquaQuake function.<br />
• Change channels.<br />
• Push [HI/LO] to select high power.<br />
Scan does not start. • Favorite channels are not programmed. • Set the desired channels as Favorite channels.<br />
No beep sounds. • Beep tones are turned OFF. • Turn the beep tones ON in the CONFIGURA-<br />
TION menu.<br />
Distress calls cannot be<br />
transmitted.<br />
• MMSI (DSC self ID) code is not programmed.<br />
p. 14<br />
p. 14<br />
p. 15<br />
pp. 9,<br />
10, 79<br />
p. 11<br />
p. 17<br />
p. 69<br />
• Program the MMSI (DSC self ID) code. p. 7<br />
1<br />
2<br />
3<br />
4<br />
5<br />
6<br />
7<br />
8<br />
9<br />
10<br />
11<br />
12<br />
13<br />
14<br />
15<br />
16<br />
83
MEMO
MEMO
Intended Country of Use ><br />
BE CY CZ DK<br />
FR DE GR HU<br />
LV LT LU MT<br />
PT SK SI ES<br />
IS LI NO CH<br />
TR HR<br />
AT<br />
FI<br />
IT<br />
PL<br />
GB<br />
RO<br />
EE<br />
IE<br />
NL<br />
SE<br />
BG<br />
A-7054D-1EU<br />
Printed in Japan<br />
© 2012 <strong>Icom</strong> Inc.<br />
Printed on recycled paper with soy ink.<br />
1-1-32 Kamiminami, Hirano-ku, Osaka 547-0003, Japan


