User Guide - Phonak
User Guide - Phonak
User Guide - Phonak

Create successful ePaper yourself
Turn your PDF publications into a flip-book with our unique Google optimized e-Paper software.
<strong>User</strong> <strong>Guide</strong><br />
!<br />
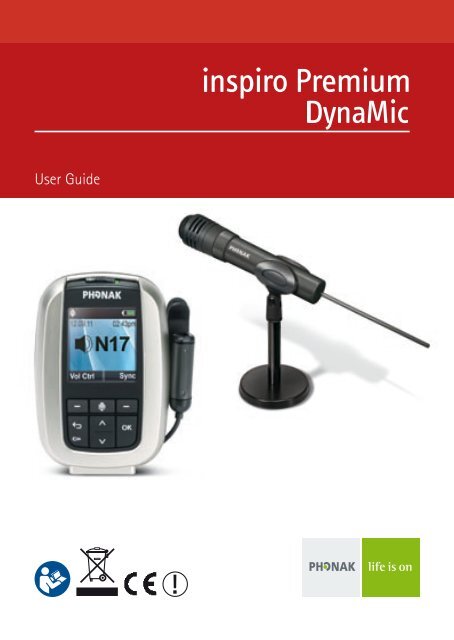
inspiro Premium
2<br />
Contents<br />
1. Welcome 6<br />
2. inspiro and accessoires 8<br />
3. Important inspiro figures 9<br />
3.1 Operating time and charging 9<br />
3.2 Operating range (FM transmission) 9<br />
4. Controls 10<br />
5. Getting started 12<br />
5.1 Charging inspiro 12<br />
5.2 Low battery alarms 14<br />
5.3 Wearing inspiro 15<br />
5.4 Attaching the clip to the inspiro 16<br />
5.5 Attaching the lavalier to the inspiro 18<br />
5.6 Wearing iLapel microphone 19<br />
5.7 iLapel wearing position 20<br />
5.8 Wearing EasyBoom microphone 21<br />
5.9 Switching ON inspiro 23<br />
5.10 Activate the key pad lock 24<br />
5.11 Monitoring 25
6. Using inspiro 27<br />
6.1 Talking 27<br />
6.2 SoundCheck 28<br />
6.3 Muting the microphone 29<br />
6.4 Using inspiro with an MP3 player,<br />
TV set, GPS, computer or HiFi 30<br />
6.5 Synchronizing receivers 32<br />
7. Individual inspiro configuration 33<br />
7.1 Setting the alarm time 33<br />
7.2 Setting the preferred date format 34<br />
7.3 Adjusting the settings of the LCD display 35<br />
7.4 Selecting a desktop picture 36<br />
7.5 Selecting your language 37<br />
8. Brief description of the menu items 38<br />
8.1 Channels 38<br />
8.2 Receiver options 39<br />
8.3 SoundCheck 40<br />
8.4 Settings 40<br />
8.5 Help 42<br />
8.6 MultiTalker Network 43<br />
8.7 Receiver options 44<br />
9. Changing the application mode 45<br />
3
4<br />
Contents<br />
10. DynaMic and accessories 46<br />
11. Important DynaMic figures 47<br />
11.1 Operating time and charging 47<br />
11.2 Operating range (FM transmission) 47<br />
12. Controls 48<br />
13. Getting started 49<br />
13.1 Charging DynaMic 49<br />
13.2 Battery status indication 50<br />
13.3 Vibration alarm indication 51<br />
13.4 Switching ON DynaMic 52<br />
14. Using DynaMic 54<br />
14.1 Common use situations 54<br />
14.2 Passaround microphone 54<br />
14.3 Talking 54<br />
14.4 Colored rings 55<br />
14.5 DynaMic DataLogging FM 55<br />
14.6 Programming 55<br />
15. The MultiTalker Network in school 56<br />
15.1 The MultiTalker Network 56<br />
15.2 Initiating a MultiTalker Network 57<br />
15.3 How to use a MultiTalker Network 58
15.4 Leaving a MultiTalker Network 58<br />
15.5 Practical tips 59<br />
15.6 Setting up a MultiTalker Network when using 60<br />
DigiMaster loudspeaker<br />
16. FM receivers 61<br />
16.1 The MLxi 61<br />
16.2 Lock MLxi push button 62<br />
16.3 Identifying receivers 62<br />
16.4 Other <strong>Phonak</strong> FM receivers 63<br />
17. Troubleshooting 64<br />
17.1 inspiro 64<br />
17.2 DynaMic 68<br />
18. Important notices 72<br />
19. Service and warranty 74<br />
20. Declaration of conformity 75<br />
21. Information and explanation of symbols 76<br />
5
6<br />
1. Welcome<br />
inspiro and DynaMic are FM transmitters ideally suited to the<br />
needs of teachers and suitable for use in both regular and<br />
special schools.<br />
inspiro’s outstanding design, with its large color display, makes<br />
this transmitter unique. Soft keys, an alarm clock, different<br />
wearing options and a wealth of other details reflect <strong>Phonak</strong>’s<br />
passion for user friendliness.<br />
DynaMic, the inspiro passaround microphone, is designed to<br />
work exclusively alongside inspiro in the MultiTalker Network.<br />
With its simple, robust and childproof design DynaMic integrates<br />
inspiro’s high performance FM technology.<br />
Please read this manual carefully to benefit from all the features<br />
of your inspiro and DynaMic FM transmitters. Ask your hearing<br />
care professional if you have any questions.<br />
With proper care and usage, inspiro and DynaMic will support<br />
your hearing and communication needs for many years.<br />
inspiro and DynaMic are quality products developed by <strong>Phonak</strong>.<br />
<strong>Phonak</strong> is the world leader in FM technology, innovation and<br />
reliability based in Switzerland.<br />
<strong>Phonak</strong> – Life is on
Further resources:<br />
To find out more about inspiro, DynaMic, and <strong>Phonak</strong> FM in<br />
general, we recommend visiting the following websites:<br />
J www.eschooldesk.com<br />
This is a special website specifically dedicated to providing<br />
support to teachers, parents and other inspiro and DynaMic<br />
users. The short movies available present for example various<br />
functions and trouble shooting for FM systems aim to provide<br />
assistance in daily life.<br />
J www.phonak.com<br />
This is <strong>Phonak</strong> home page. Go on the product section and click<br />
on the FM systems. You can find useful information about<br />
inspiro and DynaMic as well as FM receivers.<br />
J www.fmelibrary.com<br />
This is an online scientific library about FM systems.<br />
The following symbol appears in this user guide:<br />
Important notes for all users.<br />
7
8<br />
2. inspiro and accessoires<br />
inspiro is delivered with either the EasyBoom or the iLapel<br />
microphone, depending on the customer wish. All the accessories<br />
can also be ordered separately.<br />
a inspiro<br />
b Microphones: EasyBoom or iLapel<br />
c inspiro wearing options:<br />
Belt clip and lavalier cord<br />
d Audio cable<br />
e USB charging unit<br />
f Home and travel case
3. Important inspiro figures<br />
3.1 Operating time and charging<br />
J Operating time when the battery is fully charged:<br />
e approx. 12 hours<br />
J Charging time for an 80% charge:<br />
e approx. 1 hour<br />
J Charging time for a 100% charge:<br />
e approx. 2 hours<br />
3.2 Operating range (FM transmission)<br />
J Inside a building:<br />
e approx. 15 meters / 50 feet<br />
J Outside:<br />
e approx. 40-50 meters / 130-170 feet<br />
High-powered electronic equipment, large electronic<br />
installations and metallic structures may impair and<br />
significantly reduce the operating range.<br />
9
10<br />
4. Controls<br />
b<br />
c<br />
a<br />
01.10.2008 01:57pm<br />
H33<br />
Judy Smith<br />
Monitor Sync<br />
d e<br />
f g<br />
inspiro<br />
a ON/OFF slider<br />
b Color LCD<br />
c Soft keys<br />
d Keypad lock key<br />
e Microphone mute key<br />
f 3.5 mm audio input<br />
g mini-USB for charging
h<br />
i<br />
j<br />
l<br />
k<br />
h Button to attach the belt<br />
clip and the lavalier<br />
i Cable wrapper<br />
iLapel microphone<br />
j Microphone openings<br />
(do not cover!)<br />
k Wearing clip<br />
EasyBoom microphone<br />
l Microphone<br />
11
12<br />
5. Getting Started<br />
5.1 Charging inspiro<br />
inspiro contains a re-chargeable built-in state-of-the art lithium<br />
polymer battery with fast-charge capability. A fully-discharged<br />
battery will charge to 80% in one hour and 100% in 2 hours.<br />
Select an easily accessible<br />
socket outlet and plug<br />
the charging unit into the<br />
socket outlet.<br />
Connect the mini-USB plug<br />
from the charging unit to the<br />
inspiro.
Use only the original <strong>Phonak</strong> charging unit<br />
for insprio.<br />
The segments in the battery symbol flash during charging. The<br />
battery cannot be over-charged.<br />
If the charging unit is removed<br />
from the inspiro, the battery<br />
symbol shows the actual<br />
capacity.<br />
The battery is fully charged.<br />
13
14<br />
5. Getting Started<br />
5.2 Low battery alarms<br />
inspiro provides an automatic vibra alarm if the battery is low.<br />
J Approximately 1 hour before battery is empty:<br />
A vibrating alarm is activated. Check the message on the LCD<br />
and follow the instructions.<br />
J Approximately 15 minutes before battery is empty:<br />
If inspiro has not been charged after the first alarm, the<br />
second vibrating alarm is automatically activated before the<br />
battery is completely exhausted. Check the message on the<br />
LCD and follow the instructions. If the battery is not being<br />
charged at that time, inspiro switches OFF automatically in<br />
15 minutes.<br />
If the battery is completely exhausted, there will be no segments<br />
in the battery symbol and the battery symbol in the LCD will<br />
change from white to red.
5.3 Wearing inspiro<br />
inspiro can either<br />
be worn on the belt<br />
by using the clip…<br />
(see page 16)<br />
…or around the neck<br />
by using the lavalier<br />
(see page 18)<br />
15
16<br />
5. Getting Started<br />
5.4 Attaching the clip to the inspiro<br />
Attach the clip to the button on<br />
the backside of the inspiro.<br />
Make sure the clip holds securely<br />
on the inspiro.<br />
Fix the clip to the belt<br />
or trousers. Make sure the<br />
clip on the inspiro holds<br />
securely.<br />
a<br />
b<br />
“click”
a<br />
The clip can also be fixed to the belt or trousers before the<br />
inspiro is attached. Make sure the clip is secured to the inspiro.<br />
To remove the clip<br />
from the inspiro, press<br />
the button on the clip<br />
and carefully remove the<br />
clip from the inspiro.<br />
a<br />
b<br />
b<br />
17
18<br />
5. Getting Started<br />
5.5 Attaching the lavalier to the inspiro<br />
Attach the lavalier to the button<br />
a b<br />
c
5.6 Wearing iLapel microphone<br />
iLapel is an easy-to-use directional lapel microphone which<br />
provides excellent sound quality.<br />
You must switch OFF inspiro before changing the<br />
microphone.<br />
a) Unwind the iLapel from the inspiro.<br />
b) Fix the iLapel to your<br />
shirt and make sure<br />
the distance between the<br />
microphone and your<br />
mouth is approximately<br />
20 cm / 7 inches.<br />
19
20<br />
5. Getting Started<br />
5.7 iLapel wearing position<br />
OK!<br />
Wrong!<br />
Do not cover the two<br />
microphone openings!<br />
If you are uncertain whether the iLapel is in the correct position,<br />
activate the SoundCheck feature in inspiro. SoundCheck helps to<br />
position the iLapel correctly.
5.8 Wearing EasyBoom microphone<br />
EasyBoom is a comfortable, easy-to-use and robust<br />
boom microphone, ideal for use in classrooms.<br />
(A)<br />
You must switch OFF inspiro before changing the<br />
microphone.<br />
(B)<br />
21
22<br />
5. Getting Started<br />
Make sure the head of the microphone is well<br />
positioned, as depicted on page 21 (A). If required you<br />
can easily bend the boom part (B).<br />
Fix the clip on your clothes as depicted and make sure<br />
the cable is not stretched between the clip and the ear,<br />
or the clip and the inspiro transmitter.<br />
I<br />
II<br />
III
5.9 Switching ON inspiro<br />
To switch ON, push the slider to the left until the green mark<br />
appears and the LCD is illuminated.<br />
To save power, the backlight of the inspiro LCD is switched<br />
OFF after a certain time. Press any button to activate the LCD<br />
backlight.<br />
To switch OFF inspiro, push the slider to the right.<br />
ON OFF<br />
01.10.2008 01:57pm<br />
H33<br />
Judy Smith<br />
Monitor Sync<br />
The inspiro can also be switched OFF if the keypad is<br />
locked!<br />
23
24<br />
5. Getting Started<br />
5.10 Activate the key pad lock<br />
It is recommended to activate<br />
the key pad lock whenever<br />
possible.<br />
To activate the key pad lock, go<br />
to the highest menu level as<br />
shown above and press the key<br />
showing the key symbol, then<br />
press OK. A key symbol appears<br />
in the status bar.<br />
If the key pad lock is activated, the six keys are locked.<br />
These remain locked when using the ON/OFF slider. Please<br />
note that the ON/OFF slider is never locked and can<br />
always be used!<br />
To unlock the keys, repeat the above procedure.<br />
01.10.2008 01:57pm<br />
H33<br />
Judy Smith<br />
01.10.2008 01:57pm<br />
H33<br />
Judy Smith
5.11 Monitoring<br />
Monitoring is a simple and easy way to check the functionality of<br />
FM receivers. We recommend monitoring receivers every day. By<br />
pressing the Monitor soft key, the inspiro reads the information<br />
from a child’s FM receivers (one or two FM receivers).<br />
The procedure is as follows:<br />
J Hold the inspiro close to the child, at a distance of<br />
approximately 20 cm / 8 inches from the receivers. Ensure<br />
that no other receivers are within synchronisation range.<br />
J Then press the left soft key Monitor at the top Menu level.<br />
The inspiro then begins to search for receivers. Make sure you<br />
are within synchronisation range until the receivers are shown<br />
on the inspiro’s LCD display.<br />
J The result of the Monitoring process will be displayed on the<br />
inspiro’s LCD display. The completion of the Monitoring process is<br />
marked with a beeping sound.<br />
If the beeping sound cannot be heard in the hearing device,<br />
the child’s hearing device is probably not in an FM program.<br />
Contact your Hearing care professional on matters concerning<br />
the right hearing instrument program for FM.<br />
25
26<br />
5. Getting Started<br />
01.10.2008 01:57pm<br />
H33<br />
Judy Smith<br />
Monitor Sync<br />
01.10.2008 01: 57pm<br />
H33<br />
Judy Smith<br />
Monitor Sync<br />
J In order to view detailed Monitoring results, select the<br />
desired receiver on the inspiro LCD display and press<br />
the OK key. For the purpose of this step, you no longer need<br />
to be close to the receiver.<br />
Monitoring will only be performed if the receiver is<br />
connected to the hearing device and the receiver and<br />
the hearing instrument are turned ON.<br />
Monitoring will only work with <strong>Phonak</strong> Dynamic FM<br />
receivers, like MLxi, MyLink+, ML9i, ML10i, ML11i, etc.<br />
and MLxi Baha. If you are not sure that your receivers are<br />
<strong>Phonak</strong> Dynamic FM receivers, ask your hearing care<br />
professional.
6. Using inspiro<br />
6.1 Talking<br />
Before you start talking to the children, make sure of the<br />
following:<br />
J the microphone is properly positioned (see page 20 and 22)<br />
J the inspiro is turned ON (see page 23)<br />
J and the microphone is active, not muted (see page 29)<br />
We also recommend activating the keypad lock.<br />
01.10.2008 01:57pm<br />
H33<br />
Judy Smith<br />
Monitor Sync<br />
Do not touch the microphone if the inspiro is turned ON.<br />
If you need to reposition the microphone, simply press<br />
the microphone mute key to avoid any amplified noise.<br />
01.10.2008 01: 57pm<br />
H33<br />
Judy Smith<br />
Monitor Sync<br />
01.10.2008 01: 57pm<br />
H33<br />
Judy Smith<br />
Monitor Sync<br />
27
28<br />
6. Using inspiro<br />
6.2 SoundCheck<br />
The SoundCheck lets you verify whether the microphone is<br />
properly positioned, as well as checking the noise level in the<br />
classroom. The required procedure is as follows:<br />
J Activate the SoundCheck in the top menu level. Then<br />
follow the instructions shown on the inspiro’s LCD display.<br />
J Talk continuously until the inspiro stops measuring.<br />
The inspiro will show two results:<br />
J If the level of your voice is good, this will be indicated with<br />
a green bar. If the bar is yellow or red, however, you may<br />
need to reposition the microphone or to speak more loudly.<br />
J If the noise level in the room is in the red or yellow zone,<br />
discuss with your hearing care professional whether there<br />
are possibilities to improve the acoustics in the classroom.
6.3 Muting the microphone<br />
The inspiro’s microphone can be muted simply by pressing the<br />
microphone key on the device. If you have forgotten to<br />
activate the microphone, inspiro will warn you with a vibrating<br />
alarm after 15 minutes.<br />
01.10.2008 01:57pm<br />
H33<br />
Judy Smith<br />
Monitor Sync<br />
01.10.2008 01: 57pm<br />
H33<br />
Judy Smith<br />
Monitor Sync<br />
J This symbol shows that the microphone is active:<br />
J This symbol shows that the microphone has been<br />
muted:<br />
01.10.2008 01: 57pm<br />
H33<br />
Judy Smith<br />
Monitor Sync<br />
29
30<br />
6. Using inspiro<br />
6.4 Using the inspiro with an MP3 player, TV set, GPS,<br />
computer or Hifi<br />
The inspiro can be directly connected to any audio equipment<br />
via the audio input socket on the inspiro.<br />
a<br />
c<br />
a Plug in to the television’s headphone jack<br />
b Plug in to the audio jack AUDIO<br />
c Audio cable (standard accessory)<br />
MICRO<br />
b
J If the audio cable is plugged in, the audio symbol appears<br />
on the inspiro’s LCD display.<br />
J The microphone can still be activated when the audio<br />
input is connected.<br />
J Some televisions are equipped with a separate audio output<br />
volume control, or a muting function. Please refer to the<br />
television’s operating instructions for details.<br />
J Certain pieces of audio equipment feature a Scart or<br />
Cinch audio output. <strong>Phonak</strong> offers an optional adapter for<br />
connecting the audio cable to Scart or Cinch sockets.<br />
Scart adapter Cinch adapter<br />
Unwind the microphone cable in order to reach the<br />
maximum operating distance.<br />
31
32<br />
6. Using inspiro<br />
6.5 Synchronizing receivers<br />
If you change the channel of the inspiro transmitter, you<br />
should always make sure that the channel of the receivers is<br />
synchronized to the new inspiro channel. In order to synchronize<br />
the receivers, the inspiro needs to be close to the receivers (at<br />
a distance of approximately 20 cm / 8 inches).<br />
J Follow the instructions shown on the inspiro, for example<br />
if you change the inspiro channel or if you activate the<br />
Channel Finder.<br />
J In the top screen, you can have direct access to the<br />
synchronization feature by pressing the right soft key<br />
labeled “Sync” (default settings).<br />
01.10.2008 01: 57pm<br />
H33<br />
Judy Smith<br />
Monitor Sync<br />
01.10.2008 01: 57pm<br />
H33<br />
Judy Smith<br />
Monitor Sync<br />
J The Monitoring feature (see page 25) also checks whether<br />
the receivers are on the same channel as the inspiro.
7. Individual inspiro configuration<br />
7.1 Setting the alarm time<br />
The inspiro includes an alarm function. As with mobile phones,<br />
an alarm time can be entered and the alarm can be either activated<br />
or deactivated.<br />
The alarm will only be displayed if the inspiro is switched on!<br />
In order to set an alarm time, proceed as follows:<br />
J Enter the Settings menu and then select Alarm.<br />
J Select Alarm time and then press OK. Using the Up and Down<br />
keys, you can set the first digit of the alarm time. After<br />
pressing OK, the cursor then moves to the next digit. If the<br />
complete time has been entered, press Save.<br />
J Then select Set Alarm.<br />
J Select On and then press OK.<br />
The alarm time has now been set and the alarm has been activated.<br />
This is confirmed by the presence of the bell symbol in the top<br />
part of the screen.<br />
If an alarm sounds, the inspiro will vibrate and a message will<br />
pop up on the screen. Confirm this message using the OK button.<br />
33
34<br />
7. Individual inspiro configuration<br />
7.2 Setting the preferred date format<br />
A choice of two date formats is available on the inspiro:<br />
DD.MM.YYYY or MM/DD/YYYY<br />
J Enter the Settings menu and then select Date & Time.<br />
J Select Date format and then press OK.<br />
J Select the required date format by using the Up or Down key.<br />
Then press OK.<br />
The preferred date format has now been selected and the date<br />
at the top of the screen is now displayed in the new format.<br />
The inspiro also offers two time formats:<br />
24-hour clock<br />
12-hour clock (am/pm)<br />
J In order to select the desired time format, scroll down in<br />
the Date & Time menu and then select Time format. Then<br />
proceed in the same manner as when changing the date<br />
format.
7.3 Adjusting the settings of the LCD display<br />
The settings of the inspiro’s LCD display are pre-set. Should you<br />
wish to change the presets, please proceed as follows:<br />
J Enter the Settings menu and then select Display.<br />
J Select the Backlight menu to increase or decrease the level<br />
of brightness of the backlight of the LCD display.<br />
J Select Turn off light to set the time when the inspiro should<br />
switch OFF the backlight in order to save power.<br />
J Select Turn off display to set the time when the inspiro<br />
should switch OFF the LCD display to save power. The<br />
recommended setting is never.<br />
You can also check the help in the inspiro menu for further<br />
information.<br />
Always check the inspiro ON/OFF slider to determine<br />
whether the inspiro is either switched ON or OFF!<br />
If the inspiro is ON and the LCD display is OFF, the display will<br />
be black, whilst if the inspiro is ON and the background light<br />
is OFF, the LCD display will be dimmed!<br />
If the inspiro is turned ON but the LCD display is OFF or the<br />
backlight is OFF, press the OK key to activate the LCD display!<br />
35
36<br />
7. Individual inspiro configuration<br />
7.4 Selecting a desktop picture<br />
inspiro offers a choice of desktop pictures. One of these<br />
pictures is already active in your inspiro. If you wish to select<br />
another of the desktop pictures, then proceed as follows:<br />
J Enter the Settings menu and then select Desktop picture.<br />
J The LCD display shows the first desktop picture. Press<br />
the Down key once to see the next picture. Pressing the<br />
Down key again will show the other desktop picture.<br />
Once you have chosen your preferred picture, press the<br />
Save soft key.
7.5 Selecting your language<br />
The inspiro offers a choice of different languages. Should you<br />
wish to change the current inspiro language, then proceed as<br />
follows:<br />
J Enter the Settings menu and then select Language.<br />
J You will now see the different languages available listed on the<br />
LCD display. The currently selected language is marked with a<br />
black dot. All of the other languages are marked with a light<br />
grey dot.<br />
J Select the desired language using the Up and Down keys.<br />
Then press OK. An information window will pop up and then<br />
disappear automatically after 2 seconds. Alternatively, you<br />
can press OK to close the window immediately.<br />
The new language has now been set. All of the menu items,<br />
help texts and information windows will now be displayed in the<br />
selected language.<br />
37
38<br />
8. Brief description of the menu items<br />
inspiro can be used in the following operating modes:<br />
J Standard operating mode<br />
For standard use, as well as for use by all parents and<br />
teachers who do not require any special features.<br />
J Extended operating mode<br />
For all users who require access to special FM features,<br />
such as the MultiTalker Network, etc.<br />
J Light operating mode<br />
For users who do not need access to inspiro‘s menu.<br />
inspiro’s operating mode can be changed directly on the inspiro<br />
(see “Changing the application mode” on page 45).<br />
Standard operating mode<br />
8.1 Channels<br />
J Change channel<br />
Change the inspiro’s transmitting FM channel by scrolling<br />
up or down through the FM channel list. You can select a new<br />
channel using the ‘OK’ key. FM receivers can be directly<br />
synchronized to the new channel by pressing the right soft key.
J Find channel<br />
Finds a new, clean FM channel. All of the channels available in<br />
the inspiro are first checked and then the inspiro proposes the<br />
best channel for use. Follow the instructions in the inspiro!<br />
J Sync receivers<br />
Changes the FM channel on the receiver to the current<br />
inspiro channel. The receiver must be within arm’s length.<br />
Beeping sounds confirm that synchronization is complete.<br />
8.2 Receiver options<br />
J Monitor<br />
This performs a wireless check on the receivers. The inspiro<br />
should be kept close to the receivers. The receivers must be<br />
connected to a hearing device and the hearing device must<br />
be switched ON. A beeping sound marks the end of the check.<br />
Monitoring works only with <strong>Phonak</strong> Dynamic FM receivers.<br />
J Set beep tone<br />
Choose between the different beeping tones available to<br />
indicate when the Dynamic FM receivers are being<br />
synchronized or monitored.<br />
J Lock push button<br />
Locks or enables the push button on the universal MLxi<br />
receiver.<br />
39
40<br />
8. Brief description of the menu items<br />
8.3 SoundCheck<br />
J This check determines the volume level of speech and<br />
of background noise. Adjust the position of the iLapel<br />
microphone until you get the best result.<br />
8.4 Settings<br />
J Language<br />
Choose the language of the inspiro menu.<br />
J Alarm<br />
Sets the alarm time. The alarm will sound every day at the<br />
set alarm time, but only if the inspiro is switched ON.<br />
J Date & Time<br />
Sets the current date and time and the date format and<br />
time format.
J Softkeys<br />
With inspiro transmitters running firmware version<br />
3.0 or higher, the left and right soft keys can be<br />
programmed by the user.<br />
left<br />
soft key<br />
right<br />
soft key<br />
To customize these soft keys, select “Settings” in the<br />
menu list and press “OK”.<br />
“Default” key is available to restore the default<br />
configuration for the selected soft key.<br />
41
42<br />
8. Brief description of the menu items<br />
J Audio input<br />
To select the special audio input setting for certain audio<br />
devices, such as the iPod nano, go into the “Audio device”<br />
sub-menu. Select “Set microphone Mute” if you want to mute<br />
the iLapel or EasyBoom microphone when an audio input signal<br />
is detected.<br />
J Display<br />
Set the backlight level, backlight turn-off time and display<br />
turn-off time.<br />
J Desktop picture<br />
Choose your favorite of the different desktop pictures available.<br />
J Battery<br />
View information about battery status.<br />
8.5 Help<br />
J Instructions<br />
Summarizes all the inspiro help texts.<br />
J www support<br />
Displays a website that provides further useful FM information<br />
for teachers and parents.<br />
J Hotline<br />
Provides the phone number to call in case you have questions<br />
or problems.
J About inspiro<br />
Shows the device’s serial number, the software version, the<br />
hardware version, the DSP setting and the menu setting<br />
(Standard/Extended).<br />
Additional features in Extended operating mode<br />
8.6 MultiTalker Network<br />
J MultiTalker Net<br />
If a network has already been set up, you can choose to<br />
start the MultiTalker Network mode. If you do not start the<br />
MultiTalker Network, you will remain in single teaching mode.<br />
J Stop MultiTalker Net<br />
Stop the MultiTalker Network mode if you want to return<br />
to single teaching mode.<br />
J Set up network<br />
Create a MultiTalker network. The network setting is<br />
automatically stored in the inspiro.<br />
J List of participants<br />
In the inspiro managing the network, you can check the<br />
names of other teachers or speakers in the MultiTalker<br />
network.<br />
43
44<br />
8. Brief description of the menu items<br />
8.7 Receiver options<br />
J Scan for channels<br />
Searches for an existing transmission from another<br />
transmitter, e.g. if a speaker is already using an<br />
FM transmitter at a lecture or presentation.<br />
J Identify receivers<br />
Helps to identify a receiver. Relevant receiver data can<br />
be read and displayed in the inspiro LCD, e. g. the user of<br />
the receiver or the serial number.<br />
J View channels<br />
Displays the channels programmed into the receiver.<br />
J Change channel<br />
Change the channel in the receiver without changing<br />
the current inspiro channel. This can be useful if several<br />
working groups need to be created in a class.<br />
J Set FM volume<br />
Increase or decrease the volume of the Dynamic FM receiver.
9. Changing the application mode*<br />
(‘FM’, ‘SoundField‘, ‘SoundField + FM’)<br />
With inspiro Premium transmitters running firmware<br />
version 3.0 or higher, the application mode can be<br />
changed directly on the inspiro.<br />
To change the application mode, switch inspiro ON.<br />
When the battery symbol appears, press “OK” and the<br />
left soft key (C) simultaneously (shown below), then<br />
press “OK” (D) again.<br />
06.07.10 01:57pm<br />
06.07.10 01: 57pm<br />
(C) (D)<br />
Vol Down<br />
Vol Up<br />
Vol Down<br />
Select the application mode required<br />
* applicable to inspiro Premium only!<br />
Vol Up<br />
45
46<br />
10. DynaMic and accessories<br />
DynaMic is supplied with the following accessories:<br />
J Desk stand<br />
J Clamp 3/8”, 5/8”<br />
J Colored rings (for easy microphone identification)<br />
These accessories can be ordered separately.<br />
a DynaMic microphone<br />
b Desk stand with clamp<br />
c Colored rings (red, blue, green)<br />
d Charging unit<br />
e Replacement microphone head
11. Important DynaMic figures<br />
General:<br />
Operates only with inspiro on the MultiTalker Network<br />
11.1 Operating time and charging<br />
J Operating time if the battery is fully charged:<br />
e up to 10 hours<br />
J Charging time for 80% charge<br />
e approx. 1 hour<br />
J Charging time for 100% charge<br />
e approx. 2 hours<br />
11.2 Operating range (FM transmission)<br />
J Operating range (proximity to initiator inspiro):<br />
inside 20 meters / 65 feet<br />
High-powered electronic equipment, large electronic<br />
installations and metallic structures may impair and<br />
significantly reduce the operating range.<br />
47
12. Controls<br />
b<br />
f<br />
a Slider OFF/MUTE/ON<br />
The slider puts DynaMic in one of its three modes.<br />
b RESET button<br />
This allows DynaMic to be reset. The parameters stored<br />
are not affected by this operation. Use a pen to press the<br />
button.<br />
c Built-in vibration alarm<br />
The vibration alarm provides information on the status of<br />
the battery and operation.<br />
d FM Antenna<br />
Emits FM to those FM receivers attached to hearing<br />
instruments.<br />
e mini-USB interface<br />
Interface for charging and programming.<br />
f The LED indicates the following:<br />
J battery status<br />
J charging<br />
J error states<br />
48<br />
a<br />
c<br />
d<br />
e
13. Getting Started<br />
13.1 Charging DynaMic<br />
DynaMic contains the same re-chargeable, state-of-the-art,<br />
fast-charging lithium polymer battery as inspiro. The operating<br />
time of this battery is up to 10 hours, depending on how much<br />
the microphone is used to pick up speech.<br />
A fully-discharged battery takes one hour to charge up to 80%<br />
of its full capacity and two hours for a 100% charge.<br />
Use only the original <strong>Phonak</strong> charging unit for inspiro/<br />
DynaMic.<br />
To simultaneously charge your inspiro and DynaMic we<br />
recommend using the twin charger.<br />
Select an easily accessible power<br />
outlet and plug the charging unit<br />
into the socket.<br />
Connect the mini-USB<br />
plug from the charging<br />
unit to the DynaMic.<br />
49
50<br />
13. Getting Started<br />
J During charging the LED flashes two short green pulses every<br />
5 seconds.<br />
When charging is complete, the LED displays a static green<br />
light.<br />
We recommend fully charging DynaMic. The battery<br />
cannot be over-charged.<br />
13.2 Battery status indication<br />
DynaMic activates an automatic vibration alarm when its<br />
battery level is low.<br />
J Approx. 1 hour before the battery is empty: DynaMic should<br />
be charged.<br />
The LED displays 3 orange flashes, repeated every 60 seconds<br />
and the vibration alarm is activated.<br />
J Approx. 15 minutes before battery is empty: DynaMic must be<br />
charged immediately.<br />
The LED displays 10 orange flashes and the vibration alarm is<br />
activated.<br />
If the battery is not charged immediately, DynaMic’s LED<br />
displays 10 flashes before switching OFF automatically.
13.3 Vibration alarm indication<br />
DynaMic provides a vibration alarm if:<br />
J The battery is low<br />
J The device is out the range of the initiator inspiro in the<br />
MultiTalker Network further than 20 m / 65 feet<br />
J The microphone is muted for more than 15 minutes<br />
J There is no FM transmission – for instance, DynaMic is not<br />
paired<br />
J A system error occurs – fast blinking orange LED signals and<br />
a vibration alarm<br />
In case of a system error, simply press the Reset button.<br />
51
52<br />
13. Getting Started<br />
13.4 Switching ON DynaMic<br />
DynaMic is a passaround microphone designed for use with<br />
inspiro in the MultiTalker Network. It is not a standalone FM<br />
transmitter.<br />
To switch ON DynaMic, follow the steps below:<br />
J inspiro and DynaMic are both OFF<br />
J Switch ON inspiro: push the slider to the left until the green<br />
mark appears and the LCD is activated (see page 23).<br />
J Set-up the MultiTalker Network. Initiate your MultiTalker<br />
Network by pressing “OK”.
J Start DynaMic by pushing the slider from OFF to ON during<br />
the auto pairing time window of 8 seconds.<br />
J After the initiation is complete, the name of DynaMic appears.<br />
Press OK.<br />
DynaMic joins the MultiTalker Network as a secondary<br />
transmitter. It starts working as an FM transmitter.<br />
After switching ON, the LED of the microphone turns off to save<br />
power.<br />
On the initiating inspiro‘s list of participants the microphone<br />
can be recognized.<br />
After pairing DynaMic with inspiro it is recommended to activate<br />
the key pad lock of inspiro whenever possible.<br />
MUTE: When DynaMic is turned ON it is possible to mute the<br />
microphone. Switch the slider from ON to MUTE.<br />
If DynaMic is not paired in the MultiTalker Network it<br />
does not start to emit FM.<br />
53
54<br />
14. Using DynaMic<br />
14.1 Common use situations<br />
J DynaMic situated on a child’s desk, using the supplied table<br />
stand<br />
J Holding DynaMic in the hand<br />
J Wearing the remote mic with a lavalier – not supplied by <strong>Phonak</strong><br />
J Using a floor stand – not supplied by <strong>Phonak</strong><br />
14.2 Passaround microphone<br />
DynaMic can be passed from one speaker to the next.<br />
14.3 Talking<br />
inspiro – Follow all the steps described in the chapter „Talking“,<br />
inspiro chapter page 27.<br />
DynaMic – Make sure DynaMic:<br />
J Is recognized into the MultiTalker Network by the<br />
initiator inspiro. You can check via the inspiro’s LCD.<br />
J Is within range of the MultiTalker Network<br />
J Is turned ON<br />
J Is not muted<br />
Speak into the microphone at relatively<br />
close range, 5-30 cm / 2-12 inches.<br />
When speaking do not cover:<br />
J the head of the microphone<br />
J the antenna
14.4 Colored rings<br />
With the red, blue and green rings it is<br />
possible to personalize your DynaMic<br />
for quick identification.<br />
You may use only 2 rings on one DynaMic. Do not place<br />
these rings over the grill openings of the microphone’s cap.<br />
14.5 DynaMic DataLogging FM<br />
DynaMic automatically logs its usage times. This information<br />
is saved every 15 minutes. The first log entry is stored after<br />
using DynaMic for 15 minutes. The usage data log contains<br />
information such as the device’s name, timestamp, MTN<br />
mode etc.<br />
DynaMic can store up to 800 data logs, covering approx. 20 days<br />
of usage.<br />
14.6 Programming<br />
Programming is optional. The frequency is automatically<br />
selected by the initiating inspiro in the MultiTalker Network.<br />
The following parameters can be programmed using FM<br />
SuccessWare 4.3 software or higher:<br />
J Name, school and date<br />
J Firmware updates<br />
J Reading and erasing logged data<br />
55
56<br />
15. The MultiTalker Network in school<br />
15.1 The MultiTalker Network<br />
One or more inspiro/DynaMic transmitters can participate in a<br />
MultiTalker Network (up to ten transmitters in total).<br />
A maximum of nine additional transmitters can be used<br />
on the MultiTalker Network (MTN).<br />
J The MultiTalker Network is available in the inspiro’s Extended<br />
Operating Mode.<br />
J The MTN’s operating range – i. e. the distance between<br />
the initiating inspiro and each inspiro/DynaMic joining the<br />
network – is 20 m / 65 feet.<br />
If a user should unintentionally leave the network, the inspiro<br />
or DynaMic’s alarm will alert the user.<br />
Diagram of the<br />
MultiTalker Network<br />
0 1 . 2008 1 0 . 0 1:57 p m<br />
Judy Smith<br />
Monitor Sync<br />
J The initiating inspiro displays a list of the other transmitters<br />
in the MultiTalker Network.<br />
H33
15.2 Initiating a MultiTalker Network<br />
Initiating or setting up a MultiTalker Network should be<br />
performed in the classroom before the lesson begins. The<br />
procedure to follow is straightforward and the inspiro<br />
menu guides you through the necessary steps. See the chapter<br />
“Switching ON DynaMic” on page 52.<br />
J Make sure you have all the inspiro and DynaMic transmitters<br />
you plan to include in the network in front of you on the desk.<br />
Ensure all these transmitters are switched OFF.<br />
J Take the main teacher’s or main speaker’s inspiro and switch<br />
it on. In this inspiro, select MultiTalker Network and then Set<br />
up network. This inspiro is known as the “initiator“.<br />
J Read the information on the LCD display and then press the<br />
Start soft key.<br />
J Next, switch on all of the other inspiro and DynaMic<br />
transmitters.<br />
J A list of the inspiro and DynaMic transmitters that have<br />
joined the network should now be displayed on the initiating<br />
inspiro. If all of the transmitters are listed, press the Continue<br />
soft key.<br />
You have successfully created a MultiTalker Network! All inspiro<br />
and DynaMic transmitters are paired by the initiator inspiro.<br />
Begin talking as usual.<br />
57
58<br />
15. Multiple talkers in one classroom<br />
15.3 How to use a MultiTalker Network<br />
J The inspiro that has set-up (initiated) the network has first<br />
priority; all other transmitters inspiro/DynaMic that joined the<br />
network have second priority.<br />
The teacher with first priority can interrupt any teacher or<br />
student that has second priority; a second priority teacher or<br />
student can only take over during the speech pauses of the<br />
first priority teacher.<br />
J All devices transmit on the same FM channel, but they do not<br />
transmit at the same time.<br />
J No user action is required; if the first priority inspiro does not<br />
detect speech, any second priority teacher or student can “get<br />
the microphone” just by starting to talk.<br />
J The listening FM receivers only ‘hear’ one voice at a time.<br />
15.4 Leaving a MultiTalker Network<br />
The MultiTalker Network cannot exist without the presence of the<br />
initiating inspiro in the network. If you decide to end the Multi-<br />
Talker Network, the entire network will cease and all of the inspiro<br />
and DynaMic transmitters will activate their respective alarms.<br />
If you are using an inspiro that just joined a network, you can<br />
always leave the network by selecting Stop MultiTalker Network.<br />
Your inspiro will then be set to single teaching mode, but all<br />
of the other inspiro transmitters in the MultiTalker Network will<br />
remain in MultiTalker Network mode.
If you switch OFF one DynaMic, it will be deleted from your<br />
participants list. The MultiTalker Network will continue with<br />
all other DynaMic and inspiro transmitters.<br />
Should you unintentionally move outside the range of the<br />
MultiTalker Network, you will be alerted by an alarm. You can<br />
then choose to either return inside the network’s operating range<br />
(i. e. within 20 m / 65 feet of the initiating inspiro), or leave the<br />
network.<br />
15.5 Practical tips<br />
J The MultiTalker Network setting is stored in the inspiro<br />
transmitters. If the inspiro and DynaMic transmitters have<br />
been switched OFF in MultiTalker Network mode, e. g. before<br />
lunch, when switched back ON again after lunch MultiTalker<br />
Network mode can be selected by simply turning on inspiro and<br />
pressing Continue. In this case, there is no need to re-initiate<br />
the network. All the DynaMic transmitters will join the network<br />
after the 8 seconds pairing window.<br />
J If you have set up a MultiTalker Network with, for instance,<br />
two inspiro transmitters and a third person then needs to<br />
join the network with inspiro or DynaMic, you must initiate<br />
a new MultiTalker Network.<br />
J inspiro and Dynamic transmitters joining a network<br />
automatically use the FM channel of the initiating inspiro<br />
in the MultiTalker Network.<br />
59
60<br />
15. Multiple talkers in one classroom<br />
J If an inspiro reverts to single teaching mode, it automatically<br />
utilises the FM channel used previously.<br />
J If the initiating inspiro alters the FM channel in MultiTalker<br />
Network mode for any reason, this new channel will<br />
automatically be sent to the other inspiro and DynaMic<br />
transmitters in the network and then activated.<br />
15.6 Setting up a MultiTalker Network when using DigiMaster<br />
loudspeaker<br />
Pre-Requisite: All secondary inspiro‘s for MTN should not be<br />
paired with any DigiMaster loudspeaker!<br />
Before setting up MTN, select each inspiro’s “SoundField”‚ menu,<br />
then “Disconnect”.
16. FM receivers<br />
16.1 The MLxi<br />
An FM system consists of a transmitter and FM receivers. The<br />
inspiro is an FM transmitter, while the MLxi is an FM receiver.<br />
J The MLxi is a universal device and can be<br />
used with <strong>Phonak</strong>, as well as with nearly all<br />
other BTE brands.<br />
J In order to connect an MLxi to the<br />
hearing device, you will need an audio<br />
shoe (audio boot).<br />
J The Audio shoe is produced by the<br />
manufacturer of the hearing device.<br />
The user guide for your hearing<br />
device explains how to attach and<br />
remove the audio shoe from the<br />
hearing device.<br />
Consult your hearing care professional<br />
if you have any questions regarding the<br />
connecting of the MLxi to the audio shoe<br />
and the hearing device.<br />
61
62<br />
16. FM receivers<br />
16.2 Lock MLxi push button<br />
The MLxi push button can be either locked or activated. This<br />
action can be performed by either the hearing care professional<br />
or the inspiro user.<br />
J In this mode, the MLxi functions automatically.<br />
J This mode is recommended for all children.<br />
The required procedure is as follows:<br />
J Select Lock push button in the Receiver menu.<br />
J Make sure that the distance between the receivers and the<br />
inspiro is approximately 20 cm / 8 inches. Then use either the<br />
left soft key to Lock the push button or the right soft key<br />
to Activate the push button.<br />
J Press the MLxi push button to check whether the setting has<br />
successfully been altered.<br />
16.3 Identifying receivers<br />
The inspiro is able to identify Dynamic FM receivers, e.g. an<br />
MLxi or ML10i. If it locates an MLxi, the inspiro can read<br />
the identification data and display it on the LCD display. This<br />
also helps in determining to whom the receiver belongs.
This feature is only available in the inspiro’s Extended operating<br />
mode.<br />
The required procedure is as follows:<br />
J Make sure that the receiver is connected to a hearing<br />
device and that both the hearing device and the receiver<br />
are switched on and the FM program is activated in the<br />
hearing instrument.<br />
J Ensure that the distance between the inspiro and the MLxi<br />
or ML10i is approximately 20 cm / 8 inches. Select Receiver<br />
options and then Identify receivers.<br />
J The identification data should now be shown on the<br />
inspiro’s LCD display.<br />
This feature is particularly useful in schools.<br />
16.4 Other <strong>Phonak</strong> FM receivers<br />
inspiro/DynaMic are compatible with all <strong>Phonak</strong> FM receivers.<br />
If you have questions concerning a specific receiver, please consult<br />
your hearing care professional or visit:<br />
www.eschooldesk.com<br />
We do not recommend using the inspiro/DynaMic with FM<br />
receivers produced by other manufacturers.<br />
63
64<br />
17. Troubleshooting<br />
17.1 inspiro<br />
Problem<br />
The inspiro cannot be switched ON.<br />
Poor speech intelligibility.<br />
Speaker’s voice is inaudible even though the inspiro is turned ON.
Most probable cause<br />
The battery is empty.<br />
The microphone has not been<br />
positioned properly.<br />
The microphone mute has<br />
been activated or the hearing<br />
device has not been set to<br />
the right program.<br />
Solution<br />
Charge the inspiro for a period<br />
of at least two hours.<br />
Move the microphone closer<br />
to the speaker’s mouth.<br />
Activate the SoundCheck<br />
feature.<br />
Check the inspiro’s LCD<br />
display and press the microphone<br />
mute key in order to<br />
activate the microphone.<br />
Also check whether the hearing<br />
devices are turned on and<br />
set to the right program.<br />
Activate the Monitoring<br />
function on the inspiro to<br />
check the receivers.<br />
65
66<br />
17. Troubleshooting<br />
Problem<br />
Insufficient operating range.<br />
Radio interference.<br />
A second person’s voice can also be heard.<br />
inspiro does not respond to commands.
Most probable cause<br />
Microphone cable has not<br />
been unwound.<br />
External cause:<br />
radio antenna or similar<br />
interfering devices nearby.<br />
Another FM user is using the<br />
same FM channel nearby.<br />
Software issue.<br />
Solution<br />
Unwind the microphone cable.<br />
Change the FM channel. Use<br />
the ChannelFinder to locate an<br />
unused and interference-free<br />
FM channel.<br />
Change the FM channel. Use<br />
the ChannelFinder to locate an<br />
unused and interference-free<br />
FM channel.<br />
Reboot inspiro by pressing its<br />
4 side buttons at the same<br />
time.<br />
67
68<br />
17. Troubleshooting<br />
17.2 DynaMic<br />
Problem<br />
The DynaMic cannot be switched ON.<br />
Poor speech intelligibility.<br />
Speaker’s voice is inaudible even though DynaMic is turned ON.
Most probable cause<br />
The battery is empty.<br />
The microphone has not been<br />
positioned properly.<br />
DynaMic’s antenna or cap are<br />
partially covered.<br />
The colored rings are covering<br />
the acoustic openings.<br />
DynaMic is muted or the<br />
hearing device has not been<br />
set to the right program.<br />
Solution<br />
Charge DynaMic for at least<br />
two hours.<br />
Move DynaMic closer to the<br />
speaker’s mouth.<br />
Uncover DynaMic’s antenna<br />
and cap.<br />
Move DynaMic’s colored rings<br />
off these openings.<br />
Check DynaMic is not muted.<br />
Also check whether the<br />
hearing devices are turned ON<br />
and set to the right program.<br />
69
70<br />
17. Troubleshooting<br />
Problem<br />
Radio interference.<br />
A second person’s voice can also be heard.<br />
DynaMic cannot be found during MTN setup.
Most probable cause<br />
Radio antenna or similar<br />
interfering devices are nearby.<br />
Another FM user is using the<br />
same FM channel nearby.<br />
Not compatible firmware<br />
version.<br />
Solution<br />
Proceed as for inspiro.<br />
Proceed as for inspiro.<br />
Upgrade firmware version.<br />
71
72<br />
18. Important notices<br />
inspiro and DynaMic transmitters collect and store internal<br />
technical data. This data may be read by a hearing care<br />
professional in order to check the transmitters, as well as to<br />
support you in being able to use inspiro and DynaMic in<br />
the ideal manner.<br />
Do not use your inspiro and DynaMic in a place where it is<br />
prohibited to use electronic devices. If in doubt, please ask<br />
the person in charge.<br />
Persons with pacemakers or other medical devices should<br />
ALWAYS consult their physician, the manufacturer of their<br />
pacemaker, or other medical device BEFORE using inspiro<br />
and DynaMic. The use of inspiro with a pacemaker or other<br />
medical devices should ALWAYS be in accordance with the<br />
safety recommendations of the physician responsible for<br />
your pacemaker or the pacemaker manufacturer.<br />
Do not use two or more inspiro transmitters on the same<br />
FM channel, except in the case of those transmitters being<br />
used on the MultiTalker Network.<br />
Please note that radio signals might also be picked up and<br />
overheard by other receivers.<br />
Before using the inspiro in a foreign country, contact your<br />
hearing care professional to ensure that the use of your<br />
radio channels is permitted in that country.
Do not use water or other liquids to clean inspiro or DynaMic.<br />
Use only original <strong>Phonak</strong> accessories.<br />
Use only the original <strong>Phonak</strong> charger for inspiro and<br />
DynaMic.<br />
inspiro and DynaMic should only be repaired by an<br />
authorized service center.<br />
Dropping inspiro or DynaMic can damage the transmitters.<br />
Do not place DynaMic’s personalization rings over the<br />
acoustic openings of the microphone’s cap.<br />
Do not cover the antenna or the microphone’s cap while<br />
speaking.<br />
The microphone cap should only be opened for replacement<br />
purposes.<br />
Please note that with inspiro you can adjust the volume of<br />
the iSense Micro. Your hearing care professional must<br />
program your inspiro by selecting iSense Micro as FM receiver.<br />
This can be done with FM SuccessWare 4.2.1 or later.<br />
73
74<br />
19. Service and warranty<br />
Local Warranty<br />
Please ask the hearing care professional, where you purchased<br />
your devices, about the terms of the local warranty.<br />
International Warranty<br />
<strong>Phonak</strong> offers you a one year limited international warranty<br />
valid starting from the date of purchase. The limited warranty<br />
covers manufacturing and material defects in the device itself,<br />
but not accessories such as batteries. The warranty only comes<br />
into force if a proof of purchase is shown. The international<br />
warranty does not affect any legal rights that you might have<br />
under applicable national legislation governing sale of<br />
consumer goods.<br />
Warranty Limitation<br />
This warranty does not cover damage from improper handling<br />
or care, exposure to chemicals or undue stress. Damage caused<br />
by third parties or non-authorized service centers renders the<br />
warranty null and void. This warranty does not include any<br />
services performed by a hearing care professional in their<br />
office.<br />
Serial number inspiro:<br />
Serial number FM receiver:<br />
Serial DynaMic:<br />
Date of purchase:<br />
Authorized hearing care professional<br />
(Stamp/ signature):
20. Declaration of conformity<br />
Hereby, <strong>Phonak</strong> Communications AG, declares that the inspiro<br />
and DynaMic are in compliance with the essential requirements<br />
and other relevant provisions of Directive 1999/5/EC.<br />
To obtain a copy of the Declaration of conformity, please contact<br />
the manufaturer or the local <strong>Phonak</strong> representative whose<br />
address can be taken from the list on www.phonak.com<br />
(worldwide locations).<br />
This device complies with part 15 and part 95 of the FCC rules<br />
and with RSS 210 of Industry Canada.<br />
Operation is subject to the following two conditions:<br />
(1) These devices do not cause harmful interference and (2) must<br />
accept any interference received, including interference that may<br />
cause undesired operation.<br />
These transmitters are authorized by rule under the Low Power<br />
Radio Service (47 C.F.R. Part 95) and must not cause harmful<br />
interference to TV reception or United States Navy SPASUR<br />
installations.<br />
You do not need an FCC license to operate these transmitters.<br />
The transmitters may only be used to provide: auditory assistance<br />
to persons with disabilities, persons who require language<br />
translation, or persons in educational settings; health care services<br />
to the ill; law enforcement tracking services under agreement<br />
with a law enforcement agency; or automated maritime telecommunications<br />
system (AMTS) network control communications.<br />
Two way voice communications and all other types of uses not<br />
mentioned above are expressly prohibited.<br />
Warning: Changes or modifications made to this equipment<br />
not expressly approved by <strong>Phonak</strong> may void the user’s<br />
authority to operate the equipment.<br />
75
76<br />
21. Information and explanation of symbols<br />
!<br />
The CE symbol is confi rmation by <strong>Phonak</strong> AG<br />
that this <strong>Phonak</strong> product meets the requirements<br />
of directive 93/42/EEC on medical<br />
devices and the R&TTE Directive 1999/5/EC<br />
on Radio and Telecommunication Terminal<br />
Equipment. The alert sign means that potential<br />
restrictions on its use are applicable in one<br />
or more EU Member States.<br />
This symbol indicates that it is important that<br />
the user refers to associated warnings given<br />
in this user guide.<br />
The symbol with the crossed out disposal<br />
bin indicates that these products shall not be<br />
treated as household waste. Please hand over<br />
your old or unused product to the applicable<br />
collection point for the recycling of electrical<br />
and electronic equipment or bring your old<br />
product to your hearing care professional<br />
for appropriate disposal. By ensuring these<br />
products are disposed of correctly, you will<br />
help prevent potential negative effects on the<br />
environment and human health.
Operating<br />
conditions<br />
Transportation<br />
and storage<br />
conditions<br />
These products have been designed for troublefree<br />
operation without restrictions when used<br />
as intended, unless otherwise stated in this<br />
user guide.<br />
Temperature should not exceed limits of<br />
–20°/60° Celsius at a relative air humidity<br />
of 65% for extended periods during<br />
transportation and storage. Air pressure<br />
between 500 and 1100 hPa is not detrimental<br />
to these devices.<br />
!<br />
77
Personal notes
Manufacturer:<br />
<strong>Phonak</strong> Communications AG<br />
Laenggasse 17<br />
CH-3280 Murten<br />
Switzerland<br />
EU Representative:<br />
<strong>Phonak</strong> GmbH<br />
D-70736 Fellbach-Oeffi ngen<br />
Germany<br />
www.phonak.com<br />
029-3130-02/V1.00/2011-10/FO Printed in Switzerland © <strong>Phonak</strong> AG All rights reserved