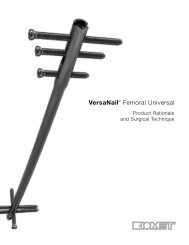
P r o d u c t R a t i o n a l e S u r g i c a l T e c h n i q u e - Biomet
P r o d u c t R a t i o n a l e S u r g i c a l T e c h n i q u e - Biomet
P r o d u c t R a t i o n a l e S u r g i c a l T e c h n i q u e - Biomet

You also want an ePaper? Increase the reach of your titles
YUMPU automatically turns print PDFs into web optimized ePapers that Google loves.
Figure 9 Figure 10 Figure 11<br />
Nail Insertion<br />
The nail is held in a Cannulated T-Handle Inserter (M21897). Align the horizontal<br />
bar of the T-Handle and the curved tip of the nail in the same plane. This will enable<br />
you to identify the position of the curved tip as it is passed along the medullary canal.<br />
Pass the nail through the entry hole with the curved tip pointing downwards.<br />
Once in the medullary canal rotate the curved tip so that it is pointing in the<br />
direction in which the nail is to be passed (Figure 9). Drive the nail up the<br />
canal by rotating the the T-Handle Inserter back and forth. Avoid using a<br />
mallet to force the passage of a nail which has become stuck as a secondary<br />
fracture may occur.<br />
Advance the nail to the fracture site (Figure 10). With a mallet, lightly<br />
tap the nail across the fracture taking care not to rotate the tip as this<br />
may cause the nail to slip behind or in front of the opposite<br />
fragment. Advance the nail towards the metaphysis and anchor it<br />
into the cancellous bone (Figure 11). Advance the second nail<br />
using the same backward and forward movements. Do not rotate<br />
the second nail through a full 360˚ as this may result in the<br />
second nail wrapping itself round the first nail. Again tap the<br />
nail across the fracture site and advance it towards the<br />
metaphysis and anchor it into the cancellous bone.<br />
8