AVR® STK501 User Guide - Atmel Corporation
AVR® STK501 User Guide - Atmel Corporation
AVR® STK501 User Guide - Atmel Corporation

Create successful ePaper yourself
Turn your PDF publications into a flip-book with our unique Google optimized e-Paper software.
<strong>STK501</strong><br />
.............................................................................<br />
<strong>User</strong> <strong>Guide</strong>
Table of Contents<br />
Table of Contents<br />
Section 1<br />
Introduction ........................................................................................... 1-1<br />
1.1 Features....................................................................................................1-2<br />
Section 2<br />
Using the <strong>STK501</strong> Top Module............................................................. 2-1<br />
2.1 Connecting the <strong>STK501</strong> to the STK500 Starter Kit...................................2-1<br />
2.1.1 Placing an ATmega103(L) or ATmega128(L) on the STK500............2-1<br />
2.2 PORT Connectors.....................................................................................2-2<br />
2.2.1 PORT E/PORT F ................................................................................2-2<br />
2.2.2 PORT G/AUX .....................................................................................2-3<br />
2.2.2.1 PG0 - PG4 ...................................................................................2-3<br />
2.2.2.2 A16...............................................................................................2-3<br />
2.2.2.3 SRAMEN......................................................................................2-3<br />
2.2.2.4 PEN..............................................................................................2-3<br />
2.3 Programming the ATmega103(L)/ 128(L) .................................................2-3<br />
2.3.1 In-System Programming.....................................................................2-3<br />
2.3.2 High-voltage Programming.................................................................2-4<br />
2.4 JTAG Connector .......................................................................................2-5<br />
2.5 External SRAM .........................................................................................2-6<br />
2.5.1 A16 .....................................................................................................2-7<br />
2.5.2 SRAMEN ............................................................................................2-7<br />
2.6 Ram High Address Jumpers .....................................................................2-8<br />
2.7 A[7:0] Connector .......................................................................................2-8<br />
2.8 Using the SRAM Interface with AT90S/LS8515 and ATmega161 ............2-8<br />
2.9 TOSC Switch ............................................................................................2-9<br />
2.10 RS-232C Port............................................................................................2-9<br />
Section 3<br />
Troubleshooting <strong>Guide</strong> ......................................................................... 3-1<br />
Section 4<br />
Technical Specifications ....................................................................... 4-1<br />
Section 5<br />
Technical Support................................................................................. 5-1<br />
i
Table of Contents<br />
Section 6<br />
Complete Schematics........................................................................... 6-1<br />
ii
Section 1<br />
Introduction<br />
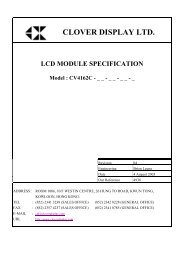
The <strong>STK501</strong> board is a top module designed to add ATmega103(L) and ATmega128(L)<br />
support to the STK500 development board from <strong>Atmel</strong> <strong>Corporation</strong>. With this board the<br />
STK500 is extended to support all current AVR devices in a single development<br />
environment.<br />
The <strong>STK501</strong> includes connectors, jumpers and hardware allowing full utilization of the<br />
new features of the ATmega128(L) while the Zero Insertion Force (ZIF) socket allows<br />
easy use of TQFP packages for prototyping.<br />
This user guide acts as a general getting started guide as well as a complete technical<br />
reference for advanced users.<br />
In addition to adding support for new devices, it also adds new support for peripherals<br />
previously not supported by the STK500. An additional RS-232 port and external SRAM<br />
interface are09/01 among the new features. Devices with dual UART or XRAM interface<br />
can all take advantage of the new resources on the <strong>STK501</strong> board.<br />
Figure 1-1. <strong>STK501</strong> Top Module for STK500<br />
AVR ® <strong>STK501</strong> <strong>User</strong> <strong>Guide</strong> 1-1<br />
Rev. 2491A-09/01
Introduction<br />
1.1 Features STK500 Compatible<br />
AVR Studio ® Compatible<br />
<br />
Supports ATmega103(L) and ATmega128(L)<br />
<br />
Zero Insertion Force Socket for TQFP Packages<br />
<br />
TQFP Footprint for Emulator Adapters<br />
<br />
Supports all Added Features in ATmega128(L)<br />
<br />
JTAG Connector for On-chip Debugging Using JTAG ICE (ATmega128(L))<br />
<br />
Additional RS-232C Port with Available RTS/CTS Handshake Lines<br />
Adds External SRAM Support to the STK500 Board (Usable for all Devices with<br />
<br />
XRAM Interface)<br />
On-board 32 kHz Crystal for Easy RTC Implementations<br />
<br />
1-2 AVR ® <strong>STK501</strong> <strong>User</strong> <strong>Guide</strong>
Section 2<br />
Using the <strong>STK501</strong> Top Module<br />
2.1 Connecting the<br />
<strong>STK501</strong> to the<br />
STK500 Starter<br />
Kit<br />
The <strong>STK501</strong> should be connected to the STK500 expansion header 0 and 1. It is important<br />
that the top module is connected in the correct orientation as shown in Figure 2-1.<br />
The EXPAND0 written on the <strong>STK501</strong> top module should match the EXPAND0 written<br />
beside the expansion header on the STK500 board.<br />
Figure 2-1. Connecting <strong>STK501</strong> to the STK500 Board<br />
Note:<br />
Connecting the <strong>STK501</strong> with wrong orientation may damage the board.<br />
2.1.1 Placing an<br />
ATmega103(L) or<br />
ATmega128(L) on<br />
the STK500<br />
The <strong>STK501</strong> contains both a ZIF socket, and the pinout for a TQFP package; which<br />
allows an easy way of soldering an emulator adapter directly into the <strong>STK501</strong>. Care<br />
should be taken so that the device (or adapter) is mounted with the correct orientation.<br />
Figure 2-2 shows the location of pin 1 for the ZIF socket and the TQFP footprint.<br />
Caution: Do not mount an ATmega103(L) or ATmega128(L) on the <strong>STK501</strong> at the<br />
same time as an AVR is mounted on the STK500 board.<br />
AVR ® <strong>STK501</strong> <strong>User</strong> <strong>Guide</strong> 2-1<br />
Rev. 2491A-09/01
Using the <strong>STK501</strong> Top Module<br />
Figure 2-2. Pin1 on ZIF Socket and TQFP Footprint<br />
2.2 PORT<br />
Connectors<br />
Since the ATmega103(L) and ATmega128(L) have additional ports not available on the<br />
STK500, these ports are located on the <strong>STK501</strong> board. They have the same pinout and<br />
functionality as the ports on the STK500 board. Port A to Port D which are already<br />
present on the STK500 board are not duplicated on the <strong>STK501</strong>.<br />
2.2.1 PORT E/PORT F Figure 2-3 shows the pinout for the I/O port headers Port E and Port F.<br />
Figure 2-3. General I/O Ports<br />
PE0<br />
PE2<br />
PE4<br />
PE6<br />
GND<br />
1 2<br />
PORT E<br />
PE1<br />
PE3<br />
PE5<br />
PE7<br />
VTG<br />
PF0<br />
PF2<br />
PF4<br />
PF6<br />
GND<br />
1 2<br />
PORT F<br />
PF1<br />
PF3<br />
PF5<br />
PF7<br />
VTG<br />
Note:<br />
Port E is also present on the STK500, but only PE0 to PE2 (3 least significant<br />
bits) are accessible there. To access all Port E bits the connector on the<br />
<strong>STK501</strong> must be used.<br />
2-2 AVR ® <strong>STK501</strong> <strong>User</strong> <strong>Guide</strong>
Using the <strong>STK501</strong> Top Module<br />
2.2.2 PORT G/AUX In addition to the normal Port G pins, this connector has some extra signals. See Figure<br />
2-4.<br />
Figure 2-4. PORTG/AUX<br />
PG0<br />
PG2<br />
PG4<br />
SRAMEN<br />
GND<br />
2.2.2.1 PG0 - PG4 These are general I/O ports for the ATmega128(L) and connect to the ZIF socket and<br />
the TQFP footprint. The PG3 and PG4 signals are routed through the TOSC switch<br />
since these pins also are inputs for a 32 kHz oscillator. For a description on the TOSC<br />
switch see Section 2.9.<br />
Note: ATmega103(L) does not have Port G.<br />
2.2.2.2 A16 This line goes to A16 (most significant address bit) on the SRAM. See Section 2.5 for<br />
more information about this signal. can be connected to any AVR pin.<br />
2.2.2.3 SRAMEN The SRAMEN signal controls if the SRAM is enabled or not. To enable the SRAM a<br />
LOW level should be applied to this pin. See “External SRAM”, Section 2.5, for more<br />
information on how to use this signal. This signal is pulled high by default.<br />
2.2.2.4 PEN The PEN pin is connected to the PEN pin on the ATmega103(L)/128(L). This pin is<br />
described in the programming section of the ATmega103(L) and ATmega128(L)<br />
datasheets.<br />
1 2<br />
PG1<br />
PG3<br />
A16<br />
PEN<br />
VTG<br />
PORT G/AUX<br />
2.3 Programming the<br />
ATmega103(L)/<br />
128(L)<br />
2.3.1 In-System<br />
Programming<br />
The ATmega103(L) and ATmega128(L) can be programmed using both SPI and Highvoltage<br />
Parallel Programming. This sub section will explain how to connect the programming<br />
cables to successfully use one of these two modes. The AVR Studio STK500<br />
software is used in the same way as for other AVR parts.<br />
Note:<br />
The ATmega128(L) also supports Self Programming. See AVR109 application<br />
note for more information on this topic.<br />
To program the ATmega103(L) or ATmega128(L) using ISP programming mode, connect<br />
the 6-wire cable between the ISP6PIN connector on the STK500 board and the ISP<br />
connector on the <strong>STK501</strong> board as shown in Figure 2-5.<br />
The device can be programmed using the serial programming mode in the AVR Studio<br />
STK500 software.<br />
Note:<br />
See the STK500 <strong>User</strong> <strong>Guide</strong> for information on how to use the STK500 frontend<br />
software for ISP programming.<br />
AVR ® <strong>STK501</strong> <strong>User</strong> <strong>Guide</strong> 2-3
Using the <strong>STK501</strong> Top Module<br />
Figure 2-5. In-System Programming<br />
2.3.2 High-voltage<br />
Programming<br />
To program the ATmega103(L) or ATmega128(L) using High-voltage (Parallel) Programming,<br />
connect the PROGCTRL to PORTD and PROGDATA to PORTB on the<br />
STK500 as shown in Figure 2-6.<br />
As described in the STK500 <strong>User</strong> <strong>Guide</strong>, the BSFL2 jumper must be mounted when<br />
High-voltage Programming ATmega devices. This also applies to the High-voltage Programming<br />
of ATmega103(L) and ATmega128(L).<br />
The device can now be programmed using the High-voltage Programming mode in AVR<br />
Studio STK500 software.<br />
Note:<br />
See the STK500 <strong>User</strong> <strong>Guide</strong> for information on how to use the STK500 frontend<br />
software in High-voltage Programming mode.<br />
Note: For the High-voltage Programming mode to function correctly, the target voltage<br />
must be higher than 4.5V.<br />
Caution: Make sure the SRAM (if mounted) can handle this voltage.<br />
2-4 AVR ® <strong>STK501</strong> <strong>User</strong> <strong>Guide</strong>
Using the <strong>STK501</strong> Top Module<br />
Figure 2-6. High-voltage (Parallel) Programming<br />
2.4 JTAG Connector The JTAG connector is intended for the ATmega128(L) that has a built-in JTAG interface.<br />
The pinout of the JTAG connector is shown in Figure 2-7 and is compliant with the<br />
pinout of the JTAG ICE available from <strong>Atmel</strong>. Connecting a JTAG ICE to this connector<br />
allows On-chip Debugging of the ATmega128(L).<br />
More information about the JTAG ICE and On-chip Debugging can be found in the AVR<br />
JTAG ICE <strong>User</strong> <strong>Guide</strong>, which is available at the <strong>Atmel</strong> web site, www.atmel.com.<br />
Figure 2-7. JTAG Connector<br />
TCK<br />
TDO<br />
TMS<br />
VTG<br />
TDI<br />
1 2<br />
JTAG<br />
GND<br />
VTG<br />
RST<br />
NC<br />
GND<br />
Figure 2-8 shows how to connect the JTAG ICE probe on the <strong>STK501</strong> board.<br />
AVR ® <strong>STK501</strong> <strong>User</strong> <strong>Guide</strong> 2-5
Using the <strong>STK501</strong> Top Module<br />
Figure 2-8. Connecting JTAG ICE to the <strong>STK501</strong><br />
2.5 External SRAM The <strong>STK501</strong> contains a footprint where an external SRAM device can be mounted.<br />
Make sure the SRAM device has the same voltage range as the rest of the design.<br />
Caution: Special care should be taken if a low voltage SRAM is used, since High-voltage<br />
Programming requires a programming voltage higher than 4.5V. Low-voltage<br />
SRAM may be damaged if High-voltage Programming of the target AVR is done.<br />
Table 2-1 shows a list of recommended SRAM devices, and typical range of operation.<br />
It is important that the SRAM device is soldered with the correct orientation as shown in<br />
Figure 2-9.<br />
Note:<br />
The SRAM is disabled by default. To enable SRAM support, put a jumper<br />
between the SRAMEN and GND pin on the PORTG/AUX connector.<br />
Figure 2-9. Pin1 on SRAM Footprint and Pinout<br />
A0<br />
A1<br />
A2<br />
A3<br />
CS<br />
D0<br />
D1<br />
VCC<br />
GND<br />
D2<br />
D3<br />
WE<br />
A4<br />
A5<br />
A6<br />
A7<br />
1<br />
32<br />
2<br />
31<br />
3<br />
30<br />
4<br />
29<br />
5<br />
28<br />
6<br />
27<br />
7<br />
26<br />
8<br />
25<br />
128Kx8<br />
9<br />
24<br />
10<br />
23<br />
11<br />
22<br />
12<br />
21<br />
13<br />
20<br />
14<br />
19<br />
15<br />
18<br />
16 17<br />
A16<br />
A15<br />
A14<br />
A13<br />
OE<br />
D7<br />
D6<br />
GND<br />
VCC<br />
D5<br />
D4<br />
A12<br />
A11<br />
A10<br />
A9<br />
A8<br />
2-6 AVR ® <strong>STK501</strong> <strong>User</strong> <strong>Guide</strong>
Using the <strong>STK501</strong> Top Module<br />
Table 2-1. Recommended SRAM Devices<br />
Manufacturer Part Number Supply Voltage (V) Package<br />
ISSI IS63LV1024-T 3.3 TSOP-II<br />
ISSI IS63LV1024-J 3.3 SOJ 300-mil<br />
ISSI IS63LV1024-K 3.3 SOJ 400-mil<br />
IDT IDT71124-Y 5.0 SOJ 400-mil<br />
IDT IDT71V124SA-TY 3.3 SOJ 300-mil<br />
IDT IDT71V124SA-Y 3.3 SOJ 400-mil<br />
IDT IDT71V124SA-PH 3.3 TSOP-II<br />
2.5.1 A16 The A16 pin on the PORTG/AUX connector is connected to A16 (address pin 16) on the<br />
SRAM. ATmega103(L) and ATmega128(L) support up to 60 KB of external SRAM. The<br />
<strong>STK501</strong> SRAM footprint is for a 128 KB SRAM. Implementing software control of the<br />
A16 line will increase the memory range from 64 KB to 128 KB. This line is pulled low by<br />
default, addressing the lower 64 KB of the SRAM.<br />
Figure 2-10. SRAM Block Schematic<br />
AVR<br />
SRAM<br />
PORTC<br />
From<br />
PORTG/AUX<br />
connector<br />
A16<br />
SRAMEN<br />
PC7<br />
PC6<br />
PC5<br />
PC4<br />
PC3<br />
PC2<br />
PC1<br />
PC0<br />
RAM HIGH<br />
ADDRESS<br />
VTG<br />
A16<br />
A15<br />
A14<br />
A13<br />
A12<br />
A11<br />
A10<br />
A9<br />
A8<br />
10K x 12<br />
RD (PG1)<br />
WR (PG0)<br />
CE<br />
OE<br />
WE<br />
ALE (PG2)<br />
LE<br />
OE<br />
PA7<br />
PA6<br />
PA5<br />
PA4<br />
PA3<br />
PA2<br />
PA1<br />
PA0<br />
D7<br />
D6<br />
D5<br />
D4<br />
D3<br />
D2<br />
D1<br />
D0<br />
LATCH<br />
Q7<br />
Q6<br />
Q5<br />
Q4<br />
Q3<br />
Q2<br />
Q1<br />
Q0<br />
A7<br />
A6<br />
A5<br />
A4<br />
A3<br />
A2<br />
A1<br />
A0<br />
A0<br />
A2<br />
A4<br />
A6<br />
A[7:0]<br />
A1<br />
A3<br />
A5<br />
A7<br />
VTG<br />
A7<br />
A6<br />
A5<br />
A4<br />
A3<br />
A2<br />
A1<br />
A0<br />
A7<br />
A6<br />
A5<br />
A4<br />
A3<br />
A2<br />
A1<br />
A0<br />
D7<br />
D6<br />
D5<br />
D4<br />
D3<br />
D2<br />
D1<br />
D0<br />
PA7<br />
PA6<br />
PA5<br />
PA4<br />
PA3<br />
PA2<br />
PA1<br />
PA0<br />
PORTA<br />
2.5.2 SRAMEN The SRAMEN pin on the PORTG/AUX connector is connected to the Chip-enable (CE)<br />
pin of the SRAM. This signal controls if the SRAM should be enabled or not. To enable<br />
the SRAM, a low level should be applied to this pin. This pin is pulled high by default,<br />
through a 10 kΩ resistor. Figure 2-10 shows a simplified block schematic on how the<br />
SRAM interface is implemented. Figure 2-11 shows how to enable the SRAM by shorting<br />
SRAMEN and GND on the PORTG/AUX connector using one of the supplied<br />
jumpers.<br />
This signal can also be controlled by software or by some external control logic.<br />
AVR ® <strong>STK501</strong> <strong>User</strong> <strong>Guide</strong> 2-7
Using the <strong>STK501</strong> Top Module<br />
Figure 2-11. SRAMEN Connected to GND<br />
2.6 Ram High<br />
Address<br />
Jumpers<br />
When External Memory is enabled in an AVR, all Port C pins are by default used for the<br />
high address byte. If the full 60 KB address space is not required to access the external<br />
memory, some, or all, Port C pins can be released for normal port pin function as<br />
described in the ATmega128(L) datasheet. AT90S/LS8515, ATmega103(L) and<br />
ATmega161 do not have this feature, and all jumpers should be connected if using the<br />
XRAM interface with these devices.<br />
If some or all of the Port C pins are released for normal port pin functions, the corresponding<br />
“RAM High Address” jumper should be removed to avoid any Port C activity to<br />
reach the SRAM address pins thus corrupting the address.<br />
If a jumper is removed, the corresponding address line will be pulled low giving a logic<br />
zero on that address bit on the SRAM. See the block schematic on Figure 2-10.<br />
2.7 A[7:0] Connector The connector marked A[7:0] contains the 8 least-significant bits of the external SRAM<br />
address bus. The purpose of the connector is to provide easy access to the address<br />
bus. The 8 most significant bits can be found on the “Ram High Addresses” jumpers or<br />
the Port C connector.<br />
The connector is placed after the latch as shown in Figure 2-10.<br />
This connector is handy when using the SRAM interface to interface external devices.<br />
2.8 Using the SRAM<br />
Interface with<br />
AT90S/LS8515<br />
and ATmega161<br />
When using the SRAM interface with devices placed in the STK500 board, some additional<br />
straps are required. The reason is that the RD, WR, and ALE signals are not on<br />
the same port pins for the AT90S8515/ATmega161(L) and ATmega103(L)/<br />
ATmega128(L), so these signals must be routed manually using two of the 2-wire<br />
cables.<br />
Table 2-2. Signal Routing Required for AT90S8515A and ATmega161(L)<br />
Connections STK500 <strong>STK501</strong> Description<br />
Write Signal WR PD6 PG0 Connect PD6:STK500 to PG0:<strong>STK501</strong><br />
Read Signal RD PD7 PG1 Connect PD7:STK500 to PG1:<strong>STK501</strong><br />
Address Latch Enable ALE PE1 PG2 Connect PE1:STK500 to PG2:<strong>STK501</strong><br />
2-8 AVR ® <strong>STK501</strong> <strong>User</strong> <strong>Guide</strong>
Using the <strong>STK501</strong> Top Module<br />
Figure 2-12. Enabling SRAM Interface for Devices in STK500<br />
2.9 TOSC Switch On the ATmega128(L) the TOSC1 and TOSC2 lines are shared with Port G (PG4 and<br />
PG3). The TOSC switch select if the 32 kHz crystal, or the Port G connector pins should<br />
be connected to the pins on the device.<br />
Figure 2-13 shows a simplified block schematic on how this is implemented.<br />
Note: Port G is not available on the ATmega103(L), the switch will thus only select if<br />
the 32 kHz crystal should be connected or not.<br />
Figure 2-13. TOSC Block Schematic<br />
AVR<br />
32 kHz<br />
PG3/TOSC2<br />
PG4/TOSC1<br />
TOSC<br />
Switch<br />
PG3<br />
PG4<br />
To<br />
PORT G/AUX<br />
Connector<br />
2.10 RS-232C Port The ATmega128(L) has an additional UART compared to the ATmega103(L). The RS-<br />
232 port on the <strong>STK501</strong> board has in addition to the RXD and TXD lines support for<br />
RTS and CTS flow control. Figure 2-14 shows a simplified block schematic on how this<br />
is implemented.<br />
Note:<br />
The UART in ATmega128(L) does not support hardware RTS or CTS control. If<br />
such functionality is needed, it must be implemented in software.<br />
AVR ® <strong>STK501</strong> <strong>User</strong> <strong>Guide</strong> 2-9
Using the <strong>STK501</strong> Top Module<br />
Figure 2-14. UART Block Schematic<br />
RS232 SPARE2<br />
4<br />
6<br />
2<br />
3<br />
7<br />
8<br />
5<br />
RS-232/Logic Level<br />
Converter<br />
RxD<br />
CTS<br />
TxD<br />
RTS<br />
This UART can also be used from devices placed in the STK500 board. Simply connect<br />
the appropriate port pins to RXD and TXD on the <strong>STK501</strong> board.<br />
Note:<br />
If no software RTS/CTS flow control is implemented, a jumper shorting RTS and<br />
CTS will ensure correct communication with an external application that uses<br />
such flow control.<br />
2-10 AVR ® <strong>STK501</strong> <strong>User</strong> <strong>Guide</strong>
Section 3<br />
Troubleshooting <strong>Guide</strong><br />
Table 3-1. Troubleshooting <strong>Guide</strong><br />
Problem Reason Solution<br />
SRAM does not work<br />
properly.<br />
SRAM does not work when<br />
used by devices on the<br />
STK500 board.<br />
After doing a High-voltage<br />
Programming of the AVR, the<br />
SRAM does not work<br />
properly.<br />
The SRAM is not connected.<br />
SRAMEN is not mounted.<br />
XRAM interface is not<br />
enabled in the AVR device.<br />
Some of the ADDRESS<br />
HIGH BYTE jumpers may be<br />
set incorrectly.<br />
WR, RD and ALE signals<br />
must be strapped using two<br />
2-wire cables.<br />
The SRAM might be<br />
damaged due to the Highvoltage<br />
needed to program<br />
the AVR.<br />
Verify all solderings, and<br />
make sure the Pin1 on the<br />
SRAM matches the one on<br />
the footprint. Make sure the<br />
SRAM pinout is correct.<br />
Make sure that the SRAMEN<br />
is connected to GND on the<br />
AUX connector.<br />
Verify that the code actually<br />
enables the XRAM interface.<br />
Connect some or all of<br />
ADDRESS HIGH BYTE<br />
jumpers.<br />
Use two 2-wire cables, and<br />
connect these signals to the<br />
appropriate pins.<br />
Make sure the SRAM<br />
handles 5V, if High-voltage<br />
Programming mode should<br />
be used.<br />
AVR ® <strong>STK501</strong> <strong>User</strong> <strong>Guide</strong> 3-1
Troubleshooting <strong>Guide</strong><br />
3-2 AVR ® <strong>STK501</strong> <strong>User</strong> <strong>Guide</strong>
Section 4<br />
Technical Specifications<br />
System Unit<br />
Physical Dimensions . . . . . . . . . . . . . . . . . . . . . . . . . . . . . . . . . . . . . . 56 x 119 x 27 mm<br />
Weight . . . . . . . . . . . . . . . . . . . . . . . . . . . . . . . . . . . . . . . . . . . . . . . . . . . . . . . . . . . . 70 g<br />
Operating Conditions<br />
Voltage Supply . . . . . . . . . . . . . . . . . . . . . . . . . . . . . . . . . . . . . . . . . . . . . . . .2.7V - 5.5V<br />
Connections<br />
Serial Connector . . . . . . . . . . . . . . . . . . . . . . . . . . . . . . . . . . . . . . . .9-pin D-SUB female<br />
Serial Communications Speed . . . . . . . . . . . . . . . . . . . . . . . . . . . . . . . . . . . . . 250 kbps<br />
AVR ® <strong>STK501</strong> <strong>User</strong> <strong>Guide</strong> 4-1
Technical Specifications<br />
4-2 AVR ® <strong>STK501</strong> <strong>User</strong> <strong>Guide</strong>
Section 5<br />
Technical Support<br />
For Technical support, please contact avr@atmel.com. When requesting technical support,<br />
please include the following information:<br />
Which target AVR device is used (complete part number)<br />
Target voltage and speed<br />
Clock source and fuse setting of the AVR<br />
Programming method (ISP or High-voltage)<br />
Hardware revisions of the AVR tools, found on the PCB<br />
Version number of AVR Studio. This can be found in the AVR Studio help menu.<br />
PC operating system and version/build<br />
PC processor type and speed<br />
A detailed description of the problem<br />
AVR ® <strong>STK501</strong> <strong>User</strong> <strong>Guide</strong> 5-1
Technical Support<br />
5-2 AVR ® <strong>STK501</strong> <strong>User</strong> <strong>Guide</strong>
Section 6<br />
Complete Schematics<br />
On the following pages the complete schematics and assembly drawing of the <strong>STK501</strong><br />
revision B are shown.<br />
AVR ® <strong>STK501</strong> <strong>User</strong> <strong>Guide</strong> 6-1
Complete Schematics<br />
Figure 6-1. Schematics, 1 of 3<br />
D<br />
C<br />
B<br />
A<br />
1<br />
2<br />
3<br />
4<br />
5<br />
6<br />
7<br />
8<br />
TQFP Footprint<br />
ZIF Socket<br />
GND VTG<br />
GND VTG<br />
PAT[7..0]<br />
PAT[7..0]<br />
PFT[7..0] PFT[7..0]<br />
PAT[7..0]<br />
PFT[7..0] PFT[7..0]<br />
PAT[7..0]<br />
PET[7..0] PET[7..0] PET0<br />
PET1<br />
PET2<br />
PET3<br />
PET4<br />
PET5<br />
PET6<br />
PET7<br />
PBT0<br />
PBT1<br />
PBT2<br />
PBT3<br />
PBT4<br />
PBT5<br />
PBT6<br />
PCT[7..0]<br />
PCT[7..0]<br />
PBT7<br />
TOSC2<br />
PDT[7..0]<br />
PBT[7..0] PBT[7..0] TOSC2<br />
PDT[7..0]<br />
TOSC1<br />
TOSC1<br />
TOSC1<br />
XT1<br />
TOSC1<br />
XT1<br />
RESET RESET XT2<br />
RESET RESET<br />
XT2<br />
PGT[4..0] PGT[4..0]<br />
<strong>STK501</strong> Page of 1 3<br />
A9903.3.1010.B<br />
Rev. B<br />
19-Jun-2001<br />
Copyright <strong>Atmel</strong> <strong>Corporation</strong> 2001<br />
1 2 3 4 5 6 7 8<br />
D<br />
C<br />
B<br />
A<br />
PAT0<br />
PAT1<br />
PAT2<br />
PAT3<br />
PAT4<br />
PAT5<br />
PAT6<br />
PAT7<br />
PCT7<br />
PCT6<br />
PCT5<br />
PCT4<br />
PCT3<br />
PCT2<br />
PCT1<br />
PCT0<br />
PGT2<br />
PGT1<br />
PGT0<br />
PDT0<br />
PDT1<br />
PDT2<br />
PDT3<br />
PDT4<br />
PDT5<br />
PDT6<br />
PDT7<br />
PFT0<br />
PFT1<br />
PFT2<br />
PFT3<br />
PFT4<br />
PFT5<br />
PFT6<br />
PFT7<br />
AREFT AREFT<br />
AREFT<br />
AREFT<br />
PEN<br />
PEN<br />
PEN GND<br />
PEN<br />
GND<br />
PAT0<br />
PAT1<br />
PAT2<br />
PET[7..0] PET[7..0] PET0<br />
PET1<br />
PET2<br />
PET3<br />
PET4<br />
PET5<br />
PET6<br />
PET7<br />
PBT0<br />
PBT1<br />
PBT2<br />
PBT3<br />
PBT4<br />
PBT5<br />
PBT6<br />
PAT3<br />
PAT4<br />
PAT5<br />
PAT6<br />
PAT7<br />
PCT7<br />
PCT6<br />
PCT5<br />
PCT4<br />
PCT3<br />
PCT2<br />
PCT1<br />
PCT0<br />
PCT[7..0]<br />
PCT[7..0]<br />
PGT2<br />
PGT1<br />
PGT0<br />
AVTG<br />
C108<br />
100N_16V_X7R<br />
PBT7<br />
TOSC2<br />
PDT[7..0]<br />
PBT[7..0] PBT[7..0] TOSC2<br />
PDT0<br />
PDT1<br />
PDT2<br />
PDT3<br />
PDT4<br />
PDT5<br />
PDT6<br />
PDT7<br />
PFT0<br />
PFT1<br />
PFT2<br />
PFT3<br />
PFT4<br />
PFT5<br />
PFT6<br />
PFT7<br />
AVTG<br />
1<br />
PEN<br />
2<br />
3<br />
PE0/PDI/RXD<br />
PE1/PDO/TXD<br />
4<br />
PE2/AC+<br />
5<br />
6<br />
PE3/AC-<br />
PE4/INT4<br />
7<br />
PE5/INT5<br />
8<br />
9<br />
PE6/INT6<br />
10 PE7/INT7<br />
11 PB0/SS<br />
12 PB1/SCK<br />
13 PB2/MOSI<br />
14 PB3/MISO<br />
15 PB4/OC0<br />
PB6/OC1B<br />
16 PB5/OC1A<br />
AD3/PA3 48<br />
AD4/PA4 47<br />
AD5/PA5 46<br />
AD6/PA6 45<br />
AD7/PA7 44<br />
ALE/PG2 43<br />
A15/PC7 42<br />
A14/PC6 41<br />
A13/PC5 40<br />
A12/PC4 39<br />
A11/PC3 38<br />
A10/PC2 37<br />
36<br />
A9/PC1<br />
35<br />
A8/PC0<br />
RD/PG1<br />
34<br />
33<br />
WR/PG0<br />
PDT[7..0]<br />
VTG GND<br />
VTG GND<br />
PGT[4..0] PGT[4..0]<br />
VTG AVTG<br />
1 L101 2<br />
BLM-21A102S<br />
2<br />
1<br />
1<br />
1<br />
1<br />
1<br />
1<br />
C101<br />
100N_16V_X7R<br />
C102<br />
100N_16V_X7R<br />
C105<br />
100N_16V_X7R<br />
C106<br />
100N_16V_X7R<br />
2<br />
2<br />
2<br />
17<br />
18<br />
19<br />
20<br />
21<br />
22<br />
23<br />
24<br />
25<br />
26<br />
27<br />
28<br />
29<br />
30<br />
31<br />
32<br />
PB7/OC2<br />
PG3/TOSC2<br />
PG4/TOSC1<br />
RESET<br />
VCC<br />
GND<br />
XTAL2<br />
XTAL1<br />
PD0/INT0<br />
PD1/INT1<br />
PD2/INT2<br />
PD3/INT3<br />
PD4/IC1<br />
PD5<br />
PD6/T1<br />
PD7/T2<br />
AVCC<br />
AGND<br />
AREF<br />
ADC0/PF0<br />
ADC1/PF1<br />
ADC2/PF2<br />
ADC3/PF3<br />
ADC4/PF4<br />
ADC6/PF6<br />
ADC6/PF6<br />
ADC7/PF7<br />
GND<br />
VCC<br />
AD0/PA0<br />
AD1/PA1<br />
AD2/PA2<br />
64<br />
63<br />
62<br />
61<br />
60<br />
59<br />
58<br />
57<br />
56<br />
55<br />
54<br />
53<br />
52<br />
51<br />
50<br />
49<br />
U101<br />
ATMEGA128<br />
1<br />
2<br />
3<br />
4<br />
5<br />
6<br />
7<br />
8<br />
9<br />
10<br />
11<br />
12<br />
13<br />
14<br />
15<br />
16<br />
48<br />
47<br />
46<br />
45<br />
44<br />
43<br />
42<br />
41<br />
40<br />
39<br />
38<br />
37<br />
36<br />
35<br />
34<br />
33<br />
17<br />
18<br />
19<br />
20<br />
21<br />
22<br />
23<br />
24<br />
25<br />
26<br />
27<br />
28<br />
29<br />
30<br />
31<br />
32<br />
49<br />
50<br />
51<br />
52<br />
53<br />
54<br />
55<br />
56<br />
57<br />
58<br />
59<br />
60<br />
61<br />
62<br />
63<br />
64<br />
ST101<br />
TQFP64 ZIF SOCKET<br />
C103<br />
100N_16V_X7R<br />
C104<br />
100N_16V_X7R<br />
2<br />
2<br />
2<br />
1<br />
1<br />
C107<br />
100N_16V_X7R<br />
2<br />
GND<br />
GND<br />
GND<br />
6-2 AVR ® <strong>STK501</strong> <strong>User</strong> <strong>Guide</strong>
Complete Schematics<br />
Figure 6-2. Schematics, 2 of 3<br />
D<br />
C<br />
B<br />
A<br />
8<br />
2<br />
3<br />
4<br />
5<br />
6<br />
7<br />
1<br />
PET[7..0]<br />
PET[7..0]<br />
XT1<br />
XT2<br />
RESET<br />
VTG<br />
GND<br />
RESET<br />
PET1<br />
PCT7<br />
PCT5<br />
PCT3<br />
PCT1<br />
PAT7<br />
PAT5<br />
PAT3<br />
PAT1<br />
AREFT<br />
PET2<br />
PET0<br />
PCT6<br />
PCT4<br />
PCT2<br />
PCT0<br />
PAT6<br />
PAT4<br />
PAT2<br />
PAT0<br />
GND<br />
AREFT<br />
GND 15 16<br />
GND VTG<br />
XT1<br />
17 18 XT2<br />
VTG<br />
19 20<br />
21 22<br />
PBT7<br />
23 24 PBT6<br />
VTG<br />
GND<br />
PBT5<br />
25 26 PBT4<br />
C202<br />
PBT3<br />
27 28 PBT2<br />
100N_16V_X7R<br />
PBT1<br />
29 30 PBT0<br />
PDT7<br />
31 32 PDT6<br />
PDT5<br />
33 34 PDT4<br />
GND<br />
PDT3<br />
35 36 PDT2<br />
PDT1<br />
37 38 PDT0<br />
39 40<br />
GND<br />
GND EXPAND0 GND<br />
GND EXPAND1 GND<br />
PAT[7..0]<br />
PDT[7..0]<br />
PAT[7..0]<br />
PDT[7..0]<br />
PCT[7..0] PCT[7..0]<br />
PBT[7..0] PBT[7..0]<br />
PET1<br />
PET0<br />
VTG<br />
GND<br />
2<br />
4<br />
6<br />
J206<br />
VCC<br />
MOSI<br />
GND<br />
1<br />
MISO<br />
SCK 3<br />
5<br />
RESET<br />
ISP_CONNECTOR<br />
<strong>STK501</strong> Page of 2 3<br />
A9903.3.1010.B<br />
Rev. B<br />
19-Jun-2001<br />
Copyright <strong>Atmel</strong> <strong>Corporation</strong> 2001<br />
1 2 3 4 5 6 7 8<br />
D<br />
C<br />
B<br />
A<br />
PBT1<br />
2<br />
2<br />
1<br />
1<br />
C201<br />
100N_16V_X7R<br />
R203<br />
0R<br />
PFT4<br />
PFT6<br />
PFT5<br />
PFT7<br />
VTG<br />
J204<br />
1 2<br />
3 4<br />
5 6<br />
7 8<br />
9 10<br />
JTAG<br />
RESET<br />
GND<br />
1<br />
GND<br />
VTG<br />
VTG<br />
C203<br />
100N_16V_X7R<br />
2<br />
2<br />
1<br />
GND<br />
RESET<br />
VTG<br />
GND<br />
C204<br />
100N_16V_X7R<br />
PFT[7..0]<br />
PGT[4..0]<br />
A[7..0]<br />
PFT[7..0]<br />
PGT[4..0]<br />
A[7..0]<br />
J203<br />
J205<br />
J208<br />
J207<br />
PFT0 1 2 PFT1<br />
PET0 1 2 PET1<br />
PGT0 1 2 PGT1<br />
A0 1 2 A1<br />
PFT2 3 4 PFT3<br />
PET2 3 4 PET3<br />
PGT2 3 4 PGT3<br />
A2 3 4 A3<br />
PFT4 5 6 PFT5<br />
PET4 5 6 PET5<br />
PGT4 5 6<br />
A16<br />
A4 5 6 A5<br />
A16<br />
PFT6 7 8 PFT7<br />
PET6 7 8 PET7<br />
SRAMEN<br />
7 8<br />
A6 7 8 A7<br />
SRAMEN<br />
GND<br />
9 10<br />
VTG<br />
GND<br />
9 10<br />
VTG<br />
GND<br />
9 10<br />
VTG<br />
VTG<br />
GND<br />
9 10<br />
VTG<br />
PORTF PORTE<br />
JS201 JS202<br />
PORTG/AUX LATCHED ADDRESS<br />
R201<br />
10K<br />
Port G special features<br />
PG0: nWR<br />
PEN<br />
PG1: nRD<br />
PEN<br />
PG2: ALE<br />
1 2<br />
1 2<br />
NOT MOUNTED<br />
1 2<br />
GND<br />
R202<br />
0R<br />
J201<br />
1 2<br />
3 4<br />
5 6<br />
7 8<br />
9 10<br />
11 12<br />
13 14<br />
15 16<br />
17 18<br />
19 20<br />
21 22<br />
23 24<br />
25 26<br />
27 28<br />
29 30<br />
31 32<br />
33 34<br />
35 36<br />
37 38<br />
39 40<br />
J202<br />
1 2<br />
3 4<br />
5 6<br />
7 8<br />
9 10<br />
11 12<br />
13 14<br />
PG3: TOSC2<br />
PG4: TOSC1<br />
AVR ® <strong>STK501</strong> <strong>User</strong> <strong>Guide</strong> 6-3
Complete Schematics<br />
Figure 6-3. Schematics, 3 of 3<br />
D<br />
C<br />
B<br />
A<br />
8<br />
2<br />
3<br />
4<br />
5<br />
6<br />
7<br />
1<br />
A[7..0]<br />
A[7..0]<br />
U301 74AHC573PW<br />
1<br />
OE<br />
11<br />
LE Q0 19<br />
Q1 18<br />
2<br />
D0 Q2 17<br />
3<br />
D1 Q3 16<br />
4<br />
D2 Q4 15<br />
5<br />
6<br />
D3 Q5 14<br />
D4 Q6 13<br />
7<br />
D5 Q7 12<br />
8<br />
9<br />
D6<br />
D7<br />
<strong>STK501</strong> Page of 3 3<br />
A9903.3.1010.B<br />
Rev. B<br />
19-Jun-2001<br />
Copyright <strong>Atmel</strong> <strong>Corporation</strong> 2001<br />
1 2 3 4 5 6 7 8<br />
D<br />
C<br />
B<br />
A<br />
10<br />
GND<br />
VCC<br />
20<br />
PCT[7..0]<br />
PGT[4..0]<br />
PCT[7..0]<br />
PGT[4..0]<br />
GND<br />
PAT0<br />
PAT1<br />
PAT2<br />
PAT3<br />
PAT4<br />
PAT5<br />
PAT6<br />
PAT7<br />
VTG<br />
GND<br />
A0<br />
A1<br />
A2<br />
A3<br />
A4<br />
A5<br />
A6<br />
A7<br />
PCT0<br />
PCT1<br />
PCT2<br />
PCT3<br />
PCT4<br />
PCT5<br />
PCT6<br />
PCT7<br />
VTG<br />
A0<br />
A1<br />
A2<br />
A3<br />
A4<br />
A5<br />
A6<br />
A7<br />
A8<br />
A9<br />
A10<br />
A11<br />
A12<br />
A13<br />
A14<br />
A15<br />
A16<br />
PAT0<br />
PAT1<br />
PAT2<br />
PAT3<br />
PAT4<br />
PAT5<br />
PAT6<br />
PAT7<br />
PGT0<br />
PGT1<br />
PGT2<br />
A16<br />
VTG<br />
C301<br />
100N_16V_X7R<br />
A16<br />
JS301 JS302 JS303 JS304 JS305 JS306 JS307 JS308<br />
PAT[7..0]<br />
PAT[7..0]<br />
VTG<br />
VTG<br />
2<br />
1<br />
16<br />
2 1<br />
J301<br />
10<br />
GND<br />
1<br />
6<br />
2<br />
7<br />
3<br />
8<br />
4<br />
9<br />
5<br />
11<br />
C303<br />
100N_16V_X7R<br />
2<br />
1<br />
1 2<br />
2<br />
1<br />
GND<br />
JP301<br />
1 2<br />
3 4<br />
5 6<br />
7 8<br />
9 10<br />
11 12<br />
13 14<br />
15 16<br />
VTG<br />
C302<br />
100N_16V_X7R<br />
1 2<br />
R301<br />
10K<br />
R302<br />
10K<br />
R303<br />
10K<br />
R304<br />
10K<br />
R305<br />
10K<br />
R306<br />
10K<br />
R307<br />
10K<br />
R308<br />
10K<br />
R309<br />
10K<br />
GND<br />
1 2<br />
1 2<br />
1 2<br />
1 2<br />
1 2<br />
1 2<br />
1 2<br />
1 2<br />
1 2<br />
2<br />
1<br />
SRAMEN<br />
SRAMEN<br />
GND<br />
R310<br />
10K<br />
U302<br />
1<br />
2 A0<br />
3 A1<br />
4 A2<br />
13 A3<br />
14 A4<br />
15 A5<br />
16 A6<br />
17 A7<br />
18 A8<br />
19 A9<br />
20 A10<br />
21 A11<br />
29 A12<br />
30 A13<br />
31 A14<br />
32<br />
A15<br />
A16<br />
5<br />
28<br />
CE<br />
12 OE<br />
WE<br />
I/O0<br />
I/O1<br />
I/O2<br />
I/O3<br />
I/O4<br />
I/O5<br />
I/O6<br />
I/O7<br />
128Kx8 SRAM<br />
VTG<br />
2 R312 1<br />
10K<br />
VTG<br />
2 R313 1<br />
10K<br />
6<br />
7<br />
10<br />
11<br />
22<br />
23<br />
26<br />
27<br />
VCC 8<br />
VCC 24<br />
GND 9<br />
GND 25<br />
VTG<br />
GND<br />
2<br />
14<br />
13<br />
7<br />
8<br />
6<br />
U303<br />
C1+ 1<br />
V+ C1- 3 11<br />
T1<br />
12<br />
R1<br />
10<br />
T2<br />
9<br />
R2<br />
V- C2+ 4<br />
XC301<br />
C305<br />
3 2<br />
100N_16V_X7R<br />
4 1<br />
SW301<br />
TOSC<br />
32kHz<br />
1<br />
TOSC2<br />
2<br />
TOSC2<br />
3<br />
PGT3<br />
6<br />
J302<br />
TOSC1<br />
5<br />
TOSC1<br />
RXD 1 2 TXD<br />
4<br />
PGT4<br />
CTS 3 4 RTS<br />
KF22-E-9-S-N<br />
GND<br />
C304<br />
100N_16V_X7R<br />
RS232 SPARE2<br />
C306<br />
GND<br />
100N_16V_X7R<br />
JS309<br />
7<br />
VCC<br />
C2- 5<br />
MAX3232ECAE<br />
15<br />
GND<br />
2<br />
1<br />
1 R311 2<br />
33R<br />
C308<br />
10P_50V_NP0<br />
GND<br />
RAM HIGH<br />
ADDRESS<br />
GND<br />
GND<br />
PGT[4..0] PGT[4..0]<br />
VTG<br />
C307<br />
1 2<br />
GND<br />
100N_16V_X7R<br />
6-4 AVR ® <strong>STK501</strong> <strong>User</strong> <strong>Guide</strong>
Complete Schematics<br />
Figure 6-4. Assembly Drawing, 1 of 1<br />
AVR ® <strong>STK501</strong> <strong>User</strong> <strong>Guide</strong> 6-5
Complete Schematics<br />
6-6 AVR ® <strong>STK501</strong> <strong>User</strong> <strong>Guide</strong>
<strong>Atmel</strong> Headquarters<br />
Corporate Headquarters<br />
2325 Orchard Parkway<br />
San Jose, CA 95131<br />
TEL (408) 441-0311<br />
FAX (408) 487-2600<br />
Europe<br />
<strong>Atmel</strong> SarL<br />
Route des Arsenaux 41<br />
Casa Postale 80<br />
CH-1705 Fribourg<br />
Switzerland<br />
TEL (41) 26-426-5555<br />
FAX (41) 26-426-5500<br />
Asia<br />
<strong>Atmel</strong> Asia, Ltd.<br />
Room 1219<br />
Chinachem Golden Plaza<br />
77 Mody Road Tsimhatsui<br />
East Kowloon<br />
Hong Kong<br />
TEL (852) 2721-9778<br />
FAX (852) 2722-1369<br />
Japan<br />
<strong>Atmel</strong> Japan K.K.<br />
9F, Tonetsu Shinkawa Bldg.<br />
1-24-8 Shinkawa<br />
Chuo-ku, Tokyo 104-0033<br />
Japan<br />
TEL (81) 3-3523-3551<br />
FAX (81) 3-3523-7581<br />
<strong>Atmel</strong> Product Operations<br />
<strong>Atmel</strong> Colorado Springs<br />
1150 E. Cheyenne Mtn. Blvd.<br />
Colorado Springs, CO 80906<br />
TEL (719) 576-3300<br />
FAX (719) 540-1759<br />
<strong>Atmel</strong> Grenoble<br />
Avenue de Rochepleine<br />
BP 123<br />
38521 Saint-Egreve Cedex, France<br />
TEL (33) 4-7658-3000<br />
FAX (33) 4-7658-3480<br />
<strong>Atmel</strong> Heilbronn<br />
Theresienstrasse 2<br />
POB 3535<br />
D-74025 Heilbronn, Germany<br />
TEL (49) 71 31 67 25 94<br />
FAX (49) 71 31 67 24 23<br />
<strong>Atmel</strong> Nantes<br />
La Chantrerie<br />
BP 70602<br />
44306 Nantes Cedex 3, France<br />
TEL (33) 0 2 40 18 18 18<br />
FAX (33) 0 2 40 18 19 60<br />
<strong>Atmel</strong> Rousset<br />
Zone Industrielle<br />
13106 Rousset Cedex, France<br />
TEL (33) 4-4253-6000<br />
FAX (33) 4-4253-6001<br />
<strong>Atmel</strong> Smart Card ICs<br />
Scottish Enterprise Technology Park<br />
East Kilbride, Scotland G75 0QR<br />
TEL (44) 1355-357-000<br />
FAX (44) 1355-242-743<br />
e-mail<br />
literature@atmel.com<br />
Web Site<br />
http://www.atmel.com<br />
BBS<br />
1-(408) 436-4309<br />
© <strong>Atmel</strong> <strong>Corporation</strong> 2001.<br />
<strong>Atmel</strong> <strong>Corporation</strong> makes no warranty for the use of its products, other than those expressly contained in the Company’s standard warranty<br />
which is detailed in <strong>Atmel</strong>’s Terms and Conditions located on the Company’s web site. The Company assumes no responsibility for any errors<br />
which may appear in this document, reserves the right to change devices or specifications detailed herein at any time without notice, and does<br />
not make any commitment to update the information contained herein. No licenses to patents or other intellectual property of <strong>Atmel</strong> are granted<br />
by the Company in connection with the sale of <strong>Atmel</strong> products, expressly or by implication. <strong>Atmel</strong>’s products are not authorized for use as critical<br />
components in life support devices or systems.<br />
<strong>Atmel</strong> ® , AVR ® and AVR Studio ® are the registered trademarks of <strong>Atmel</strong>.<br />
Windows ® and Windows NT ® are registered trademarks of Microsoft <strong>Corporation</strong>.<br />
Terms and product names may be trademarks of others.<br />
Printed on recycled paper.<br />
2491A–09/01/2M