

EFIS-D100 Installation Guide - Dynon Avionics
EFIS-D100 Installation Guide - Dynon Avionics
EFIS-D100 Installation Guide - Dynon Avionics

You also want an ePaper? Increase the reach of your titles
YUMPU automatically turns print PDFs into web optimized ePapers that Google loves.
Autopilot <strong>Installation</strong> and Configuration<br />
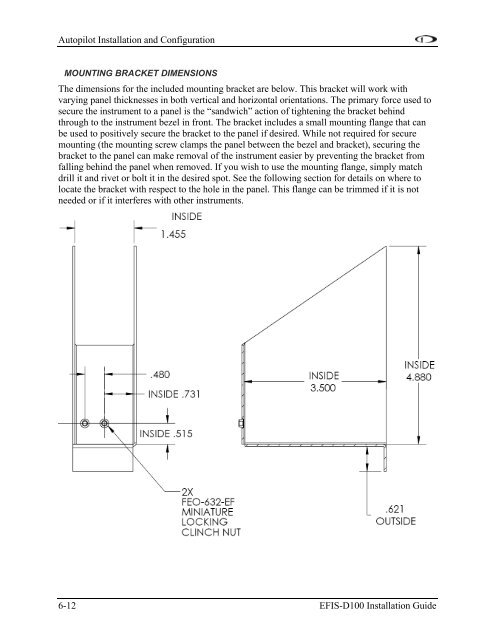
MOUNTING BRACKET DIMENSIONS<br />
The dimensions for the included mounting bracket are below. This bracket will work with<br />
varying panel thicknesses in both vertical and horizontal orientations. The primary force used to<br />
secure the instrument to a panel is the “sandwich” action of tightening the bracket behind<br />
through to the instrument bezel in front. The bracket includes a small mounting flange that can<br />
be used to positively secure the bracket to the panel if desired. While not required for secure<br />
mounting (the mounting screw clamps the panel between the bezel and bracket), securing the<br />
bracket to the panel can make removal of the instrument easier by preventing the bracket from<br />
falling behind the panel when removed. If you wish to use the mounting flange, simply match<br />
drill it and rivet or bolt it in the desired spot. See the following section for details on where to<br />
locate the bracket with respect to the hole in the panel. This flange can be trimmed if it is not<br />
needed or if it interferes with other instruments.<br />
6-12 <strong>EFIS</strong>-<strong>D100</strong> <strong>Installation</strong> <strong>Guide</strong>


