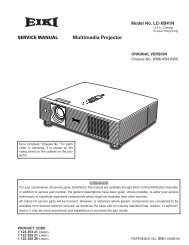
SERVICE MANUAL LC-XB41 - TechEdu.com
SERVICE MANUAL LC-XB41 - TechEdu.com
SERVICE MANUAL LC-XB41 - TechEdu.com

You also want an ePaper? Increase the reach of your titles
YUMPU automatically turns print PDFs into web optimized ePapers that Google loves.
Maintenance<br />
Lamp Replacement<br />
When the projection lamp of the projector reaches its end of life,<br />
the Lamp replacement icon appears on the screen and LAMP<br />
REPLACE indicator lights yellow. Replace the lamp with a new<br />
one promptly. The timing when the LAMP REPLACE indicator<br />
should light is depending on the lamp mode.<br />
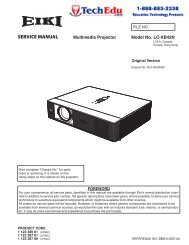
Top Control<br />
LAMP REPLACE<br />
indicator<br />
WARNING:<br />
TURN OFF THE UV LAMP BEFORE OPEN-<br />
ING THE LAMP COVER<br />
Lamp replacement icon<br />
✔Note:<br />
• The Lamp replacement icon will not appear when<br />
the Display function is set to “Off”, during “Freeze”,<br />
or “No show”.<br />
CAUTION<br />
Allow a projector to cool for at least 45 minutes<br />
before you open the Lamp cover. The inside of the<br />
projector can be<strong>com</strong>e very hot.<br />
CAUTION<br />
For continued safety, replace with a lamp of the<br />
same type. Do not drop a lamp or touch a glass<br />
bulb! The glass can shatter and may cause injury.<br />
Follow these steps to replace the lamp.<br />
1<br />
2<br />
3<br />
4<br />
5<br />
6<br />
Turn off the projector and unplug the AC power cord. Let<br />
the projector cool for at least 45 minutes.<br />
Remove the one (1) screw on the lamp cover and open<br />
the lamp cover.<br />
Remove the two (2) screws that secure the lamp. Lift the<br />
lamp out of the projector by using the handle.<br />
Replace the lamp with a new one and secure the two (2)<br />
screws. Make sure that the lamp is set properly. Close<br />
the lamp cover.<br />
Connect the AC power cord to the projector and turn on<br />
the projector.<br />
Reset the lamp counter.<br />
See “Resetting the Lamp Counter” on the next page.<br />
Lamp Cover<br />
Screw<br />
Handle<br />
Screw<br />
Lamp<br />
Press here and<br />
pull upward.<br />
Screw<br />
ORDER REPLACEMENT LAMP<br />
Type No.<br />
POA-LMP111<br />
Service Parts No. 610 333 9740<br />
--