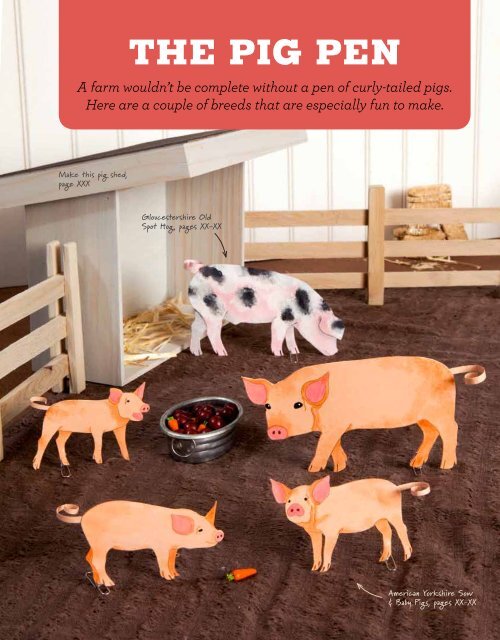
the Pig Pen
the Pig Pen
the Pig Pen

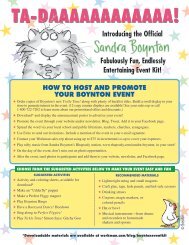
Create successful ePaper yourself
Turn your PDF publications into a flip-book with our unique Google optimized e-Paper software.
<strong>the</strong> <strong>Pig</strong> pen<br />
A farm wouldn’t be complete without a pen of curly-tailed pigs.<br />
Here are a couple of breeds that are especially fun to make.<br />
Make this pig shed,<br />
page XXX<br />
Gloucestershire Old<br />
Spot Hog, pages XX-XX<br />
American Yorkshire Sow<br />
& Baby <strong>Pig</strong>s, pages XX-XX<br />
The pig pen 7
Gloucestershire Old Spot Hog<br />
Mostly white with distinctive black patches, this breed<br />
of hog is easy to spot. Unlike <strong>the</strong> Yorkshires, Old<br />
Spots are known for producing lard, and <strong>the</strong>y have big<br />
floppy ears that often cover <strong>the</strong>ir eyes. But <strong>the</strong>y can<br />
hear very well and are great at rooting up food. In fact,<br />
some people call <strong>the</strong>m “orchard pigs” because <strong>the</strong>y<br />
were traditionally raised in English pastures where<br />
<strong>the</strong>y fed on apples that dropped from <strong>the</strong> trees.<br />
What You Need:<br />
**<br />
<strong>Pig</strong> templates (from <strong>the</strong><br />
back of <strong>the</strong> book)<br />
**<br />
Craft paints: white,<br />
black, and gray<br />
1 Pop out <strong>the</strong> two templates you need and<br />
set <strong>the</strong>m face-to-face so that you are sure to paint <strong>the</strong><br />
correct sides.<br />
**<br />
Small sponge (preferably<br />
a syn<strong>the</strong>tic craft sponge)<br />
**<br />
Pink or black scrap craft<br />
paper for <strong>the</strong> tail<br />
Make sure you leave some<br />
pink showing through<br />
2 Paint <strong>the</strong> coat. Tear a small<br />
piece (about <strong>the</strong> size of a quarter)<br />
from your sponge and press it in<br />
some white paint. Practice blotting<br />
<strong>the</strong> paint on scrap paper to make<br />
blotches. Once you have <strong>the</strong> hang<br />
of it, sponge paint a white undercoat<br />
on <strong>the</strong> template pieces leaving some<br />
pink showing through.<br />
When <strong>the</strong> white paint is dry, use<br />
ano<strong>the</strong>r piece of sponge to add a few<br />
black patches. Let this layer of paint<br />
dry before you go to <strong>the</strong> next step.<br />
If you end up with too many dark<br />
spots, just sponge on more white.<br />
Did you know that pigs get sunburns<br />
Rolling in <strong>the</strong> mud helps block <strong>the</strong>ir<br />
skin from <strong>the</strong> sun’s rays.<br />
8 The pig pen
3 Add Shading. To make<br />
<strong>the</strong> pig look three dimensional<br />
and more lifelike, add<br />
some shading. Dilute a little<br />
gray paint with an equal<br />
amount of water. Brush it on<br />
<strong>the</strong> far legs, behind <strong>the</strong> ears,<br />
and on portions of <strong>the</strong> underbelly<br />
and neck.<br />
4 Make a pig tail. See<br />
<strong>the</strong> directions in <strong>the</strong> box<br />
below for making a curly<br />
tail for your pig. Use pink or<br />
black paper.<br />
5 Make a stand and<br />
Assemble your pig.<br />
Follow <strong>the</strong> steps on page XX<br />
to finish putting your pig<br />
toge<strong>the</strong>r.<br />
Make Tails for Your <strong>Pig</strong>s<br />
1 For each of <strong>the</strong> adult pigs’ tails, cut a ¼- by<br />
3-inch strip from craft paper that’s close in<br />
color to <strong>the</strong> template. For <strong>the</strong> baby pigs, use<br />
slightly thinner and shorter strips. Trim <strong>the</strong><br />
end into a rounded point.<br />
2 Wind <strong>the</strong> strip around <strong>the</strong> handle of a paintbrush<br />
to curl it.<br />
3 Use a dab of tacky glue or a glue dot to<br />
attach <strong>the</strong> base of <strong>the</strong> tail to <strong>the</strong> upainted<br />
side of one of <strong>the</strong> two template pieces.<br />
3"<br />
ADULT ¼"<br />
2"<br />
BABY ¼"<br />
glue to unpainted<br />
side of template<br />
wrap around your<br />
paintbrush handle<br />
to curl<br />
The pig pen 9
American Yorkshire Sow & Baby <strong>Pig</strong>s<br />
With its pinkish white body, small upright ears, and long snout,<br />
<strong>the</strong> American Yorkshire is one of <strong>the</strong> most popular bacon breeds<br />
of pig. Known for producing lean meat, its body is longer and<br />
more muscular than most o<strong>the</strong>r breeds, and a full grown sow<br />
can weigh as much as 500 pounds. Yorkshires make excellent<br />
mo<strong>the</strong>rs and usually have litters of 13 or more piglets.<br />
1 Pop out <strong>the</strong> two templates you need for<br />
each pig from <strong>the</strong> back of <strong>the</strong> book, and set each pair<br />
face-to-face so that you are sure to paint <strong>the</strong> right sides.<br />
What You Need:<br />
**<br />
<strong>Pig</strong> templates (from<br />
<strong>the</strong> back of <strong>the</strong> book)<br />
**<br />
Craft paints: pink, brown,<br />
black, and white<br />
**<br />
Small sponge (preferably<br />
a syn<strong>the</strong>tic craft sponge)<br />
**<br />
Pink scrap craft paper<br />
for tails<br />
2 Paint <strong>the</strong> pigs. You’ll need a small paintbrush and a fine-tipped marker.<br />
••<br />
Use pink paint to fill in <strong>the</strong> noses<br />
and inner ears of all <strong>the</strong> pigs and<br />
<strong>the</strong> open mouth of <strong>the</strong> squealing<br />
baby pig.<br />
••<br />
Use a slightly darker pink or a<br />
shade of tan to paint <strong>the</strong> outer<br />
ears and nostrils.<br />
••<br />
With a fine-tipped marker,<br />
darken <strong>the</strong> splits in <strong>the</strong> hooves.<br />
••<br />
Fill in <strong>the</strong> sow’s and <strong>the</strong> baby<br />
pigs’ eyes with black paint or<br />
a fine-tipped marker. Once <strong>the</strong><br />
paint dries, add a glint to each of<br />
<strong>the</strong> sow’s eyes by using <strong>the</strong> tip of<br />
a toothpick to apply a tiny dot of<br />
white paint.<br />
10 The pig pen<br />
add a<br />
glint to<br />
sow’s<br />
eyes<br />
fill <strong>the</strong> open<br />
mouth of<br />
squealing pig<br />
darken splits<br />
in hooves<br />
Tip: For small areas, dip only<br />
<strong>the</strong> very tip of <strong>the</strong> brush into <strong>the</strong><br />
paint and <strong>the</strong>n apply <strong>the</strong> paint<br />
to <strong>the</strong> paper in tiny dabs. Or, you<br />
can use a fine-tipped marker<br />
or colored pencil instead of a<br />
paintbrush.
3 Add shading. This makes <strong>the</strong><br />
pigs look three dimensional and<br />
more lifelike.<br />
••<br />
Dilute a little light brown paint with<br />
an equal amount of water. You want<br />
it to look like a shadow, not a patch<br />
of paint. If it turns out too light, just<br />
mix in a little more paint.<br />
••<br />
Dip a clean brush in plain water and<br />
lightly wet <strong>the</strong> first area you plan to<br />
shade. This will show you what <strong>the</strong><br />
shading is going to look like on <strong>the</strong><br />
model. If <strong>the</strong> dampened area seems<br />
too big or small or misshapen, just<br />
let <strong>the</strong> paper dry and try again.<br />
••<br />
If it looks good, go ahead and brush<br />
<strong>the</strong> diluted paint on <strong>the</strong> far legs,<br />
behind <strong>the</strong> ears, and on <strong>the</strong> neck<br />
and belly as shown.<br />
Only infant pigs are<br />
called piglets. Once<br />
<strong>the</strong>y are weaned from<br />
<strong>the</strong>ir mo<strong>the</strong>r, <strong>the</strong>y’re<br />
called shoats.<br />
4 Want a muddy pig <strong>Pig</strong>s do<br />
like a good mud bath, so here’s how<br />
to add ano<strong>the</strong>r realistic touch.<br />
••<br />
Use a piece of craft sponge to blot<br />
some watered-down brown paint on<br />
<strong>the</strong> pigs’ bodies. Practice on scrap<br />
paper first to get <strong>the</strong> effect you like.<br />
5 Make a pig tails. See <strong>the</strong><br />
directions in <strong>the</strong> box below for making<br />
a curly tail for your pig. Use pink<br />
or black paper.<br />
6<br />
Make stands and<br />
Assemble your pigs. Follow<br />
<strong>the</strong> steps on page XX to finish<br />
putting your pig toge<strong>the</strong>r.<br />
Add mud Iciis arum nulpa<br />
volo explica borporionsed<br />
Add mud Iciis<br />
arum nulpa<br />
volo explica<br />
The pig pen 11