Desert Woodturning Roundup Aligning Your Lathe The Pen Turners ...
Desert Woodturning Roundup Aligning Your Lathe The Pen Turners ...
Desert Woodturning Roundup Aligning Your Lathe The Pen Turners ...

You also want an ePaper? Increase the reach of your titles
YUMPU automatically turns print PDFs into web optimized ePapers that Google loves.
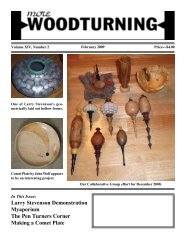
Volume XIV, Number 4 May 2009 Price—$4.00<br />
Alan Lacer’s box made during<br />
the demonstration on Saturday<br />
afternoon.<br />
Nick Van Bakel’s Diamond Bowl<br />
in Curly maple.<br />
Hans Finsterwalder’s Spider<br />
box from his demonstration on<br />
Sunday.<br />
Ron Goble’s Navajo Cross<br />
Hollow Form.<br />
Jason Clarke’s set of bowls in<br />
Eucalyptus Burl.<br />
All Photos on the cover of this issue were taken at the <strong>Desert</strong><br />
<strong>Woodturning</strong> <strong>Roundup</strong> in Mesa, Arizona in February 2009.<br />
In This Issue:<br />
<strong>Desert</strong> <strong>Woodturning</strong> <strong>Roundup</strong><br />
<strong>Aligning</strong> <strong>Your</strong> <strong>Lathe</strong><br />
<strong>The</strong> <strong>Pen</strong> <strong>Turners</strong> Corner<br />
Rockler New <strong>Pen</strong> Press<br />
More <strong>Woodturning</strong> May 2009 Page 1
Note: We now offer subscription<br />
copies as a Portable Document<br />
File (*.PDF) that you can read on<br />
your computer. You can archive<br />
your copies on your computer and<br />
search them for subjects of interest.<br />
This method provides quick delivery<br />
of the issue. This is a cost savings<br />
for foreign subscribers who have to<br />
pay a great deal extra for postage.<br />
If interested, e-mail me at:<br />
fred@morewoodturning.net<br />
Note 2: Anyone who owns a<br />
computer and likes to read More<br />
<strong>Woodturning</strong> on their computer or to<br />
archive it onto their computer, will<br />
be pleased to learn that we now have<br />
all issues (from Oct 1996) of More<br />
<strong>Woodturning</strong> ever published in PDF<br />
format. While we offer individual<br />
years on a CD-ROM for $25.00, we<br />
have come up with a special price<br />
which includes all issues published<br />
at the date that the order is placed on<br />
a single CD-ROM for just $95.00.<br />
This is a significant savings over<br />
the single year price. Order from:<br />
More <strong>Woodturning</strong>, PO Box 2168,<br />
Snohomish, WA 98291 USA.<br />
Note: For people who have never visited our web site, go to<br />
www.morewoodturning.net<br />
<strong>The</strong>re is a lot of information at our site, including a sample magazine<br />
in PDF format.<br />
• FITS ALL LATHES<br />
• EASY & SAFE TO USE<br />
• SOLID CONSTRUCTION<br />
• CD ROM TRAINING VIDEO<br />
Page 2 More <strong>Woodturning</strong> May 2009
Contents<br />
<strong>Desert</strong> <strong>Woodturning</strong> <strong>Roundup</strong><br />
2009..............................................4<br />
<strong>Aligning</strong> <strong>Your</strong> <strong>Lathe</strong>....................9<br />
Letters to the Editor ..................10<br />
News in the Trade......................11<br />
<strong>The</strong> Burly Beauty Within..........12<br />
<strong>Pen</strong>Turner’s Corner...................14<br />
Questions and Aswers from the Internet...............................................18<br />
Drying Rough Turned Bowls....18<br />
Material for Chess Pieces.........18<br />
Hand Thread Chasing ..............18<br />
Johannes Michaelson Turning a<br />
Hat ............................................19<br />
Upgrade to the Teknatool Cole Ja<br />
ws...............................................21<br />
Our Trip to Florida in February ....<br />
....................................................22<br />
Letter to the Editor.....................24<br />
Testing Rockler’s New <strong>Pen</strong> Press/<br />
Drilling Jig................................25<br />
Tormek/Ellsworth Grind Follow<br />
up...............................................26<br />
Testing the Easy Rougher Ci1...28<br />
Coming Events..........................30<br />
Turner’s Tool Handle from Woodworkers<br />
Network........................32<br />
<strong>Desert</strong> <strong>Woodturning</strong> <strong>Roundup</strong><br />
2009— Another View.................34<br />
Finishing the Collaborative Piece...<br />
....................................................35<br />
Instant Gallery Selections from the<br />
<strong>Desert</strong> <strong>Woodturning</strong> <strong>Roundup</strong>..36<br />
Live Centers..............................38<br />
Thread Cutting Jig................... 38<br />
<strong>The</strong> Market Place......................39<br />
About the Cover:<br />
All photos on the cover were<br />
taken at the <strong>Desert</strong> Woodtruning<br />
<strong>Roundup</strong> in Mesa, Arizona<br />
in February 2009.<br />
EDITORAL<br />
It was a busy time in February as Mildred and I travelled to Arizonia<br />
to attend the <strong>Desert</strong> <strong>Woodturning</strong> <strong>Roundup</strong> in Mesa, Arizonia. We had to<br />
kill a little time in Arizona before travelling on to Orlando, Florida for a<br />
couple of demonstrations and a day of hands on instructionnear Jacksonville,<br />
Florida, then attended the International Wood Collectors Society<br />
meeting in Eustus, Florida. Unfortunately, I became sick the first evening<br />
we were at the meeting. I thought it was food poisioning. That was a<br />
Wednesday evening. I got through the day on Thursday just fine and drove<br />
to the Woodcraft Store near Orlando for a demonstration. <strong>The</strong> demonstration<br />
went fine, but later that night I began to get more sick and decided we<br />
should consider going home where our medical insurance would work. I<br />
really regretted having to leave the meeting, but I had managed to attend the<br />
board meeting on Wednesday and one good demonstration on Thursday.<br />
We picked up some new tools and some nice wood on our trip. <strong>The</strong><br />
Easy Rougher that we purchased at the Craft Supplies Booth at the <strong>Desert</strong><br />
<strong>Woodturning</strong> Roungup has been reviewed in this issue. Both Mildred and<br />
I are impressed with this tool. I had heard of the tool, but couldn’t believe<br />
what it would do when we saw it demonstrated. I purchased both the Ci1<br />
and the Ci2 tools, but have only reviewed the Ci1 tool in this issue. <strong>The</strong><br />
tool looks like a scraper, but performs much better than any scraper I’ve<br />
ever used. When I got home to try it, I was pleased we had purchased the<br />
tools in Arizona.<br />
This issue has a little bit of everything. <strong>The</strong>re are stories by your editor<br />
and stories by several other writers who contribute to the magazine from<br />
time to time. I received three stories from Dick Veitch in New Zealand<br />
and have included one of them in this issue.<br />
I still want to encourage our readers to consider writing stories for the<br />
magazine. Everyone has some special thing that they do, which is probably<br />
of interest to other woodturners. If you have a story idea, send me<br />
an e-mail to fred@morewoodturning.net telling me about your proposed<br />
story. If you have a lot of high resolution photographs, please send the<br />
story and photos on a CD-ROM. If you would like, e-mail me and I’ll<br />
send you a copy of my writer’s guidelines, which outlines how I like to<br />
received the stories.<br />
We have two more trips planned for this year: <strong>The</strong> Utah <strong>Woodturning</strong><br />
Symposium in Orem, Utah in May and the American Association of<br />
Woodturners Symposium in Albuquerque, New Mexico in June. <strong>The</strong> Utah<br />
event is in the same facilities as last year, which was an excellent venue.<br />
Both of these events are well worth attending and it is even better<br />
if they are in your back yard so the cost is less. You simply can’t absorb<br />
everything that you are exposed to at one of these large events. You also<br />
can only see a few of the demonstrators. Picking the demonstrations to<br />
attend can be a difficult number of decisions.<br />
Fred Holder, Editor and Publisher<br />
More <strong>Woodturning</strong> May 2009 Page 3
<strong>Desert</strong> <strong>Woodturning</strong> <strong>Roundup</strong> 2009<br />
by Fred Holder<br />
<strong>The</strong> Arizona Woodturner’s<br />
Association held its third <strong>Desert</strong><br />
<strong>Woodturning</strong> <strong>Roundup</strong> on February<br />
6, 7 & 8, 2009 at the Mesa Convention<br />
Center, Mesa, AZ. This was a<br />
much nicer facility than was used<br />
for their first such event in 2006. I<br />
had no complaints about this event,<br />
I thought it was very well planned,<br />
had excellent demonstrators, and a<br />
good trade show area, which was in<br />
the same area lunch was served each<br />
day and the Saturday night banquet<br />
was held. Everything seemed to go<br />
smoothly and I was very pleased<br />
with the event.<br />
More <strong>Woodturning</strong> is published monthly<br />
except April and October for $35.00 per<br />
year by Fred and Mildred Holder at 19805<br />
Fales Road, Snohomish, WA 98296. Mailing<br />
Address is P. O. Box 2168, Snohomish WA<br />
98291-2168. Telephone: (360) 668-0976.<br />
E-Mail: fred@morewoodturning.net, WEB<br />
Page URL: http://www.morewoodturning.<br />
net. Periodicals Postage paid at Snohomish,<br />
Washington and at additional mailing office.<br />
More <strong>Woodturning</strong> is sold by subscription<br />
at $35.00 for one year and at a single<br />
copy price of $4.00 plus $1.50 postage<br />
and handling. Editorial material submitted<br />
for publication must be accompanied<br />
by a stamped, self-addressed envelope to<br />
ensure return if it is not accepted for use.<br />
More Woodtunring uses materials from<br />
many sources and many authors, the views<br />
expressed herein are, therefore, those of<br />
the authors and not necessarily those of the<br />
Publishers. More <strong>Woodturning</strong> receives a<br />
number of products each year for evaluation,<br />
but accepts no responsibility for return of<br />
those products unless specifically requested<br />
to do so, in advance!<br />
POSTMASTER: Send address changes<br />
to More <strong>Woodturning</strong>, P. O. Box 2168,<br />
Snohomish WA 98291-2168.<br />
USPS No. 015387<br />
We had actually arrived two<br />
days early, because I got my dates<br />
messed up when making our airplane<br />
reservations. So we had two<br />
days to sort of tour the area and visit<br />
the Woodcraft store in the area and<br />
spend a bit of money for some wood<br />
and other items. We were able to<br />
spend some time Friday afternoon<br />
in the Trade Show area and again<br />
spend a bit of money. More about<br />
that later after I talk about the actual<br />
symposium.<br />
<strong>The</strong>re were nine demonstrators<br />
and each had their own room<br />
for the entire event. <strong>The</strong> demonstrators<br />
were Jimmy Clewes, Bonnie<br />
Klein, Cindy Drozda, Mark St.<br />
Ledger, Nick Cook, Alan Lacer,<br />
Keith Tompkins, Hans Finsterwalder,<br />
and Dwight Klaus. Since<br />
I’ve seen Jimmy Clewes, Bonnie<br />
Klein, and Nick Cook demonstrate<br />
many times, I chose to watch the<br />
others for this event. I had planned<br />
to watch Dwight Klaus doing stone<br />
inlay, but decided instead to photograph<br />
the Instant Gallery. Mildred<br />
attended two of Dwight’s classes<br />
and was able to tell me about them.<br />
She was very excited about doing<br />
shell and stone inlay after watching<br />
these two demonstrations.<br />
I don’t remember whether I<br />
had ever set in on one of Cindy<br />
Drozda’s demonstrations before,<br />
but chose to attend her Multi-<br />
Axis Hollow Form demo for the<br />
first rotation. Cindy is one skillful<br />
turner and still amazes me with her<br />
exquisite finials. Her multi-axis<br />
hollow form was hollowed when it<br />
was still round and was then offset<br />
to produce open areas in three of<br />
the sides.<br />
Figure 1. Cindy Drozda starting<br />
to hollow the form.<br />
Cindy finish turned the hollow<br />
form and then turned one of her<br />
signature finials to mount on top of<br />
the form. She blackened the finial<br />
with a felt tip pen. This made it look<br />
like an exotic black wood. Figure 2<br />
shows the piece as finished during<br />
the demonstration.<br />
Figure 2. Cindy’s multi-axis<br />
hollow form with blackened<br />
finial.<br />
Page 4 More <strong>Woodturning</strong> May 2009
After lunch, I sat in on Mark<br />
St. Leger’s sphere box. Mark turned<br />
a box with a spherical inside and<br />
threaded both top and bottom before<br />
turning the outside to a spherical<br />
shape. During this demonstration,<br />
he introduced us to the thread chasers<br />
he is manufacturing and selling.<br />
Both inside and outside chasers<br />
are on one piece of steel. <strong>The</strong> end<br />
not being used is inserted into the<br />
wooden handle to protect the hand.<br />
Figure 3 shows Mark threading the<br />
inside threads on the box.<br />
During this demonstration,<br />
he introduced<br />
us to the<br />
thread chasers he is<br />
manufacturing and<br />
selling.<br />
Figure 3. Mark St. Leger<br />
threading the internal threads<br />
on his spherical box.<br />
When the spherical box was<br />
completed, Mark then took a wood<br />
burner and burned in the semblance<br />
of stitching on a baseball. Apparently<br />
this is how he completes his<br />
spherical boxes. He is shown doing<br />
the burning in Figure 4.<br />
Figure 4. Mark St. Ledger<br />
burning the stitching on his<br />
completed spherical box.<br />
I finished up the first day of<br />
demonstrations with Alan Lacer making<br />
a turned lidded box. I have seen<br />
Alan’s spindle turning demonstrations<br />
in the past and was interested<br />
in how he turned a box. Unlike most<br />
of us who use a parting tool to part<br />
[Text Continued on Page 6]<br />
More <strong>Woodturning</strong> May 2009 Page 5
<strong>Desert</strong> <strong>Woodturning</strong> <strong>Roundup</strong><br />
Continued from Page 5<br />
off the lid portion of the box, Alan<br />
used a saw. He said that he felt this<br />
gave a cleaner cut than the parting<br />
tool. He is shown sawing off the lid<br />
portion in Figure 5.<br />
Box was until the demonstrations<br />
began and we learned that it was a<br />
box like Hans Weisflog makes with<br />
the eccentric intersecting grooves in<br />
the lid as shown in Figure 7.<br />
Figure 5. Alan Lacer cutting off<br />
the lid portion of the blank with<br />
a saw.<br />
Alan then fitted and hollowed<br />
the top and bottom portions before<br />
turning the final shape. I was impressed<br />
with the final shape that he<br />
turned as shown in Figure 6.<br />
Figure 6. Alan Lacer’s finished<br />
box.<br />
<strong>The</strong> first rotation on Sunday<br />
morning , I attended Hans Finsterwalder’s<br />
demonstration on the Spider<br />
Box. I had no idea what a Spider<br />
Figure 7. Hans Finsterwalder’s<br />
spider box.<br />
Hans then showed us the eccentric<br />
fixture for offsetting the<br />
top to cut the eccentric groves in<br />
the top. This is shown in Figure<br />
8 and the wood mounted on it for<br />
the outside of the lid is shown in<br />
Figure 9.<br />
Figure 8. This photo shows the<br />
fixture for mounting the lid for<br />
turning the eccentric grooves in<br />
the top of the box.<br />
Hans then showed us<br />
the eccentric fixture<br />
for offsetting the top<br />
to cut the eccentric<br />
groves in the top.<br />
Figure 9. This photo shows the<br />
wood for the lid mounted on the<br />
fixture.<br />
I skipped the next rotation and<br />
chose to photograph the instant gallery<br />
while there would be very few<br />
people in the gallery. It was there<br />
that I met the people that we would<br />
be staying with when we first arrived<br />
in Florida where I would be doing a<br />
Chinese Ball demonstration on Saturday<br />
afternoon and a hands-on day<br />
on Sunday. We have a few of these<br />
photos in this issue on Pages 36 and<br />
37. I finished up the demonstrations<br />
with Keith Tompkins demonstration<br />
Beyond Segmenting. Keith is<br />
an expert segmental turner, but has<br />
come up with some other ways to<br />
create impossible turnings, by turning<br />
and cutting up the turnings and<br />
gluing them back together into other<br />
forms. I had to see how this is done,<br />
although I never expect to do any<br />
pieces this way. Keith began by turning<br />
a cone shaped piece and sawing<br />
it in half vertically. By using at least<br />
two pieces, Keith was able to create<br />
an unusual shape that look like it<br />
could not possibly have been turned.<br />
Figure 10 shows Keith turning a<br />
cone shaped piece. And Figure 11<br />
shows him holding pieces together<br />
to give them an unusual shape for a<br />
turned item.<br />
Page 6 More <strong>Woodturning</strong> May 2009
Figure 10. Keith Tompkins<br />
turning a cone shaped piece.<br />
Figure 13. A pen with Don Ward’s name imbedded in it.<br />
6:00 to 9:00 pm on Friday evening.<br />
We were late getting in and missed<br />
a portion of it, but were able to see<br />
the demonstration of our own <strong>Pen</strong><br />
Turning Columnist, Don Ward doing<br />
his thing. Don is shown in Figure 12<br />
during his demonstration. A pen<br />
with his name is shown in Figure<br />
13.<br />
As I mentioned earlier, the<br />
Trade Show area was in the din-<br />
[Continued on Page 8]<br />
Figure 11. Keith holds two piece<br />
of a cut apart shape together to<br />
create an unusual shape.<br />
To Subscribe to More <strong>Woodturning</strong>:<br />
Check the Print Subscription Period Below:<br />
United States Canada Other Countries<br />
__One Year/$35 __One Year/$48 __One Year/$68<br />
__Two Years/$70 __Two Years/$100 __Two Years/$105<br />
__Three Years/$105 __Three Years/$145 __Three Years/$205<br />
All amounts in US Dollars! We Accept Visa/MC.<br />
Electronic Version (PDF): For People receiving Electronic issues,new price<br />
by year only: $25.00/One year. We need an e-mail for the electronic version.<br />
Because of the significant postage increase for outside the United States,<br />
recommend the Electronic Version for all Foreign Subscribers.<br />
Thank You!!<br />
Please Enter <strong>Your</strong> Name and Address Below:<br />
Name: _________________________________________________<br />
Address: _______________________________________________<br />
Figure 12. Our own Don Ward<br />
demonstrating at the <strong>Pen</strong><br />
Turner’s get together on Friday<br />
evening.<br />
<strong>The</strong> International Association<br />
of <strong>Pen</strong> <strong>Turners</strong> held an event from<br />
City: ______________________ State: ______ ZIP: ____________<br />
E-Mail for Electronic Subscribers: ____________________________<br />
Clip and Mail with <strong>Your</strong> Check, Cash, or Charge Card Information to:<br />
More <strong>Woodturning</strong>, PO Box 2168, Snohomish, WA 98291<br />
More <strong>Woodturning</strong> May 2009 Page 7
Continued from Page 7.<br />
Figure 14. Craig Jackson<br />
making his Easy Rougher<br />
perform flawlessly.<br />
ing room and was open on Friday<br />
afternoon so that we could view the<br />
wares of the companies showing<br />
their products. <strong>The</strong> first person we<br />
met as we came in the door was Don<br />
<strong>Pen</strong>cil, who had an good display<br />
of his tools. Don showed me two<br />
new items: a buffer designed to run<br />
at about 700 rpm and the carbide<br />
cutters that he is having specially<br />
ground to his shape. <strong>The</strong> cutters are<br />
similar to those used on the Hunter<br />
Tool and the Eliminator, but Don<br />
says they have more of a bevel rubbing<br />
grind on them. I came away<br />
with two of the new cutters and<br />
one of the buffers with his special<br />
buffing compound. <strong>The</strong>se will be<br />
covered in separate articles in this<br />
or a following issue.<br />
Our next stop was the Craft<br />
Supplies USA booth where Craig<br />
Jackson inventor of the Easy Rougher<br />
was demonstrating the turning of<br />
a bowl and Darrel Nish was demonstrating<br />
the Wagner Texturing Tool<br />
to a person asking questions about<br />
the tool. I wound up purchasing all<br />
three versions of the Texturing Tools<br />
and both the Ci1 and Ci2 versions<br />
of the Easy Rougher. As shown in<br />
Figure 14, Craig Jackson was doing<br />
an excellent demonstration of his<br />
tools. Craft Supplies was offering<br />
10 percent off on purchases made<br />
at the show and free shipping. So<br />
this visit cost us a bit but we’ve<br />
some new tools that really add to<br />
“THE ELIMINATOR”<br />
our shops capabilities. We’ll have<br />
stories on these tools performance<br />
in other stories in this issue or a<br />
later issue.<br />
We continued on around and<br />
talked with our friend, Dave Smith,<br />
who does the alcohol drying of wood<br />
and on up to an end of a row to talk<br />
with J. Paul Fennell who was selling<br />
carving and burning machines.<br />
This was a well done symposium<br />
and I highly recommend<br />
anyone wishing to attend a good<br />
symposium consider putting the<br />
2011 <strong>Desert</strong> <strong>Woodturning</strong> <strong>Roundup</strong><br />
on their calendar. I don’t think the<br />
date has been set but I’m sure it will<br />
be in February 2011.<br />
Hollowing Tool<br />
ELIMINATES:<br />
CATCHES,<br />
TEAR OUT,<br />
SHARPENING<br />
Available in three sizes: 1/4, 3/8, 1/2 inch cutters. Tool shafts are<br />
milled with flats for both right and left hand cutting.<br />
Available from: Packard Woodworks and Craft Supplies USA<br />
www.jewelwood.com<br />
Page 8 More <strong>Woodturning</strong> May 2009
<strong>Aligning</strong> <strong>Your</strong> <strong>Lathe</strong><br />
by Dick Veitch<br />
If you are just turning a chair<br />
leg between centres it does not matter<br />
too much if the head and tail of<br />
your lathe are not perfectly in line.<br />
Likewise, you can turn a bowl without<br />
using the tailstock. But, if you<br />
want to do anything where the wood<br />
is held in a chuck and the tailstock<br />
is brought up to the wood, then the<br />
head and tail need to be correctly<br />
aligned. I am sure you can think of<br />
many times when both a chuck and<br />
tailstock are in use. Sphere turning<br />
is another where the two cup chucks<br />
need to be nicely aligned to turn a<br />
perfect sphere.<br />
It would be nice if all lathes<br />
were perfectly aligned at all times<br />
but some have swivel heads and<br />
their alignment needs to be checked<br />
every time the head is returned to the<br />
line of the bed. Some lathes are on<br />
uneven floors and the bed is twisted.<br />
Some lathes are a little worn and<br />
need adjusting. Some will be out<br />
of line for another reason.<br />
method may look like it<br />
is working but you finish<br />
up with both head<br />
and tail out of line.<br />
<strong>The</strong> hard metal<br />
method is to use a<br />
double-ended Morse<br />
taper. (See Figure 2.)<br />
Teknatool calls this the<br />
Acruline System. Simply<br />
insert this firmly<br />
in both the head and<br />
tailstock while both<br />
are loose on the bed.<br />
Tighten both down and<br />
they should be nicely<br />
aligned.<br />
If you need to<br />
check the headstock<br />
alignment with a little<br />
more care then grip<br />
a long length of wood in a chuck,<br />
(See Figure 3.) rotate it slowly (100-<br />
300rpm) and mark the central point<br />
on the tail end as shown in Figure<br />
4.. <strong>The</strong>n bring the tailstock close<br />
and this central point should be at<br />
the centre of the live tail as shown<br />
in Figure 5.<br />
New Video:<br />
Reviewed in the February<br />
2006 issue of More <strong>Woodturning</strong>.<br />
“Relief Carved<br />
Embellishments for Wood<br />
Projects”<br />
Available in:<br />
DVD for $30.00 plus $3.00 S/H<br />
VHS for $20.00 plus $3.00 S/H<br />
Order from: Tony Cortese<br />
20850 NW 13th Street, Dunnellon, FL 34431<br />
PH: 352-489-5652<br />
E-Mail: romeowoodturner@msn.com<br />
Web Site: www.tonycortese.org<br />
Figure 4. Marking the end of the<br />
rotating wood with a pencil.<br />
Figure 1. Using two centers to<br />
check alignment.<br />
If you are absolutely certain<br />
that the tailstock of your lathe is<br />
perfectly aligned then you can put<br />
a drive spur in the head, live centre<br />
in the tail, and bring the two into<br />
line. (See Figure 1.) If the tailstock<br />
is not perfectly in line then this<br />
5.<br />
Figure 2. Using the Acruline<br />
System to check alignment.<br />
Figure 3. A length of wood<br />
mounted in a chuck.<br />
Figure 5. <strong>The</strong> tail center should<br />
align with the pencil mark on<br />
the end of the wood.<br />
More <strong>Woodturning</strong> May 2009 Page 9
Letters to the Editor<br />
Normally, I share your enthusiasm<br />
for items you cover under<br />
Product Reviews. But I do have to<br />
take exception to your and Mildred’s<br />
endorsement of the Rockler L.E.D<br />
work light. I ordered one after reading<br />
your January article and found<br />
it grossly underpowered while<br />
employing it in woodturning applications.<br />
It certainly doesn’t have<br />
enough range to be useful on a large<br />
lathe. Additionally, my halogen<br />
light did a better job in day lighting<br />
sanding marks. In the future I will<br />
be wiser and visit the Rockler store<br />
to see an item first hand rather than<br />
using the internet.<br />
—Dave Morris Bay Area<br />
Woodturners<br />
<strong>The</strong> Editor Responds:<br />
I will have to look at the story<br />
again. We were so impressed with<br />
the light for close up lighting. I<br />
think every instance that I showed<br />
the lamp was close to the work. It<br />
does not light a large area. For large<br />
areas we have 500 watt work lights.<br />
I’m sorry if I misrepresented the<br />
little light. It was not intentional. It<br />
was the first such light that I’ve ever<br />
owned that has an adequate magnet<br />
on it, thus allowing one to get the<br />
light close to the work. I guess that<br />
was part of what impressed us.<br />
—Fred Holder<br />
Hi Fred: I am now able to open<br />
January, thank you very much. As<br />
it happens this is the issue which<br />
included your article on the use of a<br />
Universal Support in order to shape<br />
tools on a dry grinder before moving<br />
to the Tormek.<br />
<strong>The</strong>re are probably two reasons<br />
why you did not get an exactly<br />
duplicated shape when you<br />
moved from the dry grinder to the<br />
Tormek.<br />
Firstly, there are two different<br />
wheel sizes and in this case the<br />
wooden spacer method will not work<br />
100%. You will solve this problem<br />
by using the TTS-100 Turning Tool<br />
Setter, which is designed to accommodate<br />
wheels of any size. You may<br />
feel that it is worth informing your<br />
readers of this fact.<br />
Secondly, the two wheels have<br />
a different arc on the diameter and<br />
in this case you will get a difference,<br />
albeit it will be extremely<br />
small and you can quickly adjust<br />
the final shape on the Tormek after<br />
you have made the initial shape on<br />
the dry grinder.<br />
Both of these methods are<br />
fully explained in the Tormek<br />
Handbook.<br />
—Geoff Brown<br />
Page 10 More <strong>Woodturning</strong> May 2009
News in the Trade<br />
AMERICAN ASSOCIA-<br />
TION OF WOODTURNERS AN-<br />
NOUNCES 2009 SYMPOSIUM<br />
DEMONSTRATORS<br />
Albuquerque and New Mexico,<br />
which proudly proclaims itself<br />
“<strong>The</strong> Land of Enchantment”, play<br />
hosts to AAW members seeking<br />
to be educated, entertained, and<br />
enchanted at the 23rd Annual AAW<br />
Symposium in Albuquerque. <strong>The</strong><br />
complete symposium schedule will<br />
feature more than 140 rotations,<br />
a dozen more events targeted for<br />
professional/studio turners, and<br />
Special Interest Night for pen turning,<br />
segmented work, ornamental<br />
turning, and more.<br />
Please join us at the Albuquerque<br />
Convention Center June 26<br />
to 28th for the AAW 23rd Annual<br />
Symposium. <strong>The</strong> following is a list<br />
of demonstrators:<br />
<strong>The</strong> major demonstrators<br />
are:<br />
Nick Cook from Marietta,<br />
Georgia: Dynamic Plates and Platters<br />
J. Paul Fennell from Scottsdale,<br />
Arizona: Seeing <strong>Your</strong> Way to<br />
Signature Work Emmet Kane from<br />
Castledermot, Ireland: Texturing<br />
Experimenting with <strong>Woodturning</strong><br />
Ebonizing and Gilding Virginia<br />
Dotson from Show Low, Arizona:<br />
Secrets of Laminated <strong>Woodturning</strong>,<br />
Natural Perspectives, Weather<br />
Reports Peter Hromek from Sinntal,<br />
Germany: Spindle: An End-Grain<br />
Hollow, Flower: A Multiaxis Form,<br />
Capsula: Multiaxis Form Mike<br />
Mahoney from Orem, Utah: Turning<br />
Family Heirlooms, Coring Using the<br />
McNaughton Center Saver, Burial<br />
Urns with Threaded Lids Rolly Munro<br />
from Manakau, New Zealand:<br />
Very Thin Deep Vase Form, Carved<br />
Hollow-form Surfaces David<br />
Nittmann from Boulder, Colorado:<br />
Basket Illusion—<strong>The</strong> Cutting Technique—<strong>The</strong><br />
Process and Inspiration<br />
David Springett from Warwichshire,<br />
United Kingdom: Streptohedrons:<br />
Plain turning With a Twist John<br />
Wessels from Bisbee, South Africa:<br />
Sheet Pewter as Surface Cast and<br />
Turning Pewter Resident Artist:<br />
Jean-François Escoulen<br />
Featured demonstrators and<br />
or Panelists:<br />
Garry Knox Bennett, Trent<br />
Bosch, Marilyn Campbell, Andrew<br />
Chen, David Ellsworth, Peter Exton,<br />
Charles Faucher, Barry Gross, Allen<br />
Hockenbery, Sherry Hockenbery,<br />
Michael Hosaluk, William Ray<br />
Hughes, Douglas Jones, Deborah<br />
Kermode, Jerry Kermode, Bonnie<br />
Klein, Pat Kramer, Bill Luce, Alain<br />
Mailland, Andre’ Martel, Larry<br />
Miller, Michael Mocho, Pascal<br />
Oudet, Binh Pho, Chris Pytlik, Joe<br />
Ruminski, Merryll Saylan, Betty<br />
Scarpino, Mark Sfirri, Steve Sinner,<br />
Bill Smith, David Springett,<br />
Bill Tilson, Michael Werner, Molly<br />
Winton, Andi Wolfe.<br />
* * *<br />
Missing Bowl from Demo<br />
Area at <strong>Desert</strong> <strong>Woodturning</strong><br />
<strong>Roundup</strong><br />
<strong>The</strong> Arizona Woodturners Assoc.<br />
and the <strong>Desert</strong> <strong>Woodturning</strong><br />
<strong>Roundup</strong> committee thank those<br />
who attended and supported our<br />
recent symposium. We feel that we<br />
organized a good meeting and hope<br />
that all of the attendees enjoyed<br />
and benefited from the experience.<br />
We plan to hold our 4th DWR in<br />
2011 and hope you will be able to<br />
attend.<br />
One event occurred that detracted<br />
from the symposium. At<br />
the Sunday lunch break one of<br />
Alan Lacer’s prized oval bowls<br />
disappeared from his demo room.<br />
Naturally Alan is very upset about<br />
this and, along with us, asks that<br />
if anyone has seen or knows the<br />
whereabouts of this turning that<br />
they will contact him at amlacer@<br />
dishup or us or me, Norris Ready,<br />
norles@sri-az.com. A picture of<br />
Alan’s bowl is included below for<br />
your reference.<br />
Alan Lacer’s Oval bowl that<br />
disappeared during lunch on<br />
Sunday.<br />
* * *<br />
<strong>Woodturning</strong> Guilds of<br />
Southern Ontario<br />
<strong>The</strong> success of collaborative<br />
US events has sparked the idea in<br />
John Buccioni whilst wearing the<br />
cap of Woochuckers Supplies and<br />
his alternate cap of the local turning<br />
guild that the 10 Canadian guilds<br />
in Southern Ontario should start<br />
working together and maximize<br />
woodturnining awareness. We hope<br />
to follow this trend to future events<br />
and are not excluding the possibility<br />
of a mini symposium in this area<br />
soon!<br />
More <strong>Woodturning</strong> May 2009 Page 11
<strong>The</strong> Burly Beauty<br />
Within<br />
by Bob Heltman, CMW, AAW<br />
(copyright 2009)<br />
Good neighbor Rusty’s son,<br />
Nathan, passed an old OLD burl<br />
to me, wondering if I “might want<br />
do something” with it. As a side<br />
comment, when you start off in<br />
woodturning you wonder where to<br />
get the wood; after a few years the<br />
wood starts to come to you, often in<br />
more quantity than you can readily<br />
use. Like this piece which seemed<br />
fireplace ready!<br />
This old burl looked gray, dusty,<br />
and rather like a thick, sun dried buffalo<br />
pie. It had been curing so long<br />
that for its 10” diameter size it was<br />
quite light. Even the flat cut-off surface<br />
was nearly as gray and wrinkled<br />
as the round exterior.<br />
Frankly, it seemed so fragile I<br />
wondered if it would fly apart during<br />
turning. So, the first thing I did was to<br />
mount it on my power-off lathe, turn<br />
on the dust collector, and use a stiff<br />
bristle brush to try and clean off the<br />
surface. This had some positive effect,<br />
BUT it revealed cracks running<br />
all over the surface, some quite deep,<br />
and branching in all directions. As a<br />
bit of a gamble toward safety, I carefully<br />
ran thin superglue into every<br />
crevasse and pit I could find.<br />
<strong>The</strong> surface still looked terrible<br />
so I next went outside, donned<br />
filtering face shield, and carefully<br />
sandblasted the exterior. This removed<br />
more debris and left the<br />
highly rumpled surface looking like<br />
“at least somebody tried to clean it<br />
up” (Figure 1). Only then did I turn<br />
on the lathe and prepare a tenon for<br />
the chuck, starting at 300 RPM then<br />
up to 500 RPM.<br />
Figure 1. <strong>The</strong> sandblasted<br />
surface at least looked like<br />
someone had tried to clean it<br />
up.<br />
Mounting the tenon in my<br />
chuck I trued up the opposite surface<br />
where the burl was cut from the<br />
tree and carefully started hollowing<br />
the inside. Because of the deep pits<br />
and exceedingly uneven outer surface,<br />
I had to check wall thickness<br />
by putting one finger of the caliper<br />
in the deepest outer surface pit, then<br />
moving the inner finger up against<br />
the developing wall. <strong>The</strong> thinnest<br />
part became around 1/4” but the<br />
thickest exceeded an inch.<br />
<strong>The</strong> inner surface showed<br />
many more cracks, voids, and dried<br />
out wood that separated fiber by<br />
fiber in places. <strong>The</strong>refore, to both<br />
provide structural integrity as well<br />
as a smooth surface, I mixed up<br />
a small batch of EZPoly Wood<br />
Where <strong>Turners</strong> Turn First<br />
Rebuilder (www.ez-poly.net) and<br />
smeared it over the inside, pushed<br />
it with my finger into every spot I<br />
could, and let it cure over night (Fig.<br />
2). Starting with 80 grit 2” diameter<br />
sanding discs on my drill, the next<br />
step involved carefully sanding<br />
away the EZ Poly until wood could<br />
be seen, then changing grits down<br />
to 220.<br />
Figure 2. Inside of the bowl<br />
smeared with EZPoly wood<br />
Rebuilder and ready for<br />
sanding.<br />
What incredible beauty was<br />
revealed! I took the piece off the<br />
lathe, went upstairs, showed it to<br />
my admiring wife, and then sat and<br />
simply held and affectionately gazed<br />
at the unbelievable variety of wood ,<br />
turned to reveal the textures, colors,<br />
INFORMATION AND RESOURCES FOR<br />
WOODTURNERS WORLDWIDE<br />
Find articles, projects, new products, vendors, club listings,<br />
turner websites, courses and schools, discussion forum,<br />
books and videos and much more!<br />
WWW.WOODTURNINGONLINE.COM<br />
Page 12 More <strong>Woodturning</strong> May 2009
and grain patterns. <strong>The</strong>re is nothing<br />
that can equal the raw beauty of<br />
unusual pieces of wood, turned to<br />
newly reveal the secrets within. In<br />
the last several years, as more and<br />
more hungry artists uses woodturnings<br />
as canvasses for painted art<br />
(a temptation to which I’ve fallen<br />
myself to a small degree), I find<br />
time and again that wood itself<br />
just can’t be matched for its natural<br />
beauty (Fig. 3).<br />
I sprayed the inside with 4<br />
coats of gloss lacquer. It still soaked<br />
into some of the more porous areas,<br />
like the dark upper left area<br />
shown in Figure 3. <strong>The</strong>n I waxed<br />
and buffed the interior. Utterly<br />
beautiful!<br />
<strong>The</strong> outside was sprayed<br />
several times with gloss lacquer<br />
too. In this case the bark was so<br />
absorptive that even so coated it<br />
Figure 3. Inside of the sanded and finished burl bowl.<br />
mostly remained a non-descript dull<br />
gray. Of interest, however, is the fact<br />
that the heavily textured, monotone<br />
gray outer surface gives its own<br />
reward to the viewer, as one’s eyes<br />
follow the bumps and voids, tries to<br />
determine the growth pattern of the<br />
host tree, and wonders what forces<br />
of nature had been at work making<br />
such a creation.<br />
As a side note, sandblasting is<br />
not as difficult as it might seem. I<br />
had purchased a simple top-fill gun<br />
a couple years ago in anticipation<br />
of some future need. A 100# bag<br />
of fine sandblasting sand only cost<br />
about $8.00. Just make sure you follow<br />
safety instructions, don’t point<br />
the loaded gun at any of your skin,<br />
and WEAR A FILTERING FACE<br />
SHIELD.<br />
Bounceback of fine sand particles,<br />
and debris, will come at you!<br />
Believe me. For this project I only<br />
used about 10# of sand, and have<br />
the rest left over in dry, sealed plastic<br />
buckets ready for the next project.<br />
By the way, I was cleaning out the<br />
sandblasting gun and thought it<br />
was empty when I accidentally had<br />
it pointed toward my bare left arm<br />
when I hit the trigger. BOY, the few<br />
sand particles left finally discharged<br />
and really stung; fortunately none<br />
penetrated my skin - so BE CARE-<br />
FUL. 90# of air pressure drives sand<br />
particles like little sharp darts.<br />
This rare specimen has for me<br />
a moral overtone too. I’m reminded<br />
that many a person may look plain,<br />
or even what some would call ugly,<br />
yet inside they are persons of rare<br />
charm and beauty.<br />
What surprising lessons one<br />
can learn from turning the gift of an<br />
old, gnarled piece of wood.<br />
More <strong>Woodturning</strong> May 2009 Page 13
<strong>Pen</strong>Turner’s Corner<br />
by Don Ward<br />
<strong>The</strong> <strong>Desert</strong> <strong>Woodturning</strong><br />
<strong>Roundup</strong> is history. I had a great<br />
time seeing some pen friends with<br />
whom I visit via email on a regular<br />
basis. I also enjoyed the demos. I<br />
was able to attend demos by Jimmy<br />
Clewes, Alan Lacer, Bonnie Klien,<br />
Nick Cook, and Dale Nish. I always<br />
enjoy seeing others turn and hearing<br />
their explanation.<br />
<strong>The</strong> pen meeting on Friday<br />
evening was a huge success. We<br />
had over 100 in attendance and lots<br />
of nice door prizes were awarded.<br />
Anthony Turchetta did a demo with<br />
his Legacy Mill showing us how to<br />
decorate pens with spirals, flats, and<br />
flutes. Mick Vickery did a demonstration<br />
on how to conceal the clip on<br />
a pen cap. That technique is referred<br />
to as hidden clips or recessed clips.<br />
And, I did a demonstration on how<br />
I use CA and boiled linseed oil as a<br />
finish on my pens. I think all of the<br />
demos were excellent and everyone<br />
I visited with enjoyed them. Thanks<br />
to Anthony Turchetta and those who<br />
helped him organize the pen meeting.<br />
<strong>The</strong>y did a great job and we had<br />
a wonderful time. Thanks also the<br />
RoundUp bosses for allowing us to<br />
have this meeting.<br />
Reminder: <strong>The</strong> <strong>Pen</strong>turner’s<br />
Rendezvous is quickly approaching.<br />
It will be held on Wednesday<br />
evening after the Craft Supplies<br />
open house and Super Wednesday<br />
sale prior to the Utah <strong>Woodturning</strong><br />
Symposium. If you are planning to<br />
attend the symposium and arriving<br />
for the super Wednesday sale then<br />
you should also plan on attending<br />
the <strong>Pen</strong>turner’s Rendezvous. Full<br />
details are available at http://penmakersguild.com/<br />
. Also, there are<br />
penturning demos at the symposium<br />
and at the Craft Supplies sale on<br />
Wednesday. Demos will be by Anthony<br />
Turchetta, and Kurt Hertzog<br />
and they will also be demonstrating<br />
at the Utah Symposium along with<br />
Mark and Brian Gisi. Complete<br />
details can be found at http://www.<br />
utahwoodturning.com . <strong>The</strong> AAW<br />
symposium also has a penturning<br />
meeting scheduled for the special<br />
events night and maybe a penturning<br />
demo or two. Check the website<br />
at http://www.woodturner.org/sym/<br />
sym2009 .<br />
<strong>The</strong> International Association<br />
of <strong>Pen</strong>turners, aka IAP, at http://<br />
www.penturners.org has local chapters<br />
forming. Check the website for<br />
details and location and dates of the<br />
chapter meetings. Maybe one will<br />
be held close enough for attendance<br />
or maybe you would be willing to<br />
organize a chapter in your area.<br />
Let’s make a pen! I was browsing<br />
the catalogs and came across a<br />
“desk pen” from Craft Supplies. You<br />
can find this kit on the “<strong>Pen</strong> Making”<br />
in the “ballpoints” section on<br />
page 3 of the Craft Supplies website<br />
(http://www.woodturnerscatalog.<br />
com) . But why, I asked, should<br />
I pay $6.50 for what is basically a<br />
slimline kit and a pen funnel (holder)<br />
I can use one of my slimline<br />
kits in chrome (under $2) and I can<br />
make the funnel from a piece of<br />
acrylic or wood cutoffs. So, after a<br />
couple of hours in the shop the set<br />
is finished, photos are taken and I’m<br />
back at the computer writing about<br />
it. If larger pens are to your liking I<br />
am confident the cigar kit could be<br />
used to do the same desk set, with a<br />
little thought, of course. See Figure<br />
1 for the completed set. Here are the<br />
step by step details of how I made<br />
this set. My way is not the only way<br />
to make this modification. In fact,<br />
several of you may even have a<br />
better way and I would like to hear<br />
about them.<br />
I choose mesquite for this project.<br />
Not only is it one of my favorite<br />
woods, I have an unending supply<br />
here in North Texas. I also choose<br />
mesquite because I found a blank<br />
that had already been rough turned<br />
round and had a tenon on one end.<br />
I suppose it was going to be a box<br />
at one time but it suddenly grew up<br />
to become the base for a desk pen<br />
set. I also found a pen blank about<br />
8 inches long or so. Mesquite it will<br />
be. See Figure 2 for the blanks used<br />
to make this desk set.<br />
<strong>The</strong> techniques I used for making<br />
the pen have been discussed in<br />
several previous articles. <strong>The</strong> pen<br />
bottom is basic slimline pen making<br />
and the top part is a closed end<br />
barrel made much like the calligraphy<br />
dip pen outlined in an article<br />
last year. Also, two other articles<br />
of mine discussed closed end pens<br />
and any of those techniques could<br />
be used to hold the upper barrel.<br />
<strong>The</strong> base: <strong>The</strong> base is probably<br />
the easiest part of this project. I held<br />
the blank on the tenon and began<br />
to turn. Although the base in the<br />
CSUSA desk kit was flat, I decided<br />
to make mine rounded on top...just<br />
to practice on making the curve.<br />
I’m not sure if I like it but sitting<br />
on my desk the shape is growing<br />
more favorable. Shape the base to<br />
whatever shape you like. Sand and<br />
finish it and part it off. Hand sand<br />
the bottom and finish it or use a jam<br />
chuck to hold it for sanding and<br />
finishing. I added a couple of beads<br />
Page 14 More <strong>Woodturning</strong> May 2009
just above the bottom. See Figure<br />
3 for the finished base just prior to<br />
being parted off of the blank.<br />
<strong>The</strong> pen: <strong>The</strong> pen is not as<br />
simple to make as the base nor is<br />
it as simple as making a slimline.<br />
Well, half of the pen is simple. <strong>The</strong><br />
bottom half is basic slimline. I cut<br />
the blanks as usual. <strong>The</strong> bottom<br />
is standard length for the slimline<br />
kit used. <strong>The</strong> upper barrel’s blank<br />
was cut 7 inches long. <strong>The</strong>y were<br />
both cut from one blank. I often cut<br />
blanks longer than normal just for<br />
projects like this. <strong>The</strong> lower blank<br />
was drilled through as would be<br />
normally done and so was the upper<br />
barrel’s blank, except the hole in the<br />
upper barrel only went in as far as<br />
needed to receive the tube. This type<br />
of hole is called a blind hole. <strong>The</strong><br />
tubes were glued in using two part<br />
epoxy which is my glue of choice<br />
for tubes.<br />
I decided not to use the kits<br />
center band so I could make the pen<br />
a little fatter than normal. Actually,<br />
I’m not the best at turning small<br />
diameter spindles so I make these<br />
desk pens with a larger diameter.<br />
If you are good at turning small<br />
diameter spindles then I say use the<br />
center band (or not) and make the<br />
pen small. <strong>The</strong>y look really nice<br />
that way. Caution: Be aware of<br />
where the tube ends in the upper<br />
barrel and do not start the small<br />
diameter spindle turning until you<br />
are far enough away from the end<br />
to be past the tube. Turning into<br />
the tube will require starting the<br />
pen over again...well, at least the<br />
upper barrel portion. Ask me how<br />
I know. I have experience though.<br />
Experience is that which you get just<br />
after you need it! I’ve turned into<br />
the brass tube or into a blind hole<br />
[Continued on page 16]<br />
Call or Write for your FREE Copy of our<br />
156 Page Color Catalog!<br />
Featuring:<br />
• <strong>Pen</strong> Kits and Supplies<br />
• Project Kits<br />
• Full Range of <strong>Lathe</strong>s<br />
• All Major Brands of Chucks<br />
• Turning Squares<br />
• Dymondwood<br />
• Henry Taylor, Hamlet and Sorby Tools<br />
all at the best prices!<br />
Order <strong>Your</strong> Free Woodturners Catalog Today<br />
Craft Supplies USA<br />
1287 E. 1120 S.<br />
Provo, Utah 84606 USA<br />
TEL: 800-551-8876<br />
Overseas Telephone: 001-801-373-0919<br />
More <strong>Woodturning</strong> May 2009 Page 15
Continued from Previous<br />
Page<br />
Figure 3.This photo shows the<br />
finished base just prior to being<br />
parted off of the blank<br />
Figure 4. This photo shows the<br />
two blanks and the closed end<br />
pen mandrel.<br />
really want it to be. We will place<br />
both barrels on the mandrel later and<br />
finish sizing the pen, especially at<br />
the junction of the two barrels. This<br />
will insure they are both spot on the<br />
same diameter. We will also save<br />
sanding and finishing until later.<br />
We are now ready to turn the<br />
upper barrel. <strong>The</strong> blank is cut to 7<br />
inches in length. <strong>The</strong> finished length<br />
on the upper barrel of the pen for<br />
this project was 5.75 inches long.<br />
It could be made longer if desired.<br />
I used a closed end pen mandrel<br />
for 7mm pens. <strong>The</strong>se are available<br />
from Arizona Silhouette at http://arizonasilhouette.com/Closed_End_<br />
<strong>Pen</strong>_Mandrel.htm . <strong>The</strong>y are really<br />
nice if one makes several closed<br />
end pens. One drawback is that each<br />
closed end pen mandrel is tube size<br />
specific. So, to make closed end<br />
Figure 1. This photo shows the<br />
the completed set<br />
Figure 5. This photo shows the two barrels at this stage of the<br />
project.<br />
Figure 2 for the blanks used to<br />
make this desk set.<br />
on more than one occasion. Some<br />
very pleasing shapes can be done<br />
by those good at smaller diameter<br />
spindle turning.<br />
Square the ends of the lower<br />
section. Place it on the mandrel and<br />
turn as normal. Leave the end opposite<br />
the nib end larger than you<br />
Page 16 More <strong>Woodturning</strong> May 2009<br />
Figure 6. This photo shows both blanks on the same mandrel before<br />
and after the turning and finishing was done.
Figure 7. This photo shows the barrel taped to the mandrel just<br />
before I removed the waste and did my magic trick to make the<br />
doodad disappear.<br />
pens using several different size<br />
tubes one would need a mandrel for<br />
each size. <strong>The</strong>re are several ways to<br />
hold the blank for making closed<br />
end pens. Earlier articles in <strong>The</strong><br />
<strong>Pen</strong>turner’s Corner have addressed<br />
this. Closed end pen articles are<br />
available on my website at http://<br />
www.RedRiver<strong>Pen</strong>s.com/articles if<br />
earlier copies of More <strong>Woodturning</strong><br />
have been misplaced.<br />
<strong>The</strong> upper barrel’s end is<br />
squared and the blank was secured<br />
on the mandrel. Figure 4 shows the<br />
two blanks and the closed end pen<br />
mandrel. I now turned the upper<br />
barrel to the desired shape using the<br />
tail stock for support. Once the final<br />
length is determined and the basic<br />
shape of the upper barrel is set the<br />
end of the blank is parted off. <strong>The</strong><br />
upper barrel of this desk pen came<br />
in at 5.75 inches. I also left the end<br />
that will meet the lower barrel at the<br />
center a little larger than what if will<br />
finally be. Figure 5 shows the two<br />
barrels at this stage of the project.<br />
<strong>The</strong> next step is to place the<br />
two blanks on a standard mandrel<br />
for final turning and shaping. Place<br />
a slimline bushing on the mandrel<br />
followed by the lower barrel. Slip<br />
on the upper barrel and adjust the<br />
mandrel. Bring up the tail stock<br />
and gently tighten the tailstock<br />
just enough to hold the blanks for<br />
turning. Too much tail stock pressure<br />
will bow the pen, especially<br />
the upper barrel. Turn them to the<br />
shape you want. Now the junction<br />
where the center band would be can<br />
be made and both barrels will be exactly<br />
the same diameter for a perfect<br />
fit. Notice the little doodad on the<br />
end of the pen’s upper barrel. I also<br />
do a little magic. Later you will see<br />
that it has disappeared! Sand and<br />
finish the pen. I used Shellawax<br />
friction polish on this pen. Figure<br />
6 shows both blanks on the same<br />
mandrel before and after the turning<br />
and finishing was done.<br />
Remove them from the mandrel<br />
and place the upper barrel back<br />
on the mandrel. Use blue painter’s<br />
tape and secure the barrel to the<br />
mandrel. Remove the waste from<br />
the end of the pen. Be very careful<br />
or you will develop your magician’s<br />
skill also. Figure 7 shows the barrel<br />
taped to the mandrel just before I removed<br />
the waste and did my magic<br />
trick to make the doodad disappear.<br />
Once the waste is removed the end<br />
of the pen can be lightly sanded<br />
and the finish can be applied to the<br />
end. <strong>The</strong> pen is now ready to be<br />
assembled.<br />
Now where did I put those pen<br />
funnels I know I have some somewhere.<br />
Amazing...I found them.<br />
<strong>The</strong>y are all gold...no chrome ones.<br />
I thought I had some chrome ones<br />
<strong>The</strong> solution for me was to turn a<br />
funnel. I used a short piece of black<br />
acrylic and turned it round. I made<br />
a 1/2 inch in diameter to hold with<br />
my Beall collet chuck. <strong>The</strong> tenon<br />
is about 3/4 inches long. I used a<br />
small detail gouge to make the hole.<br />
Figure 8. This photo shows a<br />
before and after picture of the<br />
funnel.<br />
I checked the size and shape of the<br />
hole often using a pen to make sure it<br />
was the diameter and depth required.<br />
After the funnel was shaped it was<br />
sanded and polished. Figure 8 shows<br />
a before and after picture of the<br />
funnel. Placement of the funnel on<br />
the base was determined and a hole<br />
was drilled using the drill press. <strong>The</strong><br />
funnel was glued into place with a<br />
small amount of CA glue. <strong>The</strong> pen<br />
was assembled and the project was<br />
finished.<br />
I made the desk pen for $1.70<br />
since the wood was free. This is a<br />
great and inexpensive project for a<br />
buck seventy!<br />
Email questions and comments<br />
to me at don@RedRiver<strong>Pen</strong>s.com I<br />
look forward to hearing from anyone<br />
who tries the techniques presented<br />
in these articles. Maybe I will meet<br />
some of the readers of this column at<br />
the AAW in Albuquerque. I will be at<br />
the pen meeting on the night of the<br />
special interests meetings.<br />
Do a good turn daily!<br />
More <strong>Woodturning</strong> May 2009 Page 17
Questions and Answers from the Internet<br />
Drying Rough<br />
Turned Bowls<br />
Question: I have read posts<br />
where people say to partially turn<br />
bowls then store them in a brown<br />
paper bag for a few months, then<br />
finish turning them. 1) Why store<br />
them in a brown paper bag and is the<br />
bag sealed, left open or folded over<br />
2) Where do you store them in the<br />
shop/garage, indoors<br />
—Ted<br />
Fred’s Response: <strong>The</strong> paper<br />
bag helps slow the drying of the<br />
rough turned bowl. It should be<br />
sealed and should be stored in a dry<br />
area out of the sunshine. What I’ve<br />
found even more effective than placing<br />
the bowl in a brown paper bag<br />
is to wrap the outside of the bowl<br />
with a brown paper bag and tape the<br />
bag at the rim of the bowl leaving<br />
the hollowed inside open. Store this<br />
bowl with the hollowed side down<br />
on stickers so that some air can get<br />
into the inside. This seems to work<br />
about as well as anything I’ve tried.<br />
Most of the time, I simply rough<br />
turn, write on the date of turning,<br />
and throw them on the shelf to dry.<br />
Sometimes they crack and most of<br />
the time they don’t.<br />
—Fred Holder<br />
Lyle’s Response: <strong>The</strong> idea<br />
here is to slow down the drying process.<br />
<strong>The</strong> paper bag lets the wood<br />
breath/dry slowly and acts like a<br />
moisture chamber. You want the<br />
wet wood in the center of the wall<br />
thickness to dry out at the same rate<br />
as the outside surface of the bowl. If<br />
the outside dries too fast it will<br />
Hand Thread<br />
Chasing<br />
a crack. If you stop the drying<br />
like with a plastic bag then the wood<br />
will mold and decay. So, you cant<br />
stop the drying only slow it down.<br />
I prefer to turn wet wood so I don’t<br />
use the double turning method any<br />
more.<br />
Material for Chess<br />
Pieces<br />
Question: I need suggestions<br />
as to what is a good material to turn<br />
the white, light colored figures of a<br />
chess set. I have tried hard Maple<br />
but the density is too soft for the<br />
detail I desire. <strong>The</strong> darker pieces<br />
are to be turned from Babinga.<br />
<strong>The</strong> tallest figure will be less then<br />
3 inches.<br />
—MGH<br />
Fred’s Response: I haven’t<br />
done any chess pieces in quite a<br />
while. I would however recommend<br />
white holly or alternative<br />
ivory. Holly is fairly dense and<br />
holds detail well, but is sometimes<br />
hard to find. Alternative Ivory is<br />
a man made material that looks<br />
like ivory and will hold excellent<br />
detail. It is a bit more expensive<br />
than wood, but would give you the<br />
excellent detail holding quality you<br />
need and it makes a very attractive<br />
chess piece. I originally purchased<br />
my supply from a place in England,<br />
but I believe that Craft Supplies<br />
USA carries the material in smaller<br />
pieces than you can purchase it in<br />
from England.<br />
—Fred Holder<br />
Lyle’s Response: I did my one<br />
and only chess set when I was age<br />
16. I think I used pine. So I am no<br />
expert on ivory, ivory substitute,<br />
antler, bone or tusks used recently.<br />
I never buy turning wood either.<br />
All my wood comes from already<br />
downed trees in northern Michigan<br />
where I live. <strong>The</strong>re are 125 species<br />
of maple from very soft box elder to<br />
hard/sugar maple. I have used the<br />
softer maples for bowls and hollow<br />
forms. It spalts nicely. I have used<br />
hard maple, sugar maple (acer saccharum)<br />
for Christmas ornament<br />
finials. <strong>The</strong> hard/sugar maple from<br />
the northern growing district takes<br />
detail well with very fine close grain<br />
character. It’s the best I can do in<br />
Northern Michigan. It is a pale<br />
cream color, not white, but it has<br />
nice contrast to darker woods. I<br />
don’t know what part of the country<br />
you are from. Is it possible you got<br />
a softer variety of maple for your<br />
testing<br />
—Lyle Jamieson<br />
Hand Thread<br />
Chasing<br />
Question: I am seriously considering<br />
thread chasing tools. <strong>The</strong>se<br />
would be used primarily with lidded<br />
boxes and some small urns. But, and<br />
this is my problem, the tools are offered<br />
in 10, 16 and 20 threads per<br />
inch. Is there a best size I seem to<br />
recall reading that with 20 TPI the<br />
threading job was easier. Is one size<br />
more useful in softer woods Lots<br />
of questions and I hope some of the<br />
usual good answers.<br />
—Harry<br />
Fred’s Response: Since my<br />
book, Making Screw Threads in<br />
Wood, has been quoted a bit, I guess<br />
I better post to this thread. To learn<br />
to chase threads, you need two<br />
things: (1) a good set of thread chasers<br />
and (2)wood of the proper hardness.<br />
I suspect that the person who<br />
More <strong>Woodturning</strong> May 2009 Page 18
ecommended using PVC to learn<br />
to chase threads was me, because I<br />
highly recommend it for learning to<br />
use the tools.<br />
For wood, you need a hard,<br />
dense wood like boxwood, African<br />
Blackwood, and some of the South<br />
American rosewoods. However,<br />
if you mount the wood so that the<br />
grain runs perpendicular to the axis<br />
of rotation, it is possible to hand<br />
chase threads in the softer woods.<br />
I’ve hand chased 16 tpi threads in<br />
soft white pine with the grain oriented<br />
so that there is some side grain<br />
and some end grain in the threaded<br />
area.<br />
I own many different thread<br />
chasers and can cut threads with all<br />
of them, but for some reason the<br />
Ray Iles Chasers sold by “Tools For<br />
Working Wood” in Brooklyn (see<br />
Page 2 for their advertisement) seem<br />
to work better than all of the rest.<br />
<strong>The</strong>y are available in 16 tpi, which<br />
incidentally, is the normal thread to<br />
use for threaded boxes.<br />
—Fred Holder<br />
Lyle’s Response: Is it easier or<br />
more difficult to chase threads for<br />
finer threads What do you think<br />
of the hand-vs-mechanized thread<br />
chasing process. I know the tool<br />
cost is considerably different, and<br />
the learning curve is significant,<br />
what do you think Purest, revolutionary<br />
or pragmatist<br />
—Lyle Jamieson<br />
Johannes Michaelson<br />
Turning a Hat<br />
Question: I look forward<br />
to getting the new issue of More<br />
woodturning each month and really<br />
enjoyed your article this month on<br />
the hat man. I have been turning several<br />
years and I want to try making<br />
a hat. I have not had the opportunity<br />
to see a live demo on making a<br />
hat but I have read several articles<br />
and have a general idea of how the<br />
turning process takes place but I<br />
have some questions that were not<br />
covered in your article or the others<br />
I have read.<br />
My questions are as follows:<br />
1, What is the diameter and thickness<br />
of the blank and is it end grain<br />
or side grain. 2, What is the final<br />
thickness of the brim and crown.<br />
3, Do you keep adding moisture to<br />
the wood during the turning process<br />
to keep it from drying out. 4,Is the<br />
hat sanded and finished before it is<br />
put in the shaping jig. 5, What finish<br />
do you recommend. 6,Do you<br />
have plans or dimensions you will<br />
share on the shaping jig. 7,Does the<br />
tape on the brim add strength and<br />
prevent cracking during shaping<br />
and will wide masking tape work.<br />
8, How long do you leave the hat in<br />
the shaping jig. 9, What woods are<br />
best for hats. I have access to green<br />
sycamore, white ash, silver maple,<br />
walnut, and many more woods. 10,<br />
How tall is the crown and brim on<br />
your hats. 11, <strong>The</strong> final finish mounting<br />
fixture looks like a jam chuck<br />
that fits inside the crown with a flat<br />
surface for the brim to jam against.<br />
Is double face tape needed to keep<br />
the hat in place while turning the top<br />
of the crown. I will probably think<br />
of more when I try my first one but<br />
this will get me started. M email address<br />
is ddhawkins@sbcglobal.net.<br />
Thanks for your help and your very<br />
informative magazine.<br />
—Don Hawkins, Gainesville,<br />
Texas<br />
Fred’s Answer: I had assumed<br />
that I had Johanneses e-mail address,<br />
however, I don’t and I find that he<br />
isn’t listed in the AAW Directory<br />
either. So, I’ll have to attempt to<br />
answer your questions:<br />
1) I believe that he normally<br />
uses a half log, which makes it side<br />
grain, but I believe either side grain<br />
or endgrain will work.<br />
2) He works pretty thin. I believe<br />
that the wall thickness and the<br />
brim are slightly under 1/8” , say<br />
maybe 3/32”.<br />
3) I believe that he squirts the<br />
wood with a little water if it starts<br />
to dry out too fast.<br />
4) <strong>The</strong> hat is sanded before putting<br />
into the shaping jig, but finished<br />
after it is dry.<br />
5) I don’t remember if he said<br />
what his favorite finish is, but I believe<br />
it is an oil based finish.<br />
6) If you consider a normal<br />
cowboy hat for size and then compare<br />
it to the photo, you should be<br />
able to get close.<br />
7) <strong>The</strong> tape is to protect the hat<br />
brim during the shaping process and<br />
may help keep it from cracking.<br />
8) It seems to me that he said<br />
the hat normally remains in the jig<br />
for several days, or until it dries out<br />
so it will retain the shape given in<br />
the jig.<br />
9) I think that he uses all types<br />
of wood, but seemed to like madrone<br />
the best, which he can only get<br />
when he comes to the west coast.<br />
[Continued on Page38.]<br />
Holland 4 Wheel Steady<br />
100% improvement over 3 wheel<br />
steadies<br />
25% larger swing capacity, fits lathe<br />
sizes, 12,14,16,18,20,24<br />
Easy to build of plywood<br />
Plans for sale $20.00 + $2.00 s/h<br />
Custom Built $275.00 + s/h<br />
email: wmhollan@optonline.net<br />
phone 631-281-0302<br />
More <strong>Woodturning</strong> May 2009 Page 19
Editor’s Books for Sale<br />
Books Written by the Editor of More <strong>Woodturning</strong><br />
Making the Chinese<br />
Ball<br />
Revised 2008, by Fred<br />
Holder.<br />
This revised booklet outlines Fred’s<br />
trials and tribulations in conquering<br />
this project. Tells how to make<br />
the tools needed to use the Crown<br />
Chinese Ball Tools. Booklet now<br />
contains 64 pages of information.<br />
Price is $10.00 including shipping.<br />
Order from: Fred Holder, PO Box<br />
2168, Snohomish, WA 98291.<br />
Telephone 360-668-0976.<br />
Price: $28.00, plus $5.00s/h<br />
Price: $27.00, plus $5.00 s/h<br />
I have purchased 25 copies of<br />
<strong>The</strong> Woodturner’s FAQ Book and<br />
have them available as signed<br />
copies for $19.95 plus $5.00<br />
for shipping by Priority Mail<br />
(Washington State residents<br />
please add 8% for sales tax.)<br />
We accept cash, check, or<br />
MasterCard and Visa credit<br />
<br />
book, which is “required reading<br />
for all new turners” directly<br />
from the author:<br />
Fred Holder<br />
More <strong>Woodturning</strong><br />
PO Box 2168<br />
Snohomish, WA 98296 USA<br />
“Two Books in One”<br />
a CD-ROM<br />
This CD-ROM contains Fred’s<br />
newest book, “<strong>The</strong> Turning Process”<br />
and the above book “Making<br />
the Chinese Ball” on one CD-ROM.<br />
Both books are in PDF format and<br />
require Adobe Acrobat Reader to<br />
read them on your computer. <strong>The</strong><br />
Turning Process is a 105 page<br />
booklet designed for beginner to<br />
intermediate woodturners. It might<br />
even have something worthwhile for<br />
experienced woodturners.<br />
Available by 9/10/2008<br />
Price for this CD-ROM<br />
is just $14.95 including postage<br />
within the United States.<br />
Order from: Fred Holder, PO Box<br />
2168, Snohomish, WA 98291.<br />
Telephone: 360-668-0976<br />
<strong>The</strong>se books seemed<br />
to be missing from most US<br />
Sources. So I have purchased<br />
25 of each book for resale. If<br />
you haven’t had an opportunity<br />
to purchase one, this is<br />
an opportunity to get a signed<br />
copy. Books will be shipped<br />
by Priority Mail.<br />
Fred Holder<br />
More <strong>Woodturning</strong><br />
PO Box 2168<br />
Snohomish, WA 98291 USA<br />
TEL: 360-668-0976<br />
Back Issues of More <strong>Woodturning</strong><br />
Available on CD-ROM<br />
Anyone who owns a computer and likes to read More <strong>Woodturning</strong><br />
on their computer or to archive it onto their computer, will<br />
be pleased to learn that we now have all issues of More <strong>Woodturning</strong><br />
ever published in PDF format. While we offer individual years<br />
on a CD-ROM for $25.00, we have come up with a special price<br />
which includes all issues published from October 1996 to the date<br />
that the order is placed on a single CD-ROM for just $95.00. This<br />
<br />
More <strong>Woodturning</strong>, PO Box 2168, Snohomish, WA 98291 USA.<br />
Page 20 More <strong>Woodturning</strong> May 2009
Upgrade to the<br />
Teknatool Cole Jaws<br />
by Anthony Napoli, AAW, CMW<br />
When we turn a bowl project,<br />
the final turning step involves turning<br />
the bottom portion of the bowl.<br />
This final step merges the bowl<br />
shape into the foot and allows you<br />
to incorporate whatever design work<br />
you want to bring to the foot itself.<br />
This can include creating a series<br />
of grooves, a bead, a combination,<br />
or even carving. <strong>The</strong>re are many<br />
ways to hold a piece depending on<br />
the characteristics of the piece itself.<br />
<strong>The</strong> holding options are often<br />
dictated by the shape at the top of<br />
the bowl, wall thickness, voids in<br />
the bowl, etc. As a result, we can<br />
choose to use 1) a jam chuck holding<br />
the inside or the outside edge of the<br />
piece, or 2) hold it in the chuck jaws<br />
or a clamping jig that sandwiches<br />
the piece between two discs of<br />
plywood/MDF, or 3) use a vacuum<br />
chuck. You may want to use any<br />
of the above methods, but you may<br />
not have the necessary equipment<br />
or materials. This is where I have<br />
found the Teknatool Cole Jaws to<br />
be useful<br />
Teknatools has made two similar<br />
systems for holding pieces for<br />
bottom turning: the Cole Jaws -<br />
Mini (#6006) and the larger Cole<br />
Jaws Set (#JSCOLE). <strong>The</strong>y come<br />
with rubber buns and should be used<br />
up to 600 rpm for the larger set and<br />
up to 800 rpm for the mini. Figure 1<br />
shows the rubber buns have a height<br />
of 1/2” and work well with conventional<br />
edge bowls. <strong>The</strong> Cole Jaws<br />
are only designed for re-chucking<br />
small, lightweight bowls that are<br />
10” in diameter for the full size<br />
Cole and 8” for the mini Cole. For<br />
larger, heavier bowls, Teknatool has<br />
Figure 1. This photo shows<br />
the rubber buns have a height<br />
of 1/2” and work well with<br />
conventional edge bowls.<br />
drawings and instructions for MDF<br />
jaws extensions that are bolted on<br />
to the Cole jaws. So you have two<br />
Cole jaw options and an option for<br />
increasing the size capacity of either<br />
of the jaws. However, what do you<br />
do if you have a non-conventional<br />
edge that either does not touch the<br />
holding plates, or has a curved top<br />
edge, or other edge irregularity For<br />
instance, this piece shown (Figure<br />
2) is a triple off-center turned bowl<br />
and its edge does not sit on the<br />
Cole plates resulting in no edge to<br />
grip with the buns. I did not have<br />
available a suitable sized piece of<br />
wood to make a jam chuck. Vacuum<br />
chucking was out because I created<br />
the piece with a hole through the<br />
center.<br />
With a small investment<br />
you can increase the capacity<br />
of the Cole Jaws.<br />
Figure 2. This photo shows a<br />
triple off-center turned bowl and<br />
its edge does not sit on the Cole<br />
plates resulting in no edge to<br />
grip with the buns.<br />
With a small investment you<br />
can increase the capacity of the<br />
Cole Jaws from the 1/2” up to 1”<br />
height capacity. In Figure 3 are the<br />
components needed to upgrade the<br />
Cole Jaws capacity. I used 1-3/4”<br />
pan head screw (1-1/2” will work), a<br />
1” long steel sleeve, and clear vinyl<br />
tubing with 1/2” outside diameter<br />
and 3/8” inside diameter. <strong>The</strong> steel<br />
sleeve slides over the screw and the<br />
vinyl tubing is cut to 1” length and<br />
slid over the steel sleeve. Also when<br />
the bowls’ edge does not touch the<br />
plates, I will use a small washer between<br />
the plates and the steel sleeve<br />
to create more contact surface.<br />
Figure 3. This photo shows the<br />
components needed to upgrade<br />
the Cole Jaws capacity.<br />
[Continued on Page 22.]<br />
More <strong>Woodturning</strong> May 2009 Page 21
Cole Jaws Continued from<br />
Page 21<br />
Figure 4. Shows the upgrade<br />
installed and seems to hold the<br />
piece a little more securely than<br />
the rubber buns provided with<br />
the Cole Jaws.<br />
Too much pressure<br />
may leave marks<br />
or even crack your<br />
piece.<br />
This upgrade works well and<br />
seems to hold the piece a little<br />
more securely than the rubber buns<br />
provided with the Cole Jaws. (See<br />
Figure 4.) <strong>The</strong> steel sleeve, when<br />
tightened to the plates, does not<br />
flex or give. Depending on the<br />
height of the piece you will need<br />
to be aware of where the screws<br />
are in relationship to your tool and<br />
fingers. However, remember not to<br />
exceed Teknatool’s recommended<br />
rpm speed. Also, keep in mind the<br />
clamping pressure versus the results<br />
it may have on your piece. Too<br />
much pressure may leave marks<br />
or even crack your piece. As you<br />
can see, this upgrade increases the<br />
capacity of the jaws with limited<br />
investment of time and expense.<br />
Figure 5. This shows a sample<br />
piece being held in the upgraded<br />
jaws.<br />
Warning: As with any<br />
chucking system there is still<br />
the possibility of a piece dislodging<br />
and flying off while<br />
turning. Follow all of Teknatool’s<br />
warnings for the use of<br />
the Cole Jaws. Again, these<br />
jaws were designed for rechucking<br />
only. This includes<br />
but is not limited to, taking<br />
aggressive cuts, and/or trying<br />
to do major turning work. As<br />
always, choose the correct tool,<br />
and use it properly.<br />
Our Trip to Florida<br />
in February<br />
by Fred Holder<br />
After attending the <strong>Desert</strong><br />
<strong>Woodturning</strong> <strong>Roundup</strong> in Mesa,<br />
Arizona, we flew to Orlando, Florida<br />
where I was scheduled to do two<br />
demonstrations. One was before the<br />
International Wood Collectors Society<br />
(IWCS) meeting which was to be<br />
held near Eustus, Florida. We arrived<br />
in Orlando and then drove North to<br />
meed Keith Larrett who guided us<br />
to the demonstration location in<br />
Orange Park, Florida. <strong>The</strong> location<br />
was Jim and Sandy Schroeer’s home<br />
and shop. <strong>The</strong>y also hosted us for<br />
Saturday and Sunday nights. I did a<br />
half day demonstration on Saturday<br />
and then a full day hands on event<br />
on Sunday.<br />
Monday morning we bid our<br />
hosts goodby and drove south back<br />
to the Orlando area to locate the<br />
Woodcraft Store where I was to<br />
demonstrate on Thursday evening.<br />
We needed to locate the store and<br />
learn how to get from the Lake Yale<br />
Baptist conference Center to there<br />
and back in the dark. We took one<br />
day of rest on Tuesday before the<br />
IWCS event was to begin.<br />
IWCS Winter Woodfest<br />
2009-Florida<br />
<strong>The</strong> International Wood Collectors<br />
Society (IWCS) Winter<br />
Woodfest for 2009 was held at<br />
the Lake Yale Baptist Conference<br />
Center near Eustus, Florida from<br />
February 18 through 22, 2009 with<br />
Chris Nothnagle serving as host.<br />
<strong>The</strong>re was over 140 members in<br />
attendance. <strong>The</strong> event began with<br />
registration and set up of exhibits<br />
in the auditorium at 1:00 pm on<br />
Wednesday, February 18. Actually,<br />
Page 22 More <strong>Woodturning</strong> May 2009
egistration opened a bit early as<br />
Mildred and I arrived before noon<br />
and were able to obtain our registration<br />
packets and our room keys for<br />
our stay. Quite a number of people<br />
had exhibits, with many selling<br />
their wares. It think there was a bit<br />
of trading also going on at least between<br />
our wives: Mildred traded a<br />
butterfly to Shelly for one of Garry’s<br />
oval boxes.<br />
<strong>The</strong> first event was the annual<br />
business meeting of the IWCS,<br />
which was being held at this event<br />
because it was felt that there would<br />
not be a quorum at the annual meeting<br />
in Holland. This meeting was<br />
held at 2:30 pm on Wednesday. This<br />
was the primary reason for our attending,<br />
since I am the Northwest<br />
Region Trustee and therefore a<br />
member of the board.<br />
<strong>The</strong>re was then an announcement<br />
of the Annual Meetings for<br />
the next four years: 2009 in the<br />
Netherlands, not a bad rate of 770<br />
Euro for the three weeks; 2010 at<br />
Lake Yale, Florida with Manley and<br />
Elaine Hunt serving as host; 2011 in<br />
Crawfordsville, Indiana with Bob<br />
and Judy Chastain serving as host;<br />
finally somewhat up for consideration<br />
is the 2012 meeting in Niagra<br />
Falls area.<br />
One final note was that Buckeye<br />
wood helps one avoid rheumatism.<br />
<strong>The</strong> Woodfest was kicked off<br />
at 7:00 pm in the South Wing with<br />
opening remarks and introductions.<br />
<strong>The</strong> guest speaker for the evening<br />
was Janet Hichee on Sandpine Silva<br />
culture. We missed this because I<br />
was getting sick, I thought it was<br />
bad food related.<br />
Thursday morning began with<br />
a number of classes, plus the Sawmill<br />
running all day with Manley<br />
Hunt.<br />
At 9:00 AM three classes started<br />
and ran until almost 10:30 am.<br />
<strong>The</strong>y were Bob Chastain teaching<br />
carving ; Ted Spangenberg doing a<br />
stool making class; an Audubon bird<br />
walk outside the building toward the<br />
canal; and Ruth Wakeman with a<br />
class on making note pad covers.<br />
At 10:30 two demonstrations<br />
began and ran until noon. <strong>The</strong>y<br />
were: Robert Parker doing a bowl<br />
hewing demonstration out by the<br />
sawmill and Bob Winter with a turning<br />
seminar. Bob turned a square<br />
edge bowl and a natural edge bowl.<br />
I was able to attend Bob Winter’s<br />
demonstration.<br />
Bob Winter turning a square<br />
edge bowl.<br />
Close up of Bob’s Squae edge<br />
bowl.<br />
Bob turning the foot of the<br />
natural edge bowl that he<br />
turned.<br />
In the afternoon on Thursday,<br />
we left the site for the Woodcraft<br />
store in Fern Park (a part of Orlando).<br />
I did my Chinese Ball<br />
demonstration, but found that I<br />
was getting a bit more sick than anticipated.<br />
Friday morning, Mildred<br />
called the airline and got us a flight<br />
out at noon on Friday. It turned out<br />
that I had a pretty nasty case of the<br />
stomach flu. <strong>The</strong> rest of this story is<br />
what was supposed to happen, but<br />
we missed Friday, Saturday, and<br />
Sunday events.<br />
After lunch, Regis Miller<br />
spoke on Wood Forensics in the<br />
Conference room in the south wing.<br />
Other events for the afternoon were:<br />
Nevada Rye doing a demonstration<br />
on making Pecan Brittle, Karen<br />
Fett on ribbon roses, Art Lee on a<br />
letter opener, Pam Munger with a<br />
woodburning class, Robert Goddard<br />
doing a turning seminar and<br />
Alan Curtis doing a wood explorer<br />
seminar. <strong>The</strong> evening entertainment<br />
was provided by the Lance Graham<br />
Band doing Country Music and<br />
Bluegrass.<br />
After breakfast on Friday, Regis<br />
Miller spoke on Wood Anatomy.<br />
Also Nevada Rye again did pecan<br />
brittle, Bob Winter did a turning<br />
[Continued on Next Page]<br />
More <strong>Woodturning</strong> May 2009 Page 23
Florida Trip Continued from<br />
Page 23<br />
seminar, Bob Chastain did a carving<br />
class; Chris Nothnagle did a seminar<br />
and class on cabriole legs and Queen<br />
Anne style furniture; and Robert<br />
Parker demonstrated bowl hewing.<br />
With lunch complete more<br />
demonstrations and classes were<br />
held: Gil Bryan did a fun brooch;<br />
Tom Fortenberry did a turning seminar;<br />
Pat Powers did blacksmithing<br />
by the lake; Tim Hegarton held a<br />
wood explorer seminar; Bill Perkins<br />
did a bird house building for youth;<br />
and Robert Goddard did a turning<br />
seminar.<br />
After supper, Mike Drayton did<br />
a presentation on prescribed fires in<br />
National forests.<br />
Saturday was an under the tent<br />
all-day auction. At 4:00 pm everyone<br />
took down their exhibits. After<br />
dinner, at 7:00 pm the craft auction<br />
was held. Finally, after breakfast on<br />
Sunday the farewells were made and<br />
all began to disperse.<br />
From Wednesday afternoon<br />
through late Saturday, there were<br />
many show and tell items. <strong>The</strong>re<br />
were two that I was personally impressed<br />
with and we are including<br />
photos of those two pieces.<br />
It was a nice four day event<br />
and everybody seemed to be enjoying<br />
themselves, had an opportunity<br />
to learn new things, and many took<br />
home a lot of wood. Unfortunately,<br />
Mildred and I missed most of the<br />
event that we had come to see.<br />
This is a piece by Terry<br />
Sawbridge of the United<br />
Kingdom. At the time I<br />
photographed this piece, it was<br />
already marked sold!<br />
I failed to write down the<br />
makers name for this beautifully<br />
carved duck. It looked alive.<br />
Letter to the Editor<br />
Dear Fred,<br />
I’ve been enjoying your articles<br />
about the rolling pins. I’ve<br />
been making my style of rolling pin<br />
for about 4 or 5 years. It has a little<br />
twist, if you will, to the average pin.<br />
Thought you’d enjoy the pictures.<br />
—Mark J Klass<br />
Watertown, Wisconsin<br />
Mark’s rolling pin, does have a<br />
bit different twist.<br />
Thanks Mark,<br />
We appreciate seeing what our<br />
readers are doing.<br />
—Fred Holder, Editor<br />
Make 2-3 Bowls from 1 Blank<br />
with My New BowlSaw<br />
Turn Nested Bowls from 6” or 8” bowl blanks with a $39.95<br />
hand-held tool I call the Bowlsaw.<br />
See my website bowlsaw.com for details.<br />
Steussy Creations<br />
415-897-1457 334 Atherton Ave., Novato, CA 94945<br />
Page 24 More <strong>Woodturning</strong> May 2009
Testing Rockler’s<br />
New <strong>Pen</strong> Press/<br />
Drilling Jig<br />
from pushing the pen tip too far, a<br />
common mistake with rudimentary<br />
clamps.<br />
by Fred Holder<br />
Rockler Woodworking and<br />
Hardware contacted me recently<br />
asking if I would like to evaluate<br />
their new <strong>Pen</strong> Press/Drilling Jig.<br />
We were getting ready to leave for<br />
an extended trip to Arizona and then<br />
Florida, but I said that I would be<br />
happy to give it a check out when<br />
I returned. When we returned from<br />
Florida, the package was waiting at<br />
our home.<br />
Figure 1. This nice looking jig is<br />
what I found when I opened the<br />
package.<br />
I’ve always drilled my pen<br />
blanks on the lathe and used the<br />
tailstock to press the components<br />
together, but this new tool sounded<br />
like a better way to do the job.<br />
This is an innovative<br />
tool that eliminates<br />
three common pen<br />
making problems.<br />
This is an innovative tool that<br />
eliminates three common pen making<br />
problems: boring an inaccurate<br />
hole for the pen mechanism; pushing<br />
the mechanism in too far; and<br />
pushing the pen together crooked,<br />
resulting in a cracked casing.<br />
Figure 2. Drilling the blank<br />
is easy, but I recommend you<br />
clamp the jig to the drill press<br />
table.<br />
When drilling the blank initially,<br />
the jig’s sturdy notched<br />
jaws hold the pen blank perfectly<br />
vertical, creating a straight, precise<br />
hole to accept the pen tubes and<br />
mechanism.<br />
<strong>The</strong> jaws are also self centering<br />
so users don’t have to reposition the<br />
jig for different sized pen blanks.<br />
To take advantage of this feature,<br />
one needs to clamp the unit firmly<br />
to the drill press table and be ready<br />
to drill a large number of blanks<br />
at one time. I was pleased with<br />
the drilling of the blanks. <strong>The</strong> hole<br />
emerged exactly in the center of the<br />
other end.<br />
At the assembly<br />
stage, the pen is then<br />
positioned horizontally<br />
between the<br />
jaws.<br />
At the assembly stage, the<br />
pen is then positioned horizontally<br />
between the jaws. Two countersunk<br />
holes keep the ends precisely centered<br />
so the pen stays in a straight<br />
line and won’t buckle. At the same<br />
time, the slow, controlled clamping<br />
mechanism helps prevent the user<br />
Figure 3. This photo shows a pen<br />
being assembled in the jig. <strong>The</strong><br />
components align perfectly in<br />
the centering holes provided in<br />
the jaws.<br />
<strong>The</strong> unit is made from solid<br />
extruded aluminum. <strong>The</strong> <strong>Pen</strong> Press/<br />
Drilling Jig features a hollowed out<br />
space for a shop-made drawer. <strong>The</strong><br />
jaws are cast aluminum, and the jig<br />
includes three replaceable sacrificial<br />
wood blanks that prevent exit-hole<br />
blowout during drilling operations.<br />
<strong>The</strong> feet are pre-drilled for<br />
mounting to an auxiliary base, an<br />
option that allows for quick setup<br />
on the drill press. I didn’t mount<br />
mine on a auxiliary base, but would<br />
recommend doing so.<br />
If you make pens, this jig<br />
would be an excellent addition to<br />
your tool inventory. I highly recommend<br />
it, especially for high volume<br />
work. Drilling is easy and pressing<br />
the pen parts together couldn’t be<br />
easier.<br />
<strong>The</strong> Rockler <strong>Pen</strong> Press/Drilling<br />
Jig retails for $94.99. It can be<br />
purchased from Rockler Woodworking<br />
and Hardware stores or partner<br />
stores nationwide, from Rockler.<br />
com or from the Rockler catalog.<br />
For store locations or a free<br />
catalog, visit www.rockler.com or<br />
call 1-877-ROCKLER.<br />
More <strong>Woodturning</strong> May 2009 Page 25
<strong>Woodturning</strong> Books For Sale<br />
We are pleased to offer the following books from Linden Publishing for<br />
sale through More <strong>Woodturning</strong>.<br />
Here are the titles we are offering:<br />
• All Screwed up!: Turned Puzzles and Boxes Featuring Chased threads<br />
by John Berkeley $24.95<br />
• 500 Wood Bowls $24.95<br />
• Beyond Basic Turning: Off-Center, Coopered, and Laminated Work,<br />
by Jack Cox $28.95<br />
• Chris Child’s Projects for Woodturners, by Chris Child $16.95<br />
• Decorating Turned Wood: <strong>The</strong> Maker’s Eye, by Liz and Michael<br />
O’Donnell $19.95<br />
• Fabulous Turned Wood Projects, by Hazeu Hiebert, et al $17.95<br />
• Richard Raffan Turning Guides, Slipcase Set, by Richard Raffan $59.95<br />
• Segmented Turning: A Complete Guide, by Ron Hampton $19.95<br />
• <strong>The</strong> Art of Segmented Wood Turning: A Step-by-Step Guide,<br />
by Malcolm Tibbetts $25.95<br />
• <strong>The</strong> Complete Illustrated Guide to Turning by Richard Raffan $39.95<br />
• <strong>The</strong> <strong>Lathe</strong> Book, by Ernie Conover $24.95<br />
• <strong>The</strong> Woodturner’s Workbook, by Ray Key $19.95<br />
• <strong>The</strong> Woodturner’s FAQ Book, by Fred Holder $19.95<br />
• Turn a Bowl: Getting Good Results the First Time Around,<br />
by Ernie Conover $19.95<br />
• Turned Boxes: 50 Designs, by Chris Stott $19.95<br />
• Turning Boxes with Richard Raffan: (revised and updated) $24.95<br />
• Turning Bowls with Richard Raffan, by Richard Raffan $24.95<br />
• Turning Boxes with Richard Raffan $24.95<br />
• Turning Green Wood, by Michael O’Donnell $17.95<br />
• Turning <strong>Pen</strong>s and <strong>Pen</strong>cils, by Kip Christensen & Rex Burningham $17.95<br />
• Turning Projects, by Richard Raffan $21.95<br />
• Turning Wood with Richard Raffan, by Richard Raffan $24.95<br />
• Wood for Woodturners by Mark Baker $19.95<br />
• <strong>Woodturning</strong>: A Foundation Course, by Keith Rowley $19.95<br />
• <strong>Woodturning</strong>: A Fresh Approach, by Robert Chapman $17.95<br />
• <strong>Woodturning</strong> Forms and Materials, by John Hunnex $19.95<br />
• <strong>Woodturning</strong> Projects, by Mark Baker $19.95<br />
• Woodturner’s Wooden Clock Cases by Tim Ashby $5.95<br />
Pay shipping of $4.25 for the first book plus $1.00 for each additional book.<br />
Priority Mail is $6.50 for the first book and $1.00 for each additonal book.<br />
Foreign Customers please request a quote for shipping costs.<br />
Order three books and take a 10 percent discount on the order.<br />
Note: Discount does not apply to postage.<br />
Master Card and Visa Charge Cards Accepted<br />
Send Orders to:<br />
More <strong>Woodturning</strong><br />
P. O. Box 2168<br />
Snohomish, WA 98291-2168<br />
Telephone: 360-668-0976<br />
Fax: 360-668-1798<br />
Tormek/Ellsworth<br />
Grind Follow up<br />
Fred,<br />
I was forced to retire at age 60<br />
and, now that I’m working three<br />
jobs to make up for the one I lost,<br />
I’m having trouble getting into the<br />
shop as often as I’d like.<br />
But, I finally got to it and set up<br />
my Tormek using your instructions,<br />
finding that they were very close,<br />
but didn’t exactly match the profile<br />
of my new Ellsworth gouge.<br />
After some study, I realized<br />
that the distance from the stone to<br />
the Universal Support (guide) has<br />
the greatest bearing on the wings<br />
of the profile and that the angle of<br />
the jig and tool position in the jig<br />
had the greatest bearing on the tip<br />
of the profile.<br />
With that in mind I kept the 3”<br />
position for the extension of the tool<br />
tip beyond the jig and first adjusted<br />
the Universal Support/Stone distance<br />
to get the angle for the wings<br />
- that turned out to be 2.75 “.<br />
<strong>The</strong> next step was to adjust the<br />
angle of the jig to match the angle of<br />
the tip and that wound up to be about<br />
3+. It took a little experimentation<br />
to arrive at these settings, but only<br />
a few minutes time actually.<br />
<strong>The</strong> sequence of setting the<br />
distance between the guide and the<br />
stone first, and then the jig angle<br />
second seemed to work best for me.<br />
After marking the face to be ground<br />
with a black magic marker, I was<br />
able to complete the grind with all of<br />
the black marked area ground away<br />
from tip to the heel of the grind with<br />
a few light passes.<br />
I am able to rotate the handle<br />
through an arc of about 200 degrees<br />
- the stopping points on each side<br />
are when the tool steel comes to rest<br />
Page 26 More <strong>Woodturning</strong> May 2009
against the Universal Support rod<br />
on each side. This prevents grinding<br />
the last part of the wings and I<br />
don’t see a solution to that with the<br />
Tormek system.<br />
<strong>The</strong>n again, I’m probably<br />
missing the obvious. I assume that<br />
my adjustment changes are due to a<br />
slightly different grind on my particular<br />
gouge, which has an angle<br />
on the tip of 54 degrees from the<br />
centerline of the shaft.<br />
I too like sharpening my<br />
gouges with a finer stone, leaving<br />
a burr only on my scrapers. I also<br />
like the repeatability of using a jig<br />
and believe that I can complete the<br />
sharpening with less metal removed,<br />
resulting in the gouge lasting longer.<br />
Thanks again for getting me off in<br />
the right direction.<br />
—Jim Putnam<br />
Thanks for the feedback Jim,<br />
If you have the TTS-100 Turning<br />
Tool Setter, which is a new device<br />
that has recently come on the<br />
market, you might have been able to<br />
get the grind right on the first time.<br />
However, what you did should work<br />
for you and is worth sharing with my<br />
readers. <strong>The</strong>re may be others having<br />
trouble getting the Ellsworth Grind<br />
on their gouges.<br />
—Fred Holder, Editor<br />
Note: I had e-mailed Jim a<br />
copy of the article that I had written<br />
for the July 2005 issue of More<br />
<strong>Woodturning</strong>. At that time the TTS-<br />
100 Turning Tool Setter had not<br />
come on the market. Geoff Brown,<br />
who is the world wide distributor or<br />
representative of Tormek, sent me<br />
the Tormek chart to the right, which<br />
has the TTS-100 settings for the<br />
Ellsworth Grind on the Tormek.<br />
<strong>The</strong> above chart is from the Tormek manual on the Tormek<br />
Grinders and they are currently being manufactured today. <strong>The</strong><br />
chart assumes that the user has the TTS-100 Turning Tool Setter<br />
for their machine. If you have an old Tormek like mine, I suggest<br />
that you purchase a TTS-100 to help set up your Tormek to get the<br />
best results. This setter is much more accurate than using a space<br />
block as I described in the article in the July 2005 issue of More<br />
<strong>Woodturning</strong>.<br />
More <strong>Woodturning</strong> May 2009 Page 27
Testing the Easy Rougher Ci1<br />
By Fred Holder<br />
When I heard of the Easy<br />
Rougher, I discounted it until I<br />
saw it demonstrated extensively at<br />
the <strong>Desert</strong> <strong>Woodturning</strong> <strong>Roundup</strong><br />
this last February. I watched Craig<br />
Jackson turn a bowl from a round<br />
wet blank to a final turned bowl,<br />
turning outside and inside with the<br />
Ci1 Easy Rougher. (See Figure 1.)<br />
I was impressed enough to purchase<br />
both the large one, the Ci1, and the<br />
smaller version (the Ci2).<br />
Figure 2. I began turning this rough blank using the Easy Rougher<br />
Ci1 tool. <strong>The</strong>re were no catches, just shavings coming off of the<br />
awful blank.<br />
Figure 1. Craig Jackson turning<br />
a bowl with the Easy Rougher<br />
Ci1 at the <strong>Desert</strong> <strong>Woodturning</strong><br />
<strong>Roundup</strong>.<br />
I purchased them through Craft<br />
Supplies booth. Craft Supplies was<br />
giving a 10 Percent discount and<br />
free shipping on all purchases at<br />
the show.<br />
When we returned home, the<br />
tools were there waiting for us.<br />
I found the most awful piece of<br />
wood in the shed and mounted it<br />
poorly, i.e., not the truest mounting<br />
and went to work. <strong>The</strong> blank was<br />
approximately 10” in diameter to<br />
begin with, but I only obtained about<br />
Figure 3. <strong>The</strong> turning continued with the Easy Rougher doing an<br />
excellent job. By this time I was pretty impressed with the tool and<br />
was pleased that we had purchased them.<br />
a 5” bowl out of it because of the<br />
mounting. <strong>The</strong> wood was spalted<br />
and rotten, but the Ci1 impressed me<br />
significantly.<br />
Page 28 More <strong>Woodturning</strong> May 2009
Figure 4. With the blank<br />
reversed into the chuck, I began<br />
hollowing.<br />
Figure 5. Nearing completion<br />
of the inside of the bowl. I was<br />
amazed at how well a square<br />
cutter could cut inside a bowl.<br />
<strong>The</strong>re were no catches, it just<br />
cut away the wood. I found that a final<br />
pass with a bowl gouge gave me<br />
a better finish, but one could have<br />
started sanding with 80 or perhaps<br />
60 grit sandpaper and finished the<br />
bowl quite well.<br />
figure 7. Roughing a Red Birch<br />
spindle mounted piece at 3000<br />
rpm, the tool cut nicely.<br />
a spindle, a piece of good wood,<br />
Red Birch that was dry. At 1000<br />
rpm there was some tear out, but it<br />
roughed the wood quickly. I turned<br />
the lathe up to 3000 rpm and got a<br />
very smooth cut. Not as smooth as a<br />
skew chisel, but very smooth, ready<br />
to sand with 220 grit.<br />
Figure 9. Nearly finished with<br />
the hollowing of the goblet.<br />
I couldn’t round the bottom<br />
of the bowl and had to use<br />
an Eliminator tool to finish<br />
shaping the inside of the bowl.<br />
Figure 10. <strong>The</strong> goblet is nearly<br />
finished and only required<br />
sanding at this point.<br />
Figure 6. Completed inside of<br />
the bowl after one pass of the<br />
bowl gouge.<br />
This really is an excellent<br />
roughing tool. I then tried it on<br />
Figure 8. I thought that<br />
hollowing the goblet would be<br />
difficult, but I was wrong.<br />
I decided to try to make a goblet<br />
out of the wood. I completely<br />
turned it at 3000 rpm and only had<br />
to use an Eliminator to round out the<br />
bottom of the bowl. Otherwise the<br />
goblet was completely turned with<br />
the Ci1. Needless to say, I feel they<br />
were a good purchase. You can turn<br />
beads with it but not tight coves.<br />
Figure 11. <strong>The</strong> finished goblet.<br />
More <strong>Woodturning</strong> May 2009 Page 29
Coming Events<br />
Utah <strong>Woodturning</strong> Symposium<br />
2009 to be held May 14<br />
through 16, 2009 will mark the<br />
30th year that this symposium has<br />
been held. Mike Mahoney is again<br />
the symposium director and the<br />
location, I asume, is the same as<br />
for the 2008 symposium. For more<br />
information on this event, keep in<br />
touch with their web site: www.<br />
utahwoodturning.com.<br />
* * *<br />
<strong>The</strong> AAW 23rd Annual Symposium<br />
will be held June 26 through<br />
28, 2009 at the Albuquerque Convention<br />
Center, Albuquerque, New<br />
Mexico. <strong>The</strong> complete schedule will<br />
feature more than 120 rotations,<br />
plus many more events. Featured<br />
demonstratiors include: Nick Cook,<br />
Emmet Kane, Virginia Dotson, Peter<br />
Hromek, Mike Mahoney, Rolly<br />
Munroe, David Nittmann, David<br />
Springett, and John Wessels.<br />
AAW local chapter, New<br />
Mexico Woodturners, who will<br />
be hosting the 2009 Symposium,<br />
have selected the Holland’s Rose<br />
organization as recipient of Return<br />
To <strong>The</strong> Community gifts this year.<br />
Holland’s Rose is an all-volunteer<br />
organization dedicated to providing<br />
affordable housing and other<br />
services to patients and families<br />
who must travel to Albuquerque<br />
for medical care. For more information<br />
on the symposium go to: www.<br />
woodturner.org.<br />
* * *<br />
North Carolina <strong>Woodturning</strong><br />
Symposium will be held October<br />
23-25, 2009 in the Greensboro<br />
Coliseum Special Events Center,<br />
Greensboro, NC. It will feature 63<br />
rotations by International, National<br />
and Local area demonstrators. <strong>The</strong><br />
Page 30 More <strong>Woodturning</strong> May 2009<br />
“THE ELIMINATOR”<br />
demonstrator list includes: Allan<br />
Batty, Stuart Batty, Jimmy Clewes,<br />
Stuart Mortimer, Ray Key, Nick<br />
Cook, David Datwyler, Mark Gardner,<br />
John Jordan, and Chris Ramsey.<br />
For more details go to http://northcarolinawoodturning.com/<br />
and visit<br />
frequently to keep up to date.<br />
•••<br />
<strong>The</strong> Woodturners of Olympia<br />
2009 “Creativity in <strong>Woodturning</strong>”<br />
Symposium will be held Saturday,<br />
July 25, 2009. Eric Lofstrom will<br />
begin the day with a demonstration<br />
on woodturning basics. Eric will be<br />
followed by Jimmy Clewes. Jimmy<br />
is a well-known teacher and demonstrator<br />
in his native England as well<br />
as here in the USA. He will be performing<br />
demonstrations covering:<br />
• Design, shape, form & aesthetics<br />
• Oriental Boxes<br />
• Turning a twist and long stem<br />
goblet, and<br />
Manufacturer’s of the Worlds Largest Range of Fine<br />
Woodworking Handtools<br />
CROWN HAND TOOLS LTD.<br />
332-334 Coleford Road, Darnall<br />
Sheffield, S9 5PH England<br />
Hollowing Tool<br />
ELIMINATES:<br />
CATCHES,<br />
TEAR OUT,<br />
SHARPENING<br />
Available in three sizes: 1/4, 3/8, 1/2 inch cutters. Tool shafts are<br />
milled with flats for both right and left hand cutting.<br />
Available from: Packard Woodworks and Craft Supplies USA<br />
www.jewelwood.com<br />
• Colorings<br />
<strong>The</strong> cost for the full day is $70<br />
for early payment. After June 1,<br />
2009 the cost is $80. Children under<br />
the age of 18 can register for $10 if<br />
attending with a paying adult.<br />
Lunch is included in the cost<br />
if payment is received before July<br />
12.<br />
Demonstrations will start<br />
promptly at 8 a.m. and end by 4:30<br />
p.m. Door prize drawings will be<br />
made after the final presentation.<br />
Location is the Komachin<br />
Middle School located at 3650 College<br />
St. SE, Lacey, WA. 98503.<br />
For more information or to<br />
register see http://www.woodturnersofolympia.org/<br />
or send payment<br />
directly to Al Price at 4112 Teakwood<br />
Ct. SE, Lacey, WA. 98503.<br />
Questions may also be directed to<br />
Al on 360-791-0396.<br />
Note: Two all day classes by<br />
Jimmy Clewes are scheduled following<br />
the Creativity in Woodturn-<br />
TEL: England 114 272 3366 FAX: 114 272 5252<br />
E-Mail: info@crowntools.ltd.uk Web Site: www.crownhandtools.ltd.uk
ing symposium organized by the<br />
Woodturners of Olympia. Sunday,<br />
July 26 will be a class in the basics<br />
of woodturning with the content<br />
structured to the level of participants<br />
experience, and then an intermediate/advanced<br />
class will be held on<br />
Monday, July 27. <strong>The</strong> classes are<br />
limited to the first 8 students with<br />
a cost of $125 per class. Please<br />
contact Al Price on 360-791-0396<br />
or via e-mail: APrice44@aol.com to<br />
register or for more information.<br />
* * *<br />
Ohio Valley Woodturners<br />
Guild will sponsor its 6th biennial<br />
symposium “Turning 2009 on Oct<br />
16-18, 2009 in Cincinnati, Ohio.<br />
Featuring: David Ellsworth, Jean-<br />
François Escoulen, Bonnie Klein,<br />
Alan Lacer, Jon Magill, Stuart Mortimer,<br />
Jennifer Shirley & Jacques<br />
Vesery. For more information check<br />
their Web Site: http://www.ovwg.<br />
org/.<br />
* * *<br />
Editor’s Note: If you have an<br />
event coming up such as the ones<br />
listed here, please let us know in time<br />
to let our readers know that it is coming.<br />
Send information about your<br />
forthcoming symposium or event to<br />
fred@morewoodturning.net or to<br />
More <strong>Woodturning</strong>, PO Box 2168,<br />
Snohomish, WA 98291 USA.<br />
This space could<br />
have reported on your<br />
clubs coming event had<br />
we recieved information<br />
about it in time.<br />
Send us your Symposium information<br />
so that we may share it<br />
with our readers.<br />
<strong>Woodturning</strong> Books For Sale<br />
We are pleased to offer Schiffer <strong>Woodturning</strong> Books for Sale through<br />
More <strong>Woodturning</strong>. Here are the titles we are offering:<br />
• <strong>The</strong> Basics of Turning Spirals by Bill Bowers $14.95<br />
• Easy Turning Projects for the Smaller <strong>Lathe</strong>s by Bill Bowers $14.95<br />
• Great Turning Projects for the Smaller <strong>Lathe</strong> by Bill Bowers $14.95<br />
• Turning Threaded Boxes by John Swanson $14.95<br />
• Turning Wooden Jewelry by Judy Ditmer $12.95<br />
• Basic Bowl Turning with Judy Ditmer $12.95<br />
• Dick Sing Turns Miniature Birdhouses by Dick Sing $14.95<br />
• Turning Humidors with Dick Sing by Dick Sing $14.95<br />
• <strong>Pen</strong>s From the Wood <strong>Lathe</strong> by Dick Sing $12.95<br />
• Dick Sing ReTurns: Unique and Unusual <strong>Pen</strong>s from the<br />
Wood <strong>Lathe</strong> by Dick Sing $14.95<br />
• Wood <strong>Lathe</strong> Projects for Fun and Profit by Dick Sing $12.95<br />
• Useful Beauty: Turning Practical Items on a Wood <strong>Lathe</strong> by Dick Sing $12.95<br />
• Turning Bowls by Dick Sing (NEW) $14.95<br />
• Turning Ornaments and Eggs by Dick Sing (NEW) $14.95<br />
• Projects for the Mini <strong>Lathe</strong> by Dick Sing (NEW) $14.95<br />
• Turning Candlesticks by Mike Cripps $14.95<br />
• Turning Goblets by Mike Cripps $12.95<br />
• Turning <strong>Pen</strong>s and Desk Accessories by Mike Cripps $12.95<br />
• Wood Turning for the Garden, Projects for Outdoors by Michael Cripps $12.95<br />
• Segmented Wood Turning, by William Smith $14.95<br />
• Mini <strong>Lathe</strong> Magic: Big Projects from a Small <strong>Lathe</strong>, by Ron Hampton $14.95<br />
• A Turner’s Guide to Veneer Inlays, by Ron Hampton $14..95<br />
Pay shipping of $5.00 for each book.<br />
Foreign Customers please request a quote for shipping costs.<br />
Order three books and take a 10 percent discount on the order.<br />
Master Card and Visa Charge Cards Accepted<br />
Send Orders to:<br />
More <strong>Woodturning</strong><br />
P. O. Box 2168<br />
Snohomish, WA 98291-2168<br />
More <strong>Woodturning</strong> May 2009 Page 31
Turner’s Tool Handle from Woodworkers Network<br />
Turner’s Tool Handle from Paul Bennett of Woodworkers Network is fitted with one of Doug<br />
Thompson ‘s detail gouges.<br />
by Fred Holder<br />
Some time back, Paul Bennett<br />
of Woodworkers Network contacted<br />
me about advertising rates. <strong>The</strong>n<br />
later, he asked if I would consider<br />
evaluating his tool handle that he<br />
normally sells on Ebay. He says that<br />
if you search “<strong>Turners</strong> tool handle”<br />
his site will come up. He is currently<br />
working on a web site, but at the<br />
last communication, it was not yet<br />
operational.<br />
I agreed to give his tool handle<br />
a try, but didn’t expect it to come in<br />
with one of Doug Thompson’s detail<br />
gouges for use with the handle. So,<br />
I guess this has to be a joint review<br />
of the tool handle and the detail<br />
gouge.<br />
<strong>The</strong> tool handle is 16” in length<br />
and is made from one inch solid aluminum<br />
core which is available bored<br />
for 3/8”, 1/2”, or 5/8” tool shafts. It<br />
is bored in only one end. <strong>The</strong> other<br />
end is nicely rounded over and the<br />
handle is covered with a chusioned<br />
grip which covers 14-1/2 inch of the<br />
length and provides a grip of 1-7/16<br />
inch in diameter.<br />
I found this handle to be very<br />
comfortable in my hand. If you have<br />
a smaller hand it might seem overly<br />
large and vice versa a much larger<br />
hand might find it a bit small. I however<br />
found it very comfortable. It is<br />
easy to grip, doesn’t slip in the hand<br />
as highly polished handles may do<br />
and it the right length to give good<br />
tool control.<br />
<strong>The</strong> Turner’s Tool Handle is 16” long and comes with an Allen<br />
wrench to use in locking the tool into the handle. This particular<br />
one is for 3/8” shaft diameter tools.<br />
That is about all that I can actually<br />
say about the handle other than<br />
it does seem to be well balanced at<br />
least with this 3/8” tool mounted in<br />
the handle.<br />
This was the first time, I’ve<br />
used one of Doug Thompson’s tools.<br />
I have heard many good things about<br />
them on the Wood Central Message<br />
Board, but I have so many good<br />
tools that I’ve simply not made an<br />
effort to acquire one of the Thompson<br />
tools.<br />
I haven’t used this tool extensively<br />
enough to find out how<br />
well the edge will stand up against<br />
other similar gouges; however, I<br />
was pleased with how well it cut in<br />
my tests of it on a spindle. If you<br />
haven’t heard of the Thompson<br />
tools, I suggest that you take a look<br />
at his web site:<br />
www.thompsonlathetools.com<br />
From start to finish each tool<br />
is handcrafted by Doug Thompson.<br />
“He says, the first thing you will<br />
notice there is more steel under the<br />
flute than other tools, this creates a<br />
stronger tool that’s easy to control<br />
especially when it needs to be extended<br />
far over the rest for those<br />
This new tool with its new<br />
handle has taken a preferred<br />
space in my tool storage.<br />
hard to reach details. Bowl gouges<br />
are a balance between flute shape<br />
and depth to prevent clogging. <strong>The</strong><br />
shank will fit any aftermarket handle<br />
and are polished so they slide easily<br />
on the rest. A gunmetal finish, which<br />
is actually from the heat treatment,<br />
gives each tool a unique character all<br />
Page 32 More <strong>Woodturning</strong> May 2009
A selectrion of Thompson V-flute Bowl Gouges<br />
from his web site.<br />
it’s own. All tools are 10 inches long<br />
with a 6 inch flute except the 5/8 -<br />
3/4 inch bowl gouges that are 12<br />
inches long with a 7 inch flute.”<br />
Doug further says, “<strong>The</strong> tools<br />
are made from the best steel on the<br />
market, CPM 10V® (A-11) a powder<br />
metal manufactured by Crucible<br />
Materials Corporation with a 9.75%<br />
vanadium content to hold an edge<br />
longer and has a proven history in<br />
woodturning. <strong>The</strong> steel is hardened<br />
to 60-62 Rockwell, triple tempered<br />
with a cryogenic treatment between<br />
the first and second temper. <strong>The</strong><br />
cryogenic treatment at this stage<br />
transforms the bulk of the retained<br />
austinite to martensite and form<br />
very fine “eta” carbides much finer<br />
than tempering alone, this increases<br />
the durability and toughness of the<br />
steel. Nothing else can be done to<br />
this steel!”<br />
At Doug’s web site he lists<br />
some of the tools that he supplies<br />
as follows:<br />
• V-SHAPE BOWL GOUGES<br />
• U-SHAPE BOWL GOUGES<br />
• SPINDLE GOUGES<br />
• DETAIL GOUGES<br />
• SHALLOW DETAIL GOUGES<br />
• SKEWS<br />
• SCRAPERS<br />
I always hate to make any<br />
claims for a particular tool manu-<br />
facturer on a single tool. But I believe that the<br />
combination of the Paul Bennet handle and the<br />
Thompson detail gouge is worth recommending<br />
highly. I suspect from trying this one tool combination<br />
that one will find the Paul Bennet handle fitted<br />
with a Thompson gouge or other turning tool will<br />
give you good performance. This is also what I’ve<br />
heard from other users.<br />
From the photo on the left, the gouges look to<br />
be very well made and perhaps fully sharpened with<br />
a good grind.<br />
<br />
• Solid, robust, 4 jaw self-centring Chuck<br />
• Fits largest range of accessories on<br />
the market today including Vicmarc<br />
VM90 & VM100, Teknatool, and ‘lookalike’<br />
versions of these chucks<br />
• Fast clockwise rotational clamping<br />
• Satin etch finish to prevent rust<br />
• Totally enclosed back with unique indexing<br />
plate with up to 144 divisions<br />
• Unique pinion design provides handle<br />
clearance for large work<br />
• Optional Indexing bracket to suit most<br />
lathes<br />
Check out our range of woodworking<br />
equipment and accessories at:<br />
www.vermec.com<br />
39 Dalton Street, Kippa-Ring QLD 4021<br />
AUSTRALIA<br />
Ph: +61 7 3284 3733 Fax: +61 7 32842733<br />
Email: vermec@netspace.net.au<br />
More <strong>Woodturning</strong> May 2009 Page 33
<strong>Desert</strong> <strong>Woodturning</strong><br />
<strong>Roundup</strong> 2009—<br />
Another View<br />
by Jason Clark<br />
Page 34 More <strong>Woodturning</strong> May 2009<br />
<strong>The</strong> 2009 <strong>Desert</strong> <strong>Woodturning</strong><br />
<strong>Roundup</strong> was the weekend of February<br />
7 and 8, 2009 and I thought I’d<br />
be one of the first to post my review.<br />
Up front I want to declare that I was<br />
on the organizing committee for this<br />
symposium so my experience may<br />
have been a little different than most<br />
attendees.<br />
Friday started around 9AM<br />
and ran until 8PM. Most of the day<br />
was spent photographing the pieces<br />
in the Instant Gallery, browsing the<br />
vendors area, and meeting as many<br />
people as possible. Around 6PM my<br />
attention shifted to the <strong>Pen</strong> turning<br />
demos. <strong>The</strong> 55 chairs that had been<br />
setup were quickly filled and it<br />
ended up being standing room only<br />
with 80-90 people in the room at<br />
any given point. I took a couple of<br />
photos but was having some trouble<br />
with my flash. Overall I think it was<br />
a huge success, but next time we<br />
need to arrange for a video camera<br />
and a projector to be setup. Doing a<br />
demo with small pen parts in a large<br />
room with a capacity crowd is nearly<br />
impossible without video help. My<br />
wife and I left after the 2nd demo,<br />
around 8PM, as we knew we had an<br />
early morning on Saturday.<br />
Saturday started at 8AM<br />
with the opening ceremonies, Bill<br />
Haskell (President, American Assoc.<br />
of Woodturners) spoke as did<br />
each of the demonstrators. I didn’t<br />
stay for the whole 90 minutes as I<br />
had more instant gallery pieces to<br />
photograph.<br />
<strong>The</strong> first rotation started at<br />
9:45. I had planned to attend Cindy<br />
Drozda’s “Multi-Axis Hollow<br />
Form” but instead decided to forego<br />
the first rotation and elected to roam<br />
from room to room photographing<br />
all of the demonstrators in action.<br />
This included all 9 demonstrators,<br />
Jimmy Clewes, Bonnie Klein, Cindy<br />
Drozda, Mark St. Leger, Alan Lacer,<br />
Nick Cook, Keith Tompkins, Hans<br />
Finsterwalder, and Dwight Klaus.<br />
This also made it easier to choose<br />
which demonstrations I would attend<br />
for the 5 remaining rotations.<br />
Lunch was followed by the<br />
2nd rotation. I had selected to attend<br />
Nick Cook’s “Production Turning<br />
for Sale” but ended up splitting time<br />
between Jimmy Clewes “Colored<br />
platter” and Alan Lacer “Making<br />
and Using Hook Tools”. <strong>The</strong> volunteer<br />
videographer for Jimmy’s demo<br />
was needed in another room to fix<br />
a glitch in the video setup so I shot<br />
the first 10-15 minutes of Jimmy’s<br />
demo. I missed the first 20 minutes<br />
of Alan’s demo which I later found<br />
out was putting a burr on scrapers,<br />
but got to see the portion covering<br />
making and using the hook tool.<br />
<strong>The</strong> last rotation on Saturday<br />
was Cindy Drozda’s Finial box.<br />
Cindy made a beautiful little lidded<br />
box out of Holly and Mesquite with<br />
one of her trademark finials. She<br />
later donated it to the live auction.<br />
<strong>The</strong> Saturday evening banquet,<br />
live auction, and silent auctions were<br />
next. At the banquet 3 people were<br />
honored. Clarence “Shorty” Hart<br />
received the 3rd “<strong>Desert</strong> <strong>Woodturning</strong><br />
<strong>Roundup</strong> Recognition Award”.<br />
Previous recipients of this award<br />
include Phil Brennion and Wally<br />
Dickerman. We tried to keep it a<br />
secret but enough whispers went<br />
around that Shorty knew he had<br />
been selected. In the end I think<br />
we’re all glad that Shorty did find<br />
out, if we had surprised him like we<br />
had planned I think the shock of it<br />
all literally would have killed him.<br />
We also honored Bill Baumbeck<br />
of Arizona Silhouette with the first<br />
Sponsor award. Bill has done more<br />
for our local club and for the DWR<br />
than I have room to type. Lastly<br />
we honored Mike Lucckino. He’s a<br />
former Arizona Woodturners Assoc.<br />
President and was the driving force<br />
and Chairperson for the 2007 and<br />
2009 DWRs. Mike in turn honored<br />
the rest of the committee members<br />
for their contributions and for making<br />
his job easy.<br />
We had a volunteer professional<br />
auctioneer this year to run<br />
the live auction. <strong>The</strong> results were<br />
fantastic. I don’t know the final<br />
number but it was somewhat higher<br />
than I had expected. I contributed 2<br />
framed photos to the auction, one for<br />
the live auction and another for the<br />
silent auction. Together the 2 photos<br />
earned somewhere between $200<br />
and $240. Both went to the same<br />
bidder and I’ve had several other<br />
people contact me about acquiring<br />
copies, including Mary and Alan<br />
Lacer. Other auction items included<br />
demo pieces from Cindy Drozda,<br />
Jimmy Clewes, Mark St. Leger, and<br />
Bonnie Klein. Hans Finsterwalder<br />
and Keith Tompkins also donated<br />
finished pieces.<br />
Sunday started at 8:30. I decided<br />
to see Mark St. Leger’s “Sphere<br />
box” with hand chased threads. I’m<br />
not planning to hand chase threads<br />
or turn a perfect sphere anytime<br />
soon but it was still an interesting<br />
demo to watch and made me want<br />
to see more of Mark’s demos.<br />
Next was Keith Tompkins<br />
demo on “Priciples of form & design.”<br />
I had really wanted to see<br />
Mark St. Leger’s 2nd demonstration,<br />
“Third axis in motion” but wanted to<br />
see Keith’s design rotation as well.
This next demo of Mark’s also had<br />
some multi-axis work so Keith won<br />
that battle. Keith talked about using<br />
the golden rectangle and the golden<br />
triangle as a guide to turning pleasing<br />
forms. Keith then went over the<br />
inspiration for some of his turnings,<br />
including Playing Hooky, Tango,<br />
Steppin Out, and Winter Rose. He<br />
finished the demo by turning a cube<br />
on the lathe, something I know he<br />
does that I couldn’t quite put my<br />
head around but now that I’ve seen<br />
it done I can’t believe it was that<br />
simple. He’s definitely inspired me<br />
to try a couple of new things and to<br />
step out of my comfort zone a bit<br />
(Hi Keith!)<br />
After Sunday Lunch I returned<br />
back to Mark St. Leger’s room for<br />
his “Rock a Bye Box” demo. I had<br />
seen a small portion of this demo<br />
on Saturday morning and knew I<br />
wanted to see it in full. This demo<br />
involves pretty much everything;<br />
shop made jigs, multi-axis work,<br />
hollowing, and turning a block<br />
mounted on a bias. He’s a great<br />
turner and entertaining as well. I<br />
highly recommend him to anyone<br />
who has a chance to see him demonstrate.<br />
I think the quality of the instant<br />
gallery improved over 2 years<br />
ago, as did the selection of vendors.<br />
On hand this year were Arizona Silhouette,<br />
Sanding Glove, Don <strong>Pen</strong>cil,<br />
Big Tree Tools, Inc.<br />
Innovative tools for<br />
woodturners<br />
See our web site featuring our Sharpening<br />
System including the NEW<br />
Versa-Jig - sharpen all your tools on<br />
our system.<br />
bigtreetools.com<br />
1-888-turning (887-6464)<br />
PayPal accepted<br />
High West Wood Products, Timber<br />
Woodworking Machinery (they supplied<br />
most of the lathes used by the<br />
demonstrators), Serious tools, Driftwood<br />
Connection, Craft Supplies<br />
USA, Woodworkers Source, Rotary<br />
Chisel, Alan Lacer, Woodcraft, Elbo<br />
Tools, Burs for Carving, and several<br />
others that I can’t think of off the top<br />
of my head.<br />
All in all I think a great<br />
time was had by everyone in attendance<br />
and feedback has been<br />
vastly positive. One comment I was<br />
made aware of that springs to mind<br />
is “I’m not a woodturner. My boss<br />
is and he asked me to come along. I<br />
will be at your next one even if my<br />
boss does not attend.” If that’s not<br />
a glowing recommendation I don’t<br />
know what is.<br />
Finishing the<br />
Collaborative Piece<br />
by Fred Holder<br />
<strong>The</strong> following set of photos<br />
illustrate how I was able to hold<br />
the collaborative piece to finish the<br />
bottom. <strong>The</strong> piece was illustrated<br />
in the March-April 2009 issue of<br />
More <strong>Woodturning</strong>. This technique<br />
can be used for many projects.<br />
Figure 1. This photo shows the<br />
fixture made up to help hold the<br />
piece while the foot was turned<br />
and the grooves were cut.<br />
Figure 2. This view shows the<br />
piece mounted on the fixture and<br />
the foot has been final turned.<br />
Note the grooves above the foot<br />
which were added to hide the<br />
glue joint.<br />
Figure 3. <strong>The</strong> finished piece is no<br />
masterpiece, but it does have a<br />
finished foot.<br />
Coving Tool<br />
Jimmy Clewes says, “<strong>The</strong> tool<br />
works really well in a variety of situations<br />
but lends itself particularly well<br />
to small detail work, finials etc and<br />
miniature turning.” For perfect coves<br />
every time, visit the Home of the Coving<br />
Tool at our website.<br />
www.jonathanhess.com.<br />
703-378-8508.<br />
More <strong>Woodturning</strong> May 2009 Page 35
Instant Gallery Selections from the <strong>Desert</strong> <strong>Woodturning</strong> <strong>Roundup</strong><br />
Bob Rogne Cherry plate<br />
painted.<br />
Three of Cindy Drozda’s pieces in the Instant Gallery.<br />
Hans Finsterwalder Mystic<br />
Buffalo.<br />
Ruth Ingram plate with<br />
butterflies.<br />
Karen Freitas Silver Maple<br />
Leaves.<br />
Bruce Lewellyn Jarrah Burl<br />
Box.<br />
Page 36 More <strong>Woodturning</strong> May 2009
Two of Keith tompkins pieces in the Instant Gallery.<br />
Walley Dickerman giraffe in<br />
maple.<br />
Norris Ready quilted maple<br />
plate.<br />
Gary Scarpulh Twin Vases.<br />
Scott Clark Giving Thanks in<br />
Oak.<br />
Steve Mink Square Dish<br />
bloodwood and maple.<br />
Walley Dickerman pierced<br />
vessel in maple.<br />
More <strong>Woodturning</strong> May 2009 Page 37
Q&A Continued from Page<br />
19<br />
10) <strong>The</strong> best dimensions to use<br />
for size is to measure and actual<br />
cowboy hat. I believe after the large<br />
number of hats that he has made that<br />
Johannes has worked out a formula<br />
for the size. But basically, you need<br />
to measure the dimension around the<br />
head and add a little for shrinkage<br />
as the wood dries. <strong>The</strong> wood will<br />
warp to an oval shape in the jig as<br />
the hat dries.<br />
11) Yes, that is a jam fit chuck<br />
that will fit most of the hats that he<br />
makes. He does not tape the hat to<br />
the chuck, but he is only working<br />
on the top of the crown at this point,<br />
everything is done up to the very<br />
top of the crown. <strong>The</strong> light inside<br />
the fixture provides a guidance for<br />
thickness and eveness of his turning<br />
on the crown.<br />
I’m sorry that I don’t have Johannes’s<br />
e-mail address or telephone<br />
number. I’ve seen him demonstrate<br />
a number of times over the years<br />
and am still amazed at how skilful<br />
he is with his gouge and the grind<br />
on it. I’ve answered your questions<br />
to the best of my knowledge. I’ve<br />
never had an urge to turn a hat, but<br />
I always enjoy Johannes’s demonstrations.<br />
—Fred Holder<br />
Lyle’s Response: Fred nailed<br />
your questions nicely. I have seen<br />
Johannes and Chris Ramsey do hats<br />
many times. <strong>The</strong>y are both masters<br />
at tool control. <strong>The</strong>y use different<br />
grinds so that is not the secret. I<br />
know Chris got some significant<br />
help from Rude Osolnik on his tool<br />
control. <strong>The</strong>y are a joy to watch.<br />
It takes a steady hand and great<br />
precision to keep the wall thickness<br />
perfectly uniform. <strong>The</strong>re is no room<br />
for error.<br />
—Lyle Jamieson<br />
Live Centers<br />
Question: Why are live cone<br />
centers so hard to find I am new<br />
to woodturning and I hold my breath<br />
every time I tighten the tailstock<br />
against the bowl blank with a standard<br />
60° live center for fear that I’ll<br />
split the thing. So far that hasn’t<br />
happened, luckily. I finally got one<br />
on E-Bay last week, but you seldom<br />
see them even listed. I don’t see<br />
them at Rockler or Woodcraft. Is<br />
this something the REAL wooodturners<br />
don’t even use What do<br />
YOU do<br />
—Pete Stanaitis<br />
Fred’s Response: I think what<br />
you are looking for is a live center<br />
with a cup plus the center point.<br />
Oneway makes a live center like<br />
this, Nova makes one, and Woodcraft<br />
did sell a live center with<br />
various interchangeable heads that<br />
had a cup center in the lot. Personally,<br />
since they came on the market,<br />
I use the StebCenter from Robert<br />
Sorby. It has a spring loaded center<br />
pin that does not dig in too deep<br />
and will not split your wood. It also<br />
has a notched cup around the center<br />
pin that holds exceptionally well.<br />
I use the StebCenters in both the<br />
headstock and the tailstock. <strong>The</strong>y<br />
are a bit expensive, but no more<br />
expensive than the Oneway or the<br />
Nova centers. I know that Craft<br />
Supplies USA carries them and I’m<br />
reasonable sure that Packard Woodworks<br />
does also. Once you use the<br />
StebCenters you’ll not want to go<br />
back to regular centers.<br />
—Fred Holder<br />
Lyle’s Response: You need to<br />
be looking in the turning catalogs<br />
like Craft Supplies, www.woodturnerscatalog.com<br />
or Packard,<br />
www.packardwoodworks.com for<br />
your turning supplies. <strong>The</strong>y have<br />
many live revolving center systems<br />
to choose from. Woodcraft and<br />
Rockler are good woodworking<br />
resources but only have limited<br />
turning tools.<br />
I like the Oneway type centers<br />
too because of the versatility. I<br />
have even made my own adapters<br />
that screw on the threaded shaft for<br />
specialty turning needs.<br />
I don’t use the stebcenter. I<br />
prefer a stronger grip on the wood<br />
for the drive headstock end. <strong>The</strong><br />
tool control and easy cutting action<br />
we have available nowadays means<br />
I can pour the coal to the wood with<br />
no physical effort by my body. I can<br />
take effortless but aggressive cuts<br />
when I hog off that would make the<br />
steb center drive fail. It would be<br />
OK for the tailstock end but does<br />
not have the flexibility that I can<br />
get with the Oneway live center.<br />
It has cup alone, small cone alone,<br />
large cone alone, inverted large<br />
cone alone, or cup and pin together<br />
capabilities.<br />
—Lyle Jamieson<br />
Thread Cutting Jig<br />
Question: Does anyone know<br />
of any Plans for a Thread Cutting<br />
Jig<br />
—Woodie<br />
Fred’s Response: Before I<br />
wrote my book, Making Screw<br />
Threads in Wood, I made up a simple<br />
threading jig to cut threads. Since<br />
my lathe at that time had a 3/4” x<br />
16 tpi spindle, I used a 3/4” bolt<br />
threaded with 16 tpi and a couple<br />
Page 38 More <strong>Woodturning</strong> May 2009
of 16 tpi nuts. <strong>The</strong> jig was mostly<br />
made of wood and worked pretty well.<br />
It simply mounted to the tool rest banjo<br />
and precision adjustments were not<br />
available, but it could be fiddled into<br />
position. I’ve included a picture of it<br />
here. <strong>The</strong>re is a picture and description<br />
in my book.<br />
—Fred Holder<br />
Photo of Fred’s homemade<br />
threading jig. It worked quite<br />
well, but hand thread chasing is<br />
still faster on a one off piece.<br />
Lyle’s Response: Great way<br />
to get the accuracy of machine<br />
cut threads without going through<br />
the learning curve of hand chasing<br />
threads. With that kind of jig I<br />
would bet that once set up the accuracy<br />
would be very dependable.<br />
—Lyle Jamieson<br />
Chinese Ball<br />
Tools<br />
I have recently become a dealer<br />
for the Crown Chinese Ball Tools and<br />
have an inventory of sets and extra<br />
handles on hand for immediate shipment.<br />
A set includes one handle, four<br />
cutters, a tool to make a tapered<br />
hole, and a pamplet written by David<br />
Springett. <strong>The</strong>se are priced at $125.00<br />
for each set.<br />
<strong>The</strong> handles include a wooden<br />
handle and a metal piece to attach the<br />
cutters and ride on the ball. <strong>The</strong>se are<br />
priced at $36.20 each. I recommend<br />
three additional handles.<br />
Fred Holder<br />
PO Box 2168<br />
Snohomish, WA 98291<br />
360-668-0976<br />
<strong>The</strong> Market Place<br />
<strong>The</strong> first 10 words of classified advertisements<br />
are free to subscribers, additional<br />
words are 20-cents per word, no minimum.<br />
On non-subscriber advertisements, price is<br />
20-cents per word with a minimum billing<br />
of $4.00.<br />
Beginning and advanced woodturning<br />
classes. Call Ted Bartholomew 253-927-6855,<br />
Tacoma, WA.<br />
Sharpening Machine for all Woodworkers<br />
- <strong>The</strong> Big Tree Tools machine is a flat<br />
platen belt and buff machine for woodworkers,<br />
which allows a wide range of belt grits to be<br />
used, and belt changes take only a few seconds.<br />
Now our Versa-Jig is included with every machine<br />
allowing you to sharpen all the hand tools<br />
in your shop! <strong>The</strong> convenience and accuracy<br />
are unequaled. Visit bigtreetools.com to view<br />
photos, see our other tools and read articles on<br />
turning by Jon Siegel. See ad in this issue or<br />
call 1.888.TURNING<br />
Super Glue 2 0z. $5.50, Thin, Medium.<br />
Thick, Accelerator 2oz. $3.00. acwtinc@ameritech.net.<br />
PAYPAL, VISA & MASTERCARD.<br />
LOGLAMPS.COM ARTISTIC & CUSTOM<br />
WOODTURNING, INC. 1-800-894-8123<br />
Make pens using your drill press with a<br />
Vertilathe. http://vertilathe.freeyellow.com<br />
<strong>Woodturning</strong> on a VB36 <strong>Lathe</strong>, at<br />
Higher Manaton Farm. SW England. Web Site:<br />
www.turning-wood.com<br />
Faceplates: Straight from manufacture,<br />
heavy duty aluminum, brightly colored anodize,<br />
most common sizes. Visit our website:<br />
www.minkcrafts.com or call toll free (866)<br />
956-2200.<br />
<strong>The</strong> Burl Source. Large supply of Australian<br />
Burl Caps, turning blanks, pen blanks,<br />
and large jarrah burl slabs. Check us out at www.<br />
theburlsource.com or call 801-942-2616.<br />
Emory’s <strong>Woodturning</strong> E-Books www.<br />
asthewoodturns.com/books.html.<br />
Free Wet Grind/Hone Instant Change<br />
Sharpening System Plans: http://www.DavidReedSmith.com.<br />
Maple Turning Blanks--PRICE $6-8<br />
PBF+S&H cut to size, call 360-942-3468 or<br />
e-mail: john@hamptonwoodcraft.com.<br />
<strong>Pen</strong> Finishing Kit: A must for all pen<br />
turners! Obtain a scratch free remarkale shine on<br />
all surfaces including stabilized woods, acrylics<br />
and solid surface materials using the new 2”x2”<br />
double sided foam backed sanding pads. Kit contains<br />
instructions for use and seven color coded<br />
pads ranging from 300 to 12,000 grit. $13.95.<br />
BG Artforms. TEL: 888-717-4202.<br />
Easier, Faster Segmented Vessel Design,<br />
Web Site: www.segmentedturning.com.<br />
TEL: (805) 489-5309.<br />
<strong>Woodturning</strong> classes – Satisfaction<br />
guaranteed. Call Larry Miller 360-412-1583,<br />
Olympia, Washington”<br />
Cabochons for woodturners at www.<br />
yoyospin.com/cab<br />
<strong>Woodturning</strong> Instruction: Now that I<br />
have insurance through the AAW Craft Workers<br />
Insurance Program, I can again offer training<br />
in my shop. If interested in basic woodturning<br />
instruction or specialized training such as the<br />
Chinese Ball, contact me at: 360-668-0976.<br />
Fred Holder.<br />
New Video--”Relief carved Embellishments<br />
for Wood Projects”. DVD--$30.00<br />
plus $3.00 S/H. VHS $20.00 plus $3.00 S/H.<br />
Contact: Tony Cortese, 20850 NW 13th Street,<br />
Dunnellon, FL 34431. Ph 352-489-5652. E-mail:<br />
romeowoodturner@msn.com.<br />
NEW REDUCED PRICE: Simplified<br />
Fluting with Al Caton. Video-$20.00 plus S&H<br />
$3.00. DVD-$30.00 plus S&H $3.00. Insturction<br />
and inexpensive jigs for fluted works of art.<br />
Order from: Al Caton, PO Box 2360, Dunnellon,<br />
FL 34430. TEL: 352-465-0562. E-Mail: alcat@<br />
bellsouth.net.<br />
Making the Chinese Ball, Revised 2008,<br />
by Fred Holder. <strong>The</strong> revised booklet outlines<br />
Fred’s trials and tribulations in attempting to<br />
conquer this project. Tells how to make the tools<br />
needed to use the Crown Chinese Ball Tools.<br />
Booklet now contains 64 pages of information.<br />
Order from Fred Holder, PO Box 2168, Snohomish,<br />
WA 98291. Price is $10.00 including<br />
shipping. Telephone 360-668-0976.<br />
Bowl Coring with the McNaughton. A<br />
DVD by Reed Gray (aka robo hippy). Everything<br />
you need to know about how to use this<br />
tool, from will it work on your lathe, to the laser<br />
pointer system that is available. $30 including<br />
shipping in the US. Contact Reed Gray 541-463-<br />
9634, or reedgray@comcast.net. (05-09)<br />
Limited quantities of Mountain Mahogany<br />
(curly leaf). Flat rate postal box (12<br />
x12 x5 1/2 inches) $50 and up depending on<br />
what you want. Green logs sections, or green<br />
blanks, sealed, and plastic wrapped. Contact<br />
Reed Gray 541-463-9634, or reedgray@comcast.net.<br />
(12-08)<br />
Turn Nested Bowls from 6” or 8” bowl<br />
blanks with a $39.95 hand-held coring tool I call<br />
the BowlSaw. Check bowlsaw.com for details<br />
or e-mail me at Steuss@aol.com. For questions<br />
call 415-897-1457. Steussy Creations.<br />
More <strong>Woodturning</strong> May 2009 Page 39
MANUFACTURER OF QUALITY WOODTURNING LATHES, CHUCKS AND ACCESSORIES<br />
VACUUM CHUCK<br />
<strong>The</strong>se devices have been designed as an aid to <strong>Woodturning</strong>. It<br />
enables an item to be re-mounted on the lathe for finishing without<br />
risking further holding marks.<br />
<strong>The</strong> Vacuum Chuck comes in two configurations. <strong>The</strong> first is<br />
designed to be used with any lathe. <strong>The</strong> Vacuum chuck can either<br />
screw directly onto the spindle of your lathe (via Vicmarc<br />
VM90/100 standard insert) or it can be picked up on its dovetail<br />
using any self centering chuck. <strong>The</strong> Vacuum Plate or any of the<br />
Vacuum Cups are then screwed directly onto the vacuum chuck.<br />
This configuration can be used with either a Vacuum Pump or a<br />
standard household Vacuum Cleaner.<br />
Figure 1 – Inboard Configuration setup<br />
with Vacuum Faceplate attached.<br />
Figure 2 – Outboard<br />
Configuration setup.<br />
Figure 3 – 300mm Vacuum Cup<br />
attached to spindle via insert.<br />
<strong>The</strong> second configuration is designed for<br />
Vicmarc <strong>Lathe</strong>s only. <strong>The</strong> Vacuum chuck is<br />
screwed into the back of the headstock spindle<br />
and the air is drawn through the spindle. This<br />
allows the Vacuum Plate or Cups to be attached<br />
directly onto the spindle.<br />
This configuration can only be used with a<br />
Vacuum Pump.<br />
<strong>The</strong> Vacuum Cups are available in<br />
sizes, 100mm, 150mm and 200mm<br />
diameter. <strong>The</strong> Vacuum Plate is<br />
300mm in diameter<br />
Check our website for the full range of<br />
<strong>Lathe</strong>s, Chucks and Accessories<br />
For your nearest Vicmarc ® dealer please contact us:<br />
Phone: + 61 7 3284 3103 Fax: + 61 7 3283 4656<br />
Web: www.vicmarc.com<br />
Email: vicmarc@vicmarc.com<br />
Page 40 More <strong>Woodturning</strong> May 2009