CAUTION WARNING - Char-Broil Grills
CAUTION WARNING - Char-Broil Grills
CAUTION WARNING - Char-Broil Grills
Create successful ePaper yourself
Turn your PDF publications into a flip-book with our unique Google optimized e-Paper software.
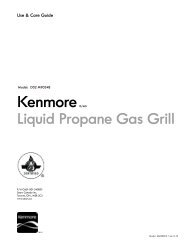
Assembly Instructions/Use and Care Manual<br />
NO TOOLS<br />
Liquid Propane Gas Grill<br />
with VapoRISER Smoking Tray<br />
Model No. 415.162020<br />
This Grill Is For<br />
Outdoor Use Only<br />
ASSEMBLY<br />
<strong>WARNING</strong><br />
• Read this manual before cooking on<br />
grill. Failure to follow all<br />
manufacturer's instructions could<br />
result in fire or explosion which could<br />
cause property damage, personal<br />
injury or death.<br />
• Combustion by-products produced<br />
when using this product contain<br />
chemicals known to the State of<br />
California to cause cancer, birth<br />
defects, or other reproductive harm.<br />
• Parts<br />
• Assembly<br />
• Safety Rules<br />
• Use and Care<br />
• Troubleshooting<br />
463731403 / 0-4165217 (11-04-02)<br />
<strong>CAUTION</strong><br />
• Read and follow all Safety<br />
Statements, Assembly Instructions<br />
and Use & Care Directions before<br />
attempting to assemble and cook.<br />
• Some parts may contain sharp edges,<br />
especially as noted in these<br />
instructions. Wear protective gloves<br />
if necessary.<br />
Assembly Questions<br />
Call 1-800-4-MY-HOME ®<br />
Parts Ordering:<br />
Call 1-800-366-PART (7278)<br />
To Installer/Assembler: Leave<br />
these instructions with<br />
consumer.<br />
To Consumer: Keep this<br />
manual for future reference.<br />
Sears, Roebuck and Co., Hoffman Estates, IL 60179 U.S.A.
<strong>WARNING</strong><br />
FOR YOUR SAFETY<br />
1. Do not store or use gasoline or other<br />
flammable vapors and liquids in the<br />
vicinity of this or any other appliance.<br />
2. An LP tank not connected for use shall<br />
not be stored in the vicinity of this or any<br />
other appliance.<br />
FOR YOUR SAFETY<br />
If you smell gas:<br />
1. Shut off gas to the appliance.<br />
2. Extinguish any open flame.<br />
3. Open lid.<br />
4. If odor continues, immediately call your<br />
gas supplier or your fire department.<br />
Call Grill Service Center For Help And Parts<br />
If you have questions or need assistance during assembly,<br />
please call 1-800-241-7548. You will be speaking to a<br />
representative of the grill manufacturer and not a Sears<br />
employee. To order new parts call Sears at 1-800-4-MY-HOME ®<br />
.<br />
Product Record<br />
IMPORTANT: Fill out the product record information below.<br />
Model Number<br />
UPC (on carton) Label Lot # GG<br />
Serial Number<br />
Date Purchased<br />
<strong>CAUTION</strong><br />
For residential use only. Do not use for commercial<br />
cooking.<br />
Installation Safety Precautions<br />
• Use grill only with LP (propane) gas and the regulator/valve<br />
assembly supplied.<br />
• Grill installation must conform with local codes, or in their<br />
absence with National Fuel Gas Code, NFPA 54 / ANSI<br />
Z223.1. Handling and storage of LP cylinders must conform to<br />
LP Gas Code NFPA/ANSI 58. Grill is not for use in or on<br />
recreational vehicles and/or boats.<br />
• All electrical accessories (such as rotisserie) must be<br />
electrically grounded in accordance with local codes, or<br />
National Electrical Code, ANSI / NFPA 70. Keep any<br />
electrical cords and/or fuel supply hoses away from any hot<br />
surfaces.<br />
• This grill is safety certified for use in the United States only. Do<br />
not modify for use in any other location. Modification will result<br />
in a safety hazard.<br />
Safety Symbols<br />
The symbols and boxes shown below explain what each heading<br />
means. Read and follow all of the messages found throughout<br />
the manual.<br />
DANGER<br />
DANGER: Indicates an imminently hazardous situation<br />
which, if not avoided, will result in death or serious injury.<br />
<strong>WARNING</strong><br />
<strong>WARNING</strong>: Be alert to the possibility of serious bodily injury<br />
if the instructions are not followed. Be sure to read and<br />
carefully follow all of the messages.<br />
<strong>CAUTION</strong><br />
<strong>CAUTION</strong>: Indicates a potentially hazardous situation which,<br />
if not avoided, may result in minor or moderate injury.<br />
2 • 463731403<br />
<strong>WARNING</strong><br />
CARBON MONOXIDE HAZARD<br />
Burning charcoal releases carbon monoxide which has no<br />
odor and can cause serious injury or death. Never burn<br />
charcoal inside homes, vehicles or tents.
TABLE OF CONTENTS<br />
For Your Safety ......................................2<br />
Grill Service Center...................................2<br />
Product Record Information ............................2<br />
Installation Safety Precautions ..........................2<br />
Safety Symbols......................................2<br />
Kenmore Grill Warranty ...............................3<br />
Parts List...........................................4<br />
Parts Diagram.......................................5<br />
Assembly ........................................6-14<br />
Use and Care ...................................15-23<br />
VapoRISER Smoking Tray .....................21<br />
Cooking <strong>Char</strong>t...............................22<br />
Troubleshooting .............................23<br />
WARRANTY<br />
KENMORE GRILL WARRANTY<br />
Full 1-Year Warranty on Grill<br />
For one year from the date of purchase Sears will repair or<br />
replace, at our option, any grill part (except for paint finish)<br />
that is defective in material or workmanship.<br />
Limited Warranty on Selected Grill Parts<br />
From one year after the date of purchase for the designated<br />
time periods listed below, Sears will replace the following grill<br />
parts if they are defective in material or workmanship. You<br />
will be charged for labor.<br />
• Lifetime of Grill: Aluminum Top and Bottom Castings<br />
(except for paint finish)<br />
• 2 years: Burner Assembly<br />
WARRANTY SERVICE<br />
Warranty service is available by contacting Sears at<br />
1-800-4-MY-HOME ®<br />
.<br />
WARRANTY RESTRICTIONS<br />
This warranty is void if grill is used for commercial or rental<br />
purposes.<br />
This warranty applies only when the grill is used in the United<br />
States.<br />
This warranty gives you specific legal rights, and you may<br />
also have other rights which vary from state to state.<br />
Sears, Roebuck and Co., Dept. 817WA,<br />
Hoffman Estates, IL 60179<br />
463731403 • 3
PARTS LIST – Model No. 415.162020<br />
Key Qty Description Part #<br />
1 2 Leg Assembly .......................4502443<br />
2 1 Base ..............................4502429<br />
3 8 #10-24x2” Carriage Bolt ...............4080064<br />
4 10 #10-24 Plastic Tee Knob...............4080091<br />
5 1 Midshelf ...........................4151034<br />
6 2 Wheel Assembly.....................4310003<br />
7 4 1” Hitch Pin. ........................4080062 STD624001<br />
8 2 Leg Extender .......................4154556<br />
9 1 Grill Bottom. ........................4580428<br />
10 1 Burner Assembly ....................4505074<br />
11 1 Collector Box .......................4500278<br />
12 1 Electrode ..........................5156119<br />
13 1 #10-16x1/2” Self-Tap Screw ............4080059 STD611005<br />
14 1 Control Panel .......................4526143<br />
15 1 Valve/Hose/Regulator Assembly ........4524165<br />
16 2 Valve Clip ..........................4156172<br />
17 4 #10x1/2”, T-20, Self-Tap Screw .........4080043<br />
18 2 Control Knob........................4154559<br />
19 1 Ignitor .............................4153713<br />
20 1 Ignitor Wire .........................4153720<br />
21 2 1/4-20x1-1/4” Carriage Bolt ............4080615 STD532512<br />
22 2 1/4-20 Wing Nut .....................4080221 STD541625<br />
23 2 #10-24x1-1/4” Carriage Bolt ............4080074<br />
Key Qty Description Part #<br />
24 1 Tank Wire ..........................4151019<br />
25 1 Vaporiser Bar Wire ...................4151036<br />
26 2 Vaporiser Bar .......................4500268<br />
27 1 Front Panel.........................4502456<br />
28 1 Front Panel Shelf ....................4154518<br />
29 4 Push-Fastener ......................4080679<br />
30 1 Panel Wire .........................4151040<br />
31 4 EndCap...........................4080065<br />
32 2 Side Shelf ..........................4154372<br />
33 8 #10-12x1-7/8” Wing Screw .............4080096<br />
34 1 Grill Lid ............................4580399<br />
35 2 1/4x1-1/8” Hinge Pin..................4156513<br />
36 1 Handle ............................4154473<br />
37 2 #10-24x1” Machine Screw .............4080302 STD511010<br />
38 2 #10-24 Wing Nut.....................4080063 STD541610<br />
39 1 Heat Indicator with Bracket.............4156800<br />
40 1 #10-24 Hex Nut (keps) ................4080208 STD541410<br />
41 1 Logo Plate .........................4156081<br />
42 2 3/16” Pal Nut........................4153096<br />
43 1 SwingAway .........................4152124<br />
44 1 Cooking Grate ......................4152739<br />
45 1 Grease Clip.........................5156607<br />
4 • 463731403
PARTS DIAGRAM – Model No. 415.162020<br />
34<br />
42<br />
44<br />
41<br />
26<br />
38<br />
40<br />
39<br />
36<br />
37<br />
26<br />
43<br />
25<br />
11<br />
13<br />
12<br />
7 35 21<br />
32<br />
10<br />
35<br />
21<br />
7<br />
9<br />
31<br />
32<br />
31<br />
22<br />
33<br />
1<br />
22<br />
45<br />
1<br />
33<br />
23<br />
33<br />
17<br />
14<br />
17 23<br />
4<br />
16<br />
6<br />
3<br />
4<br />
33<br />
2<br />
5<br />
3<br />
4<br />
3<br />
4<br />
4 3<br />
20<br />
19<br />
16<br />
17<br />
15<br />
17<br />
18<br />
7<br />
3<br />
27<br />
29<br />
4<br />
7<br />
4<br />
3<br />
29<br />
3<br />
4<br />
3<br />
8<br />
24<br />
6<br />
28<br />
30<br />
463731403 • 5
ASSEMBLY – Model No. 415.162020<br />
1<br />
Cart<br />
Assembly Step 1<br />
Position base on edge with tank hole to left side.<br />
Insert legs into base and attach with carriage bolts<br />
and plastic wing nuts. DO NOT FULLY TIGHTEN.<br />
Insert midshelf into holes on insides of legs, long<br />
wires toward left side. Fully tighten carriage bolts<br />
and plastic wing nuts.<br />
4<br />
Qty. 8<br />
3<br />
Qty. 8<br />
Leg Assembly<br />
Long midshelf wire<br />
to left side.<br />
IMPORTANT!<br />
USE TOP HOLE<br />
3<br />
4<br />
Base<br />
6 • 463731403
2<br />
Cart<br />
Assembly Step 2<br />
Insert wheel/hubcap assemblies into<br />
bottom holes on left legs.<br />
Secure beneath base with hitch pins.<br />
See inset below.<br />
Push leg extenders into right legs.<br />
7<br />
Qty. 2<br />
Wheel/Hubcap Assembly<br />
7<br />
Leg Extender<br />
Completed assembly with<br />
hitch pin in axle bolt.<br />
463731403 • 7
3<br />
Grill<br />
Bottom/Control Panel Assembly And Tank Wire<br />
Carefully place grill bottom/control panel<br />
assembly onto cart, so as not to scratch paint<br />
on legs.<br />
Insert carriage bolts through grill bottom and<br />
center hole in support bar. Secure with metal<br />
wing nuts.<br />
Insert carriage bolts through control panel and<br />
front holes in support bar. Secure with plastic<br />
wing nuts.<br />
Insert ends of tank wire into<br />
slots on each side of tank<br />
hole in grill base. Lean tank<br />
wire toward midshelf.<br />
22<br />
Qty. 2<br />
4<br />
Qty. 2<br />
21<br />
21<br />
Qty. 2<br />
23<br />
Qty. 2<br />
23<br />
Support Bar<br />
Front Hole<br />
Grill Bottom/Control Panel Assembly<br />
Support Bar<br />
Center Hole<br />
22<br />
4<br />
Tank Wire<br />
NOTE: Wheels are to left side.<br />
8 • 463731403
4<br />
VapoRISER<br />
Bars And Wire Assembly<br />
Place VapoRISER bar wire into grill bottom<br />
with middle section of wires pointing down.<br />
Rest VapoRISER bars on wire and bar supports<br />
at each end of grill bottom.<br />
NOTE: See Use and Care section for alternate bar<br />
positions and usage.<br />
VapoRISER Bars<br />
VapoRISER Bar Wire<br />
Middle section of<br />
wire pointing down.<br />
VapoRISER Bar Support<br />
463731403 • 9
5<br />
Front<br />
Panel, Shelf And Wire Assembly<br />
Snap shelf into front panel.<br />
Slide top edge of front panel UNDER control panel.<br />
Secure panel to legs with push-fasteners.<br />
Hook outer wires on panel wire into holes in panel,<br />
then slide remaining wires into front of shelf.<br />
29<br />
Qty. 4<br />
Top of front panel<br />
fits UNDER control<br />
panel.<br />
2nd<br />
Attach front<br />
panel to legs.<br />
29<br />
1st<br />
Snap front panel shelf<br />
into front panel.<br />
3rd<br />
Attach wire to front<br />
panel and shelf.<br />
10 • 463731403
6<br />
Side<br />
Shelf And End Cap Assembly<br />
Press end caps firmly into ends of leg tubes.<br />
Position side shelves onto legs as shown below<br />
and secure with four wing screws per shelf.<br />
33<br />
Qty. 8<br />
Side Shelf<br />
33<br />
End Cap<br />
463731403 • 11
7<br />
Grill<br />
Lid And Handle Assembly<br />
Attach grill lid to grill bottom with<br />
hinge pins and hitch pins.<br />
Attach handle to lid with carriage<br />
bolts and metal wing nuts.<br />
38<br />
Qty. 2<br />
7<br />
Qty. 2<br />
35<br />
Qty. 2<br />
Handle<br />
37<br />
37<br />
Qty. 2<br />
Grill Lid<br />
38<br />
35<br />
7<br />
12 • 463731403
8<br />
SwingAway<br />
And Cooking Grate Assembly<br />
Insert SwingAway pivot wires into holes<br />
in side of grill lid.<br />
Insert SwingAway leg wires into top holes<br />
in side of grill bottom.<br />
Place cooking grate onto grate rests in<br />
grill bottom.<br />
NOTE:<br />
Back of SwingAway should be pointing upward.<br />
Pivot Wire<br />
SwingAway<br />
Leg<br />
Wire<br />
Cooking Grate<br />
463731403 • 13
9<br />
Tank<br />
Wire, LP Tank And Grease Clip Assembly<br />
Place LP tank into hole in base with<br />
tank valve facing toward front of grill.<br />
To secure LP tank, pull tank wire over<br />
the side of the tank, toward the tank collar.<br />
See Use and Care section for connection<br />
of regulator to LP tank.<br />
Hang grease clip beneath grill bottom.<br />
See inset below. To collect grease, hang<br />
an empty soup can (not included) from<br />
grease clip.<br />
LP GAS TANK IS SOLD<br />
SEPARATELY. Fill and leakcheck<br />
tank before attaching<br />
to grill and regulator. See Use<br />
and Care section for instructions.<br />
<strong>CAUTION</strong><br />
• Tank collar opening must face to front of cart once<br />
tank is attached.<br />
• Failure to install tank correctly may allow gas hose to<br />
be damaged in operation, resulting in the risk of fire.<br />
Tank Collar<br />
LP Tank<br />
(Sold<br />
Separately)<br />
Pull tank wire<br />
over tank.<br />
Rear view of grill.<br />
Tank Wire<br />
Rear view of grill.<br />
<strong>CAUTION</strong><br />
Grease Clip<br />
Failure to install can in clip will cause hot<br />
grease to drip from bottom of grill with risk of<br />
fire or property damage.<br />
See Use & Care section of this manual to perform the “Burner<br />
Flame Check” and for important safety instructions before using.<br />
14 • 463731403
USE AND CARE<br />
DANGER<br />
• The safety relief valve on the LP tank could activate<br />
releasing gas and cause an intense fire with risk of<br />
property damage, serious injury or death.<br />
• NEVER store a spare LP tank under or near grill or in<br />
enclosed areas.<br />
• Never fill the cylinder beyond 80% full. An overfilled<br />
spare LP tank is hazardous due to possible gas<br />
released from the safety relief valve.<br />
• If you see, smell or hear escaping gas, immediately get<br />
away from the LP tank/grill and call your fire<br />
department.<br />
• All spare LP tanks must have safety caps installed on<br />
the LP tank outlet.<br />
LP Tank Removal, Transport And Storage<br />
• Turn OFF all control knobs and LP tank valve. Turn coupling<br />
nut counterclockwise by hand only - do not use tools to<br />
disconnect. Lift LP tank wire upward off of LP tank collar, then<br />
lift LP tank up and off of support bracket. Install safety cap onto<br />
LP tank valve. Always use cap and strap supplied with valve.<br />
Failure to use safety cap as directed may result in serious<br />
personal injury and/or property damage.<br />
LP Tank Valve<br />
Safety Cap<br />
Retainer Strap<br />
LP Tank<br />
• The LP tank used with your grill must meet the following<br />
requirements:<br />
• Purchase LP tanks only with these required measurements: 12"<br />
(30.5cm) (diameter) x 18" (45.7 cm) (tall) with 20 lb. (9 kg.)<br />
capacity maximum.<br />
• LP tanks must be constructed and marked in accordance with<br />
specifications for LP tank of the U.S. Department of<br />
Transportation (DOT). See LP tank collar for marking.<br />
• LP tank valve must have:<br />
• Type 1 outlet compatible with<br />
regulator or grill.<br />
• Safety relief valve.<br />
• UL listed Overfill Protection<br />
OPD Hand Wheel<br />
Device (OPD). This OPD safety<br />
feature is identified by a unique triangular hand wheel. Use<br />
only LP tanks equipped with this type of valve.<br />
• LP tank must be arranged for vapor withdrawal and include<br />
collar to protect LP tank valve.<br />
LP (Liquefied Petroleum Gas)<br />
• LP gas is nontoxic, odorless and colorless when produced. For<br />
Your Safety, LP gas has been given an odor (similar to rotten<br />
cabbage) so that it can be smelled.<br />
• LP gas is highly flammable and may ignite unexpectedly when<br />
mixed with air.<br />
LP Tank Filling<br />
• Use only licensed and experienced dealers.<br />
• LP dealer must purge tank before filling.<br />
• Dealer should NEVER fill LP tank more than 80% of LP tank<br />
volume. Volume of propane in tank will vary by temperature.<br />
• A frosty regulator indicates gas overfill. Immediately close LP<br />
tank valve and call local LP gas dealer for assistance.<br />
• Do not release liquid propane (LP) gas into the atmosphere.<br />
This is a hazardous practice.<br />
• To remove gas from LP tank, contact an LP dealer or call a<br />
local fire department for assistance. Check the telephone<br />
directory under “Gas Companies” for nearest certified LP<br />
dealers.<br />
• A disconnected LP tank in storage or being transported must<br />
have a safety cap installed (as shown). Do not store an LP tank<br />
in enclosed spaces such as a carport, garage, porch, covered<br />
patio or other building. Never leave an LP tank inside a vehicle<br />
which may become overheated by the sun.<br />
• Do not store an LP tank in an area where children play.<br />
463731403 • 15
LP Tank Exchange<br />
• Many retailers that sell grills offer you the option of replacing<br />
your empty LP tank through an exchange service. Use only<br />
those reputable exchange companies that inspect, precision fill,<br />
test and certify their cylinders. Exchange your tank only for<br />
an OPD safety feature-equipped tank as described in the<br />
"LP Tank" section of this manual.<br />
• Always keep new and exchanged LP tanks in upright position<br />
during use, transit or storage.<br />
• Leak test new and exchanged LP tanks BEFORE<br />
connecting to grill.<br />
LP Tank Leak Test<br />
For your safety<br />
• Leak test must be repeated each time LP tank is exchanged or<br />
refilled.<br />
• Do not smoke during leak test.<br />
• Do not use an open flame to check for gas leaks.<br />
• Grill must be leak tested outdoors in a well-ventilated area,<br />
away from ignition sources such as gas fired or electrical<br />
appliances. During leak test, keep grill away from open flames<br />
or sparks.<br />
• Use a clean paintbrush and a 50/50 mild soap and water<br />
solution. Brush soapy solution onto areas indicated by arrows<br />
in figure below.<br />
Do not use household cleaning agents. Damage to gas<br />
train components can result.<br />
Connecting Regulator To The LP Tank<br />
1. LP tank must be properly secured onto grill. (Refer to<br />
assembly section.)<br />
2. Turn all control knobs to the OFF position.<br />
3. Turn LP tank OFF by turning hand-wheel clockwise to a full<br />
stop.<br />
4. Remove the protective cap from LP tank valve. Always use<br />
cap and strap supplied with valve.<br />
Safety Relief Valve<br />
Off Clockwise<br />
Strap and Cap<br />
OPD Hand Wheel<br />
Type 1 outlet with<br />
thread on outside<br />
Do not use a POL transport plug<br />
(plastic part with external threads)!<br />
It will defeat the safety feature of<br />
the valve.<br />
5. Hold regulator and insert nipple into LP<br />
tank valve. Hand-tighten the coupling<br />
nut, holding regulator in a straight line<br />
with LP tank valve so as not to crossthread<br />
the connection.<br />
Nipple has to be centered<br />
into the LP tank valve.<br />
<strong>WARNING</strong><br />
If “growing” bubbles appear do not use or move the LP tank.<br />
Contact an LP gas supplier or your fire department!<br />
16 • 463731403
Straight<br />
Hold coupling nut and regulator<br />
as shown for proper connection<br />
to LP tank valve.<br />
Leak Testing Valves, Hose and Regulator<br />
1. Turn all grill control knobs to OFF.<br />
2. Be sure regulator is tightly connected to LP tank.<br />
3. Completely open LP tank valve by turning hand wheel<br />
counterclockwise. If you hear a rushing sound, turn gas off<br />
immediately. There is a major leak at the connection. Correct<br />
before proceeding.<br />
4. Brush soapy solution onto areas where bubbles are shown:<br />
Never remove opening<br />
at end of valve.<br />
6. Turn the coupling nut clockwise and tighten to a full stop. The<br />
regulator will seal on the back-check feature in the LP tank<br />
valve, resulting in some resistance. An additional one-half to<br />
three-quarters turn is required to complete the<br />
connection. Tighten by hand only – do not use tools.<br />
NOTE:<br />
If you cannot complete the connection, disconnect regulator and<br />
repeat steps 5 and 6. If you are still unable to complete the<br />
connection, do not use this regulator!<br />
<strong>WARNING</strong><br />
• Do not insert any foreign objects into the valve outlet. You<br />
may damage the valve and cause a leak. Leaking propane<br />
may result in explosion, fire, severe personal injury, or<br />
death.<br />
• Never attempt to attach this grill to the self-contained LP gas<br />
system of a camper trailer or motor home.<br />
• Do not use grill until leak-tested.<br />
• If a leak is detected at any time, STOP and call the fire<br />
department.<br />
• If you cannot stop a gas leak, immediately close LP tank<br />
valve and call LP gas supplier or your fire department!<br />
5. If “growing” bubbles appear, there is a leak. Close LP tank<br />
valve immediately and retighten connections. If leaks cannot<br />
be stopped do not try to repair. Call Sears for replacement<br />
®<br />
parts at 1-800-4-MY-HOME .<br />
6. Always close LP tank valve after performing leak test by<br />
turning hand wheel clockwise.<br />
463731403 • 17
<strong>WARNING</strong><br />
For Safe Use Of Your Grill And To Avoid Serious<br />
Injury:<br />
• Do not let children operate or play near grill.<br />
• Keep grill area clear and free from materials that burn.<br />
• Do not block holes in bottom or back of grill.<br />
• Check burner flames regularly.<br />
• Use grill only in well-ventilated space. NEVER use in<br />
enclosed space such as carport, garage, porch, covered<br />
patio, or under a surface that can catch fire.<br />
• Do not use charcoal or ceramic briquets in a gas grill.<br />
( Unless briquets are supplied with your grill.)<br />
• Use grill at least 3 ft. from any wall or surface. Maintain<br />
10 ft. clearance to objects that can catch fire or sources of<br />
ignition such as pilot lights on water heaters, live electrical<br />
appliances, etc.<br />
Safety Tips<br />
Before opening LP tank valve, check the coupling nut for<br />
tightness.<br />
When grill is not in use, turn off all control knobs and LP tank<br />
valve.<br />
Never move grill while in operation or still hot.<br />
Use long-handled barbecue utensils and oven mitts to avoid<br />
burns and splatters.<br />
Maximum load for shelves is 10 lbs.<br />
A soup can must be attached to grease clip and emptied<br />
after each use. Do not remove soup can until grill has<br />
completely cooled.<br />
If you notice grease or other hot material dripping from grill<br />
onto valve, hose or regulator, turn off gas supply at once.<br />
Determine the cause, correct it, then clean and inspect valve,<br />
hose and regulator before continuing. Perform a leak test.<br />
The regulator may make a humming or whistling noise during<br />
operation. This will not affect safety or use of grill.<br />
If you have a grill problem see the "Troubleshooting Section" .<br />
<strong>CAUTION</strong><br />
• Putting out grease fires by closing the lid is not<br />
possible. <strong>Grills</strong> are well ventilated for safety reasons.<br />
• Do not use water on a grease fire. Personal injury may<br />
result. If a grease fire develops, turn knobs and LP tank<br />
off.<br />
• Do not leave grill unattended while preheating or<br />
burning off food residue on HI. If grill has not been<br />
regularly cleaned, a grease fire can occur that may<br />
damage the product.<br />
• Apartment Dwellers:<br />
Check with management to learn the requirements and fire<br />
codes for using an LP gas grill in your apartment complex. If<br />
allowed, use outside on the ground floor with a three (3) foot<br />
clearance from walls or rails. Do not use on or under<br />
balconies made of wood.<br />
• NEVER attempt to light burner with lid closed. A buildup<br />
of non-ignited gas inside a closed grill is hazardous.<br />
• Never operate grill with LP tank out of correct position<br />
specified in assembly instructions.<br />
• Always close LP tank valve and remove coupling nut<br />
before moving LP tank from specified operation<br />
position.<br />
18 • 463731403<br />
Ignitor Lighting<br />
Do not lean over grill while lighting.<br />
1. Open lid. Turn on gas at LP tank.<br />
2. Turn left knob to (ignite position).<br />
3. Push ignitor button rapidly (up to 5 times) to light. Be sure<br />
burner lights and stays lit.<br />
4. If burner does not light, turn knobs to OFF , wait 5 minutes,<br />
try again.<br />
5. Once left burner is lit, turn right knob to to light right<br />
burner.<br />
6. If ignitor does not work, wait 5 minutes, then follow match<br />
lighting instructions.<br />
Lighting instructions continued on next page.
After Lighting: Turn knobs to HI position for warm-up. Do not<br />
warm up grill with knobs on (ignite position). Knobs and<br />
handle will become uncomfortably hot if left in (ignite position).<br />
<strong>CAUTION</strong><br />
If burner does not light, turn knobs to OFF , wait 5<br />
minutes, and try again. If the burner does not ignite with<br />
the valve open, gas will continue to flow out of the burner<br />
and could accidently ignite with risk of injury.<br />
Match-Lighting<br />
Do not lean over grill while lighting.<br />
1. Open lid. Turn on gas at LP tank.<br />
2. Place lit match into match-lighting hole from beneath grill<br />
bottom (as shown below).<br />
3. Push in and turn right knob to (ignite position). Be sure<br />
burner lights and stays lit.<br />
4. Light left burner by pushing left knob in and turning to<br />
(ignite position).<br />
After Lighting: Turn knobs to HI for warm-up.<br />
Match-lighting hole is<br />
beneath grill bottom.<br />
Before Your First Cookout<br />
• Light burners, check to make sure they are lit, close the lid and<br />
warm up grill on HIGH for 15 minutes. Heating of paint and<br />
parts will produce an odor only on first lighting.<br />
Burner Flame Check<br />
• Light burner, rotate knobs from HI to LO. You should see a<br />
smaller flame in LO position than seen on HI. Always check<br />
flame prior to each use. If only low flame is seen refer to<br />
"Sudden drop or low flame" in the Troubleshooting Section.<br />
HI<br />
LO<br />
Turning Grill Off<br />
• Turn all knobs to OFF position. Turn LP tank off by turning<br />
hand-wheel clockwise to a full stop.<br />
Ignitor Check<br />
• Turn gas off at LP tank. Press ignitor button rapidly. "Click"<br />
should be heard and spark seen each time between collector<br />
box or burner and electrode. See "Troubleshooting" if no click<br />
or spark.<br />
Valve Check<br />
• Important: Make sure gas is off at LP tank before checking<br />
valves. Knobs lock in OFF position. To check valves, first<br />
push in knobs and release, knobs should spring back. If knobs<br />
do not spring back, replace valve assembly before using grill.<br />
Turn knobs to LO position then turn back to OFF position.<br />
Valves should turn smoothly.<br />
Hose Check<br />
• Before each use, check to see if hose is cut or worn. Replace<br />
damaged hose before using grill. Use only identical Kenmore<br />
replacement valve/hose/regulator assembly.<br />
General Grill Cleaning<br />
• Do not mistake brown or black accumulation of grease and<br />
smoke for paint. Interiors of gas grills are not painted at the<br />
factory (and should never be painted) . Apply a strong solution<br />
of detergent and water or use a grill cleaner with scrub brush<br />
on insides of grill lid and bottom. Rinse and allow to completely<br />
air dry. Do not apply a caustic grill/oven cleaner to painted<br />
surfaces.<br />
• Plated wire grate: Wash grate and VapoRISER bars with<br />
concentrated grill cleaner or use soap and water solution. Dry<br />
thoroughly and store indoors between cookouts.<br />
• Plastic parts: Wash with warm soapy water and wipe dry.<br />
Do not use citrisol, abrasive cleaners, degreasers or a<br />
concentrated grill cleaner on plastic parts. Damage to and<br />
failure of parts can result.<br />
• Porcelain grates: Because of glass-like composition, most<br />
residue can be wiped away with baking soda/water solution or<br />
specially formulated cleaner. Use nonabrasive scouring powder<br />
for stubborn stains.<br />
Repainting Your Grill<br />
• After extended use and exposure to weather, paint on grill may<br />
deteriorate or become spotted. Although this detracts from<br />
grill's appearance, it will not impair its performance.<br />
• To refinish your grill brush outside of grill lid and bottom with<br />
wire brush and lightly sand with fine grit sandpaper. Sanding<br />
allows new paint to adhere more easily. Wash grill lid and<br />
bottom with soap and water to remove dust and grease. Do not<br />
use a grill cleaner on outside of grill. Wipe with vinegar.<br />
Refinish outside with heat-resistant paint. Do not paint inside<br />
of grill.<br />
463731403 • 19
<strong>CAUTION</strong><br />
NATURAL HAZARD • SPIDERS<br />
FACT: Sometimes spiders and other small insects climb into<br />
the burner tubes attached to the burners. The spiders spin<br />
webs, build nests and lay eggs. The webs or nests can be<br />
very small, but they are very strong and can block the flow of<br />
gas. Clean burners prior to use after storing, at the beginning<br />
of grilling season or after a period of one month not being<br />
used.<br />
Typical spider webs inside burner.<br />
Spider guards are on the air intakes in an effort to reduce this<br />
problem, but it will not eliminate it! An obstruction can result<br />
in a "flashback" (a fire in the burner tubes). The grill may still<br />
light, but the obstruction does not allow full gas flow to the<br />
burners.<br />
IF YOU EXPERIENCE THE FOLLOWING:<br />
1. Smell gas.<br />
2. Burner(s) will not light.<br />
3. A small yellow flame from burner (should be blue).<br />
4. Fire coming from around or behind control knob.<br />
STOP!<br />
Immediately turn off gas at LP tank!<br />
SOLUTION:<br />
Wait for grill to cool.<br />
Follow the “ Cleaning The Burner Assembly” instructions.<br />
Clean burners often. Use a 12” pipe cleaner to clean out the<br />
burner tubes. You may also force a stream of water from a<br />
hose nozzle through burner tubes to clean them.<br />
4. Remove screw holding collector box. Note which hole on<br />
collector box used for attaching to burner. Remove collector<br />
box and clean ceramic portion of electrode with rubbing<br />
alcohol and cloth.<br />
5. Under control panel, disengage burner springs from burner<br />
tubes. Do not remove springs from valves.<br />
6. To remove burner, slide backwards, lift up and out of grill.<br />
7. Clean outside of burner with soap and water. Lay burner<br />
upside down on flat surface. Force a stream of water through<br />
tubes. Make sure water comes out of all burner holes. Open<br />
clogged holes with a thin wire. Shake out excess water and<br />
examine holes. Due to normal wear and corrosion, some<br />
holes may become enlarged. If any large cracks or holes are<br />
found replace burner.<br />
8. If grill is to be stored, coat burner lightly with cooking oil.<br />
Wrap in protective cover to keep insects out. If not storing grill<br />
after cleaning, hold burner at an angle and insert into grill<br />
bottom.<br />
9. After cleaning, insert wire and electrode into hole in grill<br />
bottom. Reattach collector box to burner with screw. Be sure<br />
to use correct hole.<br />
10. Place end of spring into hole on underside of burner tube, as<br />
before, to secure burner. See figure A.<br />
VERY IMPORTANT: Burner tube must engage valve opening<br />
as shown.<br />
11. Reattach round connector of ignitor wire to ignitor.<br />
12. Reposition VapoRISER bar wire, VapoRISER bars and<br />
cooking grate. Reattach clean can to grease clip.<br />
13. Before cooking again on grill, follow "Burner Flame Check" .<br />
Screw<br />
Collector<br />
Box<br />
Burner<br />
Burner<br />
Tube<br />
Valve<br />
A<br />
Spring<br />
Cleaning The Burner Assembly<br />
Follow these instructions to clean and/or replace parts of burner<br />
assembly or if you have trouble igniting grill.<br />
1. Turn gas off at control knobs and LP tank.<br />
2. Remove cooking grate, VapoRISER bars and VapoRiSER bar<br />
wire.<br />
3. Remove grease can from beneath grill. Beneath control<br />
panel, disconnect ignitor wire from ignitor.<br />
20 • 463731403<br />
Do not<br />
use charcoal<br />
with this grill.<br />
Ignitor<br />
Wire<br />
Ignitor<br />
Electrode
Storing Your Grill<br />
• Clean cooking grates.<br />
• Store in dry location.<br />
• When LP tank is connected to grill, store outdoors in wellventilated<br />
space and out of reach of children.<br />
• Cover grill if stored outdoors.<br />
• Store grill indoors ONLY if LP tank is turned off and<br />
disconnected, removed from grill and stored outdoors.<br />
• When removing grill from storage follow "Cleaning Burner<br />
Assembly" instructions before starting grill.<br />
Grill Smoking<br />
The grill you have purchased offers a new burner system that<br />
allows you to get more out of your grill. Not only does this new<br />
system offer maximum flexibility by allowing for direct and<br />
indirect cooking; there is also a grill smoking feature for adding<br />
smoked flavor to your grilled food.<br />
Direct Cooking<br />
Use both burners to heat the grill for searing of the meat. Once<br />
the meat has been seared, turn the burners to LO to cook meat<br />
thoroughly.<br />
Indirect Cooking<br />
Once the grill is preheated, turn one of the burners off and place<br />
your meat on the grate above the burner that is NOT burning.<br />
This indirect method of cooking allows you to slow cook poultry<br />
or large cuts of meat without the touch of a direct flame.<br />
• Always cook with the lid closed.<br />
• Due to weather conditions, cooking times may vary. During cold<br />
and windy conditions the temperature setting may need to be<br />
increased to insure sufficient cooking temperatures.<br />
1. Ignite the LEFT burner. For slow cooking, adjust the control<br />
knob to the LO setting. For faster cooking, adjust the control<br />
knob to the HI setting.<br />
2. Place the food on the RIGHT side of the cooking grate.<br />
3. Because the heat source is only on one side, the food should<br />
be rotated at least once during cooking to insure even<br />
cooking. Use a meat thermometer to determine when the food<br />
is done.<br />
VapoRISER Smoking Tray<br />
This is where your new Kenmore grill really shines. This unique<br />
burner system allows you to introduce smoke into the cooking<br />
chamber for added flavor. The VapoRISER bar is divided into two<br />
sections which allow you to turn one section upside down, using<br />
it as a tray to accept wet wood chips (see illustrations). Now you<br />
can add your favorite flavor of wood chips to add smoke flavor to<br />
your meat and a nice aroma to your cooking area.<br />
You will need:<br />
Aromatic wood chips • Heavy-duty aluminum foil<br />
Soak 2 cups of wood chips for two hours. Tear off a piece of<br />
aluminum foil a little larger than the VapoRISER bar. Place the<br />
soaked chips into the foil and turn up the side to seal the chips<br />
inside. Punch pea-sized holes in the top of the foil pouch. Turn<br />
one VapoRISER bar upside-down on the VapoRISER bar wire<br />
and place pouch inside tray.<br />
Smoking time for a pouch is approximately 30 minutes with<br />
burner on LO, with lid closed. Make two or three pouches at one<br />
time for meats that require longer smoking/cooking times.<br />
Wrap soaked wood<br />
chips in foil pouch.<br />
Punch holes in<br />
pouch.<br />
Turn VapoRISER<br />
bar upside-down.<br />
Place foil pouch<br />
in VapoRISER bar.<br />
IMPORTANT: Return VapoRISER smoking tray to its normal<br />
upright position when not used for smoking.<br />
Food Safety<br />
Food safety is a very important part of enjoying the outdoor<br />
cooking experience. To keep food safe from harmful bacteria,<br />
follow these four basic steps:<br />
Clean: Wash hands, utensils, and surfaces with hot soapy water<br />
before and after handling raw meat and poultry.<br />
Separate: Separate raw meats and poultry from ready-to-eat<br />
foods to avoid cross contamination. Use a clean platter and<br />
utensils when removing cooked foods.<br />
Cook: Cook meat and poultry thoroughly to kill bacteria. Use a<br />
thermometer to ensure proper internal food temperatures.<br />
Chill: Refrigerate prepared foods and leftovers promptly.<br />
For more information call: USDA Meat and Poultry Hotline at<br />
1-800-535-4555 In Washington, DC (202) 720-3333, 10:00 am-<br />
4:00 pm EST.<br />
How To Tell If Meat Is Grilled Thoroughly<br />
• Meat and poultry cooked on a grill often browns very fast on the<br />
outside. Use a meat thermometer to be sure food has reached<br />
a safe internal temperature, and cut into food to check for<br />
visual signs of doneness.<br />
• Whole poultry should reach 180° F; breasts, 170° F. Juices<br />
should run clear and flesh should not be pink.<br />
• Hamburgers made of any ground meat or poultry should reach<br />
160° F, and be brown in the middle with no pink juices. Beef,<br />
veal and lamb steaks, roasts and chops can be cooked to 145°<br />
F. All cuts of pork should reach 160° F.<br />
• NEVER partially grill meat or poultry and finish cooking later.<br />
Cook food completely to destroy harmful bacteria.<br />
• When reheating takeout foods or fully cooked meats like hot<br />
dogs, grill to 165° F, or until steaming hot.<br />
463731403 • 21
Cooking <strong>Char</strong>t<br />
Cooking times and temperatures may vary according to specific recipes, cooking conditions or barbecue equipment used. Take these<br />
factors into consideration to insure best results. If you use the indirect cooking method (indirect cooking is lighting only one burner and<br />
placing food on opposite side of cooking grate), allow more grilling time.<br />
Temperatures: High = 650°F / Medium = 450°F / Low = 300°F.<br />
Food<br />
Beef<br />
Hamburger 1/2” thick<br />
Steak 1/2”<br />
Roast<br />
Pork<br />
Chops 1/2”<br />
Ribs 5-6 lbs.<br />
Roast 3-5 lbs.<br />
Ham Steak 1/2”<br />
Ham 5 lb. fully cooked<br />
Lamb<br />
Chops 1/2”<br />
Poultry<br />
Chicken 2-1/2 to 3-1/2 lbs.<br />
Chicken halved or quertered<br />
Turkey<br />
Seafood<br />
Steaks 1” thick<br />
Fillets 6-8 oz.<br />
Shrimp large or jumbo<br />
Venison<br />
Steak 1” thick<br />
Burgers 1/2”<br />
Roast 3-4 lbs.<br />
Vegetables<br />
Baking Potato whole<br />
Onions whole<br />
Tomatoes half<br />
Corn whole<br />
Mushrooms<br />
Setting<br />
Medium<br />
Medium-Hot<br />
Low<br />
Medium<br />
Low-Medium<br />
Low-Medium<br />
Medium-Hot<br />
Low-Medium<br />
Medium<br />
Low<br />
Low<br />
Low-Medium<br />
Medium-Hot<br />
Medium-Hot<br />
Low-Medium<br />
Medium<br />
Medium<br />
Low-Medium<br />
Low<br />
Low<br />
Medium<br />
Low<br />
Medium<br />
Cooking Time<br />
Med: 7-10 min. / Well done: 10-15 min.<br />
Rare: 3-6 min. / Med: 6-9 min. / Well done: 9-12 min.<br />
Rare: 18-22min. per lb. / Med: 22-28 min. per lb. / Well done: 28-32 min. per lb.<br />
Well done: 15-20 min.<br />
Well done: 45-90 min.<br />
Well done: 18-23 min. per lb.<br />
12-15 min.<br />
20 min. per lb.<br />
6-12 min.<br />
1 hr., 15 min. to 1 hr., 30 min.<br />
40-60 min.<br />
18-20 min. per lb.<br />
Well done: 10-25 min.<br />
8-12 min.<br />
8-12 min.<br />
Rare: 8-10 min. / Med: 10-12 min.<br />
Rare: 10-12 min. / Med: 12-15 min.<br />
Rare: 20-22 min. per lb. / Med: 22-25 min. per lb.<br />
Wrap vegetables in foil<br />
55-60 min.<br />
45 min.<br />
30-40 min.<br />
35-45 min.<br />
15-20 min.<br />
22 • 463731403
Troubleshooting<br />
Problem<br />
Burner(s) will not light<br />
using ignitor.<br />
Burner(s) will not<br />
match light.<br />
Sudden drop in gas<br />
flow or low flame.<br />
Flames blow out.<br />
Flare-up.<br />
Persistent grease fire<br />
(can damage the<br />
appearance of<br />
aluminum castings<br />
on the grill).<br />
Flashback...<br />
(fire in burner tube(s).<br />
Unable to fill LP tank.<br />
Possible Cause<br />
• Wire and/or electrode covered with<br />
cooking residue.<br />
• Electrode and burner are wet.<br />
• Electrode cracked or broken "sparks at<br />
crack”<br />
• Wire is loose or disconnected.<br />
• Wire is shorting (sparking) between<br />
ignitor and electrode.<br />
• Bad ignitor.<br />
• No gas flow.<br />
• Coupling nut and regulator not fully<br />
connected.<br />
• Obstruction of gas flow.<br />
• Disengagement of burner to valve.<br />
• Is grill assembled correctly<br />
• Out of gas.<br />
• Excess flow valve tripped.<br />
• High or gusting winds.<br />
• Low on LP gas.<br />
• Excess flow valve tripped.<br />
• Grease buildup.<br />
• Excessive fat in meat.<br />
• Excessive cooking temperature.<br />
• Grease trapped by food buildup around<br />
burner system.<br />
• Burner and/or burner tubes are blocked.<br />
• Some dealers have older fill nozzles<br />
with worn threads.<br />
Prevention/Solution<br />
• Clean wire and/or electrode with rubbing alcohol and clean swab.<br />
• Wipe dry with cloth.<br />
• Replace electrode.<br />
• Reconnect wires or replace electrode/wire assembly.<br />
• Replace ignitor wire/electrode assembly.<br />
• Replace ignitor.<br />
• Check to see if LP tank is empty. If LP tank is not empty, refer to<br />
"Sudden drop in gas flow" .<br />
• Turn the coupling nut about one-half to three quarters additional<br />
turn until solid stop. Tighten by hand only-do not use tools.<br />
• Clear burner tube(s).<br />
• Reengage burner and valve. Reattach spring clips.<br />
• Check steps in assembly instructions.<br />
• Check for gas in LP tank.<br />
• Turn off knobs, wait 30 seconds and light grill. If flames are still low,<br />
turn off knobs and LP tank valve. Disconnect regulator. Reconnect<br />
regulator and leak test. Turn on LP tank valve, wait 30 seconds and<br />
then light grill.<br />
• Turn front of grill to face wind or increase flame height.<br />
• Refill LP tank.<br />
• Refer to "Sudden drop in gas flow" above.<br />
• Clean grill.<br />
• Trim fat from meat before grilling.<br />
• Adjust (lower) temperature accordingly.<br />
• Turn knobs to OFF. Turn gas off at LP tank. Leave lid in position and<br />
let fire burn out. After grill cools, remove, clean all parts and replace<br />
grease can.<br />
• Turn knobs to OFF. Clean burner and/or burner tubes.<br />
• The worn nozzles don't have enough "bite" to engage the valve. Try<br />
a second LP dealer.<br />
463731403 • 23
Get it fixed, at your home or ours!<br />
Your Home<br />
For repair– in your home–of all major brand appliances,<br />
lawn and garden equipment, or heating and cooling systems,<br />
no matter who made it, no matter who sold it!<br />
For the replacement parts, accessories and<br />
owner’s manuals that you need to do-it-yourself.<br />
For Sears professional installation of home appliances<br />
and items like garage door openers and water heaters.<br />
1-800-4-MY-HOME ® (1-800-469-4663)<br />
Call anytime, day or night (U.S.A. and Canada)<br />
www.sears.com<br />
www.sears.ca<br />
Our Home<br />
For repair of carry-in items like vacuums, lawn equipment,<br />
and electrinics, call or go on-line for the location of your nearest<br />
Sears Parts & Repair Center.<br />
1-800-488-1222<br />
Call anytime, day or night (U.S.A. only)<br />
www.sears.com<br />
To purchase a protection agreement (U.S.A.)<br />
or maintenance agreement (Canada) on a product serviced by Sears:<br />
1-800-827-6655 (U.S.A.) 1-800-361-6665 (Canada)<br />
Para pedir servicio de reparación<br />
a domicilio, y para ordenar piezas:<br />
1-888-SU-HOGAR SM<br />
(1-888-784-6427)<br />
Au Canada pour service en français:<br />
MC<br />
1-800-LE-FOYER<br />
(1-800-533-6937)<br />
www.sears.ca<br />
TM<br />
SM<br />
® Registered Trademark / Trademark / Service Mark of Sears, Roebuck and Co.<br />
TM<br />
SM<br />
® Marca Registrada / Marca de Fábrica / Marca de Servicio de Sears, Roebuck and Co.<br />
MC<br />
MD<br />
Marque de commerce / Marque déposée de Sears, Roebuck and Co.<br />
© Sears, Roebuck and Co.


