Land Rover TestBook User Manual - Eng - Internet-Tools.co.uk
Land Rover TestBook User Manual - Eng - Internet-Tools.co.uk
Land Rover TestBook User Manual - Eng - Internet-Tools.co.uk
You also want an ePaper? Increase the reach of your titles
YUMPU automatically turns print PDFs into web optimized ePapers that Google loves.
HARDWARE<br />
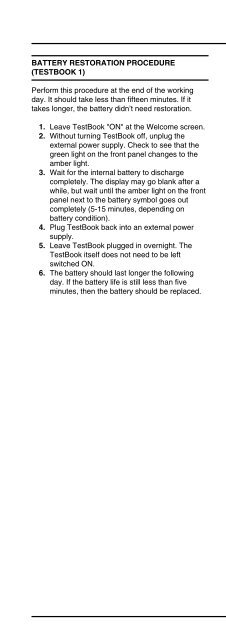
BATTERY RESTORATION PROCEDURE<br />
(TESTBOOK 1)<br />
Perform this procedure at the end of the working<br />
day. It should take less than fifteen minutes. If it<br />
takes longer, the battery didn’t need restoration.<br />
1. Leave <strong>TestBook</strong> "ON" at the Wel<strong>co</strong>me screen.<br />
2. Without turning <strong>TestBook</strong> off, unplug the<br />
external power supply. Check to see that the<br />
green light on the front panel changes to the<br />
amber light.<br />
3. Wait for the internal battery to discharge<br />
<strong>co</strong>mpletely. The display may go blank after a<br />
while, but wait until the amber light on the front<br />
panel next to the battery symbol goes out<br />
<strong>co</strong>mpletely (5-15 minutes, depending on<br />
battery <strong>co</strong>ndition).<br />
4. Plug <strong>TestBook</strong> back into an external power<br />
supply.<br />
5. Leave <strong>TestBook</strong> plugged in overnight. The<br />
<strong>TestBook</strong> itself does not need to be left<br />
switched ON.<br />
6. The battery should last longer the following<br />
day. If the battery life is still less than five<br />
minutes, then the battery should be replaced.<br />
BATTERY REPLACEMENT PROCEDURE<br />
(TESTBOOK 1)<br />
If the previous steps fail to restore acceptable<br />
battery life, it should be replaced using the following<br />
procedure.<br />
Required Tool: Torx T15 screwdriver<br />
1. Obtain a new <strong>TestBook</strong> battery from the<br />
Helpdesk. The part number for a replacement<br />
battery is 5063-0425.<br />
2. Turn OFF <strong>TestBook</strong> and unplug the power<br />
supply from the power point.<br />
3. Locate the battery <strong>co</strong>ver on the front of<br />
<strong>TestBook</strong>, just to the left of the CD access<br />
door, and remove the <strong>co</strong>ver by pulling outward<br />
on the bottom side.<br />
4. Unplug the battery wiring from <strong>TestBook</strong> at the<br />
left-hand side. This is done by gently tugging<br />
the wires just above the battery at the far left<br />
hand side.<br />
5. Use a Torx T-15 screwdriver to remove the<br />
metal clip that holds the battery in place.<br />
Remove the old battery, noting how it was<br />
positioned.<br />
6. Install the new battery in the same position that<br />
the previous one was in.<br />
7. Put the metal clip back in place and tighten the<br />
T-15 screw only until snug. Do not over-tighten.<br />
8. Plug the wiring from the new battery into<br />
<strong>TestBook</strong>. The plastic <strong>co</strong>nnector is keyed so<br />
that it will only go in one way.<br />
9. Tuck the battery wires in above the battery.<br />
Use care to make sure that they will not be<br />
pinched when the <strong>co</strong>ver is re-installed.<br />
10. Re-install the battery <strong>co</strong>ver by placing the top<br />
edge in place first, and then snapping the<br />
bottom side in.<br />
11. Leave <strong>TestBook</strong> plugged in overnight for the<br />
battery to charge.<br />
NOTE: Always recycle used batteries<br />
ac<strong>co</strong>rding to local <strong>co</strong>untry regulations.<br />
23


