- Page 1:
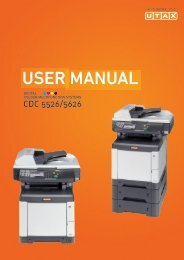
CDC 1520 | 1525 | 1532 INSTRUCTION
- Page 4 and 5:
Color Balance Adjust Adjust the str
- Page 6 and 7:
Legal and Safety Information Please
- Page 8 and 9:
Monotype Imaging License Agreement
- Page 10 and 11:
Included Guides The following guide
- Page 12 and 13:
Originals and Paper Sizes This sect
- Page 14 and 15:
3 Printer Settings ................
- Page 16 and 17:
xiv
- Page 18 and 19:
Copy Functions Selecting Paper Sour
- Page 20 and 21:
Copy Functions 4 Press [Other stand
- Page 22 and 23:
Copy Functions Copy Quantity Sets t
- Page 24 and 25:
Copy Functions 4 According to the p
- Page 26 and 27:
Copy Functions Stapling Staples set
- Page 28 and 29:
Copy Functions Punching Punch holes
- Page 30 and 31:
Copy Functions Combine Mode Images
- Page 32 and 33:
Copy Functions 3 Press either [2 in
- Page 34 and 35:
Copy Functions Centering Originals
- Page 36 and 37:
Copy Functions 4 Press [Sheet Erase
- Page 38 and 39:
Copy Functions Poster For using thi
- Page 40 and 41:
Copy Functions 8 Press [+] or [-] t
- Page 42 and 43:
Copy Functions Booklet from Sheets
- Page 44 and 45:
Copy Functions Booklets from Facing
- Page 46 and 47:
Copy Functions Memo Mode Makes copi
- Page 48 and 49:
Copy Functions Batch Scanning Scans
- Page 50 and 51:
Copy Functions Background Exposure
- Page 52 and 53:
Copy Functions Repeat Copy Set Repe
- Page 54 and 55:
Copy Functions Deleting Repeat Copy
- Page 56 and 57:
Copy Functions 5 Press [Copy] or [B
- Page 58 and 59:
Copy Functions Selecting Output Des
- Page 60 and 61:
Copy Functions Inverted Copying Cop
- Page 62 and 63:
Copy Functions Auto Selection Mode
- Page 64 and 65:
Copy Functions Image Repeat Copy Ti
- Page 66 and 67:
Copy Functions Hue Adjust Adjust th
- Page 68 and 69:
Copy Functions One touch Image Adju
- Page 70 and 71:
Copy Functions MonoColor Copy Speci
- Page 72 and 73:
Copy Functions 3 Press the number (
- Page 74 and 75:
Copy Functions Job Build Job Build
- Page 76 and 77:
Copy Functions 7 Select the MP tray
- Page 78 and 79:
Copy Functions Setting Functions Th
- Page 80 and 81:
Copy Functions NOTE: Incorrect copy
- Page 82 and 83:
Copy Functions Repeat Copy Specify
- Page 84 and 85:
Document and Output Management Func
- Page 86 and 87:
Document and Output Management Func
- Page 88 and 89:
Document and Output Management Func
- Page 90 and 91:
Document and Output Management Func
- Page 92 and 93:
Document and Output Management Func
- Page 94 and 95:
Document and Output Management Func
- Page 96 and 97:
Printer Settings Print Status Page
- Page 98 and 99:
Printer Settings Item Firmware vers
- Page 100 and 101:
Printer Settings Serial Interface M
- Page 102 and 103:
Printer Settings 15 Press [] or []
- Page 104 and 105:
Printer Settings Emulation NOTE: Em
- Page 106 and 107:
Printer Settings 6 Press desired pe
- Page 108 and 109:
Printer Settings 6 Press [] or [] t
- Page 110 and 111:
Printer Settings Print List of Font
- Page 112 and 113:
Printer Settings Print Orientation
- Page 114 and 115:
Printer Settings 5 Press the interf
- Page 116 and 117:
Printer Settings Setting Color Mode
- Page 118 and 119:
Printer Settings 2 Press [Printer M
- Page 120 and 121:
Printer Settings 7 Press [Close]. T
- Page 122 and 123:
Printer Settings 3 Press [Memory Ca
- Page 124 and 125:
Printer Settings 4 In the Delete ar
- Page 126 and 127:
Printer Settings 3 Press [RAM DISK
- Page 128 and 129:
Printer Settings e-MPS Functions e-
- Page 130 and 131: Printer Settings 4 Press [] or [] t
- Page 132 and 133: Printer Settings Processing message
- Page 134 and 135: Printer Settings 3 Press [Configura
- Page 136 and 137: Printer Settings Setting Resource P
- Page 138 and 139: Printer Settings 4 Press [] or [] t
- Page 140 and 141: Printer Settings 5 Press [Print Sta
- Page 142 and 143: Printer Settings 3-48
- Page 144 and 145: Scanner Settings Setting Scanner Fu
- Page 146 and 147: Scanner Settings Selecting Original
- Page 148 and 149: Scanner Settings Setting Image Qual
- Page 150 and 151: Scanner Settings Border Erase Remov
- Page 152 and 153: Scanner Settings Item Value Supplem
- Page 154 and 155: Scanner Settings Scanner Default Se
- Page 156 and 157: Scanner Settings File Type 3 Press
- Page 158 and 159: Scanner Settings Batch Scanning Con
- Page 160 and 161: Scanner Settings File Name Input Fi
- Page 162 and 163: Scanner Settings Programmed Scannin
- Page 164 and 165: Scanner Settings Deleting programs
- Page 166 and 167: Scanner Settings 4-24
- Page 168 and 169: Setting Scanner from a Web Browser
- Page 170 and 171: Setting Scanner from a Web Browser
- Page 172 and 173: Setting Scanner from a Web Browser
- Page 174 and 175: Setting Scanner from a Web Browser
- Page 176 and 177: Setting Scanner from a Web Browser
- Page 178 and 179: Setting Scanner from a Web Browser
- Page 182 and 183: Setting Scanner from a Web Browser
- Page 184 and 185: Setting Scanner from a Web Browser
- Page 186 and 187: Setting Scanner from a Web Browser
- Page 188 and 189: Setting Scanner from a Web Browser
- Page 190 and 191: Setting Scanner from a Web Browser
- Page 192 and 193: Setting Scanner from a Web Browser
- Page 194 and 195: Included Scanner Utilities Introduc
- Page 196 and 197: Included Scanner Utilities 2. Regis
- Page 198 and 199: Included Scanner Utilities Start Di
- Page 200 and 201: Included Scanner Utilities Configur
- Page 202 and 203: Included Scanner Utilities 5 To cha
- Page 204 and 205: Included Scanner Utilities If a har
- Page 206 and 207: Included Scanner Utilities 2 The Ad
- Page 208 and 209: Included Scanner Utilities Item Sta
- Page 210 and 211: Included Scanner Utilities Network
- Page 212 and 213: Included Scanner Utilities IP-Filte
- Page 214 and 215: Included Scanner Utilities Setting
- Page 216 and 217: Included Scanner Utilities E-mail S
- Page 218 and 219: Included Scanner Utilities Destinat
- Page 220 and 221: Included Scanner Utilities Destinat
- Page 222 and 223: Included Scanner Utilities Field Se
- Page 224 and 225: Included Scanner Utilities Address
- Page 226 and 227: Included Scanner Utilities Destinat
- Page 228 and 229: Included Scanner Utilities Register
- Page 230 and 231:
Included Scanner Utilities 8 In the
- Page 232 and 233:
Included Scanner Utilities Importin
- Page 234 and 235:
Included Scanner Utilities TWAIN So
- Page 236 and 237:
Included Scanner Utilities 3 Click
- Page 238 and 239:
Included Scanner Utilities Item 2 s
- Page 240 and 241:
Included Scanner Utilities Maximum
- Page 242 and 243:
Included Scanner Utilities Operatio
- Page 244 and 245:
Included Scanner Utilities About th
- Page 246 and 247:
Included Scanner Utilities NOTE: Re
- Page 248 and 249:
Included Scanner Utilities 2 To ver
- Page 250 and 251:
System Menu Default Settings Defaul
- Page 252 and 253:
System Menu Original Image Quality
- Page 254 and 255:
System Menu 3 Select [APS] or [Defa
- Page 256 and 257:
System Menu Setting Auto % Priority
- Page 258 and 259:
System Menu 4 Press [Close] to save
- Page 260 and 261:
System Menu 3 The current functions
- Page 262 and 263:
System Menu 3 Use numeric keys to e
- Page 264 and 265:
System Menu 3 Press [] or [] to sel
- Page 266 and 267:
System Menu • Normal 1: From 60 g
- Page 268 and 269:
System Menu Auto Detect Originals S
- Page 270 and 271:
System Menu Selecting Output Destin
- Page 272 and 273:
System Menu Silent Mode Configures
- Page 274 and 275:
System Menu Activating Auto Sleep I
- Page 276 and 277:
System Menu Setting Hard Disk Encry
- Page 278 and 279:
System Menu Registering Non-standar
- Page 280 and 281:
System Menu 2 Press [User Adjustmen
- Page 282 and 283:
System Menu 5 Press [PRT Chart]. A
- Page 284 and 285:
System Menu 6 Press [+] or [-] to e
- Page 286 and 287:
System Menu Setting Document Manage
- Page 288 and 289:
System Menu 1 Referring to Accessin
- Page 290 and 291:
System Menu Hard Disk Management Ve
- Page 292 and 293:
System Menu Toner Coverage Report T
- Page 294 and 295:
System Menu Checking Total Copy Cou
- Page 296 and 297:
System Menu Capital keyboard Name t
- Page 298 and 299:
System Menu 3 Press [b], [c], [d] a
- Page 300 and 301:
System Menu 7-52
- Page 302 and 303:
Job Accounting Overview of Job Acco
- Page 304 and 305:
Job Accounting Managing Accounts Yo
- Page 306 and 307:
Job Accounting 2 Press [] or [] to
- Page 308 and 309:
Job Accounting Restricting FAX Usag
- Page 310 and 311:
Job Accounting Restricting Printer
- Page 312 and 313:
Job Accounting 3 Select the departm
- Page 314 and 315:
Job Accounting By function: copying
- Page 316 and 317:
Job Accounting Activating and Deact
- Page 318 and 319:
Job Accounting Printer Error Report
- Page 320 and 321:
Job Accounting Fax Job Accounting A
- Page 322 and 323:
Job Accounting Using Job Accounting
- Page 324 and 325:
Job Accounting 8-24
- Page 326 and 327:
Troubleshooting Solving Malfunction
- Page 328 and 329:
Troubleshooting Symptom Checkpoints
- Page 330 and 331:
Troubleshooting Responding to Error
- Page 332 and 333:
Troubleshooting Display Checkpoints
- Page 334 and 335:
Troubleshooting Display Checkpoints
- Page 336 and 337:
Troubleshooting Display Checkpoints
- Page 338 and 339:
Troubleshooting Memory Device Error
- Page 340 and 341:
Troubleshooting Display Checkpoints
- Page 342 and 343:
Troubleshooting Scanner Error Codes
- Page 344 and 345:
Troubleshooting 9-20
- Page 346 and 347:
Appendix Paper Basic Paper Specific
- Page 348 and 349:
Appendix Smoothness The paper surfa
- Page 350 and 351:
Appendix Choosing Special Paper Alt
- Page 352 and 353:
Appendix Specifications NOTE: These
- Page 354 and 355:
Appendix Scanning Performance Hardw
- Page 356 and 357:
Appendix 3000 Sheet Document Finish
- Page 358 and 359:
Appendix Intercompatibility of Func
- Page 360 and 361:
Appendix Primary Function Auto colo
- Page 362 and 363:
Appendix 22 Stapling/punching is no
- Page 364 and 365:
Appendix Intercompatibility of Scan
- Page 366 and 367:
Appendix Dual Access Chart Two oper
- Page 368 and 369:
Appendix FTP (File Transfer Protoco
- Page 370 and 371:
Appendix Appendix-26
- Page 372 and 373:
Index Copy count per department Cop
- Page 374 and 375:
Index Page set Copy quantity 3-17 C
- Page 376 and 377:
Index Index-6
- Page 378 and 379:
Quick Guide to Adjusting Image Qual
- Page 380 and 381:
Quick Guide to Adjusting Image Qual
- Page 382 and 383:
Quick Guide to Adjusting Image Qual
- Page 384 and 385:
Quick Guide to Adjusting Image Qual
- Page 386:
UTAX GmbH, Ohechaussee 235, 22848 N


