INSTRUCTION HANDBOOK - Utax
INSTRUCTION HANDBOOK - Utax INSTRUCTION HANDBOOK - Utax
Scanner Settings Batch Scanning Configure batch scanning for default settings mode. The setting items are as follows. Item On Off Description Enables batch scanning. Disables batch scanning. One Page Per File For further details on batch scanning, refer to page 4-8. 1 Referring to Accessing the Setting default function Screen on page 4-12, access the Setting default function screen. 2 Press [] or [] to select Batch Scanning and press [Change #]. 3 Select [On] or [Off]. 4 Press [Close]. The display returns to the Setting default function screen. Configure One Page Per File for default settings mode. The setting items are as follows. Item On Off Description Enables One Page Per File. Disables One Page Per File. For further details about One Page Per File, see page 4-9. 1 Referring to Accessing the Setting default function Screen on page 4-12, access the Setting default function screen. 2 Press [] or [] to select One Page Per File (Output Each Page) and press [Change #]. 3 Select [On] or [Off]. 4 Press [Close]. The display returns to the Setting default function screen. File Name Set the scanner image filename for default settings mode. NOTE: Enter the filename using less than 16 characters. For further details on scanner image file name, refer to page 4-5. 1 Referring to Accessing the Setting default function Screen on page 4-12, access the Setting default function screen. 2 Press [] or [] to select File Name and press [Change #]. 3 Press [Change]. 4 Enter the filename and press [End]. 5 Press [Close]. The display returns to the Setting default function screen. 4-16
Scanner Settings Auto Center Configure Auto Center for default settings mode. The setting items are as follows. Item On Off Description Enables Auto Center. Disables Auto Center. Continuous Scanning For further details about Auto Center, see page 4-9. 1 Referring to Accessing the Setting default function Screen on page 4-12, access the Setting default function screen. 2 Press [] or [] to select Auto Center (Image shift) and press [Change #]. 3 Select [On] or [Off]. 4 Press [Close]. The display returns to the Setting default function screen. Use the same settings from a previously completed transmission for the next transmission. The scan function screen is returned with the sender (user), destination and other settings remaining from the previous operation. Item On Off Description Enables Continuous Scan. Disables Continuous Scan. NOTE: To switch to continuous scan from the scanner function screen, press [Cont. TX to]. When continuous scan is enabled, [Cont. TX to] changes to [Single Scan]. To enable Single Scan, press [Single Scan]. If Permit File Overwrite is checked in Scanner File Utility (see page 6-7), files Save at User PC with already existing names will be overwritten. Exercise caution when inputting file names during Continuous Scan mode. Ready to scan. ( Full-Color ) Place the original and select destination. Scan to PC-Sending Destination Address Book Auto Select Orig.Size Auto size Select Send Size Basic Original 11×8½" 08/0 Top Edge Orig. Set Direction 200dpi Scanning Resolution Quality When finished using Continuous Scan, always [Cancel] on the scanner function screen. If not pressed, the scanner function screen may remain active, rendering the copy, print or fax functions unusable. Also, exercise caution as unauthorized users may obtain access to the device while this screen is displayed. Delete Register Prgrm Cont. TX to 1 Referring to Accessing the Setting default function Screen on page 4-12, access the Setting default function screen. 2 Press [] or [] to select Continuous Sending and press [Change #]. 3 Select [On] or [Off]. 4 Press [Close]. The display returns to the Setting default function screen. 4-17
- Page 108 and 109: Printer Settings 6 Press [] or [] t
- Page 110 and 111: Printer Settings Print List of Font
- Page 112 and 113: Printer Settings Print Orientation
- Page 114 and 115: Printer Settings 5 Press the interf
- Page 116 and 117: Printer Settings Setting Color Mode
- Page 118 and 119: Printer Settings 2 Press [Printer M
- Page 120 and 121: Printer Settings 7 Press [Close]. T
- Page 122 and 123: Printer Settings 3 Press [Memory Ca
- Page 124 and 125: Printer Settings 4 In the Delete ar
- Page 126 and 127: Printer Settings 3 Press [RAM DISK
- Page 128 and 129: Printer Settings e-MPS Functions e-
- Page 130 and 131: Printer Settings 4 Press [] or [] t
- Page 132 and 133: Printer Settings Processing message
- Page 134 and 135: Printer Settings 3 Press [Configura
- Page 136 and 137: Printer Settings Setting Resource P
- Page 138 and 139: Printer Settings 4 Press [] or [] t
- Page 140 and 141: Printer Settings 5 Press [Print Sta
- Page 142 and 143: Printer Settings 3-48
- Page 144 and 145: Scanner Settings Setting Scanner Fu
- Page 146 and 147: Scanner Settings Selecting Original
- Page 148 and 149: Scanner Settings Setting Image Qual
- Page 150 and 151: Scanner Settings Border Erase Remov
- Page 152 and 153: Scanner Settings Item Value Supplem
- Page 154 and 155: Scanner Settings Scanner Default Se
- Page 156 and 157: Scanner Settings File Type 3 Press
- Page 160 and 161: Scanner Settings File Name Input Fi
- Page 162 and 163: Scanner Settings Programmed Scannin
- Page 164 and 165: Scanner Settings Deleting programs
- Page 166 and 167: Scanner Settings 4-24
- Page 168 and 169: Setting Scanner from a Web Browser
- Page 170 and 171: Setting Scanner from a Web Browser
- Page 172 and 173: Setting Scanner from a Web Browser
- Page 174 and 175: Setting Scanner from a Web Browser
- Page 176 and 177: Setting Scanner from a Web Browser
- Page 178 and 179: Setting Scanner from a Web Browser
- Page 180 and 181: Setting Scanner from a Web Browser
- Page 182 and 183: Setting Scanner from a Web Browser
- Page 184 and 185: Setting Scanner from a Web Browser
- Page 186 and 187: Setting Scanner from a Web Browser
- Page 188 and 189: Setting Scanner from a Web Browser
- Page 190 and 191: Setting Scanner from a Web Browser
- Page 192 and 193: Setting Scanner from a Web Browser
- Page 194 and 195: Included Scanner Utilities Introduc
- Page 196 and 197: Included Scanner Utilities 2. Regis
- Page 198 and 199: Included Scanner Utilities Start Di
- Page 200 and 201: Included Scanner Utilities Configur
- Page 202 and 203: Included Scanner Utilities 5 To cha
- Page 204 and 205: Included Scanner Utilities If a har
- Page 206 and 207: Included Scanner Utilities 2 The Ad
Scanner Settings<br />
Auto Center<br />
Configure Auto Center for default settings mode. The setting items are as follows.<br />
Item<br />
On<br />
Off<br />
Description<br />
Enables Auto Center.<br />
Disables Auto Center.<br />
Continuous Scanning<br />
For further details about Auto Center, see page 4-9.<br />
1 Referring to Accessing the Setting default function Screen on page 4-12, access the Setting default<br />
function screen.<br />
2 Press [] or [] to select Auto Center (Image shift) and press [Change #].<br />
3 Select [On] or [Off].<br />
4 Press [Close]. The display returns to the Setting default function screen.<br />
Use the same settings from a previously completed transmission for the next transmission. The<br />
scan function screen is returned with the sender (user), destination and other settings remaining<br />
from the previous operation.<br />
Item<br />
On<br />
Off<br />
Description<br />
Enables Continuous Scan.<br />
Disables Continuous Scan.<br />
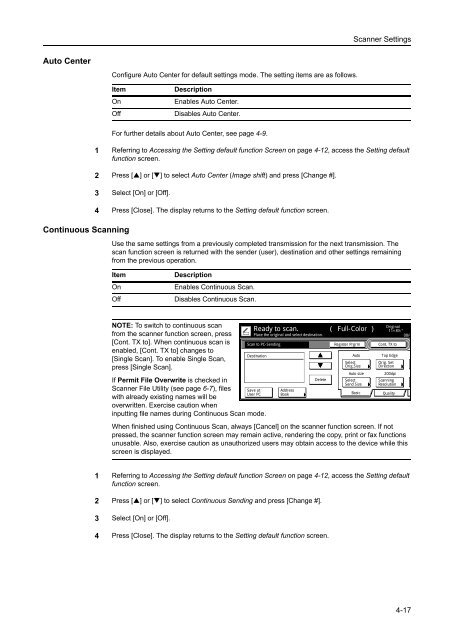
NOTE: To switch to continuous scan<br />
from the scanner function screen, press<br />
[Cont. TX to]. When continuous scan is<br />
enabled, [Cont. TX to] changes to<br />
[Single Scan]. To enable Single Scan,<br />
press [Single Scan].<br />
If Permit File Overwrite is checked in<br />
Scanner File Utility (see page 6-7), files Save at<br />
User PC<br />
with already existing names will be<br />
overwritten. Exercise caution when<br />
inputting file names during Continuous Scan mode.<br />
Ready to scan. ( Full-Color )<br />
Place the original and select destination.<br />
Scan to PC-Sending<br />
Destination<br />
Address<br />
Book<br />
Auto<br />
Select<br />
Orig.Size<br />
Auto size<br />
Select<br />
Send Size<br />
Basic<br />
Original<br />
11×8½"<br />
08/0<br />
Top Edge<br />
Orig. Set<br />
Direction<br />
200dpi<br />
Scanning<br />
Resolution<br />
Quality<br />
When finished using Continuous Scan, always [Cancel] on the scanner function screen. If not<br />
pressed, the scanner function screen may remain active, rendering the copy, print or fax functions<br />
unusable. Also, exercise caution as unauthorized users may obtain access to the device while this<br />
screen is displayed.<br />
Delete<br />
Register Prgrm<br />
Cont. TX to<br />
1 Referring to Accessing the Setting default function Screen on page 4-12, access the Setting default<br />
function screen.<br />
2 Press [] or [] to select Continuous Sending and press [Change #].<br />
3 Select [On] or [Off].<br />
4 Press [Close]. The display returns to the Setting default function screen.<br />
4-17


