

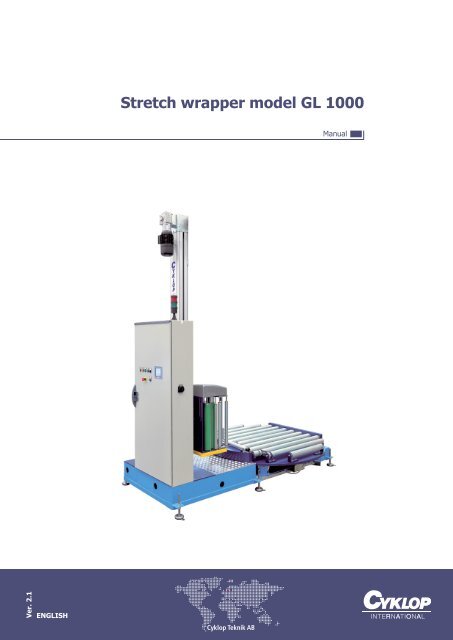
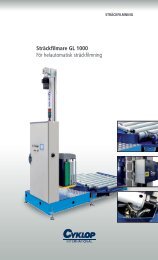
Stretch wrapper model GL 1000
Stretch wrapper model GL 1000
Stretch wrapper model GL 1000

You also want an ePaper? Increase the reach of your titles
YUMPU automatically turns print PDFs into web optimized ePapers that Google loves.
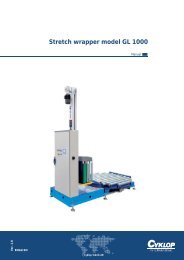
<strong>Stretch</strong> <strong>wrapper</strong> <strong>model</strong> <strong>GL</strong> <strong>1000</strong><br />
Manual<br />
Ver. 2.1<br />
EN<strong>GL</strong>ISH
Model: <strong>GL</strong> <strong>1000</strong> Serial number:........................ Delivery date:...............................<br />
YY-MM-DD<br />
This machine is equipped with the following options on delivery:<br />
6<strong>1000</strong>1 CONVEYOR FOR BIG LOADS<br />
6<strong>1000</strong>2 CUSTOM COLOR<br />
6<strong>1000</strong>3 MAST MOVED BACK<br />
6<strong>1000</strong>4 CABINET MOVED BACK<br />
6<strong>1000</strong>5 FORMAT CONTROL<br />
6<strong>1000</strong>6 HALF PALLET<br />
6<strong>1000</strong>7 CABINET EXCLUDED<br />
6<strong>1000</strong>8 SEPARATE CABINET<br />
6<strong>1000</strong>9 ALLEN BRADLEY CONTROL<br />
610012 LIGHTBEAM, 1 PC<br />
610013 LIGHTBEAMS, 2 PCS<br />
610014 LIGHTBEAMS, 3 PCS<br />
610148 TOP PLATE, RECTANGULAR<br />
610149 TOP PLATE, ROUND<br />
610150 FREQ. CONTROL OF TOP PLATE<br />
610159 ALARM, ”FILM ALMOST AT AN END”<br />
610179 GALVANIZATION OF BOTTOM CHASSIS<br />
610184 CUSTOM MAST HEIGHT<br />
610188 CHAIN CONVEYOR, 3 CHAINS<br />
610189 CHAIN CONVEYOR, 2 CHAINS<br />
610191 INFILL CONVEYOR FOR LARGE CONVEYOR<br />
610192 INFILL CONVEYOR FOR STD CONVEYOR<br />
610194 LARGER FILM ROLL DIAMETER<br />
610198 POWERED OUTER ROLLERS<br />
610206 INCREASED TRANSP. HEIGHT, 575-700 mm<br />
610207 INCREASED TRANSP. HEIGHT, 625-750 mm<br />
610208 INCREASED TRANSP. HEIGHT, 750-875 mm<br />
610209 CUSTOM CONVEYOR HEIGHT<br />
610254 WELDING UNIT<br />
610261 90 DEGREE IN OR OUT TRANSPORTATION<br />
610324 STRING ROLLER<br />
610325 PNEUMATIC STRING ROLLER<br />
610481 PALLET GUIDING DISCS<br />
610210 AIR CONDITIONED ELECTRICAL CABINET<br />
610010 INTEGRATION CI 1110<br />
610011 CONTROL OF 1 CONVEYOR<br />
610012 CONTROL OF 2 CONVEYORS<br />
610013 CONTROL OF 3 CONVEYORS<br />
610014 CONTROL OF 4 CONVEYORS<br />
610015 CONTROL OF 5 CONVEYORS<br />
610016 FREQ. CONTROL OF CONVEYOR<br />
610199 SEPARATE START BOX<br />
610663 PASSIVE ANTISTATIC<br />
610664 ACTIVE ANTISTATIC<br />
Throughout the entire manual, the following symbols will be used to indicate particularly important information.<br />
Particularly important<br />
information<br />
Must be executed by<br />
an operator<br />
Must only be executed by a<br />
Cyklop service engineer<br />
Hazard<br />
"Fast return" to a page. To access this menu/page,<br />
press the buttons in order in the grey field. (This is an example.)<br />
Rights to make any technical modifications are reserved. This manual must not be copied or otherwise duplicated.<br />
Nor may its content be amended or passed on without our written permission. All rights reserved.<br />
© Copyright by Cyklop Teknik AB – Burseryd 2010 /mka<br />
2 EN
Contents<br />
Chapter Page<br />
Machine configuration 2<br />
Positioning of safety decals 4<br />
EC declaration 5<br />
General safety instructions 1 6<br />
Main machine parts 2 10<br />
Control cabinet 3 11<br />
• Overview 3.1 11<br />
• Explanation of buttons 3.2 11<br />
• Lamp test 3.3 12<br />
Display 4 12<br />
• Overview 4.1 12<br />
• Home menu 4.2 12<br />
• Information menu for film 4.3 13<br />
• Name program 4.4 13<br />
• Manual operation 4.5 14<br />
• Service 4.6 15<br />
• Language selection, date set 4.7 15<br />
• Alarm / Status sensor 4.8 17<br />
• Contact information 4.9 19<br />
• Setting program parameters 4.10 19<br />
• Program selection 4.11 20<br />
Operate the machine 5 21<br />
• Activation 5.1 21<br />
• Load film 5.2 21<br />
• Set prestretching of film 5.3 22<br />
• Set film tension 5.4 22<br />
• Start the machine 5.5 22<br />
• Pause automatic mode 5.6 23<br />
• Description of film patterns 5.7 23<br />
Care and daily maintenance 6 24<br />
• Cleaning 6.1 24<br />
• Service & maintanence 6.2 24<br />
Resetting 7 26<br />
• Film breakage / End of film 7.1 26<br />
• Machine stop activated 7.2 26<br />
• Emergency stop activated 7.3 26<br />
• Light beam which has tripped (optional) 7.4 27<br />
Troubleshooting 8 27<br />
Transport 9 29<br />
Technical specifications 10 30<br />
Table of set values, program parameters 11 31<br />
3 EN
EN<strong>GL</strong>ISH<br />
This user guide describes the operation, safe use,<br />
maintenance and adjustment of the machine. ATTENTION!<br />
Connection to the power grid is not included.<br />
Machine design and construction allows for safe<br />
use and maintenance. This is true provided that<br />
the installation is done as is described in this guide.<br />
The warning labels that have been applied to the machine should<br />
be kept in such condition that the content is easy to read. If not,<br />
the label must be replaced. Explanations and positioning below.<br />
Design may differ slightly on label affixed to the machine, but the<br />
meaning is the same.<br />
Part No: 400777<br />
7. HAZARD!<br />
The turn table rotates in the direction of the<br />
arrrow.<br />
18. HAZARD!<br />
Aggregate travels in the directions of the arrows.<br />
Crush hazard.<br />
2. HAZARD!<br />
Topplattans släde rör sig i pilarnas riktning. Crush<br />
hazard. (For option: Top plate)<br />
MANDATORY<br />
Outtakes for forks. Lift the machine here.<br />
9. HAZARD!<br />
Rotating rollers. Crush hazard.<br />
12. HAZARD!<br />
Sharp egdes. Risk of cutting.<br />
3. VARNING!<br />
Rotating rollers. Crush hazard.<br />
5. HAZARD!<br />
Crush hazard.<br />
8. HAZARD!<br />
Crush hazard.<br />
17. HAZARD!<br />
Dangerous electrical voltage.<br />
13. HAZARD!<br />
Hot surface.<br />
(For option: Weld)<br />
4. INFORMATION<br />
1. Tread the stretch film according to the picture.<br />
2. Gear ratio.<br />
15.<br />
10.<br />
1.<br />
14.<br />
16.<br />
4 EN
The declaration of incorporation of the partly completed machinery under the EC’s Machinery<br />
Directive 2006/42/EC, Annex 2B.<br />
We:<br />
Cyklop Teknik AB<br />
Villstadsvägen 1<br />
330 26 BURSERYD<br />
Org. Nr. 556224-0001<br />
declare under our sole responsibility that the partly completed product:<br />
Model: <strong>Stretch</strong> <strong>wrapper</strong> <strong>GL</strong> <strong>1000</strong><br />
Type designation: <strong>1000</strong>50-<strong>1000</strong>50/99<br />
Machine Number:<br />
________________________<br />
• is designed to be incorporated in a larger machinery or assembled with another machine, which<br />
together will constitute machinery covered by Directive 2006/42/EC ”Machinery Directive”<br />
and which shall be made in accordance with Directive 2006 / 42/EC.<br />
• conforms to the applicable sections of annex 1 regarding essential health and safety in the design<br />
of machines have been performed and that the relevant technical documentation is compiled in<br />
accordance with Annex 7, Section B.<br />
• Remaining items in Annex 1: 1.1.3, 1.3.1, 1.3.2, 1.3.3, 1.3.7 samt 1.5.2. At the substantiated<br />
request of national authorities relevant documents on the partly completed machinery<br />
will be presented.<br />
• and declares, moreover, that the machinery should not be put into any use until the machinery<br />
it must be incorporated in, or forming part of, has been found and declared in accordance with<br />
Directive 2006/42/EC and national legislation, namely the overall including the machine,<br />
referred to in this declaration.<br />
Covered by this declaration in conformity are the following directives:<br />
2006/42/EG Machinery Directive, Basic safety regulations<br />
2006/95/EG Low Voltage Directive (LVD)<br />
2004/108/EG Electromagnetic Compatibility (EMC)<br />
The following harmonized standards apply:<br />
EN ISO 14121 Machine safety - Principles for risk assessment<br />
EN ISO 12100-1 Machine safety - Basic terminology, methodology<br />
EN ISO 12100-2 Machine safety - Technical principles<br />
SS-EN 60204-1 Machine safety - Electrical equipment of machines<br />
SS-EN 954-1 Machine safety - Control systems<br />
SS-EN 415-6 Packaging machines safety<br />
Burseryd<br />
Place and date (YY-MM-DD)<br />
Bo Eriksson<br />
Managing director<br />
Position<br />
Burseryd<br />
Place and date (YY-MM-DD)<br />
Lars Karlsson<br />
Responsible for Technical file<br />
Position<br />
Cyklop Teknik AB<br />
Villstadsvägen 1<br />
SE-330 26 BURSERYD<br />
Ph: +46 (0)371 50800<br />
Fax: +46 (0)371 50775<br />
info@cyklopteknik.se<br />
www.cyklopteknik.se<br />
5 EN
1. General safety instructions<br />
GENERAL<br />
Machine design and construction allows for safe use and<br />
maintenance. This is true provided that the installation is done<br />
as described in this guide. The guide should be read and the instructions<br />
followed by anyone working with the machinery. It is<br />
the customer’s responsibility to ensure that the instructions are<br />
complied with by staff.<br />
In some countries or some companies more safety regulations are<br />
to be observed, mainly related to personnel. This documentation<br />
does not take account of such company-specific or national<br />
guidelines. The technical specifications in the manual shall be<br />
sufficient to base for decisions on any local safety regulations.<br />
Consult with the appropriate the authorities or with company<br />
safety representatives.<br />
This documentation distinguishes between ”normal operation”<br />
(see Chapter 3-4 Running the machine) and ”other management”<br />
(see Chapter 5 Care and daily maintenance). The reason is that<br />
they place different demands on operators and service personnel,<br />
specially in regards to security.<br />
Easier maintenance, as described in Chapter 4, may also be<br />
performed by operators. Maintenance only described in Chapter 5,<br />
only carried out by skilled service personnel.<br />
SAFETY<br />
Here are the rules to be observed: Ensure that no children or<br />
animals in the vicinity of the installation.<br />
Only people who have read and understand this manual may work<br />
with this machinery. Do not tamper with the machine while it is<br />
working or is on. Warning! Even if the machine is not working,<br />
it may be switched on. Safety devices shall not be removed or<br />
eliminated. All the protection of electrical and mechanical compo<br />
nents must be correctly installed when the installation is in<br />
operation. The safety devices are essential for safety in the work<br />
environment. Thus, it is strictly forbidden in any way ignore or<br />
circumvent them. Keep the work area clean and free of foreign<br />
objects. Make sure the lighting in the work area is adequate.<br />
UNAUTHORIZED USE<br />
Some use may lead to unnecessary security risks because they are<br />
not in conformity with the machine’s specifications and therefore<br />
unlawful. You may not:<br />
• wrap pallets that do not meet specifications<br />
• wrap pallet goods exceeding the maximum allowable weight<br />
• wrap pallet goods which have not been stacked properly.<br />
Keep in mind that even if the goods look like it is stacked<br />
properly, packages can still fall due to other causes<br />
• wrap pallets that are in poor condition<br />
• wrap pallets that extends outside the periphery of the turn<br />
table<br />
• negligering of installation specifications<br />
• wrap unpackaged foods<br />
USERS<br />
Operators<br />
The machine may be operated by any adult person who has read<br />
and understood the contents of Chapters 1-4. It is not necessary<br />
that the operators have any special knowledge. Machine operators<br />
are trained by personnel from Cyklop or by Cyklop designated<br />
dealers.<br />
• daily standard maintenance This means for example cleaning<br />
of photocells - no major tasks may be performed.<br />
• ensure that dangerous situations can not arise.<br />
• keep the work area clean and free from foreign objects.<br />
Service<br />
Specific skills, experience and / or training is required. Service<br />
personnel should also master the entire contents of this<br />
documentation. Service typically have the following types of tasks:<br />
• maintenance of the installation<br />
• repair of defects<br />
• give support to operators<br />
Service personnel shall after rectifying an error restore the<br />
machine to original state. With security in mind, this means for<br />
example, re-installation of protective caps and also return safety<br />
switch to its original position. When a service person take their<br />
own initiatives to implement changes in the installation, the<br />
customer forfeits the moment of their warranty claims in the case<br />
of any problems as a consequence of the change.<br />
PERSONAL PROTECTION<br />
Some personal protection measures are not to be taken by<br />
operators of the machine. However, a number of measures<br />
are recommended. For example shoes with steel caps, hearing<br />
protection, etc.. Some products used, however, may require<br />
protective measures - advice the documentation of those devices.<br />
When handling sheet metal take certain precautions to prevent<br />
injuries such as hand injuries and the likes. When performing<br />
service local safety regulations must be folowed. Discuss personal<br />
safety with company safety representatives.<br />
The whole installation was designed and tested to work with the<br />
specified substances. Unforeseen dangers may arise from the use<br />
of substances other than those specified. The manufacturer can<br />
not accept responsibility for the complications arising from the use<br />
of substances other than those specified.<br />
TRANSPORTATION<br />
When transporting the installation on a public road, there may<br />
be local regulations to follow. Consult with national and local<br />
authorities on these kinds of regulations and if application for a<br />
permit is needed.<br />
ENVIRONMENTAL CONCERNS<br />
Potential environmental risks are in the form of, for example, oil,<br />
grease and detergent. This type of substances are to be disposed<br />
of in accordance with national environmental regulations.<br />
DISPOSAL OF THE MACHINE / INSTALLATION<br />
If and when the machine is disposed local environmental<br />
regulations must be observed. The machine contains only material<br />
that can be considered public knowledge. All the materials in the<br />
machine was at the time of manufacture of such a nature that<br />
they could be disposed of in an environmentally sound manner<br />
and without risk of personal injury.<br />
DISASTERS<br />
Disasters include fire, flood, and the like. There are no specific<br />
rules for the conduct of disaster relief.<br />
Fire fighting can be done under the usual standards.<br />
The operator is normally involved in the following tasks:<br />
• operation of the machine<br />
6 EN
Basic operation<br />
Before use, please read the handbook and safety instructions<br />
carefully. The operator handbook is to be stored ready<br />
for use in direct machine proximity. Maintenance and inspection<br />
intervals are to be adhered to.<br />
The machine/plant must only be used in technically perfect<br />
condition in accordance with its designated use and the<br />
instructions set out in the operating manual, and only by<br />
safety–conscious persons who are fully aware of the risks<br />
involved in operating the machine/plant. Any functional disorders,<br />
especially those affecting the safety of the machine/<br />
plant, should therefore be rectified immediately.<br />
The machine/plant may be operated only for its designated<br />
use.<br />
Organizational measures<br />
In addition to the operating instructions, observe and instruct<br />
the user in all other generally applicable legal and<br />
other mandatory regulations relevant to accident prevention<br />
and environmental protection. These compulsory regulations<br />
may also deal with the handling of hazardous<br />
substances, issuing and/or wearing of personal protective<br />
equipment, or traffic regulations.<br />
For reasons of security, long hair must be tied back or otherwise<br />
secured, garments must be close–fitting and no jewellery<br />
– such as rings – may be worn. Injury may result<br />
from being caught up in the machinery or from rings catching<br />
on moving parts.<br />
Use protective equipment wherever required by the circumstances<br />
or by law.<br />
Observe all safety instructions and warnings attached to the<br />
machine/plant.<br />
See to it that safety instructions and warnings attached to<br />
the machine are always complete and perfectly legible.<br />
In the event of safety relevant modifications or changes in<br />
the behaviour of the machine/plant during operation stop<br />
the machine/plant immediately and report the malfunction<br />
to the competent authority/person.<br />
Never make any modifications, additions or conversions,<br />
which might affect safety without the supplier’s approval.<br />
This also applies to the installation and adjustment of safety<br />
devices and valves as well as to welding work on load–bearing<br />
elements.<br />
Spare parts must comply with the technical requirements<br />
specified by the manufacturer. Spare parts from original<br />
equipment manufacturers can be relied to do so.<br />
Never modify the software of programmable control systems.<br />
Replace hydraulic hoses within stipulated and appropriate<br />
intervals even if no safety relevant defects have been detected.<br />
For the execution of maintenance work, tools and workshop<br />
equipment adapted to the task on hand are absolutely indispensable.<br />
The personnel must be familiar with the location and operation<br />
of fire extinguishers.<br />
Observe all fire–warning and fire–fighting procedures.<br />
Accident preventing devices, which are not included in the<br />
scope of supply, such as protective guarding, are to be provided<br />
by the customer in accordance with the local safety<br />
regulations.<br />
Selection and qualification of personnel<br />
Any work on and with the machine/plant must be executed<br />
by reliable personnel only. Statutory minimum age limits<br />
must be observed.<br />
Employ only trained or instructed staff and set out clearly<br />
the individual responsibilities of the personnel for operation,<br />
set–up, maintenance and repair.<br />
Make sure that only authorized personnel works on or with<br />
the machine.<br />
Define the machine operator’s responsibilities – also with<br />
regard to observing traffic regulations – giving the operator<br />
the authority to refuse instructions by third parties that are<br />
contrary to safety.<br />
Do not allow persons to be trained or instructed or persons<br />
taking part in a general training course to work on or with<br />
the machine/plant without being permanently supervised<br />
by an experienced person.<br />
Work on the electrical system and equipment of the machine/plant<br />
must be carried out only by a skilled electrician or<br />
by instructed persons under the supervisions and guidance<br />
of a skilled electrician and in accordance with electrical engineering<br />
rules and regulations.<br />
Work on gas–fuelled equipment (gas consumers) may be<br />
carried out by specially trained personnel only.<br />
Work on the hydraulic system must be carried out only by<br />
personnel with special knowledge and experience of hydraulic<br />
equipment.<br />
7 EN
Safety instructions governing specific operational<br />
phases<br />
Avoid any operational mode that might be prejudicial to<br />
safety.<br />
Take the necessary precautions to ensure that the machine<br />
is used only when in a safe and reliable state. Operate the<br />
machine only if all protective and safety– oriented devices,<br />
such as removable safety devices, emergency shut–off<br />
equipment, sound–proofing elements and exhausters, are<br />
in place and fully functional.<br />
Check the machine/plant at least once per working shift<br />
for obvious damage and defects. Report any changes (incl.<br />
changes in the machine’s working behaviour) to the competent<br />
organization/person immediately. If necessary, stop<br />
the machine immediately and lock it.<br />
In the event of malfunctions, stop the machine/plant immediately<br />
and lock it. Have any defects rectified immediately.<br />
Before starting up or setting the machine/plant in motion,<br />
make sure that nobody is at risk.<br />
Never switch off or remove suction and ventilation devices<br />
when the machine is in operation.<br />
Brief operating personnel before beginning special operations<br />
and maintenance work, and appoint a person to supervise<br />
the activities.<br />
Ensure that the maintenance area is adequately secured!<br />
Lift units must be secured by mechanical fall–safety units<br />
(clamps), before entering the machine!<br />
If the machine/plant is completely shut down for maintenance<br />
and repair work, it must be secured against inadvertent<br />
starting by:– locking the principal control elements and<br />
removing the ignition key and/or– attaching a warning sign<br />
to the main switch.<br />
Carry out maintenance and repair work only if the machine<br />
is positioned on stable and level ground and has been secured<br />
against inadvertent movement and buckling!<br />
To avoid the risk of accidents, individual parts and large assemblies<br />
being moved for replacement purposes should be<br />
care-fully attached to lifting tackle and secured. Use only<br />
suitable and technically perfect lifting gear and suspension<br />
systems with adequate lifting capacity. Never work or stand<br />
under suspended loads!<br />
For carrying out overhead assembly work always use specially<br />
designed or otherwise safety–oriented ladders and working<br />
platforms. Never use machine parts as a climbing aid.<br />
Wear a safety harness when carrying out maintenance work<br />
at greater heights. Keep all handles, steps, handrails, platforms,<br />
landings and ladders free from dirt, snow and ice.<br />
Clean the machine, especially connections and threaded<br />
unions, of any traces of oil, fuel or preservatives before<br />
carrying out maintenance/repair. Never use aggressive detergents.<br />
Use lint–free cleaning rags.<br />
Before cleaning the machine with water, steam jet (high–<br />
pressure cleaning) or detergents, cover up or tape shut all<br />
openings which – for safety and functional reasons – must<br />
be protected against water, steam or detergent penetration.<br />
Special care must be taken with electric motors and<br />
switchgear cabinets.<br />
Ensure during cleaning of the machine that the temperature<br />
sensors of the fire– warning and fire–fighting systems<br />
do not come into contact with hot cleaning agents as this<br />
might activate the fire–fighting system.<br />
After cleaning, remove all covers and tapes applied for that<br />
purpose.<br />
After cleaning, examine all fuel, lubricant, and hydraulic<br />
fluid lines for leaks, loose connections, chafe marks and<br />
damage. Any defects found must be rectified without delay.<br />
Always tighten any screwed connections that have been<br />
loosened during maintenance and repair.<br />
Any safety devices removed for set–up, maintenance or repair<br />
purposes must be refitted and checked immediately<br />
upon completion of the maintenance and repair work.<br />
Ensure that all consumables and replaced parts are disposed<br />
of safely and with minimum environmental impact.<br />
Before setting the machine in motion always check that the<br />
accessories have been safely stowed away.<br />
Avoid any operation that might be a risk to machine stability.<br />
Do not step on conveying equipment.<br />
The fastening of loads and the instructing of crane operators<br />
should be entrusted to experienced persons only. The<br />
mars-holler giving the instructions must be within sight or<br />
sound of the operator.<br />
8 EN
Warning of special dangers<br />
Electric energy<br />
Use only original fuses with the specified current rating.<br />
Switch off the machine/plant immediately if trouble occurs<br />
in the electrical system.<br />
Work on the electrical system or equipment may only be<br />
carried out by a skilled electrician himself or by specially<br />
instructed personnel under the control and supervision of<br />
such electrician and in accordance with the applicable electrical<br />
engineering rules.<br />
If provided for in the regulations, the power supply to parts<br />
of machines and plants, on which inspection, maintenance<br />
and repair work is to be carried out must be cut off.<br />
Before starting any work, check the de–energized parts for<br />
the presence of power and ground or short–circuit them in<br />
addition to insulating adjacent live parts and elements.<br />
The electrical equipment of machines/plants is to be inspected<br />
and checked at regular intervals. Defects such as loose<br />
connections or scorched cables must be rectified immediately.<br />
Necessary work on live parts and elements must be carried<br />
out only in the presence of a second person that can cut<br />
off the power supply in case of danger by actuating the<br />
emergency shut–off or main power switch. Secure the working<br />
area with a red– and–white safety chain and a warning<br />
sign. Use insulated tools only.<br />
Before starting work on high–voltage assemblies and after<br />
cutting out the power supply, the feeder cable must<br />
be grounded and components, such as capacitors, short–<br />
circuited with a grounding rod.<br />
EMERGENCY OFF equipment must not be bridged nor set<br />
out of function.<br />
Close area by means of a red and white chain and a warning<br />
panel. Use voltage insulated tools only.<br />
Actuation of the sensors can trigger hazardous machine<br />
functions. Use covers, protective fence or safety light barriers<br />
to prevent access. Set up warning signs.<br />
Plug or unplug quick disconnects only when mains off.<br />
Hydraulic and pneumatic equipment<br />
Work on hydraulic equipment may be carried out only by<br />
persons having special knowledge and experience in hydraulic<br />
systems.<br />
Check all lines, hoses and screwed connections regularly<br />
for leaks and obvious damage. Repair damage immediately.<br />
Splashed oil may cause injury and fire.<br />
Depressurize all system sections and pressure pipes (hydraulic<br />
system, compressed–air system) to be removed in<br />
accordance with the specific instructions for the unit concerned<br />
before carrying out any repair work.<br />
Hydraulic and compressed air lines must be laid and fitted<br />
properly. Ensure that no connections are interchanged. The<br />
fittings, lengths and quality of the hoses must comply with<br />
the technical requirements.<br />
Noise<br />
During operation, all sound baffles must be closed. Always<br />
wear the prescribed ear protectors.<br />
Hazardous substances for humans and the<br />
environment<br />
When handling oil, grease and other chemical substances,<br />
observe the product related safety regulations. Be careful<br />
when handling hot consumables (risk of burning or scalding)!<br />
Mobile Machine<br />
For loading only use lifting gear and tackle of sufficient<br />
capacity. Appoint a competent marshaller to assist in the<br />
lifting operations. Lift machinery and equipment properly<br />
with suitable lifting gear and only in accordance with the<br />
operating instructions (fixing points for lifting tackle, etc.).<br />
Only use suitable means of transport of adequate carrying<br />
capacity. Do not stay or work below suspended loads. Fasten<br />
the loads safely using the suitable fixing points.<br />
Before or immediately after completion of the loading operations<br />
the machine/plant must be secured by means of<br />
recommended/supplied devices against unintentional changes<br />
of position and a corresponding warning sign attached<br />
to the ma-chine/plant.<br />
Before re-commissioning the machine/plant these devices<br />
must be properly removed. Carefully refit and fasten all<br />
parts to be removed for transport purposes before re-commissioning<br />
the machine/plant.<br />
Cut off the external power supply of the machine or plant<br />
even if only minor changes of place are envisaged. Properly<br />
re-connect the machine to the supply mains before<br />
re-commissioning.<br />
9 EN
CYKLOP TEKNIK AB<br />
CYKLOP TEKNIK AB<br />
2. Main machine parts<br />
<br />
<br />
<br />
<br />
<br />
<br />
<br />
<br />
<br />
Machine<br />
plate<br />
Mast<br />
Top plate (optional)<br />
Control cabinet<br />
Prestretch unit<br />
Weld (optional)<br />
Cutter unit<br />
Film retainer arm<br />
Conveyor<br />
(roller conveyor is shown in<br />
the illustration)<br />
Chassis<br />
10 EN
3. Control cabinet<br />
3.1 OVERVIEW<br />
<br />
Pos Type<br />
Rotary switch<br />
Function<br />
Main switch, lockable<br />
<br />
Rotary lamp button<br />
Control voltage<br />
<br />
Lamp pushbutton<br />
Start mode / Alarm reset<br />
<br />
Lamp pushbutton<br />
Automatic<br />
<br />
Pushbutton<br />
Start<br />
<br />
<br />
<br />
Pushbutton<br />
Pushbutton<br />
Machine stop<br />
Emergency stop<br />
<br />
<br />
<br />
<br />
Lamp pushbutton<br />
Control system / Display<br />
Request open door / Part-automatic<br />
Program selection/ Parameter setting<br />
<br />
Light tower<br />
Alarm / Indicator, machine to automatic<br />
3.2 EXPLANATION OF BUTTONS<br />
3.2 EXPLANATION OF BUTTONS<br />
"Main switch on / off"<br />
Switch on or off all power to the machine. Remember<br />
always to switch off the power when working on<br />
the machine.<br />
"Control voltage on / off"<br />
Turn clockwise to switch on the control voltage: the<br />
lamp will come on. (Once you<br />
have turned the main switch,<br />
wait 7 seconds before the control voltage can be<br />
switched on.)<br />
"Start mode / Reset alarm"<br />
Press the lamp button to acknowledge an alarm. If<br />
alarm does not stop, the fault is still present. If you press<br />
the button when there are no alarms, the machine<br />
returns to start mode.<br />
"Automatic"<br />
Press the lamp button to switch to automatic mode.<br />
The lamp comes on. If automatic is enabled and you<br />
press this, the automatic lamp goes off and set the<br />
machine to "part-automatic".<br />
"Machine stop"<br />
Press the stop button and the film cycle comes to a<br />
soft stop. If you hold down the machine stop button<br />
for at least 2 sections, a lamp test is executed which<br />
is controlled via the CPU.<br />
"Emergency stop"<br />
Stops the machine and other connected<br />
equipment. Reset the emergency stop to<br />
restart machine operation. This is done by turning<br />
the button clockwise.<br />
"Request open door / Part-automatic"<br />
Press this button to request door opening.<br />
Automatic operation is interrupted and the machine<br />
continues to the end of the cycle. When this is<br />
complete, the lamp comes on and the door can be<br />
opened.<br />
"Display"<br />
All parameter settings<br />
and program selections are<br />
made here.<br />
"Start"<br />
If the film cycle is interrupted (e.g. because the film<br />
has run out), you can restart it after rectifying the problem<br />
(e.g. loading a film). Once the film cycle is complete,<br />
the pallet remains in place on the machine's conveyor.<br />
If you press "Automatic " at the start of the cycle,<br />
the machine returns to continuous automatic operation.<br />
"Light tower"<br />
When the red light is on, an alarm has been activated.<br />
When the green light is one, the machine is<br />
in automatic mode.<br />
11 EN
3.3 LAMP TEST<br />
A lamp test can be executed by pressing the "Automatic" button and holding it down for more than two seconds. If any of the<br />
buttons with integral lamps does not come on when this test is executed, the lamp is broken. Replace the lamp.<br />
4. Display<br />
4.1 OVERVIEW<br />
4.1.1 GENERAL<br />
<strong>GL</strong> <strong>1000</strong> settings are implemented by navigating in the<br />
pressure-sensitive display.<br />
Some buttons with a dark blue background cannot be pressed and<br />
are there only for information.<br />
Press the relevant button in the display to go to the<br />
required submenu or change a value.<br />
4.1.2 PASSWORDS<br />
Some of the pages cannot be accessed without a password. These<br />
can be accessed by service personnel only, for example.<br />
The login box on the right is displayed if the page is<br />
password-protected. Press to log in. A keypad<br />
then appears in the display. Type your password and then "ENT"; the<br />
login page is then displayed again. Then press to return to the<br />
password-protected page.<br />
4.2 HOME MENU<br />
Continue to the alarm page. When an alarm has been triggered,<br />
the button lamp is red. See section 4.8, page 15.<br />
Continue to pages showing<br />
Cyklop contact information. See section<br />
4.9, page 19.<br />
Continue to the program parameter settings<br />
menu. See section 4.10, page 17.<br />
The above menu is displayed when the machine is started. This<br />
is the top menu, which is called "home menu" from this point on<br />
in the manual.<br />
Continue to the information menu for film.<br />
See section 4.3, page 11.<br />
Continue to the manual operation menu.<br />
See section 4.5, page 12.<br />
1<br />
Displays the selected program. Continue to the program<br />
selection menu. See section 4.11, page 18.<br />
Step up or down to select a program. See section 4.11, page<br />
18.<br />
Continue to the service menu. See section 4.6, page 14.<br />
PROGRAM 1<br />
Displays the selected program.<br />
Continue to the program<br />
selection menu. See<br />
section 4.11, page 18.<br />
12 EN
4.3 INFORMATION MENU FOR FILM<br />
Switches to the previous screen/menu.<br />
Switches to the first information menu. If you are on the<br />
first page, nothing happens.<br />
Displays explanations for the menu page displayed.<br />
Switches to the home menu.<br />
Switches to the next screen/menu.<br />
The<br />
illustration<br />
on the left<br />
shows the first<br />
page below the<br />
information menu.<br />
The information menu<br />
consists of three pages<br />
in total.<br />
Shows on the right the total number of pallets with film<br />
applied.<br />
Resets the number of pallets with film applied. On the<br />
right, you can see the number of pallets with film applied<br />
since the last reset.<br />
Shows the number of metres of film used by the preceding<br />
pallet. Press the button to change film data. (Password<br />
required.)<br />
Shows the number of grams of film used by the preceding<br />
pallet. Requires the correct data to be input for the<br />
film. Press the button to change film data. (Password<br />
required.)<br />
Shows the number of turns for the preceding film application<br />
or the film application in progress.<br />
Switches to the contact information menu.<br />
Switches to the screen containing information on<br />
the degree of prestretch for different gear modes.<br />
Switches to a page with a graphic overview of sensor<br />
status. See section 4.8.2, page 16.<br />
Press to display an explanation on the digits: this will<br />
appear on the right. (See the illustration below.) Return<br />
by pressing "".<br />
Page number two.<br />
Switches to a page with a graphic overview of sensor<br />
status. See section 4.8.2, page 16.<br />
4.4 NAME PROGRAM<br />
Go into the information menu from the home menu, then scroll<br />
to the third page of information by pressing the down arrow.<br />
To edit a program name, press the required program button.<br />
A button pad will be displayed. Type the required name, then press<br />
"ENT".<br />
Page number three.<br />
13 EN
4.5 MANUAL OPERATION<br />
The machine can be operated manually using buttons<br />
in the display. The illustrations shown below may vary slightly<br />
depending on what options are installed on the<br />
machine.<br />
Sometimes manual operation is not possible; when an alarm has<br />
been activated or the film cycle is in progress, for example.<br />
If manual operation is not possible, the button<br />
with .<br />
is replaced<br />
Switches to the previous screen/menu.<br />
Switches to the first manual operation menu.<br />
If you are on the first page, nothing happens.<br />
Indicates whether manual operation is possible.<br />
If a green tick is displayed, manual opertion is possible.<br />
If a red cross is displayed, manual operation is not<br />
possible.<br />
Switches to the home menu.<br />
Switches to the next screen/menu.<br />
Press the relevant button to move the pallet on the<br />
stretch film applicator to the right or<br />
left.<br />
Page number one.<br />
Press the relevant button to move the pallet towards<br />
or away. (Only on machines with the option 90° input<br />
or output transport.) If the board is not in the correct<br />
position, the board is rotated first.<br />
Press the relevant button to rotate the board clockwise<br />
or counterclockwise.<br />
Press the relevant button to open or close the film<br />
clamp.<br />
Page number two.<br />
Press the relevant button to raise or lower the<br />
top plate. (Only on machines with the option: Top plate.)<br />
Press the relevant button to raise or lower the hoist<br />
with the stretch film unit. When moving downwards, the<br />
hoist stops in the starting position.<br />
Page number three.<br />
14 EN
Press the left arrow button to operate the left conveyor<br />
in combination with the shrink film applicator conveyor.<br />
Press the right arrow button to operate the left<br />
conveyor in combination with the shrink film applicator<br />
conveyor.<br />
Press the button with the green tick when the pallet<br />
is in position on the shrink film applicator conveyor.<br />
Page number four.<br />
Positioning has to take place manually as<br />
there is no automatic pallet sensing on the<br />
board.<br />
Manual operation of conveyor. (Optional.) Click on the relevant<br />
conveyor to activate manual operation. The shrink film applicator<br />
conveyor can also be operated manually.<br />
The conveyor is marked when it is activated by means of a green<br />
field which lights up beneath the conveyor. No more than two<br />
adjacent conveyors can be operated simultaneously.<br />
The first two conveyors are activated in the illustration. The first one<br />
also indicates that there is a pallet on the conveyor.<br />
Page number five.<br />
Press the left arrow button to start transport to the left,<br />
or the right arrow button to start transport to the right.<br />
(Requires the machine to have the option installed<br />
which permits transport forwards / back.)<br />
Remove control of top film applicators such as CTFP, TF or PLR.<br />
Applicable to the functions automatic mode and reset. (This page is<br />
included only if the top film applicator option is installed.)<br />
Sets the top film applicator to automatic mode.<br />
Resetting the top film applicator.<br />
Page number six.<br />
15 EN
4.6 SERVICE<br />
The service pages are accessible to service personnel only.<br />
Press to log in. A keypad then appears in the display. Enter your<br />
password and then press "ENT".<br />
4.7 LANGUAGE SELECTION, DATE SET<br />
P r e s s<br />
to access the service menu.<br />
P r e s s<br />
to access the login page.<br />
Then enter your password and close by pressing "ENT".<br />
The service menu screen should now have changed as shown in<br />
the illustration on the left. (The language button should have been<br />
displayed.)<br />
Press to<br />
Language<br />
continue to language selection.<br />
The language selected is shown in the top right corner. If you<br />
want to select a language different to the one selected, click<br />
on the relevant language button to switch to that language.<br />
Input password<br />
& press "ENT"<br />
Language<br />
16 EN
Press<br />
to continue and set the date and time.<br />
The date and time are used to "time-stamp" alarms, among other<br />
things.<br />
Input password<br />
& press “ENT”<br />
Language<br />
4.8 ALARM / STATUS SENSOR<br />
4.8.1 ALARM MESSAGES<br />
Continue to the alarm page. It is possible to press this<br />
button even when no alarm has been triggered. (The lamp<br />
on the button is white in this instance.)<br />
Current alarms are displayed here.<br />
Continue to alarm history.<br />
The alarm history shows the latest alarms triggered.<br />
Current alarms are also displayed as<br />
scrolling text across the bottom of<br />
the display. Displayed in all menus.<br />
17 EN
4.8.2 GRAPHIC OVERVIEW OF SENSOR STATUS<br />
This machine has a function whereby the sensor status is<br />
displayed graphically.<br />
Some sensors are normally in "on" mode, and some sensors are<br />
normally in "off" mode.<br />
Press the relevant part of the machine display to move on to a<br />
more detailed position indication.<br />
See below for a display overview.<br />
The ones with an erroneous status are framed red. Other<br />
sensors affected have a green frame.<br />
To the left, you can see an example of how an erroneous signal<br />
from a sensor might look. If an erroneous signal is displayed, try<br />
to move the machine to start mode and see whether it disappears.<br />
If the erroneous signal is still displayed, the sensor may be faulty.<br />
18 EN
4.9 CONTACT INFORMATION<br />
The contact pages contain information to allow you to contact<br />
your nearest Cyklop company to book a service or place an order for<br />
consumables or spares.<br />
4.10 SETTING PROGRAM PARAMETERS<br />
Values in brackets are max and min values that can be set.<br />
Select a program for parameter editing. (1-9)<br />
Film tension at start of film cycle. (0-90)<br />
Film tension at top of pallet. (0-90)<br />
Film tension in middle of pallet. (0-90)<br />
Page number one.<br />
Film tension at bottom of pallet. (0-90)<br />
Change film pattern. (1-6)<br />
Number of top turns. (0-15)<br />
Number of bottom turns. (1-15)<br />
Rate of film application upwards. (12-75)<br />
Rate of film application downwards. (12-75)<br />
Fig. 2<br />
The above explanations are also available in English in a<br />
submenu (Fig. 2). Press to go to this page.<br />
This explanation menu also includes a submenu with a<br />
graphic explanation (Fig. 3) for the relevant film pattern.<br />
Press or to go to this page.<br />
See section 5.7, page 21 for further information.<br />
Fig. 3<br />
19 EN
Change programs. (1-9)<br />
How high film is to be applied in relation to the top of<br />
the pallet. (0-500)<br />
Page number two.<br />
Value indicating how far down from the top<br />
edge of the pallet film is to be applied. The<br />
value is given in millimetres. Adjustable<br />
values are "0" to "999" mm. The values between "0" and<br />
998 correspond to the number of millimetres from the<br />
top edge of the pallet. If you input a value of "999", the<br />
hoist for the film unit always goes<br />
down to the lowest height for<br />
cutting. (0-999)<br />
Interim speed before rotary board reaches<br />
high speed. (0-999)<br />
Top plate. (Optional.)<br />
Top film. (Optional.)<br />
Top rotary board speed during film cycle. (25-100)<br />
Fig. 2<br />
Weld time. (0.05-2.00)<br />
The above explanations are also available in English in a<br />
submenu (Fig. 2). Press to go to this page.<br />
The next page shows an overview of the<br />
preset program parameters. There is also<br />
space there for noting your own program<br />
settings.<br />
4.11 PROGRAM SELECTION<br />
Programs can be selected in three ways. press 1 , or PROGRAM 1 .<br />
The third way is to step up and down using the arrow up and arrow<br />
down keys ( ).<br />
Step up or down to select a program.<br />
Fig. 2<br />
Displays the selected program. Press the button and a<br />
keypad is displayed. Then select the relevant number<br />
1<br />
and press "ENT".<br />
PROGRAM 1<br />
20 EN<br />
Displays the selected program.<br />
Continue to the program selection<br />
menu. See Fig. 2.<br />
Programs are selected by pressing the relevant program<br />
button. The program number selected is displayed in the bottom<br />
left corner. Programs can also be selected using an external signal<br />
when the machine is in automatic mode.
5. Operate the machine<br />
5.1 STARTUP - START UP THE MACHINE AND RUN IT TO STARTING POSITION<br />
<br />
Make sure that the machine is powered up<br />
and has a compressed air feed to it.<br />
<br />
The lamp for alarms should now have gone<br />
off.<br />
<br />
Check that the emergency stop button is not<br />
depressed.<br />
<br />
The lamp button "Start mode/Alarm reset"<br />
comes on.<br />
<br />
<br />
Turn the main switch. Wait for about 7 seconds<br />
before step 4.<br />
Turn the rotary lamp button "Control voltage"<br />
clockwise.<br />
<br />
The button for semiautomatic operation<br />
in the display has lit up. The display<br />
should look as shown below, possibly<br />
with a different program selection.<br />
The machine is now in start mode and<br />
semiautomatic mode.<br />
<br />
The alarm lamp in the light tower comes on.<br />
<br />
5.2 LOAD FILM<br />
Press the alarm button "Start mode/Alarm<br />
reset". If alarms are shown in the display,<br />
acknowledge these first and then press the<br />
button again. Any parts of the machine which<br />
are not in starting position will be moved to<br />
there.<br />
NOTE: If the machine is placed in an cold environment and equipped with the<br />
-6° or -28° option, keep in mind that the film must have the same temperature<br />
as the surroundings where it will be used. Store the film in the same room as the<br />
machine for at least 24h before use.<br />
1. Check which side of the film is sticky. If the outside is sticky<br />
(most common), the roll of film must rotate counterclockwise (Fig. 1). If the<br />
inside is sticky, it must rotate clockwise (Fig. 2).<br />
2. Insert a new roll of film by pressing it down over the roller "A" (Fig. 3). Take<br />
care to make sure the roll bottoms out. NOTE: Handle the roll of film with<br />
care so as not to damage it, as this may cause the film to break.<br />
Fig. 1.<br />
3. Pull the film as shown in Fig. 1 or 2. The easiest thing to do is fold the end<br />
of the film in four and pull it between the top part of the rollers as shown in<br />
Fig. 3, B (grey area).<br />
4. Secure the end of the film in the clamp on the film retainer arm on the<br />
rotary board on the machine (Figure 4). Press and hold down the valve button "D" to<br />
open the clamp. Note that the clamp will close again as soon as the<br />
valve button is released.<br />
B<br />
Fig. 2. Fig. 4.<br />
Risk of cutting!<br />
The flanges on the<br />
roller may be sharp.<br />
Fig. 3.<br />
A<br />
Warning!<br />
The machine has a number of points where<br />
there is a risk of getting trapped or cut.<br />
Take great care when in the machine's<br />
operating range.<br />
D<br />
21 EN
5.3 SET PRESTRETCH OF FILM<br />
Use the gear control (see the figure on the left) directly above the<br />
roll of film to set different degrees of prestretch.<br />
Gear 1= 60%<br />
Gear 2= 100%<br />
Gear 3= 130%<br />
Gear 4= 160%<br />
Gear 5= 200%<br />
Gear 6= 280%<br />
Gear 7= 340%<br />
Gear 8= 400%<br />
If you select a high gear, the film will be thinner on the pallet goods.<br />
This means less film consumption per pallet, but it also requires a<br />
higher film quality than a lower gear. Start with gear 6, for example,<br />
to see whether the film holds. If it breaks, switch to a lower gear or<br />
a higher film quality.<br />
5.4 SET FILM TENSION<br />
Film tension parameters are set via the display.<br />
See section 4.10, page 19 for information on the buttons.<br />
The film tension is adjustable for every program and for different<br />
parts of the film cycle.<br />
Value set to "0" = Low film tension<br />
Value set to "90" = High film tension<br />
This value corresponds to the percentage reduction in motor torque.<br />
Example:<br />
If a value "25" is set, this is equivalent to the pallet/rotary board<br />
pulling 25% and the motor feeding 75%.<br />
5.5 START THE MACHINE<br />
<br />
IF THE MACHINE HAS A PALLET<br />
STANDING ON THE CONVEYOR<br />
Make sure that the machine is in start mode.<br />
See section 5.1, page 19.<br />
IF THE MACHINE DOES NOT HAVE A<br />
PALLET STANDING ON THE CONVEYOR<br />
<br />
Make sure that the machine is in start mode.<br />
See section 5.1, page 19.<br />
<br />
Select a program. See section 4.11, page 18.<br />
<br />
Select a program. See section 4.11, page 18.<br />
<br />
Press the "Start" button. This needs to be<br />
done only if the machine has a pallet on the<br />
conveyor.<br />
<br />
Press the "Automatic" button to switch to automatic<br />
mode.<br />
<br />
Press the "Automatic" button to switch to automatic<br />
mode.<br />
The machine is now ready for operation and in<br />
automatic mode.<br />
The machine is now ready for operation and in<br />
automatic mode.<br />
22 EN
5.6 PAUSE IN AUTOMATIC MODE<br />
<br />
<br />
Pause in automatic mode can be used if the<br />
operation needs to enter the machine's operating<br />
area.<br />
Press the button "Request open door". This<br />
button then starts to flash.<br />
The machine stops and the lamp for the button<br />
"Request open door" is on continuously.<br />
<br />
<br />
<br />
Check that nobody is present within the safety<br />
fencing before closing the gate.<br />
Acknowledge with the button "Start mode /<br />
Reset alarm".<br />
The lamp for alarms on the light tower should<br />
now have gone off and the button "Start<br />
mode / Reset alarm" comes on.<br />
<br />
Open the gate and do what has to be done.<br />
The alarm lamp comes on at the light tower.<br />
<br />
Press the "Automatic" button to return to automatic<br />
mode.<br />
Warning!<br />
The machine has a number of points where<br />
there is a risk of getting trapped or cut.<br />
Take great care when in the machine's<br />
operating range.<br />
The machine will now continue in<br />
automatic mode from the position<br />
in the sequence<br />
where it was interrupted.<br />
5.7 DESCRIPTION OF FILM PATTERN<br />
Pattern 1 - Dust-protected /<br />
Secure<br />
This film program starts at the bottom<br />
and ends at the top. With the parameter<br />
"Down before cutting" and the<br />
value set to "999", the hoist moves<br />
down to the lowest height for cutting.<br />
(Gives one to two layers of film.)<br />
The number of bottom and top turns, film<br />
tension, film overlap, etc. can be selected<br />
via film parameters.<br />
TS<br />
Topsheet<br />
Pattern 4 - Water-protected (Requires<br />
optional top film equipment)<br />
This film program starts at the bottom,<br />
then pauses at the top where top<br />
film is applied. The film sequence<br />
then continues and can be<br />
terminated at either the top<br />
or the bottom of the pallet.<br />
The number of bottom and top turns, film<br />
tension, film overlap, etc. can be<br />
selected via film parameters.<br />
Pattern 2 - Secure<br />
This film program starts at the bottom,<br />
applies film up to the top and then<br />
applies film down to the bottom and<br />
up to the lowest height for cutting.<br />
(Gives two-and-a-half layers of film.)<br />
The number of bottom and top turns, film<br />
tension, film overlap, etc. can be selected<br />
via film parameters.<br />
Pattern 5 - Custom (Optional)<br />
Pattern 3 - Extra secure<br />
This film program starts at the bottom,<br />
applies film up to the top and then<br />
applies film down to the bottom and ends<br />
at the top. With the parameter<br />
"Down before cutting" and the value<br />
set to "999", the hoist moves<br />
down to the lowest height for<br />
cutting. (Gives three to four layers of<br />
film.)<br />
The number of bottom and top turns,<br />
film tension, film overlap, etc. can be<br />
selected via film parameters.<br />
Pattern 6 - Through-transport<br />
The pallet is transported through the<br />
machine without film being applied.<br />
23 EN
6.1 CLEANING<br />
6. Care and daily maintenance<br />
(Trained personnel only)<br />
Always keep the area inside and around the machine clean and tidy. Get into the habit of checking over the machine at least once a<br />
week, and clean if so required. Use a damp cloth with water and washing-up liquid.<br />
ATTENTION !<br />
The installation should be turned off before<br />
cleaning. Lock the master switch located<br />
on the mast so that the installation<br />
can’t be turned on while cleaning is in<br />
progress.<br />
WARNING !<br />
Ensure that electrical components are<br />
not in contact with water or other liquids.<br />
When the machine is cleaned by<br />
staff other than the operator, eg a cleaner,<br />
he or she must be given instructions<br />
regarding cleaning of the machine<br />
6.2 SERVICE & MAINTENENCE<br />
Within the warranty period, repairs may only<br />
be performed under the supervision of a<br />
technichian of the supplier.<br />
The quality of any replacement part must at least<br />
correspond to the one of the original part (compare specifications).<br />
All parts can be ordered from the manufacturer.<br />
As a precaution, it may be advisable to stock some spare<br />
parts to minimize downtime. Consult the manufacturer. See<br />
”Recommended spare parts list” last in the spare parts section.<br />
The installation consists mainly of standard parts (which<br />
can be purchased on the open market), but also of original<br />
parts (which are available from the manufacturer).<br />
Standard parts:<br />
• Use preferably the same make as the original. If in doubt,<br />
consult the supplier.<br />
Original parts:<br />
• Replacement parts must be ordered from the supplier.<br />
WARNING !<br />
Deviations from the above rules can<br />
have consequences that endanger the<br />
safe operation of the installation and<br />
the warranty period will be forfeited.<br />
The manufacturer is not responsible for<br />
events resulting from such deviations.<br />
SERVICE AND MAINTENANCE<br />
The power should be broken with the<br />
power main switch during service or<br />
maintenance. Also the main switch must<br />
be locked to prevent unplanned actuation.<br />
ELECTRICAL WORKS<br />
Although the power switch is turned off<br />
some electricity may remain in the<br />
installation, eg in capacitors or in the<br />
form of potential energy differences.<br />
Therefore wait a few minutes before<br />
work with electrical wiring can begin.<br />
24 EN
Air and power must be switched off before work may commence on the machine. Make sure that there are no goods on the machine.<br />
To be checked Adjustment and/or lubrication Range<br />
General<br />
Cleaning should be carried out around the rotary board and<br />
unit in order to<br />
minimise the risk of problems<br />
Weekly<br />
To be checked Adjustment and/or lubrication Range<br />
Knife, Catcher<br />
Check that the knife blade (A) is not blunt or cracked.<br />
Replace where necessary.<br />
Check that the blade steels (B) are<br />
not cracked or bent. Replace where<br />
necessary.<br />
As necessary<br />
As necessary<br />
Risk of cutting!<br />
The knife and blade steels are sharp.<br />
Discard any worn-out knives/blade<br />
steels in a container for sharp waste.<br />
Do not discard among ordinary waste.<br />
B<br />
A<br />
To be checked Adjustment and/or lubrication Range<br />
Roll of film<br />
- Brake<br />
A<br />
B<br />
Check the friction brake by pulling on the film at<br />
normal film speed and then suddenly releasing the film.<br />
The roll of film should then stop after approx. 1/5 of a turn.<br />
3 mths<br />
Basic setting: Screw down the nut (A) until the spring washer<br />
(B) is fully compressed.<br />
Then unscrew the nut by (A) ¾ turn.<br />
Lubrication!<br />
Apply a lubricant spray with a<br />
pipe. Avoid applying lubrication in<br />
locations not specified.<br />
25 EN
7. Resetting<br />
7.1 FILM BREAKAGE / END OF FILM<br />
If the film has run out or broken, the machine<br />
goes automatically to its starting position.<br />
The alarm lamp comes on at the light tower.<br />
<br />
The lamp for alarms on the light tower should<br />
now have gone off and the button "Start<br />
mode / Reset alarm" comes on.<br />
<br />
<br />
<br />
<br />
Press the button "Start mode / Reset" to<br />
acknowledge the alarm. The button lights up.<br />
Press the button "Request open door" and<br />
the button will light up.<br />
Open the gate and go in and - if the film has<br />
run out - switch to a new roll of film. If the<br />
film has broken, secure the end of the film in<br />
the film retainer. See section 5.2, page 19 for<br />
further information.<br />
Check that nobody is present within the safety<br />
fencing before closing the gate.<br />
Once the gate is closed, the contactor<br />
automatically applies the gate switch.<br />
Acknowledge by pressing either "Request<br />
open door" or "Start mode / Reset alarm".<br />
<br />
<br />
The button for semiautomatic operation in<br />
the display has lit up. The machine is now in<br />
start mode and semiautomatic mode.<br />
If there is a pallet in the machine which needs<br />
to have film applied again, press the button<br />
"Cycle start" to start the film cycle.<br />
Press the "Automatic" button once the cycle<br />
has started.<br />
When the film cycle is complete, the pallet<br />
will be transported out of the machine and<br />
the machine will continue to operate in<br />
automatic mode.<br />
7.2 MACHINE STOP ACTIVATED<br />
<br />
<br />
If the button "Machine stop" has been<br />
depressed during any sequence, the<br />
sequence in progress will be terminated. The<br />
alarm lamp comes on at the light tower.<br />
Press the button "Start mode / Reset".<br />
Press the button "Start mode / Reset" again.<br />
Any parts of the machine which are not in<br />
starting position will be moved to there.<br />
<br />
<br />
<br />
If there is a pallet in the machine which<br />
needs to have film applied again, press the<br />
button "Cycle start" to start the film cycle.<br />
Press the "Automatic" button once the cycle<br />
has started.<br />
When the film cycle is complete, the pallet<br />
will be transported out of the machine and<br />
the machine will continue to operate in<br />
automatic mode.<br />
7.3 EMERGENCY STOP ACTIVATED<br />
<br />
<br />
<br />
<br />
If the button "Emergency stop" has been<br />
depressed during any sequence, the<br />
sequence in progress will be<br />
stopped immediately and the alarm<br />
lamp will come on at the light tower.<br />
Release the emergency stop button.<br />
Rotate the button "Control voltage" clockwise<br />
to on position. The lamp comes on.<br />
Press the button "Start mode / Reset" to acknowledge<br />
the alarm.<br />
Press the button "Start mode / Reset" again.<br />
Any parts of the machine which are not in<br />
starting position will be moved to there.<br />
<br />
<br />
<br />
<br />
The lamp for alarms on the light tower should<br />
now have gone off.<br />
If there is a pallet in the machine which needs<br />
to have film applied again, press the button<br />
"Cycle start" to start the film cycle.<br />
Press the "Automatic" button once the cycle<br />
has started.<br />
When the film cycle is complete, the pallet<br />
will be transported out of the machine and<br />
the machine will continue to operate in automatic<br />
mode.<br />
26 EN
7.4 LIGHT BEAM WHICH HAS TRIPPED (OPTIONAL)<br />
<br />
<br />
In some cases, a reset can be executed<br />
without going into the machine's operating<br />
range. The following description is applicable<br />
if the operator needs to go in to reset light<br />
boom.<br />
Open the gate. The alarm lamp comes on at<br />
the light tower. Go in and reset light boom.<br />
When the gate is closed, acknowledge with<br />
the button "Start mode / Reset alarm".<br />
<br />
<br />
The lamp for alarms on the light tower should<br />
now have gone off and the button "Start<br />
mode / Reset alarm" comes on.<br />
If the machine was in automatic mode before<br />
the pause in automatic mode, press the<br />
button "Automatic".<br />
The machine will now continue at the point<br />
where it left off in the automatic sequence.<br />
The machine will continue working in automatic<br />
mode.<br />
27 EN
8. General troubleshooting<br />
8.1 TROUBLESHOOTING<br />
Problem<br />
If nothing works<br />
Action<br />
Check that the machine is powered up and that the main switch and the rotary knob for control<br />
voltage are set to position "1". Try holding down "Machine stop" for 3 s.<br />
Then press "Reset". Run to starting position.<br />
Error message "A2", main contactor not on, check that the emergency stop is not depressed. If it is,<br />
turn the button clockwise to release it.<br />
If the film breaks Check that the roll of film has sustained no damage. Replace the roll of film if it has. See section 7.1,<br />
page 23 for resetting.<br />
If the rotary board stops<br />
in the wrong position<br />
If the film is not applied<br />
right up to<br />
the top of the goods<br />
The display is not working.<br />
The hoist does not operate<br />
and gives error message<br />
"A15", "A16" or "A4"<br />
Press the button "Start mode / Reset alarm" to return the rotary table to home position.<br />
Check the goods height sensor. Check the film application settings: read "Display - Pallet parameters"<br />
(password required).<br />
The machine can be run, but only with the latest cycle setting (program selection) run. Contact<br />
Cyklop.<br />
The obstruction protection under the hoist or cutting unit may be activated. Check that there is nothing<br />
under the hoist or cutting unit. With error message "A4", check the hoist pulse sensor.<br />
28 EN
9. Transport<br />
9.1 TRANSPORT<br />
The machine must be transported by truck. The machine can be<br />
lifted from the long sides or from the front. Do not lift from the side<br />
with the electrical cabinet. See illustrations.<br />
If the machine is lifted from the side, the truck must have forks<br />
which reach through the entire machine chassis.<br />
If the machine is lifted from the front, the truck must have forks<br />
long enough to reach the centre beam (A).<br />
Lift the machine carefully and transport it slowly.<br />
Risk to life!<br />
Remaining under any type of<br />
suspended load, or working<br />
there, may risk your life!<br />
A<br />
Service area: Minimum of 1 m around the machine is needed for service.<br />
The service places of the machine must be reachable by approved<br />
person lift or similar, alternatively, the customer takes responsibility<br />
that the machine’s service can be performed. NOTE! This will then<br />
be determined at the time of procurement.<br />
Transport<br />
National rules and regulations must be observed when transporting<br />
Cyklop film stretch machines and accessories.<br />
Individual parts and large components are carefully fixed during<br />
delivery. When the machine is assembled or moved, great care<br />
must be taken. Check that the lifting device is designed to take the<br />
weight and does not pose a safety risk.<br />
Only approved lifting devices with a lifting capacity greater than<br />
the total weight of the machine, plus packaging, may be used.<br />
Dimensions and weight<br />
The delivery note with the goods includes details on the weight and<br />
dimensions of the goods.<br />
General rules<br />
Unless stated otherwise, all parts must be transported in their original<br />
packaging to the installation site. When unpacked, all parts<br />
must be examined so that any transport damage can be found. If<br />
the goods have been damaged in transit, the shipping agent must<br />
be contacted immediately and unpacking must be stopped.<br />
Transport damage<br />
Any damage to the goods must<br />
be noted on the delivery note<br />
when the goods are received.<br />
No exceptions!<br />
Risk of damage!<br />
The centre of gravity of the machine may be high,<br />
which increases the risk of the machine tipping<br />
over. Check carefully where the centre of gravity<br />
is so as to eliminate the risk of tipping.<br />
29 EN
10. Technical specifications<br />
Machine<br />
Capacity<br />
Rotary board speed<br />
Hoist speed<br />
Temperature range<br />
Safety class<br />
Max 80 pallet/h (depending on goods type)<br />
Max 23 r/min<br />
Max. 0.6 m/s<br />
+5 to +35°C, for use in a dry, tempered area<br />
2<br />
Electricity<br />
Connection<br />
Output<br />
Safety norm<br />
EX-classification<br />
3x400 V + N + PE, 50 Hz<br />
t.b.a. kW<br />
IP54<br />
Not approved for ATEX classified areas<br />
Pallet goods<br />
Min size (length x width)<br />
Max size (length x width)<br />
Lowest inc. pallet<br />
Height inc. pallet<br />
Weight<br />
0.4 x 0.6 m<br />
1.2 x 1.2 m or 1.4 x 1.0 m<br />
>500 mm (depending on goods type)<br />
Std. height 2500 mm<br />
Max 1500 Kg<br />
<strong>Stretch</strong> film<br />
Diameter, core<br />
Outer diameter, max<br />
Film width, max<br />
Film thickness<br />
76.4 mm +-<br />
250 mm<br />
500 mm<br />
12-25 my, 20 my recommended<br />
The above values apply to standard machines. These values may differ if the machine is<br />
fitted with additional options.<br />
30 EN
11. Table of set values, program parameters<br />
Film parameters<br />
Prog 1 Prog 2 Prog 3 Prog 4 Prog 5 Prog 6 Prog 7 Prog 8 Prog 9<br />
1 1 1 6<br />
10 10 10<br />
15 15 15<br />
15 15 15<br />
15 15 15<br />
2 2 2<br />
3 3 3<br />
35 35 35<br />
35 35 35<br />
75 75 75<br />
100 999 999<br />
75 75 75<br />
60 60 60<br />
1,00 1,00 1,00<br />
No No No<br />
No No No<br />
31 EN
Version log<br />
1.0 Initial release<br />
1.1 Version log added.<br />
EC declaration updated according to new machine directive.<br />
2.0 EG-declaration updated with SS-EN 415-6, Packaging machines<br />
safety.<br />
General safety instructions uppdated with unauthorized use.<br />
Installation updated with service area.<br />
2.1 Temperature information for stretch film handling added.<br />
32 EN
33 EN
Ver. 1.0<br />
English<br />
Deutsch<br />
Svenska<br />
Art.no: 961010EN
![[1.4 CONTROL MOTOR] (drC-)](https://img.yumpu.com/50024176/1/184x260/14-control-motor-drc.jpg?quality=85)


![[1.5 in-/utgångskonfig.] (io-)](https://img.yumpu.com/32675802/1/184x260/15-in-utgaangskonfig-io.jpg?quality=85)