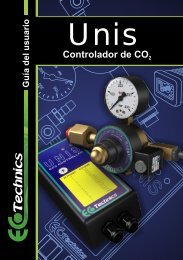
Horticultural CO Controller - Ecotechnics
Horticultural CO Controller - Ecotechnics
Horticultural CO Controller - Ecotechnics

You also want an ePaper? Increase the reach of your titles
YUMPU automatically turns print PDFs into web optimized ePapers that Google loves.
ar<br />
User Guide<br />
400<br />
Revision 25th October 2012<br />
Unis<br />
Page 9 new FAQ section<br />
<strong>Horticultural</strong> <strong>CO</strong> <strong>Controller</strong><br />
2<br />
300<br />
0<br />
200<br />
100<br />
UNIS
Introduction<br />
Thank you for purchasing the <strong>Ecotechnics</strong> Unis <strong>CO</strong> <strong>Controller</strong>. In order to<br />
2<br />
take full advantage of your new controller, please read this manual carefully<br />
and use the product as directed.<br />
Carbon dioxide (<strong>CO</strong> ) is a colourless, odorless gas that occurs naturally in our<br />
2<br />
environment. It is normally present in the atmosphere at a concentration of<br />
approximately 0.036% or 360 PPM.<br />
Carbon dioxide in our atmosphere is known as a "greenhouse" gas. This naturally<br />
occurring gas, along with hydrogen vapor, methane, nitrous oxide, and ozone act<br />
something like the glass walls and ceiling of a greenhouse. It lets sunlight in to keep<br />
things warm, but it doesn't let the heat escape. That's why scientists began to call gases<br />
"greenhouse" gases because of their warming effect on the earth. If it were not for these<br />
greenhouse gases, scientists predict that our planet would be un- inhabitable with an<br />
average temperature of about -23°C.<br />
Although it comprises a very small percentage of our atmosphere, it is vital for nearly all<br />
forms of life. Without <strong>CO</strong> 2 we would probably not exist because carbon dioxide is the<br />
principle inorganic compound that plants use to construct their tissues. Consequently, we<br />
derive our energy resources by either consuming plants directly, or indirectly when we<br />
eat the animals that consume the plants. Therefore, it is clear that carbon dioxide<br />
enhances and makes possible the very existence of life on earth. As a vital atmospheric<br />
ingredient, <strong>CO</strong> 2 makes our planet a place where all forms of life may flourish.<br />
Many growers fail to recognize the importance of Carbon Dioxide in their growroom.<br />
most plants grow faster and larger with enhanced <strong>CO</strong><br />
2<br />
levels because of more efficient<br />
photosynthesis and a reduction in water loss. There are also many other benefits for<br />
plants, among them greater resistance to temperature extremes and other forms of<br />
stress, better growth at low light intensities, improved root/top ratios & less injury from air<br />
pollutants.<br />
Photosynthesis is the term used to describe the process by which plants combine <strong>CO</strong> 2<br />
molecules with water molecules to form complex sugars, there is a resultant spare<br />
oxygen atom which is released back into the air, the sugars being further processed by<br />
the plant to form natural polymers for growth. The ambient level of <strong>CO</strong> in air is 300-400<br />
2<br />
PPM, fast growing plants in your growroom or glasshouse can use all the available <strong>CO</strong> 2<br />
in less than an hour slowing photosynthesis and therefore growth to a virtual halt.<br />
It can be seen that the rate at which plants are able to grow is relative to the availability<br />
of photosynthesized complex sugars. Raising the ambient <strong>CO</strong> 2 level in your growroom<br />
causes more sugars to be produced allowing the plant to grow bigger and faster. The<br />
optimum level of <strong>CO</strong> 2 for plant growth is generally accepted at 1200-1600 PPM, plants<br />
grown in this environment can grow up to 40% faster thus shortening crop times and<br />
increasing yields. This is of course assuming no other limiting factors such as lack of<br />
available light etc.<br />
It should be noted that there is no advantage to increasing <strong>CO</strong> levels beyond 2000<br />
2<br />
PPM for most greenhouse plant species. It should also be noted that there is<br />
generally no advantage to raising <strong>CO</strong> levels during dark hours.<br />
2<br />
1
Unis <strong>CO</strong> Regulator Diagrams<br />
2<br />
Unis Regulator<br />
7<br />
100<br />
0<br />
200<br />
300<br />
bar 400<br />
5<br />
1<br />
To Gas Bottle<br />
2<br />
3<br />
Safety Valve<br />
Solenoid Valve<br />
1<br />
6<br />
4<br />
4<br />
5<br />
Output<br />
Pressure Gauge<br />
6<br />
7<br />
Main body<br />
Fibre Washer<br />
2<br />
3<br />
Note: The Regulator is preset to deliver 17 litres per minute (no need to adjust)<br />
Unis <strong>Controller</strong><br />
1<br />
2<br />
3<br />
UNIS<br />
1<br />
2<br />
3<br />
4<br />
5<br />
6<br />
Power LED<br />
Dose LED<br />
Room Size Setting Dial<br />
Power Input<br />
2<br />
Output to <strong>CO</strong> Regulator<br />
Room Calculation Chart<br />
6<br />
2<br />
5 4
Setting up the Unis <strong>CO</strong> System<br />
2<br />
Preparations<br />
Before you set up your UNIS <strong>CO</strong> 2 controller you will need to find out the cubic volume of your<br />
growing area. Once calculated and set this will enable the Unis <strong>CO</strong> 2 <strong>Controller</strong> to introduce the<br />
optimum amount of <strong>CO</strong> 2 for your plants.<br />
Use the example below as a guide on how to measure, calculate and then adjust the controller to<br />
the appropriate setting needed for your room using a small screw driver.<br />
length x width x height = internal cubic volume of the room<br />
Example Room Volume Calculation<br />
The illustration below shows a typical example of a room, in this case the room<br />
measures 5M in length, 3M in width and 2.5M in height.<br />
5 x 3 x 2.5 =<br />
3<br />
37.5 M<br />
Setting<br />
Growroom Volume<br />
0 1 Cubic metre<br />
1 2 Cubic metres<br />
2 4 Cubic metres<br />
3 6 Cubic metres<br />
4 8 Cubic metres<br />
5 10 Cubic metres<br />
6 15 Cubic metres<br />
7 20 Cubic metres<br />
8 25 Cubic metres<br />
9 30 Cubic metres<br />
A 35 Cubic metres<br />
B 40 Cubic metres<br />
C 45 Cubic metres<br />
D 50 Cubic metres<br />
E 75 Cubic metres<br />
F 100 Cubic metres<br />
1<br />
2<br />
3<br />
To calculate your grow room volume, measure your room in length width and height<br />
in metres, then multiply the length width and height measurements to obtain the<br />
cubic volume of your room.<br />
3<br />
Example: 5 x 3 x 2.5 = 37.5 M<br />
Once you have your room volume, use the Unis <strong>CO</strong> chart to find the nearest<br />
2<br />
corresponding setting.<br />
Dial in the required setting on the Unis <strong>CO</strong> <strong>Controller</strong> using a small screw driver,<br />
2<br />
Example: You would turn the arrow clockwise to line up with ‘B’ as seen in the<br />
diagram below as 40 cubic metres is the nearest setting.<br />
Initial factory setting<br />
Set arrow to point toward ‘B’<br />
for example room above<br />
3
Easy Setting chart for Secret Jardin Grow Tents<br />
Choose your Secret Jardin tent from the list,<br />
then simply dial in it’s setting<br />
Setting 0 Volume 0 m<br />
3<br />
0<br />
3<br />
Nearest Secret Jardin Tent Volume m<br />
0<br />
3<br />
1 m<br />
0 DS60, DS90, DR60 , DR60Twin<br />
1<br />
3<br />
2 m<br />
0<br />
DS120, DR90, DR120, DR120Twin<br />
2<br />
3<br />
4 m<br />
0<br />
DS150, DR150<br />
3<br />
3<br />
6 m<br />
0<br />
DR240w, INT120<br />
4<br />
3<br />
8 m<br />
0<br />
5<br />
3<br />
10 m<br />
0<br />
DR300w, INT150<br />
6<br />
3<br />
15 m<br />
0<br />
DR240, INT240<br />
7<br />
3<br />
20 m<br />
0<br />
DR300, INT300<br />
8<br />
3<br />
25 m<br />
0<br />
INT480<br />
9<br />
3<br />
30 m<br />
0<br />
A<br />
3<br />
35 m<br />
0<br />
B<br />
C<br />
D<br />
E<br />
F<br />
3<br />
40 m<br />
3<br />
45 m<br />
3<br />
50 m<br />
3<br />
75 m<br />
3<br />
100 m<br />
0 INT600<br />
4
Secret Jardin Grow Tents Volume<br />
Dark Street II<br />
3<br />
DS60 0.5m<br />
DS90 1.29m<br />
DS120 2.59m<br />
DS150 4.56m<br />
Dark Room II<br />
3<br />
DR60 0.57m<br />
3<br />
DR90 1.46m<br />
3<br />
DR120 2.88m<br />
3<br />
DR150 4.5m<br />
DR240 11.52m<br />
3<br />
DR300 18m<br />
3<br />
DR240w 5.76m<br />
3<br />
DR300w 9m<br />
Dark Room Twin<br />
DR60T 1.25m<br />
DR120T 2.16m<br />
INTense<br />
3<br />
INT120 6.19m<br />
INT240 12.38m<br />
INT480 24.76m<br />
3<br />
INT150 9.67m<br />
INT300 19.34m<br />
3<br />
INT600 38.6m<br />
3<br />
3<br />
3<br />
3<br />
3<br />
3<br />
3<br />
3<br />
3<br />
5
Connecting up the Unis <strong>CO</strong> <strong>Controller</strong><br />
2<br />
1<br />
Bolt the brass regulator onto a <strong>CO</strong> bottle.<br />
2<br />
Make sure you have the Fibre washer on before<br />
you tighten up the connection to the gas bottle.<br />
Fibre Washer<br />
100<br />
0<br />
200<br />
300<br />
bar 400<br />
<strong>CO</strong> Cylinder<br />
2<br />
2<br />
3<br />
Plug the Unis <strong>Controller</strong> flying lead into the<br />
regulator, not forgetting the rubber seal.<br />
Secure the plug to the regulator via the<br />
internal fixing screw.<br />
100<br />
0<br />
200<br />
300<br />
bar 400<br />
<strong>CO</strong> Cylinder<br />
2<br />
Fixing Screw<br />
Rubber Seal<br />
4<br />
UNIS<br />
The Unis controller<br />
can now be plugged<br />
into the power source.<br />
Wire connection diagram for<br />
angled plug on Regulator<br />
Brown: Live<br />
Blue: Neutral<br />
Green/Yellow: Earth<br />
Mains<br />
Power<br />
6
Setting up the Unis <strong>CO</strong> System<br />
2<br />
Grow Room Usage<br />
Generally for indoor grow room usage the Unis <strong>CO</strong> controller would be plugged in with<br />
2<br />
the lighting system supply so that it only works when the lights are switched on.<br />
Glass House Usage<br />
For glass house use the Unis <strong>CO</strong> 2 controller should be connected to a 24 Hour timer in<br />
order to turn it off during dark hours as there is no benefit to raising <strong>CO</strong><br />
2<br />
levels during<br />
darkness.<br />
7
Unis <strong>CO</strong>2 with 24 hour Timers and Contactors<br />
Once you have set your Unis <strong>CO</strong><br />
2<br />
<strong>Controller</strong> with the appropriate room size,<br />
connected the Regulator and <strong>CO</strong> gas bottle you can now connect the Unis to<br />
2<br />
the power supply..<br />
The Unis controller should only be dosing <strong>CO</strong> during the day cycle when using<br />
2<br />
lighting (plants do not process <strong>CO</strong> at night/when lights are off)<br />
2<br />
To control your Unis and your lighting setup for day cycle use we recommend<br />
the <strong>Ecotechnics</strong> Powerstar Pro range as they have a easy to use 24 hour timer<br />
and a suitable heavy duty contactor combined.<br />
Carbon Dioxide Safety<br />
Exterior Levels of Carbon Dioxide:<br />
Ordinary outside air normally contains <strong>CO</strong> 2 at a concentration of about 300 to 400ppm (300 parts of<br />
<strong>CO</strong> 2 gas per million parts of air.)<br />
Interior Levels of Carbon Dioxide:<br />
Indoors, however, whether we're at home, office, or traveling in a confined space like a plane, the<br />
<strong>CO</strong> 2 content can vary considerably.<br />
Usually in a home, the <strong>CO</strong> 2 levels can vary from 300 up to 2000 ppm.<br />
Several studies have indicated that <strong>CO</strong> 2 does not seriously impact human health until levels reach<br />
approximately 15,000 ppm. This level is more than 40 times greater than the normal concentration<br />
of atmospheric <strong>CO</strong> 2. At extremely high levels, i.e., 30,000 ppm, (these concentrations are usually<br />
never be reached in a standard home) the symptoms can include nausea, dizziness, mental<br />
depression, shaking, visual disturbances and vomiting.<br />
At extremely high levels, loss of consciousness may occur. The seriousness of the symptoms is<br />
dependent on the concentration of Carbon Dioxide and the length of time the individual is exposed.<br />
<strong>CO</strong> 2 - Denser Than Air<br />
Gaseous Carbon Dioxide is 1.5 times denser than air. Therefore, it will be found in greater<br />
concentrations at low levels.<br />
High concentrations of <strong>CO</strong> 2 can displace oxygen, and can subsequently cause death especially if<br />
allowed to accumulate in open pits and other areas below ground. Carbon Dioxide acts upon our<br />
vital bodily functions in a number of ways, including stimulating respiration, regulation of blood<br />
circulation, and the acidity of body fluids.<br />
Common complaints from increases in <strong>CO</strong> 2 levels include difficulty in breathing, increase in the<br />
breathing rate and/or pulse rate, headaches, sweating, shortness of breath, abnormal fatigue and a<br />
feeling of "stuffiness". Introduction of fresh air can assist in eliminating these problems.<br />
Finally, <strong>CO</strong> 2 is an asphyxiate, a condition in which an extreme decrease in the amount of oxygen in<br />
the body, accompanied by an increase of carbon dioxide, leads to loss of consciousness or death.<br />
Concentrations of 100,000 ppm or more of <strong>CO</strong> 2 can produce unconsciousness or death.<br />
STANDARDS AND RE<strong>CO</strong>MMENDATIONS FOR <strong>CO</strong> 2 EXPOSURE<br />
The Occupational Safety and Health Administration (OSHA) has set a standard for the maximum<br />
allowable concentration of carbon dioxide in the air of 0.5% (5000 ppm) for eight continuous hours<br />
of exposure. The maximum time weighted average exposure to carbon dioxide in the air is set at<br />
1.0% (10,000 PPM) for a ten hour shift in a 40 hour week.<br />
8
Understanding how the Unis controller works:<br />
Let’s take a closer look at understanding how the UNIS operates in delivering Carbon<br />
Dioxide into your Grow room.<br />
Example Grow Tent:<br />
For this example we’ll choose a Secret Jardin DR240 as the Grow Tent we wish to use<br />
Our Unis <strong>CO</strong> controller in.<br />
2<br />
Grow Tent size<br />
3<br />
DR240 has a cubic capacity of 15m . Looking on the chart on page 4 we see that we<br />
need to choose setting 6 on the Unis controller .<br />
Choosing setting 6 means that the Gas Regulator will dose each time for apx. 6 seconds.<br />
How much <strong>CO</strong> per dose<br />
2<br />
The Gas regulator has a preset Gas delivery rate of 17ltrs per minute.<br />
Setting number 6 on the Unis doses for 6 seconds, that’s 1 tenth of a minute.<br />
So the amount of <strong>CO</strong> released per dose is 1.7ltrs of <strong>CO</strong> Gas into your grow tent.<br />
2 2<br />
How often does the UNIS dose<br />
The timer in the Unis is preset to make a dose every 240 seconds (4 minutes)<br />
You can further regulate this by plugging the Unis into a 24hour timer so that it is only<br />
powered ON in the DAY cycle for example.<br />
When should the UNIS dose<br />
The Unis is designed to ideally dose <strong>CO</strong> 2 into a grow tent after an air extraction.<br />
The new air introduced after an extraction event will fill the room with clean fresh air that<br />
should have a background level of around 300 to 400ppm.<br />
What will the <strong>CO</strong>2<br />
PPM level in the grow tent be using a UNIS<br />
Using our example grow tent:<br />
3<br />
Dosing <strong>CO</strong> 2 for 6 seconds in a grow tent of around 15m volume should raise the <strong>CO</strong> 2<br />
ppm up from a background level of apx. 400ppm up to around 1600ppm and so give<br />
your plants a excellent boost of Carbon Dioxide.<br />
Things to take into account:<br />
• The optimum time to dose is after an air extraction event during the day cycle.<br />
• How air tight is the grow tent<br />
• Please Note: A leaky tent or open zips will allow the <strong>CO</strong> 2 to exit the tent<br />
• How many plants are in your grow tent<br />
• 1 plant will use a small amount of <strong>CO</strong> 2 but 40 plants will use much more <strong>CO</strong>2<br />
• What stage of development are your plants<br />
• How are you distributing the gas from the regulator (perforated hose for example)<br />
• Do you have a small fan (not extraction) to stir the air in the grow tent to mix the <strong>CO</strong>2<br />
evenly<br />
• What height do you release the <strong>CO</strong> 2 in the tent<br />
NEW PAGE<br />
October 2012<br />
• <strong>CO</strong> 2 is heavier than Air: so will tend to sink to the lower part of the grow tent in “still air” conditions.<br />
• Having an extraction event shortly a dose: This will drop the level of <strong>CO</strong>2 in the tent.<br />
• No need to dose during the night cycle of the plants.<br />
• Plants do not take up <strong>CO</strong> 2 in the night cycle<br />
What the UNIS Carbon Dioxide <strong>Controller</strong> does NOT do!<br />
• Unis does do not constantly measure/control the level of carbon dioxide. (no analyser)<br />
• If you wish to monitor and control the levels of <strong>CO</strong> 2 use our Evolution <strong>CO</strong> 2 <strong>Controller</strong><br />
9
Gas Regulator Safety Advice<br />
200<br />
100<br />
300<br />
0<br />
bar<br />
400<br />
Only experienced and properly trained persons should handle compressed gases, they should be<br />
conversant with relative safely instructions including the current British compressed Gases<br />
Association code of practice CP7 and the gas safety instructions from the gas supplier.<br />
Markings<br />
The regulator is marked with the following:-<br />
Ÿ Maximum inlet pressure (pressure service)<br />
Ÿ Rated outlet pressure<br />
Ÿ Gas (only use for gas shown)<br />
Fitting to the cylinder<br />
Before fitting the regulator, ensure both the cylinder outlet valve and the regulator inlet are clean<br />
and free from contaminants including dirt, oil and water. If fitted, fully release the regulator<br />
adjusting knob by winding anticlockwise prior to fitting to the cylinder. Right hand thread is<br />
employed for oxygen and permanent gases and left hand thread is used for fuel gases. Use only<br />
the correct size spanner and finally tighten by applying 2 blows to the end of the spanner with the<br />
heel of the hand.<br />
Operating<br />
After fitting of the downstream equipment, open the cylinder valve slowly, this is a critical operation<br />
and must be done slowly to be safe. If fitted, adjust the regulator knob to the required outlet<br />
pressure and purge hoses, make the final adjustment when gasses are flowing. It is vital to ensure<br />
that any audiable vibration or freezing of the regulator is avoided during operation. Check for leaks<br />
at all joints with a leak detection spray. On completion of use, close the cylinder valve and exhaust<br />
gas from lines.<br />
If fitted, fully release regulator pressure adjusting knob.<br />
Safety points<br />
Carefully inspect the regulator for oil, grease and damaged or dirty parts. Oxygen vigorously<br />
supports combustion, never use the regulator if oil, grease or damaged parts are detected.<br />
Never:<br />
Never use a regulator showing any signs of damage<br />
Never allow cylinders to become heated<br />
Never use pressure gauges that are damaged, not smooth in operation or not zeroing<br />
Never remove or change any component parts of a regulator.<br />
Always:<br />
Always check the whole system for damage and leaks at frequent intervals<br />
Always work to BCGA codes of practice ( to purchase copies, telephone 01491 825533)<br />
Always fit a flashback arrestor to the outlet of an oxygen or fuel gas cylinder.<br />
10
Safety Advice<br />
---- ALWAYS OBSERVE THE FOLLOWING ----<br />
When connecting / disconnecting all cables, grasp the connector itself—never pull on the<br />
cable. This way you will avoid causing shorts, or damage to the cable’s internal elements.<br />
Do not excessively twist or bend the power cord, or place heavy objects on it. Doing so can<br />
damage the cord, producing severed elements and short circuits. Damaged cords are fire and<br />
shock hazards!<br />
In households with small children, an adult should provide supervision which is essential for<br />
the safe operation of any electrical appliances in the home.<br />
All cords and cables should be placed so they are out of the reach of children.<br />
Try to prevent cords and cables from becoming entangled.<br />
Before moving the unit, disconnect the power cable from the mains supply and any cords<br />
coming from external devices.<br />
Never handle an AC adaptor or electrical plugs with wet hands when plugging into, or<br />
unplugging from, an outlet or this unit.<br />
Before cleaning the unit, turn off the power and unplug the AC adaptor from the outlet.<br />
Do not force the unit’s power-supply cord to share an outlet with an unreasonable number of<br />
other devices.<br />
Be especially careful when using extension cords—the total power used by all devices you<br />
have connected to the extension cord’s outlet must never exceed the power rating<br />
(watts/amperes) for the extension cord. Excessive loads can cause the insulation on the cord<br />
to heat up and eventually melt through.<br />
Protect the unit from strong impact.(Do not drop it!)<br />
Jan 2012 document revision<br />
Before using the unit in a foreign country, consult with your retailer or an authorized<br />
distributor.<br />
Whenever you suspect the possibility of lightning in your area, disconnect the unit from the<br />
power outlet.<br />
Do not attempt to repair the unit, or replace parts within it. Refer all servicing to your retailer<br />
or an authorized distributor.<br />
When moved from one location to another where the temperature and/or humidity is very<br />
different, water droplets (condensation) may form inside the unit. Damage or malfunction may<br />
result if you attempt to use the unit in this condition. Therefore, before using the unit, you<br />
must allow it to stand for several hours, until the condensation has completely evaporated.<br />
Please note you will find the latest revision of any of our<br />
User Guides on the <strong>Ecotechnics</strong> website located in the downloads area<br />
below:<br />
http://www.ecotechnics.co.uk/downloads.htm<br />
11
SAFETY <strong>CO</strong>NSIDERATIONS<br />
Always make sure the unit is unplugged before attempting to connect the fan<br />
and/or heater to the unit.<br />
200<br />
100<br />
300<br />
Always check that all cables are correctly and securely connected and that the<br />
cover is securely screwed on before plugging the unit in and turning the power<br />
on.<br />
Always Remember that Electricity and Water is an Extremely Dangerous<br />
Combination. Electricity can be fatal especially in the presence of water.<br />
It is strongly recommended that any electrical equipment used in the growing<br />
environment is mounted above ground level, on a shelf or if possible wall<br />
mounted so that in the event of water spillage or flooding the two remain<br />
separate.<br />
bar<br />
400<br />
0<br />
POWER <strong>CO</strong>NSUMPTION<br />
SUPPLY VOLTAGE<br />
15 WATTS MAX<br />
230-240V AC<br />
E<strong>CO</strong>TECHNICS PRODUCT GUARANTEE<br />
Thank you for choosing an <strong>Ecotechnics</strong> product for use in your growroom.<br />
As leading manufacturers of horticultural equipment and accessories we<br />
are committed to providing a range of innovative products to enhance your<br />
garden. Our commitment to quality is second to none, however if you do<br />
experience any problem all our products are covered with a full 1 year<br />
parts & labor guarantee and should be returned to the retailer along with<br />
the original purchase receipt .<br />
<strong>Ecotechnics</strong> UK Ltd is not liable for labor costs involved in the installation<br />
or removal of the product, lost profits, incidental or consequential loss,<br />
injury to property or persons or any other consequential loss however<br />
caused.<br />
UNIS<br />
Shop / Dealer<br />
D D<br />
Purchase Date<br />
M M Y<br />
Y<br />
Serial Number U C<br />
www.ecotechnics.co.uk