The Juice & Blend - Breville
The Juice & Blend - Breville
The Juice & Blend - Breville

You also want an ePaper? Increase the reach of your titles
YUMPU automatically turns print PDFs into web optimized ePapers that Google loves.
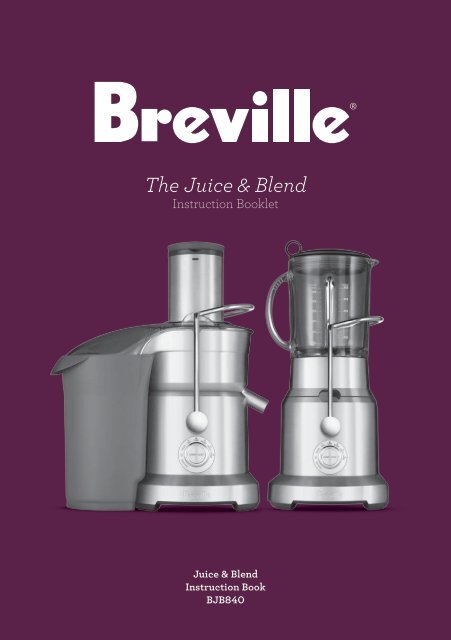
<strong>The</strong> <strong>Juice</strong> & <strong>Blend</strong><br />
Instruction Booklet<br />
<strong>Juice</strong> & <strong>Blend</strong><br />
Instruction Book<br />
BJB840
CONGRATULATIONS<br />
On the purchase of your new<br />
<strong>Breville</strong> <strong>Juice</strong> & <strong>Blend</strong>
Contents<br />
4 <strong>Breville</strong> recommends safety first<br />
7 How to Use as a <strong>Juice</strong> Extractor<br />
8 Know your <strong>Breville</strong> <strong>Juice</strong> Extractor<br />
10 Assembling the <strong>Juice</strong> Extractor<br />
13 Operating the <strong>Juice</strong> Extractor<br />
17 Disassembling the <strong>Juice</strong> Extractor<br />
20 Cleaning the <strong>Juice</strong> Extractor<br />
22 <strong>Juice</strong> Extractor Troubleshooting<br />
27 How to Use as a <strong>Blend</strong>er<br />
28 Know your <strong>Breville</strong> <strong>Blend</strong>er<br />
30 Assembling the <strong>Blend</strong>er<br />
33 Operating the <strong>Blend</strong>er<br />
37 Disassembling the <strong>Blend</strong>er<br />
39 Cleaning the <strong>Blend</strong>er<br />
41 <strong>Blend</strong>ing tips<br />
43 <strong>Blend</strong>er Troubleshooting<br />
47 Recipes<br />
69 One year limited warranty<br />
3
<strong>Breville</strong> recommends safety first<br />
At <strong>Breville</strong> we are very safety conscious. We design and manufacture consumer products with<br />
the safety of you, our valued customer, foremost in mind. In addition we ask that you exercise<br />
a degree of care when using any electrical appliance and adhere to the following precautions.<br />
Important safeguards<br />
Read all instructions<br />
BEFORE USE AND SAVE FOR<br />
FUTURE REFERENCE<br />
• Carefully read all instructions before<br />
operating the appliance for the first time<br />
and save for future reference.<br />
• Remove and safely discard any<br />
packaging materials and promotional<br />
labels before using the appliance for the<br />
first time.<br />
• To eliminate a choking hazard for young<br />
children, remove and safely discard the<br />
protective cover fitted to the power plug<br />
of this appliance.<br />
• To protect against electrical shock, do not<br />
immerse the power cord, power plug or<br />
motor base in water or any other liquid.<br />
• Always use the appliance on a dry,<br />
level surface.<br />
• Do not use the appliance on a sink<br />
drain board.<br />
• Do not place the appliance near the<br />
edge of a bench or table during<br />
operation. Vibration during operation<br />
may cause the appliance to move.<br />
• Do not place the appliance on or near<br />
a hot gas or electric burner, or where it<br />
could touch any other source of heat.<br />
• Unwind the power cord fully before use.<br />
• Do not allow the power cord to hang<br />
over the edge of a table or counter, touch<br />
hot surfaces or become knotted.<br />
• Always ensure the appliance is<br />
completely assembled before<br />
connecting to the power outlet and<br />
operating. <strong>The</strong> appliance will not turn on<br />
unless properly assembled. Follow the<br />
instructions provided in this book.<br />
• Always make sure the safety locking<br />
bar is securely in place before the motor<br />
is turned on. Do not unfasten the safety<br />
locking bar while the appliance is<br />
in operation.<br />
• Always avoid contact with moving parts.<br />
• Strictly follow the care and cleaning<br />
instructions described in this book.<br />
• This appliance is for household use only.<br />
Do not use the appliance for anything<br />
other than its intended purpose as<br />
described in this book. Do not use<br />
outdoors. Do not use in moving<br />
vehicles or boats.<br />
• <strong>The</strong> use of attachments not sold or<br />
recommended by <strong>Breville</strong> may cause fire,<br />
electric shock or injury.<br />
• Do not leave the appliance unattended<br />
when in use.<br />
4
<strong>Breville</strong> recommends safety first<br />
When using the<br />
appliance as a<br />
<strong>Juice</strong> Extractor<br />
• Do not operate the juice extractor<br />
without the pulp container in place<br />
• Do not use the juice extractor if the<br />
rotating filter basket is damaged.<br />
• Do not touch the small sharp teeth and<br />
blades in the center of the filter basket.<br />
• Do not touch the blade in the feed chute.<br />
• Do not push produce into the feed chute<br />
with your fingers. Always use the food<br />
pusher provided.<br />
• Do not load feed chute with food before<br />
the motor is running.<br />
• Do not juice stone fruit unless seeds<br />
and/or stones have been removed.<br />
• Always switch the juice extractor off<br />
after each use. Ensure the motor stops<br />
completely and unplug the power cord<br />
from the wall outlet before attempting<br />
to move the appliance, before cleaning,<br />
disassembling, assembling and when<br />
storing the appliance.<br />
WARNING<br />
Super wide feed chute. Do not place<br />
hands or foreign objects down feed<br />
chute, always use food pusher provided.<br />
When using the<br />
appliance as a <strong>Blend</strong>er<br />
• Do not place hands in the blending jug<br />
unless the appliance is disconnected<br />
from the power outlet. A spatula may<br />
be used but only when the blender is<br />
not running.<br />
• Always operate the blender with the<br />
blender jug lid in place.<br />
• Do not use the blender for any purpose<br />
other than food or beverage preparation.<br />
• Do not process boiling liquids. Let the<br />
liquid cool slightly before placing in the<br />
blending jug.<br />
• Always switch the blender off after<br />
each use. Ensure the motor stops<br />
completely and unplug the power cord<br />
from the wall outlet before attempting<br />
to move the appliance, before cleaning,<br />
disassembling, assembling and when<br />
storing the appliance.<br />
WARNING<br />
<strong>Blend</strong>er blades are sharp.<br />
Handle carefully.<br />
5
<strong>Breville</strong> recommends safety first<br />
IMPORTANT SAFEGUARDS FOR<br />
ALL ELECTRICAL APPLIANCES<br />
• Fully unwind the power cord before use.<br />
• Do not let the power cord hang over<br />
the edge of a bench or table, touch hot<br />
surfaces or become knotted.<br />
• To protect against electric shock do not<br />
immerse the power cord, power plug or<br />
appliance in water or any other liquid.<br />
• <strong>The</strong> appliance is not intended for use<br />
by persons (including children) with<br />
reduced physical, sensory or mental<br />
capabilities, or lack of experience and<br />
knowledge, unless they have been given<br />
supervision or instruction concerning<br />
use of the appliance by a person<br />
responsible for their safety.<br />
• Children should be supervised to ensure<br />
that they do not play with the appliance.<br />
• It is recommended to regularly inspect<br />
the appliance. To avoid a hazard do not<br />
use the appliance if power cord, power<br />
plug or appliance becomes damaged in<br />
any way. Return the entire appliance to<br />
the nearest authorised <strong>Breville</strong> Service<br />
Centre for examination and/or repair.<br />
• Any maintenance other than cleaning<br />
should be performed at an authorised<br />
<strong>Breville</strong> Service Centre.<br />
• This appliance is for household use only.<br />
Do not use this appliance for anything<br />
other than its intended use. Do not use<br />
in moving vehicles or boats. Do not use<br />
outdoors. Misuse may cause injury.<br />
• <strong>The</strong> installation of a residual current<br />
device (safety switch) is recommended<br />
to provide additional safety protection<br />
when using electrical appliances. It<br />
is advisable that a safety switch with<br />
a rated residual operating current<br />
not exceeding 30mA be installed in<br />
the electrical circuit supplying the<br />
appliance. See your electrician for<br />
professional advice.<br />
SAVE THESE<br />
INSTRUCTIONS<br />
6
HOW TO USE AS A<br />
JUICE EXTRACTOR
KNOW YOUR BREVILLE JUICE EXTRACTOR<br />
A<br />
B<br />
c<br />
E<br />
N<br />
L<br />
D<br />
F<br />
M<br />
G<br />
H<br />
I<br />
J<br />
K<br />
8
KNOW YOUR BREVILLE JUICE EXTRACTOR<br />
A. Food pusher<br />
B. <strong>Juice</strong>r cover with extra wide<br />
feed chute<br />
C. Pulp container with integrated handle<br />
D. Juicing speed guide (not shown)<br />
E. Filter basket<br />
F. Filter bowl surround<br />
G. Motor drive coupling<br />
H. Motor base<br />
I. Safety locking arm<br />
J. START | STOP button and speed<br />
control dial<br />
K. Overload protection reset button<br />
(underside of the motor base)<br />
L. Juicing jug lid<br />
M. 1.2L juicing jug<br />
N. Nylon cleaning brush<br />
9
ASSEMBLING<br />
your <strong>Breville</strong> <strong>Juice</strong> Extractor
PAge ASSEMBLING header..... THE JUICE EXTRACTOR<br />
Assembling the<br />
<strong>Juice</strong> Extractor<br />
Before using the <strong>Juice</strong> Extractor for the<br />
first time, remove and safely discard any<br />
packaging material and promotional labels.<br />
Ensure the power cord is unplugged from<br />
the wall outlet.<br />
Wipe the Motor Base with a damp cloth.<br />
Dry thoroughly.<br />
Wash the Filter Bowl Surround, Filter Basket,<br />
<strong>Juice</strong>r Cover, Food Pusher, <strong>Juice</strong> Jug, <strong>Juice</strong><br />
Jug Lid and Pulp Container in warm soapy<br />
water with a soft cloth or nylon brush. Rinse<br />
and dry thoroughly. Alternatively, place<br />
these parts, excluding the Food Pusher, in<br />
the dishwasher.<br />
1. Place the Motor Base on a flat dry<br />
surface such as a bench top. Ensure<br />
the power cord is unplugged from the<br />
wall outlet.<br />
2. Place the Filter Bowl Surround on top<br />
of the Motor Base.<br />
3. Align the arrows on the Filter Basket<br />
with the arrows on the Motor Drive<br />
Coupling and push down until it clicks<br />
into place. Ensure the Filter Basket is<br />
fitted securely inside the Filter Bowl<br />
Surround and onto the Motor Base.<br />
4. Lower the <strong>Juice</strong>r Cover, positioning the<br />
rim within the Filter Bowl Surround.<br />
11
PAge ASSEMBLING header..... THE JUICE EXTRACTOR<br />
5. Raise the Safety Locking Arm and lock<br />
into the two grooves on either side of the<br />
<strong>Juice</strong>r Cover. <strong>The</strong> Safety Locking Arm<br />
should now be in a vertical position.<br />
7. Place the Pulp Container into position<br />
by tilting slightly.<br />
TIP<br />
To minimize clean up, place a plastic<br />
freezer bag (or plastic grocery bag)<br />
into the Pulp Container to collect<br />
the pulp.<br />
6. Slide the Food Pusher down the Feed<br />
Chute by aligning the groove in the<br />
Food Pusher with the small protrusion<br />
on the inside top of the Feed Chute.<br />
8. Place the provided <strong>Juice</strong> Jug under<br />
the spout on the right hand side.<br />
Ensure the <strong>Juice</strong> Jug Lid is used to<br />
avoid any splatter.<br />
NOTE<br />
A glass could also be used to<br />
collect juice.<br />
12
OPERATING<br />
your <strong>Breville</strong> <strong>Juice</strong> Extractor
OPERATING THE JUICE EXTRACTOR<br />
Operating the <strong>Juice</strong> Extractor<br />
1. Wash and prepare your selection of fruit<br />
and/or vegetables :<br />
Fruits with hard or inedible skins such as<br />
citrus fruit, melons and kiwi fruit should<br />
be peeled before juicing. Pineapple<br />
can be juiced with or without the rind<br />
removed.<br />
Fruits with pits, hard seeds or stones<br />
such as nectarines, peaches, mangoes,<br />
apricots, plums and cherries must be<br />
pitted before juicing.<br />
2. Ensure the <strong>Juice</strong> Extractor is correctly<br />
assembled with the Safety Locking Arm<br />
securely locked into the vertical position<br />
and the <strong>Juice</strong> Jug under the spout.<br />
NOTE<br />
As a safety precaution, the <strong>Juice</strong><br />
Extractor will not operate if the Safety<br />
Locking Arm is not securely locked<br />
into the vertical position.<br />
3. Plug the power cord into a 230V/240V<br />
power outlet. <strong>The</strong>n turn the power on at<br />
the outlet. <strong>The</strong> START | STOP button<br />
surround will illuminate.<br />
NOTE<br />
<strong>The</strong> button surround will illuminate<br />
for 2 minutes before entering standby<br />
mode. To re-activate the <strong>Juice</strong><br />
Extractor out of stand-by mode, press<br />
or turn the START | STOP button.<br />
FOOD TO BE JUICED<br />
Apples 5<br />
Apricots (stone removed) 2<br />
Beetroot (cleaned, trimmed) 5<br />
Blueberries 1<br />
Broccoli 4<br />
Brussel sprouts (trimmed) 5<br />
Cabbage 4<br />
Carrot 5<br />
Cauliflower 4<br />
Celery 5<br />
Cucumber, soft skinned 4<br />
Fennel 5<br />
Grapes (seedless) 1<br />
Kiwi fruit (peeled) 2<br />
Mangoes (peeled, stone removed)<br />
2<br />
Melons (peeled) 1<br />
Nectarines (stone removed) 2<br />
Oranges (peeled) 3<br />
Peaches (stone removed) 2<br />
Pears hard (stalks removed) 5<br />
Pears soft (stalks removed) 2<br />
Pineapple 5<br />
Plums (stone removed) 2<br />
Raspberries 1<br />
Tomatoes 1<br />
Watermelon (peeled) 1<br />
Speed<br />
14
OPERATING THE JUICE EXTRACTOR<br />
4. Rotate the speed control dial to<br />
the desired speed. Use the speed<br />
selector table on page 14 as a guide for<br />
juicing different fruit and vegetables.<br />
For your convenience, a juicing speed<br />
guide is also printed on the inside of<br />
the Pulp Container.<br />
NOTE<br />
<strong>The</strong> SMOOTHIE, ICE and PULSE<br />
settings can only be selected when<br />
the appliance is assembled as a blender.<br />
5. Push the START | STOP button. With<br />
the motor running and while the<br />
Food Pusher, gently guide food down<br />
the Feed Chute. Do not exert excess<br />
pressure. To extract the maximum<br />
amount of juice, always push the Food<br />
Pusher down slowly.<br />
IMPORTANT:<br />
Do not load the Feed Chute with food<br />
until the motor is running.<br />
TIPS<br />
• A small amount of lemon juice<br />
can be added to the fruit and/or<br />
vegetables to inhibit browning.<br />
• When juicing herbs, sprouts or<br />
leafy green vegetables, either wrap<br />
them together to form a bundle<br />
or juice them in the middle of a<br />
combination of ingredients on low<br />
speed to obtain the best extraction.<br />
If only juicing herbs or leafy green<br />
vegetables, the juice yield will be<br />
low due to the nature of centrifugal<br />
juicing. It is advised to juice them<br />
with a combination of other fruits<br />
and vegetables.<br />
• When juicing different ingredients<br />
of varying textures, start with the<br />
softer textured ingredients on low<br />
speed then change to high speed for<br />
harder textured ingredients. This<br />
assists in extracting the maximum<br />
amount of juice by clearing the<br />
Filter Basket between ingredients.<br />
6. As fruits and vegetables are processed,<br />
juice will flow into the <strong>Juice</strong> Jug and the<br />
separated pulp will accumulate in the<br />
Pulp Container.<br />
NOTE<br />
<strong>The</strong> Pulp Container can be emptied<br />
during juicing by turning the <strong>Juice</strong><br />
Extractor off and then carefully<br />
removing the Pulp Container. Replace<br />
the empty Pulp Container into<br />
position before continuing to juice.<br />
Do not allow the Pulp Container<br />
to over-fill as this may affect the<br />
operation of the appliance.<br />
15
OPERATING THE JUICE EXTRACTOR<br />
7. Immediately after each use, use the<br />
provided nylon brush to thoroughly<br />
clean the fine mesh holes of the Filter<br />
Basket and rinse the remaining<br />
removable parts under running water.<br />
For more cleaning information, refer<br />
to ‘Cleaning the <strong>Juice</strong> Extractor’ on<br />
page 20.<br />
<strong>The</strong> <strong>Breville</strong> <strong>Juice</strong> & <strong>Blend</strong> is fitted with<br />
protection devices as a safety precaution to<br />
prevent both personal injury and damage to<br />
the appliance.<br />
OVERLOAD PROTECTION<br />
This protection device safeguards against<br />
overloading the motor with excessive loads.<br />
If overloading occurs, the Overload<br />
Protection will automatically de-activate<br />
the motor. When this occurs, unplug the<br />
power cord from the wall outlet and press<br />
the OVERLOAD RESET button found on the<br />
underside of the Motor Base. This will reset<br />
the Overload Protection, enabling you to<br />
reconnect the power cord to the wall outlet<br />
and recommence normal use.<br />
ELECTRONIC PROTECTION<br />
This protection device will automatically<br />
de-activate the motor if the motor is stalled.<br />
If the motor stalls, the START | STOP button<br />
surround will flash red and the Electronic<br />
Protection will automatically de-activate<br />
the motor. When this occurs, unplug the<br />
power cord from the wall outlet and clear the<br />
Feed Chute. Either too much food is being<br />
processed at one time or the pieces are not<br />
small enough. Try trimming food, cutting<br />
food into smaller pieces of even size and/<br />
or processing a smaller amount per batch.<br />
<strong>The</strong>n reconnect the power cord to the wall<br />
outlet and recommence normal use.<br />
OVERHEAT PROTECTION<br />
This protection device safeguards<br />
against overheating of the motor with<br />
excessive loads.<br />
If overheating occurs, the START | STOP<br />
button surround will flash red and the<br />
Overheat Protection will automatically<br />
de-activate the motor. When this occurs,<br />
unplug the power cord from the wall outlet<br />
and allow the appliance to cool for at least 15<br />
minutes. <strong>The</strong>n reconnect the power cord to<br />
the wall outlet and recommence normal use.<br />
16
DISASSEMBLING<br />
your <strong>Breville</strong> <strong>Juice</strong> Extractor
PAge DISASSEMBLING header..... THE JUICE EXTRACTOR<br />
Disassembling the<br />
<strong>Juice</strong> Extractor<br />
1. Ensure the <strong>Juice</strong> Extractor is turned off,<br />
the power is switched off at the power<br />
outlet and the power cord is unplugged<br />
from the power outlet.<br />
2. Grip the handle around the top rim<br />
of the Pulp Container, then pivot the<br />
bottom of the Pulp Container away from<br />
the <strong>Juice</strong> Extractor.<br />
3. Pull the Safety Locking Arm downwards<br />
and over the grooves on either side of<br />
the <strong>Juice</strong>r Cover.<br />
6. To remove the Filter Bowl Surround,<br />
hold the Motor Base then turn the Filter<br />
Bowl Surround by the <strong>Juice</strong> Spout. <strong>The</strong><br />
Filter Bowl Surround should lift off the<br />
Motor Base with the Filter Basket still<br />
in place.<br />
7. To remove the Filter Basket from the<br />
Filter Bowl Surround, turn the Filter<br />
Bowl Surround upside down over<br />
the sink.<br />
4. Remove the Food Pusher from the<br />
Feed Chute.<br />
5. Lift the <strong>Juice</strong>r Cover off the Filter<br />
Bowl Surround.<br />
18
PAge DISASSEMBLING header..... THE JUICE EXTRACTOR<br />
WARNING<br />
<strong>The</strong> Filter Basket contains a titanium<br />
reinforced cutting disc with ultra<br />
sharp blades and teeth. Do not touch<br />
blades and teeth when handling the<br />
Filter Basket.<br />
19
CLEANING<br />
your <strong>Breville</strong> <strong>Juice</strong> Extractor
PAge CLEANING header..... THE JUICE EXTRACTOR<br />
Always ensure that the juicer is switched off,<br />
the power is switched at the power outlet<br />
and the power cord is unplugged from the<br />
power outlet before cleaning, disassembling<br />
or assembling and storing the appliance.<br />
1. Immediately after each use, use the<br />
provided nylon brush to thoroughly<br />
clean the fine mesh holes of the Filter<br />
Basket. Brush the inside of the Filter<br />
Basket under running water, holding<br />
it up towards a light to ensure the fine<br />
mesh holes are not blocked. If the holes<br />
are blocked, soak the Filter Basket<br />
in hot water with 10% lemon juice to<br />
loosen the blocked holes. Alternatively,<br />
immediately after each use, wash the<br />
Filter Basket in the dishwasher then<br />
allow to air dry.<br />
TIP<br />
If the Filter Basket cannot be cleaned<br />
immediately after use, soak the Filter<br />
Basket in hot soapy water immediately<br />
after juicing is complete. If pulp is<br />
left to dry on the Filter Basket, it may<br />
clog the fine mesh holes, thereby<br />
lessening the effectiveness of the<br />
<strong>Juice</strong> Extractor.<br />
Do not soak the Filter Basket in bleach.<br />
WARNING<br />
<strong>The</strong> Filter Basket contains a titanium<br />
reinforced cutting disc with ultra<br />
sharp blades and teeth. Do not touch<br />
blades and teeth when handling the<br />
Filter Basket.<br />
2. Wash the Filter Bowl Surround, <strong>Juice</strong>r<br />
Cover, Food Pusher, <strong>Juice</strong> Jug, <strong>Juice</strong><br />
Jug Lid and Pulp Container in warm<br />
soapy water with the provided nylon<br />
brush or a soft cloth. Rinse and dry<br />
thoroughly. Alternatively, place these<br />
parts, excluding the Food Pusher, in the<br />
dishwasher.<br />
NOTE<br />
Do not wash the Food Pusher in<br />
the dishwasher.<br />
TIP<br />
Discoloration of the plastic parts may<br />
occur with strongly colored fruit and<br />
vegetables. To help prevent this, wash<br />
parts immediately after use.<br />
If discoloration does occur, the plastic<br />
parts can be soaked in 10% lemon<br />
juice and water or they can be cleaned<br />
with a non abrasive cleaner.Do not<br />
soak the Filter Basket in bleach.<br />
3. Wipe the Motor base with a soft damp<br />
cloth and dry thoroughly. Do not use<br />
abrasive scouring pads or cleaners when<br />
cleaning the Motor Base as these may<br />
scratch the surface. Wipe any excess<br />
food particles from the power cord.<br />
21
TROUBLESHOOTING<br />
your <strong>Breville</strong> <strong>Juice</strong> Extractor
JUICE EXTRACTOR TROUBLESHOOTING<br />
Problem<br />
<strong>Juice</strong> Extractor will not<br />
work or suddenly switches<br />
off during juicing<br />
Easy Solution<br />
• Check that the power plug is securely inserted into<br />
wall outlet.<br />
• Insert the power plug into an independent outlet.<br />
• Insert the power plug into a different outlet.<br />
• Reset the circuit breaker if necessary.<br />
• Ensure the Safety Locking Arm is in the upright<br />
position and is securely locked into the two grooves<br />
on either side of the <strong>Juice</strong>r Cover (see page 12).<br />
• <strong>The</strong> Overload Protection may have automatically<br />
de-activated the motor. Unplug the power cord from<br />
the wall outlet and press the OVERLOAD RESET<br />
button found on the underside of the Motor Base.<br />
This will reset the Overload Protection, enabling you<br />
to reconnect the power cord to the wall outlet and<br />
recommence normal use (see page 16).<br />
• <strong>The</strong> Overheat Protection may have automatically<br />
de-activated the motor. Unplug the power cord from<br />
the wall outlet and allow the appliance to cool for at<br />
least 15 minutes. Insufficient cooling time may result<br />
in the motor de-activating again. After sufficient<br />
cooling time, reconnect the power cord to the wall<br />
outlet and recommence normal use (see page 16).<br />
• <strong>The</strong> Electronic Protection may have automatically<br />
de-activated the motor. Unplug the power cord from<br />
the wall outlet and clear the Feed Chute. Either too<br />
much food is being processed at one time or the<br />
pieces are not small enough. Try trimming food,<br />
cutting food into smaller pieces of even size and/<br />
or processing a smaller amount per batch. <strong>The</strong>n<br />
reconnect the power cord to the wall outlet and<br />
recommence normal use (see page 16).<br />
23
JUICE EXTRACTOR TROUBLESHOOTING<br />
Problem<br />
Motor appears to stall<br />
when juicing<br />
Easy Solution<br />
• <strong>The</strong> Electronic Protection device will automatically<br />
de-activate the motor if the motor is stalled. Unplug<br />
the power cord from the wall outlet and clear the<br />
Feed Chute. Either too much food is being processed<br />
at one time or the pieces are not small enough. Try<br />
trimming food, cutting food into smaller pieces of<br />
even size and/or processing a smaller amount per<br />
batch. <strong>The</strong>n reconnect the power cord to the wall<br />
outlet and recommence normal use (see page 16).<br />
• Ensure the motor is running before loading the Feed<br />
Chute with food.<br />
• Wet pulp can build up under the <strong>Juice</strong>r Cover if<br />
the juicing action is too vigorous. Stop the juicing<br />
process and remove the power cord from the wall<br />
outlet. Clean the <strong>Juice</strong>r Cover, Filter Bowl Surround<br />
and Filter Basket. Reconnect the power cord to the<br />
wall outlet and recommence juicing with a slower<br />
juicing action by pushing the Food Pusher down<br />
more slowly.<br />
• Hard fruits and vegetables will put excess strain<br />
onto the motor if a low speed is selected. Refer to<br />
the speed selector table on page 14 to determine<br />
the recommended speed for the selected fruits and<br />
vegetables.<br />
Excess pulp building up in<br />
the mesh of the Filter Basket<br />
• Stop the juicing process and remove the power<br />
cord from the wall outlet. Clean the <strong>Juice</strong>r Cover,<br />
Filter Bowl Surround and Filter Basket. Reconnect<br />
the power cord to the wall outlet and recommence<br />
juicing. Try alternating soft and hard fruits and<br />
vegetables, starting with the softer textured<br />
ingredients on low speed then changing to high<br />
speed for harder textured ingredients. This assists in<br />
extracting the maximum amount of juice by clearing<br />
the Filter Basket between ingredients.<br />
24
JUICE EXTRACTOR TROUBLESHOOTING<br />
Problem<br />
Very wet pulp and reduced<br />
juice extraction<br />
I cannot select the<br />
SMOOTHIE, ICE or<br />
PULSE settings<br />
<strong>Juice</strong> leaks between the rim<br />
of the <strong>Juice</strong>r Cover and the<br />
Filter Bowl Surround<br />
<strong>Juice</strong> sprays out too fast<br />
from the <strong>Juice</strong> Spout<br />
Easy Solution<br />
• <strong>Juice</strong> with a slower juicing action by pushing the<br />
Food Pusher down more slowly.<br />
• Stop the juicing process and remove the power<br />
cord from the wall outlet. Use the provided nylon<br />
brush to thoroughly clean the fine mesh holes of the<br />
Filter Basket. Brush the inside of the Filter Basket<br />
under running water, holding it up towards a light<br />
to ensure the fine mesh holes are not blocked. If<br />
the holes are blocked, soak the Filter Basket in hot<br />
water with 10% lemon juice to loosen the blocked<br />
holes. Alternatively, wash the Filter Basket in the<br />
dishwasher. Cleaning the Filter Basket will remove<br />
excess fiber build up (from juicing the fruit or<br />
vegetables) which could be inhibiting the juice flow.<br />
• <strong>The</strong>se settings can only be selected when the<br />
appliance is assembled as a blender.<br />
• <strong>Juice</strong> with a slower juicing action by pushing the<br />
Food Pusher down more slowly.<br />
• Fruit and vegetables with a high water content, for<br />
example tomatoes and watermelon, should be juiced<br />
on low speed.<br />
• Ensure the <strong>Juice</strong> Extractor is correctly assembled<br />
(see page 12). <strong>The</strong> rim of the <strong>Juice</strong>r Cover should be<br />
securely positioned within the Pulp Container and<br />
Filter Bowl Surround.<br />
• <strong>Juice</strong> with a slower juicing action by pushing the<br />
Food Pusher down more slowly.<br />
25
JUICE EXTRACTOR TROUBLESHOOTING<br />
Problem<br />
Red light flashing<br />
Easy Solution<br />
• <strong>The</strong> Overheat Protection may have automatically<br />
de-activated the motor. If this occurs, the START<br />
| STOP button surround will flash red. Unplug<br />
the power cord from the wall outlet and allow the<br />
appliance to cool for at least 15 minutes. Insufficient<br />
cooling time may result in the motor de-activating<br />
again. After sufficient cooling time, reconnect the<br />
power cord to the wall outlet and recommence<br />
normal use (see page 16).<br />
• <strong>The</strong> Electronic Protection may have automatically<br />
de-activated the motor. If this occurs, the START<br />
| STOP button surround will flash red. Unplug the<br />
power cord from the wall outlet and clear the Feed<br />
Chute. Either too much food is being processed at<br />
one time or the pieces are not small enough. Try<br />
trimming food, cutting food into smaller pieces of<br />
even size and/or processing a smaller amount per<br />
batch. <strong>The</strong>n reconnect the power cord to the wall<br />
outlet and recommence normal use (see page 16).<br />
26
USE AS A BLENDER
KNOW YOUR BREVILLE BLENDER<br />
A<br />
B<br />
C<br />
D<br />
F<br />
E<br />
G<br />
H<br />
I<br />
J<br />
K<br />
28
KNOW YOUR BREVILLE BLENDER<br />
A. Inner lid<br />
B. Lid with breville assist<br />
ring-pull removal<br />
C. 1.5L blender jug<br />
D. Removable silicone gasket<br />
E. Removable blade assembly<br />
F. Blade removal tool<br />
G. Motor drive coupling<br />
H. Motor base<br />
I. Safety locking arm<br />
J. START | STOP button and speed<br />
control dial<br />
K. Overload reset button<br />
(underside of the motor base)<br />
29
ASSEMBLING<br />
your <strong>Breville</strong> <strong>Blend</strong>er
ASSEMBLING THE BLENDER<br />
Assembling the BLENDER<br />
Before using the <strong>Blend</strong>er for the first<br />
time, remove and safely discard any<br />
packaging material and promotional labels.<br />
Ensure the power cord is unplugged from<br />
the wall outlet.<br />
Wipe the Motor Base with a damp cloth.<br />
Dry thoroughly.<br />
Wash the Lid, Inner Lid, <strong>Blend</strong>er Jug,<br />
Removable Silicone Gasket and Removable<br />
Blade Assembly (see Disassembling the<br />
<strong>Blend</strong>er, page 37) in warm, soapy water with<br />
a soft cloth. Rinse and dry thoroughly.<br />
2. With the raised rim of the Removable<br />
Silicone Gasket facing downwards, place<br />
the Gasket onto the Blade Assembly and<br />
push down until it clicks into place.<br />
WARNING<br />
Be careful when handling the blending<br />
blades as they are sharp. Mishandling<br />
of the blades may cause injury.<br />
Place raised rim downwards into Blade Assembly.<br />
Alternatively:<br />
• Fill the <strong>Blend</strong>er Jug halfway with warm<br />
(not hot) water and add 1-2 drops of<br />
dishwashing liquid. Place the <strong>Blend</strong>er Jug<br />
on the Motor Base. Select speed 1/MIX<br />
and run the <strong>Blend</strong>er for 10-20 seconds.<br />
Remove the <strong>Blend</strong>er Jug and discard<br />
the contents. Rinse the <strong>Blend</strong>er Jug with<br />
warm water until clean. Dry thoroughly.<br />
OR<br />
• Place these parts in the dishwasher on<br />
a normal cycle. <strong>The</strong> Removable Silicone<br />
Gasket and Removable Blade Assembly<br />
should be removed from the <strong>Blend</strong>er<br />
Jug and placed on the top shelf of the<br />
dishwasher with the Lid and Inner Lid.<br />
<strong>The</strong> <strong>Blend</strong>er Jug should be turned<br />
upside down (with the jug spout facing<br />
downwards) to prevent the dishwasher’s<br />
heating element from damaging the<br />
<strong>Blend</strong>er Jug base.<br />
1. Place the Motor Base on a flat dry<br />
surface such as a bench top. Ensure<br />
the power cord is unplugged from the<br />
wall outlet.<br />
31
ASSEMBLING THE BLENDER<br />
3. Insert the Blade Assembly into the<br />
<strong>Blend</strong>er Jug base and turn clockwise<br />
until securely locked into position.<br />
4. With the <strong>Blend</strong>er Jug handle to the left,<br />
place the <strong>Blend</strong>er Jug on top of the<br />
Motor Base.<br />
6. Place the Lid firmly into position on top<br />
of the <strong>Blend</strong>er Jug and insert the Inner<br />
Lid by turning clockwise until securely<br />
locked into position.<br />
5. Raise the Safety Locking Arm and lock<br />
into the two grooves on either side of<br />
the <strong>Blend</strong>er Jug base. <strong>The</strong> Safety<br />
Locking Arm should now be in a<br />
vertical position.<br />
32
OPERATING<br />
your <strong>Breville</strong> <strong>Blend</strong>er
OPERATING THE BLENDER<br />
Operating the BLENDER<br />
1. Ensure the <strong>Blend</strong>er is correctly<br />
assembled with the Safety Locking<br />
Arm securely locked into the vertical<br />
position.<br />
NOTE<br />
As a safety precaution, the <strong>Blend</strong>er<br />
will not operate if the Safety Locking<br />
Arm is not securely locked into the<br />
vertical position.<br />
3. Place the Lid firmly into position on top<br />
of the <strong>Blend</strong>er Jug and insert the Inner<br />
Lid by turning clockwise until securely<br />
locked into position.<br />
NOTE<br />
<strong>The</strong> Lid features a patented ringpull<br />
removal. <strong>The</strong> ring-pull design<br />
allows the Lid to be easily removed<br />
with a simple leverage action, yet fit<br />
tightly onto the <strong>Blend</strong>er Jug to avoid<br />
displacement during operation.<br />
2. Add food or liquid to the <strong>Blend</strong>er Jug<br />
ensuring not to exceed the ‘MAX’ line.<br />
When filled at or near the ‘MAX’ line,<br />
ensure to place one hand on the Lid to<br />
avoid displacement during operation.<br />
NOTE<br />
If any liquid appears around the top<br />
of the Motor Base, ensure the <strong>Blend</strong>er<br />
is turned off before removing the<br />
<strong>Blend</strong>er Jug from the Motor Base.<br />
Immediately dry the Motor Base<br />
with a soft cloth or paper towel to<br />
absorb the liquid and check that<br />
the Removable Silicone Gasket and<br />
Removable Blade Assembly are<br />
correctly assembled (see Assembling<br />
the <strong>Blend</strong>er, page 31 step 2).<br />
4. Plug the power cord into a 230V/240V<br />
power outlet. <strong>The</strong> START | STOP button<br />
surround will illuminate..<br />
NOTE<br />
<strong>The</strong> button surround will illuminate<br />
for 2 minutes before entering standby<br />
mode. To re-activate the <strong>Blend</strong>er<br />
out of stand-by mode, press or turn<br />
the START | STOP button.<br />
5. Rotate the START | STOP button to the<br />
desired speed. For your convenience, a<br />
blending speed guide is printed on the<br />
stainless steel collar of the <strong>Blend</strong>er Jug.<br />
34
OPERATING THE BLENDER<br />
6. Push the START | STOP button. If<br />
necessary, the 30ml (1oz) Inner Lid can<br />
be used to measure and add ingredients<br />
while blending. Remove the Inner Lid<br />
and add ingredients while on speeds<br />
1/MIX, 2/CHOP or 3/BLEND. When<br />
operating at higher speeds; with a<br />
<strong>Blend</strong>er Jug filled at or near the ‘MAX’<br />
line; or with hot contents; stop the<br />
<strong>Blend</strong>er before adding ingredients.<br />
In addition to the 5 speed settings, the<br />
<strong>Blend</strong>er features 3 additional settings:<br />
SMOOTHIE and ICE settings<br />
• <strong>The</strong>se are pre-programmed cycles which<br />
automatically adjust the blending times<br />
and speeds to optimize blending results.<br />
Rotate the speed control dial to the<br />
SMOOTHIE or ICE setting. <strong>The</strong> preprogrammed<br />
cycle will commence then<br />
automatically switch off. You may notice<br />
the blending speed change mid-cycle,<br />
this is normal.<br />
• Process up to one standard ice cube<br />
tray or 12-14 standard ice cubes at one<br />
time. <strong>The</strong> type of ice used will affect the<br />
consistency of the crushed ice. To create<br />
even, powdery snow for icy drinks and<br />
cocktails, use the ICE setting and large,<br />
solid, dry ice that has come straight<br />
from the freezer (-5.6ºC/22ºF, or below).<br />
Small, slightly melted or hollow ice may<br />
result in a coarser ice, perfect for use as a<br />
base for fresh oysters.<br />
7. To stop blending at any time, press the<br />
START | STOP button. Lower the Safety<br />
Locking Arm and ensure the blades have<br />
completely stopped before removing the<br />
<strong>Blend</strong>er Jug from the Motor Base.<br />
NOTE<br />
If necessary, turn the <strong>Blend</strong>er off and<br />
ensure the blades have completely<br />
stopped before using a plastic spatula<br />
to occasionally stir or scrape down the<br />
sides of the <strong>Blend</strong>er Jug. Replace the<br />
Lid before recommencing blending.<br />
Do not use metal utensils as these may<br />
damage the blades or <strong>Blend</strong>er Jug.<br />
8. After each use, remove the Blade<br />
Assembly with the Silicone Gasket<br />
still in place, from the <strong>Blend</strong>er Jug.<br />
Disassemble the Silicone Gasket from<br />
the Blade Assembly. Wash the <strong>Blend</strong>er<br />
Jug, Lid, Inner Lid, Removable Silicone<br />
Gasket and Removable Blade in warm<br />
soapy water or in the dishwasher<br />
(see Cleaning the <strong>Blend</strong>er, page 39).<br />
Alternatively, immediately fill the<br />
<strong>Blend</strong>er Jug halfway with warm (not hot)<br />
water and add 1-2 drops of dishwashing<br />
liquid. Place the <strong>Blend</strong>er Jug on the<br />
Motor Base. Select speed 1/MIX and<br />
run the <strong>Blend</strong>er for 10-20 seconds.<br />
Remove the <strong>Blend</strong>er Jug and discard<br />
the contents. Rinse the <strong>Blend</strong>er Jug with<br />
warm water until clean.<br />
PULSE setting<br />
• For ingredients that require short<br />
bursts of power, such as thick or coarse<br />
mixtures, select the PULSE setting.<br />
Rotate the speed control dial to the<br />
PULSE setting. Press the START | STOP<br />
button each time you want to pulse<br />
the mixture.<br />
35
OPERATING THE BLENDER<br />
<strong>The</strong> <strong>Breville</strong> <strong>Juice</strong> & <strong>Blend</strong> is fitted with<br />
protection devices as a safety precaution to<br />
prevent both personal injury and damage to<br />
the appliance.<br />
OVERLOAD PROTECTION<br />
This protection device safeguards against<br />
overloading the motor with excessive loads.<br />
If overloading occurs, the Overload<br />
Protection will automatically de-activate<br />
the motor. When this occurs, unplug the<br />
power cord from the wall outlet and press<br />
the OVERLOAD RESET button found on the<br />
underside of the Motor Base. This will reset<br />
the Overload Protection, enabling you to<br />
reconnect the power cord to the wall outlet<br />
and recommence normal use.<br />
ELECTRONIC PROTECTION<br />
This protection device will automatically<br />
de-activate the motor if the motor is stalled.<br />
If the motor stalls, the START | STOP button<br />
surround will flash red and the Electronic<br />
Protection will automatically de-activate<br />
the motor. When this occurs, unplug the<br />
power cord from the wall outlet. Either too<br />
much food is being blended at one time<br />
or the pieces are not small enough. Try<br />
removing a portion of the mixture, cutting<br />
food into smaller pieces of even size and/or<br />
processing a smaller amount per batch. For<br />
best results the food should be chopped into<br />
pieces no larger than 2cm (¾ inch). <strong>The</strong>n<br />
reconnect the power cord to the wall outlet<br />
and recommence normal use.<br />
OVERHEAT PROTECTION<br />
This protection device safeguards<br />
against overheating of the motor with<br />
excessive loads.<br />
If overheating occurs, the START | STOP<br />
button surround will flash red and the<br />
Overheat Protection will automatically<br />
de-activate the motor. When this occurs,<br />
unplug the power cord from the wall outlet<br />
and allow the appliance to cool for at least 15<br />
minutes. <strong>The</strong>n reconnect the power cord to<br />
the wall outlet and recommence normal use.<br />
36
DISASSEMBLING<br />
your <strong>Breville</strong> <strong>Blend</strong>er
DISASSEMBLING THE BLENDER<br />
DISASSEMBLING the BLENDER<br />
1. Ensure the <strong>Blend</strong>er is turned off, the<br />
power is switched off at the power outlet<br />
and, the power cord is unplugged from<br />
the power outlet.<br />
2. Pull the Safety Locking Arm downwards<br />
and over the grooves on either side of<br />
the <strong>Blend</strong>er Jug base.<br />
NOTE<br />
If the Blade Assembly is difficult<br />
to remove by hand, insert the<br />
included Blade Removal Tool into<br />
the Blade Assembly base and turn<br />
counterclockwise.<br />
3. Remove the <strong>Blend</strong>er Jug from the<br />
Motor Base.<br />
4. Remove the Blade Assembly (with<br />
the Silicone Gasket still in place)<br />
from the <strong>Blend</strong>er Jug base by turning<br />
counterclockwise. <strong>The</strong> stainless<br />
steel collar of the <strong>Blend</strong>er Jug is not<br />
removable.<br />
WARNING<br />
Be careful when handling the blending<br />
blades as they are sharp. Mishandling<br />
of the blades may cause injury.<br />
5. Remove the Silicone Gasket from the<br />
Blade Assembly.<br />
38
CLEANING<br />
your <strong>Breville</strong> <strong>Blend</strong>er
CLEANING THE BLENDER<br />
Always ensure that the power cord is<br />
unplugged from the wall outlet before<br />
cleaning, disassembling or assembling and<br />
storing the appliance. Pull the Safety Locking<br />
Arm downwards and over the grooves on<br />
either side of the <strong>Blend</strong>er Jug base.<br />
1. Immediately after each use, wash the<br />
Lid, Inner Lid, <strong>Blend</strong>er Jug, Removable<br />
Silicone Gasket and Removable Blade<br />
Assembly (see Disassembling the<br />
<strong>Blend</strong>er, page 37) in warm, soapy water<br />
with a soft cloth. To remove strong odors,<br />
for example, from garlic, fish and some<br />
vegetables, soak the disassembled parts<br />
for 10 minutes in warm soapy water.<br />
<strong>The</strong>n wash with a mild detergent and a<br />
cleaning brush. Rinse and dry thoroughly.<br />
WARNING<br />
Be careful when handling the blending<br />
blades as they are sharp. Mishandling<br />
of the blades may cause injury.<br />
2. Wipe the Motor base with a soft damp<br />
cloth and dry thoroughly. Do not use<br />
abrasive scouring pads or cleaners when<br />
cleaning the Motor Base as these may<br />
scratch the surface. Wipe any excess<br />
food particles from the power cord.<br />
Alternatively:<br />
• Immediately fill the <strong>Blend</strong>er Jug halfway<br />
with warm (not hot) water and add 1-2<br />
drops of dishwashing liquid. Place the<br />
<strong>Blend</strong>er Jug on the Motor Base. Select<br />
speed 1/MIX and run the <strong>Blend</strong>er for<br />
10-20 seconds. Remove the <strong>Blend</strong>er<br />
Jug and discard the contents. Rinse the<br />
<strong>Blend</strong>er Jug with warm water until clean.<br />
Dry thoroughly.<br />
OR<br />
• Immediately place these parts in the<br />
dishwasher on a normal cycle. Remove<br />
the Blade Assembly with the Silicone<br />
Gasket still in place, from the <strong>Blend</strong>er<br />
Jug. Disassemble the Silicone Gasket<br />
from the Blade Assembly and place both<br />
parts on the top shelf of the dishwasher<br />
with the Lid and Inner Lid. <strong>The</strong> <strong>Blend</strong>er<br />
Jug should be turned upside down (with<br />
the jug spout facing downwards) to<br />
prevent the dishwasher’s heating element<br />
from damaging the <strong>Blend</strong>er Jug base.<br />
40
BLENDING TIPS<br />
for your <strong>Breville</strong> <strong>Blend</strong>er
BLENDING TIPS<br />
• Use low speeds (1-3 – MIX, CHOP<br />
and BLEND) for emulsions such as<br />
mayonnaise, dressings and marinades.<br />
• Use high speeds (4-5 – LIQUIFY and<br />
PUREE) for pureeing soups and<br />
aerating liquids.<br />
• Use the SMOOTHIE setting for<br />
drink making using both liquid<br />
and solid ingredients.<br />
• Use the ICE setting for ice crushing.<br />
Process up to one standard ice cube<br />
tray or 12-14 standard ice cubes at one<br />
time. <strong>The</strong> type of ice used will affect<br />
the consistency of the crushed ice. To<br />
create even, powdery snow for icy drinks<br />
and cocktails, use large, solid, dry ice<br />
that has come straight from the freezer<br />
(-5.6ºC/22ºF, or below). Small, slightly<br />
melted or hollow ice may result in a<br />
coarser ice, perfect for use as a base for<br />
fresh oysters.<br />
• Use the PULSE setting for foods that<br />
only require short bursts of power such<br />
as chopping nuts.<br />
• Use the 30ml (1oz) Inner Lid to<br />
measure and add ingredients while<br />
blending. Remove the Inner Lid and add<br />
ingredients while on speeds 1/MIX, 2/<br />
CHOP or 3/BLEND. When operating<br />
at higher speeds; with a <strong>Blend</strong>er Jug<br />
filled at or near the ‘MAX’ line; or with<br />
hot contents - stop the <strong>Blend</strong>er before<br />
adding ingredients.<br />
• Make sure all foods are cut into cubes,<br />
approx. 2cm (¾ inch squares) to achieve<br />
an even result.<br />
• Thick mixtures puree more efficiently if<br />
the <strong>Blend</strong>ing Jug is 1/4 to 1/2 full.<br />
• When using several ingredients, place<br />
liquid ingredients in the <strong>Blend</strong>er Jug<br />
before solid ingredients, unless specified<br />
in the recipe.<br />
• Do not use the <strong>Blend</strong>er to mix dense,<br />
heavy mixtures like dough or mash<br />
potatoes. Other, less thick but heavy<br />
mixtures may be blended, however<br />
depending on the foods being processed,<br />
may activate one of the motor protection<br />
devices as a safety precaution (see page<br />
36). For this reason, we recommend that<br />
heavy mixtures are only blended for 30<br />
second intervals before turning off the<br />
<strong>Blend</strong>er and stirring the ingredients with<br />
a plastic spatula. For normal blending<br />
tasks, we recommend only blending<br />
for up to 1 minute intervals to prevent<br />
overprocessing.<br />
• Do not operate the <strong>Blend</strong>er without the<br />
Lid in position.<br />
• Do not fill the <strong>Blend</strong>er Jug above the<br />
'MAX' line. When filled at or near the<br />
‘MAX’ line, ensure to place one hand on<br />
the Lid to avoid displacement during<br />
operation.<br />
• Do not place any objects, other than food<br />
or liquid, into the <strong>Blend</strong>er Jug while the<br />
motor is running.<br />
• Do not place boiling ingredients into<br />
the <strong>Blend</strong>er Jug. Allow ingredients<br />
to cool slightly. Select speed 1/MIX<br />
initially, then increase to a higher speed<br />
if necessary.<br />
• Do not use the <strong>Blend</strong>er Jug to store food.<br />
42
TROUBLESHOOTING<br />
your <strong>Breville</strong> <strong>Blend</strong>er
BLENDER TROUBLESHOOTING<br />
Problem<br />
<strong>Blend</strong>er will not work or<br />
suddenly switches off<br />
during juicing<br />
Easy Solution<br />
• Check that the power plug is securely inserted into<br />
wall outlet.<br />
• Insert the power plug into an independent outlet.<br />
• Insert the power plug into a different outlet.<br />
• Reset the circuit breaker if necessary.<br />
• Ensure the Safety Locking Arm is in the upright<br />
position and is securely locked into the two grooves<br />
on either side of the <strong>Blend</strong>er Jug base (see page 32).<br />
• <strong>The</strong> Overload Protection may have automatically<br />
de-activated the motor. Unplug the power cord from<br />
the wall outlet and press the OVERLOAD RESET<br />
button found on the underside of the Motor Base.<br />
This will reset the Overload Protection, enabling you<br />
to reconnect the power cord to the wall outlet and<br />
recommence normal use (see page 36).<br />
• <strong>The</strong> Overheat Protection may have automatically<br />
de-activated the motor. Unplug the power cord from<br />
the wall outlet and allow the appliance to cool for at<br />
least 15 minutes. Insufficient cooling time may result<br />
in the motor de-activating again. After sufficient<br />
cooling time, reconnect the power cord to the wall<br />
outlet and recommence normal use (see page 36).<br />
• <strong>The</strong> Electronic Protection may have automatically<br />
de-activated the motor. Unplug the power cord<br />
from the wall outlet. Either too much food is being<br />
blended at one time or the pieces are not small<br />
enough. Try removing a portion of the mixture,<br />
cutting food into smaller pieces of even size and/<br />
or processing a smaller amount per batch. For best<br />
results the food should be chopped into pieces no<br />
larger than 2cm (¾ inch). <strong>The</strong>n reconnect the power<br />
cord to the wall outlet and recommence normal use<br />
(see page 36).<br />
44
BLENDER TROUBLESHOOTING<br />
Problem<br />
Motor appears to stall<br />
Food is unevenly chopped<br />
Food is chopped too fine<br />
or is watery<br />
Food sticks to blade<br />
Ice is not chopping to<br />
desired consistency<br />
Easy Solution<br />
• One of the protection devices will be activated if<br />
the motor stalls from overloading or overheating.<br />
Unplug the power cord from the wall outlet. Either<br />
too much food is being blended at one time or the<br />
pieces are not small enough. Try trimming food,<br />
cutting food into smaller pieces of even size and/<br />
or processing a smaller amount per batch. You may<br />
even need to remove a portion of the mixture from<br />
the <strong>Blend</strong>er Jug before reconnecting the power cord<br />
to the wall outlet and recommencing normal use (see<br />
page 36).<br />
• Either too much food is being chopped at one time<br />
or the pieces are not small enough. Try cutting food<br />
into smaller pieces of even size and/or processing a<br />
smaller amount per batch. For best results the food<br />
should be chopped into pieces no larger than 2cm<br />
(¾ inch).<br />
• <strong>The</strong> food has been over-processed. Use the PULSE<br />
setting or process for a shorter time.<br />
• Too much food is being blended at one time. Unplug<br />
the power cord from the wall outlet and remove a<br />
portion of the mixture with a plastic spatula before<br />
recommencing normal use.<br />
• <strong>The</strong> mixture being blended is very thick. Thick<br />
mixtures blend more efficiently if the <strong>Blend</strong>ing Jug<br />
is 1/4 to 1/2 full. You may need to unplug the power<br />
cord from the wall outlet and use a plastic spatula<br />
to occasionally stir or scrape down the sides of the<br />
<strong>Blend</strong>er Jug.<br />
• Use the ICE setting for ice crushing. Process up to<br />
one standard ice cube tray or 12-14 standard ice<br />
cubes at one time. <strong>The</strong> type of ice used will affect<br />
the consistency of the crushed ice. To create even,<br />
powdery snow for icy drinks and cocktails, use large,<br />
solid, dry ice that has come straight from the freezer<br />
(-5.6ºC/22ºF, or below). Small, slightly melted or<br />
hollow ice may result in a coarser ice, perfect for use<br />
as a base for fresh oysters.<br />
45
BLENDER TROUBLESHOOTING<br />
Problem<br />
<strong>Blend</strong>er Jug is leaking<br />
<strong>Blend</strong>er Jug smells<br />
Easy Solution<br />
• Unplug the power cord from the wall outlet before<br />
removing the <strong>Blend</strong>er Jug from the Motor Base.<br />
Check that the Removable Silicone Gasket is<br />
securely attached to the Blade Assembly. <strong>The</strong>n insert<br />
the Blade Assembly into the <strong>Blend</strong>er Jug base and<br />
turn clockwise until securely locked into position<br />
(see Assembling the <strong>Blend</strong>er, page 31)<br />
• To remove strong odors, for example, from garlic,<br />
fish and some vegetables, disassemble the <strong>Blend</strong>er<br />
Jug (see Disassembling the <strong>Blend</strong>er, page 37) and<br />
soak the parts for 10 minutes in warm soapy water.<br />
<strong>The</strong>n wash with a mild detergent and a cleaning<br />
brush. Rinse and dry thoroughly.<br />
• Always ensure the <strong>Blend</strong>er Jug is thoroughly<br />
cleaned immediately after each use (see Cleaning<br />
the <strong>Blend</strong>er, page 39).<br />
Red light flashing • <strong>The</strong> Overheat Protection may have automatically<br />
de-activated the motor. If this occurs, the START<br />
| STOP button surround will flash red. Unplug<br />
the power cord from the wall outlet and allow the<br />
appliance to cool for at least 15 minutes. Insufficient<br />
cooling time may result in the motor de-activating<br />
again. After sufficient cooling time, reconnect the<br />
power cord to the wall outlet and recommence<br />
normal use (see page 36).<br />
• <strong>The</strong> Electronic Protection may have automatically<br />
de-activated the motor. If this occurs, the START<br />
| STOP button surround will flash red. Unplug the<br />
power cord from the wall outlet. Either too much<br />
food is being blended at one time or the pieces are<br />
not small enough. Try removing a portion of the<br />
mixture, cutting food into smaller pieces of even size<br />
and/or processing a smaller amount per batch. For<br />
best results the food should be chopped into pieces<br />
no larger than 3/4 inch (2cm). <strong>The</strong>n reconnect<br />
the power cord to the wall outlet and recommence<br />
normal use (see page 36).<br />
46
RECIPES<br />
using the <strong>Breville</strong> <strong>Juice</strong> & <strong>Blend</strong>
RECIPES USING THE JUICER AND BLENDER - SMOOTHIES<br />
Pineapple and mango shake<br />
Makes 4 servings<br />
Ingredients<br />
250g (8oz) pineapple chunks<br />
2 oranges, peel and pith removed, cut in half<br />
1 large ripe mango (about 375g/12oz), peeled,<br />
stoned and cubed<br />
½ ripe banana, peeled and cut in pieces<br />
½ cup (125ml/4 fl oz) milk or soy milk<br />
6 ice cubes<br />
Method<br />
1. Using the juicer attachment, feed the<br />
pineapple chunks and oranges through<br />
the juice extractor’s feed tube.<br />
2. Using the blender attachment,<br />
process the pineapple/orange juice,<br />
mango, milk and ice for about 1<br />
minute on the SMOOTHIE setting<br />
or until mixture is smooth.<br />
3. Pour the shake evenly into 4 chilled<br />
glasses. Serve immediately.<br />
Fruit Salad Smoothie<br />
Makes 4 servings<br />
Ingredients<br />
2 oranges, peel and pith removed, cut in half<br />
500g (1lb), cubed watermelon, rind and<br />
seeds removed<br />
250g (8oz), cubed cantaloupe<br />
1 kiwi fruit, peeled and cut in half<br />
16 seedless green grapes<br />
4 ripe strawberries, hulled<br />
6 ice cubes<br />
Method<br />
1. Using the juicer attachment, feed the<br />
oranges, watermelon, cantaloupe, kiwi<br />
fruit and grapes through the juice<br />
extractor’s feed tube.<br />
2. Using the blender attachment, process<br />
the mixed fruit juice, strawberries<br />
and ice for about 1 minute on the<br />
SMOOTHIE setting or until mixture is<br />
smooth.<br />
3. Pour the smoothie evenly into 4 chilled<br />
glasses. Serve immediately.<br />
48
RECIPES USING THE JUICER AND BLENDER - SMOOTHIES<br />
Blueberry and<br />
Coconut Smoothie<br />
Makes 3 servings<br />
Ingredients<br />
250g (8oz) ripe strawberries, hulled and cut half<br />
125g (4oz) fresh or defrosted frozen blueberries<br />
½ ripe banana, peeled and roughly chopped<br />
½ cup (125ml/4 fl oz) coconut milk<br />
½ cup (125g/4oz) coconut or vanilla ice cream<br />
½ cup (125g/4oz) cold water<br />
Method<br />
1. Using the juicer attachment, feed the<br />
strawberries through the juice extractor’s<br />
feed tube.<br />
2. Using the blender attachment, process<br />
the strawberry juice, blueberries, banana,<br />
coconut milk, ice cream and water for<br />
about 2 minutes on speed 4/LIQUIFY<br />
or until mixture is smooth.<br />
3. Pour the smoothie evenly into 3 chilled<br />
glasses. Serve immediately.<br />
49
RECIPES USING THE JUICER AND BLENDER - COCKTAILS<br />
Watermelon Martini<br />
Watermelon ice cubes<br />
Makes 28 ice cubes<br />
Ingredients<br />
500g (1lb) watermelon, rind and seeds removed<br />
and cut in pieces<br />
½ lemon, peel and pith removed<br />
Method<br />
1. Using the juicer attachment, feed<br />
watermelon and lemon through the juice<br />
extractor’s feed tube.<br />
2. Pour juice into ice cube trays. Freeze<br />
juice for 3 to 4 hours.<br />
Watermelon Martini<br />
Makes 1 serving<br />
Ingredients<br />
7 watermelon ice cubes<br />
2 shots (60ml/2 fl oz) vodka (optional)<br />
1 teaspoon fresh lemon juice<br />
Fresh mint, chopped for garnish<br />
3 watermelon ice cubes, for serving<br />
Method<br />
Frozen Pomegranate and<br />
Strawberry Margarita<br />
Makes 2 servings<br />
INGREDIENTS<br />
2 ripe pomegranates, cut in half, seeds removed<br />
carefully from pulp making 250g (8oz) seeds<br />
250g (8oz) ripe strawberries, hulled<br />
12 ice cubes<br />
4 shots (125ml/4 fl oz) tequila (optional)<br />
2 shots (60ml/2 fl oz) Triple sec (optional)<br />
2 teaspoons concentrated sweet lime juice<br />
½ teaspoon caster sugar<br />
8 ice cubes, for serving<br />
Method<br />
1. Using the juicer attachment, feed<br />
pomegranate seeds and strawberries<br />
through the juice extractor’s feed tube.<br />
2. Using the blender attachment, process<br />
pomegranate/strawberry juice, ice cubes,<br />
tequila (optional), Triple sec (optional),<br />
concentrated sweet lime juice and sugar<br />
for about 1 minute on the SMOOTHIE<br />
setting or until mixture is well blended.<br />
3. Pour Margarita evenly into 2 chilled<br />
glasses over ice. Serve immediately.<br />
1. Using the blender attachment, process<br />
the watermelon ice cubes, vodka<br />
(optional) and lemon juice for about<br />
1 minute on speed 3/BLEND or until<br />
mixture is slushy.<br />
2. Serve immediately in an ice cold glass<br />
garnished with chopped mint and extra<br />
watermelon ice cubes.<br />
50
RECIPES USING THE JUICER AND BLENDER - COCKTAILS<br />
Homemade Tomato Crush<br />
with Vodka (Bloody Mary)<br />
Makes 2 servings<br />
Homemade Tomato Crush<br />
INGREDIENTS<br />
6 large (about 685g/1½lb) vine-ripened<br />
tomatoes, cored and quartered<br />
1 teaspoon superfine sugar<br />
Few drops Tabasco<br />
1 teaspoon fresh lemon juice<br />
2 shots (60ml/2 fl oz) vodka (optional)<br />
Salt to taste<br />
Crushed ice, for serving<br />
2 lemon wedges, for serving<br />
2 sticks celery with leaves, for serving<br />
Method<br />
1. Using the juicer attachment, feed<br />
tomatoes through the juice extractor’s<br />
feed tube.<br />
2. Using the blender attachment, process<br />
the tomato juice, sugar, Tabasco, lemon<br />
juice and vodka (optional) for about 1<br />
minute on the SMOOTHIE setting or<br />
until mixture is well blended. Taste and<br />
add salt if needed.<br />
3. Pour Bloody Mary evenly into 2 chilled<br />
glasses over crushed ice and garnish<br />
with lemon wedges and celery sticks.<br />
Serve immediately.<br />
Frozen Raspberry Colada<br />
Makes 2 servings<br />
INGREDIENTS<br />
250g (8oz) pineapple chunks<br />
250g (8oz) frozen raspberries, defrosted<br />
½ cup (125ml/4 fl oz) coconut milk<br />
2 shots Malibu (60ml/2 fl oz) (optional)<br />
8 ice cubes<br />
Method<br />
1. Using the juicer attachment, feed<br />
pineapple and raspberries thought the<br />
juice extractor’s feed tube.<br />
2. Using the blender attachment, process<br />
pineapple/raspberry juice, coconut<br />
milk, Malibu (optional) and ice cubes<br />
for about 1 minute on the SMOOTHIE<br />
setting or until mixture is smooth.<br />
3. Pour Frozen Raspberry Colada<br />
evenly into 2 chilled glasses and<br />
serve immediately.<br />
51
RECIPES USING THE JUICER AND BLENDER - COCKTAILS<br />
Mango, Raspberry and Pear<br />
Layered Cocktail<br />
Makes 2 serving<br />
Layering, also known as floating or<br />
stacking, uses the different densities of<br />
various liquids to create an attractive<br />
array of colored layers. Pouring these<br />
drinks is easier than you might think:<br />
you just need to know the specific<br />
gravity of each liquid you’re working<br />
with, and pour them in order from<br />
heaviest to lightest. Liqueurs with the<br />
most dissolved sugar and the least<br />
alcohol are densest and are put at the<br />
bottom. <strong>The</strong>se include fruit juices and<br />
cream liqueurs. Those with the least<br />
water and the most alcohol, such as<br />
rum with 75% alcohol by volume, are<br />
floated on top<br />
Mango Layer<br />
Ingredients<br />
1 large ripe mango (about 375g/12oz), peeled,<br />
stoned and cubed<br />
125g (4oz) pineapple chunks (for mocktail only)<br />
2 shots Malibu (60ml/2 fl oz) (optional)<br />
Method<br />
1. For the mocktail version of this cocktail,<br />
using the juicer attachment, feed<br />
pineapple pieces through the juice<br />
extractor’s feed tube.<br />
2. Using the blender attachment, process<br />
pineapple juice and mango for about<br />
1 minute on speed 5/PUREE or until<br />
mixture is smooth.<br />
OR<br />
3. For the cocktail version, using the<br />
blender attachment, process mango and<br />
Malibu for about 1 minute on speed<br />
5/ PUREE or until mixture is smooth.<br />
Raspberries Layer<br />
Ingredients<br />
250g (8oz) frozen raspberries, defrosted<br />
1 shot (30ml/1 fl oz) Grenadine<br />
2 shots Crème de Cassis (60ml/2 fl oz)<br />
(optional)<br />
Method<br />
1. Using the juicer attachment, feed<br />
raspberries through the juice extractor’s<br />
feed tube.<br />
2. Mix raspberry juice with Grenadine and<br />
Crème de Cassis (optional).<br />
Pear Layer<br />
Ingredients<br />
1 pear, cored and cut in half<br />
Shot Vodka (1fl oz/30ml) (optional).<br />
Method<br />
1. Using the juicer attachment, feed pear<br />
through the juice extractor’s feed tube.<br />
2. For the mocktail version, using the<br />
blender attachment, process pear juice<br />
with ice cubes for about 1 minute on<br />
speed 3/BLEND or until mixture is<br />
slushy.<br />
OR<br />
3. For the cocktail version, mix pear juice<br />
with vodka.<br />
52
RECIPES USING THE JUICER AND BLENDER - COCKTAILS<br />
Constructing Mango, Raspberry<br />
and Pear Layered Cocktail<br />
1. Pour mango mixture into a glass.<br />
2. Insert the bowl of a spoon into the glass,<br />
with the rounded side of the spoon<br />
facing up. Place the tip of the spoon as<br />
far as it will go into the glass without<br />
touching the mango layer, very near or<br />
even touching the side of the glass.<br />
3. Very gently, pour the raspberry layer<br />
over the bowl of the spoon so that it<br />
floats on the surface of the mango layer.<br />
Pour in a steady stream but a very slow<br />
stream, almost a trickle, to keep the<br />
layers from mixing.<br />
4. Clean the spoon then repeat with the<br />
pear juice layer. Serve immediately.<br />
53
RECIPES USING THE JUICER AND BLENDER<br />
Peach and Mango<br />
Yogurt Pops<br />
Makes 8 yogurt pops<br />
Ingredients<br />
2 ripe peaches, stone removed and cut in half<br />
2 oranges, peeled and cut in half<br />
1 large ripe mango (375g/12oz), peeled, stone<br />
removed and cubed<br />
4 tablespoons (60ml/2oz) low-fat peach-mango<br />
yogurt or fruit soy yogurt<br />
1 tablespoon (15ml/½ oz) honey<br />
Method<br />
1. Using the juicer attachment, feed the<br />
peaches and oranges through the juice<br />
extractor’s feed tube.<br />
2. Using the blender attachment, process<br />
the peach/orange juice with mango,<br />
yogurt and honey for about 1 minute on<br />
speed 4/LIQUIFY or until mixture is<br />
smooth.<br />
3. Pour mixture into ice pop trays or ice<br />
cube trays until frozen<br />
Spicy Butternut pumpkin<br />
and Apple Soup<br />
Makes 4 to 6 servings<br />
Ingredients<br />
3-4 medium Granny Smith apples, peeled, cored,<br />
cut in half<br />
5g (¼ oz) fresh peeled ginger<br />
1 tablespoon (15ml/½ fl oz) olive oil<br />
2 medium onions, diced<br />
3 cloves garlic, crushed<br />
¼-½ teaspoon chili powder<br />
c butternut squash (pumpkin), skinned, seeded<br />
and cubed<br />
1 Gala apple (baking apple), peeled, cored and<br />
diced<br />
2 cups (500ml/16 fl oz) vegetable stock<br />
2 teaspoons fresh lemon juice<br />
Salt and pepper to taste<br />
Light sour cream<br />
Chopped fresh chives<br />
Method<br />
1. Using the juicer attachment, feed<br />
the Granny Smith apples and ginger<br />
through the juice extractor’s feed tube.<br />
<strong>The</strong>re should be approximately 1 cup<br />
(8oz/250ml) freshly squeezed apple<br />
juice.<br />
2. Heat olive oil in a large saucepan over<br />
high heat. Add onions and sauté for 3<br />
to 4 minutes, until they begin to brown.<br />
Add garlic and chilli powder and sauté<br />
10 seconds. Add pumpkin and Gala<br />
apple and sauté for 3 minutes. Add apple<br />
juice and vegetable stock, bring to a boil<br />
and simmer uncovered until squash and<br />
apple are tender, about 25 to 30 minutes.<br />
54
RECIPES USING THE JUICER AND BLENDER<br />
3. Allow mixture to cool slightly.<br />
4. Using the blender attachment, carefully<br />
transfer slightly cooled mixture in two<br />
batches into blender jug. Process for<br />
about 2 minutes on speed 3/BLEND or<br />
until soup is smooth.<br />
5. Return soup to saucepan, add lemon<br />
juice and season with salt and pepper.<br />
Bring soup to a simmer before serving.<br />
Garnish with sour cream and chives<br />
and serve.<br />
55
RECIPES USING THE JUICER<br />
Apple, carrot and<br />
celery juice<br />
Makes approximately 2 cups<br />
Ingredients<br />
4 small Granny Smith apples<br />
3 medium sized carrots, trimmed<br />
4 sticks celery<br />
Method<br />
Using the juicer attachment, feed apples,<br />
carrots and celery through the juice<br />
extractor’s feed tube. Serve immediately.<br />
TOMATO, CARROT, CELERY AND<br />
LIME JUICE<br />
Makes approximately 3 cups<br />
Ingredients<br />
2 medium tomatoes<br />
1 large carrot, trimmed<br />
2 celery stalks, trimmed<br />
1 lime, peeled<br />
Method<br />
Using the juicer attachment, feed<br />
tomatoes, carrot, celery and lime<br />
through the juice extractor’s feed tube.<br />
Serve immediately.<br />
CANTALOPE, MINT AND<br />
MANGO JUICE<br />
Makes approximately 2¼ cups<br />
Ingredients<br />
½ small cantaloupe, peeled, seeded and<br />
quartered<br />
3 sprigs fresh mint leaves<br />
1 mango, halved, seeded and peeled<br />
Method<br />
Using the juicer attachment, feed the<br />
cantaloupe, mint and mango through<br />
the juice extractor’s feed tube. Serve<br />
immediately.<br />
TOMATO, CUCUMBER, PARSLEY<br />
AND CARROT JUICE<br />
Makes approximately 3 cups<br />
Ingredients<br />
3 medium tomatoes<br />
1 large cucumber<br />
1 large bunch fresh parsley<br />
3 medium carrots, trimmed<br />
Method<br />
Using the juicer attachment, feed the<br />
tomatoes, cucumber, parsley and carrots<br />
through the juice extractor’s feed tube.<br />
Serve immediately.<br />
56
RECIPES USING THE JUICER<br />
SWEET POTATO, CELERY,<br />
GINGER AND ORANGE JUICE<br />
Makes approximately 3 cups<br />
Ingredients<br />
1 small sweet potato, peeled and halved<br />
4 sticks celery, trimmed<br />
2.5cm (1”) piece fresh ginger<br />
4 oranges, peeled<br />
Method<br />
Using the juicer attachment, feed the<br />
sweet potato, celery, ginger and oranges<br />
through the juice extractor’s feed tube.<br />
Serve immediately.<br />
PARSNIP, CELERY AND PEAR<br />
JUICE<br />
Makes approximately 3 cups<br />
Ingredients<br />
2 parsnips, trimmed<br />
4 sticks celery, trimmed<br />
4 medium pears, stalks removed<br />
Method<br />
Using the juicer attachment, feed the<br />
parsnips, celery and pears through<br />
the juice extractor’s feed tube. Serve<br />
immediately.<br />
TOMATO, CARROT AND RED Red<br />
capsicum JUICE<br />
Makes approximately 3 cups<br />
Ingredients<br />
2 small red red capsicum, trimmed,<br />
seeds removed<br />
3 medium tomatoes<br />
3 carrots, trimmed<br />
4 sprigs parsley<br />
Method<br />
Using the juicer attachment, feed the red<br />
capsicum, tomatoes, carrots and parsley<br />
through the juice extractor’s feed tube.<br />
Serve immediately.<br />
BLACKBERRY, PEAR AND<br />
GRAPEFRUIT JUICE<br />
Makes approximately 3 cups<br />
Ingredients<br />
225g (½ lb) blackberries<br />
3 ripe pears<br />
2 grapefruits, peeled<br />
Method<br />
Using the juicer attachment, feed the<br />
blackberries, pears and grapefruits<br />
through the juice extractor’s feed tube.<br />
Serve immediately.<br />
57
RECIPES USING THE JUICER<br />
BEETROOT, APPLE AND<br />
CELERY JUICE<br />
Makes approximately 2 cups<br />
Ingredients<br />
4 medium sized beetroot, trimmed<br />
2 medium Granny Smith apples<br />
4 sticks celery<br />
Method<br />
Using the juicer attachment, feed the<br />
beetroot, apples and celery through<br />
the juice extractor’s feed tube. Serve<br />
immediately.<br />
BLUEBERRY, BLACKBERRY,<br />
STRAWBERRY AND LIME JUICE<br />
Makes approximately 3½ cups<br />
Ingredients<br />
500g (1lb) blueberries<br />
500g (1lb) blackberries<br />
500g (1lb) strawberries, hulled<br />
1 lime, peeled<br />
Method<br />
Using the juicer attachment, feed<br />
blueberries, blackberries, strawberries<br />
and lime through the juice extractor’s<br />
feed tube. Serve immediately.<br />
CUCUMBER, CELERY, FENNEL<br />
AND BEAN SPROUT JUICE<br />
Makes approximately 3 cups<br />
Ingredients<br />
1 large cucumber<br />
3 sticks celery<br />
1 bulb fennel, trimmed<br />
2 cups bean sprouts<br />
Method<br />
Using the juicer attachment, feed<br />
cucumber, celery, fennel and bean<br />
sprouts through the juice extractor’<br />
feed tube. Serve immediately.<br />
APRICOT, APPLE AND<br />
PEAR SPARKLE<br />
Makes 4 servings<br />
Ingredients<br />
4 large apricots, halved and seeded<br />
4 small red apples<br />
3 medium pears<br />
250ml (8oz) sparkling mineral water<br />
½ cup crushed ice<br />
Method<br />
1. Using the juicer attachment, feed<br />
apricots, apples and pears through the<br />
juice extractor’s feed tube.<br />
2. Stir in mineral water and ice. Serve<br />
immediately.<br />
58
RECIPES USING THE JUICER<br />
GAZPACHO<br />
Makes 4 servings<br />
Ingredients<br />
4 medium tomatoes<br />
4 sprigs fresh parsley<br />
1 large clove garlic, peeled<br />
1 small onion, peeled and trimmed<br />
2 carrots<br />
2 stalks celery<br />
1 red red capsicum, base removed and seeded<br />
1 Lebanese cucumber<br />
2 tablespoons red wine vinegar<br />
Freshly ground black pepper<br />
1 cup crushed ice<br />
3 tablespoons chopped fresh basil<br />
Method<br />
1. Using the juicer attachment, feed<br />
tomatoes, parsley, garlic, onion, carrots,<br />
celery, red red capsicum and cucumber<br />
through the juice extractor’s feed tube.<br />
2. Stir in vinegar and black pepper.<br />
3. Arrange ice in four soup bowls. Pour in<br />
extracted juice, sprinkle with basil and<br />
serve immediately.<br />
VEGETABLE AND BACON SOUP<br />
Serves 4<br />
<strong>The</strong> remaining pulp left after juicing<br />
fruit or vegetables is mostly fiber and<br />
cellulose which, like the juice, contains<br />
vital nutrients necessary for the daily<br />
diet. However, like the juice, pulp<br />
should be used that day to avoid loss of<br />
vitamins. Some of the uses of pulp are<br />
to thicken casseroles or soups or in the<br />
case of fruit, simply placed in a bowl<br />
topped with meringue and baked for<br />
a simple dessert. Quite apart from the<br />
consumption use, pulp is great used in<br />
the garden for compost.<br />
Ingredients<br />
3 teaspoons butter<br />
1 onion, finely chopped<br />
1 ham hock<br />
350g (12oz) beetroot pulp, strained and juice<br />
reserved<br />
40g (1.5oz) potato pulp, strained and juice<br />
reserved<br />
40g (1.5oz) carrot pulp, strained and juice<br />
reserved<br />
85g (3oz) tomato pulp, strained and juice<br />
reserved<br />
30g (1oz) cabbage pulp, strained and juice<br />
reserved<br />
Reserved juices and enough water to make 2<br />
extra liters<br />
4 bacon rashers, chopped<br />
1 tablespoon lemon juice<br />
½ cup sour cream<br />
Method<br />
1. Melt butter in a large saucepan, cook<br />
onion over a medium heat for 2-3<br />
minutes or until golden.<br />
2. Add ham hock to pan, stir in beetroot<br />
pulp, potato pulp, carrot pulp, tomato<br />
pulp, cabbage pulp, reserved juices and<br />
water, bacon and lemon juice.<br />
3. Bring to the boil, reduce heat and<br />
simmer for 30-40 minutes.<br />
4. Remove ham bone, discard bone, finely<br />
chop meat and return to the pan.<br />
5. Serve topped with sour cream.<br />
59
RECIPES USING THE BLENDER - COCKTAILS<br />
Margarita<br />
Ingredients<br />
¼ cup (60ml) tequila<br />
¼ cup (60ml) cointreau<br />
1<br />
⁄3 cup (80ml) lime juice<br />
12 ice cubes<br />
Sunset Cooler<br />
Ingredients<br />
375ml (1½ cups) sauternes<br />
2 cups frozen pears, peeled, cored and diced<br />
1 cup frozen apricots, de-seeded and diced<br />
1 tablespoon lemon juice<br />
Method<br />
1. Place tequila, cointreau, lime juice and<br />
ice cubes into blender jug.<br />
2. Use the ICE setting or speed 2/CHOP<br />
and blend until well combined and ice is<br />
crushed. Serve in salt rimmed glasses.<br />
Daiquiris<br />
Basic Recipe:<br />
Ingredients<br />
Fruit (approximately 1 cup)<br />
½ cup (125ml) white spirits (white rum, vodka or<br />
kirsch)<br />
¼ cup (60ml) sugar syrup<br />
1 cup ice<br />
Method<br />
1. Place all ingredients into blender jug.<br />
2. Use the ICE setting or speed 2/CHOP<br />
and blend until well combined and ice<br />
is crushed.<br />
Method<br />
1. Place all ingredients into blender jug.<br />
2. Use the ICE setting or speed 2/CHOP<br />
and blend until well combined and ice is<br />
crushed.<br />
TIP: Sauternes is a sweet dessert wine.<br />
TIP: Place diced fruit in a plastic bag<br />
and freeze until firm.<br />
Pina Colada<br />
Ingredients<br />
2 tablespoons white rum<br />
2 tablespoons coconut cream<br />
2 teaspoons sugar<br />
¾ cup (190ml) unsweetened pineapple juice<br />
10 ice cubes<br />
Method<br />
1. Place all ingredients into blender jug.<br />
2. Use the ICE setting or speed 2/CHOP<br />
and blend until well combined and ice is<br />
crushed.<br />
60
RECIPES USING THE BLENDER - SHAKES<br />
Passionfruit Milkshake<br />
Ingredients<br />
1 punnet strawberries, hulled<br />
Pulp of 4 passionfruit<br />
2 cups (500ml) milk, chilled<br />
4 scoops passionfruit ice-cream<br />
2 tablespoons strawberry topping<br />
Method<br />
1. Place strawberries into blender jug.<br />
2. Select speed 2/CHOP and puree until<br />
smooth.<br />
3. Add half the passionfruit pulp, milk, and<br />
two ice-cream scoops.<br />
4. Select speed 3/BLEND and blend until<br />
smooth and thick.<br />
5. Pour into two glasses then top with<br />
remaining ice-cream and passionfruit<br />
pulp and strawberry topping. Serve<br />
immediately.<br />
Chocolate Malted<br />
Smoothie<br />
Ingredients<br />
2 cups (500ml) milk, chilled<br />
3 tablespoons malted milk powder<br />
4 scoops vanilla ice-cream<br />
4 scoops chocolate ice cream<br />
4 tablespoons caramel sauce<br />
Chocolate curls, for garnish (optional)<br />
Method<br />
1. Place milk, malted milk powder and<br />
vanilla ice-cream into blender jug.<br />
2. Use the SMOOTHIE setting and blend<br />
until well combined.<br />
3. Divide between 2 glasses and add<br />
chocolate ice cream. Top with caramel<br />
sauce and garnish with chocolate curls.<br />
61
RECIPES USING THE BLENDER - SAUCES<br />
Pesto<br />
Ingredients<br />
1 bunch basil leaves<br />
2 cloves garlic<br />
2 tablespoons lemon juice<br />
125g (4oz) pine nuts<br />
125ml (4 fl oz) olive oil<br />
60g (2oz) grated parmesan cheese<br />
Method<br />
1. Place all ingredients into blender jug.<br />
2. Select speed 2/CHOP and blend until<br />
smooth.<br />
3. Transfer mixture to a serving bowl. Chill<br />
until ready to use. Serve with toasted<br />
Turkish bread.<br />
Mayonnaise<br />
Ingredients<br />
2 egg yolks<br />
1 teaspoon dry mustard<br />
1 tablespoon vinegar<br />
Salt and white pepper, to taste<br />
½ cup (125ml) vegetable oil<br />
Method<br />
1. Place egg yolks, mustard, vinegar, salt<br />
and pepper into blender jug.<br />
2. Select speed 1/MIX and blend for 10-15<br />
seconds until light and fluffy.<br />
3. With blender running on speed 3/<br />
BLEND, slowly pour oil through the<br />
inner measuring lid. <strong>Blend</strong> until<br />
mixture thickens. This should take<br />
about 1 minute.<br />
Mayonnaise variations:<br />
Raspberry: replace 1 tablespoon vinegar<br />
with 1 tablespoon raspberry vinegar.<br />
Garlic: add 2 cloves garlic, peeled and<br />
chopped to the egg yolk mixture.<br />
Herb: add ½ cup chopped mixed fresh<br />
herbs (such as basil, chives, parsley,<br />
thyme) to the prepared mayonnaise.<br />
62
RECIPES USING THE BLENDER - SAUCES<br />
Satay Sauce<br />
Ingredients<br />
2 cloves garlic, peeled<br />
1 small onion, peeled and quartered<br />
2 teaspoons peanut oil<br />
½ cup roasted peanuts<br />
1 small chilli, halved and seeded<br />
2/3 cup (165ml) water<br />
2 tablespoons lemon juice<br />
1 tablespoon dark soy sauce<br />
2 tablespoons coconut milk<br />
1 teaspoon brown sugar<br />
Method<br />
1. Place garlic and onion into blender jug.<br />
Pulse until chopped.<br />
2. Heat peanut oil in a saucepan and cook<br />
garlic and onion mixture until lightly<br />
browned.<br />
3. Place remaining ingredients into<br />
blender jug.<br />
4. Select speed 3/BLEND and blend until<br />
smooth.<br />
5. Pour combined mixture over garlic and<br />
onion mixture and stir over a gentle heat<br />
to warm through. Serve immediately or<br />
cover and store in the refrigerator.<br />
TIP: Satay sauce may thicken on<br />
standing, if this happens, stir in a little<br />
more warm water.<br />
63
RECIPES USING THE BLENDER - MAINS<br />
Wonton Soup<br />
Ingredients<br />
125g (4oz) lean pork meat, trimmed and roughly<br />
chopped<br />
125g (4oz) green prawns, shelled and deveined<br />
2.5cm (1”) piece ginger, peeled and sliced<br />
1 tablespoon soy sauce<br />
½ teaspoon salt<br />
1 clove garlic<br />
¼ teaspoon sesame oil<br />
16 wonton wrappers<br />
1 x 60g (2oz) egg, lightly beaten<br />
4 cups (1 liter) chicken stock<br />
2 shallots, finely chopped<br />
Method<br />
1. Place pork, prawns, ginger, soy sauce,<br />
salt, garlic and sesame oil into blender<br />
jug. Pulse to a smooth paste.<br />
2. Place a teaspoon of mixture slightly<br />
below center of wonton wrapper and<br />
brush edges of the wrapper with egg.<br />
Fold wrapper in half to make a triangle<br />
and press edges to seal, excluding<br />
any air. Moisten the two edges of the<br />
triangle with egg, bring together and<br />
pinch to seal.<br />
3. Drop wontons into boiling salted water<br />
and cook for 10 minutes.<br />
4. Meanwhile, bring chicken stock to the<br />
boil in a saucepan, reduce heat and<br />
simmer 2-3 minutes.<br />
5. Lift out wontons from boiling water<br />
and place four wontons each in four<br />
individual bowls, spoon over chicken<br />
stock. Garnish with chopped shallots.<br />
Sweet Corn and Bacon Soup<br />
Ingredients<br />
1 tablespoon oil<br />
1 onion, chopped<br />
4 cloves garlic, peeled and crushed<br />
2 teaspoons ground coriander<br />
1 teaspoon Cajun seasoning<br />
2 cups frozen corn kernels, thawed<br />
3 cups (750ml) chicken stock<br />
1 cup (250ml) milk<br />
3 bacon rashers, rinds removed and chopped<br />
½ cup (125ml) cream<br />
2 tablespoons snipped chives<br />
Method<br />
1. Heat oil in a large saucepan and<br />
add onion, garlic, coriander and<br />
Cajun seasoning.<br />
2. Cook over a medium heat, stirring<br />
constantly until onion is soft. Add corn,<br />
stock and milk. Bring to the boil then<br />
reduce heat and simmer, covered for<br />
30 minutes.<br />
3. Allow mixture to cool slightly.<br />
4. Cook bacon in a separate pan until crisp,<br />
drain on absorbent kitchen paper.<br />
5. Carefully transfer slightly cooled<br />
mixture in two batches into blender jug.<br />
6. Select speed 5/PUREE and blend<br />
until smooth.<br />
7. Return soup to pan, add cream, bacon<br />
and chives, heat through gently.<br />
Serve immediately.<br />
64
RECIPES USING THE BLENDER - MAINS<br />
Sweet Peppered<br />
Tomato Soup<br />
Ingredients<br />
1 tablespoon oil<br />
2 cloves garlic, crushed<br />
2 leeks, sliced<br />
2 x400g can tomatoes, chopped<br />
2 teaspoons chicken stock powder<br />
1 tablespoon tomato paste<br />
2 teaspoons brown sugar<br />
1 bay leaf<br />
¼ teaspoon dried thyme<br />
1 teaspoon chopped fresh mint<br />
1 teaspoon chopped fresh coriander<br />
¼ teaspoon ground cloves<br />
Pinch of cayenne pepper<br />
2 tablespoons chopped fresh parsley<br />
Method<br />
1. Heat oil in a large saucepan, add garlic<br />
and leeks, cook over medium heat for 2-3<br />
minutes or until leeks are soft.<br />
2. Combine tomatoes, stock powder,<br />
tomato paste, brown sugar, bay leaf,<br />
thyme, mint, coriander, cloves and<br />
cayenne pepper.<br />
3. Pour into pan with leek mixture, bring<br />
to boil, then reduce heat and simmer,<br />
uncovered for 20 minutes or until liquid<br />
has reduced by one third.<br />
4. Allow mixture to cool slightly.<br />
5. Carefully transfer mixture in two batches<br />
into blender jug.<br />
6. Select speed 5/PUREE and blend<br />
until smooth.<br />
7. Ladle soup into serving bowls, sprinkle<br />
with parsley and serve immediately.<br />
Thai Fish Cakes<br />
Ingredients<br />
1 small onion, peeled and quartered<br />
2 cloves garlic, peeled<br />
2 thick slices peeled ginger<br />
2 red chillies<br />
2.5cm (1”) piece fresh lemongrass<br />
6 fresh kaffir lime leaves<br />
¼ bunch coriander, roughly chopped<br />
350g (12oz) white boneless fish fillets, cubed<br />
1 x 60g (2oz) egg<br />
2 tablespoons water<br />
1 tablespoon fish sauce<br />
8 green beans, sliced<br />
Oil for shallow frying<br />
Method<br />
1. Place all ingredients except oil into<br />
blender jug. Pulse until well combined.<br />
2. Remove mixture from blender jug and<br />
shape into 24 fish cakes.<br />
3. Cover and chill for 30 minutes.<br />
4. Heat oil in a large fry pan and cook fish<br />
cakes on a medium heat until golden<br />
on both sides and cooked through,<br />
approximately 10 minutes.<br />
Serve with cucumber sauce made by<br />
combining ¼ cup warmed honey with 1<br />
tablespoon lime juice and 1 tablespoon<br />
finely chopped, peeled cucumber.<br />
65
RECIPES USING THE BLENDER - MAINS<br />
Thai Green Curry Paste<br />
Ingredients<br />
4 large green chillies, stems removed and<br />
roughly chopped<br />
1 teaspoon black peppercorns<br />
1 onion, roughly chopped<br />
2 cloves garlic<br />
1 bunch coriander, including root, washed and<br />
chopped<br />
1 stem lemongrass, trimmed and thinly sliced<br />
(or 2 teaspoons chopped lemon rind)<br />
1 teaspoon salt<br />
2 teaspoons ground coriander<br />
1 teaspoon ground cumin<br />
2 teaspoons dried shrimp paste<br />
1 teaspoons ground turmeric<br />
1 cup (250ml) oil<br />
Method<br />
1. Place all ingredients into blender jug.<br />
2. Select speed 3/BLEND and blend to a<br />
smooth paste.<br />
This curry paste is best suited to poultry.<br />
Allow 2 tablespoons paste per 16oz<br />
(500g) poultry.<br />
TIP: Scrape sides of blender jug with<br />
a spatula and add a little extra oil or<br />
tablespoon of water if necessary.<br />
TIP: Store curry paste in an airtight<br />
container in the refrigerator.<br />
Lamb Burgers<br />
Ingredients<br />
1 tablespoon fresh herb sprigs (parsley, coriander<br />
or rosemary)<br />
1 slice bread, crusts removed<br />
½ small onion, quartered<br />
250g (8oz) trim lamb, diced<br />
1 tablespoon mint sauce<br />
Salt and pepper, to taste<br />
Method<br />
1. Place all ingredients into blender jug.<br />
2. Select speed 2/CHOP and blend until<br />
well combined.<br />
3. Shape mixture into 3-4 burgers, cover<br />
and refrigerate for 20-30 minutes.<br />
4. Cook burgers on a preheated grill or<br />
pan fry for 5 minutes each side or until<br />
cooked when tested.<br />
66
RECIPES USING THE BLENDER - DESSERTS<br />
Mixed Berry Crepes<br />
Ingredients<br />
2 x 60g (2oz) eggs<br />
1 cup (250ml) milk<br />
1 tablespoon butter, melted<br />
1 cup plain flour<br />
2 teaspoons caster sugar<br />
¼ cup (60ml) caster sugar, extra<br />
¼ cup (60ml) water<br />
250g (8oz) mixed fresh berries (strawberries,<br />
raspberries, blueberries), washed and hulled<br />
5. Transfer cooled berry mixture into<br />
blender jug.<br />
6. Select speed 1/MIX and blend until<br />
smooth.<br />
7. Fold crepes into quarters and arrange<br />
in an ovenproof dish overlapping layers.<br />
Pour sauce over crepe and bake in a<br />
preheated oven at 200ºC (400ºF) for 10-<br />
15 minutes. Serve with scoops of vanilla<br />
ice cream.<br />
TIP: Brandy can be added to mixed<br />
berry sauce if desired.<br />
Method<br />
1. Place eggs, milk, butter, flour and sugar<br />
into blender jug.<br />
2. Select speed 3/BLEND and blend until<br />
smooth. Allow to stand for 1 hour.<br />
3. Heat a small non stick fry pan or crepe<br />
pan. Pour ¼ cup batter into pan, swirling<br />
to cover base. Cook on medium heat<br />
until underside is golden, approximately<br />
1 minute. Turn crepe to cook other side.<br />
Remove from pan and place on a plate.<br />
Repeat with remaining batter, stacking<br />
crepes onto plate and interweaving with<br />
grease proof paper. Set aside.<br />
4. To make mixed berry sauce, heat extra<br />
sugar and water in a small saucepan<br />
until dissolved. Add mixed berries and<br />
cook until soft. Allow to cool.<br />
67
RECIPES USING THE BLENDER - DESSERTS<br />
Chilled Cheesecake with<br />
Raspberry Puree<br />
Ingredients<br />
250g (8oz) packet plain sweet biscuits, broken<br />
125g (4oz) butter, melted<br />
250g (8oz) cream cheese, cubed and softened<br />
1 x 300ml can sweetened condensed milk<br />
½ cup (125ml) cream<br />
1 tablespoon grated lemon zest<br />
1<br />
⁄3 cup lemon juice<br />
1 punnet raspberries, washed<br />
Whipped cream<br />
Ingredients<br />
1 x 300ml thickened or pure cream<br />
Method<br />
1. Place cream into blender jug.<br />
2. Select speed 1/MIX and blend for<br />
approximately 20 seconds. Check<br />
thickness. Pulse once or twice if<br />
thickening is required. Do not<br />
over blend.<br />
Method<br />
1. Place biscuits into blender jug.<br />
2. Select speed 2/CHOP and blend until<br />
finely crushed. Add melted butter to<br />
blender jug and continue to blend until<br />
well combined.<br />
3. Press biscuit mixture over base and<br />
sides of a greased 20cm (8”) spring form<br />
pan. Chill until firm.<br />
4. Place cream cheese, condensed milk,<br />
cream, lemon zest and juice into<br />
blender jug.<br />
5. Select speed 3/BLEND and blend<br />
until smooth.<br />
6. Pour into prepared crumb crust, cover<br />
and refrigerate for at least 24 hours<br />
before serving.<br />
7. Place raspberries into blender jug.<br />
8. Select speed 1/MIX and blend until<br />
smooth. If desired, sweeten raspberry<br />
puree with a little icing sugar. Serve with<br />
whipped cream and raspberry puree.<br />
68
NOTES<br />
69
NOTES<br />
70
NOTES<br />
71
<strong>Breville</strong> Customer Service Centre<br />
Australian Customers<br />
Mail: PO Box 22<br />
Botany, NSW, 2019<br />
AUSTRALIA<br />
Phone: 1300 139 798<br />
Fax: (02) 9384 9601<br />
Email: Customer Service:<br />
askus@breville.com.au<br />
New Zealand Customers<br />
Mail: Private Bag 94411<br />
Greenmount, Auckland<br />
NEW ZEALAND<br />
Phone: 0800 273 845<br />
Fax: 0800 288 513<br />
Email: Customer Service:<br />
askus@breville.com.au<br />
www.breville.com.au<br />
<strong>Breville</strong> is a registered trademark of <strong>Breville</strong> Pty. Ltd. A.B.N. 98 000 092 928.<br />
Copyright <strong>Breville</strong> Pty. Ltd. 2010.<br />
Due to continued product improvement, the products illustrated/photographed<br />
in this brochure may vary slightly from the actual product.<br />
Model BJB840 Issue - A10