DVD4000 DVD Player - Ward Electronics
DVD4000 DVD Player - Ward Electronics
DVD4000 DVD Player - Ward Electronics

Create successful ePaper yourself
Turn your PDF publications into a flip-book with our unique Google optimized e-Paper software.
www.asaelectronics.com<br />
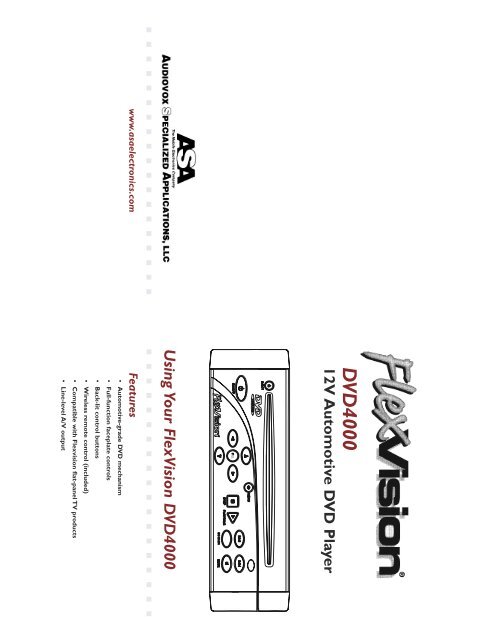
<strong><strong>DVD</strong>4000</strong><br />
12V Automotive <strong>DVD</strong> <strong>Player</strong><br />
SEL<br />
Using Your FlexVision <strong><strong>DVD</strong>4000</strong><br />
Features<br />
• Automotive-grade <strong>DVD</strong> mechanism<br />
• Full-function faceplate controls<br />
• Back-lit control buttons<br />
• Wireless remote control (included)<br />
• Compatible with Flexvision flat-panel TV products<br />
• Line-level A/V output
CAUTIONS AND WARNINGS<br />
To obtain the best results and to avoid malfunctions, PLEASE READ CAREFULLY THE<br />
DESCRIPTIONS AND OPERATING PROCEDURES CONTAINED IN THIS OWNER’S MANUAL<br />
PRIOR TO OPERATING THE VIDEO CASSETTE PLAYER.<br />
IMPORTANT NOTICES<br />
• It is unlawful in most jurisdictions for a person to drive a motor vehicle which is<br />
equipped with a television viewer or screen that is located in the motor vehicle at<br />
any point forward of the driver's seat, or that is visible, directly or indirectly, to the<br />
driver while operating the vehicle. Furthermore, and in the interest of safety, this VCP<br />
should never be connected to a video monitor that is installed in a location where it<br />
will be visible, directly or indirectly, by the operator of the motor vehicle.<br />
• Please note that the state of Rhode Island forbids the installation of such a device in a<br />
motor vehicle.<br />
WARNING: TO PREVENT FIRE OR ELECTRIC SHOCK, DO NOT EXPOSE THIS<br />
APPLIANCE TO RAIN OR MOISTURE.<br />
For your protection, record the<br />
model and serial numbers of your<br />
video cassette player here. In the<br />
event your player requires servicing<br />
or is stolen, you may need this<br />
information.You may also wish to<br />
clip or staple your sales receipt to<br />
this page.<br />
Model Number: <strong><strong>DVD</strong>4000</strong><br />
Serial Number:<br />
Date Purchased:<br />
Store’s Name and Address:<br />
WARRANTY<br />
90 DAY / 12 MONTH LIMITED WARRANTY<br />
AUDIOVOX SPECIALIZED APPLICATION, LLC (the Company) warrants to the<br />
original retail purchaser of this product that should this product or any part thereof,<br />
under normal use and conditions, be proven defective in material or workmanship<br />
within 90 days from the date of original purchase, such defect(s) will be repaired or<br />
replaced (at the Company's option) without charge for parts and repair labor.After the<br />
initial 90 day period and for a period of 12 months from the date of original purchase,<br />
the Company will supply at no charge a replacement for any defective part(s), but will<br />
charge for the labor to repair the product.<br />
To obtain repair or replacement within the terms of this warranty, the product is to<br />
be delivered with proof of warranty coverage (e.g. dated bill of sale), specification of<br />
defect(s), transportation prepaid, to an approved warranty station, or the Company at<br />
the address shown below.<br />
This warranty does not extend to the elimination of externally generated static or<br />
noise, to the correction of antenna problems, to costs incurred for removal or<br />
reinstallation of the product, or to damage to any tapes, speakers, accessories, or<br />
electrical systems.<br />
This warranty does not apply to any product or part thereof which, in the opinion of the<br />
Company, has been damaged through alteration, improper installation, mishandling,<br />
misuse, neglect, or accident. THE EXTENT OF THE COMPANY'S LIABILITY UNDER<br />
THIS WARRANTY IS LIMITED TO THE REPAIR OR REPLACEMENT PROVIDED<br />
ABOVE, AND, IN NO EVENT, SHALL THE COMPANY'S LIABILITY EXCEED THE<br />
PURCHASE PRICE PAID BY THE PURCHASER FOR THE PRODUCT.<br />
This warranty is in lieu of all other express warranties or liabilities. ANY IMPLIED<br />
WARRANTIES, INCLUDING ANY IMPLIED WARRANTY OF MERCHANTABILITY,<br />
SHALL BE LIMITED TO THE DURATION OF THIS WARRANTY. ANY ACTION FOR<br />
BREECH OF ANY WARRANTY HEREUNDER INCLUDING ANY IMPLIED<br />
WARRANTY OF MERCHANTABILITY MUST BE BROUGHT WITHIN A PERIOD OF<br />
30 DAYS FROM THE DATE OF ORIGINAL PURCHASE. IN NO CASE SHALL THE<br />
COMPANY BE LIABLE FOR ANY CONSEQUENTIAL OR INCIDENTAL DAMAGES<br />
FOR BREECH OF THIS OR ANY OTHER WARRANTY, EXPRESS OR IMPLIED,<br />
WHATSOEVER. No person or representative is authorized to assume for the<br />
Company any liability other that expressed herein in connection with the sale of<br />
this product.<br />
Some states do not allow limitations on how long an implied warranty lasts or the<br />
exclusion or limitation of incidental or consequential damages so the above limitations<br />
or exclusions may not apply to you. This warranty gives you specific legal rights and you<br />
may also have other rights which vary from state to state.<br />
AUDIOVOX SPECIALIZED APPLICATIONS, LLC<br />
Visit us at www.asaelectronics.com<br />
24
SPECIFICATIONS<br />
Operation Temperature • -20 ~ 65º C<br />
Storage Temperature • -40 ~ 85º C<br />
Video Display System • NTSC<br />
Current Draw • 1.5A<br />
Weight • 2.9 Lbs<br />
Overall Dimensions • 2 x 8.6 x 11.8 Inch (H x W x D)<br />
Supported Formats • <strong>DVD</strong>, CD Audio, MP3<br />
Media Type • CD, CD-Rom, CDR, CDR-W<br />
23<br />
TABLE OF CONTENTS<br />
Safety Instructions<br />
Features and Package Contents<br />
Installation<br />
Standard Connections<br />
Installation User Kits<br />
Front Panel Controls<br />
Remote Control Functions<br />
How to Operate <strong>DVD</strong>s<br />
Main Menu Operation<br />
• <strong>DVD</strong> Main Menu<br />
• Audio CD or MP3 Main Menu<br />
Troubleshooting<br />
Specifications<br />
Warranty<br />
1<br />
2<br />
3<br />
4<br />
5<br />
6<br />
8<br />
12<br />
16<br />
16<br />
19<br />
21<br />
23<br />
24
SAFETY INSTRUCTIONS<br />
1 Read Instructions - All the safety and operating instructions<br />
should be read before operating the <strong>DVD</strong> player.<br />
2 Retain Instructions - The safety and operating instructions<br />
should be retained for future reference.<br />
3 Heed Cautions and Warnings - All cautions and warnings<br />
regarding the <strong>DVD</strong> player should be adhered to.<br />
4 Cleaning - Unplug or turn off vehicle power to the <strong>DVD</strong><br />
player before cleaning. Do not use liquid cleaners or aerosol<br />
cleaners. Use only a damp cloth for cleaning.<br />
5 Use in Vehicles - The <strong>DVD</strong> player must be securely fastened.<br />
6 Ventilation - Slots and openings in the cabinet are provided for<br />
ventilation to ensure reliable operation of the <strong>DVD</strong> player and to<br />
protect it from overheating.<br />
7 Power Sources - The <strong>DVD</strong> player should be operated only from<br />
a twelve volt negative ground source.<br />
1<br />
TROUBLESHOOTING CONTINUED<br />
SYMPTOM POSSIBLE CAUSE SOLUTION<br />
The OSD menu is in<br />
a foreign language.<br />
• Incorrect OSD<br />
language<br />
• Change OSD language<br />
selection.<br />
The symbol<br />
appears<br />
• Requested function<br />
not available at this<br />
time<br />
• Certain functions may be<br />
disabled by the <strong>DVD</strong> itself<br />
during passages of a disc.<br />
Picture is displayed<br />
in the wrong aspect<br />
ratio<br />
• Incorrect match of<br />
aspect-ratio settings to<br />
disc<br />
• Change aspect ratio<br />
settings.<br />
Remote control<br />
inoperative<br />
• Weak batteries<br />
• Sensor is blocked<br />
• Change both batteries.<br />
• Clear path to sensor.<br />
The picture has<br />
occasional distortion<br />
• Damaged disc • Make sure the disc is free<br />
from scratches and dirt.<br />
Brightness is<br />
unstable or noises<br />
are produced on<br />
video<br />
• Copy protection • Connect the <strong><strong>DVD</strong>4000</strong><br />
directly to the TV/monitor.<br />
The effect is caused by<br />
copy protection circuitry<br />
required on all <strong>DVD</strong><br />
players.<br />
MP3 discs won’t<br />
read or they skip<br />
• Incorrect record<br />
format<br />
• Make sure CD is not<br />
recorded with variable bit<br />
rate.<br />
• Re-record the CD at a<br />
slower rate.<br />
22
TROUBLESHOOTING<br />
SYMPTOM POSSIBLE CAUSE SOLUTION<br />
Unit does not turn<br />
on.<br />
• Main Power Switch<br />
turned off<br />
• No power<br />
• Press in Main Power<br />
Switch.<br />
• Check fuses and that the<br />
ACC power is on.<br />
Disc does not play. • Disc is loaded<br />
improperly<br />
• Incorrect disc type<br />
• Invalid Region Code<br />
• Rating is above<br />
parental preset<br />
• Dirty disc<br />
• Load disc label-side up.<br />
• Check to see that disc is<br />
CD, CD-R, CD-RW,VCD,<br />
MP3-CD, <strong>DVD</strong>-R, and<br />
<strong>DVD</strong>-RW or <strong>DVD</strong>-Movie:<br />
other types will not play.<br />
• Use Region 1 disc only.<br />
• Enter password to over<br />
ride or change rating<br />
settings.<br />
• Make sure the disc is free<br />
from scratches and dirt.<br />
No picture. • Intermittent<br />
connections<br />
• Wrong input on<br />
monitor<br />
• Check all video<br />
connections.<br />
• Check input selection of<br />
TV or receiver.<br />
No sound. • Intermittent<br />
connections.<br />
• Incorrect digital audio<br />
selection<br />
• <strong>DVD</strong> disc is in fast or<br />
slow mode<br />
• Check all audio<br />
connectors.<br />
• Check digital audio<br />
settings.<br />
• There is no audio playback<br />
on <strong>DVD</strong> discs during fast<br />
or slow modes.<br />
Picture is distorted<br />
or jumps during fast<br />
forward or reverse<br />
play.<br />
• MPEG-2 decoding • It is a normal artifact of<br />
<strong>DVD</strong> playback for pictures<br />
to jump or show some<br />
distortion during rapid<br />
play.<br />
Some remote buttons<br />
do not operate<br />
during <strong>DVD</strong> play;<br />
prohibited symbol<br />
appears (see next<br />
page)<br />
• MPEG-2 decoding • It is a normal artifact of<br />
<strong>DVD</strong> playback for pictures<br />
to jump or show some<br />
distortion during rapid<br />
play.<br />
21<br />
FEATURES<br />
CONGRATULATIONS on your purchase of the Flexvision <strong><strong>DVD</strong>4000</strong> automotive<br />
<strong>DVD</strong> player.This product has been designed to give you and your family many years of<br />
enjoyment. Please read the directions that follow to familiarize yourself with the<br />
product operation and installation procedures.<br />
• 12V, DIN-Chassis <strong>DVD</strong> player<br />
• Automotive-grade <strong>DVD</strong> mechanism<br />
• Full-function faceplate controls<br />
• Back-lit control buttons<br />
• Wireless remote control (included)<br />
• Direct-wire (source-component) compatible with<br />
Flexvision flat-panel TV products<br />
• Universal line-level A/V output (RCA) use with most<br />
TV/Video products<br />
PACKAGE CONTENTS<br />
• [ 1 ] <strong>DVD</strong> player<br />
• [ 1 ] DIN mounting sleeve<br />
• [ 1 ] Power pigtail harness<br />
• [ 1 ] RCA patch cord<br />
• [ 1 ] Wireless (IR) remote control<br />
• [ 1 ] Mounting Hardware Bag<br />
• [ 1 ] Owner’s Manual / Warranty Card<br />
2
INSTALLATION<br />
This unit is designed for installation in vehicle cabs with an existing radio<br />
opening. In some cases, a special installation kit will be required to mount the<br />
<strong><strong>DVD</strong>4000</strong> to the dashboard.These kits are available at electronics supply<br />
stores and car stereo specialist stores.Always check the kit application before<br />
purchasing to make sure the kit works with your vehicle.<br />
1 Slide the mounting sleeve off of the chassis. If it is locked into<br />
position, remove the end caps and use the removal tools<br />
(supplied) to disengage it.<br />
2 Check the dashboard opening size by sliding the mounting sleeve<br />
easily slides into the opening. Do not force the sleeve into the<br />
opening or cause it to bend or bow. Check that there is sufficient<br />
space behind the dash board for the <strong>DVD</strong> player chassis wires<br />
prior to actually installing the sleeve.Wiring on the DIN<br />
power harness assembly should take place after hole size is<br />
confirmed. Mount sleeve after wiring.<br />
3 Follow the wiring diagram and instructions on page 4 and make<br />
certain all connections of the wiring harness are properly secured<br />
and insulated to ensure proper operation of this unit.After<br />
completing the wiring connections, connect the <strong><strong>DVD</strong>4000</strong> and<br />
turn the unit on to confirm operation is corrected. Once proper<br />
operation is achieved, turn off the ignition switch, disconnect the<br />
<strong><strong>DVD</strong>4000</strong>, and proceed with installation of the mounting sleeve.<br />
4 Locate the series of bend tabs along the top, bottom, and sides of<br />
mounting sleeve.With the sleeve fully inserted into the dash<br />
opening, bend as an tabs outward as necessary so that the sleeve<br />
is firmly secured to the dash board.<br />
5 Attach one end of the DIN mounting strap to the screw stud on<br />
the rear chassis using the flange nut provided. Fasten other<br />
end of the DIN mounting strap to a secure part of the dash<br />
board, either above or below the <strong>DVD</strong> player using the screw<br />
and flange nut provided. Bend strap to positioning as necessary.<br />
6 Reconnect the wire harness of the <strong><strong>DVD</strong>4000</strong> to the wiring in the<br />
vehicle installed in step 3. Carefully slide the <strong>DVD</strong> player into the<br />
mounting sleeve, making sure it is right side up, until fully seated,<br />
and that the spring clips lock into place.<br />
3<br />
MAIN MENU OPERATION (AUDIO/MP3)<br />
Setting an Item to Repeat<br />
1 In the Main menu, highlight Repeat Mode.The item that is<br />
currently set to repeat is displayed next to the option.<br />
2 Press SELECT to display a list of the possible items that can be<br />
set to repeat.These are Disc,Title, Chapter,Track or Playlist<br />
depending on the type of disc and the current settings.<br />
3 Highlight the item that you want to repeat and press SELECT.<br />
The selected repeat mode is the top right corner of the<br />
screen and when the selected item finishes it will be repeat.<br />
Changing the Time Display<br />
1 In the Main menu, highlight Time Display.The time that is<br />
currently being displayed in the bottom bar is shown next to<br />
the option.<br />
2 Press SELECT to display a list of the possible type of time<br />
display.These are:<br />
• Total - the total time in the disc.<br />
• Total elapsed - the total amount of time the disc has<br />
been playing for.<br />
• Single elapsed - the amount of time the track or title<br />
has been playing for.<br />
• Single remain - the amount of time remaining on the<br />
track or title.<br />
• Single - the total time if the track or title.<br />
3 Highlight the item that you want to display and press SELECT.<br />
The selected time is displayed in the bottom bar.<br />
20
MAIN MENU OPERATION (AUDIO/MP3)<br />
Changing the Play Mode of Audio Discs<br />
1 There are three different play modes available for audio disc:<br />
• Normal Mode - plays the tracks on disc in the order<br />
they appear or, if a playlist is being used, in the order<br />
they appear in the list.<br />
• Shuffle Mode - plays the tracks on the disc or in a<br />
playlist in random order.<br />
• Intro Mode - plays ten seconds of each of the tracks<br />
on the disc or in a playlist if one is being used.<br />
2 To change the play mode, follow these steps:<br />
1 In the Main menu, highlight Play Mode.<br />
2 The current play mode is displayed next to the option.<br />
3 Press SELECT to display a list of the play modes.<br />
3 Highlight the mode that is displayed in the top right corner of<br />
the screen and next to the item.The disc starts playing again<br />
using the selected play mode.<br />
Using a Playlist<br />
A playlist is a selection of tracks from the full track list of an<br />
audio disc.The order that the tracks are selected in is the order in<br />
which they are played.A playlist of audio tracks can be created and<br />
edited as described below:<br />
1 In the Main menu, highlight Playlist. If the Playlist is currently<br />
being used,‘On’ will be displayed next to the option.<br />
Otherwise,‘Off’ will be displayed.<br />
2 Press SELECT to display the Playlist submenu.<br />
3 To create or edit a playlist, highlight Edit Playlist and<br />
press SELECT.<br />
4 To add all of the tracks on the disc to the playlist,<br />
highlight Add All Tracks to Playlist and press SELECT.<br />
5 If a playlist is already setup and is not being Played,<br />
highlight Enable Playlist and press SELECT to play it.<br />
If a playlist is playing and you want to return to playing<br />
the full list of tracks, highlight Disable Playlist and<br />
press SELECT.<br />
19<br />
STANDARD CONNECTIONS<br />
1 BLACK – VEHICLE GROUND<br />
3 GREEN – BATTERY B+ POWER<br />
2 ORANGE – IGN (ACCESSORY B+) POWER<br />
WHITE – AUDIO-L<br />
RED – AUDIO-R<br />
Video TV/Monitor and<br />
audio amplifiers<br />
YELLOW – VIDEO<br />
1 BROWN – GROUND<br />
2 YELLOW – IR<br />
To remote control output<br />
on Flexvision monitors (optional)<br />
1 Connect the power input harness with extension into the pigtail<br />
on the back of the chassis.This harness has provision for audio<br />
(left and right) and video output as well as input power and a<br />
2-pin wired infrared connection.<br />
2 Connect the green wire of the power harness extension to the<br />
battery of the vehicle.The orange wire of the power harness<br />
extension should be connected to the ignition or switched 12V.<br />
3 Connect the composite video output of the <strong>DVD</strong> player (yellow<br />
RCA) to the selected video display.<br />
4 Connect the line level audio outputs (left and right) to the<br />
corresponding line level audio inputs on the desired audio<br />
amplification device. (Typically an audio amplifier or the audio<br />
inputs on your TV.)<br />
NOTE: A ‘noisy’ power supply can degrade the performance of your <strong>DVD</strong> player. Please take<br />
steps to ensure that the unit is connected to a power circuit that does not have excessive<br />
noise or ripple on it.<br />
4
INSTALLATION USER KITS<br />
1 If your vehicle requires the use of an installation kit to mount<br />
this <strong>DVD</strong> player, follow he instructions included with the<br />
installation kit to attach the <strong>DVD</strong> player to the mounting plate<br />
supplied with the kit.<br />
2 Wire and test the <strong>DVD</strong> player as described in step 3 on page 3.<br />
3 Install the <strong>DVD</strong> player/mounting plate assembly to the sub-dash<br />
according to the instructions of the installation kit.<br />
4 Attach the <strong>DVD</strong> player support strap to the player and the<br />
dash board as described in step 5 on page 3.<br />
5 Replace the dashboard trim panel.<br />
CAUTION: The rear of the <strong>DVD</strong> player must be supported with the strap to prevent damage<br />
to the dashboard from the weight of the <strong>DVD</strong> player or improper operation due to vehicle<br />
vibration.<br />
5<br />
MAIN MENU OPERATION (<strong>DVD</strong>) CONTINUED<br />
Entering a Time to Play<br />
1 In the Main menu, highlight Time.<br />
2 The time displayed next to the option is the total time of the<br />
track for audio discs and the total time of the title for <strong>DVD</strong>s.<br />
3 Press SELECT and enter the time that you want the play to<br />
skip to in the format h:mm:ss, for example 0:27:30.This must<br />
be less than the total time displayed.<br />
Using Position Markers<br />
The Markers option allows you to set markers at up to five<br />
different places on the disc.When you then select a previously set<br />
marker, the disc will skip to the place marked.To set a marker,<br />
follow these steps:<br />
1 In the main menu, highlight Marker.<br />
2 Press SELECT to display the Marker submenu.<br />
3 Highlight the marker that you want to set.This can be<br />
Marker 1 to Marker 5.<br />
4 When play reaches the point at which you want the<br />
marker to be set, press SELECT. Details of the selected<br />
marker are displayed. If you set the marker at the wrong<br />
point you can delete it by pressing CLEAR.To delete all<br />
of the set markers, highlight Clear All Markers and<br />
press SELECT.<br />
5 To jump to a marker that you have set, highlight it and<br />
press SELECT.<br />
18
MAIN MENU OPERATION (<strong>DVD</strong>) CONTINUED<br />
3 Press SELECT and enter the number of the chapter, title or<br />
track that you want to play using the number buttons on your<br />
remote control.<br />
4 If there are more than nine available you must enter the<br />
number the selected chapter, title or track is played.<br />
Changing the Audio Language<br />
1 In the Main menu, highlight Audio.<br />
2 Press SELECT to display a list of the audio options.<br />
3 Highlight the required language and press SELECT.<br />
4 The selected language is displayed in the top right<br />
corner of the screen and the audio is changed to the<br />
selected language.<br />
Selecting to View Subtitle<br />
1 In the Main menu, highlight Subtitle.<br />
2 If subtitles are currently being used the language that they are<br />
being shown in is displayed next to the option, otherwise Off<br />
is displayed.<br />
3 Press SELECT to display a list of the possible subtitle<br />
languages.<br />
4 Either highlight the required language or highlight Off to<br />
remove the subtitles and press SELECT.<br />
5 The subtitle selection is displayed in the top right corner of<br />
the screen and subtitles are displayed or removed as selected.<br />
Changing the Angle of View<br />
1 In the Main menu, highlight Angle.<br />
2 The number of the current angle being used is displayed<br />
separated from the total number available by a / symbol.<br />
For example, 1/2.<br />
3 Press SELECT and enter the number of the angle that you<br />
want to view.The angles selection is displayed in the top right<br />
corner of the screen and the angle of view changes.<br />
NOTE: The angle function will not work unless the <strong>DVD</strong> disc contains material recorded<br />
from multiple angles.<br />
17<br />
FRONT PANEL CONTROLS<br />
1 2 3<br />
4<br />
SEL<br />
5<br />
6<br />
14<br />
13 12 11 10 9 8 7<br />
1 POWER<br />
Press button to turn the power on and off.<br />
2 EJECT<br />
<strong>DVD</strong> disc is stopped and ejected by pressing button.<br />
3 DISC OPENING<br />
With the label surface up, gently insert the disc into the slot until<br />
the soft loading mechanism engages and the <strong>DVD</strong> disc play begins.<br />
A <strong>DVD</strong> disc can be loaded into the player even if the <strong>DVD</strong> player is<br />
turned off.<br />
4 UP CURSOR<br />
Used to navigate through OSD (On Screen Display) menus.<br />
5 DOWN CURSOR<br />
Used to navigate through the OSD (On Screen Display) menus.<br />
6 LEFT CURSOR<br />
Used to navigate through the OSC (On Screen Display) menus.<br />
7 RIGHT CURSOR<br />
Used to navigate through the OSC (On Screen Display) menus.<br />
6
FRONT PANEL CONTROLS CONTINUED<br />
8 SELECT<br />
This button is used to choose the highlighted selection from<br />
the OSD menu. (If the highlighted selections are numbered the<br />
appropriate number key on the remote may be used.)<br />
9 MENU<br />
Select this button to access the <strong>DVD</strong> menus.Titles and Chapters<br />
may be included on the <strong>DVD</strong> OSD menu press the menu along<br />
with Camera Angles, Spoken language, and Sub-title options.To<br />
remove the OSD menu press the menu button again.<br />
10 STOP<br />
Pressing this button will stop play of the <strong>DVD</strong> disc.<br />
11 PLAY/PAUSE<br />
Pressing this button will start the <strong>DVD</strong> play, pressing again will<br />
pause the <strong>DVD</strong> play.<br />
12 PREVIOUS<br />
Pressing this button will start the play to the previous chapter.<br />
13 NEXT<br />
Pressing this button will skip forward to the next chapter.<br />
14 GO BACK<br />
If pressed in the OSD menu mode this button will return you to<br />
the previous screen.This works the same as the RETURN on<br />
the remote control.<br />
15 MUTE<br />
Pressing this button will mute the audio output.<br />
16 INFRARED SENSOR EYE<br />
This eye picks up the IR signal from the remote.A blocked ‘eye’<br />
will not allow the remote to function properly.<br />
7<br />
MAIN MENU OPERATION (<strong>DVD</strong>)<br />
1 To display the Main Menu for the disc that is playing, press<br />
DISPLAY on your remote control.<br />
2 The Main Menu can also be displayed in Stop mode by<br />
pressing SELECT.<br />
3 The Main Menu is available to change the options that effect the<br />
way the disc is playing.<br />
4 For example, you can change the chapter or track that is playing, or<br />
the angle of view for <strong>DVD</strong>s.The language that the Main Menu<br />
options are displayed in is set using the Language options in the<br />
Setup Menu.<br />
5 The Main Menu consists of three areas:<br />
• The left panel displays the type of disc that is playing, the<br />
current listening mode, in the bottom bar, the track or title<br />
and chapter number, the time display, and the bit rate.<br />
• The bottom bar displays the rack numbers that are playing<br />
for an audio disc and the video that is playing for <strong>DVD</strong>s.<br />
• The bottom box displays the options that can be changed<br />
using the Main menu.These options are detailed in the video<br />
that is playing for <strong>DVD</strong>s.<br />
6 To display the Main Menu for the disc that is playing, press DISPLAY<br />
on your remote control.<br />
7 The Main menu can also be displayed in Stop mode by pressing<br />
SELECT.<br />
Selecting a Chapter,Title or Track to Play<br />
1 In the Main menu, highlight one of the following options:<br />
• Chapter to change the chapter that is being played<br />
on a <strong>DVD</strong><br />
• Title to change the title that is being played on <strong>DVD</strong><br />
• Track to change the track that is being played on an<br />
audio disk<br />
2 The number of the current chapter, title or track being played<br />
is displayed separated from the total number available by<br />
a / symbol. For example, 06/15.<br />
16
HOW TO OPERATE <strong>DVD</strong>s CONTINUED<br />
Repeating a Section of any Disc<br />
1 Press A > B once to start selection.<br />
2 Press A > B again to finish selection.<br />
3 To cancel selection press A > B again.<br />
Playing a Disc at Different Speeds<br />
1 The facility is available to play a disc at different speeds in<br />
both forward and reverse directions.<br />
2 To play the disc at different speeds in a forward direction<br />
use the Forward button on your remote control.The speeds<br />
that can be achieved are:<br />
• x2, x4, x8, and x15 for <strong>DVD</strong>s and video CDs. (For<br />
<strong>DVD</strong>s, at 2x, the subtitles are still displayed.)<br />
• x2, x3, and x4 for audio discs and mp3s.The audio can<br />
still be heard at all speeds.<br />
3 To play the disc at different speeds in reverse use the Backward<br />
button on your remote control.The speeds that can be achieved<br />
in reverse are:<br />
• x2, x4, x8<br />
• x2 for audio disc and mp3s.The audio can be heard in<br />
reverse at all speeds.<br />
15<br />
REMOTE CONTROL FUNCTIONS<br />
1 2<br />
3<br />
4<br />
5<br />
6 7<br />
8 9<br />
10<br />
11 12<br />
13 14<br />
15<br />
16<br />
17 18<br />
19<br />
21<br />
20<br />
22 23<br />
24<br />
25<br />
27<br />
26<br />
28<br />
8
REMOTE CONTROL FUNCTIONS CONTINUED<br />
Loading the Batteries into the Infrared Remote Control:<br />
Open the battery compartment cover and insert two ‘AAA’ batteries inside the<br />
battery compartment. Note polarity. Close cover door.<br />
CAUTION: DO NOT MIX OLD AND NEW BATTERIES. NEVER MIX DIFFERENT<br />
TYPES OF BATTERIES (STANDARD, ALKALINE, AND SO ON.)<br />
1 POWER<br />
Pressing this button will turn the <strong>DVD</strong> player on or set the player<br />
on standby.<br />
2 OPEN / CLOSE<br />
Pressing this button will open or close disc tray.<br />
3 MENU<br />
Pressing this button will enable user to select <strong>DVD</strong> main menu.<br />
4 TITLE<br />
Pressing this button will go to the <strong>DVD</strong> title menu.<br />
5 NUMBER (0-9)<br />
These numeric keys allow you to directly enter the highlighted<br />
menu chapter, or track selection.<br />
6 +10<br />
This button will allow you to directly enter the tracks above 10.<br />
For instance, track 17 is (+10) then (7).Track 21 is (+10), (+10),<br />
then (1).<br />
7 CLR (CLEAR)<br />
Pressing this button will clear track numbers while in track<br />
selection or search mode.<br />
8 SUBTITLE<br />
This button controls the language selector and allows you to<br />
choose whether subtitles are visible.<br />
9 MUTE<br />
Pressing this button will silence the audio output.<br />
10 ZOOM<br />
Pressing this button will allow you to zoom the video with<br />
-/+ buttons (13, 14).<br />
9<br />
HOW TO OPERATE <strong>DVD</strong>s CONTINUED<br />
Skipping Through the Chapters or Tracks<br />
As you are playing a disc you can skip to the next or to a previous<br />
chapter (on a <strong>DVD</strong>) or track (on a audio disk.).This carried out<br />
using the Skip Next and Skip Previous buttons as follows:<br />
• To skip to the beginning of the next chapter or track,<br />
press the Skip Next button.<br />
• To skip to the beginning of the current chapter or track,<br />
press the Skip Previous button.<br />
• To skip to the beginning of the previous chapter or track,<br />
press the Skip Previous button twice.<br />
Using the Repeat Features<br />
The repeat feature allows you to repeat a section of a disc once it<br />
has finished playing.The following items can be repeated:<br />
• The entire disc<br />
• A playlist<br />
• A single track<br />
• A single chapter<br />
• A single title<br />
• A section of the disc between two selected points<br />
Repeating a Track, Chapter, or Title<br />
1 Play the track, chapter, or title that you want to repeat.<br />
2 Press the REPEAT MODE button on your remote control<br />
until the required repeat mode is displayed in the top right<br />
corner of the screen.This can be Repeat Track, Repeat<br />
Chapter, or Repeat Title.When the disc reaches the end of<br />
the selected track, chapter, or title, it will start playing it again.<br />
3 To stop the track repeating, press the REPEAT MODE<br />
button again until Repeat Off is displayed in the top right<br />
corner of the screen.<br />
14
HOW TO OPERATE <strong>DVD</strong>s CONTINUED<br />
3 Use the directions to highlight the chapter that you want<br />
to play and press SELECT.The menu is closed and the<br />
chapter is immediately played.<br />
Playing from a Specific Time in a Title or Track<br />
• This facility is available for audio discs and other discs that<br />
support the ability to move to a specific time in a track or<br />
title. For example, if a track is 5 minutes and 38 seconds<br />
long you can select to start playing form 5 minutes and 8<br />
seconds so that you only listen to the last 30 seconds of<br />
the track.<br />
• There are two ways that you can move to a specific time,<br />
(a) either use the Main Menu, as described in Entering a<br />
time to play, or (b) follow the steps below:<br />
1 Press the SEARCH MODE button on your remote control<br />
until the Time option is displayed in the top left corner of<br />
the screen.<br />
2 Use the number buttons on your remote control to enter<br />
the time that you want to move to in the format: mm:ss.<br />
3 When you have finished entering the time, the Time option<br />
is closed and the track or title is played from the time<br />
entered.<br />
Playing a Specific Track or Chapter and Title<br />
There are two ways that you can move to a specific track or<br />
chapter and title: (a) either use the Main Menu, as described in<br />
Selecting a chapter, title, or track to play, or (b) follow the<br />
steps below:<br />
1 Press SEARCH MODE button on your remote control<br />
until either the Track or Title and Chapter option is<br />
displayed in the top left corner of the screen.The total<br />
number of tracks or titles and chapters are displayed.<br />
2 Use the number buttons on your remote control to enter<br />
the track or title and chapter that you want to play.<br />
13<br />
REMOTE CONTROL FUNCTIONS CONTINUED<br />
11 AUDIO<br />
This button allows you to select the language you prefer from<br />
the menu. Note that not all <strong>DVD</strong>s support this function.<br />
12 TIME<br />
Pressing this button will select the time display model such as<br />
single, single remain, total, etc.<br />
13 PREVIOUS<br />
Pressing this button will select the previous chapter.<br />
14 NEXT<br />
Pressing this button will select the next chapter.<br />
15 SELECT<br />
Use this button to acknowledge the highlighted menu selection.<br />
16 UP<br />
Use this icon to navigate through the menu selections. In play mode<br />
this button will also pause play.<br />
17 ><br />
LEFT<br />
Use this icon to navigate through the menu selections. In play mode<br />
this button will also fast reverse.<br />
RIGHT<br />
Use this icon to navigate through the menu selections. In play mode<br />
this button will also fast forward 4X.<br />
DOWN<br />
Use this icon to navigate through the menu selections. In play mode<br />
this button will also allow the <strong>DVD</strong> to be reviewed in slow motion.<br />
Pressing this button will allow you to select the playing speed. Fast<br />
forward x2, x4, x8, x15.When in pause mode, will allow slow<br />
forward 5%, 12%, 20%...90%.<br />
Pressing this button will allow you to select the playing speed. Fast<br />
reverse x2, x4, x8, x15.When in pause mode, will allow slow<br />
reverse 50% and 75%.<br />
10
REMOTE CONTROL FUNCTIONS CONTINUED<br />
19 STOP<br />
Pressing this button will stop play of the <strong>DVD</strong> disc.<br />
20 PLAY/PAUSE<br />
Pressing this button will start the play of the <strong>DVD</strong> disc. Pressing<br />
again will pause the <strong>DVD</strong> disc.<br />
21 DISPLAY<br />
This button turns the on screen display on and off. In stop mode,<br />
this button will allow for player settings such as aspect ratio and<br />
so on.<br />
22 A > B<br />
Multiple presses of this button will allow you to repeat a sequence<br />
A to B audio or video.To set the beginning, press once, and to set<br />
the ending point, press a second time.To cancel the repeat<br />
sequence, press a third time.<br />
23 PROGRAM<br />
Pressing this button will allow you to make a favorite program list<br />
with program button on CD or on MP3 disc.<br />
24 RETURN<br />
This button will allow you to go back one menu step.<br />
25 SEARCH MODE<br />
This button will allow you to go back one menu step.<br />
26 PLAY MODE<br />
This button selects playing modes such as Shuffle, Intro, and<br />
Normal.<br />
27 ANGLE<br />
If the <strong>DVD</strong> disc contains sequences recorded from different camera<br />
angles, pressing the button causes the angle icon to appear and<br />
show you the number of camera angles available and allows you to<br />
change the angle if you wish.The angle function will not work with<br />
<strong>DVD</strong> discs that do not have recorded multiple angles.<br />
28 REPEAT MODE<br />
This button will select repeat mode such as Repeat disc, Repeat<br />
track, and Repeat off.<br />
11<br />
HOW TO OPERATE <strong>DVD</strong>s<br />
Playing a Disc<br />
1 When you insert the disc it will automatically play if the AutoPlay<br />
setup option is turned on.<br />
2 If the AutoPlay option is turned off or if you have stopped a disc<br />
that was playing, you can restart a disc by pressing the Play/Pause<br />
button on the faceplate or your remote control.<br />
Pausing a Disc<br />
To pause a disc that is playing, press the Play/Pause button.<br />
Stopping a Disc<br />
1 To stop a disc that is playing, press the Stop button on your<br />
remote control.<br />
2 For a short amount of time the disc can be restarted in the same<br />
place as if Play/Pause had been pressed, by pressing Play/Pause.<br />
Selecting a Section of the Disc to Play<br />
If you do not want to play the entire disc, you can select a section to play<br />
using one of the following options:<br />
• For <strong>DVD</strong>s that are provided with a menu you can select the<br />
chapter that you want to view.<br />
• Move to a specific time, title, chapter, or track.<br />
• Skip through the chapters or tracks.<br />
• For audio discs you can create a playlist of selected tracks that<br />
you want to play.There are two methods of creating a playlist;<br />
a) using playlist and (b) creating a playlist.<br />
Selecting a Chapter Using the <strong>DVD</strong> Menu<br />
Some <strong>DVD</strong>s are provided with a menu that, amongst other options, allows<br />
you to select a specific chapter to play.To use the <strong>DVD</strong> menu to select a<br />
chapter to play, follow the stops below:<br />
1 Press the Menu button on either the remote control or the<br />
front panel.The <strong>DVD</strong> menu is displayed.<br />
2 Use the direction arrows to highlight the chapters option in the<br />
menu and press SELECT.<br />
12