BP200 Manual.pdf - Digitech
BP200 Manual.pdf - Digitech
BP200 Manual.pdf - Digitech

Create successful ePaper yourself
Turn your PDF publications into a flip-book with our unique Google optimized e-Paper software.
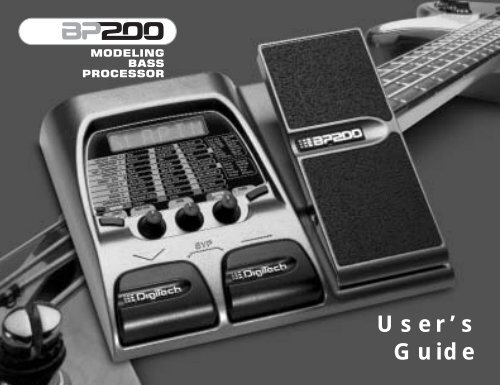
MODELING<br />
BASS<br />
PROCESSOR<br />
User’s<br />
Guide
These symbols are internationally accepted symbols that warn of potential<br />
hazards with electrical products.The lightning flash means that there are<br />
dangerous voltages present within the unit.The exclamation point indicates<br />
that it is necessary for the user to refer to the owners manual.<br />
These symbols warn that there are no user serviceable parts inside the unit.<br />
Do not open the unit. Do not attempt to service the unit yourself. Refer all<br />
servicing to qualified personnel. Opening the chassis for any reason will void<br />
the manufacturer’s warranty. Do not get the unit wet. If liquid is spilled on<br />
the unit, shut it off immediately and take it to a dealer for service.<br />
Disconnect the unit during storms to prevent damage.<br />
Electromagnetic Compatibility<br />
Operation is subject to the following conditions:<br />
•This device may not cause harmful interference.<br />
•This device must accept any interference received, including interference<br />
that may cause undesired operation.<br />
•Use only shielded interconnecting cables.<br />
•Operation of this unit within significant electromagnetic fields should<br />
be avoided.<br />
Warning<br />
For your protection, please read the following:<br />
Water and Moisture: Appliances should not be used near water<br />
(e.g. near a bathtub, washbowl, kitchen sink, laundry tub, in a wet<br />
basement, or near a swimming pool, etc.) Care should be taken so<br />
that objects do not fall and liquids are not spilled into the enclosure<br />
through openings.<br />
Power Sources: The appliance should be connected to a power<br />
supply only of the type described in the operating instructions or as<br />
marked on the appliance.<br />
Grounding or Polarization: Precautions should be taken so that<br />
the grounding or polarization means of an appliance is not defeated.<br />
Power Cord Protection: Power supply cords should be routed so<br />
that they are not likely to be walked on or pinched by items placed<br />
upon or against them, paying particular attention to cords at plugs,<br />
convenience receptacles, and the point where they exit from the<br />
appliance.<br />
Servicing: To reduce the risk of fire or electrical shock, the user<br />
should not attempt to service the appliance beyond that described in<br />
the operating instructions.All other servicing should be referred to<br />
qualified service personnel.<br />
For units equipped with externally accessible fuse receptacle:<br />
Replace fuse with same type and rating only.
DECLARATION OF CONFORMITY<br />
Manufacturer’s Name: DigiTech<br />
Manufacturer’s Address: 8760 S. Sandy Parkway<br />
Sandy, Utah 84070, USA<br />
declares that the product:<br />
Product name: <strong>BP200</strong><br />
Note: Product name may be suffixed by the letters EU, JA, NP and UK.<br />
Product option: all (requires Class II power adapter that conforms<br />
to the requirements of EN60065, EN60742, or equivalent.)<br />
conforms to the following Product Specifications:<br />
Safety: IEC 60065 (1998)<br />
EMC: EN 55013 (1990)<br />
EN 55020 (1991)<br />
Supplementary Information:<br />
The product herewith complies with the requirements of the Low Voltage Directive 72/23/EEC and the EMC Directive<br />
89/336/EEC as amended by Directive 93/68/EEC.<br />
DigiTech / Johnson<br />
President of Harman Music Group<br />
8760 S. Sandy Parkway<br />
Sandy, Utah 84070, USA<br />
Date: September 14,2001<br />
European Contact: Your local DigiTech / Johnson Sales and Service Office or<br />
Harman Music Group<br />
8760 South Sandy Parkway<br />
Sandy, Utah 84070 USA<br />
Ph: (801) 566-8800<br />
Fax: (801) 568-7573
Warranty<br />
We at DigiTech are very proud of our products and back-up each one we sell with the following warranty:<br />
1.The warranty registration card must be mailed within ten days after purchase date to validate this warranty.<br />
2. DigiTech warrants this product, when used solely within the U.S., to be free from defects in materials and workmanship<br />
under normal use and service.<br />
3. DigiTech liability under this warranty is limited to repairing or replacing defective materials that show evidence of defect,<br />
provided the product is returned to DigiTech WITH RETURN AUTHORIZATION, where all parts and labor will be covered<br />
up to a period of one year.A Return Authorization number may be obtained from DigiTech by telephone.The company shall<br />
not be liable for any consequential damage as a result of the product's use in any circuit or assembly.<br />
4. Proof-of-purchase is considered to be the burden of the consumer.<br />
5. DigiTech reserves the right to make changes in design, or make additions to, or improvements upon this product without<br />
incurring any obligation to install the same on products previously manufactured.<br />
6.The consumer forfeits the benefits of this warranty if the product's main assembly is opened and tampered with by anyone<br />
other than a certified DigiTech technician or, if the product is used with AC voltages outside of the range suggested by the<br />
manufacturer.<br />
7.The foregoing is in lieu of all other warranties, expressed or implied, and DigiTech neither assumes nor authorizes any person<br />
to assume any obligation or liability in connection with the sale of this product. In no event shall DigiTech or its dealers<br />
be liable for special or consequential damages or from any delay in the performance of this warranty due to causes beyond<br />
their control.<br />
NOTE:The information contained in this manual is subject to change at any time without notification. Some information contained<br />
in this manual may also be inaccurate due to undocumented changes in the product or operating system since this<br />
version of the manual was completed.The information contained in this version of the owner's manual supersedes all previous<br />
versions.
Table of Contents<br />
Introduction . . . . . . . . . . . . . . . . . . . . . . . . .1<br />
Included Items . . . . . . . . . . . . . . . . . . . . . . . . .1<br />
Front Panel . . . . . . . . . . . . . . . . . . . . . . . . . . . .2<br />
Rear Panel . . . . . . . . . . . . . . . . . . . . . . . . . . . .4<br />
Connecting the <strong>BP200</strong> . . . . . . . . . . . . . . . . . . .5<br />
Mono Operation . . . . . . . . . . . . . . . . . . . . . . .5<br />
Stereo Operation . . . . . . . . . . . . . . . . . . . . . . .6<br />
Modes and Functions . . . . . . . . . . . . . . . . . .8<br />
Performance Mode . . . . . . . . . . . . . . . . . . . . . .8<br />
Edit Mode . . . . . . . . . . . . . . . . . . . . . . . . . . . . .9<br />
Store Mode . . . . . . . . . . . . . . . . . . . . . . . . . .10<br />
Bypass Mode . . . . . . . . . . . . . . . . . . . . . . . . .12<br />
Tuner Mode . . . . . . . . . . . . . . . . . . . . . . . . . .12<br />
Rhythm Trainer . . . . . . . . . . . . . . . . . . . . . . . .14<br />
Expression Pedal . . . . . . . . . . . . . . . . . . . . . . .14<br />
Assigning A Parameter . . . . . . . . . . . . . . . . . .14<br />
Expression Pedal Calibration . . . . . . . . . . . . .15<br />
Factory Reset . . . . . . . . . . . . . . . . . . . . . . . . .16<br />
Effects and Parameters . . . . . . . . . . . . . . .17<br />
Signal Path . . . . . . . . . . . . . . . . . . . . . . . . . . .17<br />
Fretless / Wah . . . . . . . . . . . . . . . . . . . . . . . .17<br />
Compressor . . . . . . . . . . . . . . . . . . . . . . . . . .18<br />
Amp/Stompbox Models . . . . . . . . . . . . . . . . .18<br />
EQ . . . . . . . . . . . . . . . . . . . . . . . . . . . . . . . . .19<br />
Cabinet - Gate . . . . . . . . . . . . . . . . . . . . . . . .20<br />
Effects . . . . . . . . . . . . . . . . . . . . . . . . . . . . . . .21<br />
Chorus . . . . . . . . . . . . . . . . . . . . . . . . . . . . . .21<br />
Flanger . . . . . . . . . . . . . . . . . . . . . . . . . . . . . .21<br />
Phaser . . . . . . . . . . . . . . . . . . . . . . . . . . . . . .22<br />
Envelope Filter . . . . . . . . . . . . . . . . . . . . . . . .22<br />
Vibrato . . . . . . . . . . . . . . . . . . . . . . . . . . . . . .22<br />
Octavider . . . . . . . . . . . . . . . . . . . . . . . . . . . .23<br />
SynthTalk . . . . . . . . . . . . . . . . . . . . . . . . . .23<br />
Pitch Shift . . . . . . . . . . . . . . . . . . . . . . . . . . . .23<br />
Detune . . . . . . . . . . . . . . . . . . . . . . . . . . . . . .24<br />
Whammy . . . . . . . . . . . . . . . . . . . . . . . . . .24<br />
Delay . . . . . . . . . . . . . . . . . . . . . . . . . . . . . . .25<br />
Reverb . . . . . . . . . . . . . . . . . . . . . . . . . . . . . .25<br />
Appendix . . . . . . . . . . . . . . . . . . . . . . . . . . .26<br />
Specifications: . . . . . . . . . . . . . . . . . . . . . . . . .26<br />
Preset List . . . . . . . . . . . . . . . . . . . . . . . . . . .27
Introduction<br />
The <strong>BP200</strong> gives you the flexibility and power to produce sonic creations never before thought<br />
possible. To become better acquainted with the <strong>BP200</strong>, we recommend you go through this<br />
User’s Guide with your <strong>BP200</strong> in front of you.<br />
Included Items<br />
Before you get started, please make sure that the following items have been included:<br />
• <strong>BP200</strong><br />
• PS0913B Power Supply<br />
• User’s Guide<br />
• Warranty Card<br />
The utmost care was taken while your <strong>BP200</strong> was being manufactured. Everything should<br />
be included and in perfect working order. If anything is missing, contact the factory at once.<br />
Please help us become acquainted with you and your needs by completing your warranty<br />
card. Thank you!<br />
1
2<br />
Front Panel<br />
SLApin
1. FOOT SWITCHES - Navigate through all 80 presets. When pressed together, they bypass<br />
the current preset. When pressed together and held,Tuner mode is entered.<br />
2. AMP TYPE, GAIN, MASTER LEVEL Knobs - Adjusts the effect parameters in Edit Mode<br />
and adjust Amp Type, Gain, and Master Level in Performance Mode, and select Pattern,Tempo,<br />
and Rhythm Level in Rhythm mode.<br />
3. SELECT button - Enters and exits Edit Mode. Successive presses will navigate through all<br />
the effect rows.<br />
4. RHYTHM button - Turns on and off the Rhythm Trainer function.<br />
5. EFFECTS MATRIX - Lists all effect parameters available for editing. The LEDs next to<br />
each effect will light when the effect is on in a preset. The LEDs also serve as a reference<br />
when using the <strong>BP200</strong>’s Tuner.<br />
6. DISPLAY - Provides information for all the <strong>BP200</strong>’s different functions.<br />
7. EXPRESSION PEDAL - Controls the <strong>BP200</strong>'s parameters in real time.<br />
8. STORE button - Stores or copies presets to User preset locations.<br />
3
4<br />
Rear Panel<br />
1. INPUT - Connect your instrument to this jack.<br />
2. JAM-A-LONG - Connect the headphone output of your CD, tape, or MP3 player to this<br />
1/8” stereo jack to practice along with you favorite music.<br />
3. OUTPUT - The <strong>BP200</strong>’s output is a TRS (tip, ring, sleeve) Stereo output that is used for<br />
both mono and stereo applications. Connect one end of a single mono instrument cable, or<br />
a TRS stereo “Y” cord to this jack, and the other end to an amplifier, mixer, or recording<br />
device’s input(s).<br />
4. HEADPHONE - Connect a pair of stereo headphones to this jack.<br />
5. POWER - Connect only the DigiTech PS0913B power supply to this jack.
Connecting the <strong>BP200</strong><br />
The <strong>BP200</strong> can be connected in several different ways.The following diagrams show a few possible<br />
options. Before connecting the <strong>BP200</strong>, make sure the power to your amplifier is turned off.<br />
The <strong>BP200</strong> should also be powered off or unplugged.<br />
Mono Operation<br />
Bass Amp Input/Effect Return Output Input<br />
SLApin<br />
1. Connect your bass to the <strong>BP200</strong>’s Input.<br />
2. Connect a single mono instrument cable from the <strong>BP200</strong>’s Output to the amplifier’s<br />
instrument input, or a power amp’s line input.<br />
5
6<br />
Stereo Operation<br />
Bass Amp Input/Effect Return<br />
Stereo 'Y'<br />
Cord<br />
TRS Stereo Output<br />
SLApin<br />
Instrument Input<br />
1. Connect your bass to the <strong>BP200</strong>’s Input.<br />
2. Connect a TRS stereo “Y” cord to the <strong>BP200</strong>’s Stereo Output.<br />
3. Connect one end of the “Y” cord to an amplifier, mixer channel, or power amp input.<br />
4. Connect the second end of the “Y” cord to another amplifier, mixer channel, or power<br />
amp output.
Note: If connecting to a mixing console, set the pan controls of the mixer hard<br />
left and right, and be sure to use the <strong>BP200</strong>’s Cabinet Modeling. See page 20<br />
for more information on selecting Cabinet Modeling.<br />
7
8<br />
Modes and Functions<br />
Performance Mode<br />
The <strong>BP200</strong> initially powers up in performance mode. While in Performance mode, the<br />
<strong>BP200</strong>'s buttons, knobs, and footswitches function as follows:<br />
SELECT Button - Enters Edit Mode. Successive presses move to the next row of effects<br />
in the Matrix. If this button is pressed after the Expression LED lights, you return to<br />
Performance mode. Press and hold this button to exit Edit mode.<br />
STORE Button - Enters Store Mode.<br />
AMP TYPE, GAIN, and MASTER LEVEL Knobs - These knobs control the Amp Type,<br />
Gain, and Master Level of the current preset.<br />
FOOT SWITCHES - The 2 foot switches navigate up and down through the <strong>BP200</strong>'s<br />
presets. Press both footswitches simultaneously to access Bypass mode. Press and hold<br />
these together to access the Tuner mode. When a preset is selected the first three letters<br />
of the preset name followed by a space and preset number are shown in the display.<br />
After one second, the full preset name is displayed.<br />
RHYTHM Button - Turns on an off the Rhythm Trainer. When the Rhythm Trainer is<br />
active, the AMP TYPE knob selects the Rhythm pattern, the GAIN knob changes the<br />
Rhythm Tempo, and the MASTER LEVEL knob changes the Rhythm Level.<br />
EXPRESSION PEDAL - Controls the selected preset’s parameter that is assigned to<br />
it.
Edit Mode<br />
The <strong>BP200</strong> lets you create your own presets, and modify existing presets. To create your<br />
own preset, do the following:<br />
1. Select a User or Factory Preset.<br />
2. Press the SELECT button. The Matrix’s first effect row LED begins flashing.<br />
3. Modify the parameters in the selected row using the AMP TYPE, GAIN, and<br />
MASTER LEVEL knobs. When changes are made, the Store LED lights, and an abbreviated<br />
parameter name with a space followed by a two digit parameter value is displayed.<br />
To move to the next effect in the Matrix, press the SELECT button again.<br />
4. Press the STORE button to save your changes. See page 10 for more information on<br />
storing presets.<br />
Use Select Button<br />
to Select Effect<br />
Amp Type<br />
Knob<br />
Adjusts Left<br />
Column<br />
SLApin<br />
Gain Knob<br />
Adjusts Center<br />
Column<br />
Master Level<br />
Knob<br />
Adjusts Right<br />
Column<br />
9
10<br />
Store Mode<br />
After modifying a preset, you must store your settings to one of the 40 User Preset locations.<br />
Do the following to store changes, or store a preset to a different location:<br />
1. Press the STORE button. The STORE LED begins blinking off and on and the first<br />
character of the name flashes.<br />
2. Use the AMP TYPE knob or either footswitch to change the character. Use the<br />
GAIN knob to move to the next character to the left or right in the name.<br />
SLApin<br />
2. Use Knobs to<br />
Name Preset<br />
1. Press Store<br />
Characters in Display<br />
Flash Individually
3. Press the STORE button again. A three letter abbreviation of the preset name and the<br />
preset number is displayed.<br />
4. Select a new preset location (if desired) using the UP or DOWN footswitches or the<br />
MASTER LEVEL knob. Only presets 1-40 can be overwritten.<br />
5. Press the STORE button a final time to store your changes. STORED followed by the<br />
current preset name is displayed.<br />
SLA 20<br />
4. Select Destination<br />
with Footswitches<br />
3. Press Store Again<br />
Preset Number Flashes<br />
5. Press Store Again<br />
Saves Preset to <strong>BP200</strong><br />
Note: The SELECT and RHYTHM buttons abort the Store Mode.<br />
11
12<br />
Bypass Mode<br />
The <strong>BP200</strong> can be bypassed so only a clean, unprocessed bass signal is heard. To bypass<br />
the <strong>BP200</strong>, do the following:<br />
1. Press both footswitches simultaneously. Bypass appears in the display.<br />
2. Press either of the footswitches again to return to Performance mode with all edits in<br />
tact.<br />
Note: the SELECT, RHYTHM, and STORE buttons, and the AMP TYPE,GAIN,<br />
and MASTER LEVEL knobs are disabled in Bypass mode.<br />
Tuner Mode<br />
The tuner in the <strong>BP200</strong> lets you quickly tune or check the tuning of your bass. To access<br />
the Tuner do the following:<br />
1. Press and hold both foot switches until TUNER appears in the display.<br />
2. Begin playing and the note appears in the display. The Matrix LED’s indicate whether<br />
the note is sharp (red LED’s lit above the green CABINET-GATE LED ) or flat (red<br />
LED’s lit below the green CABINET-GATE LED). When the note is in tune, only the<br />
green CABINET-GATE LED is lit.<br />
3. Press the SELECT button to select the tuning reference (A=440,A=Ab,A=G,A=Gb)<br />
4. Rotate the AMP TYPE, GAIN, and MASTER LEVEL knobs to change the tuning<br />
reference in semitone steps. This setting is maintained until changed by the user or a<br />
factory reset is performed.
5. Press either of the 2 foot switches to exit the Tuner mode, and returns you to the last<br />
mode used.<br />
Top LEDs Indicate<br />
Note is Sharp<br />
Green LED Indicates<br />
Note is In Tune<br />
Bottom LEDs Indicate<br />
Note is Flat<br />
Display Shows<br />
Note Played<br />
tuner<br />
Note:The STORE and RHYTHM buttons are disabled in Tuner mode. The<br />
EXPRESSION PEDAL returns sound to the signal and acts as bypass volume.<br />
13
14<br />
Rhythm Trainer<br />
The <strong>BP200</strong> includes 31 sampled drum patterns that may be used to develop a good sense<br />
of timing. To use the Rhythm Trainer, do the following:<br />
1. Press the RHYTHM button.<br />
2. Rotate the AMP TYPE knob to select 1 of the 30 patterns available.<br />
3. Rotate the GAIN knob to set the pattern tempo (40-240BPM).<br />
4. Rotate the MASTER LEVEL knob to adjust the rhythm playback level (0-99).<br />
5. Press the RHYTHM button again to exit the Rhythm Trainer. All rhythm settings are<br />
maintained until the <strong>BP200</strong> is powered off.<br />
Note: Press the SELECT button to return to Edit Mode. Press the STORE<br />
button to return to Store Mode. Press either footswitch to return to<br />
Performance Mode with the Rhythm Trainer playback still enabled.<br />
Expression Pedal<br />
Assigning a Parameter<br />
The <strong>BP200</strong> includes a built-in Expression pedal. The Expression pedal is used to control<br />
many of the <strong>BP200</strong>’s effect parameters in real time. To assign a parameter to the<br />
Expression pedal, do the following:<br />
1. Select a User or Factory Preset.<br />
2. Press the SELECT button until the Matrix’s last effect row LED begins flashing.<br />
3. Rotate the AMP TYPE knob to select the parameter the pedal will control.
4. Rotate the GAIN knob to adjust the minimum value the expression pedal reaches<br />
(toe up).<br />
5. Rotate the MASTER LEVEL knob to adjust the maximum value the expression<br />
pedal reaches (toe down).<br />
6. Press the STORE button to store your changes. See page 10 for more information<br />
on storing presets.<br />
Here is a list of the parameters that can be assigned to the expression pedal:<br />
PARAMETER MIN VALUE MAX VALUE<br />
WAH 1 99<br />
A GAIN 0 99<br />
AMPLVL 0 99<br />
AMOUNT 1 99<br />
EFFLVL 0 99<br />
WHAMMY 0 99<br />
FBACK 1 99-R-HOLD<br />
DLYLVL 0 99<br />
DECAY 1 99<br />
REVLVL 0 99<br />
VOLPRE **** ****<br />
VOLPST **** ****<br />
Expression Pedal Calibration<br />
It is important to calibrate your expression pedal for it to function properly. To calibrate<br />
the expression pedal, do the following:<br />
15
16<br />
1. Power up unit while pressing the UP footswitch until TOE dn is displayed.<br />
2. Rock the Expression pedal forward (toe down position).<br />
3. Press a footswitch, until TOE up is displayed.<br />
4. Rock the Expression pedal forward (toe up position).<br />
5. Press a footswitch again to complete calibration.<br />
Note: If error is displayed, an error has occurred in the calibration and all<br />
steps must be repeated. This calibration procedure does not erase user<br />
presets.<br />
Factory Reset<br />
This function resets the <strong>BP200</strong> to its original factory settings. This procedure erases all<br />
custom user presets, and recalibrates the Expression Pedal. To complete a factory reset,<br />
do the following:<br />
Attention: ALL user defined presets will be lost if this function is performed!<br />
1. Disconnect the power supply from the <strong>BP200</strong>.<br />
2. Press and hold the SELECT button while connecting the power supply.<br />
3.When rst ? displays, release the button and press the STORE button. rEset displays<br />
and the <strong>BP200</strong> is reset.<br />
Once a factory reset has been completed, it is required to calibrate the Expression Pedal.<br />
Follow steps 2-5 of the calibration procedure outlined in the previous section.
Effects and Parameters<br />
Signal Path<br />
The <strong>BP200</strong> is comprised of the following effect modules linked as follows:<br />
Cabinet<br />
Modeling<br />
Fretless/<br />
Wah<br />
Compressor Whammy<br />
Bass Amp/<br />
Stompbox<br />
Modeling<br />
Noise Gate<br />
Volume<br />
Effects Delay Reverb<br />
Pedal - Pre<br />
Fretless / Wah<br />
The fretless simulator creates a fretless bass sound with a fretted bass. The wah effect is<br />
controlled by an Expression pedal and makes the bass sound as if it’s saying “Wah”.<br />
Type - Rotate the AMP TYPE knob to select one of the following: OFF, Fretless1-3, Cry<br />
Wah, Boutique Wah, and Full Range Wah.<br />
Fret Amount - Rotate the GAIN knob to change the character of the fretless simulator.<br />
Fret Attack - Rotate the MASTER LEVEL knob to set the attack time of the fretless<br />
simulator.<br />
Note: Fret Amount and Fret Attack do not function when a Wah is selected.<br />
EQ<br />
Volume<br />
Pedal - Post<br />
17
18<br />
Compressor<br />
A Compressor is used to increase sustain, and prevent the signal from clipping the input<br />
of the other effects.The compressor threshold is a fixed setting.<br />
Amount - Rotate the AMP TYPE knob to increase the amount of compression (OFF,<br />
1-99).<br />
Comp Gain - Rotate the GAIN KNOB to increase the compression level (1-6)<br />
Crossover - Rotate the MASTER LEVEL knob to adjust the compressor crossover<br />
frequency. Signals below this frequency are compressed (50Hz, 63Hz, 80Hz,<br />
100Hz, 125Hz, 160Hz, 200Hz, 250Hz, 315Hz, 400Hz, 500Hz, 630Hz, 800Hz,<br />
1.0KHz, 1.25KHz, 1.6KHz, 2.0KHz, 2.5KHz, 3.15KHz, & Full Range).<br />
Amp/Stompbox Models<br />
Selects the amp to be used for the preset. Choices are as follows:<br />
Rock Amp rock - Model based on an Ampeg SVT<br />
Ash Down ashdwn - Model based on an Ashdown ABM-C410H<br />
Bass Man basman - Model based on a Fender Bassman<br />
Solar 200 solar - Model based on a Sunn 200S<br />
Stellar stella - Model based on a SWR Interstellar Overdrive<br />
British britsh - Model based on a Trace-Elliot Commando<br />
Bomber bomber - Model based on an Ampeg B-15<br />
Hi Wattage hiwatg - Modeled based on an Hiwatt 50<br />
Bogey Man boogmn - Model based on an Mesa/Boogie Bass 400+
Basic basic - Model based on an SWR Basic Black<br />
Dual Show dualsh - Model based on an Fender Dual Showman<br />
DigiFuzz dgfuzz - DigiTech Fuzz<br />
Guydrive guydrv - Model based from a Guyatone OD-2<br />
Muff Fuzz muffuz - Model based from a Big Muff Pi<br />
Sparkle sparkl - Model based from a Voodoo Labs Sparkledrive<br />
DS Dist dsdist - Model based from a Boss DS-1 Distortion<br />
Marshall® is a registered trademark of Marshall Amplification Plc. Vox® is a registered trademark of Korg UK.<br />
Hiwatt, Fender,Ashdown, Sunn,Ampeg, SWR,Trace-Elliot, Mesa/Boogie, Guyatone, Electro Harmonix,Voodoo Labs,<br />
and Boss are trademarks of their respective companies and are in no way associated with DigiTech.<br />
Type - Rotate the AMP TYPE knob to select the type of Amp/Stompbox model.<br />
Gain - Rotate the GAIN knob to adjust the amount of gain for the selected model (1-99)<br />
Level - Rotate the MASTER LEVEL knob to control the preset level for the selected<br />
model (0-99).<br />
EQ<br />
Equalization is a useful tool used to shape the tonal response of the bass signal.The EQ is<br />
a 3-band EQ consisting of Bass, Mid and Treble. The frequency centers for each band may<br />
vary depending on the model selected in order to optimize their usability.<br />
Bass - Rotate the AMP TYPE knob to adjust the boost/cut of the Bass Frequency (+/-<br />
12dB).<br />
Midrange - Rotate the GAIN knob to adjust the boost/cut of the Mid Frequency (+/-<br />
12dB).<br />
Treble - Rotate the MASTER LEVEL knob to adjust the boost/cut of the Treble<br />
Frequency (+/-12dB).<br />
19
20<br />
Cabinet - Gate<br />
The Cabinet Modeling simulates different types of miked speaker cabinets. There are six<br />
cabinet types. The Silencer Noise Gate eliminates noise when you are not playing. The<br />
Auto Swell gate has 9 attack settings for automatically fading in the bass signal. The<br />
Cabinet choices are as follows:<br />
1x15 – Based on an Ampeg Portaflex 1x15 cabinet<br />
1x18 – Based on an Acoustic 360 1x18 cabinet<br />
2x15 - Based on an Sunn 200S 2x15 cabinet<br />
4x10 - Based on an Fender Bassman 4x10 cabinet<br />
4x10 H - Based on an Eden 4x10 w/horn cabinet<br />
8x10 - Based on an Ampeg SVT 8x10 cabinet<br />
Ampeg,Acoustic, Sunn, Fender, and Eden are trademarks of their respective companies and are in no way associated<br />
with DigiTech.<br />
Cabinet - Rotate the AMP TYPE knob to select one of 6 cabinet types .<br />
Gate Type - Rotate the GAIN knob to select the gate type (Off, Silncr, or Swel 1-9).<br />
Gate Thresh - Rotate the MASTER LEVEL knob to select the Noise Gate’s threshold,<br />
higher settings are higher thresholds (1-40).
Effects<br />
The Effects row has several effects to choose from: Off, Chorus, Flanger, Phaser, Vibrato,<br />
Octavider, SynthTalk, Envelope Filter, Pitch, Detune, and Whammy. When the Effects<br />
row is selected, the following settings apply:<br />
Type - Selects the type of effect used in the EFFECTS module.<br />
Amount - Controls different aspects of effects depending on the type selected.<br />
Level - Controls Level, Depth, or Mix depending on type selected.<br />
Note: Only one of the effects in this row can be used at a time.<br />
Chorus<br />
A chorus adds a short delay to your signal. The delayed signal is modulated in and out<br />
of tune and mixed back with the original signal to create a thicker sound.<br />
Amount - Rotate the GAIN knob to simultaneously adjust the effect’s speed and<br />
depth (1-99).<br />
Effect Level - Rotate the MASTER LEVEL knob to adjust chorus the level (1-99).<br />
Flanger<br />
A flanger uses the same principle as a chorus but uses a shorter delay time and adds<br />
regeneration (repeats) to the modulating delay. This results in an exaggerated up and<br />
down sweeping motion of the effect.<br />
Amount - Rotate the GAIN knob to simultaneously adjust the effect’s speed and<br />
depth (1-99).<br />
Effect Level - Rotate the MASTER LEVEL knob to adjust the flanger level (1-99).<br />
21
22<br />
Phaser<br />
A phaser splits the incoming signal, and changes the phasing of the signal. The signal<br />
is then taken in and out of phase and mixed back in with the original signal. As the<br />
phasing changes, different frequencies get cancelled resulting in a warm twisting<br />
sound.<br />
Amount - Rotate the GAIN knob to simultaneously adjust the phaser speed and<br />
depth (1-99).<br />
Effect Level - Rotate the MASTER LEVEL knob to adjust the phaser level (1-99).<br />
Envelope Filter<br />
The Envelope Filter is a dynamic Wah effect that alters your sound based upon how<br />
hard you play.<br />
Amount - Rotate the GAIN knob to adjust the amount of input signal (sensitivity)<br />
required to trigger the Envelope effect (1-99).<br />
Effect Level - Rotate the MASTER LEVEL knob to adjust the mix of the<br />
Envelope effect (0-99).<br />
Vibrato<br />
A vibrato effect modulates the pitch of the incoming signal at an even rate.<br />
Amount - Rotate the GAIN knob to adjust the speed at which the pitch modulates<br />
(1-99).<br />
Effect Level - Rotate the MASTER LEVEL knob to adjust the depth of the modulation<br />
(0-99).
Octavider<br />
The Octavider effect creates a smooth tracking unison note one octave below the<br />
note being played.<br />
Amount - Has no function when Octavider is used.<br />
Effect Level - Rotate the MASTER LEVEL knob to adjust the level of the<br />
Octavider effect (0-99).<br />
SynthTalk<br />
SynthTalk is exclusive to DigiTech. It appears to make your bass speak based upon<br />
the attack or how hard you strike the strings.<br />
Amount - Rotate the GAIN knob to select one of the ten different synth voices<br />
(Vox 1- Vox 10).<br />
Effect Level - Rotate the MASTER LEVEL knob to adjust the the input signal<br />
(sensitivity) required to trigger SynthTalk (0-99).<br />
Pitch Shift<br />
The pitch shifting copies the incoming signal, shifts the pitch of the copy to a different<br />
note, and then mixes it back with the original signal. This gives the illusion that two<br />
basses are playing different notes at the same time.<br />
Amount - Rotate the GAIN knob to select the interval of the shifted pitch (+/-12<br />
semitones).<br />
Effect Level - Rotate the MASTER LEVEL knob to control the mix level of the<br />
shifted pitch (0-99).<br />
23
24<br />
Detune<br />
A detuner makes a copy of the original signal, takes the copied signal slightly out of<br />
tune, and mixes the two signals back together. This gives the illusion that two guitars<br />
are playing the same part together.<br />
Amount - Rotate the GAIN knob to adjust the amount of detune (+/-24 cents).<br />
Effect Level - Rotate the MASTER LEVEL knob to control the mix of the<br />
detuned note (0-99).<br />
Whammy<br />
Whammy is an effect that uses an Expression Pedal to bend the pitch of the incoming<br />
signal, or add a bendable harmony with the original signal. As the pedal is moved,<br />
the note is bent either up or down.<br />
Amount - Rotate the GAIN knob to select the type of pitch bend.<br />
Whammy (no Dry Signal)<br />
1OCTUP (1 octave above)<br />
2OCTUP (2 octaves above)<br />
2NDDWN (a second below)<br />
REV2ND (a second below reversed pedal<br />
action)<br />
4THDWN (a fourth below)<br />
1OCTDN (an octave below)<br />
2OCTDN (2 octaves below)<br />
DIVBOM (Dive Bomb)<br />
Harmony Bends (Dry Signal Added)<br />
M3>MA3 (a minor third to a Major third)<br />
2NDMA3 (a second above to a Major third<br />
above)<br />
3RD4TH (a third above to a fourth above)<br />
4TH5TH (a fourth above to a fifth above)<br />
5THOCT (a fifth above to an octave above)<br />
HOCTUP (one octave above)<br />
HOCTDN (one octave down)<br />
Effect Level - Rotate the MASTER LEVEL knob to adjust the volume of the<br />
Whammy (0-99).
Delay<br />
Delay records a portion of the incoming signal, and plays it back a short time later.The<br />
recording can repeat just once or several times.<br />
Type/Level - Rotate the AMP TYPE knob to select one of the following: Mono 1-9,<br />
Analog 1-9, and Ping Pong 1-9, and Spread 1-9. (1-9 are varying delay levels).<br />
Delay Time - Rotate the GAIN knob to select the delay time (10ms - 990ms, 1sec -<br />
2sec).<br />
Delay Feedback - Rotate the MASTER LEVEL knob to adjust the amount of feedback<br />
(repeats) (0-99, RHold).<br />
Reverb<br />
Using reverb in recorded program material gives the listener a sense that the material is<br />
being performed in an actual room or hall.This similarity to actual acoustic spaces makes<br />
reverberation a useful tool in recorded music.<br />
Reverb Type - Rotate the AMP TYPE knob to select 1 of 10 reverb effects, or Off .<br />
REV OF = Reverb Off<br />
STUDIO = Studio<br />
ROOM = Wood Room<br />
CLUB = Club<br />
PLATE = Plate<br />
HALL = Hall<br />
AMPTHE = Amphitheater<br />
CHURCH = Church<br />
GARAGE = Parking Garage<br />
ARENA = Arena<br />
SPRING = Spring<br />
Decay - Rotate the GAIN knob to adjust the reverb decay time (1-99).<br />
Reverb Level - Rotate the MASTER LEVEL knob to adjust the reverb level (0-99).<br />
25
26<br />
Appendix<br />
Specifications:<br />
Input: 1/4” TS<br />
Jam-A-Long: 1/8” Stereo TRS<br />
Output: 1/4” Stereo TRS<br />
Headphone: 1/8” Stereo TRS<br />
A/D/A: 24 bit Delta Sigma<br />
Power Supply: 9 VAC, 1.3A (PS0913B)<br />
Power Consumption: 6.8 Watts<br />
Memory: 40 User/40 Factory<br />
Effects: Fretless Simulator,Wah, Compressor, 16 Bass Amp/Stompbox Models, 3 band<br />
EQ, Noise Gate, Cabinet Modeling, Chorus, Flange, Phaser, Envelope Filter,<br />
Vibrato, Octavider, SynthTalk, Detune, Pitch Shift,Whammy, Delay, and<br />
Reverb.<br />
Rhythm Trainer: 31 Patterns<br />
Dimensions: 8.5” L x 10” W x 2.25” H<br />
Weight: 3 lbs.
Preset List<br />
Number Preset Name Display Name Number Preset Name Display Name<br />
1/41 Punch Bass Punch 21/61 Auto Wah autowa<br />
2/42 Crunch crunch 22/62 Phased phased<br />
3/43 Growl growl 23/63 Comp Clean cmpcln<br />
4/44 Grit Bass gritty 24/64 Chorus chorus<br />
5/45 Beefy beefy 25/65 Traced traced<br />
6/46 Slappin slapin 26/66 Amped amped<br />
7/47 Rockin' rockin 27/67 Sunny sunny<br />
8/48 Jazzy jazzy 28/68 Solo solo<br />
9/49 Smooth smooth 29/69 Bright bright<br />
10/50 Spank spank 30/70 Dark dark<br />
11/51 Fretless nofret 31/71 Studio studio<br />
12/52 Dirt Bass dirt 32/72 Tight tight<br />
13/53 Octave Fuzz octfuz 33/73 Big Butt bigbut<br />
14/54 Grind grind 34/74 Fat Fuzz fatfuz<br />
15/55 Synthlike synth 35/75 Fuzz Phase fuzfaz<br />
16/56 Sweep sweep 36/76 Vibro vibro<br />
17/57 Phat phat 37/77 Vintage vintag<br />
18/58 Standup stndup 38/78 B- Man b-man<br />
19/59 Funken funken 39/79 Strings strngs<br />
20/60 Pick It pickit 40/80 Space space<br />
27
28<br />
Notes:
Notes:<br />
29
DigiTech<br />
8760 S. Sandy Parkway, Sandy, Utah 84070<br />
PH (801) 566-8800 FAX (801) 566-7005<br />
International Distribution<br />
8760 S. Sandy Parkway, Sandy, Utah 84070 USA<br />
PH (801) 566-8800 FAX (801) 566-7005<br />
DigiTech and <strong>BP200</strong> are trade marks of the<br />
Harman Music Group Inc.<br />
Copyright the Harman Music Group<br />
Printed in the USA 9/2001<br />
Manufactured in the USA<br />
<strong>BP200</strong> Owners <strong>Manual</strong> 18-1315-A<br />
Please visit DigiTech on the World Wide Web at:<br />
http://www.digitech.com<br />
A Harman International Company