Zeiss Axio Observer live cell station manual
Zeiss Axio Observer live cell station manual
Zeiss Axio Observer live cell station manual

Create successful ePaper yourself
Turn your PDF publications into a flip-book with our unique Google optimized e-Paper software.
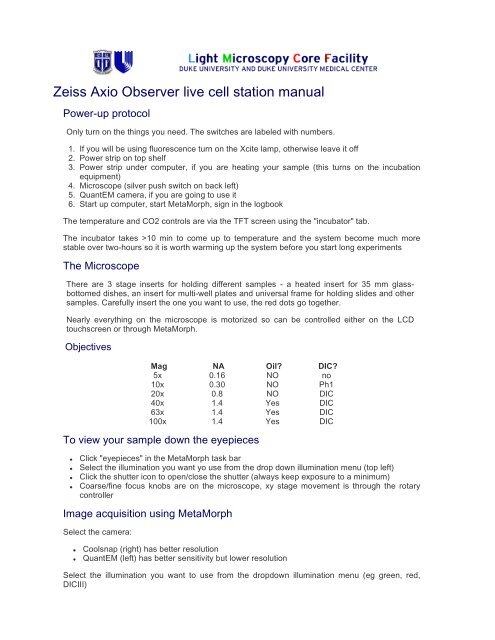
<strong>Zeiss</strong> <strong>Axio</strong> <strong>Observer</strong> <strong>live</strong> <strong>cell</strong> <strong>station</strong> <strong>manual</strong><br />
Power-up protocol<br />
Only turn on the things you need. The switches are labeled with numbers.<br />
1. If you will be using fluorescence turn on the Xcite lamp, otherwise leave it off<br />
2. Power strip on top shelf<br />
3. Power strip under computer, if you are heating your sample (this turns on the incubation<br />
equipment)<br />
4. Microscope (silver push switch on back left)<br />
5. QuantEM camera, if you are going to use it<br />
6. Start up computer, start MetaMorph, sign in the logbook<br />
The temperature and CO2 controls are via the TFT screen using the "incubator" tab.<br />
The incubator takes >10 min to come up to temperature and the system become much more<br />
stable over two-hours so it is worth warming up the system before you start long experiments<br />
The Microscope<br />
There are 3 stage inserts for holding different samples - a heated insert for 35 mm glassbottomed<br />
dishes, an insert for multi-well plates and universal frame for holding slides and other<br />
samples. Carefully insert the one you want to use, the red dots go together.<br />
Nearly everything on the microscope is motorized so can be controlled either on the LCD<br />
touchscreen or through MetaMorph.<br />
Objectives<br />
Mag NA Oil DIC<br />
5x 0.16 NO no<br />
10x 0.30 NO Ph1<br />
20x 0.8 NO DIC<br />
40x 1.4 Yes DIC<br />
63x 1.4 Yes DIC<br />
100x 1.4 Yes DIC<br />
To view your sample down the eyepieces<br />
<br />
<br />
<br />
<br />
Click "eyepieces" in the MetaMorph task bar<br />
Select the illumination you want yo use from the drop down illumination menu (top left)<br />
Click the shutter icon to open/close the shutter (always keep exposure to a minimum)<br />
Coarse/fine focus knobs are on the microscope, xy stage movement is through the rotary<br />
controller<br />
Image acquisition using MetaMorph<br />
Select the camera:<br />
<br />
<br />
Coolsnap (right) has better resolution<br />
QuantEM (left) has better sensitivity but lower resolution<br />
Select the illumination you want to use from the dropdown illumination menu (eg green, red,<br />
DICIII)
Show <strong>live</strong> to center and focus your sample<br />
Acquisition through the "acquire" dialog box<br />
This is for simple images of your samples. It can be opened from the task bar Acquire or from the<br />
dropdown menu, Acquire> Acquire<br />
Things to set in the Acquire window:<br />
<br />
<br />
<br />
<br />
Set the display to "Autoscale" - the triangles on the image histogram show the scale min and<br />
max.<br />
The image gamma - the relationship between measured and displayed brightness. 1=linear<br />
Exposure Time - Type in value (or choose AutoExpose) mouse-over image to give pixel<br />
intensity values (between 0 and 4095)<br />
Full chip uses entire CCD camera, sub-arrays produce smaller files and may be faster<br />
<br />
<br />
<br />
<br />
<br />
Binning - combines CCD pixels to form n x n super pixels - increases sensitivity but reduces<br />
resolution<br />
Press Show Live to see the specimen through the camera - it may be necessary to focus or<br />
move the stage slightly<br />
Clicking the folder icon allows you to set whether each image starts in a new window or<br />
overwrites the previous image (handy for optimizing your image, be careful not to lose your<br />
data though)<br />
External shutter linked to camera should be [Current Shutter]<br />
Gain and offset for the camera under the Special tab - Start as 0 and 255 respectively<br />
Press the Acquire button to capture the image<br />
Saving images<br />
Simply click save and name your file. Images will be saved as 12-bit TIFF images with all the<br />
original data. Not all programs will open these images. Photoshop will open the files as 16-bit<br />
images, you will need to adjust the levels ON A COPY of the file. ImageJ can open them also.<br />
To save your images as 8-bit files (compatible with all programs)
Press Copy to 8-bit button on the task bar<br />
Select the desired image from the "Image:" drop-down menu<br />
Press Copy and Save by going to File >Save as (make sure the file name is different<br />
otherwise you will overwrite the original)<br />
Acquisition through the "Multidimensional acquisition" dialog box<br />
Open this dialog box for timelapse, multi-wavelength, and z-stacks for 3D acquisition. You can<br />
open the dialog box from the shortcut on the taskbar.<br />
Main - Select the things you want to do and then go through each tab:<br />
Saving<br />
<br />
<br />
<br />
Select directory (if you are acquring at a very high frame rate (eg streaming), use the harddrive<br />
and then move the data afterwards to your server/memory stick)<br />
Choose a base file name (all the images will be named basename-t1z1 etc)<br />
Check the increment base file name box<br />
Timelapse<br />
<br />
Choose number of time points, duration and interval (one will always be a consequence of<br />
the other two)<br />
Wavelength<br />
<br />
<br />
<br />
<br />
<br />
Illumination - choose from the dropdownmenu<br />
Set exposure time - minimum possible to get a reasonable image<br />
Set binning (2 is a good starting point for many <strong>live</strong> samples)<br />
Press the full chip button once before you start to make sure the entire camera chip is used<br />
Test the settings using the <strong>live</strong> and snap buttons at the bottom of the box (mouse over to<br />
label which is which)<br />
Display
Default is okay for most things, for high frame rates they should be minimized to not slow<br />
down the computer<br />
Summary is an overview of the settings for your experiment<br />
Press the green acquire button to start your multidimensional acquisition.<br />
The most recent image/stack of each channel will be displayed as you acquire.<br />
Review multidimensional data<br />
A. Tell metamorph which images you want to build. Press "select base file" in the main review<br />
MDA window which gives you this box -<br />
<br />
<br />
<br />
Select directory - point to your folder with the images<br />
Select data set - choose the individual experiement you want to look at<br />
Press View<br />
B. Select the wavelengths, stage positions, Z-slices and timepoints you want to view.
Select the stage position (one at a time here) and channels you want (probably all of them)<br />
Right clicking in the boxes selects that image. Right click on the row/column heading selects the<br />
entire row/column<br />
You can choose multi-colour overlay (under display), projection, or best focus if wanted.<br />
Use the play and reverse arrows to view the timecouse etc.<br />
Load Images loads the select images to a single .stk file which can be saved as one or<br />
exported to avi or quicktime (Stack/Make Movie from the top menu).<br />
Finishing and shutting down<br />
If there is somebody using the scope after you, clean the objective(s) you used using lens tissue and<br />
cotton tipped applicators, close metamorph, log-off the computer, fill in the log book. If the person<br />
after you is not going to use some of the components they can be turned off -<br />
<br />
<br />
The fluorescence source (1) can be switched off even if the rest of the system is on<br />
Incubator can be turned off as below using the touch pad and then turning of switch 3 (it's a<br />
good idea to then reboot the microscope for the next person by turning off and on switch 4)<br />
If there is nobody booked after you within 2 hours, shutdown the system in the reverse order of<br />
startup, switch 6 to switch 1:<br />
<br />
<br />
<br />
<br />
<br />
<br />
<br />
Using the LCD touch screen, turn off the Heating Inset P and the CO2 and turn down the XL<br />
unit to 20C and open the incubator doors (This blows cold air through the system so the heating<br />
elements are not damaged by turning the box off when it is very hot). After 5 min, when the air<br />
coming into the incubator is cold, it is safe to turn off the rest of the system<br />
Close Metamorph, shutdown the computer<br />
Turn off the QuantEM camera, if you used it<br />
Turn off the incubator powerstrip (under computer), if you used it<br />
Turn off the main power strip (on shelf)<br />
Note the lamp hours in the log book<br />
Turn off the fluorescence lamp