
You also want an ePaper? Increase the reach of your titles
YUMPU automatically turns print PDFs into web optimized ePapers that Google loves.
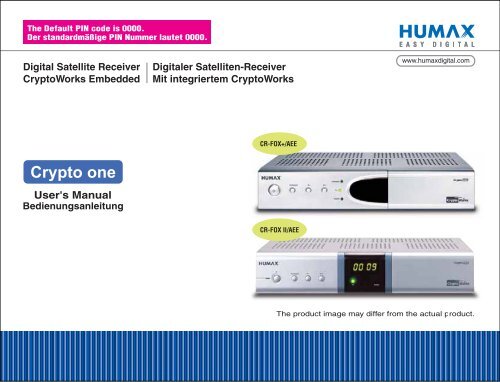
Digital Satellite Receiver<br />
<strong>Crypto</strong>Works Embedded<br />
<strong>Crypto</strong> <strong>one</strong><br />
Digitaler Satelliten-Receiver<br />
Mit integriertem <strong>Crypto</strong>Works<br />
CR-FOX+/AEE<br />
CR-FOX II/AEE
Notice<br />
Thank you for purchasing a HUMAX Digital Satellite Receiver. Please read this user's manual carefully, to be able to safely install, use<br />
and maintain the product at maximum performance. Keep this user's manual next to your product for future reference.<br />
Throughout the whole manual, Note indicates additional product operation information to make the user aware of possible problems and<br />
information of any importance and help understand, use and maintain the installation.<br />
**<br />
Manufactured under license from Dolby Laboratories.<br />
**<br />
Dolby and the double-D symbol are trademarks of Dolby Laboratories.<br />
**<br />
All other trademarks are the properties of their respective owners.<br />
**<br />
Copyright © 2007 HUMAX Corporation<br />
**<br />
Not to be copied, used or translated in part or whole without HUMAX's prior consent in writing except approval of ownership of copyright<br />
and copyright law.<br />
**<br />
The information in this user's manual is subject to change without notice.<br />
**<br />
This product incorporates copyright protection technology that is protected by U.S. patents and other intellectual property<br />
rights. Use of this copyright protection technology must be authorized by Macrovision Corporation, and is intended for home<br />
and other limited viewing uses only unless otherwise authorized by Macrovision. Reverse engineering or disassembly is<br />
prohibited.<br />
GB 1
Safety Warning<br />
The product has been manufactured to satisfy international safety standards. Please read the following safety precautions and<br />
warnings carefully.<br />
**<br />
• Disconnect the product from the mains before you start any maintenance or installation procedures.<br />
Do not overload a wall outlet, extension cord or adapter as this may result in electric fire or shock.<br />
The product should not be exposed to liquid of any kind. In addition, no objects filled with liquid, such as vases, should be placed on<br />
the apparatus.<br />
Do not stand the product on soft furnishings or carpets. Do not stack electronic equipments on top of the product.<br />
Do not use any unsupported attachments as these may be hazardous or cause damage to the product.<br />
Disconnect the product from the mains before connecting or disconnecting the cable from the antenna or TV.<br />
The LNB cable must be earthed to the system earth for the satellite dish.<br />
Place the product indoors to avoid exposing it to lightening, rain or sun. Do not place it near a radiator or heat register. Make sure it<br />
has more than 10 cm clearance from any appliances susceptible to electromagnetic influences, such as a TV or a VCR.<br />
Do not block these openings with any object, and do not place the product on a bed, sofa, rug, or other similar surface. If you place the<br />
product on a rack or bookcase, ensure that there is adequate ventilation and that you have followed the manufacturer's instructions for<br />
mounting.<br />
Do not place the product on an unstable cart, stand, tripod, bracket, or table where it can fall. A falling product can cause serious injury<br />
to a child or adult, and serious damage to the appliance.<br />
Unplug the product from the wall outlet and disconnect the antenna during a thunderstorm or when left unattended and unused for<br />
long periods of time.<br />
Do not insert anything through the openings in the unit, where they can touch dangerous voltage points or damage parts.<br />
When replacement parts are required, be sure the service technician uses replacement parts specified by the manufacturer or those<br />
that have the same characteristics as the original part. Unauthorised substitution may result in additional damage to the unit.<br />
GB 2
Contents<br />
1. Before Using the Product ................................................................................. GB5<br />
1.1 Package Contents ............................................................................. GB5<br />
1.2 Front Panel ................................................................................... GB6<br />
1.3 Rear Panel.................................................................................... GB8<br />
1.4 Conditional Access............................................................................. GB10<br />
1.5 Remote Control................................................................................ GB11<br />
2. Setup.................................................................................................... GB13<br />
2.1 Connecting the Antenna/TV/VCR ................................................................ GB13<br />
2.2 Connecting Audio System....................................................................... GB14<br />
2.3 Powering On .................................................................................. GB15<br />
3. Menu Map ............................................................................................... GB16<br />
4. Searching Service ........................................................................................ GB18<br />
4.1 Antenna Setting ............................................................................... GB18<br />
4.2 Manual Search ................................................................................ GB20<br />
4.3 Satellite Setting................................................................................ GB21<br />
4.4 Motor Limit Setting ............................................................................. GB22<br />
4.5 USALS Setting ................................................................................ GB23<br />
4.6 Automatic Search .............................................................................. GB24<br />
5. Basic Operation .......................................................................................... GB25<br />
5.1 Viewing Programme............................................................................ GB25<br />
5.2 Changing Language............................................................................ GB26<br />
5.3 Teletext ...................................................................................... GB26<br />
5.4 Setting Property of Service...................................................................... GB27<br />
6. Service List .............................................................................................. GB28<br />
6.1 Switching Services ............................................................................. GB28<br />
6.2 Organising Services............................................................................ GB29<br />
6.3 Organising Favourite Services................................................................... GB31<br />
6.4 Organising Networks ........................................................................... GB32<br />
6.5 Deleting Satellites.............................................................................. GB33<br />
GB 3
Contents<br />
GB 4<br />
7. Programme Guide ........................................................................................ GB34<br />
7.1 Automatic Reservation ......................................................................... GB35<br />
7.2 Manual Reservation ............................................................................ GB36<br />
8. Setting Preferences ...................................................................................... GB37<br />
8.1 Parental Control ............................................................................... GB37<br />
8.2 System Setting ................................................................................ GB37<br />
9. System Information....................................................................................... GB39<br />
9.1 Status ........................................................................................ GB39<br />
9.2 Default Setting ................................................................................ GB40<br />
9.3 Mail Messages ................................................................................ GB40<br />
9.4 Conditional Access............................................................................. GB40<br />
10. Utility................................................................................................... GB41<br />
11. Software Update ........................................................................................ GB42<br />
12. Troubleshooting ........................................................................................ GB44<br />
13. Specification............................................................................................ GB46<br />
14. Service and Support..................................................................................... GB48
1. Before Using the Product<br />
1. Before Using the Product<br />
This chapter provides detailed instructions on the product and its accessories.<br />
1.1 Package Contents<br />
Please check all package contents before using your product.<br />
**<br />
**<br />
**<br />
**<br />
Remote Control<br />
**<br />
Batteries<br />
Note:<br />
Package contents may vary according to area.<br />
The product image may differ from the actual product.<br />
**<br />
User's Manual<br />
**<br />
Scart Cable<br />
GB 5
1. Before Using the Product<br />
1.2 Front Panel<br />
**<br />
**<br />
1. STANDBY BUTTON<br />
**<br />
Switches between operation and standby modes.<br />
**<br />
2. TV/RADIO BUTTON<br />
**<br />
Switches between TV and radio modes.<br />
**<br />
3. P-/P+ BUTTON<br />
**<br />
Moves the TV/radio service up or down.<br />
**<br />
4. STANDBY LED<br />
**<br />
Red light is emitted when the product is in standby mode.<br />
Note:<br />
See 1.4 Conditional Access when you insert the Smartcard.<br />
The image above is CR-FOX+/AEE.<br />
GB 6<br />
5. TV LED<br />
**<br />
Green light is emitted when the product is in TV mode.<br />
**<br />
6. RADIO LED<br />
**<br />
Amber light is emitted when the product is in radio mode.<br />
**<br />
7. SMARTCARD SLOT<br />
**<br />
A slot for a Smartcard<br />
**
1. Before Using the Product<br />
**<br />
**<br />
1. STANDBY LED<br />
**<br />
Red light is emitted when the product is in standby mode.<br />
2. STANDBY BUTTON<br />
**<br />
Switches between operation and standby modes.<br />
**<br />
3. TV/RADIO BUTTON<br />
**<br />
Switches between TV and radio modes.<br />
**<br />
4. P-/P+ BUTTON<br />
**<br />
Moves the TV/radio service up or down.<br />
**<br />
**<br />
Note:<br />
See 1.4 Conditional Access when you insert the Smartcard.<br />
The image above is CR-FOX ll/AEE.<br />
5. TV LED<br />
**<br />
Green light is emitted when the product is in TV mode.<br />
**<br />
6. RADIO LED<br />
**<br />
Amber light is emitted when the product is in radio mode.<br />
**<br />
7. SMARTCARD SLOT<br />
**<br />
A slot for a Smartcard<br />
**<br />
GB 7
1. Before Using the Product<br />
1.3 Rear Panel<br />
**<br />
** 1. LNB IN<br />
**<br />
**<br />
Connects to a satellite antenna cable.<br />
**<br />
2. VCR SCART<br />
**<br />
Connects to the VCR/DVD using a VCR SCART cable.<br />
**<br />
Note: The image above is CR-FOX+/AEE.<br />
GB 8<br />
3. TV SCART<br />
**<br />
Connects to the TV set using a TV SCART cable.<br />
**<br />
4. S/PDIF<br />
**<br />
Outputs digital audio signals.<br />
**
**<br />
** 1. LNB IN<br />
**<br />
**<br />
Connects to a satellite antenna cable.<br />
**<br />
2. VCR SCART<br />
**<br />
Connects to the VCR/DVD using a VCR SCART cable.<br />
**<br />
3. TV SCART<br />
**<br />
Connects to the TV set using a TV SCART cable.<br />
**<br />
4. AUDIO L/R<br />
**<br />
Connects to the TV or VCR and outputs audio signals.<br />
**<br />
Note: The image above is CR-FOX II/AEE.<br />
5. VIDEO<br />
**<br />
Connects to the TV or VCR and outputs video signals.<br />
**<br />
6. RS-232C<br />
**<br />
Connects to the PC to update software.<br />
**<br />
7. S/PDIF<br />
**<br />
Outputs digital audio signals.<br />
**<br />
GB 9
1. Before Using the Product<br />
1.4 Conditional Access<br />
Although some TV and radio channels are free to air, most TV and radio/music channels are available on a subscription basis and can<br />
only be enjoyed via a Conditional Access comp<strong>one</strong>nt.<br />
**<br />
Inserting the Smartcard<br />
The Smartcard looks similar to a credit card and is inserted into the slot behind the right-hand front flap of the product. A valid Smartcard<br />
entitles you to view and listen to all the channels you choose to subscribe to.<br />
1. Open the right-hand flap on the front panel of the product. Swing it upwards to expose the card slot.<br />
2. Hold the Smartcard horizontally with the electronic chip (small square-shaped, gold in colour) facing downwards.<br />
3. Insert the Smartcard into the top slot.<br />
**<br />
**<br />
Note: The product image may differ from the actual product.<br />
GB 10
1.5 Remote Control<br />
1. SOURCE<br />
**<br />
Controls the input of TV.<br />
**<br />
2. TV/RADIO<br />
**<br />
Switches between TV and radio modes.<br />
**<br />
3. NUMERIC BUTTONS<br />
**<br />
Enter a TV/radio service number.<br />
**<br />
4. MENU<br />
**<br />
Displays the main menu.<br />
**<br />
5. TIME - WHITE<br />
**<br />
Displays the current time on the screen. To set the<br />
current time, refer to 8.2 System Setting.<br />
**<br />
6. ARROW BUTTONS<br />
**<br />
Changes services or moves the cursor up, down, left<br />
or right.<br />
**<br />
7. i (INFORMATION) - RED<br />
**<br />
Displays the channel and programme information.<br />
**<br />
8. SOUNDTRACK - GREEN<br />
**<br />
Displays the soundtrack list.<br />
GB 11
1. Before Using the Product<br />
GB 12<br />
9. CH-/CH+<br />
**<br />
Changes the service.<br />
**<br />
10. RECALL<br />
**<br />
Returns to the previous service.<br />
**<br />
11. FREEZE<br />
**<br />
Freezes the TV screen you are watching. Does not<br />
cease audio.<br />
**<br />
12. WIDE<br />
**<br />
Sets the display format.<br />
**<br />
13. STANDBY<br />
**<br />
Switches between operation and standby modes.<br />
**<br />
14. GUIDE<br />
**<br />
Displays the programme guide.<br />
**<br />
15. EXIT<br />
**<br />
Exits all On-Screen Display (OSD) screens.<br />
**<br />
16. OK<br />
**<br />
Selects a menu or confirms the selected operation.<br />
Also, displays the channel list while watching a<br />
programme.<br />
17. ZOOM - BLUE<br />
**<br />
Enlarges the picture.<br />
**<br />
18. SUBTITLE - YELLOW<br />
**<br />
Displays the subtitle language list.<br />
**<br />
19.V-/V+<br />
**<br />
Adjusts the audio volume.<br />
**<br />
20. MUTE<br />
**<br />
Mutes or unmutes the audio temporarily.<br />
**<br />
21. UHF<br />
**<br />
Currently not supported.<br />
**<br />
22. ? (HELP)<br />
**<br />
Displays the property of service on the screen.<br />
Please refer to 5.4 Setting Property of Service.<br />
**<br />
** COLOUR BUTTONS (R/G/B/Y/W)<br />
**<br />
Select color keys for interactive applications.
2. Setup<br />
2. Setup<br />
This chapter describes how to set up the product. Select the most appropriate procedure depending on your requirements. Before you<br />
connect the product to any other equipment, you must disconnect all equipments from their power sources.<br />
Note: If you encounter any problem when setting up the product, please contact your local product distributor.<br />
2.1 Connecting the Antenna/TV/VCR<br />
**<br />
**<br />
1. Connect the antenna to the LNB IN.<br />
2. Connect the product and the TV/VCR using the SCART cable or the RCA cable.<br />
**<br />
Note:<br />
Connecting your TV directly to the Audio/Video output of the product will assure a more vivid picture and enhance your viewing<br />
enjoyment.<br />
The product image may differ from the actual product.<br />
GB 13
2. Setup<br />
2.2 Connecting Audio System<br />
**<br />
**<br />
1. Connect the optical S/PDIF terminal and Dolby Digital decoder for higher quality sound.<br />
**<br />
Note: The product image may differ from the actual product.<br />
GB 14
2.3 Powering On<br />
**<br />
1. Connect the power cord of the product to a wall outlet.<br />
**<br />
**<br />
2. Power on by pressing the STANDBY button on the remote control or the STANDBY button on the front of the product.<br />
**<br />
**<br />
Note: The product image may differ from the actual product.<br />
GB 15
3. Menu Map<br />
3. Menu Map<br />
**<br />
GB 16
**<br />
**<br />
Menu structure varies according to the item and its operation. You can easily navigate the menu using the following instructions:<br />
**<br />
1. Press the MENU button to display the main menu screen.<br />
**<br />
2. Select the item you want using the button.<br />
**<br />
3. Press the OK button to move from a menu to a sub-menu.<br />
**<br />
4. Press the button to select option values.<br />
**<br />
5. Press the button to open the option list and press the EXIT button to close the option list.<br />
**<br />
6. Press the EXIT button to return to the parent-menu.<br />
**<br />
7. Press the MENU button to exit the menu screen.<br />
**<br />
**<br />
Note: Some menu items are access controlled. When accessing to the protected menu, you will be prompted to enter the<br />
PIN-Code. Enter your PIN-Code using the NUMERIC buttons. The default PIN-Code is set to 0000.<br />
GB 17
4. Searching Service<br />
4. Searching Service<br />
When powering on your product for the first time after purchase, the Selecting Language screen is automatically displayed. Select the<br />
language using the button and press the OK button. Then the Antenna Setting menu will be displayed.<br />
The default PIN-Code is 0000.<br />
**<br />
4.1 Antenna Setting<br />
You can set antenna and LNB information to search services using Antenna Setting (MENU-INSTALLATION-SERVICE<br />
SEARCHING-ANTENNA SETTING).<br />
**<br />
Antenna Alternative: Select antenna alternative which has different<br />
combinations of settings for search. Antenna Alternative 16 is predefined for<br />
SMATV.<br />
Satellite Name: Displays the satellite list in name order. If the desired<br />
satellite name is not listed, then select "User Defined". You can enter the<br />
Satellite Name using the keyboard displayed on the screen.<br />
LNB Frequency: Select the L.O (Local Oscillator) Frequency of the LNB.<br />
22KHz T<strong>one</strong>: When using the 22HKz t<strong>one</strong> switch, select "Enabled".<br />
Otherwise, select "Disabled".<br />
DiSEqC Input: If you are using DiSEqC (Digital Satellite Equipment<br />
Control) switch to connect multiple antennas or LNBs, select DiSEqC input<br />
to connect to antenna or LNB.<br />
GB 18
4. Searching Service<br />
**<br />
Motorised System: When using motorized system, select from "DiSEqC<br />
1.2" or "USALS". Otherwise, select "Disabled". When motorized system is<br />
set to "DiSEqC 1.2" or "USALS", DiSEqC input is disabled.<br />
LNB Power: You can select "On" or "Off".<br />
Single Cable System: Select from “User Band 1 to 8” or “Disabled”. (If you<br />
are using more than <strong>one</strong> satellite receiver, set <strong>one</strong> receiver at a time and<br />
turn off the others while setting. Refer to the LNB manual for details.)<br />
Band Frequency:When selecting “User Band 1 to 8” in Single Cable<br />
System, the default value is displayed. You can also select “User Define”<br />
and enter the band frequency directly.<br />
Note: If Single Cable System is enabled, 22KHz, Motorised System and DiSEqC Input is disabled. If Single Cable System is<br />
disabled, Band Frequency is also disabled.<br />
**<br />
When you complete the settings, press the OK button to move to the Manual Search menu.<br />
GB 19
4. Searching Service<br />
4.2 Manual Search<br />
You can search services of the selected satellite by transponders using the transponder information.<br />
**<br />
Antenna Alternative: Select antenna alternative which has different<br />
combinations of settings for search. Antenna Alternative 16 is predefined for<br />
SMATV.<br />
Frequency: Enter transponder frequency.<br />
Polarisation: Select the type of polarisation.<br />
Symbol Rate: Select or enter transponder symbol rate.<br />
FEC: Select FEC (Forward Error Correction).<br />
Network Search: If you want to search services for multiple transponders,<br />
select "Yes". Otherwise, select "No".<br />
Automatic Skip: When skipping all scrambled service search, select "Yes".<br />
Otherwise, select "No".<br />
Advanced: In advanced mode, enter Video Packet ID (PID), Audio PID,<br />
and PCR PID.<br />
**<br />
After setting the parameters of search, press the OK button to start service search. Wait until the operation is completed. After finishing<br />
search operation, the result window will be displayed. You can delete the services using the and the RED button. To cancel<br />
deleting operation, press the RED button again. The screen also shows the number of the services found and the transponder<br />
information.<br />
To save the found services, press the OK button.<br />
**<br />
Note:<br />
You can also select the transponder frequency from the given options. The symbol rate, polarization and FEC will be set automatically.<br />
If the antenna is properly set up, the signal strength bar and quality bar level, located at the bottom of the screen, moves up.<br />
Press the EXIT button to stop search operation.<br />
When you press the i button after selecting "USALS" in Motorised System, USALS Setting screen will appear.<br />
GB 20
4.3 Satellite Setting<br />
This menu appears only when you enable Motorised System in Antenna Setting menu and press the i button while Antenna<br />
Alternative in Manual Search menu is selected.<br />
**<br />
Satellite Name: Select a satellite to identify a motor antenna. If the desired satellite name is not listed, then select "other".<br />
Movement: In user mode, this is used to fine-tune the position of the motor. In installer mode, this is used to search for the position of<br />
the satellite manually.<br />
Motor Control: You can select <strong>one</strong> option among "Search", "Go to",<br />
"Store", or "Reset".<br />
**<br />
- Search: Searches for services on the selected transponder.<br />
- Go to: Moves the motor to the saved position of the selected satellite.<br />
- Store: Saves the current position of the motor for the selected satellite.<br />
- Reset: Resets all saved positions of the motor relative to the 0 position.<br />
(Installer Mode Only)<br />
DiSEqC Command Mode: Select "Installer" or "User" mode.<br />
**<br />
The following table shows the value of the motor setting options.<br />
**<br />
DiSEqC Command Mode Movement Motor Control<br />
Installer East / Stop / West Search / Go to / Store / Reset<br />
User Stop(60E) ~Stop(0) ~Stop(60W) Search / Go to / Store<br />
GB 21
4. Searching Service<br />
To initialise the satellite position saved at Motor Antenna, set DiSEqC Command Mode to "Installer", set "Motor Control" to "Reset", then<br />
press the OK button. You will see a warning message. To continue the procedure, press the OK button.<br />
To set the motor position for each satellite manually, select the Satellite Name, set DiSEqC Command Mode to "Installer", and then set<br />
Movement to <strong>one</strong> option among "East", "Stop", or "West". The motor starts moving. The level of signal strength and quality bar at the<br />
bottom of the screen will indicate the best position of the dish. Set Motor Control to "Store" when you find the best position, then press<br />
the OK button to save the position.<br />
To move the motor to the pre-set position of the satellite, select the Satellite Name, set DiSEqC Command Mode to "User", set Motor<br />
Control to "Goto", and set Movement to the desired value. Movement is used to fine-tune the position of the motor. Press the OK button.<br />
the motor will move to the position of the selected satellite.<br />
**<br />
4.4 Motor Limit Setting<br />
To enter this menu, press the RED button in Satellite Setting menu. You can set the maximum for both East and West to prevent<br />
damage to the antenna.<br />
**<br />
Limit Setting: When Limit setting is set to "Enabled", the motor does not<br />
move exceeding the limit. When Limit setting is set to "Disabled", the setting<br />
is released.<br />
Movement: You can select <strong>one</strong> among "East", "Stop", or "West".<br />
Store East Limit: You can save the East Limit.<br />
Store West Limit: You can save the West Limit.<br />
GB 22
4.5 USALS Setting<br />
This menu appears only when you select "USALS" in Motorised System menu and press the i button in Antenna Setting menu.<br />
**<br />
**<br />
Satellite Name: Displays the satellite list in name order. If the required<br />
satellite name is not listed, select "User Defined". You can enter the satellite<br />
name using the keyboard displayed on the screen.<br />
My Longitude: Enter the longitude.<br />
My Latitude: Enter the latitude.<br />
Note: The values for My Longitude and My Latitude will be saved after initial setting.<br />
GB 23
4. Searching Service<br />
4.6 Automatic Search<br />
If you select the satellite to search services according to Antenna Setting, you can automatically search the service without entering any<br />
other information.<br />
To enter Automatic Search menu, press the MENU button, then select INSTALLATION-SERVICE SEARCHING-AUTOMATIC<br />
SEARCH.<br />
**<br />
Antenna Alternative: Select antenna alternative which has different<br />
combinations of settings for search. The Satellite Name is automatically<br />
displayed. Antenna Alternative 16 is predefined for SMATV.<br />
**<br />
Automatic Skip: When skipping all scrambled service search, select "Yes".<br />
Otherwise, select "No".<br />
**<br />
Search Type: If you want to search services through all field of tuner<br />
(950~2150MHz), select "Detail". Otherwise, select "Quick" to search<br />
services with the preset parameters. In detail mode, you can add the<br />
desired Symbol Rate.<br />
**<br />
Network Search: If you want to search services for multiple transponders,<br />
select "Yes". Otherwise, select "No". When you complete the setting, press<br />
the OK button to start service search.<br />
**<br />
GB 24
5. Basic Operation<br />
5. Basic Operation<br />
5.1 Viewing Programme<br />
You can change a service using the CH-/CH+, ,orNUMERIC buttons. You can also use the Service List or Programme Guide.<br />
You can adjust the audio volume using the V-/V+ or button.<br />
**<br />
The Programme Information (i-plate)<br />
The i-plate, or the Information Box, is always displayed for a specific period of time whenever you switch services. You can view the<br />
programme information by pressing the i button while watching a programme. You can see the detailed information about the current<br />
programme by pressing the i button twice. If the detailed information is more than <strong>one</strong> page, use the button to move to the previous<br />
or next page. Press the EXIT button to hide the i-plate.<br />
You can adjust the display time of i-plate in MENU-INSTALLATION-SYSTEM SETTING-OTHER SETTING-INFO.BOX DISPLAY TIME.<br />
**<br />
**<br />
Represents parental level. Indicates the minimum level of<br />
ages that the programme is targeted at.<br />
**<br />
Displayed only when the programme is reserved.<br />
**<br />
Displayed only when the channel is a locked channel.<br />
**<br />
Displayed only when the channel is a scrambled channel.<br />
**<br />
Displayed only when subtitle information is available.<br />
**<br />
Displayed only when there is any teletext information.<br />
**<br />
Displayed only when the programme is braodcast in Dolby Digital.<br />
GB 25
5. Basic Operation<br />
5.2 Changing Language<br />
If the current programme provides subtitle information, the subtitle icon will appear on the i-plate. You can select the language for the<br />
subtitle using the SUBTITLE button. You can select a default subtitle language in MENU-INSTALLATION-SYSTEM<br />
SETTING-LANGUAGE SETTING-SUBTITLE LANGUAGE.<br />
If the current programme is available in multiple audio languages, you can select the language that you wish to listen in using the<br />
SOUNDTRACK button. You can select a default audio language in MENU-INSTALLATION-SYSTEM SETTING-LANGUAGE<br />
SETTING-AUDIO LANGUAGE.<br />
You can also select a default OSD language in MENU-INSTALLATION-SYSTEM SETTING-LANGUAGE SETTING-MENU LANGUAGE.<br />
**<br />
5.3 Teletext<br />
When the service supports teletext, the teletext icon is displayed on the i-plate. To enter Teletext mode, use the SUBTITLE button<br />
to display teletext.<br />
To display teletext menu, press the MENU button in teletext mode. Select your desired teletext function using the button and press<br />
the OK button. To view the teletext page, use the CH-/CH+, , RECALL, orNUMERIC buttons.<br />
**<br />
Teletext Functions<br />
**<br />
GB 26<br />
Index Returns to index page. If there is no index page, jumps to page 100.<br />
Sub-page Searches the sub-page using the sub-code written by users. If not in teletext mode, the current time is<br />
displayed.<br />
MIX Adjusts transparency of teletext screen.<br />
Cancel Hides the teletext except page number.<br />
Reveal Displays the concealed information.<br />
Double Size Displays the text size as double size.<br />
Page Hold Holds the current page not updating it.
5.4 Setting Property of Service<br />
You can add the current service to Favourite group. In addition, you can lock,<br />
unlock, skip and delete the current service while watching a programme.<br />
The operation is as follows:<br />
1. Press the OK button while watching a programme. The service list will<br />
appear on the screen.<br />
You can also display the service list using the MENU-SELECT<br />
SERVICE-SIMPLE (or ADVANCED). You can select the type of the service<br />
lists (All, Favourite, Network, Satellite, Alphabet) by pressing the COLOUR<br />
button.<br />
2. Press the MENU button while the service list is displayed.<br />
3. Select the item (Favourites/Lock or Unlock/Skip/Delete) using the<br />
button, and press the OK or button.<br />
4. After setting property of a service, press the OK button to save the changes.<br />
Note:<br />
When unlocking a service, you will be prompted to enter your PIN-Code. The default PIN-Code is 0000.<br />
When switching to the locked service, you should enter the PIN-Code to view the service.<br />
You will not be able to watch the skipped services by using the CH-/CH+ button. However, you can watch the skipped services using<br />
the NUMERIC buttons or Service List.<br />
For detailed information about how to register all services as Favourite Service, refer to 6.3 Organising Favourite Services.<br />
GB 27
6. Service List<br />
6. Service List<br />
There are five types of service lists – All, Favourite, Network, Satellite, Alphabet - to find services you are interested in quickly and easily.<br />
All service list displays all searched TV or Radio services sorted by service number. Favourite service list displays favourite services with<br />
automatic sub-groups and four sub-groups that you can organise services according to your preference. Network service list displays<br />
services with several network subgroups. Satellite service list displays services classified by satellites. Alphabet service list displays all<br />
searched TV or Radio services sorted by service name.<br />
**<br />
6.1 Switching Services<br />
1. Press the OK button while watching a programme to display the service list.<br />
You can also display the service list using the MENU-SELECT<br />
SERVICE-SIMPLE (or ADVANCED).<br />
2. Press the COLOUR button to display the corresponding service list.<br />
RED (All service list), GREEN (Favourite service list), YELLOW (Network<br />
service list), BLUE (Satellite service list), WHITE (Alphabet service list)<br />
3. Select your desired service using the , CH-/CH+ or NUMERIC buttons,<br />
and press the OK button to change to the selected service.<br />
Note:<br />
Whenever you press the TV/RADIO button while the service list is<br />
displayed, the service list will be switched between TV and Radio<br />
service list.<br />
You can also set the property of services in this service list. Press the<br />
MENU button while the service list is displayed. For more information,<br />
refer to 5.4 Setting Property of Service.<br />
GB 28
6.2 Organising Services<br />
You can edit TV or Radio services using the Organise TV Services<br />
(MENU-INSTALLATION-SERVICE ORGANISING-ORGANISE TV<br />
SERVICES-ORGANISE ALL SERVICES) or Organise Radio Services<br />
(MENU-INSTALLATION-SERVICE ORGANISING-ORGANISE RADIO<br />
SERVICES-ORGANISE ALL SERVICES). You will be prompted to enter your<br />
PIN-Code. The default PIN-Code is 0000. Before leaving Organise TV/Radio<br />
Services screen, you will be prompted to save the changes. If you would like to<br />
save the changes, select OK, and press the OK button.<br />
GB 29
6. Service List<br />
You can delete, move, lock or unlock, skip and rename services.<br />
You can select a service using the button, and press the COLOUR<br />
button to execute the corresponding operation as described on the screen.<br />
When you rename a service, the keyboard will appear on the screen. You can<br />
change the name using the keyboard. Select a character using the<br />
button, and press the OK button to enter the selected character. After entering<br />
the new name, press the YELLOW button to save it.<br />
To delete a character, press the BLUE button.<br />
To switch to the standard keyboard, press the RED button.<br />
To switch to the extended keyboard, press the GREEN button.<br />
**<br />
Note: You must enter your PIN-Code using the NUMERIC buttons to<br />
view the locked services.<br />
GB 30
6.3 Organising Favourite Services<br />
You can add services to Favourite groups using Organise Favourite TV Services (MENU-INSTALLATION-SERVICE<br />
ORGANISING-ORGANISE TV SERVICES-ORGANISE FAVOURITE A~D) or Organise Favourite Radio Services<br />
(MENU-INSTALLATION-SERVICE ORGANISING-ORGANISE RADIO SERVICES-ORGANISE FAVOURITE A~D). Before leaving Edit<br />
Favourite Services screen, you will be prompted to save the changes. If you would like to save the changes, select OK, and press the<br />
OK button.<br />
The Organise Favourite TV/Radio Services screen consists of Favourite<br />
Group and Favourite List on the left side of the screen and Service List on the<br />
right side. You can move the highlighter in order of Favourite Group, Favourite<br />
List, and Service List using the button. You can move the highlighter in<br />
reverse direction using the button.<br />
To add services to Favourite List, select a service in Service List using the<br />
button, and press the OK button.<br />
For more information about how to edit the services in Favourite List, refer to<br />
6.2 Organising Services.<br />
GB 31
6. Service List<br />
6.4 Organising Networks<br />
You can delete, move and rename networks. To enter Organise Networks<br />
menu, go to MENU-INSTALLATION-SERVICE ORANISING-ORGANISE<br />
NETWORKS. You can select a network using the button, and press the<br />
COLOUR button to execute the corresponding operation as described on the<br />
screen. You can move the highlighter in order of Network List and Service List<br />
using the button. You can move the highlighter in reverse direction using the<br />
button. For more information about how to rename a network, refer to 6.2<br />
Organising Services.<br />
GB 32
6.5 Deleting Satellites<br />
You can delete satellites and transponders.<br />
To enter Delete Satellites menu, go to MENU-INSTALLATION-SERVICE ORGANISING-DELETE SATELLITES.<br />
The Delete Satellites screen consists of Satellite List on the left side of the<br />
screen and Transponder List and Service List on the right side. You can move<br />
the highlighter in order of Satellite List Transponder List, and Service List using<br />
the button. You can move the highlighter in reverse direction using the<br />
button.<br />
You can select a satellite in Satellite List or transponder in Transponder List<br />
using the button, and press the RED button to delete the selected satellite<br />
or transponder.<br />
**<br />
Note: You should turn on at least <strong>one</strong> satellite.<br />
GB 33
7. Programme Guide<br />
7. Programme Guide<br />
The programme guide provides the programme information for all services,<br />
based on date and time. In addition, it provides convenient ways to view<br />
programmes in "Now", "Next", "Weekly", or "Quick" mode - to search your<br />
desired programme and to watch or reserve it.<br />
You can go to the programme guide screen by just pressing the GUIDE button<br />
or by using MENU-TV GUIDE. To close the guide screen, press the GUIDE or<br />
EXIT button.<br />
**<br />
You can navigate the guide using the following instructions:<br />
Press the RED button to display the current or next programme list.<br />
Press the GREEN button to display the programme list for a week.<br />
Press the YELLOW button to display the reserved programme list.<br />
Press the BLUE button to display the simple guide. This is also called Quick<br />
Guide.<br />
Press the ? button in Now/Next/Weekly mode to show the extended EIT<br />
information. (when available)<br />
GB 34<br />
**
7.1 Automatic Reservation<br />
Press the WHITE button to reserve the selected programme in Now, Next,<br />
Weekly, or Quick mode.<br />
Press the WHITE button to change the reservation mode or to cancel the<br />
reservation in Reserved mode.<br />
Select a service using the or CH-/CH+ button. When switching<br />
services using the button, press the OK button to display the selected<br />
service on the right side of the screen.<br />
Select a day in Weekly mode using the button, and press the OK<br />
button.<br />
Note:<br />
**<br />
Press the TV/RADIO button to switch to Radio Guide.<br />
The reservation icons on the reserved programmes in the guide differ according to the reservation type.<br />
Once Reserve the programme once.<br />
Daily Reserve the programme everyday.<br />
Weekly Reserve the programme once a week.<br />
If the programme is overlapped with another programme, adjust the reservation appropriately.<br />
The default PIN-Code is 0000.<br />
GB 35
7. Programme Guide<br />
7.2 Manual Reservation<br />
Press the YELLOW button to view the list of reserved programmes.<br />
Select an empty column to manually add a reservation and press the OK<br />
button.<br />
Select the channel and press the OK button to display the channel list.<br />
Select a channel using the button and press the OK button.<br />
Enter the Date, Start Time, End Time and Repeat frequency of the<br />
programme using the or NUMERIC buttons.<br />
Select Save and press the OK button.<br />
Press the WHITE button or OK button in Reserved to edit the reservation.<br />
**<br />
Note: You can only change the repeat frequency or delete the reservation in Automatic Reservation.<br />
GB 36
8. Setting Preferences<br />
8. Setting Preferences<br />
This chapter describes the menu which lets you customise your product according to your perference.<br />
**<br />
8.1 Parental Control<br />
**<br />
The Parental Control menu (MENU-PARENTAL CONTROL) lets you control<br />
the access to programmes by programme rating.<br />
Set Censorship Classification by age level. “No Block” allows you to watch<br />
programmes without any blocking. You can block all programmes regardless of<br />
age level. The blocked programmes require your PIN-Code.<br />
The default PIN-Code is 0000.<br />
We recommend you to change the old PIN-Code to a new <strong>one</strong> periodically for<br />
security. If you have forgotten your PIN-Code, please contact your local product<br />
distributor.<br />
8.2 System Setting<br />
The System Setting menu (MENU-INSTALLATION-SYSTEM SETTING) lets you set language, time, audio/video output, transparency of<br />
OSD, i-plate display time and changing to reserved service options.<br />
1. Language Setting<br />
You can set the default language for menu, audio, and subtitle.<br />
GB 37
8. Setting Preferences<br />
2. Time Setting<br />
You can set the current time, and turn the product on or off automatically. Once you set the Wakeup time and Sleep time, the product is<br />
turned on and off everyday.<br />
3. A/V Output Setting<br />
This menu lets you adjust the audio and video output, set Dolby Digital, match the screen ratio to your TV, select the display format<br />
according to the screen ratio, select the TV standard, and set the NTSC mode.<br />
You can choose the Dolby Digital audio stream whenever possible by selecting On in the Dolby Digital setting.<br />
4. Other Setting<br />
You can adjust the transparency level of On-Screen Display (OSD), set the<br />
display time of the i-plate when switching services and select automatic or<br />
manual mode for changing to the reserved service.<br />
GB 38
9. System Information<br />
9. System Information<br />
9.1 Status<br />
The Status menu (MENU-INSTALLATION-STATUS) displays information on STB status, signal detection and STB upgrade.<br />
1. STB Status<br />
You can view the information on the H/W and S/W version, device driver<br />
version, S/W last update, loader version, system ID and current service.<br />
When you contact your service provider or local product distributor, this<br />
information may be required.<br />
2. Signal Detection<br />
You can view the signal level and signal quality of the current service.<br />
3. STB Upgrade<br />
You can enter the required values and upgrade the STB software.<br />
Antenna Alternative : Select antenna alternative which has different combinations of settings for search. Antenna Alternative 16 is<br />
predefined for SMATV.<br />
Frequency: Enter transponder frequency.<br />
Polarisation: Select the type of polarisation.<br />
Symbol Rate: Select or enter transponder symbol rate.<br />
FEC: Select FEC(Forward Error Correction).<br />
**<br />
For detailed information about STB Upgrade, refer to 11. Software Update.<br />
GB 39
9. System Information<br />
9.2 Default Setting<br />
**<br />
You can restore the product to the factory settings using the Default Setting<br />
menu (MENU-INSTALLATION-DEFAULT SETTING). You will be prompted to<br />
enter your PIN-Code. The default PIN-Code is 0000.<br />
After completing the default setting, the Searching Services screen will be<br />
displayed. For more information, refer to 4. Searching Services.<br />
Warning:<br />
Please note that once you perform Default Setting, all data except the<br />
customised PIN-Code will be restored to the factory settings.<br />
**<br />
9.3 Mail Messages<br />
You can receive mail from the broadcasting company. When a new mail arrives, the envelope icon will appear. Urgent messages will<br />
be displayed directly on the screen while watching a programme. Old messages will be deleted automatically when the mail box becomes<br />
full. Select a mail using the button and press the OK button to read the mail. The message will be displayed. Press the OK or EXIT<br />
button to return to the mail box screen. If you wish to delete the mail, select Delete and press the OK button.<br />
**<br />
9.4 Conditional Access<br />
**<br />
You can view the current status of the Smartcard.<br />
GB 40
10. Utility<br />
10. Utility<br />
The product provides various utilities; calendar, biorhythm and games.<br />
To use utilities, go to MENU-UTILITY.<br />
**<br />
1. Calendar<br />
You can see the specified monthly calendar. Press the button to change<br />
the year. Press the button to change the month. Press the OK or EXIT<br />
button to return to the previous menu.<br />
2. Biorhythm<br />
You can adjust your birth year and date to see your current biorhythm. Press<br />
the button to move to the next step. Press the button to change a<br />
value in the step. Press the EXIT button to return to the previous menu.<br />
3. Games<br />
You can select games using the button. Use the , OK, COLOUR<br />
or EXIT button according to the instructions displayed on the screen.<br />
GB 41
11. Software Update<br />
11. Software Update<br />
In order to maintain proper performance of the product, it is essential to have the most up-to-date software.<br />
**<br />
1. OTA (Over the Air)<br />
OTA, an abbreviation of Over–the-Air, is a standard for the transmission of software for equipment through a broadcast system.<br />
Over the Air (OTA) is simply an alternative method for downloading software versions. However, the operator reserves the right to decide<br />
when and where this software update can take place over the antenna.<br />
The software update will only occur under the following circumstances:<br />
**<br />
1. The equipment should have appropriate loader software.<br />
Caution: Please note that if you don't have normal loader software, the equipment may not be updated or work after<br />
software update.<br />
2. The operator decides to release the software via a designated antenna system.<br />
3. The equipment must be tuned properly to the same channel that the operator uses.<br />
4. Upgrade software when the quality of receiving signal strength is high.<br />
**<br />
Caution:<br />
Please be careful to keep the power on and the power cord plugged in during software update. If the power is off during software<br />
update, it may cause fatal damage to the product.<br />
Please be careful not to pull out the signal line during software update. Update may be interrupted and the product may not work.<br />
GB 42
The product cannot work at all during software update. It may take 5-10 minutes to update software.<br />
Updating software is largely divided into two ways, automatic detection and using software update menu<br />
(MENU-INSTALLATION-STATUS-STB UPGRADE).<br />
New software can be found when powering on the product. The notice informing you of new software detection will appear on the screen.<br />
If you would like to update software, select Yes, and press the OK button. After completing the software upgrade, the product is<br />
automatically powered off and on again.<br />
2. Software Update from PC<br />
You can connect your product to the PC directly and upgrade your software by transferring the new software from the PC.<br />
Follow these steps to download new software from PC to this product.<br />
**<br />
1. Download new software file equivalent for this product model from our website (http://www.humaxdigital.com).<br />
2. Download and install download tool from our website.<br />
3. Connect your PC to this product with RS-232C serial cable.<br />
4. Execute installed download tool, and then follow the instructions on the download tool.<br />
5. Press the STANDBY button to operate product.<br />
**<br />
**<br />
Note: The feature is for CR-FOX II/AEE<br />
GB 43
12. Troubleshooting<br />
12. Troubleshooting<br />
Before contacting your local service, please read the following instructions. If the product does not work normally after completing the<br />
following troubleshooting, please contact your local product distributor or service centre.<br />
**<br />
1. The LED on the front panel does not light.<br />
- Check the main power cable and make sure that it is plugged into a suitable power outlet.<br />
**<br />
2. No picture<br />
- Make sure that the product is in operation mode.<br />
- Make sure that the AV cable is firmly connected to the TV.<br />
- Make sure that the antenna line is correctly connected to the equipment.<br />
- Check the brightness level of TV.<br />
- Check if the service is on air.<br />
**<br />
3. Poor picture or sound quality<br />
- Make sure there is no mobile ph<strong>one</strong> or microwave oven near the equipment.<br />
- Check the signal strength and quality which can be influenced by weather.<br />
- Change satellite dish into a bigger <strong>one</strong> if it is small.<br />
- Replace the LNB with a <strong>one</strong> with low noise factor if the noise factor is high.<br />
- Replace the LNB with a new <strong>one</strong> if it is damaged or out of order.<br />
**<br />
4. No/poor sound<br />
- Check the volume level of the TV and product.<br />
- Check the mute status of the TV and product.<br />
- Press the SOUNDTRACK button to change the audio type.<br />
GB 44
5. Remote control does not operate<br />
- To manipulate the equipment with the remote control, its emitting part should directly point towards its receiving part of the product.<br />
- Check the battery of the remote control.<br />
**<br />
6. Reservation is unavailable<br />
- Check if it is overlapped with other reservation.<br />
- Check if the power is off.<br />
**<br />
7. Watching scrambled service is not available<br />
- Install the proper Smartcard.<br />
- Check if the Smartcard is broken.<br />
- Pull out the Smartcard and reinsert.<br />
GB 45
13. Specification<br />
13. Specification<br />
CR-FOX+/AEE<br />
**<br />
MPEG Transport Stream A/V Decoding<br />
Aspect Ratio 4:3, 16:9<br />
Video Resolution 720 x 576<br />
Audio Mode Single /Dual mono/ Stereo /Joint<br />
stereo<br />
Memory<br />
Flash Memory 2MB<br />
Graphics(MPEG) &<br />
System Memory<br />
16 MB<br />
EEPROM 8KB<br />
Power Supply<br />
Input Voltage AC 90 ~ 250V, 50/60Hz<br />
Type Switching Mode Power Supply<br />
(SMPS)<br />
Power Consumption Operation mode: Max. 30 W<br />
Protection Separate internal fuse & Lightning<br />
protection<br />
GB 46<br />
A/V & Data In/Out<br />
TV SCART Video Output (CVBS, RGB, S-Video)<br />
Audio Output<br />
VCR SCART Video Output (CVBS, S-Video)<br />
Video Input (CVBS, RGB, S-Video)<br />
Audio Output<br />
S/PDIF Digital Audio Output, Fiber-Optic<br />
(Resolution: 20 bits)<br />
Physical Specification<br />
Size 260 mm X 50 mm X 182 mm<br />
Weight (Net) 1.3 kg<br />
Operating<br />
Temperature<br />
0 to +45<br />
Storage Humidity 5% ~ 95% RH (Non-condensing)
13. Specification<br />
CR-FOX II/AEE<br />
**<br />
MPEG Transport Stream A/V Decoding<br />
Aspect Ratio 4:3, 16:9<br />
Video Resolution 720 x 576<br />
Audio Mode Single /Dual mono/ Stereo /Joint<br />
stereo<br />
Memory<br />
Flash Memory 2MB<br />
Graphics(MPEG) &<br />
System Memory<br />
16 MB<br />
EEPROM 8KB<br />
Power Supply<br />
Input Voltage AC 90 ~ 250V, 50/60Hz<br />
Type Switching Mode Power Supply<br />
(SMPS)<br />
Power Consumption Operation mode: Max. 30 W<br />
Protection Separate internal fuse & Lightning<br />
protection<br />
A/V & Data In/Out<br />
TV SCART Video Output (CVBS, RGB, S-Video)<br />
Audio Output<br />
VCR SCART Video Output (CVBS, S-Video)<br />
Video Input (CVBS, RGB, S-Video)<br />
Audio Output<br />
RCA Video 1 Output (CVBS)<br />
Audio 2 Output (left/right)<br />
S/PDIF Digital Audio Output, Fiber-Optic<br />
(Resolution: 20 bits)<br />
RS-232C D-SUB 9 pin<br />
Physical Specification<br />
Size 260 mm X 50 mm X 182 mm<br />
Weight (Net) 1.3 kg<br />
Operating<br />
Temperature<br />
0 to +45<br />
Storage Humidity 5% ~ 95% RH (Non-condensing)<br />
GB 47
14. Service and Support<br />
14. Service and Support<br />
Information concerning troubleshooting, software upgrade and product support is provided in the following websites and call centers.<br />
Should your product require warranty service, please contact HUMAX to obtain the appropriate authorization.<br />
**<br />
Germany<br />
Tel: 01805-778870 ( 0,12/min)<br />
Opening Hours: Mon-Sat 8:00-20:00<br />
E-mail: techinfo@humax-digital.de<br />
Website: www.humax-digital.de<br />
Language: Deutsch/English/Turkish<br />
**<br />
UK<br />
Tel: 0870 247 8800<br />
Opening Hours: Mon-Fri 9:00-18:00<br />
E-mail: uksupport@humax-digital.co.uk<br />
Website: www.humax-digital.co.uk<br />
Language: English<br />
**<br />
Middle East (Dubai, UAE)<br />
Tel: +971 (0)4 359 2323<br />
Opening Hours: Sat-Thurs 9:00-20:00 (Closed on Fri)<br />
E-mail: callcenterME@humaxdigital.com<br />
Website: www.humaxarabia.com<br />
Language: Arabic/English<br />
GB 48<br />
Australia<br />
Tel: 1800 613 011<br />
Opening Hours: Mon- Fri 9:00- 17:30<br />
E-mail: techinfoau@humaxdigital.com<br />
Website: www.humaxdigital.com/australia<br />
Language: English<br />
**<br />
Italy<br />
Tel: 899 100 080 ( 1+ VAT/min)<br />
Orario: Local time in Italy (GMT+1)<br />
Mon- Fri 8:00 – 18:00<br />
Language: Italian<br />
**<br />
Sweden<br />
Tel: +46 (0)550 85527<br />
Opening Hours: Mon-Fri 8:00-16:30<br />
Language: Swedish/English
Finland<br />
Tel: 09 56186366<br />
Opening Hours: Mon-Fri 8:00-16:00<br />
Language: Finnish/English<br />
**<br />
Austria<br />
Tel: 0820 400675 ( 0,12/min)<br />
Opening Hours: Mon-Sun 8:00-23:00<br />
E-mail: support@humax-digital.de<br />
Website: www.humax-digital.de<br />
Language: Deutsch/English/Turkish<br />
**<br />
Note: For hardware repair, please visit our website.<br />
GB 49
HUMNO-CRFOX+/AEE_CRFOXII/AEE.100GBDE