Gas-fired water boiler Ultra Interface Kit - Weil-McLain
Gas-fired water boiler Ultra Interface Kit - Weil-McLain
Gas-fired water boiler Ultra Interface Kit - Weil-McLain

You also want an ePaper? Increase the reach of your titles
YUMPU automatically turns print PDFs into web optimized ePapers that Google loves.
<strong>Gas</strong>-<strong>fired</strong><br />
<strong>water</strong> <strong>boiler</strong><br />
Control Addendum<br />
<strong>Ultra</strong> <strong>Interface</strong> <strong>Kit</strong><br />
Revise module parameters ONLY if you fully understand the<br />
purpose and result of the changes. Tampering with control<br />
settings can result in unreliable operation, with possible severe<br />
personal injury, death or substantial property damage.<br />
This document must only be used by a qualified heating<br />
installer/service technician. Read all instructions, including this<br />
Addendum, the <strong>Ultra</strong> Boiler Control Supplement and the Boiler<br />
Manual before installing. Perform steps in the order given.<br />
Failure to comply could result in severe personal injury, death<br />
or substantial property damage.<br />
Installation must comply with local requirements and with the<br />
National Fuel <strong>Gas</strong> Code, ANSI Z223.1 for U.S. installations or<br />
CSA B149.1 or B149.2 for Canadian installations.<br />
Contents<br />
Overview ...........................................................................3<br />
How to set parameters ......................................................4<br />
Table 1 — Default parameter settings ...............................5<br />
Installing <strong>Gas</strong>com software ...............................................6<br />
Setting parameters using <strong>Gas</strong>com software ......................7<br />
Monitoring the MCBA ................................................... 11<br />
Notes ...............................................................................12<br />
Parameter explanations ................................................... 13<br />
Outdoor reset operation ...........................................14<br />
Automatic temperature boost ................................... 16<br />
Fan speed settings ...................................................... 17<br />
Differential (hysteresis) settings ................................18<br />
Parameter reference table......................................... 19 – 27<br />
Record of parameter changes.......................................... 28<br />
Part No. 550-100-040/0804
GAS-FIRED WATER BOILER — CONTROL ADDENDUM — <strong>Ultra</strong> <strong>Interface</strong> <strong>Kit</strong><br />
General<br />
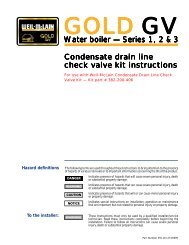
Hazard definitions<br />
The following defined terms are used throughout this manual to bring<br />
attention to the presence of hazards of various risk levels or to important<br />
information concerning the life of the product.<br />
Indicates presence of hazards that will cause severe personal<br />
injury, death or substantial property damage.<br />
Indicates presence of hazards that can cause severe personal<br />
injury, death or substantial property damage.<br />
Indicates presence of hazards that will or can cause minor<br />
personal injury or property damage.<br />
Indicates special instructions on installation, operation or<br />
maintenance that are important but not related to personal<br />
injury or property damage.<br />
2<br />
Part number 550-100-040/0804
GAS-FIRED WATER BOILER — CONTROL ADDENDUM — <strong>Ultra</strong> <strong>Interface</strong> <strong>Kit</strong><br />
Overview<br />
<strong>Ultra</strong> Control Module parameters<br />
See pages 13 to 27 for detailed information on all <strong>Ultra</strong> control<br />
module parameters.<br />
Parameter descriptions<br />
1. This Addendum includes explanations of the adjustable parameters (pages<br />
13 – 27).<br />
Revise module parameters ONLY if you fully understand the<br />
purpose and result of the changes. Tampering with control<br />
settings can result in unreliable operation, with possible severe<br />
personal injury, death or substantial property damage.<br />
2. You will find additional information on parameters and control operation<br />
in the <strong>Ultra</strong> Control Supplement.<br />
Default parameter settings<br />
1. Table 1 lists the factory default settings for all <strong>Ultra</strong> models, for standard<br />
altitudes (up to 5,500 feet) and high altitude (over 5,500 feet).<br />
2. When in doubt, always restore parameters to the default settings listed in<br />
Table 1 (page 5).<br />
3. You can restore factory settings by loading the parameter file supplied on<br />
the <strong>Gas</strong>com disk to the <strong>Ultra</strong> control module as described in this Addendum.<br />
When to change parameters<br />
1. Factory default settings will work for most applications. There are situations<br />
for which changes are desirable or even mandatory:<br />
• altitudes over 5500 feet.<br />
• multiple <strong>boiler</strong> applications using the AM4 module.<br />
• Default <strong>boiler</strong> settings are satisfactory for most high-mass systems (radiant<br />
slab, cast iron radiators, most finned-tube radiation).<br />
Typical parameter changes<br />
Outdoor reset applications<br />
1. Outdoor reset operation can sometimes be improved by adjusting parameters<br />
4, 5, 6 and 7. Parameters 9, 10 and 11 might also be modified.<br />
2. See page 14 for discussion of outdoor reset.<br />
High altitude installations<br />
1. Minimum fan speed (parameter 17) and ignition fan speed (parameter<br />
19) MUST be changed for operation at altitudes over 5,500 feet.<br />
2. See the High Altitude <strong>Kit</strong> instructions for details. Change these parameters<br />
following the High Altitude instructions, or load the correct high<br />
altitude parameter file from the <strong>Ultra</strong> <strong>Interface</strong> <strong>Kit</strong> CD. If using <strong>Gas</strong>com<br />
software to revise the parameters, use ONLY the values given in Table 1.<br />
3. Also see page 17 for further discussion of fan speed parameters.<br />
Fan-coil systems<br />
1. Systems using fan coil units respond to heat input<br />
rapidly, and may require larger differential settings<br />
for best performance.<br />
2. See page 18 for discussion of control differential and<br />
how to adjust.<br />
High-mass systems<br />
1. High-mass systems, such as in-slab radiant and cast<br />
iron radiator systems, respond slowly to heat input.<br />
The factory default settings will work well for most<br />
of these applications.<br />
DO NOT Change the following:<br />
Failure to comply with the following could<br />
cause equipment performance problems,<br />
resulting in potential severe personal injury,<br />
death or substantial property damage.<br />
Parameter 2<br />
• DO NOT set for continuous DHW pump.<br />
Parameters 13 & 15<br />
• DO NOT set higher than values in Table 1.<br />
Parameters 17 & 19<br />
• DO NOT set lower than the values in Table 1.<br />
Parameters 24, 25, 26 & 27<br />
• DO NOT change from default settings.<br />
Parameter 32<br />
• DO NOT change from value of 0.<br />
Parameter 33<br />
• Leave setting at 50°F for storage tank DHW applications.<br />
Parameter 34 – first digit<br />
• DO NOT change from value of 0.<br />
Parameter 34 – second digit<br />
• Set only at 0 (2nd CH circuit off) unless using an<br />
AM-4. With AM-4, set second digit to 4 (0 - 10 V<br />
analog on AM-4: capacity).<br />
Parameter 35 – both digits<br />
• DO NOT change either digit from default setting.<br />
Parameters 37, 39, 40 & 41<br />
• DO NOT CHANGE — For future use only.<br />
Parameter 42 – first digit<br />
• DO NOT change from default value.<br />
Part number 550-100-040/0804 3
GAS-FIRED WATER BOILER — CONTROL ADDENDUM — <strong>Ultra</strong> <strong>Interface</strong> <strong>Kit</strong><br />
How to set parameters (3 methods)<br />
METHOD 1 — Boiler display<br />
With the six buttons on the front of the <strong>boiler</strong> and the<br />
proper code the <strong>boiler</strong> can be both monitored and<br />
modified using the digital display (Figure 1).<br />
Perform the following steps with the <strong>boiler</strong> powered and<br />
in a standby condition.<br />
1. On the <strong>boiler</strong> display in [STBY] mode<br />
2. Press and hold the button. While holding the<br />
"Step" button press and hold the button. Hold<br />
both buttons together for several seconds until "Code"<br />
is displayed. Release buttons. “Code” stays on the<br />
display.<br />
3. NOTE: If [CODE] is not displayed after several seconds<br />
release the buttons and press the button<br />
several times to return to [STBY]. Repeat step two<br />
again.<br />
4. Press the button once.<br />
5. Adjust the number displayed to [C - 05] by using the<br />
and buttons.<br />
6. Press the "Store" button.<br />
The <strong>Ultra</strong> control module will automatically<br />
exit code mode after10 minutes<br />
of no activity.<br />
7. Press the mode button several times until [PARA] is<br />
displayed.<br />
8. Press the button several times until [P-XX] is<br />
displayed. The XX represents the parameter that will<br />
be changed. The parameter’s value will then be displayed.<br />
9. Use the or buttons to adjust to the<br />
desired value.<br />
10. Press the button. Steps 8 through 10 can now<br />
be repeated for additional parameter changes. Or<br />
continue to step 11 to exit.<br />
11. Press the button until [STBY] is displayed to<br />
exit.<br />
Figure 1<br />
<strong>Ultra</strong> <strong>boiler</strong> digital display<br />
METHOD 2 — <strong>Ultra</strong> <strong>Interface</strong> <strong>Kit</strong><br />
Using the <strong>Ultra</strong> <strong>Interface</strong> <strong>Kit</strong> and a Windows 95+ based<br />
computer with an available serial port.<br />
Contents of <strong>Ultra</strong> <strong>Interface</strong> <strong>Kit</strong><br />
1. GCI communication module with cables (Allows<br />
connection of a PC to the <strong>Ultra</strong> Control Module).<br />
2. <strong>Gas</strong>com software (Provides Microsoft Windows user<br />
interface with <strong>Ultra</strong> Control Module).<br />
Computer requirements<br />
1. PC computer with available serial port.<br />
2. CD-ROM drive (to load software onto computer).<br />
3. Microsoft Windows, version 95 or later.<br />
Purposes of the <strong>Interface</strong> <strong>Kit</strong><br />
1. Modify control parameters when necessary — Computer<br />
interface simplifies parameter change.<br />
2. Monitor control operation — All <strong>boiler</strong> inputs can<br />
be viewed on-screen in both text mode and in realtime<br />
graphical display.<br />
3. Troubleshoot <strong>boiler</strong> — Use <strong>Gas</strong>com software to<br />
download a log of error codes recorded by the <strong>Ultra</strong><br />
Control Module.<br />
Using <strong>Gas</strong>com software<br />
1. See procedures in this addendum.<br />
Using parameter files<br />
1. The <strong>Gas</strong>com software disk contains parameter files<br />
for high altitude, AM4 applications, fan-coil systems<br />
and default <strong>boiler</strong> parameters.<br />
2. See “Setting Parameters Using <strong>Gas</strong>com Software” for<br />
file listings and procedures.<br />
METHOD 3 — GMKEY device<br />
1. (Not covered in this supplement) Using a GMKEY<br />
device that will flash a new set of parameters to the<br />
control. This method is currently reserved for <strong>Weil</strong>-<br />
<strong>McLain</strong> representatives. Only the first two methods<br />
of changing parameters are discussed in this document.<br />
After making changes to parameters,<br />
record the changes made on the last<br />
page of this supplement, and leave a<br />
copy with the <strong>boiler</strong> for future<br />
reference.<br />
4<br />
Part number 550-100-040/0804
GAS-FIRED WATER BOILER — CONTROL ADDENDUM — <strong>Ultra</strong> <strong>Interface</strong> <strong>Kit</strong><br />
Table 1 Default parameter settings (as they appear in <strong>Gas</strong>com software and Boiler display) —<br />
DO NOT change any parameter unless the application requires special settings<br />
Part number 550-100-040/0804 5
GAS-FIRED WATER BOILER — CONTROL ADDENDUM — <strong>Ultra</strong> <strong>Interface</strong> <strong>Kit</strong><br />
Installing <strong>Gas</strong>com software on your computer<br />
1. In order to run the <strong>Gas</strong>com it must be installed from<br />
the supplied software CD. Insert the CD into the<br />
CD-Rom drive and open it through “My Computer.”<br />
Copy the “<strong>Gas</strong>com” file folder over to a directory on<br />
your computer’s hard drive. (Write down where you<br />
put this folder for future configuration.)<br />
2. Once you have copied the folder, navigate to it on<br />
your hard drive using “My Computer” or “Windows<br />
Explorer”. Locate the file named “gascom.exe”. Create<br />
a shortcut on the desktop to this file by clicking<br />
on it and holding the right mouse button and dragging<br />
it to the desktop. Release the mouse button and<br />
choose “Create Shortcut(s) here”. This shortcut will<br />
now be used to open the <strong>Gas</strong>com program.<br />
3. Close all windows and use the newly created shortcut<br />
to open the <strong>Gas</strong>com program. Once <strong>Gas</strong>com is<br />
open for the first time you must configure it to work<br />
properly on your computer and with the <strong>Ultra</strong> <strong>boiler</strong>.<br />
4. Choose “<strong>Gas</strong>com” from the menu bar and then “configuration.”<br />
A dialog box will open as shown below.<br />
5. From the first dropdown box choose “Standard<br />
HR7A60Hz” for the MCBA1400 type. Choose from<br />
the second dropdown box “GCI232” for the <strong>Interface</strong><br />
device. The choice for the Communication port<br />
depends on the computer being used. Choose the<br />
available serial port that you will connect the GCI<br />
<strong>Interface</strong> module to. If you do not know the name of<br />
the serial port that you will be using you can often<br />
find it using trial and error. The “<strong>Gas</strong>com directory”<br />
is the location on your computer where the <strong>Gas</strong>com<br />
program is stored. In the example below the “<strong>Gas</strong>com”<br />
folder is stored on the C: drive. If you do not know<br />
the location of the folder you may find it by right<br />
clicking on the shortcut that was created on the desktop<br />
and then choosing “Properties”. There is often a<br />
“Target” or “Start in” listing that shows the location<br />
of the file folder.<br />
6. The last entry in the configuration menu is the “Access<br />
code” field. Entering the correct code in the location<br />
will allow access to Parameter Numbers 1 to 42.<br />
An access code is not needed in order to access parameters<br />
1 to 4, monitor <strong>boiler</strong> performance, or view<br />
the logged error codes. THE ACCESS CODE WILL<br />
CLEAR AFTER THE PROGRAM CLOSES.<br />
6<br />
Part number 550-100-040/0804
GAS-FIRED WATER BOILER — CONTROL ADDENDUM — <strong>Ultra</strong> <strong>Interface</strong> <strong>Kit</strong><br />
Setting parameters using <strong>Gas</strong>com software<br />
Using <strong>Gas</strong>com software<br />
1. Connect the GCI interface module from the communications<br />
kit to the serial port on the computer.<br />
Connect the ribbon cable to the <strong>Ultra</strong> Control<br />
through the connection on the front display panel.<br />
(Series 1 <strong>boiler</strong>s have the connection under the top<br />
front cover on the control itself.) Plug in the GCI<br />
power cord.<br />
2. Make sure the power to the <strong>boiler</strong> is on.<br />
3. Start the <strong>Gas</strong>com program and go through configuration<br />
if it has not already been completed. If the<br />
configuration was done previously choose “Read<br />
from MCBA,” as shown below.<br />
5. The first four parameters are the only parameters<br />
available to change unless an Access code is entered<br />
under the configuration menu.<br />
Entering the access code makes all<br />
parameters 1 through 42 available for<br />
change. Do not change any parameter that<br />
is not directly addressed in this Addendum<br />
as an acceptable change. Some parameters<br />
in the control should never be changed<br />
under any circumstance, as explained in<br />
this Addendum. After making changes to<br />
parameters, record the changes made on<br />
the last page of this supplement, and leave<br />
a copy with the <strong>boiler</strong> for future reference.<br />
Accessing parameters 5–42<br />
1. If access to parameters 5-42 is needed, choose the<br />
“configuration” option from the “gascom” menu.<br />
4. If the device is connected correctly and the correct<br />
communication port is chosen the following screen<br />
will appear. This indicates that communication has<br />
been established between the <strong>Ultra</strong>’s MCBA control<br />
and the computer.<br />
2. To access parameters 5–42, enter “05” in the access<br />
code box, as shown below. Choose “OK”.<br />
8. Parameters 1 through 42 should all be visible.<br />
Part number 550-100-040/0804 7
GAS-FIRED WATER BOILER — CONTROL ADDENDUM — <strong>Ultra</strong> <strong>Interface</strong> <strong>Kit</strong><br />
Setting parameters using <strong>Gas</strong>com software (cont.)<br />
To change a parameter:<br />
1. Choose the parameter by double-clicking (left mouse<br />
button) on its description OR highlighting it with a<br />
single click (left mouse button) and pressing “Enter.”<br />
2. A pop-up window will appear for the parameter with<br />
a brief description of its functions and the possible<br />
settings.<br />
3. Choose the desired setting following all instructions<br />
referring to all instructions supplied in this manual.<br />
Refer to the Parameter reference table for specific parameter<br />
information.<br />
Downloading parameters<br />
1. The new parameters can now be downloaded to the<br />
control.<br />
2. Choose the “Parameters” menu and then the “Write<br />
to MCBA” option.<br />
3. The computer OVERWRITES ALL of the parameters<br />
on the control. The first digit of the front display<br />
will flash once the parameters are received.<br />
4. Choose “OK”. The parameter should now show the<br />
updated value in the list. If any of the parameters<br />
appear red in color this indicates an invalid entry.<br />
The parameter is out of the acceptable range and<br />
must be corrected.<br />
5. Choose and modify parameters until all the desired<br />
settings are achieved. Correct any invalid parameters<br />
appearing in red text.<br />
Restoring default settings<br />
1. Factory default parameter files are included on the<br />
<strong>Gas</strong>com software disk. Downloading the default parameter<br />
file to the <strong>Ultra</strong> control module will undo<br />
any previously made parameter modifications.<br />
2. To restore defaults, open the appropriate file in<br />
<strong>Gas</strong>com (“Parameters” menu, “Load from file” option)<br />
from the <strong>Gas</strong>com disk and download the parameters<br />
to the MCBA.<br />
8<br />
Part number 550-100-040/0804
GAS-FIRED WATER BOILER — CONTROL ADDENDUM — <strong>Ultra</strong> <strong>Interface</strong> <strong>Kit</strong><br />
Setting parameters using <strong>Gas</strong>com software (cont.)<br />
Loading parameters from a file<br />
1. The files listed in Tables 2 and 3 (next page) are located<br />
on the <strong>Gas</strong>com software disk.<br />
2. To load the appropriate parameter file, use the “Parameters”<br />
menu, “Load from file” option.<br />
3. Navigate to the file and select it to load the parameters.<br />
Table 2<br />
You must be careful to select the correct file<br />
for the <strong>boiler</strong> model being used. Installing<br />
a parameter file for the wrong model could<br />
result in overfiring the <strong>boiler</strong>, resulting in<br />
possible severe personal injury, death or<br />
substantial property damage.<br />
<strong>Gas</strong>com software disk parameter files for <strong>Ultra</strong>-80 through <strong>Ultra</strong>-230 (Standard files work<br />
best for radiant slab, suspended-floor radiant, finned-tube baseboard and cast iron radiator<br />
sytems; Fan-coil files work best for fan-coil systems.) The factory default file is the file<br />
named, “80-230.par.”<br />
Part number 550-100-040/0804 9
GAS-FIRED WATER BOILER — CONTROL ADDENDUM — <strong>Ultra</strong> <strong>Interface</strong> <strong>Kit</strong><br />
Setting parameters using <strong>Gas</strong>com software (cont.)<br />
Loading parameters from a file<br />
1. The files listed in Tables 2 (previous page) and 3 (below)<br />
are located on the <strong>Gas</strong>com software disk.<br />
2. To load the appropriate parameter file, use the “Parameters”<br />
menu, “Load from file” option.<br />
3. Navigate to the file and select it to load the parameters.<br />
Table 3<br />
You must be careful to select the correct file<br />
for the <strong>boiler</strong> model being used. Installing<br />
a parameter file for the wrong model could<br />
result in overfiring the <strong>boiler</strong>, resulting in<br />
possible severe personal injury, death or<br />
substantial property damage.<br />
<strong>Gas</strong>com software disk parameter files for <strong>Ultra</strong>-310 ONLY (Standard files work best for<br />
radiant slab, suspended-floor radiant, finned-tube baseboard and cast iron radiator sytems;<br />
Fan-coil files work best for fan-coil systems.) The factory default file is the file named,<br />
“310.par.”<br />
10<br />
Part number 550-100-040/0804
GAS-FIRED WATER BOILER — CONTROL ADDENDUM — <strong>Ultra</strong> <strong>Interface</strong> <strong>Kit</strong><br />
Monitoring the MCBA and reading error logs<br />
Monitoring the <strong>Ultra</strong> control<br />
1. When ready to monitor the control, select “Monitor<br />
MCBA” from the “Monitor” menu.<br />
2. To change the setup for monitoring, select “Configuration”<br />
from the “Monitor” menu.<br />
• You can also change line color.<br />
• Enable the parameter to show on the display by<br />
clicking to cause a check next to “Line.” To prevent<br />
the parameter from showing on the monitor, remove<br />
the check mark.<br />
• Enable the parameter to be listed in the legend by<br />
clicking to cause a check next to “Legend.” To prevent<br />
the parameter from showing in the legend,<br />
remove the check mark.<br />
• Click “OK” to accept the changes and return.<br />
7. Adjust monitor background, scale, legend and font<br />
size in the dialog box below.<br />
8. When all changes are made, click “OK” to set the<br />
configuration.<br />
9. Select “Save to file” to save the configuration to disk.<br />
Select “Load from file” to use an existing configuration.<br />
3. You will see the dialog box like the one below.<br />
4. Scroll down the list and select the parameters you<br />
want to monitor.<br />
5. The check mark boxes indicate which parameters will<br />
be shown on the monitor display. The first check box<br />
means a line will show for the parameter. The second<br />
check box means the paramerter will be shown in the<br />
legend. Check boxes are enabled or disabled by clicking<br />
on “Edit.”<br />
6. Click on “Edit” to add or change check boxes for<br />
parameters.<br />
• You can change the line end style, make it solid or<br />
dashed, and change the way corners appear.<br />
10. From the “Monitor” menu, you can also:<br />
• Save a configuration file to disk.<br />
• Print the configuration.<br />
Reviewing error logs<br />
1. Use the “Error” menu in <strong>Gas</strong>com to load the error<br />
log from the control module (MCBA) or from a file<br />
you have saved.<br />
2. From the “Error” menu, you can also:<br />
• Save an error log to disk.<br />
• Print an error log.<br />
• Clear the control module error log.<br />
Part number 550-100-040/0804 11
GAS-FIRED WATER BOILER — CONTROL ADDENDUM — <strong>Ultra</strong> <strong>Interface</strong> <strong>Kit</strong><br />
Notes<br />
12<br />
Part number 550-100-040/0804
GAS-FIRED WATER BOILER — CONTROL ADDENDUM — <strong>Ultra</strong> <strong>Interface</strong> <strong>Kit</strong><br />
Parameter explanations<br />
Revise module parameters ONLY if you fully understand the purpose and result of<br />
the changes. Tampering with control settings can result in unreliable operation,<br />
with possible severe personal injury, death or substantial property damage.<br />
This document must only be used by a qualified heating installer/service technician.<br />
Read all instructions, including this Addendum, the <strong>Ultra</strong> Boiler Control Supplement<br />
and the Boiler Manual before installing. Perform steps in the order given. Failure to<br />
comply could result in severe personal injury, death or substantial property damage.<br />
Installation must comply with local requirements and with the National Fuel <strong>Gas</strong><br />
Code, ANSI Z223.1 for U.S. installations or CSA B149.1 or B149.2 for Canadian<br />
installations.<br />
Part number 550-100-040/0804 13
GAS-FIRED WATER BOILER — CONTROL ADDENDUM — <strong>Ultra</strong> <strong>Interface</strong> <strong>Kit</strong><br />
Parameter explanations (continued)<br />
Outdoor reset operation<br />
1. Outdoor reset adjusts the supply <strong>water</strong> temperature so<br />
the heat output from the heating units matches the heat<br />
loss as the outdoor temperature changes. The colder the<br />
outdoor temperature, the warmer the <strong>water</strong> temperature,<br />
and vice versa.<br />
2. The closer the heating unit output matches the heat loss,<br />
the less the swing in indoor temperature. You can adjust<br />
<strong>Ultra</strong> control parameters to do this, as discussed below.<br />
3. Outdoor reset terms:<br />
• ODT — ODT is the outdoor design temperature for<br />
the area, used to calculate heat loss. (Use this value<br />
for T4 minimum.)<br />
• Balance point temperature — outside temperature<br />
at which building heat loss equals building heat gain<br />
from solar and internal sources. At this temperature,<br />
no space heating is required. (use this value for<br />
T4 maximum.)<br />
4. Automatic temperature boost — Automatic temperature<br />
boost compensates for required pick-up times and<br />
variations in heating load requirements by automatically<br />
increasing setpoint temperature when a call for heat<br />
exceeds a specified time (parameter 11). See page 16 for<br />
further discussion.<br />
Parameters 4, 5, 6 & 7 (Outdoor reset)<br />
1. Fixed-temperature operation:<br />
a. If <strong>boiler</strong> is operated with constant outlet temperature<br />
(no outside temperature sensor installed), set<br />
parameter 4 as described in the <strong>Ultra</strong> Control Supplement.<br />
2. Outdoor reset operation:<br />
a. Parameters 4 to 8 determine the reset curve, as shown<br />
in Figure 1.<br />
3. T1 is the <strong>boiler</strong> outlet <strong>water</strong> temperature. T4 is the outside<br />
temperature.<br />
• T1top is the outlet <strong>water</strong> temperature the <strong>boiler</strong> tries<br />
to maintain whenever the outside temperature is less<br />
than T4 minimum.<br />
T1top is parameter 4.<br />
T4 minimum is parameter 6.<br />
• T1foot is the outlet <strong>water</strong> temperature the <strong>boiler</strong> tries<br />
to maintain whenever the outside temperature is<br />
higher than T4maximum.<br />
T1foot is parameter 5.<br />
T4 maximum is parameter 7.<br />
• When outside temperature is between T4<br />
maximum and T4 minimum, the control calculates<br />
a value for T1 setpoint (T1set) between T1foot<br />
and T4 top.<br />
4. The <strong>boiler</strong> may not operate all the way down to<br />
T1foot. Parameter 10, Tblocking, sets a minimum<br />
operating outlet <strong>water</strong> temperature. If the calculated<br />
setpoint, T1set, is less than Tblocking, the<br />
<strong>boiler</strong> shuts off.<br />
5. Set parameters 4 to 7 as needed for the desired<br />
reset curve. Make sure to set parameters 4 and<br />
6 so the outlet <strong>water</strong> temperature is at design<br />
<strong>water</strong> temperature when outside temperature<br />
drops to the ODT (outdoor design temperature).<br />
Parameter 9 (T4correction)<br />
1. Location of the outdoor sensor may sometimes<br />
cause the sensor to incorrectly detect outside<br />
temperature.<br />
2. You can set parameter 9 to correct for this difference<br />
(up to 9°F more or less) if you believe<br />
<strong>boiler</strong> response needs to be improved. Set a negative<br />
number to reduce the outdoor temperature<br />
reading, a positive number to increase the<br />
reading.<br />
Parameter 10 (Tblocking)<br />
1. Use this parameter to set a minimum operating<br />
<strong>boiler</strong> outlet <strong>water</strong> setpoint temperature.<br />
2. When calculated setpoint temperature, Tset, is<br />
at or below Tblocking the <strong>boiler</strong> shuts down (after<br />
operating a postpump cycle).<br />
3. To deactivate this parameter, set the value to 32.<br />
Suggested outdoor reset settings<br />
1. T1top — Set to the required supply <strong>water</strong> temperature<br />
when outdoor temperature is at or<br />
below ODT (outdoor design temperature).<br />
2. T1foot — Set so the drop in supply <strong>water</strong> temperature<br />
results in the best match of heating<br />
unit output to heat loss as the outdoor temperature<br />
rises.<br />
3. T4 maximum — Set to the balance point temperature<br />
for the building (typically 65°F or lower).<br />
3. T4 minimum — Set to the outdoor design temperature.<br />
14<br />
Part number 550-100-040/0804
GAS-FIRED WATER BOILER — CONTROL ADDENDUM — <strong>Ultra</strong> <strong>Interface</strong> <strong>Kit</strong><br />
Parameter explanations (continued)<br />
Figure 1<br />
Outdoor reset curve and control module parameters<br />
Figure 2<br />
Typical reset curves<br />
Part number 550-100-040/0804 15
GAS-FIRED WATER BOILER — CONTROL ADDENDUM — <strong>Ultra</strong> <strong>Interface</strong> <strong>Kit</strong><br />
Parameter explanations (continued)<br />
Automatic temperature boost<br />
1. If the target temperature happens to be too low for the heating units to<br />
supply sufficient heat within ten minutes (default setting), the control<br />
“boosts” the target temperature until the supply <strong>water</strong> meets the system’s<br />
needs.<br />
2. Even if the reset parameters are optimized for the application, use of<br />
setback thermostats or the need for occasional cold start operation will<br />
require faster recovery than provided by the normal calculated supply<br />
<strong>water</strong> temperature because the curve assumes steady-state operation.<br />
3. Boost will not call for supply <strong>water</strong> temperature setpoint greater than the<br />
value of parameter 4 (T1top). There is no concern that temperature boost<br />
would supply <strong>water</strong> too hot for low-temperature systems, such as slabtype<br />
radiant heating. On hybrid systems, with finned tube radiation and<br />
radiant slab, provide additional low temperature protection for the radiant<br />
portion of the system, because parameter 4 (T1top) is likely to be set<br />
higher than on a radiant-only system.<br />
Many slab-type radiant systems won’t require boost. This<br />
function can be disabled with a parameter setting of “0.”<br />
Boost operation<br />
1. In outdoor reset operation (outdoor sensor connected),<br />
the <strong>Ultra</strong> control module automatically increases<br />
the target outlet <strong>water</strong> temperature if a call<br />
for heat exceeds a time equal to parameter 11 (factory<br />
default of 10 minutes for most <strong>Ultra</strong> <strong>boiler</strong>s).<br />
2. At each interval of parameter 11 of a continuous call<br />
for heat, the control module increases the target temperature<br />
by 18°F.<br />
3. The control module will continue increasing target<br />
temperature until it reaches the value set in parameter<br />
4 (T1top).<br />
4. When the call for heat ends while target temperature<br />
is “boosted,” the target temperature drops about 2°F<br />
for each minute the thermostat is open.<br />
5. Range = 1 to 30 minutes.<br />
6. Factory default setting = 10 minutes.<br />
7. Deactivate automatic temperature boost by setting<br />
to “0.”<br />
Figure 3<br />
Parameter 11 — Automatic supply temperature boost operation — In the example below, the <strong>boiler</strong> is<br />
operating in outdoor reset mode, with a calculated setpoint temperature of 130°F. The call for heat has<br />
lasted for more than 10 minutes (value of parameter 11), and supply temperature boost has occurred.<br />
16<br />
Part number 550-100-040/0804
GAS-FIRED WATER BOILER — CONTROL ADDENDUM — <strong>Ultra</strong> <strong>Interface</strong> <strong>Kit</strong><br />
Parameter explanations (continued)<br />
Maximum fan speed<br />
1. Parameters 13 and 15 can be set to limit the maximum<br />
<strong>boiler</strong> firing rate. Boiler firing rate is proportional to the fan<br />
speed, so reducing the maximum fan speed reduces maximum<br />
input.<br />
2. Reducing maximum fan speed will be helpful for systems on<br />
which the <strong>boiler</strong> is oversized for either space heating or DHW,<br />
or both.<br />
3. The maximum fan speed can be set separately for space heating<br />
and DHW using parameters 13 and 15.<br />
The fan speed must not be set ABOVE the value<br />
as supplied from the factory (also listed in Table 1,<br />
page 5). This would increase <strong>boiler</strong> firing rate beyond<br />
the acceptable limit, resulting in potential for severe<br />
personal injury, death or substantial property<br />
damage.<br />
The fan speed must not be set BELOW the value<br />
as supplied from the factory (also listed in Table 1,<br />
page 5). This could result in potential for severe<br />
personal injury, death or substantial property<br />
damage.<br />
Parameter 13 — Space heating max fan speed<br />
1. Acceptable range:<br />
<strong>Ultra</strong>-80 to 230: 1300 to 5200 rpm (13 to 52 on <strong>boiler</strong> display).<br />
<strong>Ultra</strong>-310: 1400 to 5800 rpm (14 to 58 on <strong>boiler</strong> display).<br />
• Boiler display shows fan speed in 100’s of rpm. A value of 48<br />
would mean a speed of 100 x 48, or 4800 rpm.<br />
2. Factory default — see Table 1, page 5..<br />
3. If the <strong>boiler</strong> is oversized for space heating, you can reduce the<br />
maximum fan speed during space heating operation, parameter<br />
13, to limit the maximum <strong>boiler</strong> input.<br />
Parameter 15 — DHW max fan speed<br />
1. Acceptable range:<br />
<strong>Ultra</strong>-80 to 230: 1300 to 5200 rpm (13 to 52 on <strong>boiler</strong> display).<br />
<strong>Ultra</strong>-310: 1400 to 5800 rpm (14 to 58 on <strong>boiler</strong> display).<br />
• Boiler display shows fan speed in 100’s of rpm. A value of 48<br />
would mean a speed of 100 x 48, or 4800 rpm.<br />
2. Factory default — see Table 1, page 5..<br />
3. If the <strong>boiler</strong> is oversized for domestic <strong>water</strong> heating, you can<br />
reduce the maximum fan speed during DHW operation, parameter<br />
15, to limit the maximum <strong>boiler</strong> input.<br />
The fan speed must not be set BELOW the value<br />
as supplied from the factory (also listed in Table 1,<br />
page 5). This would reduce <strong>boiler</strong> firing rate below<br />
the acceptable limit, resulting in potential for severe<br />
personal injury, death or substantial property<br />
damage.<br />
2. Parameter 17 sets the minimum fan speed for both DHW and<br />
space heating modes.<br />
3. Acceptable range:<br />
<strong>Ultra</strong>-80 to 230: 1300 to 5200 rpm (13 to 52 on <strong>boiler</strong> display).<br />
<strong>Ultra</strong>-310: 1400 to 5800 rpm (14 to 58 on <strong>boiler</strong> display).<br />
• Boiler display shows fan speed in 100’s of rpm. A value of 48<br />
would mean a speed of 100 x 48, or 4800 rpm.<br />
4. Parameter 17 must be increased for high altitude applications<br />
(default values are listed in Table 1, page 5). See the High Altitude<br />
(over 5500 feet) Instructions and the Parameter reference<br />
table in this Addendum for details.<br />
5. Factory default — see Table 1, page 5.<br />
Ignition fan speed — param. 19<br />
1. Parameter 19 sets the fan speed during ignition. Boiler firing<br />
rate is proportional to fan speed, so increasing the minimum<br />
fan speed increases the minimum firing rate (low fire).<br />
The ignition fan speed must not be set BELOW<br />
the value as supplied from the factory (also listed in<br />
Table 1, page 5). This would reduce <strong>boiler</strong> firing rate<br />
below the acceptable limit during ignition, resulting<br />
in potential for severe personal injury, death or<br />
substantial property damage.<br />
2. Parameter 19 should only be changed where required for<br />
high altitude applications.<br />
3. Acceptable range:<br />
<strong>Ultra</strong>-80 to 230: 1300 to 5200 rpm (13 to 52 on <strong>boiler</strong> display).<br />
<strong>Ultra</strong>-310: 1400 to 5800 rpm (14 to 58 on <strong>boiler</strong> display).<br />
• Boiler display shows fan speed in 100’s of rpm. A value of 27<br />
would mean a speed of 100 x 27, or 2700 rpm.<br />
4. Factory default — see Table 1, page 5.<br />
Table 4<br />
Boiler firing rate vs RPM<br />
Minimum fan speed — param. 17<br />
1. Parameter 17 sets the minimum fan speed. Boiler firing rate<br />
is proportional to fan speed, so increasing the minimum fan<br />
speed increases the minimum firing rate (low fire).<br />
Part number 550-100-040/0804 17
GAS-FIRED WATER BOILER — CONTROL ADDENDUM — <strong>Ultra</strong> <strong>Interface</strong> <strong>Kit</strong><br />
Parameter explanations (continued)<br />
Differential (hysteresis) settings<br />
DO NOT change the differentials<br />
(hysteresis) for DHW operation<br />
(parameters 24 25, 26 and 27). Always use<br />
only the factory default settings for these<br />
parameters.<br />
Space heating differentials<br />
(parameters 22 and 23)<br />
1. The term, “differential,” is also referred to as “hysteresis.”<br />
2. Parameter 22 is the “ON” differential. The <strong>water</strong> temperature<br />
must be at least parameter 22 less than the<br />
calculated setpoint temperature for the <strong>boiler</strong> to turn<br />
on.<br />
3. Parameter 23 is the “OFF” differential. When the<br />
<strong>boiler</strong> is firing, the <strong>water</strong> temperature must rise at<br />
least parameter 23 above the calculated setpoint temperature<br />
for the <strong>boiler</strong> to turn off.<br />
4. See Figure 4 for an explanation of the “ON” and<br />
“OFF” differentials of the <strong>Ultra</strong> control module. Note<br />
that the differentials are greater when a heat call starts<br />
or stops, as shown. The differentials decrease with<br />
time until they equal parameters 22 and 23.<br />
Setting “OFF” differential<br />
(parameter 23)<br />
1. The factory DEFAULT setting for parameter 23 is<br />
4°F. This works well for most applications.<br />
2. For low-mass systems (fan coil), performance can<br />
be improved by increasing parameter 23. This compensates<br />
for the quicker system temperature response<br />
of low-mass systems. The “fan coil” parameter files<br />
on the <strong>Gas</strong>com disk have parameter 23 set at 16°F,<br />
with parameter 4 set at 180°F, to allow adequate time<br />
for the <strong>boiler</strong> to modulate.<br />
3. When setting parameter 23, make sure that parameter<br />
23 plus parameter 4 is not over 203°F to avoid<br />
possible nuisance lockouts.<br />
Figure 4 Space heating on and off differentials (hysteresis) — Parameters 22 and 23<br />
18<br />
Part number 550-100-040/0804
GAS-FIRED WATER BOILER — CONTROL ADDENDUM — <strong>Ultra</strong> <strong>Interface</strong> <strong>Kit</strong><br />
Parameter reference table<br />
Part number 550-100-040/0804 19
GAS-FIRED WATER BOILER — CONTROL ADDENDUM — <strong>Ultra</strong> <strong>Interface</strong> <strong>Kit</strong><br />
Parameter reference table (continued)<br />
20 Part Number xxx-xxx-xxx/0104
GAS-FIRED WATER BOILER — CONTROL ADDENDUM — <strong>Ultra</strong> <strong>Interface</strong> <strong>Kit</strong><br />
Parameter reference table (continued)<br />
Part number 550-100-040/0804 21
GAS-FIRED WATER BOILER — CONTROL ADDENDUM — <strong>Ultra</strong> <strong>Interface</strong> <strong>Kit</strong><br />
Parameter reference table (continued)<br />
22<br />
Part number 550-100-040/0804
GAS-FIRED WATER BOILER — CONTROL ADDENDUM — <strong>Ultra</strong> <strong>Interface</strong> <strong>Kit</strong><br />
Parameter reference table (continued)<br />
Part number 550-100-040/0804 23
GAS-FIRED WATER BOILER — CONTROL ADDENDUM — <strong>Ultra</strong> <strong>Interface</strong> <strong>Kit</strong><br />
Parameter reference table (continued)<br />
24<br />
Part number 550-100-040/0804
GAS-FIRED WATER BOILER — CONTROL ADDENDUM — <strong>Ultra</strong> <strong>Interface</strong> <strong>Kit</strong><br />
Parameter reference table (continued)<br />
Part number 550-100-040/0804 25
GAS-FIRED WATER BOILER — CONTROL ADDENDUM — <strong>Ultra</strong> <strong>Interface</strong> <strong>Kit</strong><br />
Parameter reference table (continued)<br />
26<br />
Part number 550-100-040/0804
GAS-FIRED WATER BOILER — CONTROL ADDENDUM — <strong>Ultra</strong> <strong>Interface</strong> <strong>Kit</strong><br />
Parameter reference table (continued)<br />
Part number 550-100-040/0804 27
GAS-FIRED WATER BOILER — CONTROL ADDENDUM — <strong>Ultra</strong> <strong>Interface</strong> <strong>Kit</strong><br />
28<br />
Part number 550-100-040/0804