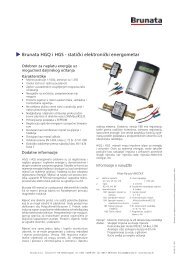
HGQ & HGS Energy Meter - Brunata
HGQ & HGS Energy Meter - Brunata
HGQ & HGS Energy Meter - Brunata

You also want an ePaper? Increase the reach of your titles
YUMPU automatically turns print PDFs into web optimized ePapers that Google loves.
Specification of Output Pulses:<br />
Pulse output for volume and energy<br />
The open collector pulse out is power supplied with load resistance R, whic<br />
The open collector pulse out is power supplied with load resistance R, which is dimensioned<br />
according to table<br />
table below.<br />
below.<br />
Setting of external <br />
voltage supply <br />
(from meter: 5 VDC) <br />
+ V −1.5V<br />
R =<br />
5mA<br />
+V R for I=5 mA <br />
5 700 Ω Ω<br />
<br />
10 1,7 k Ω Ω <br />
15 2,7 k Ω Ω <br />
<br />
20 3,7 k Ω Ω<br />
Ω<br />
24 4,5 k Ω<br />
pplied with load resistance R, which is Ω dimensioned according to<br />
28 5,3 k Ω<br />
<br />
<br />
<br />
<br />
<br />
<br />
<br />
<br />
<br />
<br />
<br />
<br />
<br />
1.5V<br />
mA<br />
<br />
<br />
<br />
<br />
<br />
<br />
<br />
Insertion og communication module<br />
A communication module RS262, M-Bus or LON is plugged into the display<br />
nected to the terminals A1+B1 and A2+B2, [5] and [6] in fig 2.<br />
+<br />
Connection of external meters with pulse outlet<br />
NB only valid for meters, which has been programmed for connection<br />
The meter accepts active as well as passive signal source. The most comm<br />
<br />
which are connected to the terminals AUX 1 or AUX 2 and the switch in pos<br />
Fig. 2 Example of connection for volume pulse out with internal 5V<br />
fig. 6. <br />
<br />
Insertion of<br />
Connection<br />
communication<br />
of meters<br />
module<br />
with active signal source is done as illustrated in pictu<br />
position OFF.<br />
A communication module RS262, M-Bus or LON is plugged into the display unit, and<br />
le the signal cable Each is con-nected of the 2 input to the AUX1 terminals and A1+B1 AUX2 and can A2+B2, be set [5] separately. and [6] in fig Please 1. note th<br />
s or LON is plugged into the display unit, and the signal cable is con-<br />
2, [5] and [6] in fig 2.<br />
<br />
Connection of external meters with pulse outlet<br />
(only valid for meters, which has been programmed for connection of external meters)<br />
<br />
h pulse outlet<br />
een programmed for connection of external meters.<br />
sive signal position source. ON as The shown most in common picture B, fig. is passive 3. signal source,<br />
X 1 or AUX 2 and the switch in position ON as shown in picture B,<br />
The meter accepts active as well as passive signal source. The most common is passive<br />
signal source, which are connected to the terminals AUX 1 or AUX 2 and the switch in<br />
Connection of meters with active signal source is done as illustrated in picture B, fig. 6<br />
with the switch in position OFF.<br />
Each of the 2 input AUX1 and AUX2 can be set separately. Please note the polarity,<br />
source is see done fig. as 3. illustrated in picture B, fig. 6 with the switch in<br />
be set separately. Please note the polarity, see fig. 6.