SD Stereo System - Operating Manuals for Panasonic Products ...
SD Stereo System - Operating Manuals for Panasonic Products ...
SD Stereo System - Operating Manuals for Panasonic Products ...

You also want an ePaper? Increase the reach of your titles
YUMPU automatically turns print PDFs into web optimized ePapers that Google loves.
P<br />
As an ENERGY STAR ®<br />
Partner, <strong>Panasonic</strong> has<br />
determined that this product<br />
meets the ENERGY STAR ®<br />
guidelines <strong>for</strong> energy<br />
efficiency.<br />
Dear customer<br />
Thank you <strong>for</strong> purchasing this product. For optimum per<strong>for</strong>mance and<br />
safety, please read these instructions carefully.<br />
Be<strong>for</strong>e connecting, operating or adjusting this product, please read<br />
the instructions completely.<br />
Please keep this manual <strong>for</strong> future reference.<br />
If you have any questions, contact<br />
1-800-211-PANA (7262)<br />
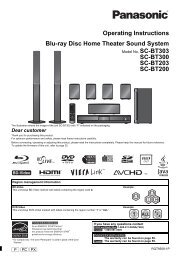
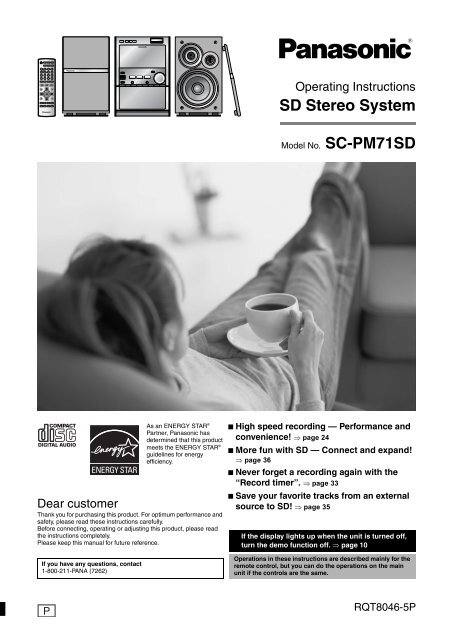
<strong>Operating</strong> Instructions<br />
<strong>SD</strong> <strong>Stereo</strong> <strong>System</strong><br />
Model No. SC-PM71<strong>SD</strong><br />
n High speed recording — Per<strong>for</strong>mance and<br />
convenience! ⇒ page 24<br />
n More fun with <strong>SD</strong> — Connect and expand!<br />
⇒ page 36<br />
n Never <strong>for</strong>get a recording again with the<br />
“Record timer”. ⇒ page 33<br />
n Save your favorite tracks from an external<br />
source to <strong>SD</strong>! ⇒ page 35<br />
If the display lights up when the unit is turned off,<br />
turn the demo function off. ⇒ page 10<br />
Operations in these instructions are described mainly <strong>for</strong> the<br />
remote control, but you can do the operations on the main<br />
unit if the controls are the same.<br />
RQT8046-5P
2<br />
RQT8046<br />
CAUTION!<br />
THIS PRODUCT UTILIZES A LASER.<br />
USE OF CONTROLS OR ADJUSTMENTS OR<br />
PERFORMANCE OF PROCEDURES OTHER THAN<br />
THOSE SPECIFIED HEREIN MAY RESULT IN<br />
HAZARDOUS RADIATION EXPOSURE.<br />
DO NOT OPEN COVERS AND DO NOT REPAIR<br />
YOURSELF. REFER SERVICING TO QUALIFIED<br />
PERSONNEL.<br />
WARNING:<br />
TO REDUCE THE RISK OF FIRE, ELECTRIC SHOCK<br />
OR PRODUCT DAMAGE, DO NOT EXPOSE THIS<br />
APPARATUS TO RAIN, MOISTURE, DRIPPING OR<br />
SPLASHING AND THAT NO OBJECTS FILLED WITH<br />
LIQUIDS, SUCH AS VASES, SHALL BE PLACED ON<br />
THE APPARATUS.<br />
CAUTION!<br />
DO NOT INSTALL OR PLACE THIS UNIT IN A<br />
BOOKCASE, BUILT-IN CABINET OR IN ANOTHER<br />
CONFINED SPACE. ENSURE THE UNIT IS WELL<br />
VENTILATED. TO PREVENT RISK OF ELECTRIC SHOCK<br />
OR FIRE HAZARD DUE TO OVERHEATING, ENSURE<br />
THAT CURTAINS AND ANY OTHER MATERIALS DO NOT<br />
OBSTRUCT THE VENTILATION VENTS.<br />
CAUTION<br />
RISK OF ELECTRIC SHOCK<br />
DO NOT OPEN<br />
CAUTION: TO REDUCE THE RISK OF ELECTRIC<br />
SHOCK, DO NOT REMOVE SCREWS.<br />
NO USER-SERVICEABLE PARTS INSIDE.<br />
REFER SERVICING TO QUALIFIED<br />
SERVICE PERSONNEL.<br />
The lightning flash with arrowhead<br />
symbol, within an equilateral triangle, is<br />
intended to alert the user to the presence<br />
of uninsulated “dangerous voltage” within<br />
the product’s enclosure that may be of<br />
sufficient magnitude to constitute a risk of<br />
electric shock to persons.<br />
The exclamation point within an<br />
equilateral triangle is intended to alert the<br />
user to the presence of important<br />
operating and maintenance (servicing)<br />
instructions in the literature<br />
accompanying the appliance.<br />
CAUTION:<br />
This equipment has been tested and found to comply with the<br />
limits <strong>for</strong> a Class B digital device, pursuant to Part 15 of the<br />
FCC Rules.<br />
These limits are designed to provide reasonable protection<br />
against harmful interference in a residential installation. This<br />
equipment generates, uses and can radiate radio frequency<br />
energy and, if not installed and used in accordance with the<br />
instructions, may cause harmful interference to radio<br />
communications. However, there is no guarantee that<br />
interference will not occur in a particular installation. If this<br />
equipment does cause harmful interference to radio or<br />
television reception, which can be determined by turning the<br />
equipment off and on, the user is encouraged to try to correct<br />
the interference by one or more of the following measures:<br />
• Reorient or relocate the receiving antenna.<br />
• Increase the separation between the equipment and<br />
receiver.<br />
• Connect the equipment into an outlet on a circuit different<br />
from that to which the receiver is connected.<br />
• Consult the dealer or an experienced radio/TV technician<br />
<strong>for</strong> help.<br />
Any unauthorized changes or modifications to this equipment<br />
would void the user’s authority to operate this device.<br />
This device complies with Part 15 of the FCC Rules.<br />
Operation is subject to the following two conditions: (1) This<br />
device may not cause harmful interference, and (2) this device<br />
must accept any interference received, including interference<br />
that may cause undesired operation.<br />
Responsible Party:<br />
<strong>Panasonic</strong> Corporation of North America<br />
One <strong>Panasonic</strong> Way<br />
Secaucus, NJ, 07094 USA<br />
Telephone No.: 1-800-211-7262<br />
The socket outlet shall be installed near the equipment and<br />
easily accessible or the mains plug or an appliance coupler<br />
shall remain readily operable.<br />
Keep the small memory cards such as the <strong>SD</strong> Memory<br />
Card out of reach of children. If swallowed, seek medical<br />
advice immediately.<br />
This unit is not waterproof and should not be exposed to<br />
excessive moisture.
Table of contents<br />
Getting started<br />
Accessories . . . . . . . . . . . . . . . . . . . . . . . . . . . . . . . 4<br />
Listening caution. . . . . . . . . . . . . . . . . . . . . . . . . . . 4<br />
IMPORTANT SAFETY INSTRUCTIONS . . . . . . . . . 5<br />
Disc/Card in<strong>for</strong>mation. . . . . . . . . . . . . . . . . . . . . . . 6<br />
Inserting/Removing the discs and cards . . . . . . . 8<br />
Setup . . . . . . . . . . . . . . . . . . . . . . . . . . . . . . . . . . . . 9<br />
The remote control . . . . . . . . . . . . . . . . . . . . . . . . . . . . . 9<br />
Positioning the speakers . . . . . . . . . . . . . . . . . . . . . . . . . 9<br />
Connections . . . . . . . . . . . . . . . . . . . . . . . . . . . . . . . . . 10<br />
Control guide. . . . . . . . . . . . . . . . . . . . . . . . . . . . . 12<br />
Playing back<br />
Basic play . . . . . . . . . . . . . . . . . . . . . . . . . . . . . . . 14<br />
Playing discs . . . . . . . . . . . . . . . . . . . . . . . . . . . . . . . . . 14<br />
Playing <strong>SD</strong> cards . . . . . . . . . . . . . . . . . . . . . . . . . . . . . 15<br />
Other ways of playing discs/cards. . . . . . . . . . . . . . . . . 16<br />
Selecting a track. . . . . . . . . . . . . . . . . . . . . . . . . . . . . 16<br />
Selecting an album. . . . . . . . . . . . . . . . . . . . . . . . . . . 16<br />
Title search. . . . . . . . . . . . . . . . . . . . . . . . . . . . . . . . . 16<br />
Program play (up to 24 items) . . . . . . . . . . . . . . . . . . 17<br />
Random play . . . . . . . . . . . . . . . . . . . . . . . . . . . . . . . 17<br />
Repeat play . . . . . . . . . . . . . . . . . . . . . . . . . . . . . . . . 17<br />
Playing HighMAT discs. . . . . . . . . . . . . . . . . . . . . . . . 18<br />
Cassette tapes. . . . . . . . . . . . . . . . . . . . . . . . . . . . 19<br />
Sound field and sound quality. . . . . . . . . . . . . . . 20<br />
H.BASS. . . . . . . . . . . . . . . . . . . . . . . . . . . . . . . . . . . . . 20<br />
Re-master — Enjoying more natural sound . . . . . . . . . 20<br />
SURROUND . . . . . . . . . . . . . . . . . . . . . . . . . . . . . . . . . 21<br />
Changing sound field and quality . . . . . . . . . . . . . . . . . 21<br />
Muting the volume. . . . . . . . . . . . . . . . . . . . . . . . . . . . . 21<br />
The radio . . . . . . . . . . . . . . . . . . . . . . . . . . . . . . . . 22<br />
Recording<br />
Know at a glance what kind of recording to do!!<br />
Recording sources and media. . . . . . . . . . . . . . . 23<br />
Approximate recording time on <strong>SD</strong> Memory Card . . . . 23<br />
High-speed recording . . . . . . . . . . . . . . . . . . . . . . . . . . 23<br />
Recording CDs . . . . . . . . . . . . . . . . . . . . . . . . . . . 24<br />
Recording to <strong>SD</strong> . . . . . . . . . . . . . . . . . . . . . . . . . . . . . . 24<br />
5CD auto recording (CD è <strong>SD</strong>) . . . . . . . . . . . . . . . . . . 25<br />
Program recording . . . . . . . . . . . . . . . . . . . . . . . . . . . . 25<br />
Recording to cassette tape . . . . . . . . . . . . . . . . . . . . . . 25<br />
Recording from cassette tape/the radio to <strong>SD</strong> . . 26<br />
Recording from <strong>SD</strong>/the radio to cassette tape . . 27<br />
If the display lights up when the unit is turned<br />
off, the demo function is set to on.<br />
Press and hold until “DEMO OFF” is<br />
displayed.<br />
Every time you press the button:<br />
DEMO OFF ↔ DEMO ON<br />
Editing<br />
Editing <strong>SD</strong>s . . . . . . . . . . . . . . . . . . . . . . . . . . . . . . 28<br />
Erasing tracks — TRACK ERASE/ALL ERASE . . . . . . 28<br />
Moving tracks — MOVE . . . . . . . . . . . . . . . . . . . . . . . . 28<br />
Formatting a card — CARD FORMAT . . . . . . . . . . . . . 29<br />
Editing playlists — PLAYLIST. . . . . . . . . . . . . . . . . . . . 29<br />
Entering titles . . . . . . . . . . . . . . . . . . . . . . . . . . . . 30<br />
Convenient functions<br />
Convenient functions . . . . . . . . . . . . . . . . . . . . . . 32<br />
Setting the time. . . . . . . . . . . . . . . . . . . . . . . . . . . . . . . 32<br />
Auto-off function . . . . . . . . . . . . . . . . . . . . . . . . . . . . . . 32<br />
The sleep timer. . . . . . . . . . . . . . . . . . . . . . . . . . . . . . . 32<br />
The play/record timer . . . . . . . . . . . . . . . . . . . . . . . . . . 33<br />
Displaying in<strong>for</strong>mation . . . . . . . . . . . . . . . . . . . . . . . . . 33<br />
Dimming the display . . . . . . . . . . . . . . . . . . . . . . . . . . . 33<br />
Using other equipment. . . . . . . . . . . . . . . . . . . . . 34<br />
Using an external unit. . . . . . . . . . . . . . . . . . . . . . . . . . 34<br />
Other antenna connections . . . . . . . . . . . . . . . . . . . . . 34<br />
Recording from an external unit . . . . . . . . . . . . . . . . . . 35<br />
Even more fun with <strong>SD</strong>. . . . . . . . . . . . . . . . . . . . . 36<br />
Listening on portable equipment . . . . . . . . . . . . . . . . . 36<br />
Using a computer . . . . . . . . . . . . . . . . . . . . . . . . . . . . . 36<br />
<strong>SD</strong>-Jukebox . . . . . . . . . . . . . . . . . . . . . . . . . . . . . . . . . 36<br />
Reference<br />
Troubleshooting guide. . . . . . . . . . . . . . . . . . . . . 38<br />
Additional accessories. . . . . . . . . . . . . . . . . . . . . 39<br />
Limited Warranty . . . . . . . . . . . . . . . . . . . . . . . . . 40<br />
Product Service . . . . . . . . . . . . . . . . . . . . . . . . . . 41<br />
Maintenance . . . . . . . . . . . . . . . . . . . . . . . . . . . . . 41<br />
When moving the unit . . . . . . . . . . . . . . . . . . . . . 41<br />
Specifications . . . . . . . . . . . . . . . . . . . . . . . . . . . . 42<br />
Index . . . . . . . . . . . . . . . . . . . . . . . . . . . Back cover<br />
RQT8046<br />
3
Getting started<br />
4<br />
RQT8046<br />
<strong>System</strong> SC-PM71<strong>SD</strong><br />
Main unit SA-PM71<strong>SD</strong><br />
Speakers SB-PM71<br />
Accessories<br />
Please check and identify the supplied accessories.<br />
Use numbers indicated in parentheses when asking <strong>for</strong><br />
replacement parts. (As of February 2005)<br />
To order accessories, refer to “Accessory Purchases” on page 40.<br />
1 Remote control 1 AM loop antenna<br />
(N2QAJB000130) (N1DAAAA00001)<br />
1 AC power supply cord 1 CD-ROM<br />
(K2CB2CB00006)<br />
1 FM indoor antenna<br />
(RSA0007-L)<br />
2 Batteries<br />
<strong>for</strong> remote control<br />
Note<br />
• The included AC power supply cord is <strong>for</strong> use with this unit only. Do not<br />
use it with other equipment.<br />
• Do not use an AC power supply cord from other equipment.<br />
User memo:<br />
DATE OF PURCHASE ____________________<br />
DEALER NAME _________________________<br />
DEALER ADDRESS______________________<br />
______________________________________<br />
TELEPHONE NUMBER ___________________<br />
The model number and serial number of this product can be<br />
found on either the back or the bottom of the unit. Please note<br />
them in the space provided below and keep <strong>for</strong> future<br />
reference.<br />
MODEL NUMBER SC-PM71<strong>SD</strong><br />
SERIAL NUMBER<br />
Listening caution<br />
Selecting fine audio equipment such as the unit you've just<br />
purchased is only the start of your musical enjoyment. Now it's<br />
time to consider how you can maximize the fun and excitement<br />
your equipment offers. This manufacturer and the Electronic<br />
Industries Association’s Consumer Electronics Group want you<br />
to get the most out of your equipment by playing it at a safe level.<br />
One that lets the sound come through loud and clear without<br />
annoying blaring or distortion-and, most importantly, without<br />
affecting your sensitive hearing.<br />
We recommend that you avoid prolonged exposure to excessive<br />
noise.<br />
Sound can be deceiving. Over time your hearing “com<strong>for</strong>t level”<br />
adapts to higher volumes of sound. So what sounds “normal”<br />
can actually be loud and harmful to your hearing.<br />
Guard against this by setting your equipment at a safe level<br />
BEFORE your hearing adapts.<br />
To establish a safe level:<br />
• Start your volume control at a low setting.<br />
• Slowly increase the sound until you can hear it com<strong>for</strong>tably<br />
and clearly, and without distortion.<br />
Once you have established a com<strong>for</strong>table sound level:<br />
• Set the dial and leave it there.<br />
Taking a minute to do this now will help to prevent hearing<br />
damage or loss in the future. After all, we want you listening <strong>for</strong> a<br />
lifetime.
IMPORTANT SAFETY INSTRUCTIONS<br />
Read these operating instructions carefully be<strong>for</strong>e using the unit. Follow the safety instructions on the unit and the applicable safety<br />
instructions listed below. Keep these operating instructions handy <strong>for</strong> future reference.<br />
1) Read these instructions.<br />
2) Keep these instructions.<br />
3) Heed all warnings.<br />
4) Follow all instructions.<br />
5) Do not use this apparatus near water.<br />
6) Clean only with dry cloth.<br />
7) Do not block any ventilation openings. Install in accordance with the manufacturer’s instructions.<br />
8) Do not install near any heat sources such as radiators, heat registers, stoves, or other apparatus (including amplifiers) that<br />
produce heat.<br />
9) Do not defeat the safety purpose of the polarized or grounding-type plug. A polarized plug has two blades with one wider than<br />
the other. A grounding-type plug has two blades and a third grounding prong. The wide blade or the third prong are provided <strong>for</strong><br />
your safety. If the provided plug does not fit into your outlet, consult an electrician <strong>for</strong> replacement of the obsolete outlet.<br />
10) Protect the power cord from being walked on or pinched particularly at plugs, convenience receptacles, and the point where they<br />
exit from the apparatus.<br />
11) Only use attachments/accessories specified by the manufacturer.<br />
12) Use only with the cart, stand, tripod, bracket, or table specified by the manufacturer, or sold with the apparatus.<br />
When a cart is used, use caution when moving the cart/apparatus combination to avoid injury from tip-over.<br />
13) Unplug this apparatus during lightning storms or when unused <strong>for</strong> long periods of time.<br />
14) Refer all servicing to qualified service personnel. Servicing is required when the apparatus has been damaged in<br />
any way, such as power-supply cord or plug is damaged, liquid has been spilled or objects have fallen into the apparatus, the<br />
apparatus has been exposed to rain or moisture, does not operate normally, or has been dropped.<br />
RQT8046<br />
Getting started<br />
5
Getting started<br />
6<br />
RQT8046<br />
Disc/Card in<strong>for</strong>mation<br />
Discs and cards usable on this unit<br />
Type Logo<br />
CD<br />
CD-R<br />
CD-RW<br />
<strong>SD</strong> Memory<br />
Card<br />
—<br />
—<br />
Indication in<br />
these operating<br />
instructions<br />
1 A process that allows play on compatible equipment.<br />
• It may not be possible to play the above discs in all cases due to the type of disc or condition of the recording.<br />
• Note about using a DualDisc<br />
The digital audio content side of a DualDisc does not meet the technical specifications of the Compact Disc Digital Audio (CD-DA) <strong>for</strong>mat so play may<br />
not be possible.<br />
Suitable <strong>SD</strong> Memory Cards<br />
You can use <strong>SD</strong> Memory Cards with the following capacities (from 8 MB<br />
to 1 GB).<br />
8 MB, 16 MB, 32 MB, 64 MB<br />
128 MB, 256 MB, 512 MB, 1 GB (Maximum)<br />
Please confirm the latest in<strong>for</strong>mation on the following website.<br />
http://panasonic.co.jp/pavc/global/cs<br />
(This site is in English only.)<br />
• If the <strong>SD</strong> Memory Card is <strong>for</strong>matted on other equipment, the time spent<br />
<strong>for</strong> recording may become longer. Also if the <strong>SD</strong> Memory Card is<br />
<strong>for</strong>matted on a PC, you may not be able to use it on this unit.<br />
In these cases, <strong>for</strong>mat the card on this unit.<br />
• This unit supports <strong>SD</strong> Memory Cards <strong>for</strong>matted in FAT12 system and<br />
FAT16 system based on <strong>SD</strong> Memory Card Specifications.<br />
Remarks<br />
• This unit can play CD-R/RW (audio recording disc) recorded with the <strong>for</strong>mats on the<br />
left. Close the session or finalize 1 the disc after recording.<br />
• HighMAT discs<br />
WMA and MP3 files only.<br />
• Includes mini<strong>SD</strong> Cards. A mini<strong>SD</strong> adaptor needs to be inserted be<strong>for</strong>e using these<br />
cards.<br />
• You cannot use multimedia cards.<br />
• We recommend using a <strong>Panasonic</strong> <strong>SD</strong> card. (⇒ Suitable <strong>SD</strong> Memory Cards, below)<br />
• You can only play audio data (AAC/MP3/WMA) recorded in <strong>SD</strong> Audio Format.<br />
AAC: Advanced Audio Coding<br />
MP3: MPEG- 1 Audio Layer 3 / MPEG- 2 Audio Layer 3<br />
WMA: Windows Media Audio<br />
Recording and editing<br />
This unit records data to <strong>SD</strong> card in <strong>SD</strong> Audio Format*. This <strong>for</strong>mat incorporates<br />
CPRM (Content Protection <strong>for</strong> Recordable Media) technology.<br />
*This is an audio standard <strong>for</strong> <strong>SD</strong> Memory cards from the <strong>SD</strong> association.<br />
n Regarding music protection<br />
<strong>SD</strong> cards incorporate secure digital music initiative (<strong>SD</strong>MI) standard copyright<br />
protection technology. This uses encryption technology to protect<br />
copyrights, to ensure the healthy development of music culture and to protect<br />
the rights of valid purchasers.<br />
• This unit records music data in encrypted <strong>for</strong>m. Encrypted data cannot<br />
be moved/copied to other equipment <strong>for</strong> use.<br />
• This unit cannot back up or restore music data recorded in encrypted<br />
<strong>for</strong>m.<br />
• Use <strong>Panasonic</strong> <strong>SD</strong>-Jukebox software (included) to move data contained<br />
in the <strong>SD</strong> card.<br />
• You may not be able to use a <strong>SD</strong> card containing copy limitation<br />
in<strong>for</strong>mation.<br />
n Limitations on digital recording<br />
Digital recording from CD to <strong>SD</strong> is limited by SCMS (serial copy management<br />
system). You can record digitally from CD to <strong>SD</strong> with little signal<br />
degradation on this unit. However, you cannot record digitally from a CD<br />
that is protected by SCMS.<br />
Analog recordings are not affected.
Disc and card handling<br />
n How to hold a disc or<br />
card<br />
Do not touch the recorded<br />
surface or the terminal<br />
surface.<br />
n If there is dirt or condensation<br />
on the disc<br />
Wipe with a damp cloth and then wipe dry.<br />
n Handling precautions<br />
• Do not attach labels or stickers to discs. (This may cause disc warping<br />
and un-balanced rotation, rendering it unusable.)<br />
• Do not write on the label side with a ball-point pen or other writing<br />
instrument.<br />
• Do not use record cleaning sprays, benzine, thinner, static electricity<br />
prevention liquids or any other solvent.<br />
• Do not use scratch-proof protectors or covers.<br />
• Do not expose the terminals of the card to water, garbage or other<br />
strange things.<br />
• Do not use the following discs:<br />
– Discs with exposed adhesive from removed stickers or labels (rented<br />
discs, etc).<br />
– Discs that are badly warped or cracked.<br />
– Irregularly shaped discs, such as heart<br />
shapes.<br />
• Do not place in the following areas:<br />
– In direct sunlight.<br />
– In very dusty or humid areas.<br />
– Near a heater.<br />
– Where static electricity or electromagnetic waves occur.<br />
Tips <strong>for</strong> making WMA/MP3 discs<br />
• Discs must con<strong>for</strong>m to ISO9660 level 1 or 2 (except <strong>for</strong> extended<br />
<strong>for</strong>mats).<br />
• If you have recorded MP3/WMA on the same disc as CD-DA, only<br />
the <strong>for</strong>mat recorded in the first session can be played.<br />
• This unit is compatible with multi-session but if there are a lot of<br />
sessions it takes more time <strong>for</strong> play to start. Keep the number of<br />
sessions to a minimum to avoid this.<br />
• If there is a large amount of JPEG data etc. within a WMA/MP3 file,<br />
sound may not be output and play may not be possible.<br />
• The unit can play a maximum of 400 albums and 999 tracks. If there<br />
are multiple folders with many levels, there may be files and folders<br />
that cannot be recognized.<br />
• This unit is compatible with Windows Media Audio 9 (WMA9),<br />
however not with WMA9 Professional/Lossless/Voice and MBR*<br />
*Multiple Bit Rate: A file that contains the same content encoded at<br />
several different bit rates.<br />
• Noise may occur when playing WMA files.<br />
• You cannot play WMA files that are copy protected.<br />
• This unit is not compatible with packet-write <strong>for</strong>mat.<br />
• This unit is not compatible with ID3 tags.<br />
• If you play an MP3 track that includes still picture data, it will take<br />
some time be<strong>for</strong>e the music itself starts playing and the elapsed time<br />
will not be displayed during this time. Even after the track starts, the<br />
correct play time will not be displayed.<br />
n To protect your data<br />
• Switch the write-protect switch a of the <strong>SD</strong> Memory<br />
Card to “LOCK”. Unlock when you want to record or<br />
edit the card again.<br />
• Per<strong>for</strong>ming the following actions during operation can<br />
damage your <strong>SD</strong> Memory Card and corrupt the data<br />
it contains.<br />
– Inserting or ejecting the <strong>SD</strong> Memory Card<br />
– Turning the unit off <strong>for</strong>cibly (<strong>for</strong> example, unplugging the AC power<br />
supply cord)<br />
Naming folders and files<br />
At the time of recording, prefix folder and<br />
Example:<br />
root<br />
file names with 3-digit numbers in the<br />
001 group<br />
order you want to play them (this may not<br />
work at times).<br />
Files must have the extension:<br />
001 track.mp3<br />
“.WMA” or “.wma”<br />
002 track.mp3<br />
003 track.mp3<br />
“.MP3” or “.mp3”<br />
002 group<br />
001 track.mp3<br />
003 group 002 track.mp3<br />
003 track.mp3<br />
004 track.mp3<br />
001 track.mp3<br />
002 track.mp3<br />
003 track.mp3<br />
RQT8046<br />
Getting started<br />
7
Getting started<br />
8<br />
RQT8046<br />
Inserting/Removing the discs and cards<br />
Adhere to the following to avoid problems.<br />
Inserting discs<br />
2 Insert to fit in the tray<br />
guide.<br />
• Place the disc label up in the center of the tray.<br />
• Insert only one disc into each tray.<br />
1 Open/close the<br />
CD lid only with<br />
[OPEN/CLOSE ;].<br />
12 cm 8 cm<br />
Do not pull.<br />
Do not push.<br />
Inserting a card<br />
You can use <strong>SD</strong> cards with capacities between 8MB and 1GB on this unit<br />
(⇒ page 6)<br />
Press on the center of the<br />
card until it clicks into<br />
place.<br />
Insert label up with cut-off<br />
corner on the right.<br />
Removing the card<br />
1 Open the lid.<br />
2 Insert the <strong>SD</strong> card.<br />
• When using a mini<strong>SD</strong> card<br />
A mini<strong>SD</strong> adapter is necessary.<br />
mini<strong>SD</strong> adapter<br />
mini<strong>SD</strong> card<br />
• Do not open the card lid during play as play stops.<br />
• Do not open the lid while recording/editing. This may cause recording/<br />
editing to stop or the data may not be correctly recorded/edited on the<br />
<strong>SD</strong> card.<br />
• Do not open the lid or remove the <strong>SD</strong> card when “CARD Writing” is<br />
displayed or the <strong>SD</strong> card indicator is flashing. The <strong>SD</strong> card may become<br />
unusable.<br />
Note<br />
• If you accidentally open the cover when recording from a CD, reinsert<br />
the <strong>SD</strong> card and check your recording. If there is a problem, delete what<br />
was recorded, then do the recording again.<br />
You cannot use high-speed recording to record the same CD <strong>for</strong> a<br />
second time within 74 minutes of finishing the first high-speed recording.<br />
(You can record at normal speed.)<br />
• If you accidentally open the cover when recording from the radio,<br />
recording stops.<br />
• If you accidentally open the cover when editing an <strong>SD</strong> card, reinsert the<br />
card and check what you have edited. If there is a problem, delete what<br />
was edited, then do the editing again.<br />
LOCK<br />
ADAPTER<br />
3 Close the lid securely.<br />
• The <strong>SD</strong> card indicator lights on.<br />
• You cannot play, record, or edit the <strong>SD</strong><br />
card when the lid is open.<br />
<strong>SD</strong> card indicator<br />
1 Open the lid.<br />
2 Press on the center of<br />
the <strong>SD</strong> card.<br />
3 Pull straight out.<br />
4 Close the lid securely.
Setup<br />
The remote control<br />
Positioning the speakers<br />
R6/LR6, AA<br />
• Insert so the poles (+ and –)<br />
match those in the remote<br />
control.<br />
• Do not use rechargeable<br />
type batteries.<br />
n Do not:<br />
• mix old and new batteries.<br />
• use different types at the same time.<br />
• heat or expose to flame.<br />
• take apart or short circuit.<br />
• attempt to recharge alkaline or manganese batteries.<br />
• use batteries if the covering has been peeled off.<br />
Mishandling of batteries can cause electrolyte leakage which can damage<br />
items the fluid contacts and may cause a fire.<br />
Remove the batteries if the remote control is not going to be used <strong>for</strong> a<br />
long period of time. Store the batteries in a cool, dark place.<br />
n Use<br />
Aim at the sensor, avoiding obstacles, at a maximum range of 7 m (23<br />
feet) directly in front of the unit.<br />
Place so that the <strong>Panasonic</strong> logos and super tweeters are on the outside. n Use only the supplied speakers<br />
<strong>Panasonic</strong> logo Super tweeter<br />
• Using other speakers can damage the unit and sound quality will be<br />
negatively affected.<br />
• Set the speakers up on an even surface to prevent them from falling.<br />
Take proper precautions to prevent the speakers from falling if you<br />
cannot set them up on an even surface.<br />
Speaker Main unit Speaker<br />
Caution<br />
• Use the speakers only with the<br />
recommended system. Failure to do<br />
so can damage the amplifier and<br />
speakers, and can cause fire.<br />
Consult a qualified service person if<br />
damage occurs or if a sudden<br />
change in per<strong>for</strong>mance is apparent.<br />
• Do not attach these speakers to walls<br />
or ceilings.<br />
n Positioning <strong>for</strong> best effect<br />
How you set up your speakers can affect the bass and the sound field.<br />
Note the following points.<br />
• Place speakers on flat secure bases.<br />
• Placing speakers too close to floors, walls, and corners can result in<br />
excessive bass. Cover walls and windows with thick curtain.<br />
• Keep your speakers at least 10 mm ( 13 /32”) away from the system <strong>for</strong><br />
proper ventilation.<br />
• To avoid damage to the speakers, do not touch the speaker cones if you<br />
have taken the nets off.<br />
n Notes on speaker use<br />
• These speakers do not have magnetic shielding. Do not place them<br />
near televisions, personal computers or other devices easily influenced<br />
by magnetism.<br />
• You can damage your speakers and shorten their useful life if you play<br />
sound at high levels over extended periods.<br />
• Reduce the volume in the following cases to avoid damage.<br />
– When playing distorted sound.<br />
– When the speakers emit strange noise (howling) from a record player,<br />
noise from FM broadcasts, or continuous signals from an oscillator,<br />
test disc, or electronic instrument.<br />
– When adjusting the sound quality.<br />
– When turning the unit on or off.<br />
RQT8046<br />
Getting started<br />
9
Getting started<br />
10<br />
RQT8046<br />
Setup<br />
Connections<br />
Conserving power<br />
The unit consumes power (approx. 0.3 W) even when it is turned off with [POWER ^/I]. To save power when the unit is not to be used <strong>for</strong> a long time,<br />
unplug it from the household AC outlet. You will need to reset some memory items after plugging in the unit again.<br />
To AUX terminals<br />
(⇒ page 34)<br />
Video cassette recorder<br />
Television<br />
If the display lights up when the<br />
unit is turned off, the demo<br />
function is set to on.<br />
Stand the antenna<br />
up on its base.<br />
AM loop antenna<br />
DEMO function<br />
Keep loose antenna cord away<br />
from other wires and cords.<br />
Press and hold until “DEMO OFF”<br />
is displayed.<br />
Every time you press the button:<br />
DEMO OFF ↔ DEMO ON
FM indoor antenna<br />
Adhesive tape<br />
Note<br />
• You can reduce the power consumed in standby mode by<br />
turning the demo function off.<br />
• If you set the clock (⇒ page 32), the demo function will<br />
turn off automatically.<br />
Fix the other end of the<br />
antenna where reception<br />
is best.<br />
To household AC outlet<br />
(AC 120V, 60 Hz)<br />
Speakers<br />
• If the speaker cords have vinyl tips, twist the vinyl tip and<br />
pull off.<br />
• Confirm the colors of the tags on the ends of the cords.<br />
White<br />
Blue<br />
Black<br />
Red<br />
Red<br />
Black<br />
White<br />
Blue<br />
• For White tags, connect to grey terminals.<br />
For Blue, Black and Red tags, connect so tag colors match<br />
the terminal colors.<br />
Grey<br />
Blue<br />
Black<br />
Red<br />
HIGH<br />
(For high frequency)<br />
LOW<br />
(For low frequency)<br />
Note<br />
• Never short-circuit positive (+) and negative (–) speaker<br />
wires.<br />
Incorrect connection can damage the speakers.<br />
AC power supply cord<br />
Connect the AC power supply cord<br />
after all other connections are<br />
complete.<br />
When disconnecting the AC power<br />
supply cord<br />
1 Press [POWER 8].<br />
2 Disconnect after “GOODBYE”<br />
disappears from the display.<br />
RQT8046<br />
Getting started<br />
11
Getting started<br />
12<br />
RQT8046<br />
Control guide<br />
Main unit<br />
POWER 8 (standby/on switch)<br />
Press to switch the unit from on to<br />
standby mode or vice versa.<br />
In standby mode, the unit is still<br />
consuming a small amount of power.<br />
AC IN (AC supply indicator)<br />
This indicator lights when the unit is<br />
connected to the AC power supply.<br />
REC MODE (⇒ page 24)<br />
*/h <strong>SD</strong> (⇒ page 24)<br />
* CD q <strong>SD</strong> HI-SPEED AUTO REC<br />
(⇒ page 25)<br />
1 q – 5 q (disc direct play buttons)<br />
(⇒ page 14)<br />
Display<br />
q TAPE (⇒ page 19)<br />
q/h <strong>SD</strong> (⇒ page 15)<br />
q/h CD (⇒ page 14)<br />
LIST/ENTER (⇒ page 16)<br />
LIST SELECT e, r (⇒ page 16)<br />
RETURN (⇒ page 16)<br />
TUNER/AUX (⇒ page 22)<br />
OPEN/CLOSE ; (⇒ page 8)<br />
The following screen is <strong>for</strong> explanation purposes.<br />
Indicates the selected disc tray.<br />
Cassette tape<br />
Cassette tape<br />
indicator<br />
Sleep timer<br />
Play/Record Timer<br />
OPEN ; (⇒ page 19)<br />
Press to open the<br />
cassette lid.<br />
Cassette lid<br />
(⇒ page 19)<br />
<strong>SD</strong> recording mode<br />
Recording<br />
PHONES (Headphone jack)<br />
Reduce the volume level and connect the headphones.<br />
Headphones plug type: 3.5mm (1/8”) stereo.<br />
Avoid listening <strong>for</strong> prolonged periods of time to prevent<br />
hearing damage.<br />
<strong>SD</strong> card slot (⇒ page 8)<br />
Display (⇒ below)<br />
<strong>SD</strong> card indicator (⇒ page 8)<br />
H.BASS indicator (⇒ page 20)<br />
H.BASS (⇒ page 20)<br />
VOLUME UP/DOWN (⇒ page 15)<br />
STOP g (⇒ page 15),<br />
–DEMO (⇒ page 10)<br />
CD CHECK (⇒ page 15)<br />
CHANGE ; (⇒ page 15)<br />
CD lid (⇒ page 8)<br />
Remote control sensor<br />
n Regarding the screen saver<br />
(prevents screen burning)<br />
If you do not set the auto-off function<br />
(⇒ page 32), the screen saver appears<br />
on the display when the unit is left<br />
unused <strong>for</strong> 10 minutes. Press any<br />
button to clear the screen saver.<br />
The screen saver does not work when<br />
the auto-off function is set.
Remote control<br />
SLEEP (⇒ page 32)<br />
–AUTO OFF (⇒ page 32)<br />
^ (⇒ page 33)<br />
PROGRAM (⇒ page 17)<br />
DISC (⇒ page 15)<br />
TITLE IN (⇒ page 31)<br />
CHARA (⇒ page 30)<br />
EDIT MODE (⇒ page 26, 28)<br />
DEL (⇒ page 30)<br />
, ALBUM/GROUP<br />
(⇒ page 16, 18)<br />
q TAPE (⇒ page 19)<br />
q/h <strong>SD</strong> (⇒ page 15)<br />
q/h CD (⇒ page 15)<br />
g STOP (⇒ page 15)<br />
MUTING (⇒ page 21)<br />
H.BASS (⇒ page 20)<br />
RE-MASTER (⇒ page 20)<br />
*/h REC (⇒ page 24)<br />
<strong>SD</strong>, –HI-SPEED CD q <strong>SD</strong><br />
(⇒ page 24)<br />
To record to <strong>SD</strong> cards<br />
CLOCK/ (⇒ page 32)<br />
TIMER (⇒ page 33)<br />
z PLAY/REC (⇒ page 33)<br />
DISPLAY (⇒ page 15, 33)<br />
–DIMMER (⇒ page 33)<br />
PLAY MODE (⇒ page 15)<br />
–REPEAT (⇒ page 17)<br />
Numbered buttons (⇒ page 16)<br />
u 2/REW, i 1/FF<br />
(⇒ page 15)<br />
TUNER/AUX (⇒ page 22, 35)<br />
e, r<br />
LIST/ENTER (⇒ page 16)<br />
VOL–, + (⇒ page 15)<br />
RETURN (⇒ page 16)<br />
SURROUND (⇒ page 21)<br />
SOUND (⇒ page 21)<br />
REC MODE (⇒ page 24)<br />
TAPE (⇒ page 25)<br />
To record to cassette tapes<br />
RQT8046<br />
Getting started<br />
13
Playing back<br />
14<br />
RQT8046<br />
Basic play<br />
Playing discs<br />
1 Select a disc tray.<br />
• The unit turns on automatically.<br />
• When a CD is already loaded, the unit comes on automatically and starts play (One<br />
touch play).<br />
2 Open the CD lid.<br />
3 Insert disc. (⇒ page 8)<br />
Label must face<br />
upward.<br />
Disc tray<br />
STOP g<br />
LIST SELECT e, r<br />
OPEN/CLOSE ;<br />
1<br />
4 Close the CD lid.<br />
5 Start play.<br />
Tray number<br />
• It may take some time <strong>for</strong> play to start but this is normal.<br />
q/h <strong>SD</strong><br />
q/h CD<br />
VOLUME UP/DOWN<br />
CD CHECK<br />
CHANGE ;<br />
1 q – 5 q<br />
CD lid
Selecting a<br />
disc<br />
All disc play<br />
(during stop)<br />
Changing a<br />
disc in the<br />
desired tray<br />
Checking<br />
the disc<br />
location<br />
Volume<br />
adjustment<br />
Stop<br />
Pause<br />
Remote control Main unit<br />
Within 10 seconds<br />
Select “ALL DISC”.<br />
Within 10 seconds<br />
Press [CHANGE ;] again to close the tray.<br />
• You can also remove a disc while another is playing.<br />
This feature lets you check whether a disc is in a<br />
tray.<br />
Press again to close the tray.<br />
• If a disc is being played, the corresponding tray will<br />
not open.<br />
• Do not remove or insert discs during a disc check.<br />
• Do not push or pull out the trays during a disc<br />
check.<br />
Remote control Main unit<br />
Remote control Main unit<br />
Remote control Main unit<br />
• Press again to restart play.<br />
Tray number<br />
Playing <strong>SD</strong> cards<br />
This unit can only play music data (AAC/MP3/WMA) recorded in the <strong>SD</strong><br />
standard audio <strong>for</strong>mat. Other <strong>SD</strong> audio <strong>for</strong>mats cannot be played.<br />
1 Insert the <strong>SD</strong> card. (⇒ page 8)<br />
2 Start play.<br />
• When a <strong>SD</strong> card is already loaded, the unit comes on automatically and<br />
starts play (One touch play).<br />
Note<br />
• Do not open the card lid during play as play stops.<br />
• You can use <strong>SD</strong> cards with capacities between 8MB and 1GB on this<br />
unit (⇒ page 6)<br />
• Playback quality depends on the recording mode (XP/SP/LP) selected.<br />
(⇒ page 23)<br />
Skip<br />
Search<br />
(during play or<br />
pause)<br />
Status<br />
display<br />
Remote control Main unit<br />
Remote control<br />
Press and hold.<br />
Remote control<br />
• You cannot search through<br />
a disc with WMA/MP3 files.<br />
• The display changes each<br />
time you press the button.<br />
RQT8046<br />
Playing back<br />
15
Playing back<br />
16<br />
RQT8046<br />
Basic play<br />
LIST/ENTER<br />
LIST SELECT<br />
e, r<br />
RETURN<br />
q/h <strong>SD</strong><br />
q/h CD<br />
STOP g<br />
Other ways of playing discs/cards<br />
Preparation<br />
Press [q/h CD] or [q/h <strong>SD</strong>] and then [g STOP].<br />
Press the numbered button(s) to select and play the<br />
track.<br />
Example<br />
To select 12: [ 10] è [1] è [2]<br />
To select 123: [ 10] è [ 10] è [1] è [2] è [3]<br />
Note<br />
You cannot use this feature with program play and random play modes.<br />
1 During stop<br />
Press [PLAY MODE, –REPEAT] to select “1 ALBUM”.<br />
2 Press [ , ALBUM/GROUP] to select the album.<br />
3 Press [q/h CD].<br />
To skip an album<br />
Press [ , ALBUM/GROUP].<br />
Title search<br />
1 During stop<br />
Press [LIST/ENTER].<br />
2 Press [e] or [r] to select the title and press<br />
[LIST/ENTER].<br />
• First select the disc, album or playlist title.<br />
• Select “Track List” to select a track from all the track titles on <strong>SD</strong>.<br />
• With HighMAT, press [e] or [r] to select the method of play (⇒ step 3,<br />
page 18).<br />
Main unit<br />
1 Press [LIST/ENTER].<br />
2 Turn [LIST SELECT e, r] control to select the title and press<br />
[LIST/ENTER].<br />
To return to the previous display<br />
Press [RETURN].<br />
Selecting a track<br />
Selecting an album<br />
Note<br />
• Up to 32 characters per title can be shown by pressing [DISPLAY,<br />
–DIMMER].<br />
• You cannot use this feature with program play, random play, and 1-<br />
Album modes.
Program play (up to 24 items)<br />
1 During stop<br />
Press [PROGRAM].<br />
2 CD/WMA/MP3 only<br />
Select a disc.<br />
1 Press [DISC].<br />
2 Within 10 seconds:<br />
Press [1] - [5] to select the disc.<br />
3 Press the numbered button(s) to select the track.<br />
• Example<br />
To select 12: [ 10] è [1] è [2]<br />
To select 123: [ 10] è [ 10] è [1] è [2] è [3]<br />
• Repeat steps 2 and 3 to program other tracks.<br />
4 Press [q/h CD] or [q/h <strong>SD</strong>].<br />
Program play will start.<br />
To Action<br />
cancel program play Press [PROGRAM] in the stop mode.<br />
Programmed contents will be saved in memory.<br />
• Your program is retained in memory if the<br />
system is unplugged.<br />
replay your program Press [PROGRAM] then [q/h CD] or [q/h <strong>SD</strong>].<br />
check program<br />
contents<br />
When “PGM FULL” appears<br />
No further tracks can be programmed.<br />
Press [u 2/REW] or [i 1/FF] when “PGM” is<br />
displayed.<br />
add to the program Repeat steps 2 and 3.<br />
clear the program Press [g STOP] in the stop mode.<br />
Note<br />
• Times are not displayed while programming (CD/WMA/MP3).<br />
• The program is not cleared even when you switch the unit to standby or<br />
select another source.<br />
• The program is cleared when you remove the disc or the card.<br />
• You can search <strong>for</strong>ward or backward only within the current track.<br />
• You cannot clear a specified track from the program.<br />
Random play<br />
1 During stop<br />
Press [PLAY MODE, –REPEAT] to select the mode.<br />
Every time you press the button:<br />
2 Press [q/h CD] or [q/h <strong>SD</strong>].<br />
Random play will start.<br />
To cancel<br />
While stopped, press [PLAY MODE, –REPEAT] to select “1 DISC”, “ALL<br />
DISC”, “1 ALBUM”, or “PLAY MODE OFF”.<br />
Note<br />
• You cannot skip to tracks which have been played.<br />
• You can search <strong>for</strong>ward or backward only within the current track.<br />
Repeat play<br />
Repeat play according to the current play mode.<br />
During play<br />
Press and hold [PLAY MODE, –REPEAT] until<br />
“REPEAT ON” is displayed.<br />
“REP)” [“PGM)” in program play and “RND)” in random play] appears on<br />
the display.<br />
To cancel<br />
Press and hold [PLAY MODE, –REPEAT] until “REPEAT OFF” is<br />
displayed.<br />
• Repeat play is canceled when the unit stops play.<br />
Note<br />
Repeat play is not possible when playing HighMAT discs according to a<br />
playlist order.<br />
RQT8046<br />
Playing back<br />
17
Playing back<br />
18<br />
RQT8046<br />
Basic play<br />
LIST/ENTER<br />
LIST SELECT e, r<br />
RETURN<br />
“HighMAT” appears to show that you can use these features.<br />
Remote control<br />
1 During stop<br />
Press [LIST/ENTER].<br />
The CD selection screen appears.<br />
2 Press [e] or [r] to select the disc and press [LIST/ENTER].<br />
3 Press [e] or [r] to select the method of play and press<br />
[LIST/ENTER].<br />
4 Press [e] or [r] to select the menu, playlist, or track and press<br />
[LIST/ENTER].<br />
Play starts when you select a playlist or track.<br />
Main unit<br />
1 Press [LIST/ENTER].<br />
2 Turn [LIST SELECT e, r] control to select the disc and press [LIST/ENTER].<br />
3 Turn [LIST SELECT e, r] control to select the method of play and press [LIST/ENTER].<br />
4 Turn [LIST SELECT e, r] control to select the menu, playlist, or track and press<br />
[LIST/ENTER].<br />
To return to the previous display<br />
Press [RETURN].<br />
To select a group<br />
Press [ , ALBUM/GROUP] during play.<br />
To cancel partway<br />
Press [g STOP].<br />
The original display appears.<br />
Playing HighMAT discs<br />
HighMAT Menu Find a playlist in the HighMAT menu<br />
All Playlist Select and play playlists<br />
WMA/MP3 Select and play WMA/MP3<br />
STOP g<br />
Note<br />
You cannot use this feature with program play, random play, and 1-Album modes.
Cassette tapes<br />
Cassette tape selection and care<br />
Use normal position tapes.<br />
High position and metal position tapes can be played, but the unit is not<br />
able to do full justice to the characteristics of these tapes.<br />
• Tapes exceeding 100 minutes are thin and can break or get caught in<br />
the mechanism.<br />
• Tape slack can get caught up in the mechanism and should be wound<br />
up be<strong>for</strong>e the tape is played.<br />
• Endless tapes can get caught up in the deck’s moving parts if used<br />
incorrectly.<br />
q TAPE<br />
LIST SELECT<br />
e, r<br />
1 Press to open and insert a cassette.<br />
• Make sure that the cassette is fully inserted and close the cassette<br />
lid by hand.<br />
• The cassette tape indicator lights on the display.<br />
2 Start play.<br />
• To play the other side of the tape, turn the tape over and restart<br />
play.<br />
Volume<br />
adjustment<br />
Stop<br />
OPEN ;<br />
Fast-<strong>for</strong>ward and<br />
rewind<br />
(during stop)<br />
Cassette lid<br />
Side to be played back facing up.<br />
Insert the cassette with the exposed<br />
tape facing you.<br />
Remote control Main unit<br />
Remote control Main unit<br />
Remote control Main unit<br />
Finding the<br />
beginning of a<br />
track (TPS: Tape<br />
Remote control Main unit<br />
Program Sensor) TPS finds the beginning of a track and resumes<br />
(during play) play from there. Each press increases the number<br />
of tracks skipped, up to a maximum of 9.<br />
TPS may not operate correctly in the following situations:<br />
• If the interval between tracks is less than 4 seconds.<br />
• If there is noise between tracks.<br />
• If there are silent parts within tracks.<br />
VOLUME<br />
UP/DOWN<br />
STOP g<br />
RQT8046<br />
Playing back<br />
19
Playing back<br />
20<br />
RQT8046<br />
Sound field and sound quality<br />
H.BASS<br />
You can enjoy more powerful bass on wide range speakers.<br />
Press [H.BASS].<br />
Every time you press the button:<br />
H.BASS 1: Add powerful bass (factory preset)<br />
H.BASS 2: Further increases the power of the bass<br />
• The H.BASS indicator lights on.<br />
Note<br />
• You cannot change H.BASS during recording.<br />
• The effect may be less discernible with some sound sources.<br />
Discs recorded at 32 kHz, 44.1 kHz or 48 kHz<br />
This feature reproduces the frequencies lost during recording to give you<br />
a sound closer to the original.<br />
During play<br />
Press [RE-MASTER].<br />
Every time you press the button:<br />
H.BASS<br />
indicator<br />
H.BASS<br />
Re-master — Enjoying more natural sound<br />
Note<br />
• You cannot change RE-MASTER during recording.<br />
• This does not work when playing WMA files recorded to a <strong>SD</strong> card.
SURROUND<br />
You can add natural width and depth to the stereo sound.<br />
Press [SURROUND].<br />
Every time you press the button:<br />
SURROUND 1: Natural effect<br />
SURROUND 2: Enhanced effect<br />
SURROUND OFF: Cancel (factory preset)<br />
• This does not work or has less effect with some discs.<br />
• Turn off if it causes distortion.<br />
• Do not use in combination with surround effects on other equipment.<br />
• You cannot change SURROUND during recording.<br />
n Optimum seating position<br />
Speaker Speaker<br />
3 to 4 times<br />
distance A<br />
Seating position<br />
Preset EQ<br />
Press [SOUND].<br />
Every time you press the button:<br />
HEAVY : Adds punch to rock (factory preset)<br />
CLEAR : Clarifies higher sounds<br />
SOFT : For background music<br />
VOCAL : Adds gloss to vocal<br />
FLAT : EQ off<br />
Manual EQ<br />
1 Press and hold [SOUND].<br />
“BASS” and “TREBLE” appear on the display.<br />
2 Press [SOUND] to select a setting.<br />
BASS TREBLE<br />
3 Press [e] or [r] while either “BASS” or “TREBLE”<br />
is flashing to change the level (–4 to +4) and press<br />
[LIST/ENTER].<br />
• You cannot change SOUND (Sound field and quality) during recording.<br />
Press [MUTING].<br />
Volume is reduced to minimum.<br />
Changing sound field and quality<br />
Muting the volume<br />
To cancel<br />
Press [MUTING] again or reduce the volume to minimum, then raise it to<br />
the required level.<br />
Muting is also canceled when you switch the unit to standby.<br />
RQT8046<br />
Playing back<br />
21
Playing back<br />
22<br />
RQT8046<br />
The radio<br />
Preset tuning<br />
Manual tuning<br />
1 Select “FM” or “AM”.<br />
2 Select “MANUAL”.<br />
Preset channels to make selection simpler. Up to 15 stations can each be preset in the FM and AM bands.<br />
Automatic presetting Manual presetting<br />
1 Tune to the frequency where presetting is to begin.<br />
(⇒ see above)<br />
2 Press and hold.<br />
• “AUTO MEMORY” starts flashing.<br />
• The tuner presets the stations it can receive into the channels in<br />
ascending order. When finished, “SET OK” appears and the last<br />
station to be preset is played.<br />
3 Select the frequency of the desired station.<br />
4 Adjust the volume.<br />
MANUAL PRESET<br />
• Press and hold [u 2/REW] or [i 1/FF] until the frequency starts scrolling to start automatic<br />
tuning. Tuning stops when a station is found.<br />
• “STEREO” is displayed when a stereo FM broadcast is being received.<br />
n If noise is excessive in FM<br />
Press and hold [PLAY MODE, –REPEAT] to display “MONO”.<br />
To cancel, press and hold [PLAY MODE, –REPEAT] again.<br />
The mode also cancels when you change the frequency.<br />
n FM frequency step (main unit only)<br />
You can change the frequency step (0.2 MHz or 0.1 MHz).<br />
1. Select “FM”.<br />
2. Press and hold [TUNER/AUX] on the main unit.<br />
After a few seconds, “FM” starts flashing on the display. Continue to hold the button down. The<br />
minimum frequency changes and the step is changed.<br />
• To return to the original step, repeat the above steps.<br />
• Any preset stations are cleared by this procedure. Preset them again.<br />
1 Tune to the desired station. (⇒ see above)<br />
2 Press.<br />
“PGM” appears.<br />
3 Within 10 seconds:<br />
Select the channel.<br />
The station occupying a channel is erased if another station is preset<br />
in that channel.<br />
Selecting channels<br />
1 Press [TUNER/AUX] to select “FM” or “AM”.<br />
2 Press [PLAY MODE, –REPEAT] to select “PRESET”.<br />
3 Press the numbered buttons or [u2/REW] or [i1/FF] to select<br />
the channel.
Recording sources and media<br />
To:<br />
<strong>SD</strong> card Cassette tape<br />
From: Normal speed High speed* Normal speed<br />
CD A disc in play position ⇒ page 24 ⇒ page 25<br />
All discs in trays ⇒ page 24 ⇒ page 25<br />
5CD auto recording - ⇒ page 25 -<br />
Program recording ⇒ page 25 - ⇒ page 25<br />
<strong>SD</strong> card All tracks - - ⇒ page 27<br />
Program recording - - ⇒ page 27<br />
Tape ⇒ page 26 - -<br />
Radio ⇒ page 26 - ⇒ page 27<br />
AUX ⇒ page 35 - ⇒ page 35<br />
*Please read “High-speed recording” below.<br />
Note<br />
You can only make digital recordings from CD to <strong>SD</strong>.<br />
Approximate recording time on <strong>SD</strong> Memory Card<br />
You can use <strong>SD</strong> cards with capacities between 8MB and 1GB on this unit.<br />
(⇒ page 6)<br />
<strong>SD</strong> card<br />
Recording mode<br />
Capacity*<br />
XP: 128 kbps SP: 96 kbps LP: 64 kbps<br />
32 MB 31 min. 41 min. 62 min.<br />
64 MB 64 min. 85 min. 128 min.<br />
128 MB 130 min. 173 min. 260 min.<br />
256 MB 259 min. 346 min. 519 min.<br />
512 MB 523 min. 698 min. 1047 min.<br />
1 GB 1007 min. 1343 min. 2014 min.<br />
* Usable capacity will be less.<br />
• The maximum number of tracks recordable in a <strong>SD</strong> card: 998<br />
• Recording mode:<br />
XP: High quality mode<br />
SP: Normal mode<br />
LP: Long play mode<br />
High-speed recording<br />
You can record at up to four times normal speed from a CD to a <strong>SD</strong> and<br />
up to two times normal speed from a CD-RW to a <strong>SD</strong>.<br />
This means you can complete recording from a 74 minute CD in<br />
approximately 19 minutes.<br />
n Limitations on high-speed recording<br />
This unit uses a copy management system to limit the use of high-speed<br />
recording.<br />
• You cannot use high-speed recording to record the same CD <strong>for</strong> a<br />
second time within 74 minutes of finishing the first high-speed<br />
recording. (You can record at normal speed.)<br />
If you try to start high-speed recording again, “PLEASE WAIT XX MIN.”<br />
appears on the display. (“XX” is the number of minutes you must wait<br />
be<strong>for</strong>e starting high-speed recording again.)<br />
• You can record up to 24 discs within 74 minutes.<br />
If you finish recording 24 discs within approximately 74 minutes, you<br />
cannot start recording the twenty-fifth disc.<br />
n When recording at high-speed from CD to <strong>SD</strong><br />
Use <strong>Panasonic</strong> <strong>SD</strong> Memory cards with a transfer speed of 10 MB/sec or<br />
better (SUPER HIGH SPEED/PRO HIGH SPEED types) <strong>for</strong> best results.<br />
• The maximum transfer speed may not be achieved or high-speed<br />
recording may not be possible if you use other cards.<br />
• See our homepage <strong>for</strong> details.<br />
http://panasonic.co.jp/pavc/global/cs<br />
(This site is in English only.)<br />
• You can use any kind of <strong>SD</strong> Memory card when recording at<br />
normal-speed.<br />
Note<br />
• Depending on the condition of the disc, it may not be possible to record<br />
at four times normal speed or to high-speed record. Record the CD at<br />
normal speed.<br />
• You cannot use high-speed recording when discs contain WMA/MP3<br />
files.<br />
• Discs are not recorded continually at four times normal speed. (Different<br />
parts of the disc are read at different speeds.)<br />
• You will not hear sound when using high-speed recording.<br />
RQT8046<br />
Recording<br />
23
Recording<br />
24<br />
RQT8046<br />
Recording CDs<br />
To stop<br />
Press [g STOP].<br />
To display the remaining time on the <strong>SD</strong><br />
Press [DISPLAY, –DIMMER] several times.<br />
The remaining time depends on the selected recording mode (XP/SP/LP).<br />
Note<br />
• WMA/MP3 files are automatically recorded in analog.<br />
• This unit records CDs to <strong>SD</strong> in AAC <strong>for</strong>mat.<br />
• Do not open the lid while recording. This may cause recording to stop or<br />
the data may not be correctly recorded onto the <strong>SD</strong> card.<br />
If you accidentally open the cover when recording from a CD, reinsert<br />
the <strong>SD</strong> card and check your recording. If there is a problem, delete what<br />
was recorded, then do the recording again.<br />
• You can use <strong>SD</strong> cards with capacities between 8MB and 1GB on this<br />
unit. (⇒ page 6)<br />
n To automatically create playlists during high-speed<br />
recording of all the discs in trays<br />
⇒ page 25, 5CD auto recording<br />
REC MODE<br />
TAPE q<br />
OPEN/CLOSE ;<br />
Preparation<br />
Insert the <strong>SD</strong> card (⇒ page 8) or the cassette tape (⇒ page 19).<br />
• Securely close the lid of the <strong>SD</strong> card slot. You cannot record if the lid is<br />
open.<br />
Recording to <strong>SD</strong><br />
(Normal recording/High-speed recording)<br />
1 Select the disc tray.<br />
The unit turns on automatically.<br />
2 Open the CD lid and insert the disc.<br />
Press [OPEN/CLOSE ;] again to close the CD lid.<br />
3 Select the recording mode (XP/SP/LP).<br />
Remote control<br />
Every time you press the button:<br />
4 During stop<br />
Select “1 DISC” or “ALL DISC”.<br />
Every time you press the button:<br />
• You cannot select RANDOM modes when recording.<br />
1 DISC: To record one disc<br />
ALL DISC: To record all the discs<br />
5 For normal recording<br />
Remote control<br />
Main unit<br />
+<br />
For high-speed recording<br />
Remote control only<br />
+<br />
Main unit<br />
*/h <strong>SD</strong><br />
* CD q <strong>SD</strong><br />
HI-SPEED AUTO REC<br />
q/h CD<br />
STOP g<br />
1 q – 5 q<br />
CD lid<br />
While pressing [*/h REC],<br />
press [<strong>SD</strong>, -HI-SPEED CD q <strong>SD</strong>]<br />
to start recording.<br />
Press [*/h <strong>SD</strong>] to start<br />
recording.<br />
While pressing [*/h REC],<br />
press and hold [<strong>SD</strong>, -HI-SPEED<br />
CD q <strong>SD</strong>] <strong>for</strong> two seconds or<br />
longer to start recording.
5CD auto recording (CD è <strong>SD</strong>)<br />
(High-speed recording only)<br />
This function high-speed records all loaded CDs in succession from the<br />
first tray onto a <strong>SD</strong> card with one-touch.<br />
• All tracks on one CD are recorded as one playlist.<br />
• All titles on the CDs (⇒ page 31) are copied to the <strong>SD</strong>.<br />
1 Insert the CD and select the recording mode.<br />
(per<strong>for</strong>m steps 1 to 3 on page 24.)<br />
2 Select “CD” as the source.<br />
3 Start recording.<br />
• Recording starts after the in<strong>for</strong>mation from all the discs has been read.<br />
Note<br />
• Program and random modes are canceled.<br />
• If there is not enough space to record all the tracks, the amount<br />
recorded is displayed <strong>for</strong> approximately 6 seconds.<br />
(The example below indicates that all the tracks until the tenth one on<br />
the fifth disc were recorded)<br />
“REC UNTIL DISC 5 TRACK 10”<br />
You can cancel AUTO REC by pressing [g STOP] while this is<br />
displayed. You may be able to fit all the tracks on the <strong>SD</strong> card if you<br />
change the recording mode.<br />
• When “REC RETRY” is displayed<br />
The unit was not able to read the in<strong>for</strong>mation from the discs properly<br />
and is automatically recording again. Do not press any buttons while<br />
this is displayed.<br />
Program recording<br />
(Normal recording only)<br />
Program record allows you to specify the tracks to be recorded to <strong>SD</strong> or<br />
cassette tape.<br />
1 Insert the CD and select the recording mode.<br />
(per<strong>for</strong>m steps 1 to 3 on page 24.)<br />
2 Select “CD” as the source.<br />
3 Program the desired tracks. (⇒ page 17, Program play,<br />
steps 1 to 3)<br />
4 For recording to <strong>SD</strong><br />
+<br />
While pressing [*/h REC],<br />
press [<strong>SD</strong>, -HI-SPEED CD q <strong>SD</strong>]<br />
to start recording.<br />
For recording to tape<br />
+ While pressing [*/h REC],<br />
press [TAPE] to start recording.<br />
(Normal recording only)<br />
Preparation<br />
Wind up the leader tape so recording can begin immediately.<br />
1 Select the disc tray.<br />
The unit turns on automatically.<br />
2 Open the CD lid and insert the disc.<br />
Press [OPEN/CLOSE ;] again to close the CD lid.<br />
3 During stop<br />
Select “1 DISC” or “ALL DISC”.<br />
4<br />
Recording to cassette tape<br />
Every time you press the button:<br />
• You cannot select RANDOM modes when recording.<br />
1 DISC: To record one disc<br />
ALL DISC: To record all the discs<br />
+<br />
• Recording starts from the first track and automatically stops when<br />
play stops.<br />
• To record the other side, turn the tape over.<br />
• Recording automatically stops when play stops on the CD or the end<br />
of the side of the tape being recorded to is reached.<br />
To erase a recorded sound<br />
1 Press [TAPE q] and then [g STOP].<br />
2 Insert the recorded cassette with the tape facing out.<br />
3 While pressing [*/h REC], press [TAPE].<br />
n Regarding cassette tapes<br />
• Use normal position tapes.<br />
High position and metal position tapes can be used, but the unit will not<br />
be able to record or erase them correctly.<br />
• Volume, surround effects, sound field and quality<br />
– Recording level is set automatically.<br />
– The volume, sound field and quality have no effect on recording.<br />
They can be adjusted <strong>for</strong> playback.<br />
• Erasure prevention<br />
Use a screwdriver or similar object to break out the tab.<br />
Side A<br />
While pressing [*/h REC],<br />
press [TAPE] to start recording.<br />
Tab <strong>for</strong> side B Tab <strong>for</strong> side A<br />
To record on the tape again, cover the hole with adhesive tape.<br />
Adhesive tape<br />
RQT8046<br />
Recording<br />
25
Recording<br />
26<br />
RQT8046<br />
Recording from cassette tape/the radio to <strong>SD</strong><br />
To stop<br />
Press [g STOP].<br />
To pause<br />
While pressing [*/h REC], press [<strong>SD</strong>, -HI-SPEED CD q <strong>SD</strong>].<br />
The <strong>SD</strong> pauses and the cassette tape or radio continues playing. (“REC”<br />
flashes on the display.)<br />
Press again to restart recording.<br />
A track mark is added (⇒ right).<br />
To display the remaining time on the <strong>SD</strong><br />
Press [DISPLAY, –DIMMER] several times.<br />
Note<br />
You can use <strong>SD</strong> cards with capacities between 8MB and 1GB on this unit.<br />
(⇒ page 6)<br />
Preparation<br />
1 Insert the <strong>SD</strong> card. (⇒ page 8)<br />
• Securely close the lid of the <strong>SD</strong> card slot. You cannot record if the lid<br />
is open.<br />
2 Press [REC MODE] to select the recording mode.<br />
(Normal recording only)<br />
1 Insert the cassette tape. (⇒ page 19)<br />
2 Select “TAPE” as the source.<br />
3 Select the recording method.<br />
4<br />
Every time you press the button:<br />
MANUAL: Normal recording<br />
TIME MARK: Track marks are inserted automatically every five<br />
minutes.<br />
• When recording from cassette tape, recording automatically stops<br />
when the end of the side of the tape being recorded from is reached.<br />
To record from the other side, turn the tape over.<br />
(Normal recording only)<br />
1 Tune to the station. (⇒ page 22)<br />
2 Select the recording method.<br />
3<br />
Recording from cassette tape<br />
+<br />
Recording from the radio<br />
Every time you press the button:<br />
MANUAL: Normal recording<br />
TIME MARK: Track marks are inserted automatically every five<br />
minutes.<br />
+<br />
• Do not open the lid while recording. This may cause recording to<br />
stop or the data may not be correctly recorded onto the <strong>SD</strong> card.<br />
If you accidentally open the cover when recording from the radio,<br />
recording stops.<br />
n Adding track marks on the <strong>SD</strong><br />
You can add track marks where the track changes on the cassette tape or<br />
radio. These marks separate tracks in a recording. They can be added<br />
automatically or manually during recording.<br />
During recording<br />
While pressing [*/h REC],<br />
press [<strong>SD</strong>, -HI-SPEED CD q <strong>SD</strong>]<br />
to start recording.<br />
While pressing [*/h REC],<br />
press [<strong>SD</strong>, -HI-SPEED CD q <strong>SD</strong>]<br />
to start recording.<br />
“TR MARKING” is shown on the display and a track mark is added.
Recording from <strong>SD</strong>/the radio to cassette tape<br />
Note<br />
You can use <strong>SD</strong> cards with capacities between 8MB and 1GB on this unit.<br />
(⇒ page 6)<br />
Preparation<br />
Insert the <strong>SD</strong> card (⇒ page 8) or the cassette tape. (⇒ page 19)<br />
(Normal recording only)<br />
1 Select “<strong>SD</strong>” as the source.<br />
2<br />
(Normal recording only)<br />
1 Tune to the station (⇒ page 22).<br />
2<br />
(Normal recording only)<br />
Program record allows you to specify the tracks to be recorded to tape.<br />
1 Select “<strong>SD</strong>” as the source.<br />
2 Program the desired tracks. (⇒ page 17, Program play,<br />
steps 1 to 3)<br />
3<br />
Recording from <strong>SD</strong><br />
+<br />
Recording from the radio<br />
+<br />
Program recording<br />
+<br />
To stop<br />
Press [g STOP].<br />
While pressing [*/h REC],<br />
press [TAPE] to start recording.<br />
While pressing [*/h REC],<br />
press [TAPE] to start recording.<br />
While pressing [*/h REC],<br />
press [TAPE] to start recording.<br />
To pause (recording from the radio)<br />
While pressing [*/h REC], press [TAPE].<br />
The cassette tape pauses and the radio continues playing. (“REC” flashes<br />
on the display.)<br />
Press again to restart recording.<br />
Note<br />
• Recording automatically stops when the end of the side of the tape<br />
being recorded to is reached. To record the other side, turn the tape<br />
over.<br />
• When recording an AM broadcast, sound is momentarily interrupted<br />
when you start and stop the recording.<br />
• You cannot select RANDOM mode when recording.<br />
RQT8046<br />
Recording<br />
27
Editing<br />
28<br />
RQT8046<br />
Editing <strong>SD</strong>s<br />
Preparation<br />
1 Insert the <strong>SD</strong> card. (⇒ page 8)<br />
• Securely close the lid of the <strong>SD</strong> card slot. You cannot edit if the lid is<br />
open.<br />
2 Press [q/h <strong>SD</strong>] and then [g STOP] to select “<strong>SD</strong>” as the source.<br />
To stop partway<br />
Press [g STOP].<br />
Note<br />
• Do not open the <strong>SD</strong> card lid while editing as the operation in progress<br />
stops and the editing is not completed properly.<br />
If you accidentally open the cover when editing an <strong>SD</strong> card, reinsert the<br />
card and check what you have edited. If there is a problem, delete what<br />
was edited, then do the editing again.<br />
• You can use <strong>SD</strong> cards with capacities between 8MB and 1GB on this<br />
unit. (⇒ page 6)<br />
Erasing tracks — TRACK ERASE/ALL ERASE<br />
TRACK ERASE<br />
1 During stop or play<br />
Select “TRACK ERASE?”.<br />
Every time you press the button:<br />
2 Press [LIST/ENTER].<br />
3 Press [u 2/REW, i 1/FF] to select the track to<br />
erase and press [LIST/ENTER].<br />
• Repeat this step to select other tracks (up to 24 tracks).<br />
• During play, the current track is selected.<br />
4 Press [LIST/ENTER].<br />
When “CARD Writing” stops flashing editing is complete.<br />
ALL ERASE<br />
All the <strong>SD</strong>-Audio tracks on the card are erased.<br />
1 During stop<br />
Select “ALL ERASE?”.<br />
Every time you press the button:<br />
2 Press [LIST/ENTER].<br />
3 Press [LIST/ENTER].<br />
• When “CARD Writing” stops flashing editing is complete.<br />
• If you erase all the tracks, “NO TRACK” is displayed.<br />
• Editing <strong>SD</strong>s may take time when erasing a lot of tracks at one time<br />
or when erasing tracks in multiple playlists.<br />
Moving tracks — MOVE<br />
1 During stop or play<br />
Select “MOVE?”.<br />
Every time you press the button:<br />
2 Press [LIST/ENTER].<br />
3 Press [u 2/REW, i 1/FF] to select the track to<br />
be moved and press [LIST/ENTER].<br />
During play, the current track is selected.<br />
4 Press [u 2/REW, i 1/FF] to select the new<br />
position and press [LIST/ENTER].<br />
5 Press [LIST/ENTER].<br />
When “CARD Writing” stops flashing editing is complete.
Formatting a card — CARD FORMAT<br />
Formatting erases all the contents of the card and not only the tracks<br />
recorded using this unit. Once erased, the contents of the card are lost<br />
and cannot be restored. Make certain be<strong>for</strong>e proceeding.<br />
• When a card is <strong>for</strong>matted using this unit, it may not be possible to use it<br />
on other equipment.<br />
1 During stop<br />
Select “CARD FORMAT?”.<br />
Every time you press the button:<br />
2 Press [LIST/ENTER].<br />
3 Press [LIST/ENTER].<br />
• When “CARD Writing” stops flashing editing is complete.<br />
• Do not open the card lid until “NO TRACK” is displayed. This can render<br />
the card unusable.<br />
• Formatting may take time depending on the type of card.<br />
Editing playlists — PLAYLIST<br />
Playlists<br />
You can arrange recorded tracks in the order you want to play them.<br />
Track Track Track Track<br />
Playlist<br />
• Playlists only register the order of play so this doesn't use much<br />
capacity.<br />
• Editing tracks on playlists doesn't modify the recorded data.<br />
• The maximum number of items on a card<br />
Playlists: 99<br />
Tracks in playlists: 99<br />
Preparation<br />
1 During stop<br />
Select “PLAYLIST?”.<br />
Every time you press the button:<br />
Track Track<br />
2 Press [LIST/ENTER].<br />
3 Press [u 2/REW, i 1/FF] to select the playlist<br />
operation and press [LIST/ENTER].<br />
• Playlist operations<br />
PLAYLIST?<br />
PL EDIT? : To add tracks to/erase tracks from playlists<br />
— PL EDIT (⇒ right)<br />
PL ERASE? : To erase playlists — PL ERASE (⇒ right)<br />
PL CREATE? : To create a new playlist — PL CREATE (⇒ right)<br />
PL TITLE? : Entering a playlist title. (⇒ page 31)<br />
To create a new playlist — PL CREATE<br />
4 Press the numbered buttons to select the track.<br />
• Example:<br />
To select 12<br />
[ 10] è [1] è [2]<br />
To select 123<br />
[ 10] è [ 10] è [1] è [2] è [3]<br />
• Repeat this step to select other tracks (up to 99 tracks).<br />
5 Press [LIST/ENTER].<br />
6 Enter the name (⇒ page 30) and press [LIST/ENTER].<br />
When “CARD Writing” stops flashing editing is complete.<br />
To play a playlist<br />
(⇒ page 16, Title search)<br />
To erase playlists — PL ERASE<br />
4 Press [u 2/REW, i 1/FF] to select the playlist<br />
and press [LIST/ENTER].<br />
5 Press [LIST/ENTER].<br />
When “CARD Writing” stops flashing editing is complete.<br />
To add tracks to/erase tracks from playlists — PL EDIT<br />
If you erase all the tracks in a playlist, the playlist is also erased.<br />
4 Press [u 2/REW, i 1/FF] to select the playlist<br />
and press [LIST/ENTER].<br />
To add tracks<br />
1 Press [u 2/REW, i 1/FF] to select where to add the track.<br />
The track currently in this position becomes the next track in the<br />
order of play.<br />
2 Press the numbered buttons to select the track.<br />
Example:<br />
To select 12: [ 10] è [1] è [2]<br />
To select 123: [ 10] è [ 10] è [1] è [2] è [3]<br />
To erase tracks<br />
Press [u 2/REW, i 1/FF] to select the track and press [DEL].<br />
5 Press [LIST/ENTER].<br />
When “CARD Writing” stops flashing editing is complete.<br />
To check tracks placed in a playlist<br />
Press [u 2/REW, i 1/FF].<br />
RQT8046<br />
Editing<br />
29
Editing<br />
30<br />
RQT8046<br />
Entering titles<br />
You can enter titles <strong>for</strong> discs, tracks, artists and playlists.<br />
Note<br />
The maximum number of characters per title: 32<br />
Preparation<br />
Show Enter Name screen. (⇒ page 31)<br />
Entering characters<br />
1 Press [CHARA] to select upper-case, lower-case,<br />
or numeric characters.<br />
2 Press the numbered button to select the character.<br />
The characters change each time you press a button.<br />
Button Characters Button Characters<br />
1 1 6 M N O m n o 6<br />
2 A B C a b c 2 7 P Q R S p q r s 7<br />
3 D E F d e f 3 8 T U V t u v 8<br />
4 G H I g h i 4 9 W X Y Z w x y z 9<br />
5 J K L j k l 5 0 0<br />
10 space ! ” # $ % & ’ ( ) * + , - . / : ; < = > ? @ [ \ ] ˆ _ ` { | } ˜<br />
: For <strong>SD</strong> only<br />
3 Press [ ALBUM/GROUP] to enter the character.<br />
Repeat steps 1 through 3 to enter the title.<br />
To move the cursor<br />
Press [ , ALBUM/GROUP].<br />
To insert characters<br />
Press [ ALBUM/GROUP] to move the cursor and then enter the correct<br />
character.<br />
To delete a character<br />
Move the cursor over the character and press [DEL].<br />
To stop partway<br />
Press [g STOP].<br />
To change a title<br />
Enter the title again from the beginning.
Entering titles on a CD (CD title memory) Entering titles on a <strong>SD</strong> after recording<br />
The unit can record the disc titles <strong>for</strong> 100 CDs, 25 track titles per CD.<br />
Preparation<br />
1 Insert the CD. (⇒ page 8)<br />
2 Press [q/h CD] and then [g STOP] to select “CD” as the source.<br />
3 To select a CD<br />
Press [DISC], then press the numbered button to select the CD and<br />
press [g STOP].<br />
1 Press [TITLE IN].<br />
2 Press [u 2/REW, i 1/FF] to select the title<br />
type (Disc title/Artist name/Track title), track<br />
number, etc. and press [LIST/ENTER].<br />
3 Enter the characters (⇒ page 30) and press [LIST/ENTER].<br />
Repeat steps 2 and 3 as necessary.<br />
4 Press [TITLE IN].<br />
The title name is entered.<br />
To stop partway<br />
Press [TITLE IN].<br />
To check titles<br />
Press [DISPLAY, –DIMMER] several times while stopped.<br />
Track titles appear during play or when you skip tracks while stopped.<br />
(Nothing is shown if you only enter spaces.)<br />
To delete titles<br />
1 During stop, press [EDIT MODE].<br />
“TITLE ERASE?” appears.<br />
2 Press [LIST/ENTER].<br />
3 Press [e, r] to select the title and press [LIST/ENTER].<br />
“TITLE ERASE?” and “PRESS ENTER” alternatively appear.<br />
4 Press [LIST/ENTER].<br />
The title is erased after “COMPLETE” is displayed. All the titles you<br />
entered <strong>for</strong> the disc are deleted.<br />
Repeat to delete the titles on other CDs.<br />
To cancel, press [g STOP].<br />
Preparation<br />
1 Insert the <strong>SD</strong> card. (⇒ page 8)<br />
• Securely close the lid of the <strong>SD</strong> card slot. You cannot edit if the lid is<br />
open.<br />
2 Press [q/h <strong>SD</strong>] and then [g STOP] to select “<strong>SD</strong>” as the source.<br />
1 Press [TITLE IN].<br />
2 Press [u 2/REW, i 1/FF] to select the track<br />
number and press [LIST/ENTER].<br />
3 Enter the track title (⇒ page 30) and press [LIST/ENTER].<br />
4 Enter the artist name (⇒ page 30) and press [LIST/ENTER].<br />
Repeat steps 2 through 4 as necessary.<br />
5 Press [TITLE IN].<br />
When “CARD Writing” stops flashing editing is complete.<br />
To stop partway<br />
Press [TITLE IN].<br />
Note<br />
• Do not open the <strong>SD</strong> card lid while editing as the operation in progress<br />
stops and the editing is not completed properly.<br />
• You can use <strong>SD</strong> cards with capacities between 8MB and 1GB on this<br />
unit. (⇒ page 6)<br />
Entering a playlist title<br />
Preparation<br />
1 Insert the <strong>SD</strong> card. (⇒ page 8)<br />
• Securely close the lid of the <strong>SD</strong> card slot. You cannot edit if the lid is<br />
open.<br />
2 Press [q/h <strong>SD</strong>] and then [g STOP] to select “<strong>SD</strong>” as the source.<br />
1 Press [EDIT MODE] to select “PLAYLIST?” and<br />
press [LIST/ENTER].<br />
2 Press [u 2/REW, i 1/FF] to select “PL<br />
TITLE?” and press [LIST/ENTER].<br />
3 Press [u 2/REW, i 1/FF] to select the playlist<br />
and press [LIST/ENTER].<br />
4 Enter the characters (⇒ page 30) and press [LIST/ENTER].<br />
When "CARD Writing" stops flashing editing is complete.<br />
To stop partway<br />
Press [g STOP].<br />
Note<br />
• Do not open the <strong>SD</strong> card lid while editing as the operation in progress<br />
stops and the editing is not completed properly.<br />
• You can use <strong>SD</strong> cards with capacities between 8MB and 1GB on this<br />
unit. (⇒ page 6)<br />
RQT8046<br />
Editing<br />
31
Convenient functions<br />
32<br />
RQT8046<br />
Convenient functions<br />
1 Press [CLOCK/TIMER] to select "CLOCK".<br />
Every time you press the button:<br />
2 Within 10 seconds:<br />
Press [u 2/REW, i 1/FF] to set the day and press [LIST/ENTER].<br />
Every time you press the button:<br />
3 Press [u 2/REW, i 1/FF] to set the time and press [LIST/ENTER].<br />
• Press and hold to change the time faster.<br />
The time is set and the original display is restored.<br />
To display the clock<br />
When the unit is on, press [CLOCK/TIMER].<br />
When the unit is off, press [DISPLAY, –DIMMER].<br />
To stop partway<br />
Press [g STOP].<br />
Setting the time<br />
Original display<br />
Note<br />
• This is a 12-hour clock.<br />
• Reset the clock regularly to maintain accuracy.<br />
• If you set the clock, the demo function will turn off automatically.<br />
• If there is a power failure or the plug is disconnected from the AC outlet, set this again.<br />
Auto-off function<br />
(When disc, card or tape is selected as the source and the unit is stopped)<br />
The unit turns off to save power if it is left unused <strong>for</strong> 10 minutes.<br />
Press and hold [SLEEP, –AUTO OFF] until “AUTO OFF” is<br />
displayed.<br />
Every time you press the button:<br />
AUTO OFF v SCREEN SAVER (Auto off cancel) (⇒ page 12)<br />
This function does not work if the source is tuner or AUX.<br />
The sleep timer<br />
This timer turns the unit off after a set time.<br />
While enjoying the desired source:<br />
Press [SLEEP, –AUTO OFF] to select the time (minutes).<br />
Every time you press the button:<br />
To cancel the sleep timer<br />
Press [SLEEP, –AUTO OFF] to select “SLEEP OFF”.<br />
To confirm the remaining time<br />
Press [SLEEP, –AUTO OFF] once.<br />
The remaining time is shown <strong>for</strong> about 5 seconds.<br />
You can use the sleep timer in combination with the play/record timer.<br />
Make sure the unit is off be<strong>for</strong>e the play/record timer’s start time.
The play/record timer<br />
You can set the timer to come on at a certain time to wake you up (play<br />
timer) or to record a radio station or from the external source (record<br />
timer).<br />
The play and record timers cannot be used together.<br />
Preparation<br />
1 Switch on the unit and set the clock. (⇒ Setting the time, page 32)<br />
2 For the play timer<br />
Prepare the desired source (CD, <strong>SD</strong>, tape, radio, or external), and set<br />
the volume.<br />
For the record timer<br />
– To record to <strong>SD</strong>:<br />
Check the card’s write-protect switch (⇒ To protect your data, page<br />
7) and insert the card (⇒ page 8).<br />
To record to cassette tape:<br />
Check the cassette’s erasure prevention tabs (⇒ Erasure<br />
prevention, page 25) and insert the tape (⇒ page 19).<br />
– Tune to the radio station (⇒ page 22) or select the external source<br />
(⇒ page 35).<br />
1 Press [CLOCK/TIMER] to select the timer function.<br />
Every time you press the button:<br />
Original display<br />
zPLAY: To set the play timer<br />
zREC: To set the record timer<br />
2 Within 10 seconds:<br />
Press [u 2/REW, i 1/FF] to set the day and<br />
press [LIST/ENTER].<br />
Every time you press the button:<br />
: For the play timer only<br />
3 ON time setting<br />
Press [u 2/REW, i 1/FF] to set the start time<br />
and press [LIST/ENTER].<br />
4 OFF time setting<br />
Press [u 2/REW, i 1/FF] to set the finish time<br />
and press [LIST/ENTER].<br />
The start and finish times are now set.<br />
5 Press [z PLAY/REC] to display the timer indicator.<br />
z PLAY: To turn the play timer on<br />
z REC-<strong>SD</strong>: To turn the record timer on (Recording to <strong>SD</strong>)<br />
z REC-TAPE: To turn the record timer on (Recording to cassete tape)<br />
(The indicator doesn’t appear if the start and finish times or the clock<br />
have not been set.)<br />
6 Press [^] to turn the unit off.<br />
The unit must be off <strong>for</strong> the timers to operate.<br />
• Play timer: Play will start in the set condition at the set time with<br />
volume increasing gradually to the set level.<br />
• Record timer: The unit comes on 30 seconds be<strong>for</strong>e the set time<br />
with the volume muted.<br />
To cancel the timer<br />
Press [z PLAY/REC] to select “TIMER OFF”.<br />
(The timer comes on as set if the timer is on.)<br />
To check the settings<br />
Press [CLOCK/TIMER] while the unit is on to select “z PLAY” or<br />
“z REC”.<br />
To check the settings while the unit is off<br />
Press [CLOCK/TIMER].<br />
If you use the unit after the timers are set<br />
After using, check that the correct disc, card or tape is loaded be<strong>for</strong>e<br />
turning the unit off.<br />
Changing the timer settings<br />
(when the unit is on)<br />
To change the play/record times<br />
Do steps 1, 2, 3, 4 and 6. (⇒ left)<br />
To change the source or volume<br />
1. Press [z PLAY/REC] to clear the timer indicator from the display.<br />
2. Make changes to the source or volume. (⇒ left, Preparation)<br />
3. Do steps 5 and 6. (⇒ left)<br />
To change the timer<br />
Press [z PLAY/REC] to select the desired timer.<br />
Every time the button is pressed:<br />
Note<br />
• If you turn the unit off and on again while a timer is functioning, the finish<br />
time setting will not be activated.<br />
• If you selected AUX as the source, when the timer comes on, the unit<br />
turns on and engages “AUX” as the source. If you want to playback or<br />
record from a connected unit, set that unit’s timer to the same time. (See<br />
the connected unit’s operating instructions.)<br />
Displaying in<strong>for</strong>mation<br />
Show various types of in<strong>for</strong>mation during play or recording.<br />
Press [DISPLAY, –DIMMER].<br />
• Items shown differ depending on the current operation and sound<br />
source.<br />
Dimming the display<br />
Use this when you are going to sleep or any other time you would prefer to<br />
dim the display panel.<br />
Press and hold [DISPLAY, –DIMMER].<br />
To return to the original brightness, press and hold [DISPLAY, –DIMMER]<br />
again.<br />
RQT8046<br />
Convenient functions<br />
33
Convenient functions<br />
34<br />
RQT8046<br />
Using other equipment<br />
Be<strong>for</strong>e connection<br />
• Disconnect the AC power supply cord.<br />
• Turn off all equipment and read the appropriate operating instructions.<br />
• The equipment connections described are examples only.<br />
Using an external unit<br />
You can playback the sound from a video cassette recorder, tape deck,<br />
laser disc player, etc., through this unit’s speakers.<br />
• Peripheral cables and equipment are sold separately unless otherwise<br />
indicated.<br />
Audio cable<br />
• To change the input level (⇒ page 35)<br />
Video cassette recorder<br />
Television<br />
Other antenna connections<br />
Use outdoor antennas if radio reception is poor.<br />
FM outdoor antenna (using a television antenna)<br />
• Disconnect the FM indoor antenna.<br />
• The antenna should be installed by a competent technician.<br />
Rework your outdoor antenna’s 75 Ω coaxial cable as follows.<br />
Antenna plug<br />
(not included)<br />
AM outdoor antenna<br />
AM outdoor antenna<br />
5 m<br />
to 12m<br />
FM outdoor antenna<br />
75 Ω coaxial cable<br />
AM loop<br />
antenna<br />
(included)<br />
• Run a piece of vinyl wire horizontally across a window or other<br />
convenient location.<br />
• Leave the loop antenna connected.<br />
Note<br />
Disconnect the outdoor antenna when the unit is not in use. Do not use<br />
the outdoor antenna during a lightning storm.
Recording from an external unit<br />
Note<br />
You can use <strong>SD</strong> cards with capacities between 8MB and 1GB on this unit.<br />
(⇒ page 6)<br />
Preparation<br />
1 Connect the external unit (⇒ page 34).<br />
2 Turn on the power.<br />
3 Insert the <strong>SD</strong> card (⇒ page 8) or the cassette tape (⇒ page 19).<br />
4 If recording to <strong>SD</strong> card, press [REC MODE] to select XP, SP or LP<br />
mode.<br />
• With satellite and cable sources, tune to the desired broadcasting<br />
station.<br />
Recording to cards<br />
(Normal recording only)<br />
1 Press [TUNER/AUX] to select “AUX”.<br />
2 Press [EDIT MODE] to select a recording method.<br />
MANUAL<br />
SYNCHRO:<br />
TIME MARK: A track mark is automatically added<br />
every 5 minutes.<br />
3 While pressing [*/h REC], press [<strong>SD</strong>, -HI-SPEED<br />
CD q <strong>SD</strong>].<br />
MANUAL/TIME MARK: Recording starts.<br />
SYNCHRO: Goes to recording standby.<br />
4 Start play on the external source.<br />
When you have selected “SYNCHRO”, recording starts when a signal<br />
from the sound source is received<br />
Recording to cassette tapes<br />
(Normal recording only)<br />
Recording starts automatically when you<br />
start play on the connected equipment.<br />
1 Press [TUNER/AUX] to select “AUX”.<br />
2 While pressing [*/h REC], press [TAPE] to start<br />
recording.<br />
3 Start play on the external source.<br />
(For details, refer to the external unit’s operating instructions.)<br />
To change the input level<br />
Be<strong>for</strong>e recording external sources with low volume to a <strong>SD</strong> card or a<br />
cassette tape<br />
1 Start play on the external source.<br />
2 Press [TUNER/AUX] to select “AUX”.<br />
3 Press [PLAY MODE, –REPEAT].<br />
HIGH ↔ NORMAL<br />
Note<br />
• There may be an error in the recording time depending on the sound<br />
source and the recording method.<br />
• When you have selected “SYNCHRO”, recording pauses if a 3-second<br />
silence is detected, then starts again when play starts. A track mark is<br />
added at the point recording starts.<br />
• Depending on the type of tracks being recorded, the beginning of tracks<br />
may be cut off or recording of tracks with low volume may stop partway<br />
when you have selected “SYNCHRO” mode. Select “MANUAL” if this<br />
happens.<br />
• Recording automatically stops when the end of the side of the tape<br />
being recorded to is reached.<br />
RQT8046<br />
Convenient functions<br />
35
Convenient functions<br />
36<br />
RQT8046<br />
Even more fun with <strong>SD</strong><br />
You can record music to <strong>SD</strong> card on this unit and then play it on a <strong>SD</strong> audio player or save it to computer. You can also write music saved on your computer<br />
to <strong>SD</strong> card and play it on this unit or other equipment like a <strong>SD</strong> audio player.<br />
• You can use <strong>SD</strong> cards with capacities between 8MB and 1GB on this unit. (⇒ page 6)<br />
Listening on portable equipment<br />
You can enjoy playback on an AAC compatible <strong>SD</strong> audio player, etc.<br />
(⇒ page 39, Additional accessories)<br />
<strong>SD</strong> Multi Camera<br />
(D-snap)<br />
Note<br />
• Although your television, DVD recorder or digital camera may have a <strong>SD</strong><br />
card slot, it must support the <strong>SD</strong> audio <strong>for</strong>mat to enjoy playback.<br />
• Compatibility with products from other manufacturers<br />
Confirm that the <strong>SD</strong> audio player can play the AAC <strong>for</strong>mat.<br />
Using a computer<br />
You can save <strong>SD</strong> tracks (audio data) to your computer, edit titles, make<br />
and edit playlists and write tracks on your computer to a <strong>SD</strong> card by using<br />
the <strong>Panasonic</strong> <strong>SD</strong>-Jukebox software (included).<br />
You need the <strong>Panasonic</strong> <strong>SD</strong>-Jukebox software and a Windows computer<br />
with a CPRM (Content Protection <strong>for</strong> Recordable Media) compatible <strong>SD</strong><br />
card slot. [You need a <strong>SD</strong> Memory CARD Reader Writer (not included) if<br />
your computer does not have a <strong>SD</strong> card slot or the <strong>SD</strong> card slot is not<br />
CPRM compatible.]<br />
<strong>SD</strong> card<br />
<strong>SD</strong> Audio Player<br />
Install <strong>SD</strong>-Jukebox (included).<br />
(⇒ right)<br />
A <strong>SD</strong> Memory CARD Reader<br />
Writer (not included) may be<br />
necessary.<br />
<strong>SD</strong>-Jukebox<br />
<strong>SD</strong>-Jukebox is a software program <strong>for</strong> recording and managing music<br />
CDs on your PC and transferring recorded tracks to a <strong>SD</strong> Memory Card<br />
so you can enjoy the music on your player.<br />
Important <strong>SD</strong>-Jukebox usage in<strong>for</strong>mation<br />
<strong>SD</strong>-Jukebox incorporates copyright protection technology using<br />
encryption technology in order to protect copyrights, to ensure the healthy<br />
development of music culture, and to protect the rights of valid<br />
purchasers.<br />
• Unique in<strong>for</strong>mation pertaining to your PC’s processor and hard disk<br />
drive is used in the encryption process. There<strong>for</strong>e, if either the<br />
processor or hard disk drive is replaced, previously created music data<br />
will no longer be available <strong>for</strong> use.<br />
• Depending on your computer system, you may experience problems<br />
such as being unable to record or use recorded music data. Please note<br />
that <strong>Panasonic</strong> is in no way liable <strong>for</strong> any music data you lose, or <strong>for</strong> any<br />
other direct or indirect damages.<br />
– <strong>SD</strong>-Jukebox cannot work with MMC (MultiMediaCard).<br />
Installing <strong>SD</strong>-Jukebox<br />
<strong>SD</strong>-Jukebox can be found on the included CD-ROM. Follow these steps to<br />
install it.<br />
1 Turn on the computer and start Windows.<br />
2 Insert the included CD-ROM into the CD-ROM<br />
drive.<br />
The installer program starts automatically.<br />
3 Follow the on-screen instructions.<br />
4 Click on “Finish”.<br />
The <strong>SD</strong>-Jukebox icon appears on the desktop.<br />
Note<br />
If the installation does not start automatically on your computer, follow<br />
these steps: From the Windows “start” menu, choose “Run”. The “Run”<br />
dialog box will open. Type “#:\autorun.exe” and click on “OK”. (#: Use the<br />
correct CD-ROM drive ID.)<br />
Important: The Serial No. included with the CD is required <strong>for</strong> the<br />
installation of this software onto your PC. Please file the Serial No. in a<br />
safe place in case the software needs to be reinstalled.<br />
Using the PDF <strong>Operating</strong> Instructions <strong>for</strong> <strong>SD</strong>-Jukebox<br />
The operating instructions <strong>for</strong> <strong>SD</strong>-Jukebox are installed along with the<br />
application as a PDF.<br />
To open the PDF from the “start” menu, select “All Programs” è<br />
“<strong>Panasonic</strong>” è “<strong>SD</strong>-Jukebox V5” è “<strong>SD</strong>-Jukebox V5 <strong>Operating</strong><br />
Instructions”.<br />
• You will need Adobe Acrobat Reader to read the file containing the<br />
operating instructions.<br />
• Install Adobe Acrobat Reader from the included <strong>SD</strong>-Jukebox CD-ROM if<br />
you do not have it or if your version cannot correctly open the file.<br />
From the “start” menu, select “Run...”, then select the .exe file <strong>for</strong><br />
installing Acrobat Reader from the CD-ROM.<br />
Starting <strong>SD</strong>-Jukebox<br />
Double click on the <strong>SD</strong>-Jukebox icon on the desktop.<br />
<strong>SD</strong>-Jukebox starts and the main window is shown.<br />
For your reference<br />
If the icon is not on the desktop, from the “start” menu, select “All<br />
Programs” è “<strong>Panasonic</strong>” è “<strong>SD</strong>-Jukebox V5” è “<strong>SD</strong>-Jukebox V5”.
<strong>System</strong> Requirements<br />
Personal computer IBM PC/AT compatible personal computer<br />
OS Windows ® 2000 Professional SP2, 3, 4<br />
Windows ® XP Home Edition/Professional, or<br />
SP1, 2<br />
CPU Intel ® Pentium ® III 500 MHz or higher<br />
RAM 256 MB or more<br />
Display High Color (16 bit) or more<br />
Desktop resolution of 800 x 600 pixels or more<br />
(1024 x 768 pixels or more recommended)<br />
Free hard disk space 100 MB or more<br />
Necessary software DirectX ® 8.1 or later<br />
Sound Windows compatible sound device<br />
Drive CD-ROM drive<br />
A CD-ROM drive capable of digital recording is<br />
required. Four-speed or higher is recommended.<br />
(Recording can not work properly with CD-ROM<br />
drives connected through an IEEE1394<br />
connection.)<br />
Interface USB port (When devices are connected through<br />
USB hub or by using USB extension cable,<br />
operation is not guaranteed.)<br />
Other requirements If you are using the CDDB function, then an<br />
Internet connection is also required.<br />
• Even if the system requirements mentioned in these operating<br />
instructions are fulfilled, some personal computers can not be used.<br />
• This software can not be used on Macintosh.<br />
• Operation is not guaranteed when used on Windows OSs except those<br />
above.<br />
• Operation on an upgraded OS is not guaranteed.<br />
• Operation on an OS other than the one pre-installed is not guaranteed.<br />
• Multi-boot environment is not supported.<br />
• Only available when the user is logged in as the system administrator.<br />
• This software may not run properly on user-built computers.<br />
• This software can not be used on 64-bit OS.<br />
• This software can not play and record music CDs that do<br />
not have the disc mark (⇒ right) on the disc label.<br />
• This system requirements are not guaranteed in the case<br />
that any other application runs.<br />
• Depending on your computer system, you may experience problems<br />
such as being unable to record or use recorded music data. Please note<br />
that Matsushita is in no way liable <strong>for</strong> any music data you lose, or <strong>for</strong> any<br />
other direct or indirect damages.<br />
Connecting <strong>SD</strong> Memory Cards<br />
Follow these steps to connect the <strong>SD</strong> Memory CARD Reader Writer (not<br />
included) to the computer and insert <strong>SD</strong> Memory Cards.<br />
1 Turn on the computer and start Windows.<br />
2 Connect the <strong>SD</strong> Memory CARD Reader Writer to<br />
the computer.<br />
Make sure the <strong>SD</strong> Memory CARD Reader Writer is recognized and<br />
displayed in Windows Explorer or your file browser. (If it is not<br />
displayed, refer to the PDF <strong>Operating</strong> Instructions <strong>for</strong> <strong>SD</strong>-Jukebox.)<br />
3 Check the orientation of the <strong>SD</strong> Memory Card and<br />
insert it in the <strong>SD</strong> Memory CARD Reader Writer.<br />
Be careful to insert <strong>SD</strong> Memory Card in the right direction. Cards<br />
inserted incorrectly may be damaged or may damage the <strong>SD</strong> Memory<br />
CARD Reader Writer.<br />
Removing <strong>SD</strong> Memory Cards<br />
1 Be<strong>for</strong>e removing <strong>SD</strong> Memory Cards, make sure the<br />
cards are not being accessed by the <strong>SD</strong> Memory<br />
CARD Reader Writer.<br />
2 Double-click [My Computer] and then right-click on<br />
the [Removable Disk] icon <strong>for</strong> the <strong>SD</strong> Memory Card.<br />
3 Click [Eject].<br />
4 Remove <strong>SD</strong> Memory Cards.<br />
Note<br />
• Do not remove <strong>SD</strong> Memory Cards during access by the <strong>SD</strong> Memory<br />
CARD Reader Writer.<br />
• Operation of <strong>SD</strong> Memory CARD Reader Writers is not ensured under<br />
the following conditions.<br />
– If the <strong>SD</strong> Memory CARD Reader Writer is equipped with an adaptor<br />
<strong>for</strong> other types of <strong>SD</strong> Memory Cards<br />
– If connected via a USB hub or USB extension cord<br />
• Using <strong>SD</strong>-Jukebox to check out tracks to <strong>SD</strong> Memory Cards requires<br />
<strong>SD</strong> Memory CARD Reader Writers that support data security (copyright<br />
protection functions). Operation is not ensured with third-party <strong>SD</strong><br />
Memory CARD Reader Writers.<br />
• Handling precautions <strong>for</strong> the <strong>SD</strong> Memory CARD Reader Writer<br />
– Do not wet, drop, or expose the <strong>SD</strong> Memory CARD Reader Writer to<br />
impacts.<br />
– Do not use or store in locations directly exposed to sunlight, a heat<br />
vent, or a heating appliance.<br />
– Do not disassemble or modify.<br />
– Do not insert <strong>for</strong>eign objects into the slot.<br />
• This unit is compliant with <strong>SD</strong> audio standards and is compatible with<br />
<strong>SD</strong> audio recording and playback. However, operation compatibility with<br />
all <strong>SD</strong> audio units is not guaranteed.<br />
RQT8046<br />
Convenient functions<br />
37
Reference<br />
38<br />
RQT8046<br />
Troubleshooting guide<br />
Be<strong>for</strong>e requesting service, make the following checks. If you are in doubt about some of the check points, or if the remedies indicated in the chart do not<br />
solve the problem, refer to the “Customer Services Directory” on page 40.<br />
Reference pages are shown in parentheses.<br />
Playing back<br />
No sound. Turn the volume up.<br />
The speaker cords may be shorted. Turn the unit off, check and correct the connections and turn the unit on.<br />
(⇒ page 11)<br />
Sound is unfixed, reversed or<br />
comes from one speaker only.<br />
Check the speaker connections. (⇒ page 11)<br />
Humming heard during play. An AC power supply cord or fluorescent light is near the cables. Keep other appliances and leads away from this<br />
unit’s cables.<br />
Poor quality sound. Clean the heads of the cassette tapes. (⇒ page 41)<br />
Discs with WMA/MP3 data are You have to close sessions on multi-session discs be<strong>for</strong>e play.<br />
not read correctly.<br />
Each session on multi-session discs must be more than approximately 5 MB (approximately two 3-minute songs).<br />
The display is wrong or play The disc may be upside down.<br />
won’t start.<br />
Wipe the disc.<br />
Replace the disc if it is scratched, warped, or non-standard.<br />
Condensation may have <strong>for</strong>med inside the unit due to a sudden change in temperature. Wait about an hour <strong>for</strong> it<br />
to clear and try again.<br />
You haven't inserted a card correctly; insert it correctly. (⇒ page 8)<br />
The lid of the <strong>SD</strong> card slot is not closed; close it securely.<br />
You have inserted a card other than a <strong>SD</strong> card. Insert <strong>SD</strong> cards only.<br />
The total number of tracks<br />
displayed differs each time the<br />
same disc is inserted.<br />
Unusual sound is heard.<br />
The disc may be scratched, or its data may be defective. Replace the disc.<br />
CD-RW cannot be read.<br />
Radio<br />
The disc was incompletely <strong>for</strong>matted. Use the recording equipment to fully <strong>for</strong>mat the disc be<strong>for</strong>e recording.<br />
Noise is heard.<br />
The stereo indicator flickers or<br />
doesn’t light.<br />
Sound is distorted.<br />
Use an outdoor antenna. (⇒ page 34)<br />
A beat sound is heard. Turn the TV off or separate it from the unit.<br />
A low hum is heard during AM<br />
broadcast.<br />
Recording<br />
Separate the antenna from other cables and cords.<br />
Recording is not possible. If the erasure prevention tabs have been removed, cover the holes with adhesive tape. (⇒ page 25)<br />
The card’s write protect switch has been moved to the LOCK position. Unlock the switch when you want to record<br />
or edit. (⇒ page 7)<br />
There is skipping of sound or There may be scratches or fingerprints on the CD. Replace the CD if it is scratched.<br />
noise recorded during high- These problems can be relieved in some cases by carefully cleaning the CD and then recording it at normal<br />
speed recording to <strong>SD</strong>. speed.<br />
Cannot record from CD-R/RW. Depending on the condition of the disc, you may not be able to record from CD-R/RW discs.<br />
Cannot use the 5CD AUTO You cannot use 5CD AUTO REC with WMA and MP3 files. Select another recording method.<br />
REC function.<br />
Depending on the condition of the disc, you may not be able to use 5CD AUTO REC.<br />
Cannot high-speed record.<br />
Others<br />
You cannot use high-speed recording to record the same CD <strong>for</strong> a second time within 74 minutes of finishing the<br />
first high-speed recording. Wait 74 minutes or record the CD at normal speed.<br />
The display lights up when the<br />
unit is turned off.<br />
Turn the demo function off. (⇒ page 10)<br />
Remote control doesn’t work. Check that the batteries are inserted correctly. (⇒ page 9)<br />
Replace the batteries if they are depleted.<br />
Other products respond to the Change the remote control code on this unit to stop other products responding.<br />
unit's remote control.<br />
1 Press [TUNER/AUX] on the main unit to select “AUX”.<br />
2 While pressing [TUNER/AUX] on the main unit, press the numbered button [1] or [2] on the remote control <strong>for</strong><br />
2 seconds. The main unit code is changed.<br />
3 While pressing [LIST/ENTER] on the remote control, press the numbered button you selected in step 2 <strong>for</strong> 2<br />
seconds. The remote control code is changed.<br />
The computer does not The computer will not respond if the <strong>SD</strong> card slot is not CPRM (Content Protection <strong>for</strong> Recordable Media)<br />
respond when a <strong>SD</strong> is inserted<br />
in the <strong>SD</strong> card slot.<br />
compatible.<br />
Cannot play <strong>SD</strong> on other<br />
players or mobile phones.<br />
The other equipment must be AAC compatible.<br />
The picture on the TV set The location and orientation of the antenna are incorrect. If you are using an indoor antenna, change to an<br />
nearby disappears or stripes outdoor antenna. (⇒ page 34)<br />
appear on the screen.<br />
The TV antenna wire is too close to the unit. Separate the antenna wire of the TV set from the unit.
Unit displays<br />
“CAN’T EDIT” You cannot edit or enter titles on <strong>SD</strong> during play.<br />
“CARD FULL” There is no space on the <strong>SD</strong> card. Erase unneeded tracks (⇒ page 28) or record with another card.<br />
“CARD LOCKED” You have inserted a <strong>SD</strong> card the unit cannot play or record on. Insert a compatible card (⇒ page 6).<br />
“CARD PROTECTED” The write protect switch has been moved to the LOCK position.Unlock the switch when you want to record or edit.<br />
“CHECK CARD” You inserted an un<strong>for</strong>matted card or a card that was not properly <strong>for</strong>matted. Format the card (the contents are<br />
erased) (⇒ page 29) or insert another card.<br />
“EMERGENCY STOP” A problem has occurred. Reinsert the card and try the operation again.<br />
“F ” “H ”<br />
( stands <strong>for</strong> a number.)<br />
Trouble may have occurred.<br />
Reset procedure:<br />
Press [POWER 8] to switch the unit to standby mode and then back to ON. If the service numbers fail to clear,<br />
note the service number and contact a qualified service person.<br />
“MEMORY FULL<br />
ERASE TITLE”<br />
You cannot enter more than 100 CD titles. Delete titles you no longer need (⇒ page 31) and try again.<br />
“NO PLAY” The unit cannot play this track. It skips the track and continues play.<br />
There was a problem reading WMA/MP3.<br />
If there is a large amount of JPEG data etc. within a WMA/MP3 file, sound may not be output and play may not be<br />
possible.<br />
“NO REMAIN” You cannot record all of the discs if there is not enough space on the <strong>SD</strong>. Erase unneeded tracks (⇒ page 28) or<br />
record with another <strong>SD</strong>.<br />
“NO TRACK” There are no tracks recorded on the <strong>SD</strong>.<br />
“NO WMA/MP3” There are no WMA/MP3 on the CD-ROM so the unit cannot play it.<br />
“NOT MP3 ERROR” You are trying to play a file type that the unit cannot play. It skips the track and continues play.<br />
“PGM FULL” You are trying to program more than 24 tracks.<br />
“PLAYBACK CARD” You are trying to record or edit a play-only <strong>SD</strong> card. Replace it with a recordable card.<br />
“READ ERROR” The unit was trying to play a WMA/MP3 track, but an error occurred. It skips the track and continues play.<br />
“REMOTE MODE<br />
( is either 1 or 2)<br />
”<br />
The remote control and main unit are using different codes. Change the remote control’s code. Press and hold<br />
[LIST/ENTER] and [1] or [2] (the number shown on the display) <strong>for</strong> at least 2 seconds.<br />
“SELECT OVER” The maximum number of tracks in playlist (99) has been reached. Erase unneeded tracks (⇒ page 29).<br />
You are trying to erase more than 24 tracks.<br />
“SCMS CAN’T COPY” You cannot record from video CDs or CD-ROM to <strong>SD</strong>. Use an audio CD.<br />
You are trying to record digitally from a CD-R or CD-RW that is protected by SCMS (⇒ page 6). Press and hold<br />
[EDIT MODE] until “ANALOG- REC” is displayed.<br />
“TAPE PROTECTED” The cassette’s erasure prevention tab has been removed. Cover the hole where the tab was with adhesive tape.<br />
“TITLE FULL” You cannot enter any more characters <strong>for</strong> this track’s title. Make the title shorter.<br />
“TOC ERROR” There was a problem reading WMA/MP3. Turn the unit OFF and then back to ON, and reinsert the disc.<br />
“TOC READING” Play will start after the TOC in<strong>for</strong>mation from CD has been read.<br />
“TRACK FULL” The maximum number of tracks (998) has been reached.<br />
Erase unneeded tracks (⇒ page 28) or use another card.<br />
“TRACK PROTECTED” This track is protected. The unit skips the track and continues play.<br />
“--:--” You plugged the AC power supply cord in <strong>for</strong> the first time or there was a power failure recently. Set the time.<br />
(⇒ page 32)<br />
Additional accessories<br />
The product numbers are correct as of February 2005.<br />
<strong>SD</strong> Multi Camera<br />
<strong>SD</strong> Audio Player<br />
<strong>SD</strong> Memory Card<br />
Product name Product number<br />
SV-AS3, SV-AV50, SV-AV25 etc.<br />
SV-<strong>SD</strong>100V, SV-<strong>SD</strong>80 etc.<br />
1GB : RP-<strong>SD</strong>K01GU1A<br />
512MB : RP-<strong>SD</strong>K512U1A<br />
256MB : RP-<strong>SD</strong>H256U1A, RP-<strong>SD</strong>256BU1A<br />
128MB : RP-<strong>SD</strong>128BU1A<br />
64MB : RP-<strong>SD</strong>064BPPA<br />
32MB : RP-<strong>SD</strong>032BPPA<br />
RQT8046<br />
Reference<br />
39
Reference<br />
40<br />
RQT8046<br />
Limited Warranty<br />
<strong>Panasonic</strong> Consumer Electronics Company,<br />
Division of <strong>Panasonic</strong> Corporation of North America<br />
One <strong>Panasonic</strong> Way Secaucus, New Jersey 07094<br />
Limited Warranty Coverage<br />
If your product does not work properly because of a defect in materials or<br />
workmanship, <strong>Panasonic</strong> Consumer Electronics Company or <strong>Panasonic</strong> Puerto Rico,<br />
Inc. (collectively referred to as “the warrantor”) will, <strong>for</strong> the length of the period<br />
indicated on the chart below, which starts with the date of original purchase (“warranty<br />
period”), at its option either (a) repair your product with new or refurbished parts, or (b)<br />
replace it with a new or a refurbished product. The decision to repair or replace will be<br />
made by the warrantor.<br />
Product or Part Name Parts Labor<br />
Audio <strong>Products</strong> (except items listed below)<br />
USB Reader-Writer, Personal Computer Card<br />
One (1) year One (1) year<br />
Adapters<br />
(in exchange <strong>for</strong> defective item)<br />
One (1) year Not Applicable<br />
Accessories: Headphones, Cartridges,<br />
Microphones, Adapters<br />
Ninety (90) days Ninety (90) days<br />
Rechargeable Batteries (in exchange <strong>for</strong><br />
defective item)<br />
Ten (10) days Not Applicable<br />
<strong>SD</strong> Memory Cards, Rechargeable Battery<br />
Packs (in exchange <strong>for</strong> defective item)<br />
Ninety (90) days Not Applicable<br />
During the “Labor” warranty period there will be no charge <strong>for</strong> labor. During the “Parts”<br />
warranty period, there will be no charge <strong>for</strong> parts. You must carry-in or mail-in your<br />
product during the warranty period. If non-rechargeable batteries are included, they<br />
are not warranted. This warranty only applies to products purchased and serviced in<br />
the United States or Puerto Rico. This warranty is extended only to the original<br />
purchaser of a new product which was not sold “as is”. A purchase receipt or other<br />
proof of the original purchase date is required <strong>for</strong> warranty service.<br />
Customer Services Directory<br />
Accessory Purchases<br />
<strong>Panasonic</strong> Puerto Rico, Inc.<br />
Ave. 65 de Infantería, Km. 9.5<br />
San Gabriel Industrial Park, Carolina, Puerto Rico 00985<br />
<strong>Panasonic</strong>/Technics Audio <strong>Products</strong><br />
Limited Warranty<br />
Carry-In or Mail-In Service<br />
For Carry-In or Mail-In Service in the United States call 1-800-211-PANA (1-800-211-<br />
7262) or visit <strong>Panasonic</strong> web site: http://www.panasonic.com<br />
For assistance in Puerto Rico call <strong>Panasonic</strong> Puerto Rico, inc. (787)-750-4300 or fax<br />
(787)-768-2910.<br />
Limited Warranty Limits And Exclusions<br />
This warranty ONLY COVERS failures due to defects in materials or workmanship, and DOES<br />
NOT COVER normal wear and tear or cosmetic damage. The warranty ALSO DOES NOT COVER<br />
damages which occurred in shipment, or failures which are caused by products not supplied by<br />
the warrantor, or failures which result from accidents, misuse, abuse, neglect, mishandling,<br />
misapplication, alteration, faulty installation, set-up adjustments, misadjustment of consumer<br />
controls, improper maintenance, power line surge, lightning damage, modification, or commercial<br />
use (such as in a hotel, office, restaurant, or other business), rental use of the product, service by<br />
anyone other than a Factory Servicenter or other Authorized Servicer, or damage that is<br />
attributable to acts of God.<br />
THERE ARE NO EXPRESS WARRANTIES EXCEPT AS LISTED UNDER “LIMITED<br />
WARRANTY COVERAGE”. THE WARRANTOR IS NOT LIABLE FOR INCIDENTAL<br />
OR CONSEQUENTIAL DAMAGES RESULTING FROM THE USE OF THIS<br />
PRODUCT, OR ARISING OUT OF ANY BREACH OF THIS WARRANTY. (As<br />
examples, this excludes damages <strong>for</strong> lost time, travel to and from the servicer, loss of<br />
media or images, data or other memory content. The items listed are not exclusive,<br />
but are <strong>for</strong> illustration only.) ALL EXPRESS AND IMPLIED WARRANTIES,<br />
INCLUDING THE WARRANTY OF MERCHANTABILITY, ARE LIMITED TO THE<br />
PERIOD OF THE LIMITED WARRANTY.<br />
Some states do not allow the exclusion or limitation of incidental or consequential damages,<br />
or limitations on how long an implied warranty lasts, so the exclusions may not apply to you.<br />
This warranty gives you specific legal rights and you may also have other rights which vary<br />
from state to state. If a problem with this product develops during or after the warranty<br />
period, you may contact your dealer or Servicenter. If the problem is not handled to your<br />
satisfaction, then write to the warrantor’s Consumer Affairs Department at the addresses<br />
listed <strong>for</strong> the warrantor.<br />
PARTS AND SERVICE WHICH ARE NOT COVERED BY THIS LIMITED<br />
WARRANTY ARE YOUR RESPONSIBILITY.<br />
Obtain Product In<strong>for</strong>mation and <strong>Operating</strong> Assistance; locate your nearest Dealer or Servicenter; purchase Parts and<br />
Accessories; or make Customer Service and Literature requests by visiting our Web Site at:<br />
http://www.panasonic.com/consumersupport<br />
or, contact us via the web at:<br />
http://www.panasonic.com/contactinfo<br />
You may also contact us directly at:<br />
1-800-211-PANA (7262),<br />
Monday-Friday 9 am-9 pm; Saturday-Sunday 10 am-7 pm, EST.<br />
For hearing or speech impaired TTY users, TTY: 1-877-833-8855<br />
Purchase Parts, Accessories and Instruction Books online <strong>for</strong> all <strong>Panasonic</strong> <strong>Products</strong> by visiting our Web Site at:<br />
http://www.pasc.panasonic.com<br />
or, send your request by E-mail to: npcparts@us.panasonic.com<br />
You may also contact us directly at:<br />
1-800-332-5368 (Phone) 1-800-237-9080 (Fax Only) (Monday – Friday 9 am to 8 pm, EST.)<br />
<strong>Panasonic</strong> Services Company<br />
20421 84th Avenue South, Kent, WA 98032<br />
(We Accept Visa, MasterCard, Discover Card, American Express, and Personal Checks)<br />
For hearing or speech impaired TTY users, TTY: 1-866-605-1277<br />
Product Repairs Centralized Factory Servicenter<br />
SV-<strong>SD</strong>90 only<br />
MAIL TO:<br />
Service in Puerto Rico<br />
<strong>Panasonic</strong> Services Company<br />
410B Airport Road,<br />
Elgin, IL 60123-7847<br />
Attention: <strong>SD</strong> Repair<br />
Please carefully pack and ship, prepaid and insured, to the Elgin Centralized Factory Servicenter.<br />
Customer’s in Puerto Rico, please ship or carry in to location below (“Service in Puerto Rico”)<br />
<strong>Panasonic</strong> Puerto Rico, Inc.<br />
Ave. 65 de Infantería, Km. 9.5, San Gabriel Industrial Park, Carolina, Puerto Rico 00985<br />
Phone (787)750-4300, Fax (787)768-2910
Product Service<br />
1. Damage requiring service—The unit should be serviced by qualified service personnel if:<br />
(a) The AC power supply cord or the plug has been damaged; or<br />
(b) Objects or liquids have gotten into the unit; or<br />
(c) The unit has been exposed to rain; or<br />
(d) The unit does not operate normally or exhibits a marked change in per<strong>for</strong>mance; or<br />
(e) The unit has been dropped or the cabinet damaged.<br />
2. Servicing—Do not attempt to service the unit beyond that described in these operating instructions. Refer all other servicing to<br />
authorized servicing personnel.<br />
3. Replacement parts—When parts need replacing ensure the servicer uses parts specified by the manufacturer or parts that have<br />
the same characteristics as the original parts. Unauthorized substitutes may result in fire, electric shock, or other hazards.<br />
4. Safety check—After repairs or service, ask the servicer to per<strong>for</strong>m safety checks to confirm that the unit is in proper working<br />
condition.<br />
The servicer will require all components to service your system.<br />
There<strong>for</strong>e, should service ever be necessary, be sure to bring the entire system.<br />
Product in<strong>for</strong>mation<br />
For product in<strong>for</strong>mation or assistance with product operation:<br />
In the U.S.A., refer to “Customer Services Directory” on page 40.<br />
Maintenance<br />
To clean this unit, wipe with a soft, dry cloth.<br />
• Never use alcohol, paint thinner or benzine to clean this unit.<br />
• Be<strong>for</strong>e using chemically treated cloth, read the instructions that came<br />
with the cloth carefully.<br />
For a cleaner, crisper sound (cassette deck)<br />
Clean the heads regularly to assure good quality playback and recording.<br />
Use a cleaning tape (not included).<br />
When moving the unit<br />
1 Remove all discs, card, and tape.<br />
2 Press [POWER ^/I] on the main unit to turn it off.<br />
3 Disconnect the AC power supply cord after “GOODBYE”<br />
disappears from the display.<br />
RQT8046<br />
Reference<br />
41
Reference<br />
42<br />
RQT8046<br />
Specifications<br />
n AMPLIFIER SECTION<br />
FTC output power both channels driven<br />
10 % total harmonic distortion<br />
60 Hz to 3 kHz (Low channel) 35 W per channel (6 Ω)<br />
3 kHz to 16 kHz (High channel) 35 W per channel (6 Ω)<br />
Total Bi-Amp power 70 W per channel<br />
RMS output power both channels driven<br />
10 % total harmonic distortion<br />
1 kHz (Low channel) 40 W per channel (6 Ω)<br />
8 kHz (High channel) 40 W per channel (6 Ω)<br />
Total Bi-Amp power 80 W per channel<br />
Output impedance<br />
HEADPHONE 16 Ω to 32 Ω<br />
n FM TUNER SECTION<br />
Frequency range 87.9 MHz to 107.9 MHz (Default) (200 kHz steps)<br />
87.5 MHz to 108.0 MHz (100 kHz steps)<br />
Sensitivity 1.50 µV (IHF)<br />
S/N 26 dB 1.70 µV<br />
Antenna terminals 75 Ω (unbalanced)<br />
Preset stations 15<br />
n AM TUNER SECTION<br />
Frequency range 520 kHz to 1710 kHz (10 kHz steps)<br />
Sensitivity S/N 20 dB at 1000 kHz 560 µV/m<br />
Preset stations 15<br />
n CASSETTE DECK SECTION<br />
Track system 4-track, 2-channel<br />
Heads<br />
Record/playback Solid permalloy head<br />
Erasure Double gap ferrite head<br />
Motor DC servo motor<br />
Recording system AC bias 100 kHz<br />
Erase system AC erase 100 kHz<br />
Tape speed 4.8 cm/s (1-7/8 ips)<br />
Overall frequency response (+3, -6 dB) at DECK OUT<br />
Normal 35 Hz to 14 kHz<br />
Wow and flutter 0.10 % (WRMS)<br />
Fast <strong>for</strong>ward and rewind time<br />
Approx. 120 seconds with C-60 cassette tape<br />
n CD SECTION<br />
Disc CD, MP3, WMA, CD-R/RW, and HighMAT<br />
8 cm/12 cm<br />
Sampling frequency<br />
CD 44.1 kHz<br />
MP3/WMA 32 kHz, 44.1 kHz, 48 kHz<br />
Bit rate<br />
MP3 32 kbps to 320 kbps<br />
WMA 40 kbps to 192 kbps<br />
Decoding 16 bit linear<br />
Pickup<br />
Beam source Semiconductor laser<br />
Wavelength 780 nm<br />
Number of channels <strong>Stereo</strong><br />
Frequency response 20 Hz to 20 kHz (+1, -2 dB)<br />
Wow and flutter Below measurable limit<br />
Digital filter 8 fs<br />
D/A converter MASH (1 bit DAC)<br />
n <strong>SD</strong> SECTION<br />
Sampling frequency 32 kHz (LP), 44.1 kHz (SP, XP)<br />
Coding system <strong>SD</strong> audio playback (AAC/MP3/WMA)<br />
<strong>SD</strong> audio record (AAC)<br />
Number of channels 2 channel (stereo)<br />
n OTHER<br />
CDè<strong>SD</strong> Recording speed: Maximum 4 times (LP)<br />
n SPEAKER SECTION (Front speakers SB-PM71)<br />
Type 3 way, 3 speaker system (Bass-Ref)<br />
Speaker units<br />
Woofer 10 cm (4”) cone type<br />
Tweeter 6 cm (2 3 /8”) cone type<br />
S-tweeter Piezo type<br />
Impedance<br />
High 6 Ω<br />
Low 6 Ω<br />
Input power (IEC MAX)<br />
High 40 W<br />
Low 40 W<br />
Output sound pressure 84 dB/W (1.0 m)<br />
Crossover frequency 3 kHz, 10 kHz<br />
Frequency range 50 Hz to 50 kHz (–16 dB)<br />
60 Hz to 45 kHz (–10 dB)<br />
Dimensions (WxHxD) 145 mm x 250 mm x 232 mm<br />
(5 23 /32” x 9 27 /32” x 9 5 /32”)<br />
Mass 2.4 kg (5.3 lbs)<br />
n GENERAL<br />
Power supply AC 120 V, 60 Hz<br />
Power consumption 141 W<br />
Dimensions (WxHxD) 175 mm x 249.5 mm x 379.6 mm<br />
(6 29 /32” x 9 27 /32” x 14 31 /32”)<br />
Mass 5.8 kg (12.8 lbs)<br />
Power consumption in standby mode Approx. 0.3 W<br />
Note<br />
1. Specifications are subject to change without notice.<br />
Mass and dimensions are approximate.<br />
2. Total harmonic distortion is measured by digital spectrum analyzer.
• <strong>SD</strong> logo is a trademark.<br />
• Microsoft, Microsoft logo, Windows, Windows<br />
logo, Windows NT, Windows Media and DirectX<br />
are either trademarks or registered trademarks<br />
of Microsoft Corporation in the United States and<br />
other countries.<br />
• WMA is a compression <strong>for</strong>mat developed by<br />
Microsoft Corporation. It achieves the same<br />
sound quality as MP3 with a file size that is<br />
smaller than that of MP3.<br />
• MPEG Layer-3 audio decoding technology licensed from Fraunhofer IIS<br />
and Thomson multimedia.<br />
• Licensed AAC Patents (U.S. patent numbers);<br />
08/937,950 5,394,473 5,579,430 5,481,614 5,299,238 5,581,654<br />
5848391 5,583,962 08/678,666 5,592,584 5,299,239 05-183,988<br />
5,291,557 5,274,740 98/03037 5,781,888 5,299,240 5,548,574<br />
5,451,954 5,633,981 97/02875 08/039,478 5,197,087 08/506,729<br />
5 400 433 5 297 236 97/02874 08/211,547 5,490,170 08/576,495<br />
5,222,189 4,914,701 98/03036 5,703,999 5,264,846 5,717,821<br />
5,357,594 5,235,671 5,227,788 08/557,046 5,268,685 08/392,756<br />
5 752 225 07/640,550 5,285,498 08/894,844 5,375,189<br />
• Portions of this product are protected under copyright law and are<br />
provided under license by ARIS/SOLANA/4C.<br />
• Macintosh is a registered trademark of Apple Computer, Inc. of the U.S.<br />
in both the United States and other countries.<br />
• IBM and PC/AT are registered trademarks of International Business<br />
Machines Corporation of the U.S.<br />
• Intel, Pentium and Celeron are registered trademarks or trademarks of<br />
Intel Corporation in the United States and other countries.<br />
• CD and music-related data from Gracenote, Inc., copyright© 2000-2003<br />
Gracenote. Gracenote CDDB ® Client Software, copyright© 2000-2003<br />
Gracenote. This product and service may practice one or more of the<br />
following U.S. Patents: #5,987,523; #6,061,680; #6,154,773,<br />
#6,161,132, #6,230,192, #6,230,207, #6,240,459, #6,330,593, and<br />
other patents issued or pending.<br />
• Gracenote ® and CDDB ® are registered trademarks of GraceNote. The<br />
Gracenote logo and logotype, the Gracenote CDDB logo and logotype,<br />
and the “Powered by Gracenote” logo are trademarks of Gracenote.<br />
• Adobe ® , the Adobe logos, Acrobat ® , and Acrobat ® Reader are<br />
trademarks or registered trademarks of Adobe <strong>System</strong>s Incorporated.<br />
• Other names of systems and products mentioned in these instructions<br />
are usually the registered trademarks or trademarks of the<br />
manufacturers who developed the system or product concerned.<br />
The and ® marks are not used to identify registered trademarks and<br />
trademarks in these instructions.<br />
RQT8046<br />
Reference<br />
43
A<br />
C<br />
D<br />
E<br />
H<br />
I<br />
M<br />
O<br />
P<br />
Index<br />
All disc play . . . . . . . . . . . . . . . . . . . . . . . . . . . . . . . . 15<br />
ALL ERASE . . . . . . . . . . . . . . . . . . . . . . . . . . . . . . . . 28<br />
Auto-off function . . . . . . . . . . . . . . . . . . . . . . . . . . . . 32<br />
CARD FORMAT . . . . . . . . . . . . . . . . . . . . . . . . . . . . . 29<br />
CD title memory . . . . . . . . . . . . . . . . . . . . . . . . . . . . . 31<br />
Changing a disc in the desired tray . . . . . . . . . . . . . . 15<br />
Checking the disc location . . . . . . . . . . . . . . . . . . . . . 15<br />
DEMO function . . . . . . . . . . . . . . . . . . . . . . . . . . . . . 10<br />
Dimming the display . . . . . . . . . . . . . . . . . . . . . . . . . . 33<br />
Entering characters . . . . . . . . . . . . . . . . . . . . . . . . . . 30<br />
External unit . . . . . . . . . . . . . . . . . . . . . . . . . . . . . . . . 34<br />
H.BASS . . . . . . . . . . . . . . . . . . . . . . . . . . . . . . . . . . . 20<br />
HighMAT . . . . . . . . . . . . . . . . . . . . . . . . . . . . . . . . . . 18<br />
High-speed recording . . . . . . . . . . . . . . . . . . . . . . . . 23<br />
Input level . . . . . . . . . . . . . . . . . . . . . . . . . . . . . . . . . . 35<br />
Manual EQ . . . . . . . . . . . . . . . . . . . . . . . . . . . . . . . . . 21<br />
Manual tuning . . . . . . . . . . . . . . . . . . . . . . . . . . . . . . 22<br />
mini<strong>SD</strong> Card . . . . . . . . . . . . . . . . . . . . . . . . . . . . . . . . 8<br />
MOVE . . . . . . . . . . . . . . . . . . . . . . . . . . . . . . . . . . . . 28<br />
MP3 . . . . . . . . . . . . . . . . . . . . . . . . . . . . . . . . . . . . . . . 6<br />
Music protection . . . . . . . . . . . . . . . . . . . . . . . . . . . . . 6<br />
Muting . . . . . . . . . . . . . . . . . . . . . . . . . . . . . . . . . . . . 21<br />
Outdoor antenna. . . . . . . . . . . . . . . . . . . . . . . . . . . . . 34<br />
Play timer . . . . . . . . . . . . . . . . . . . . . . . . . . . . . . . . . . 33<br />
PLAYLIST . . . . . . . . . . . . . . . . . . . . . . . . . . . . . . . . . 29<br />
Preset EQ . . . . . . . . . . . . . . . . . . . . . . . . . . . . . . . . . 21<br />
Preset tuning . . . . . . . . . . . . . . . . . . . . . . . . . . . . . . . 22<br />
Program play . . . . . . . . . . . . . . . . . . . . . . . . . . . . . . . 17<br />
Program recording . . . . . . . . . . . . . . . . . . . . . . . . 25, 27<br />
<strong>Panasonic</strong> Consumer Electronics<br />
Company, Division of <strong>Panasonic</strong><br />
Corporation of North America<br />
One <strong>Panasonic</strong> Way Secaucus,<br />
New Jersey 07094<br />
http://www.panasonic.com<br />
2005 Matsushita Electric Industrial Co., Ltd.<br />
Printed in Malaysia<br />
<strong>Panasonic</strong> Puerto Rico, Inc.<br />
Ave. 65 de Infantería, Km. 9.5<br />
San Gabriel Industrial Park, Carolina,<br />
Puerto Rico 00985<br />
R<br />
Random play . . . . . . . . . . . . . . . . . . . . . . . . . . . . . . . 17<br />
Record timer. . . . . . . . . . . . . . . . . . . . . . . . . . . . . . . . 33<br />
Recording method . . . . . . . . . . . . . . . . . . . . . . . . 26, 35<br />
Recording mode . . . . . . . . . . . . . . . . . . . . . . . . . . . . 23<br />
Recording sources and media . . . . . . . . . . . . . . . . . 23<br />
Recording time on <strong>SD</strong> Memory Card . . . . . . . . . . . . 23<br />
Re-master . . . . . . . . . . . . . . . . . . . . . . . . . . . . . . . . . 20<br />
Repeat play . . . . . . . . . . . . . . . . . . . . . . . . . . . . . . . . 17<br />
S<br />
SCMS. . . . . . . . . . . . . . . . . . . . . . . . . . . . . . . . . . . . . . 6<br />
Screen saver . . . . . . . . . . . . . . . . . . . . . . . . . . . . . . . 12<br />
<strong>SD</strong> Audio Player . . . . . . . . . . . . . . . . . . . . . . . . . . 36, 39<br />
<strong>SD</strong> Memory CARD Reader Writer . . . . . . . . . . . . . . . 37<br />
<strong>SD</strong> Multi Camera . . . . . . . . . . . . . . . . . . . . . . . . . 36, 39<br />
<strong>SD</strong>-Jukebox . . . . . . . . . . . . . . . . . . . . . . . . . . . . . . . . 36<br />
Search . . . . . . . . . . . . . . . . . . . . . . . . . . . . . . . . . . . . 15<br />
Selecting a disc . . . . . . . . . . . . . . . . . . . . . . . . . . . . . 15<br />
Selecting a track . . . . . . . . . . . . . . . . . . . . . . . . . . . . 16<br />
Selecting an album . . . . . . . . . . . . . . . . . . . . . . . . . . 16<br />
Setting the time . . . . . . . . . . . . . . . . . . . . . . . . . . . . . 32<br />
Skip . . . . . . . . . . . . . . . . . . . . . . . . . . . . . . . . . . . . . . 15<br />
Sleep timer. . . . . . . . . . . . . . . . . . . . . . . . . . . . . . . . . 32<br />
Sound field and sound quality . . . . . . . . . . . . . . . . . . 20<br />
Speaker . . . . . . . . . . . . . . . . . . . . . . . . . . . . . . . . . 9, 11<br />
Status display . . . . . . . . . . . . . . . . . . . . . . . . . . . . . . 15<br />
SURROUND . . . . . . . . . . . . . . . . . . . . . . . . . . . . . . . 21<br />
T<br />
Title search . . . . . . . . . . . . . . . . . . . . . . . . . . . . . . . . 16<br />
TPS . . . . . . . . . . . . . . . . . . . . . . . . . . . . . . . . . . . . . . 19<br />
TRACK ERASE . . . . . . . . . . . . . . . . . . . . . . . . . . . . . 28<br />
Track mark . . . . . . . . . . . . . . . . . . . . . . . . . . . . . . . . . 26<br />
W<br />
WMA . . . . . . . . . . . . . . . . . . . . . . . . . . . . . . . . . . . . . . 6<br />
Numerics<br />
5CD auto recording . . . . . . . . . . . . . . . . . . . . . . . . . . 25<br />
En<br />
RQT8046-5P<br />
H0205MH5095