a) Instruction Manual for Institute - msbve.gov.in
a) Instruction Manual for Institute - msbve.gov.in
a) Instruction Manual for Institute - msbve.gov.in

Create successful ePaper yourself
Turn your PDF publications into a flip-book with our unique Google optimized e-Paper software.
M.S. Board of Vocational Education Exam<strong>in</strong>ations,<br />
Mumbai‐51<br />
<strong>Instruction</strong> <strong>Manual</strong><br />
(<strong>Institute</strong> Level)<br />
For Jan‐2013 Admission and On Words<br />
Enrollment & Exam Software<br />
‘6 Month & 1 Year Courses’
Procedure:‐<br />
A) Software Installation<br />
i) New Student Enrollment Form<br />
ii) Ex‐Student Form Entry<br />
iii) Already Enrolled (Old Student)<br />
B) DD/Challan Detail Entry<br />
C) Student Register (List of Student)<br />
D) Export Data<br />
E) Data to be written on CD<br />
F) Submission
<strong>Instruction</strong>s:<br />
A) Software Installation<br />
Insert CD <strong>in</strong> CD/DVD Drive.<br />
1) Open the CD<br />
2) Copy the MSBVE folder<br />
3) Paste this MSBVE folder <strong>in</strong> to d: drive of your computer.<br />
4) Open the MSBVE folder.<br />
5) Copy fonts “Devnew” & “Kiran” file.<br />
6) Paste these fonts file <strong>in</strong> to font folder of control panel.<br />
7) Scan Photo & Sign and paste it <strong>in</strong>to MSBVE/Photo.(JPG Format Colour<br />
Passport Size Photo)<br />
8 ) Double click on ”NTMAIN”<br />
9) Enter password “test”<br />
10) Enter your Code “393939” and press Enter key<br />
Follow<strong>in</strong>g w<strong>in</strong>dow appears
11) Enter your <strong>Institute</strong> Code (Six Digit)<br />
12) Click on Log In button.<br />
Follow<strong>in</strong>g w<strong>in</strong>dow appears
i) New Student Enrollment Form<br />
1) Click on “New Student” tab. You will get follow<strong>in</strong>g screen.<br />
2) Rename the photo & sign which is save <strong>in</strong> MSBVE/Photo Folder. Give exactly<br />
the same name <strong>for</strong> photo ie. P2501260001, 2, 3……….. And <strong>for</strong> sign<br />
s2501260001,2,3…… as appeared on enrollment <strong>for</strong>m….(Photo starts with P and<br />
Sign starts with S)<br />
3) As soon as photo and sign rename with given allocated number, respective<br />
photo and sign will apper on <strong>for</strong>m<br />
4) Fill up rema<strong>in</strong><strong>in</strong>g Form.<br />
5) Fill up all the <strong>in</strong><strong>for</strong>mation <strong>in</strong> the <strong>for</strong>m properly.<br />
6) Use Pop up w<strong>in</strong>dow <strong>for</strong> Year of Admission, Category, M<strong>in</strong>ority, Handicap, and<br />
Education Qualification. Click <strong>in</strong> that box & use arrow key & select appropriate<br />
option.
u<br />
o<br />
-<br />
7) For Marathi Data Entry Use Follow<strong>in</strong>g Key Board<br />
Without press<strong>in</strong>g shift+ key<br />
`<br />
`<br />
1<br />
1<br />
q<br />
q<br />
2<br />
2<br />
w<br />
w<br />
a<br />
a<br />
z<br />
z<br />
3<br />
3<br />
e<br />
e<br />
s<br />
s<br />
x<br />
4<br />
4<br />
r<br />
r<br />
d<br />
d<br />
c<br />
c<br />
5<br />
5<br />
t<br />
t<br />
f<br />
f<br />
v<br />
v<br />
6<br />
6<br />
y<br />
y<br />
g<br />
g<br />
b<br />
b<br />
7<br />
7<br />
u<br />
h<br />
h<br />
n<br />
n<br />
8<br />
8<br />
i<br />
i<br />
j<br />
j<br />
m<br />
m<br />
9<br />
9<br />
o<br />
k<br />
k<br />
,<br />
,<br />
0<br />
0<br />
p<br />
p<br />
l<br />
l<br />
.<br />
.<br />
‐<br />
[<br />
[<br />
;<br />
;<br />
/<br />
/<br />
=<br />
=<br />
]<br />
]<br />
‘<br />
‘<br />
\<br />
\
R<br />
^<br />
U<br />
O<br />
After press<strong>in</strong>g shift+ key<br />
`<br />
~<br />
1<br />
!<br />
Q<br />
Q<br />
2<br />
@<br />
W<br />
W<br />
A<br />
A<br />
Z<br />
Z<br />
3<br />
#<br />
E<br />
E<br />
S<br />
S<br />
X<br />
X<br />
4<br />
$<br />
R<br />
D<br />
D<br />
C<br />
C<br />
5<br />
%<br />
T<br />
T<br />
F<br />
F<br />
V<br />
V<br />
6<br />
Y<br />
Y<br />
G<br />
G<br />
B<br />
B<br />
7<br />
&<br />
U<br />
H<br />
H<br />
N<br />
N<br />
8<br />
*<br />
I<br />
I<br />
J<br />
J<br />
M<br />
M<br />
9<br />
(<br />
O<br />
K<br />
K<br />
<<br />
<<br />
0<br />
)<br />
P<br />
P<br />
L<br />
L<br />
><br />
><br />
‐<br />
_<br />
{<br />
[<br />
:<br />
:<br />
<br />
<br />
=<br />
+<br />
}<br />
}<br />
“<br />
“<br />
\<br />
|<br />
8) After fill<strong>in</strong>g <strong>for</strong>m completely (English & Marathi Data), click on save button. It<br />
gives follow<strong>in</strong>g message.<br />
9) Click on Yes button to save the <strong>for</strong>m, Pr<strong>in</strong>t preview appeared
10) Click on pr<strong>in</strong>ter button to pr<strong>in</strong>tout the enrollment cum Exam <strong>for</strong>m.<br />
Note : If you keep any field vacant(blank) follow<strong>in</strong>g error will appear<br />
11) After pr<strong>in</strong>t<strong>in</strong>g ‐‐ check the Form Pr<strong>in</strong>t, if found any mistake, follow the<br />
follow<strong>in</strong>g procedure
a) Click on Edit button. Follow<strong>in</strong>g w<strong>in</strong>dow appears<br />
b) To select the <strong>for</strong>m double click on Fee Receipt No. The <strong>for</strong>m will open <strong>for</strong><br />
edit<strong>in</strong>g.<br />
c) Make correction which is required & save the <strong>for</strong>m.<br />
12) Thus fill up all rema<strong>in</strong><strong>in</strong>g <strong>for</strong>ms.
ii) Ex‐Student Form Entry<br />
1) Select Ex‐Student tab from <strong>in</strong>stitute Enrollment Ma<strong>in</strong> w<strong>in</strong>dow.<br />
Follow<strong>in</strong>g w<strong>in</strong>dow appears.
2) Fill up all the details <strong>in</strong> above <strong>for</strong>m. Then click on Re‐Exam Details.<br />
Note: In W<strong>in</strong>dow (column cleared YN)<br />
‘N’:Type ‘N’ if student is appear<strong>in</strong>g <strong>for</strong> that subject<br />
‘Y’: Type ‘Y’ if passed (Fill up all details of pass out student)<br />
3) Fill up all Re‐Exam Details.<br />
4) Click on Back button.<br />
5) Click on save button to save the <strong>for</strong>m.<br />
6) And follow same procedure as enrollment <strong>for</strong>m. (i.e. pr<strong>in</strong>t etc)<br />
7)) After f<strong>in</strong>ish<strong>in</strong>g click on Exit button.
iii) Already Enrolled (Old Student)<br />
1) Select Already Enrolled (Old Student) tab from <strong>in</strong>stitute Enrollment<br />
Ma<strong>in</strong> w<strong>in</strong>dow.<br />
Follow<strong>in</strong>g w<strong>in</strong>dow appears.<br />
2) Fill up all the details <strong>in</strong> above <strong>for</strong>m.<br />
3) Click on save button to save the <strong>for</strong>m.<br />
4) And follow same procedure as enrollment <strong>for</strong>m (i.e. pr<strong>in</strong>t etc)<br />
5) After f<strong>in</strong>ish<strong>in</strong>g click on Exit button.
B) DD/Challan Detail entry:<br />
1) Click on DD/Challan Detail Entry tab. Follow<strong>in</strong>g w<strong>in</strong>dow will appeared
1) Select exam month from popup w<strong>in</strong>dow & make entry of year, DD/Challan<br />
No, DD Date etc.<br />
2) Click on Add DD button.<br />
3) Click on Save button.<br />
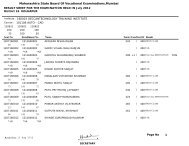
4) For pr<strong>in</strong>t<strong>in</strong>g report—click on report button, to get follow<strong>in</strong>g dd details pr<strong>in</strong>t.<br />
5) Click on Exit button. Back to <strong>Institute</strong> Enrollment Ma<strong>in</strong> w<strong>in</strong>dow.
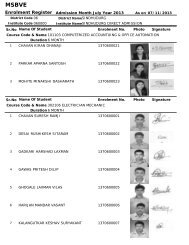
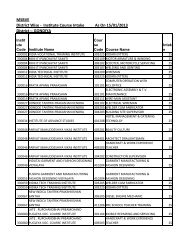
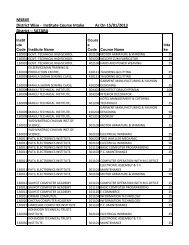
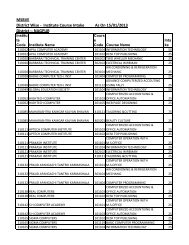
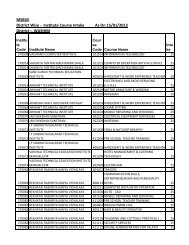
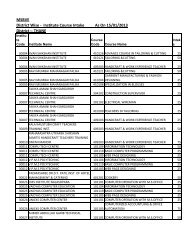
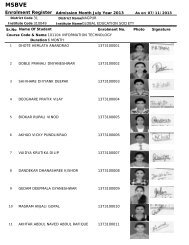
C) Student Register (List of Student)<br />
1) Click on Student Register tab. Follow<strong>in</strong>g w<strong>in</strong>dow appeared…
2) Type Admission Month and Select Admission Month from popup w<strong>in</strong>dow.<br />
3) Click On Process Button.<br />
4) Click On Excel Button. Follow<strong>in</strong>g w<strong>in</strong>dow appears<br />
5) Click on OK button.<br />
6) Student Register appears <strong>in</strong> separate Excel sheet<br />
7) Save that sheet and take pr<strong>in</strong>t of student register..<br />
8) Click on Exit button. Back to <strong>Institute</strong> Enrollment Ma<strong>in</strong> w<strong>in</strong>dow.
D) Export Data:<br />
1) Click on Export Data button on <strong>Institute</strong> Enrollment Ma<strong>in</strong> w<strong>in</strong>dow.<br />
Follow<strong>in</strong>g w<strong>in</strong>dow will appeared<br />
2) Click on Export Data button.
3) Click on OK button.<br />
4) Click on Exit button.<br />
5) Click on <strong>Institute</strong> Enrollment Ma<strong>in</strong> w<strong>in</strong>dow’s Exit button.<br />
6) Click on password w<strong>in</strong>dow’s Exit button.<br />
E) Data to be written on CD<br />
1) “VOCBOARD” along with “MSBVE” Folder from d: drive.<br />
2) Ensure that VOCBOARD and MSBVE folder written on CD.<br />
F) Submit ‐ CD to District Vocational Education and Tra<strong>in</strong><strong>in</strong>g<br />
Office Along with Follow<strong>in</strong>g Documents:<br />
1) Above Data CD<br />
2) Pr<strong>in</strong>t out Of Student Enrollment <strong>for</strong>ms.<br />
3) DD/ Challan Report Pr<strong>in</strong>t.<br />
4) Challan Copy.<br />
5) Student Register (List of Student).