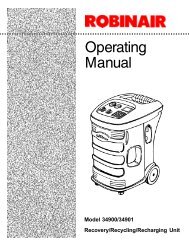
Robinair 34134-2K 134a Recovery Unit - NY Tech Supply
Robinair 34134-2K 134a Recovery Unit - NY Tech Supply
Robinair 34134-2K 134a Recovery Unit - NY Tech Supply

You also want an ePaper? Increase the reach of your titles
YUMPU automatically turns print PDFs into web optimized ePapers that Google loves.
Operating Instructions<br />
AIR PURGE<br />
! !<br />
The gauge on the control panel shows when to purge air from the tank. To purge<br />
non-condensables:<br />
1. Check the TEMPERATURE display (see page 4) to find the temperature of<br />
the refrigerant in the unit tank.<br />
2. Use this temperature to find the correct pressure for the refrigerant on the<br />
appropriate pressure/temperature chart on the control panel.<br />
3. Compare the pressure from the chart to the reading on the tank pressure<br />
gauge.<br />
4. If the pressure exceeds the target pressure by more than 10 psi (0.7 Bar), press<br />
the air purge button for approximately 30 seconds.<br />
5. Check tank pressure and repeat steps as necessary.<br />
RECHARGING THE A/C SYSTEM<br />
10<br />
To recharge A/C system:<br />
1. Connect the high side and low side hoses to the A/C system according to its<br />
manufacturer's recommendations for charging. Open appropriate service<br />
coupler and manifold valve(s).<br />
2. Verify both tank valves are open.<br />
3. Press TARE button until “00.00” weight is displayed.<br />
4. Determine the amount of charge needed from the vehicle nameplate. Press<br />
and hold the CHARGE button until the desired weight charge is indicated on<br />
the display. Release the CHARGE button.<br />
5. Close both manifold valves.<br />
6. Start the vehicle's engine and turn on the A/C system for maximum cooling.<br />
Let it run until the gauge pressure readings stabilize. Compare the gauge<br />
readings with the system manufacturer's specifications.<br />
7. Check the evaporator outlet temperature to be sure that the A/C system is<br />
operating correctly. Refer to the system manufacturer's specifications for the<br />
correct temperature.<br />
8. Turn off the vehicle's engine.<br />
9. Close the high side coupler valve, then disconnect the high side hose from the<br />
A/C system.<br />
10. Restart the vehicle, then open both valves on the manifold. Refrigerant from<br />
both hoses will be drawn quickly into the A/C system through the low side<br />
hose.<br />
11. Close the low side coupler valve, then disconnect the low side hose from the<br />
A/C system.<br />
12. Turn off the vehicle engine.<br />
13. Close both manifold valves.<br />
NOTE: If using the optional heating blanket, make sure the blanket is far enough away<br />
from the temperature probe not to interfere with temperature probe accuracy.<br />
© 2000 <strong>Robinair</strong>, SPX Corporation