

McDonnell ADM-20 Quail - 1/72 scale Rockets, Missiles, Drones ...
McDonnell ADM-20 Quail - 1/72 scale Rockets, Missiles, Drones ...
McDonnell ADM-20 Quail - 1/72 scale Rockets, Missiles, Drones ...

You also want an ePaper? Increase the reach of your titles
YUMPU automatically turns print PDFs into web optimized ePapers that Google loves.
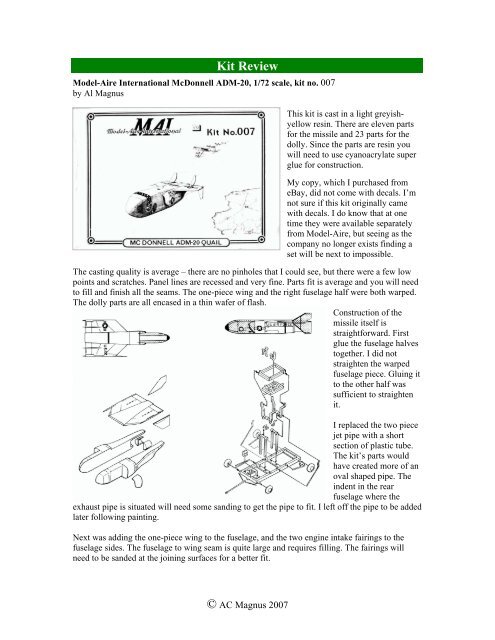
Kit Review<br />
Model-Aire International <strong>McDonnell</strong> <strong>ADM</strong>-<strong>20</strong>, 1/<strong>72</strong> <strong>scale</strong>, kit no. 007<br />
by Al Magnus<br />
This kit is cast in a light greyishyellow<br />
resin. There are eleven parts<br />
for the missile and 23 parts for the<br />
dolly. Since the parts are resin you<br />
will need to use cyanoacrylate super<br />
glue for construction.<br />
My copy, which I purchased from<br />
eBay, did not come with decals. I’m<br />
not sure if this kit originally came<br />
with decals. I do know that at one<br />
time they were available separately<br />
from Model-Aire, but seeing as the<br />
company no longer exists finding a<br />
set will be next to impossible.<br />
The casting quality is average – there are no pinholes that I could see, but there were a few low<br />
points and scratches. Panel lines are recessed and very fine. Parts fit is average and you will need<br />
to fill and finish all the seams. The one-piece wing and the right fuselage half were both warped.<br />
The dolly parts are all encased in a thin wafer of flash.<br />
Construction of the<br />
missile itself is<br />
straightforward. First<br />
glue the fuselage halves<br />
together. I did not<br />
straighten the warped<br />
fuselage piece. Gluing it<br />
to the other half was<br />
sufficient to straighten<br />
it.<br />
I replaced the two piece<br />
jet pipe with a short<br />
section of plastic tube.<br />
The kit’s parts would<br />
have created more of an<br />
oval shaped pipe. The<br />
indent in the rear<br />
fuselage where the<br />
exhaust pipe is situated will need some sanding to get the pipe to fit. I left off the pipe to be added<br />
later following painting.<br />
Next was adding the one-piece wing to the fuselage, and the two engine intake fairings to the<br />
fuselage sides. The fuselage to wing seam is quite large and requires filling. The fairings will<br />
need to be sanded at the joining surfaces for a better fit.<br />
© AC Magnus <strong>20</strong>07
The final step is to add the fins and the vertical endplates to the wing. To help locate the fins,<br />
there is a very faint, almost in distinguishable line on the wing’s upper surface (as shown by the<br />
dotted line in the construction diagram in the instructions). Look carefully, it’s easy to miss.<br />
Be judicious and use a light hand when sanding. Due to the fine engraved panel lines, this has to<br />
be done with a fine touch or they will be removed.<br />
The dolly parts are extremely fine, ergo fragile, so be careful or they will snap. I must admit that I<br />
do not plan to build the dolly anytime soon. After much consideration I felt that this was best<br />
served as a long term project of its own, one where I take my time and work on it when other<br />
projects have some idle time. As of this writing I have separated and prepared three of the 23<br />
parts that comprise the dolly.<br />
With the prep finished, final painting commenced with a coat of flat medium grey as the primer.<br />
The final coats, of which there were four, were done with Testors gloss light grey enamel. I<br />
lightly sanded between coats in an attempt to get a nice smooth and even finish to the paint. The<br />
engine pipe was painted black and then dry brushed with silver to get a metallic sheen.<br />
As mentioned earlier Model-Aire also offered the decals separate from the kit. Quite a few years<br />
ago I had contacted Model-Aire when they were still in business looking for the <strong>Quail</strong> kit. Model-<br />
Aire no longer had any <strong>Quail</strong>s but I was able to purchase two sheets of the decals. I figured I<br />
would be able to get the <strong>Quail</strong> on eBay. My search took about five years before I finally obtained<br />
a copy. During that time I had used the US insignia for other projects. So when it came time to<br />
add markings to this kit I had to find another source.<br />
To my rescue came Mark Tutton at Mark’s Models and Toys, a.k.a. Starfighter Decals. He was<br />
able to custom print me a set of US Insignia and US Airforce script of the proper size using his<br />
Alps printer.<br />
The kit markings and painting guide are representative of a non-operation <strong>Quail</strong>. Operational<br />
machines usually lacked any form of markings and were simply an overall light grey. I didn’t<br />
want a bland overall grey scheme, and I didn’t really want to try an aluminum finish on my kit as<br />
per the instructions, so I decided to fudge the markings by applying them based on some<br />
examples found in various museums - but not on any one <strong>Quail</strong> in particular.<br />
The only Model-Aire decals I used were the “GAM-<strong>72</strong>” scripts located just above the fuselage<br />
star-and-bar insignia. The Model-Aire decals do not like to bend around curved surfaces and<br />
multiple applications of Microsol were needed to get them to settle down onto the model.<br />
Without a dolly to rest the model upon, I built my standard display stand - which consists of a<br />
bent piece of piano wire, with one end attached to the corner of a Games Workshop large monster<br />
base and the other end mounted into the jet pipe of the missile.<br />
All in all, this kit makes for a very interesting subject, but you will need to have a ton of patience<br />
to eliminate the numerous flaws in the resin to get an acceptably finished model.<br />
© AC Magnus <strong>20</strong>07


