SAF installation manual modular air susp - drum brakes ... - Transpec
SAF installation manual modular air susp - drum brakes ... - Transpec
SAF installation manual modular air susp - drum brakes ... - Transpec

You also want an ePaper? Increase the reach of your titles
YUMPU automatically turns print PDFs into web optimized ePapers that Google loves.
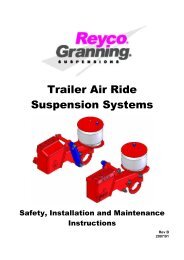
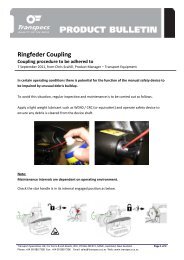
General Installation Instruction Manual<br />
<strong>SAF</strong> Modular Air <strong>susp</strong>ension system<br />
Drum Brake<br />
<strong>SAF</strong> SERVICE und ORIGINALTEILE<br />
<strong>SAF</strong> SERVICE and ORIGINAL PARTS<br />
www.<strong>Transpec</strong>s.co.nz<br />
Edition 11/2006<br />
Service
Welding instructions<br />
for hanger brackets of steel,<br />
<strong>SAF</strong> <strong>air</strong> <strong>susp</strong>ension series U / M / O<br />
Welding recommendation<br />
The high-tensile steel used for the hanger brackets with a carbon content C of max. 0.2% can be easily<br />
welded. Special welding electrodes are therefore not required.<br />
Cover the trailing arm to protect it from flying sparks. In order to avoid bearing damage, the welding<br />
equipment ground cable must not be connected either to the wheel or to the wheel hub with brake <strong>drum</strong>.<br />
Design information<br />
The vehicle frame must be reinforced so that it can absorb the forces to which it is exposed.<br />
Important note<br />
Ensure that the gap between the hanger bracket and chassis in the area “X” is kept small!<br />
Dimension „H1“<br />
Dimension „L1“<br />
250 298<br />
290 313<br />
355 337<br />
CONTENTS
Installation instructions for lateral hanger<br />
bracket brace / adjustable spring bearing<br />
The lateral brace (gusset plate) must be attached to the spring hanger as low as<br />
possible.<br />
Overlapping of the gusset plate and inner brace plate is necessary to avoid any<br />
diaphragm effect.<br />
Welding zone for lateral brace (gusset plate)<br />
Ref. No.: MODULBOCK020703
Bracing recommendations – Hanger bracket “steel”<br />
Chassis beam<br />
Reinforcement<br />
Cross member<br />
approx. 75<br />
Cross member<br />
approx. 20<br />
Hanger bracket welding instructions see page 0 183 0003 00<br />
The design and dimensioning of the hanger bracket reinforcement is the responsibility of the vehicle manufacturer,<br />
allowing for the type and operating conditions of the vehicle.
Bracing recommendations – Hanger bracket “steel”<br />
Chassis beam<br />
Reinforcement<br />
approx. 75<br />
Cross member<br />
approx. 20<br />
Hanger bracket welding instructions see page 0 183 0003 00<br />
The design and dimensioning of the hanger bracket reinforcement is the responsibility of the vehicle manufacturer,<br />
allowing for the type and operating conditions of the vehicle.<br />
CONTENTS
Bracing recommendations – Hanger bracket “steel”<br />
Chassis beam<br />
Reinforcement<br />
Cross member<br />
alternatively<br />
11360MS Edition 11 / 2003<br />
176<br />
Hanger bracket welding instructions see page 0 183 0003 00<br />
The design and dimensioning of the hanger bracket reinforcement is the responsibility of the vehicle manufacturer,<br />
allowing for the type and operating conditions of the vehicle.<br />
CONTENTS
Bracing recommendations – Hanger bracket “steel”<br />
Chassis beam<br />
Reinforcement<br />
Cross member<br />
alternatively<br />
Hanger bracket welding instructions see page 0 183 0003 00<br />
The design and dimensioning of the hanger bracket reinforcement is the responsibility of the vehicle manufacturer,<br />
allowing for the type and operating conditions of the vehicle.<br />
CONTENTS
Welding recommendation – Air bag bracket<br />
<strong>SAF</strong> Standard Air Bag Offsets V<br />
Schweißnahtverlauf und Abstützung sind<br />
<strong>SAF</strong>-Empfehlungen. Dimensionen, Varianten<br />
und Ausführung unterliegen der<br />
Verantwortung des Fahrzeugherstellers.<br />
Weld seam course, and bracing are <strong>SAF</strong><br />
recommendation. Dimension, Design and<br />
implementation are under the responsability<br />
of the vehicle manufacturer.<br />
CONTENTS
Mounting plate + Air Bag brackets<br />
for <strong>SAF</strong> Air bags<br />
Designation H (mm) Order-No.:<br />
Mounting plate 5 1 043 0261 01<br />
“steel”<br />
Mounting plate 8 1 043 0262 01<br />
“Alu”<br />
40 2 237 0070 01<br />
70 2 237 0071 01<br />
100 2 237 0080 01<br />
Air bag bracket 130 2 237 0072 01<br />
“steel”<br />
160 2 237 0073 01<br />
210 2 237 0074 01<br />
260 2 237 0075 01<br />
CONTENTS
Adjustable spring bearing<br />
steel hanger bracket / cross member<br />
ANZUGSVERFAHREN SIEHE TD 0000400500<br />
TIGHTENING PROCEDURE SEE TD 0000400500<br />
CONTENTS
Tightening torques for <strong>susp</strong>ension arms –<br />
shock absorbers – <strong>air</strong> bags<br />
The max. coat thickness of any primer or paint must not exceed 45 µm on any contact surfaces of the<br />
<strong>susp</strong>ension arm and shock absorber fixation!<br />
Torque - Tightening procedure<br />
1. Faces of the HD bearing bush must be free<br />
from oil and grease.<br />
2. Install the functional <strong>susp</strong>ension arm<br />
bearing parts as shown in the spare parts<br />
drawing.<br />
3. Adjust the vehicle to ride height.<br />
4. Pretighten the nuts M30/WAF46<br />
to 400 Nm.<br />
Using a torque wrench.<br />
5. Align the marks on the welded hub,<br />
hexagon head bolt and nut over one<br />
corner of the nut.<br />
6. Tighten the nut a further 120º<br />
(2 nut corners), holding the bolt head<br />
to prevent the bolt from turning with<br />
the nut.<br />
7. Perform a visual check. Correct the turn<br />
angle, if necessary.<br />
8. Make marks with a counterpunch on the<br />
welded hub, hexagon head bolt and nut<br />
in a line after completing the tightening<br />
procedure.<br />
Attention!<br />
– Threads are not to be oiled or greased!<br />
– Spring bearing for steel hanger brackets maintenance free<br />
– spring bearing for aluminium hanger brackets to be<br />
checked after 500 km, further check after every 6000 km.<br />
Inspection torque 1200 Nm.<br />
R<br />
CONTENTS
Tightening instructions for adjustable pivot bolt<br />
Attention:<br />
Tightening always within the specified ride height range!<br />
No paint residues between eccentric/thrust washer and hanger!<br />
Bolt head always on the eccentric washer side.
Mounting of diaphragm brake cylinders and<br />
spring-loaded brake cylinders on <strong>SAF</strong> axles<br />
Connection of diaphragm cylinders to standard baseplates<br />
Position of the mounting bolts:<br />
ca. 14°<br />
- Distance between hole lines 120.5 mm<br />
at an angle of approx. 7° from the<br />
horizontal<br />
76,5<br />
120,5<br />
- Distance between hole lines 76.5 mm<br />
not required on axles with axle load<br />
> 6,000 kg<br />
Connection of spring-loaded brake cylinders to special baseplates<br />
120,5<br />
Position of the mounting bolts at<br />
an angle of 30° to the vertical!<br />
30°<br />
Connection of spring-loaded brake cylinders to standard baseplates<br />
Position of the mounting bolts:<br />
ca. 14°<br />
- Distance between hole lines 120.5 mm<br />
at an angle of approx. 7° from the<br />
horizontal<br />
76,5<br />
120,5<br />
- Distance between hole lines 76.5 mm<br />
not required on axles with axle load<br />
> 6,000 kg<br />
The <strong>SAF</strong> baseplates are sufficiently well dimensioned to take spring-loaded brake cylinders where<br />
the manufacturer permits <strong>installation</strong> with the mounting bolts horizontal.<br />
The flatness of the baseplates when new complies with the specifications of the brake cylinder<br />
manufacturers, a reinforcing plate to strengthen the baseplate is not necessary.<br />
Observe the <strong>installation</strong> instructions of the brake cylinder manufacturers.<br />
A major factor for the serviceability of the brake cylinders and baseplates is compliance with the<br />
specified tightening torques and regular checking of the torque.<br />
In conjunction with axle <strong>susp</strong>ensions, please contact <strong>SAF</strong> to obtain approval for <strong>installation</strong> due to the larger<br />
space requirement of spring-loaded brake cylinders where approval is not automatically given.<br />
CONTENTS
General information<br />
Check the brake setting<br />
Adjustment of S-cam <strong>brakes</strong> with <strong>manual</strong> slack adjusters<br />
The natural wear of the brake <strong>drum</strong> and brake lining necessitate frequent adjustment of the wheel <strong>brakes</strong> in order to<br />
maintain the maximum stroke of the brake cylinders. In order to achieve good braking, it is essential to minimise the<br />
clearance between the brake <strong>drum</strong> and brake lining. In order to check the clearance, the service brake is applied with<br />
full pressure and the stroke of the brake cylinder checked. If the stroke at the yoke end is more than 2/3 of the maximum<br />
cylinder stroke, the brake must be urgently adjusted. If the <strong>brakes</strong> are correctly adjusted, it should not be possible to<br />
move the piston rod more than 15 mm by hand.<br />
Turn the adjusting screw to the<br />
right until the<br />
brake shoes are firmly up<br />
against the brake <strong>drum</strong>.<br />
SV11484GB Edition 01/2006 · Last updated 2006-01-13 · Amendments and errors reserved © <strong>SAF</strong><br />
No clearance between<br />
piston and diaphragm<br />
permitted in the rest<br />
position.<br />
Adjustment is performed at the<br />
adjustment screw (WAF 19)<br />
Turn the adjusting screw to the<br />
left until<br />
the free travel of the slack<br />
adjuster (at 127 mm) is<br />
approx. 10 - 15 mm.<br />
It must be possible to turn the<br />
wheel freely without braking<br />
(without scraping noises).<br />
Special instructions apply for automatic slack adjusters (see adjustment procedure on the following<br />
pages).<br />
A = Angle must not exceed 90° at 1/2 stroke.<br />
B = No contact permissible between slack adjuster and axle beam during emergency braking.<br />
L = Observe piston rod length as per the <strong>SAF</strong> specifications.<br />
GB 18
General information<br />
HALDEX automatic slack adjuster<br />
Note when changing over from mechanical slack adjuster to automatic slack adjuster:<br />
In order to avoid damage to the wheel brake, install only the automatic slack adjuster with the prescribed adjustment<br />
gate and corresponding mounting point strap approved by <strong>SAF</strong> for the respective axle type.<br />
Changes to the effective brake lever lengths are not admissible.<br />
The field <strong>installation</strong> of automatic slack adjusters does not require type approval so that no inspection by the technical<br />
inspection authorities (TÜV) is necessary.<br />
Technical information on <strong>SAF</strong> spare part numbers and correspondence of slack<br />
adjusters and axle types can be obtained from the <strong>SAF</strong> service partners.<br />
SV11484GB Edition 01/2006 · Last updated 2006-01-13 · Amendments and errors reserved © <strong>SAF</strong><br />
19<br />
GB
Adjustment, S-ABA<br />
Adjustment of S-ABA automatic slack adjusters<br />
L<br />
10<br />
7<br />
4<br />
1<br />
2<br />
3<br />
• Cams and brake shoes are in the zero position.<br />
• Observe the correct piston rod length “L” as given in the<br />
<strong>SAF</strong> specifications.<br />
• Brake chambers<br />
Before <strong>installation</strong>, ensure that the brake chamber is in<br />
its starting position.<br />
• Spring brake chambers, on the other hand, must be<br />
under full working pressure (min. 6 bar).<br />
IMPORTANT: If this is not observed, the basic<br />
setting will be wrong!<br />
• Grease the camshaft.<br />
• Install mounting point strap (3); be sure to use two<br />
mounting bolts (4).<br />
• Install the slack adjuster on the camshaft.<br />
• The arrow mark (7) points in the braking direction.<br />
• Turn adjusting screw (1) until the bore in the slack<br />
adjuster (8.1) is aligned with the bore in the yoke end<br />
(9) (see figure).<br />
• With the fixed mounting point, ensure that the 2<br />
U-profiles engage correctly in one another.<br />
• Grease cotter pin (8) and secure.<br />
• Hook in return spring (10).<br />
• Fix the slack adjuster on the camshaft.<br />
• Axial clearance: Adjust the nominal value of 0.5 - 2 mm<br />
using shims.<br />
• Adjust the control arm.<br />
• Observe the possible setting range for the control lever<br />
position.<br />
• Adjust the clearance of the brake lining by turning<br />
adjusting screw (1) in clock-wise direction until the brake<br />
lining is in contact with the brake <strong>drum</strong>. Then back off<br />
adjusting screw (1) by 3/4 turn.<br />
Do not use an impact wrench!<br />
FUNCTION CHECK<br />
• If the adjustment coupling is functioning correctly, a<br />
torque of at least 18 Nm must be felt when backing off<br />
adjusting screw (1); a ratchet noise should also be clearly<br />
audible.<br />
• Actuate the service brake several times, check the free<br />
running of the brake <strong>drum</strong>, check the clearance.<br />
If necessary, repeat the adjustment of the slack adjuster.<br />
SV11484GB Edition 01/2006 · Last updated 2006-01-13 · Amendments and errors reserved © <strong>SAF</strong><br />
21<br />
GB
Adjustment of the <strong>air</strong> <strong>susp</strong>ension system ride height<br />
Air <strong>susp</strong>ension valve<br />
As standard’s <strong>air</strong> <strong>susp</strong>ension axles and system require only one <strong>air</strong> <strong>susp</strong>ension valve.<br />
The <strong>air</strong> <strong>susp</strong>ension valve controls the <strong>air</strong> bag pressure in relation to the trailer load in order to maintain a<br />
constant ride height in every load condition.<br />
The <strong>air</strong> <strong>susp</strong>ension valve is fastened to the trailer frame with screws and connected to the axle via the pivot<br />
joint (valve lever and adjustment pipe).On Tri-axle trailers, the height control valve is generally connected to<br />
the middle axle (normally in the middle of the axle), on Tandem-axle group on the rear axle, and Quad axle<br />
trailers recommended axle No.3. In special cases (e.g. large trailer tilt angle), the <strong>air</strong> <strong>susp</strong>ension valve can<br />
be installed in the rear axle<br />
For trailers with axle lifting system, the axle to which the system is connected depends on the axle to be<br />
lifted<br />
Installation<br />
The valve lever should be at least 200 mm long and is horizontal when the trailer is in the driving position.<br />
As a function check, move the lever down slightly. Air must now escape via the venting cap into the<br />
atmosphere. If <strong>air</strong>flows into the <strong>air</strong> bags when the lever is pushed down, the valve lever has to be turned<br />
through 180°.For this the valve lever has to be disconnected. The ride height is set by adjusting the<br />
adjustment pipe in the fulcrums and by turning the lock nuts.<br />
The adjustment must be carried out with the trailer standing on level ground. It can be carried out with the<br />
trailer either empty or loaded.<br />
Note<br />
For a final check, the <strong>air</strong> <strong>susp</strong>ension system should be lowered to the <strong>susp</strong>ension stop or raised to the limit<br />
(shock absorbers, stop ropes, <strong>air</strong> bag length).During this process, the specified angle between valve lever<br />
and adjustment pipe must not be exceeded in order that the valve lever does not move in the wrong<br />
direction.
HC464 HEIGHT CONTROL VALVE PIPING DIAGRAM<br />
TO SUSPENSION BAGS<br />
DEL<br />
21<br />
DEL<br />
22<br />
TO SUSPENSION BAGS<br />
FROM AUXILIARY TANK<br />
SUP<br />
1<br />
PIL<br />
4<br />
SILENCER<br />
NB GREY PLASTIC SILENCER IS SUPPLIED AND TO BE FITTED<br />
TO “PIL 4” PORT IF DUMP OPERATION IS NOT NEEDED.<br />
IF DUMP OPERATION IS REQUIRED, CONNECT DUMP SWITCH<br />
INTO “PIL 4”.<br />
PORT 21 IS TO BE CONNECTED TO THE AIR BAGS ON ONE SIDE<br />
OF THE TRAILER AND PORT 22 TO THE BAGS ON THE OTHER SIDE.<br />
IT DOES NOT MATTER WHICH PORT GOES TO WHICH SIDE.<br />
RGHC464
AIR SUSPENSION PIPING 3 AXLE SEMI<br />
HEIGHT CONTROL<br />
VALVE<br />
AUX<br />
TANK<br />
NB; Height control valves to be fitted<br />
With exhaust port down.<br />
5/8” nylon to be used between <strong>air</strong> bags<br />
on each side.<br />
3/8” nylon at all other points.<br />
Sealco<br />
1300<br />
OUT<br />
IN<br />
FROM BRAKE<br />
SYSTEM (this should be taken<br />
off the main brake tank)
AIR SUSPENSION PIPING<br />
HEIGHT CONTROL<br />
VALVE<br />
AUX<br />
TANK<br />
HEIGHT CONTROL<br />
VALVE<br />
NB; Height control valves to be fitted<br />
With exhaust port down.<br />
5/8” nylon to be used between <strong>air</strong> bags<br />
on each side.<br />
3/8” nylon at all other points.<br />
OUT<br />
Sealco<br />
1300<br />
IN<br />
FROM BRAKE<br />
SYSTEM (this should be taken<br />
off the rear brake tank)
Axle alginment<br />
For axle alignment, the <strong>air</strong> <strong>susp</strong>ension must be adjusted to the ride height specified by <strong>SAF</strong>.<br />
Semi-trailers with self steering axle<br />
Distance A, B, C max. permissible deviation 1.0 mm<br />
Toe setting + 12’ = + 3.0 mm/m Camber + 12’<br />
Values apply to unloaded vehicle.<br />
Air <strong>susp</strong>ension must be in Ride Height for axle alignment check and re-adjustment works.<br />
In the case of self steering axles the stabilizing chambers must be pressurised to 2.0 bar.<br />
Total toe-in 4.0 mm/m.<br />
Trailer<br />
Distance A, B, C max. permissible deviation 1.0 mm<br />
Toe setting + 12’ = + 3.0 mm/m Camber + 12’<br />
Values apply to unloaded vehicle.<br />
Air <strong>susp</strong>ension must be in Ride Height for axle alignment check and re-adjustment works.<br />
11353GB Edition 0203<br />
The max. permissible deviation values for axle aligment are according to the tyre manufacture specifications.<br />
To avoid excessive tyre wear we recommend having the alignment checked at regular intervals.<br />
Deviations may be caused by:<br />
• loose U-bolts<br />
• spring guide bearing wear<br />
• deformation of axle assembly components due to improper use<br />
The relevant reference point for alignment is the hub cap centre or stub axle centre.<br />
28
NOTES / NOTE
NOTES / NOTE
Transport Specialties Limited<br />
P O Box 98-971, S.A.M.C., Cnr Kerrs Rd, Wiri, Auckland<br />
Phone: (09) 980-7300, Fax: (09) 980-7306, Parts Fax: (09) 980-7341<br />
Email: mailroom@transpecs.co.nz, Website: www.transpecs.co.nz