MatchUp Quick Start Guide - Melissa Data
MatchUp Quick Start Guide - Melissa Data
MatchUp Quick Start Guide - Melissa Data

Create successful ePaper yourself
Turn your PDF publications into a flip-book with our unique Google optimized e-Paper software.
Experience extraordinary merge/purge power
<strong>MatchUp</strong><br />
<strong>Quick</strong> <strong>Start</strong> <strong>Guide</strong>
COPYRIGHT<br />
Information in this document is subject to change without notice. Companies, names, and data used in<br />
examples herein are fictitious unless otherwise noted. No part of this document may be reproduced or<br />
transmitted in any form or by any means, electronic or mechanical, for any purpose, without the express<br />
written permission of <strong>Melissa</strong> <strong>Data</strong> Corporation. This document and the software it describes are furnished<br />
under a license agreement, and may be used or copied only in accordance with the terms of the license<br />
agreement.<br />
Copyright © 2008 by <strong>Melissa</strong> <strong>Data</strong> Corporation. All rights reserved.<br />
Information in this document is subject to change without notice. <strong>Melissa</strong> <strong>Data</strong> Corporation assumes no<br />
responsibility or liability for any errors, omissions, or inaccuracies that may appear in this document.<br />
TRADEMARKS<br />
<strong>MatchUp</strong> is a registered trademark of <strong>Melissa</strong> <strong>Data</strong> Corp. Windows is a registered trademark of Microsoft<br />
Corp.<br />
The following are registered trademarks of the United States Postal Service: CASS, CASS Certified, DMM,<br />
DPV, DSF 2 , eLOT, First-Class Mail, LACS Link , NCOA Link , PAVE, Planet Code, Post Office, Postal Service,<br />
RDI, Standard Mail, U.S. Postal Service, United States Post Office, United States Postal Service, USPS,<br />
ZIP, ZIP Code, and ZIP+4.<br />
Document number: MUQG0810A<br />
Last update: October 13, 2008<br />
MELISSA DATA CORPORATION<br />
22382 Avenida Empresa<br />
Rancho Santa Margarita, CA 92688<br />
Phone: (800) MELISSA (1-800-635-4772)<br />
Fax: 949-589-5211<br />
E-mail: info@<strong>Melissa</strong><strong>Data</strong>.com<br />
Internet: www.<strong>Melissa</strong><strong>Data</strong>.com<br />
For the most recent version of this document, visit http://www.melissadata.com/tech/matchup.htm
Table of Contents<br />
Welcome to <strong>MatchUp</strong>!.............................................................................................................1<br />
New Setup .....................................................................................................................................2<br />
Merge ..........................................................................................................................................3<br />
Purge ..........................................................................................................................................7<br />
Merge/Purge.............................................................................................................................15<br />
File Update ...............................................................................................................................25<br />
CASS.........................................................................................................................................32<br />
Processing ..................................................................................................................................37<br />
Analyzer....................................................................................................................................38<br />
Reports .....................................................................................................................................39<br />
Reference.....................................................................................................................................40<br />
CASS Codes.............................................................................................................................40<br />
i
Welcome to <strong>MatchUp</strong>!<br />
Welcome to <strong>MatchUp</strong>!<br />
<strong>MatchUp</strong> is a one-stop solution from de-duping and merging database tables.<br />
• Process up to 512 tables simultaneously.<br />
• Work with dBase, ASCII, Excel, Access, ODBC, SQL, Oracle and DB/2 tables,<br />
even mixing different table types in the same operation.<br />
• Mix tables with different field structures.<br />
• Process up to 50 million records per hour.<br />
• CASS Certified address verification [Optional].<br />
System Requirements<br />
Installation<br />
<strong>MatchUp</strong> requires:<br />
• Microsoft® Windows 98, Me, NT, 2000, 2003, XP or Vista.<br />
• Intel Pentium III® or better.<br />
• 64 MB of RAM minimum. 128 MB of RAM is recommended.<br />
• 10 MB (1GB MB additional space with optional CASS/DPV modules) of<br />
available hard disk space.<br />
To install from a CD or DVD:<br />
<strong>MatchUp</strong> is distributed on CD when purchased without the CASS option, DVD with the<br />
CASS option.<br />
1. Insert the installation disk into your CD-ROM or DVD-ROM drive.<br />
2. The installation program should start automatically and the install program will<br />
appear.<br />
3. Follow the on-screen instructions.<br />
If installation does not start automatically:<br />
1. Click the <strong>Start</strong> button on the task bar.<br />
2. Click Run...<br />
3. Type d:\setup.exe (where d: is your CD-ROM or DVD-ROM drive letter).<br />
4. Follow the on-screen instructions.<br />
1
<strong>MatchUp</strong> <strong>Quick</strong> <strong>Start</strong> <strong>Guide</strong><br />
New Setup<br />
A Setup is a collection of settings that points <strong>MatchUp</strong> to your database tables<br />
and instructs the application how to handle them.<br />
There are four basic types of Setups available within <strong>MatchUp</strong> (Five, if you<br />
purchase <strong>MatchUp</strong> with the CASS option).<br />
• Merge — Merge combines multiple data sources into a single output table,<br />
matching information to the correct database field even if they have different field<br />
names in their original input table.<br />
• Purge — Purge takes one or more data sources and searches for duplicate<br />
records, either across all input tables or only within their own table. <strong>MatchUp</strong> can<br />
also eliminate any records also found in a “suppression” table or not found in an<br />
“intersection” table. Purge updates the input tables but can also write the results to<br />
new tables containing only the unique, non-suppressed records.<br />
• Merge/Purge — As the name suggests, Merge/Purge combines Merge and<br />
Purge into a single operation, performing a Purge operation across many tables<br />
and then writing the unique, non-suppressed records to a new output tables.<br />
• File Update — File update compares records between an output table and one or<br />
more input tables. If it finds matches between records, it updates the records in<br />
the output table with the information in the input table or tables.<br />
• CASS — (Optional) A CASS setup compares your input table to the National<br />
postal database using the same CASS Certified technology found in <strong>Melissa</strong><br />
<strong>Data</strong>’s Address Object and MAILERS+4 software, and verifies that your records<br />
represent actual deliverable addresses.<br />
2
New Setup<br />
Merge<br />
Input Tables<br />
Merge will combine two or more database tables into a new output table,<br />
mapping fields that contain the same data type even if they have different<br />
names.<br />
To create a Merge setup:<br />
• Click New Setup, then click Merge.<br />
An input table is any data source that supplies the data for <strong>MatchUp</strong> to process. <strong>MatchUp</strong><br />
works with dBase, FoxPro, ASCII files, Microsoft Access, Microsoft Excel and ODBC data<br />
sources. It will also work with SQL, Oracle and DB/2 if you have clients for those databases<br />
installed. If not, you can still use these file types via ODBC but processing will be slower<br />
1. Click Add...<br />
2. Select file (Dbase/FoxPro, ASCII, MSAccess/Excel, ODBC, SQL, Oracle, DB/2).<br />
You can mix database tables of different types.<br />
3. Repeat to add additional files.<br />
4. Click Next.<br />
3
<strong>MatchUp</strong> <strong>Quick</strong> <strong>Start</strong> <strong>Guide</strong><br />
Output Field Mapping<br />
The Output Field Mapping tab displays a grid, showing how fields from the input table will<br />
be sent to the output table. The output fields will be in the left column while the matching<br />
fields from the input tables will be in the columns to the right.<br />
<strong>MatchUp</strong> will attempt to determine which fields in the different input tables match each<br />
other and map those fields to the same field in the output table.<br />
In some cases, such as when one table contains separate fields for city, state and ZIP<br />
Code and another includes a single string containing the entire last line of the address<br />
(such as “New York, NY 10012”), <strong>MatchUp</strong> will have to parse the data in one table to match<br />
the fields in another. These fields will be displayed with a pink background<br />
To add an output field:<br />
1. Click on the left hand column.<br />
2. Click Add Output Field.<br />
<strong>MatchUp</strong> displays the Add New Output Field dialog. This allows you to enter the<br />
name of the field, select the type of data (text, numeric, date, logical and so on),<br />
the size of the field, the number of decimal points and the type of data stored in<br />
the field (name, address, city and so on).<br />
3. To add another field, click Save & Add Another. If you are finished, just click OK.<br />
4
New Setup<br />
To change an output field:<br />
Output Table<br />
1. Select that field from the left column and click Change Output Field...<br />
<strong>MatchUp</strong> displays the Change Output Field dialog. This allows you to enter the<br />
name of the field, select the type of data, the size of the field, the number of<br />
decimal points and the type of data stored in the field (name, address, city and so<br />
on).<br />
2. To change another field, click Next or Previous. When finished changing the<br />
output fields, click OK.<br />
3. To modify the mapping of an input field, select that field on the grid and click<br />
Change <strong>Data</strong> Type. <strong>MatchUp</strong> displays a popup with a dropdown list that enables<br />
you to select the type of data contained in the input field.<br />
4. Clicking the Check Mappings... button shows which fields have been mapped,<br />
which have been mapped multiple times and which input fields have not yet been<br />
mapped.<br />
5. Click the Previous and Next to switch between input tables.<br />
6. Click Check Truncations... <strong>MatchUp</strong> shows which input fields could be truncated<br />
during processing. This does not mean that any fields will be truncated but makes<br />
it simpler to check.<br />
7. Click View File to browse the records in the currently selected input table.<br />
8. Click Field List to show a list of the fields in the input tables. Currently mapped<br />
fields are shown in green. Field names can be dragged from this list to the grid to<br />
map or remap the selected input field to an output field.<br />
Use this tab to select or create a database file that will contain the merged records. In the<br />
case of text files, Excel files and dBase tables, <strong>MatchUp</strong> will create the specified table if it<br />
does not exist. If you select an already existing database table, that table will be overwritten<br />
with the merged data when this setup is processed.<br />
To specify an output table:<br />
1. Select the table type from the drop down list.<br />
2. Click the Browse button.<br />
For an ODBC source:<br />
1. Select the data source type from the dropdown list. <strong>MatchUp</strong> will fill in the<br />
connection string.<br />
5
<strong>MatchUp</strong> <strong>Quick</strong> <strong>Start</strong> <strong>Guide</strong><br />
2. Select the database file and table. This will vary according to the database type<br />
selected.<br />
3. Click OK.<br />
For an MS Access database:<br />
1. Select the database file to use.<br />
2. Select an existing table or enter a new table name.<br />
3. Click OK.<br />
For an Excel file:<br />
1. Select the directory containing the Excel spreadsheet you want to use (or a target<br />
directory if you are creating a new file).<br />
2. Select an Excel file (or enter the name of a new Excel file).<br />
3. Select the worksheet to use for the output (or enter a new name to create a new<br />
worksheet).<br />
4. Click OK.<br />
For a dBase file or ASCII file:<br />
1. Select the directory containing the file you want to use (or a target directory if you<br />
are creating a new file).<br />
2. Select a dBase or ASCII file (or enter the name of a new file if you want <strong>MatchUp</strong><br />
to create one).<br />
6
New Setup<br />
3. Click OK.<br />
Source Code Field<br />
If you enter any name in the Source Code Field box, <strong>MatchUp</strong> will add a text field to each<br />
record that will indicate which table the record came from, the record number or both.<br />
For the table, you can select the table name, a two-digit number or a one-letter code (A, B,<br />
C).<br />
The record number can be four, six or eight digits. If you select “Right Justify Record<br />
Number” you can check a box to have <strong>MatchUp</strong> fill the unused digits with zeroes.<br />
Saving the Setup<br />
1. Click OK to finish creating the new Merge setup.<br />
2. You will be warned if some of the input fields may be truncated. Click Yes to<br />
confirm.<br />
3. Click the Save Setup button.<br />
4. Specify a directory and a file name for the new setup and click OK.<br />
Other Uses for Merge<br />
Purge<br />
While you would normally use Merge to combine two or more tables into one, there are also<br />
ways to use Merge on a single file.<br />
You could use the filter function to extract all records that match a certain criteria. For<br />
instance, Merge could build a new table containing only records from a certain state or a<br />
certain range of ZIP codes.<br />
Also, if you start with a table that has a single “City/ST/ZIP” field, you could add output<br />
fields for CITY, STATE, ZIP and PLUS and thus use Merge to parse the last line information.<br />
Purge will search one or more tables and eliminate duplicate records. You<br />
can set the application to match records based on any combination of fields.<br />
<strong>MatchUp</strong> has several common “match codes” preconfigured, but you can also<br />
create your own using the Matchcode Editor.<br />
To create a Purge setup:<br />
1. Click the New Setup button.<br />
2. Click Purge.<br />
7
<strong>MatchUp</strong> <strong>Quick</strong> <strong>Start</strong> <strong>Guide</strong><br />
General Tab<br />
This is where you select the matchcode that <strong>MatchUp</strong> will use to match records in the files.<br />
A matchcode is a list of several combinations of data types that the program will use to<br />
match records. The more fields used, the more selective <strong>MatchUp</strong> will be in finding<br />
matches. In other words, if you use address only, <strong>MatchUp</strong> will find more matches than it<br />
would if you were using address and last name.<br />
<strong>MatchUp</strong> has several of the most commonly used matchcodes already installed. Each is<br />
named according to field types used to match records. These pre-installed matchcodes<br />
cannot be edited, but you can create your own using the Matchcode Editor.<br />
1. Select the Matchcode that you want to use from the dropdown list.<br />
<strong>MatchUp</strong> shows the matchcode settings in a grid below. This grid shows the data<br />
types used in the present matchcode, with their individual settings, and a series of<br />
columns containing X's to the right of each component. Each column shows a<br />
different combination of components to be used, up to 16 combinations, to<br />
determine a match.<br />
2. Select the Ranking.<br />
This determines what priority to give records when it finds duplicates. The record<br />
that gets the highest priority will be kept, while the others will be rejected.<br />
“<strong>MatchUp</strong> will select the best record” instructs the software to keep the most<br />
complete record. This is probably the best for most situations. See the <strong>MatchUp</strong><br />
User's <strong>Guide</strong> for information on the other options.<br />
3. Click Next.<br />
8
New Setup<br />
Input Tables<br />
This is where you will select the tables to be used by this purge setup.<br />
To add Input Tables:<br />
1. Click Add...<br />
2. Select file (dBase/FoxPro, ASCII, MSAccess/Excel, ODBC, SQL, Oracle, DB/2).<br />
It will also work with SQL, Oracle and DB/2 if you have clients for those databases<br />
installed. If not, you can still use these file types via ODBC but processing will be<br />
slower<br />
You can mix database tables of different file types.<br />
3. Repeat to add additional files.<br />
If you enter a name in the Alias, <strong>MatchUp</strong> will use that name on subsequent<br />
screens and on reports. This is helpful if the file or table name is cryptic or<br />
otherwise unclear.<br />
4. Select the Table Type. Tables in a Purge setup can be used five different ways”<br />
• Regular — Records in this and other Regular tables are compared to each<br />
other and duplicates are excluded from the output table.<br />
• Suppression — Records in Regular, No Purge and Self-Purge tables that<br />
match records in a Suppression table will be excluded from the output table.<br />
This is useful for applying “Do Not Mail” lists.<br />
9
<strong>MatchUp</strong> <strong>Quick</strong> <strong>Start</strong> <strong>Guide</strong><br />
• Intersection — Records in Regular, No Purge and Self-Purge tables that do<br />
not match records in any Intersection tables will be excluded from the output<br />
table and marked as non-intersected.<br />
• Self Purge — Records in Self Purge tables are only checked against records<br />
in the same table to find duplicates. They are checked against Suppression<br />
and Intersection tables as normal.<br />
• No Purge — Records in No Purge tables are not checked for duplicates.<br />
They are checked against Suppression and Intersection tables as normal.<br />
5. Repeat for each input table.<br />
The Priority options are only enabled if you selected “I will assign priorities...” on the<br />
General tab. See the <strong>MatchUp</strong> User's <strong>Guide</strong> for more information on these options.<br />
Status Marking<br />
1. Check “Mark rejected records for deletion” if you want duplicate records,<br />
Suppression table matches and Intersection table non-matches tagged for<br />
deletion from the input table.<br />
These records will be deleted when you open this table in the browser and select<br />
File Control > Pack Table. This option is only available for dBase files.<br />
2. Enter or select the name of a field to use as a Count field.<br />
This will contain the number of duplicates found for each record. With dBase<br />
tables, you can enter a new field name and this field will be added to the input<br />
table during processing.<br />
3. Enter or select the name of a field to use as a Status field.<br />
This will contain the Status code for each record. See the <strong>MatchUp</strong> User's <strong>Guide</strong><br />
for more information on <strong>MatchUp</strong> status codes. With dBase tables, you can enter<br />
a new field name and this field will be added to the input file during processing.<br />
4. Repeat for each input table.<br />
If you do not use some form of Status Markup, then you will need to specify output<br />
files on the Advanced tab to know what files were not rejected during the purge<br />
process.<br />
5. Click Next.<br />
Matchcode Mapping<br />
The Matchcode Mapping sets how fields from each input table are matched to the data<br />
types used by the selected matchcode. <strong>MatchUp</strong> attempts to intelligently match fields to the<br />
10
New Setup<br />
correct data types. Fields that have to be parsed prior to matching are displayed with a pink<br />
background.<br />
If you find that <strong>MatchUp</strong> has not assigned a field to the correct data type:<br />
1. Click the Field List button.<br />
2. <strong>MatchUp</strong> displays the field list. Fields that are already matched are displayed with<br />
a blue-green background.<br />
3. Drag the field name to the correct square in the column for that input table.<br />
To remove a field from the mapping:<br />
1. Right click on the field on the Field Mapping table.<br />
2. Click Change Field and select .<br />
To change a field mapping:<br />
1. Right click on the field on the Field Mapping table.<br />
2. Click Change Field and select the correct field name.<br />
To change the data type of a field in an input table:<br />
1. Click on the field.<br />
2. Click the Change <strong>Data</strong> Type button.<br />
3. Select the correct data type from the dropdown list.<br />
11
<strong>MatchUp</strong> <strong>Quick</strong> <strong>Start</strong> <strong>Guide</strong><br />
Advanced<br />
When finished with the Matchcode Mapping, click Next.<br />
The Advanced tab is where you can specify output options for the current Purge Setup.<br />
You set each option separately for each input file.<br />
• Input Matchcode — If you have previously run a Purge on this file and had<br />
<strong>MatchUp</strong> add an Output Matchcode field to the table (see next), you can select<br />
this field. Reusing the matchcode will speed processing because <strong>MatchUp</strong> does<br />
not have to regenerate the matchcode.<br />
Only use this field if you had selected the exact same matchcode settings on the<br />
General tab when the existing matchcode was written to the table as you are<br />
using this time. Using an existing matchcode with different matchcode settings will<br />
have unpredictable effects that could damage your data.<br />
• Output Matchcode — Select or enter a field name that <strong>MatchUp</strong> will use to store<br />
the matchcode for the current record. <strong>MatchUp</strong> can re-use this matchcode in the<br />
future to speed up processing when the same matchcode settings are used.<br />
During processing, <strong>MatchUp</strong> will write this information to the table, creating a new<br />
field in the table if necessary.<br />
• Output Multi-Buyer Count — Select or enter a field name that <strong>MatchUp</strong> will use<br />
to store the Multi-Buyer count for the current record. This is the number of<br />
duplicate records found in other tables. If only purging a single table, this option<br />
has no effect. During processing, <strong>MatchUp</strong> will write this information to the table,<br />
creating a new field in the table if necessary.<br />
12
New Setup<br />
Create New Tables<br />
• Output Dupe Group — Every unique record gets a unique identifying number.<br />
Duplicate records are assigned the same number as the record that is kept. This<br />
is the duplicate group number. Select or enter a field name that <strong>MatchUp</strong> will use<br />
to store this count. During processing, <strong>MatchUp</strong> will write this information to the<br />
table, creating a new field in the table if necessary.<br />
• Input Source Code — If the input table has source code information, select the<br />
field that contains that data for it to appear on reports. See the section on Merge<br />
for more information on Source Codes.<br />
• Input Filter — Enter a dBase expression to limit the records from the selected<br />
input table that will be processed. Click the “...” button to use the Expression<br />
Builder. See the <strong>MatchUp</strong> help file for more information on dBase syntax and the<br />
Expression Builder.<br />
Even though <strong>MatchUp</strong> can write the Purge information back to the input table(s), it can also<br />
create any of the following tables.<br />
• Output Table — Use this option to create a table of the records from this input<br />
table that were not rejected due to duplication, suppression or non-intersection.<br />
• Duplicate Table — Use this option to create a table of the records from this input<br />
table that were rejected due to duplication.<br />
• Suppression Table — Use this option to create a table of the records from this<br />
input table that were rejected due to a match with a Suppression table. If no<br />
suppression table was specified, this table would be empty.<br />
• Intersection Table — Use this option to create a table of the records from this<br />
input table that were rejected due to no match with an Intersection table. If no<br />
intersection table was specified, this table would be empty.<br />
Each input table would have its own settings for output tables.<br />
These tables can be of any file type that <strong>MatchUp</strong> supports (dBase, ASCII, Excel, Access<br />
or ODBC).<br />
To specify an output table:<br />
1. Select the table type from the dropdown list.<br />
2. Click the Browse button<br />
For an ODBC source:<br />
1. Select the data source type from the dropdown list. <strong>MatchUp</strong> will fill in the<br />
connection string.<br />
13
<strong>MatchUp</strong> <strong>Quick</strong> <strong>Start</strong> <strong>Guide</strong><br />
2. Select the database file and table. This will vary according to the database type<br />
selected.<br />
3. Click OK.<br />
For an MS Access database:<br />
1. Select the database file to use.<br />
2. Select an existing table or enter a new table name.<br />
3. Click OK.<br />
For an Excel file<br />
1. Select the directory containing the Excel spreadsheet you want to use (or a target<br />
directory if you are creating a new file).<br />
2. Select an Excel file (or enter the name of a new Excel file).<br />
3. Select the worksheet to use for the output (or enter a new name to create a new<br />
worksheet).<br />
4. Click OK.<br />
For a dBase file or ASCII file:<br />
1. Select the directory containing the file you want to use (or a target directory if you<br />
are creating a new file).<br />
2. Select a dBase or ASCII file (or enter the name of a new file if you want <strong>MatchUp</strong><br />
to create one).<br />
3. Click OK.<br />
Saving the Setup<br />
1. Click OK to finish creating the new Purge setup.<br />
2. You will be warned if some of the input fields may be truncated. Click Yes to<br />
confirm.<br />
3. Click the Save Setup button.<br />
4. Specify a directory and a file name for the new setup and click OK.<br />
14
New Setup<br />
Merge/Purge<br />
General Tab<br />
As the name implies, Merge/Purge is a combination of both the merge and<br />
purge functions. Matchup will purge two or more tables of duplicate records,<br />
suppressed records and non-intersection records and then write the<br />
remaining records to a single table, matching records with different structures<br />
to the correct fields.<br />
If desired, <strong>MatchUp</strong> can also verify and code the output data, using the same CASS<br />
Certified technology found in <strong>Melissa</strong> <strong>Data</strong>’s MAILERS+4 and Address Object.<br />
This is where you select the matchcode that <strong>MatchUp</strong> will use to match records in the files.<br />
A matchcode is a list of several combinations of data types that the program will use to<br />
match records. The more fields used, the more selective <strong>MatchUp</strong> will be in finding<br />
matches. In other words, if you use address only, <strong>MatchUp</strong> will find more matches than it<br />
would if you were using address and last name.<br />
<strong>MatchUp</strong> has several of the most commonly used matchcodes already installed. Each is<br />
named according to field types used to match records. These pre-installed matchcodes<br />
cannot be edited, but you can create your own using the Matchcode Editor.<br />
1. Select the Matchcode that you want to use from the dropdown list.<br />
<strong>MatchUp</strong> shows the matchcode settings in a grid below. This grid shows the field<br />
types used, in the order they will be compared, and a series of columns containing<br />
X's to the right of each field. Each column shows a different combination of field<br />
15
<strong>MatchUp</strong> <strong>Quick</strong> <strong>Start</strong> <strong>Guide</strong><br />
Input Tables<br />
types, up to 16 combinations, in the order that they will be used to determine a<br />
match.<br />
2. Select the Ranking.<br />
This determines what priority to give records when it finds duplicates. The record<br />
that gets the highest priority will be kept, while the others will be rejected.<br />
“<strong>MatchUp</strong> will select the best record” instructs the software to keep the most<br />
complete record. This is probably the best for most situations. See the <strong>MatchUp</strong><br />
User's <strong>Guide</strong> for information on the other options.<br />
3. Click Next.<br />
This is where you will select the tables to be used by this Merge/Purge setup.<br />
To add Input Tables:<br />
1. Click Add...<br />
2. Select file (dBase/FoxPro, ASCII, MSAccess/Excel, ODBC, SQL, Oracle, DB/2).<br />
<strong>MatchUp</strong> can use SQL Server, Oracle or DB/2 files directly if you have clients for<br />
those database systems installed. If not, you can still use those file types via<br />
ODBC but processing will be slower.<br />
You can mix database tables of different file types.<br />
16
New Setup<br />
3. Repeat to add additional files.<br />
If you enter a name in the Alias, <strong>MatchUp</strong> will use that name on subsequent<br />
screens and on reports. This is helpful if the file or table name is cryptic or<br />
otherwise unclear.<br />
4. Select the Table Type. Tables in a Merge/Purge setup can be used five different<br />
ways:<br />
• Regular — Records in this and other Regular tables are compared to each<br />
other and duplicates are excluded from the output table.<br />
• Suppression — Records in Regular, No Purge and Self-Purge tables that<br />
match records in a Suppression table will be excluded from the output table.<br />
This is useful for applying “Do Not Mail” lists.<br />
• Intersection — Records in Regular, No Purge and Self-Purge tables that do<br />
not match records in any Intersection tables will be excluded from the output<br />
table.<br />
• Self Purge — Records in Self Purge tables are only checked against records<br />
in the same table to find duplicates. They are checked against Suppression<br />
and Intersection tables as normal.<br />
• No Purge — Records in No Purge tables are not checked for duplicates.<br />
They are checked against Suppression and Intersection tables as normal.<br />
5. Repeat for each input table.<br />
The Priority options are only enabled if you selected “I will assign priorities...” on<br />
the General tab. See the <strong>MatchUp</strong> User's <strong>Guide</strong> for more information on these<br />
options.<br />
Status Marking<br />
If you want duplicate records, Suppression table matches and Intersection table nonmatches<br />
tagged for deletion from the input table.<br />
1. Check “Mark rejected records for deletion.”<br />
These records will be deleted when you open this table in the browser and select<br />
File Control > Pack Table. This option is only available for dBase files.<br />
2. Enter or select the name of a field to use as a Count field.<br />
This will contain the number of duplicates found for each record. With dBase<br />
tables, you can enter a new field name and this field will be added to the input<br />
table during processing.<br />
17
<strong>MatchUp</strong> <strong>Quick</strong> <strong>Start</strong> <strong>Guide</strong><br />
3. Enter or select the name of a field to use as a Status field.<br />
This will contain the Status code for each record. See the <strong>MatchUp</strong> User's <strong>Guide</strong><br />
for more information on <strong>MatchUp</strong> status codes. With dBase tables you can enter a<br />
new field name and this field will be added to the input file during processing.<br />
4. Repeat for each input table.<br />
If you do not use some form of Status Markup, then you will need to specify output<br />
files on either the Output or Advanced tabs to record what files were not rejected<br />
during the merge/purge process.<br />
5. Click Next.<br />
Matchcode Mapping<br />
The Matchcode Mapping sets how fields from each input table are matched to the data<br />
types used by the selected matchcode. <strong>MatchUp</strong> attempts to intelligently match fields to the<br />
correct data types. Fields that have to be parsed prior to matching are displayed with a pink<br />
background.<br />
If you find that <strong>MatchUp</strong> has not assigned a field to the correct data type:<br />
1. Click the Field List button.<br />
<strong>MatchUp</strong> displays the field list. Fields that are already matched are displayed with<br />
a blue-green background.<br />
2. Drag the field name to the correct square in the column for that input table.<br />
18
New Setup<br />
To remove a field from the mapping:<br />
1. Right click on the field on the Field Mapping table.<br />
2. Click Change Field and select .<br />
To change a field mapping:<br />
1. Right click on the field on the Field Mapping table.<br />
2. Click Change Field and select the correct field name.<br />
To change the data type of a field in an input table:<br />
1. Click on the field.<br />
2. Click the Change <strong>Data</strong> Type button.<br />
3. Select the correct data type from the dropdown list.<br />
When finished with the Matchcode Mapping, click Next.<br />
Output Field Mapping<br />
The Output Field Mapping tab displays a grid showing how fields from the input table will<br />
be sent to the output table. The output fields will be in the left column while the matching<br />
fields from the input tables will be in the columns to the right.<br />
<strong>MatchUp</strong> will attempt to determine which fields in the different input tables match each<br />
other and map those fields to the same field in the output table.<br />
19
<strong>MatchUp</strong> <strong>Quick</strong> <strong>Start</strong> <strong>Guide</strong><br />
In some cases, such as when one table contains separate fields for city, state and ZIP<br />
Code and another includes a single string containing the entire last line of the address<br />
(such as “New York, NY 10012”), <strong>MatchUp</strong> will have to parse the data in one table to match<br />
the fields in another. These fields will be displayed with a pink background.<br />
To add an output field:<br />
1. Click on the left hand column.<br />
2. Click Add Output Field.<br />
<strong>MatchUp</strong> displays the Add New Output Field dialog. This allows you to enter the<br />
name of the field, select the type of data (text, numeric, date, logical, etc.), the size<br />
of the field, the number of decimal points and the type of data stored in the field<br />
(name, address, city and so on).<br />
3. To add another field, click Save & Add Another. If you are finished, just click OK.<br />
To change an output field:<br />
1. Select that field from the left columns and click Change Output Field...<br />
<strong>MatchUp</strong> displays the Change Output Field dialog. This allows you to enter the<br />
name of the field, select the type of data (text, numeric, date, logical, etc), the size<br />
of the field, the number of decimal points and the type of data stored in the field<br />
(name, address, city and so on).<br />
2. To change another field, click Next or Previous.<br />
3. When finished changing the output fields, click OK.<br />
To modify the mapping of an input field:<br />
Select that field on the grid and click Change <strong>Data</strong> Type.<br />
<strong>MatchUp</strong> displays a popup with a dropdown list that enables you to select the type<br />
of data contained in the input field.<br />
To check your mappings:<br />
1. Click the Check Mappings...<br />
<strong>MatchUp</strong> shows which fields have been mapped, which have been mapped<br />
multiple times and which input fields have not yet been mapped.<br />
Click the Previous and Next to switch between input tables.<br />
2. Clicking Check Truncations...<br />
<strong>MatchUp</strong> shows which input fields could be truncated during processing. This<br />
does not mean that the data in any fields will be truncated but makes it simpler to<br />
check.<br />
20
New Setup<br />
Output Tables<br />
3. Click View File to browse the records in the currently selected input table.<br />
4. Click Field List to show a list of the fields in the input tables.<br />
Currently mapped fields are shown in green. Field names can be dragged from<br />
this list to the grid to map or remap the select input field to an output field.<br />
Use this tab to select or create the database files that will contain the merged records. In<br />
the case of text files, Excel files and dBase tables, this table does not have to exist. If you<br />
select an already existing database table, that table will be overwritten with the merged<br />
data when this setup is processed.<br />
Unlike the Merge option, Merge/Purge can create up to four output tables, similar to ones<br />
created by the Purge option.<br />
• Output Table — Use this option to create a table of the records from all input<br />
tables that were not rejected due to duplication, suppression or non-intersection.<br />
• Duplicate Table — Use this option to create a table of the records from all input<br />
tables that were rejected due to duplication.<br />
• Suppression Table — Use this option to create a table of the records from all<br />
input tables that were rejected due to a match with a Suppression table. If no<br />
suppression table(s) were specified, this table would be empty.<br />
• Intersection Table — Use this option to create a table of the records from all input<br />
tables that were rejected due to no match with an Intersection table. If no<br />
intersection table(s) were specified, this table would be empty.<br />
21
<strong>MatchUp</strong> <strong>Quick</strong> <strong>Start</strong> <strong>Guide</strong><br />
These tables can be of any file type that <strong>MatchUp</strong> supports (dBase, ASCII, Excel, Access,<br />
SQL, Oracle, DB/2 or ODBC). See the Output Table section under Merge setup on page 5<br />
for more information on how to set up the different table types.<br />
You can also designate fields in the output tables to contain match data.<br />
• Status Field — This will contain the Status code for each record. Status codes<br />
indicate whether or not duplicates, suppression records or intersection records<br />
were found for the current record. See the <strong>MatchUp</strong> User's <strong>Guide</strong> for more<br />
information on <strong>MatchUp</strong> status codes.<br />
• Output Matchcode — Enter a field name that <strong>MatchUp</strong> will use to store the<br />
matchcode for the current record. <strong>MatchUp</strong> can re-use this matchcode in the<br />
future to speed up processing when the same matchcode settings are used.<br />
During processing, <strong>MatchUp</strong> will write this information to the table, creating a new<br />
field in dBase tables if necessary.<br />
• Multi-Buyer Count Field — Enter a field name that <strong>MatchUp</strong> will use to store the<br />
Multi-Buyer count for the current record. See Tools | User Settings in the help file<br />
for more information about seting how <strong>MatchUp</strong> calculates this field. During<br />
processing, <strong>MatchUp</strong> will write this information to the table, creating a new field in<br />
dBase tables if necessary.<br />
• Source Code Field — If you enter any name in the Source Code Field box,<br />
<strong>MatchUp</strong> will add a text field to each record that will indicate which table the record<br />
came from, the record number or both. Click the Source Code Format button to<br />
indicate how to format this information. See the Merge section on page 3 for more<br />
information on Source Code formatting.<br />
• Count Field — If you enter a name in the Count Field box, <strong>MatchUp</strong> will add a<br />
field to each record that will indicate how many duplicate records were found for<br />
the current record, including those found in the same table (the Multi-Buyer Count<br />
only counts duplicates found in different tables). During processing, <strong>MatchUp</strong> will<br />
write this information to the table, creating a new field in dBase tables if necessary.<br />
• Dupe Group Field — Every unique record gets a unique identifying number.<br />
Duplicate records are assigned the same number as the record that is not<br />
rejected. This is the duplicate group number. Enter a field name that <strong>MatchUp</strong> will<br />
use to store this count. During processing, <strong>MatchUp</strong> will write this information to<br />
the table, creating a new field in dBase tables if necessary.<br />
• Multi-Buyer Field — If you enter a name in the Count field box, <strong>MatchUp</strong> will add<br />
a field to each record that will indicate in which tables the duplicate records were<br />
found. Click Multi-Buyer Format... to control how <strong>MatchUp</strong> formats the Multi-<br />
Buyer information.<br />
22
New Setup<br />
CASS the Output Table<br />
Using the optional CASS module, <strong>MatchUp</strong> can verify and code the records in the output<br />
table using the same CASS Certified technology found in <strong>Melissa</strong> <strong>Data</strong>'s MAILERS+4<br />
software and Address Object.<br />
Note: In order to assign output fields to CASS information, you must have already created<br />
those fields in the Output Field Mapping step (see page 19).<br />
To validate the output table:<br />
Advanced<br />
1. Click the CASS button.<br />
2. <strong>MatchUp</strong> will display the CASS dialog.<br />
3. Check CASS the Output Table. This will enable the options on the CASS dialog<br />
4. Select the output fields for the CASS information. For more information on setting<br />
up these fields, see the CASS section on page 32.<br />
5. Click OK.<br />
When you have finished setting up the Output Tables, click Next.<br />
Even though Merge/Purge writes the non-rejected records to a single new, merged output<br />
table, it can also update the input tables and can create additional output tables for each<br />
input table.<br />
23
<strong>MatchUp</strong> <strong>Quick</strong> <strong>Start</strong> <strong>Guide</strong><br />
The Advanced tab is where you can specify output options for each input file.<br />
Output Tables<br />
• Input Matchcode — If you have previously run a Purge on this file and had<br />
<strong>MatchUp</strong> add an Output Matchcode field to the table (see next), you can select<br />
this field. Reusing the matchcode will speed processing because <strong>MatchUp</strong> does<br />
not have to regenerate the matchcode.<br />
Only use this field if you had selected the exact same matchcode settings on the<br />
General tab when the existing matchcode was written to the table as you are<br />
using this time. Using an existing matchcode with different matchcode settings will<br />
have unpredictable effects on your data.<br />
• Output Matchcode — Select or enter a field name that <strong>MatchUp</strong> will use to store<br />
the matchcode for the current record. <strong>MatchUp</strong> can re-use this matchcode in the<br />
future to speed up processing when the same matchcode settings are used.<br />
During processing, <strong>MatchUp</strong> will write this information to the table, creating a new<br />
field in the table if necessary.<br />
• Output Multi-Buyer Count — Select or enter a field name that <strong>MatchUp</strong> will use<br />
to store the Multi-Buyer count for the current record. This is the number of<br />
duplicate records found in other tables. If only purging a single table, this option<br />
has no effect. During processing, <strong>MatchUp</strong> will write this information to the table,<br />
creating a new field in the table if necessary.<br />
• Output Dupe Group — Every unique record gets a unique identifying number.<br />
Duplicate records are assigned the same number as the record that is kept. This<br />
is the duplicate group number. Select or enter a field name that <strong>MatchUp</strong> will use<br />
to store this count. During processing, <strong>MatchUp</strong> will write this information to the<br />
table, creating a new field in the table if necessary.<br />
• Input Source Code — If the input table has source code information, select the<br />
field that contains that data for it to appear on reports. See the Output Field<br />
Mapping section under Merge on page 7 for more information on Source Codes.<br />
• Input Filter — Enter a dBase expression to limit the records from the select input<br />
table that will be processed. Click the “...” button to use the Expression Builder.<br />
See the <strong>MatchUp</strong> help file for more information on dBase syntax and the<br />
Expression Builder.<br />
Even though <strong>MatchUp</strong> will write the Purge information back to the input table(s), it can also<br />
create any of the following output tables.<br />
• Output Table — Use this option to create a table of the records from this input<br />
table that were not rejected due to duplication, suppression or non-intersection.<br />
• Duplicate Table — Use this option to create a table of the records from this input<br />
table that were rejected due to duplication.<br />
24
New Setup<br />
• Suppression Table — Use this option to create a table of the records from this<br />
input table that were rejected due to a match with a Suppression table. If no<br />
suppression table was specified, this table would be empty.<br />
• Intersection Table — Use this option to create a table of the records from this<br />
input table that were rejected due to no match with an Intersection table. If no<br />
intersection table was specified, this table would be empty.<br />
Each input table would have its own settings for output tables.<br />
These tables can be from any database that <strong>MatchUp</strong> supports (dBase, ASCII, Excel,<br />
Access, ODBC, SQL, Oracle or DB/2).<br />
When finished with the Advanced Options, click OK.<br />
Saving the Setup<br />
File Update<br />
1. Click OK to finish creating the new Merge/Purge setup.<br />
2. You will be warned if some of the input fields may be truncated. Click Yes to<br />
confirm.<br />
3. Click the Save Setup button.<br />
4. Specify a directory and a file name for the new setup and click OK.<br />
The File Update option will take two separate tables, both containing<br />
matching records but different kinds of data, and write the data from one<br />
table to matching records in another. In other words, you might have a table<br />
containing very complete customer records but no e-mail addresses, which<br />
are in another table. File Update can extract the e-mail addresses from the<br />
second table and write that information to matching records in the first.<br />
There must be some overlap between the two tables, so there is enough information for<br />
<strong>MatchUp</strong> to find the matching records. File Update uses the same matchcodes used to<br />
determine matches in Purge and Merge/Purge operations. So the e-mail address table<br />
would also need name and address fields, for example, to match records in the master<br />
database.<br />
If <strong>MatchUp</strong> finds multiple matches to the same record, it can use a process called gathering<br />
to select the best record or even combine the contents of multiple records into a single field.<br />
In our e-mail address example, if <strong>MatchUp</strong> found multiple e-mail addresses matching the<br />
same physical address, it might take the e-mail address from the first matching record it<br />
encounters or it could join the e-mail addresses into a single string, separated by spaces.<br />
25
<strong>MatchUp</strong> <strong>Quick</strong> <strong>Start</strong> <strong>Guide</strong><br />
To create a File Update setup:<br />
General Tab<br />
1. Click New Setup.<br />
2. Click File Update.<br />
This is where you select the matchcode that <strong>MatchUp</strong> will use to match records in the files.<br />
A matchcode is a list of several combinations of data types that the program will use to<br />
match records. The more fields used, the more selective <strong>MatchUp</strong> will be in finding<br />
matches. In other words, if you use address only, <strong>MatchUp</strong> will find more matches than it<br />
would if you were using address and last name.<br />
<strong>MatchUp</strong> has several of the most commonly used matchcodes already installed. Each is<br />
named according to field types used to match records. These pre-installed matchcodes<br />
cannot be edited, but you can create your own using the Matchcode Editor.<br />
1. Select the Matchcode that you want to use from the dropdown list.<br />
<strong>MatchUp</strong> shows the matchcode settings in a grid below. This grid shows the data<br />
types used in the present matchcode, with their individual settings, and a series of<br />
columns containing X’s to the right of each component. Each column shows a<br />
different combination of components to be used, up to 16 combinations, to<br />
determine a match.<br />
2. Select the Ranking.<br />
This determines what priority to give records when it finds duplicates. The record<br />
that gets the highest priority will be kept, while the others will be rejected.<br />
“<strong>MatchUp</strong> will select the best record” instructs the software to keep the most<br />
26
New Setup<br />
Input Tables<br />
complete record. This is probably the best for most situations. See the <strong>MatchUp</strong><br />
User's <strong>Guide</strong> for information on the other options.<br />
3. Click Next.<br />
This is where you will select the tables to be used by this File Update setup.<br />
To add an input table:<br />
1. Click Add...<br />
2. Select file (dBase/FoxPro, ASCII, MSAccess/Excel, ODBC, SQL, Oracle, DB/2).<br />
To use SQL Server, Oracle or DB/2 files directly, you must have the clients for<br />
those database types installed. You can still use those file types via ODBC but<br />
processing will be slower.<br />
You can mix database tables of different file types.<br />
3. Repeat to add additional files.<br />
If you enter a name in the Alias, <strong>MatchUp</strong> will use that name on subsequent<br />
screens and on reports. This is helpful if the file or table name is cryptic or<br />
otherwise unclear.<br />
4. Select the Table Type. Tables in a File Update setup can be used two different<br />
ways.<br />
• Input — The table or tables that contain the updated information to be added<br />
to matching records in the output table.<br />
27
<strong>MatchUp</strong> <strong>Quick</strong> <strong>Start</strong> <strong>Guide</strong><br />
Matchcode Mapping<br />
• Output — The table that will be updated with information from matching<br />
records in the input table or tables. There can only be one output table.<br />
In order for the data from the input table or tables to be added to the output, the<br />
matching fields must already exist in the output table. <strong>MatchUp</strong> will not create the<br />
fields during the update. You can use the Modify Structure button in <strong>MatchUp</strong> to<br />
add the necessary fields before adding the table to the setup.<br />
The Matchcode Mapping sets how fields from each input table are matched to the data<br />
types used by the selected matchcode. <strong>MatchUp</strong> attempts to intelligently match fields to the<br />
correct data types. Fields that have to be parsed prior to matching are displayed with a pink<br />
background.<br />
If you find that <strong>MatchUp</strong> has not assigned a field to the correct data type:<br />
1. Click the Field List button.<br />
<strong>MatchUp</strong> displays the field list. Fields that are already matched are displayed with<br />
a blue-green background.<br />
2. Drag the field name to the correct square in the column for that input table.<br />
To remove a field from the mapping:<br />
1. Right click on the field on the Field Mapping table.<br />
28
New Setup<br />
2. Click Change Field and select .<br />
To change a field mapping:<br />
1. Right click on the field on the Field Mapping table.<br />
2. Click Change Field and select the correct field name.<br />
To change the data type of a field in an input table:<br />
Update<br />
1. Click on the field.<br />
2. Click the Change <strong>Data</strong> Type button.<br />
3. Select the correct data type from the dropdown list.<br />
When finished with the Matchcode Mapping, click Next.<br />
On the Update tab, you will select which field in your output table will be updated with<br />
information from matching records in the input table or tables.<br />
In the left column or columns, this table shows lists of fields from the input tables.<br />
To change the data type of an input field:<br />
1. Click the field.<br />
<strong>MatchUp</strong> will activate the Input Field controls below.<br />
29
<strong>MatchUp</strong> <strong>Quick</strong> <strong>Start</strong> <strong>Guide</strong><br />
2. Click Change <strong>Data</strong> Type...<br />
3. <strong>MatchUp</strong> will display a dropdown list.<br />
4. Select the correct data type and click the green check button.<br />
In the right column you will see a list of the fields in the output table. At first, all<br />
fields are set for . In order for <strong>MatchUp</strong> to update the output table,<br />
you must select an Update Method for one or more of the fields.<br />
To select the Update Method for a field:<br />
1. Click on the field name in the right column.<br />
2. Select the Update Method from the dropdown list below.<br />
To change the data type of an updated field:<br />
1. Click the Change <strong>Data</strong> Type... button.<br />
2. <strong>MatchUp</strong> will display a dropdown list.<br />
3. Select the correct data type and click the green check button.<br />
To select the Update Method for several fields at once:<br />
1. Click the Global Update... button.<br />
2. <strong>MatchUp</strong> displays the Global Update dialog.<br />
3. Click on the field name to select them. Click again to deselect them.<br />
4. Check Update.<br />
5. Select the Update Method from the dropdown list.<br />
6. Click Change!<br />
7. Repeat as needed for other fields.<br />
8. Click Close when finished.<br />
Click OK to finish configuring the File Update setup.<br />
Update Methods<br />
There are numerous Update Methods available. Which ones are accessible for any given<br />
field depends on the type of data in the actual field (text, numbers or dates). Many are selfexplanatory,<br />
but some may need clarification.<br />
First <strong>Data</strong>:<br />
<strong>MatchUp</strong> selects the first matching record that contains data in the updated field.<br />
30
New Setup<br />
Join:<br />
<strong>MatchUp</strong> joins together all of the data contributed into a single string. Join is only available<br />
for character fields.<br />
Join with Spaces:<br />
Same as Join above, but each piece of data is separated by a space.<br />
Longest:<br />
<strong>MatchUp</strong> scans the group of duplicates and takes the longest data string that it comes<br />
across. Longest is only available for character fields.<br />
Shortest:<br />
The opposite of Longest above.<br />
Maximum Value:<br />
<strong>MatchUp</strong> scans the group of duplicates and takes the field with the largest value. Maximum<br />
is available for character and numeric fields.<br />
Minimum Value:<br />
Same as Maximum, above, but takes the field with the smallest value.<br />
Add Values:<br />
The value in each contributing field is added together to obtain a total result. This is useful if<br />
the data consists of sales figures that need to be totaled. Add is only available for numeric<br />
fields.<br />
Earliest Date:<br />
The field with the earliest date is selected for output.<br />
Latest Date:<br />
Just like Earliest, above, but takes the field with the latest date. Latest is only available for<br />
date fields.<br />
Stack Group (A-H):<br />
There are 8 stack groups (letters A through H). These are useful if you have tables with<br />
multiple instances of the same kind of data. Two or more output fields are assigned to a<br />
stack group. The data from the first matching record is written to the first field in the stack<br />
group. The next record's data is written to the second field, and so on. If there are more<br />
31
<strong>MatchUp</strong> <strong>Quick</strong> <strong>Start</strong> <strong>Guide</strong><br />
records with matching fields than there are fields in the stack group, the excess fields are<br />
discarded.<br />
Saving the Setup<br />
CASS<br />
1. Click OK to finish creating the new File Update setup.<br />
2. You will be warned if some of the input fields may be truncated. Click Yes to<br />
confirm.<br />
3. Click the Save Setup button.<br />
4. Specify a directory and a file name for the new setup and click OK.<br />
This optional part of the <strong>MatchUp</strong> software uses the same CASS Certified<br />
address matching technology found in <strong>Melissa</strong> <strong>Data</strong>'s MAILERS+4 software<br />
and Address Object API. In <strong>MatchUp</strong>, you can use this technology to verify<br />
the deliverability of addresses in your list and add ZIP + 4® codes and carrier<br />
routes to your list, as well as enhance your list with additional demographic<br />
information from the National postal database.<br />
To set up <strong>MatchUp</strong> to verify your list:<br />
Input/Output Fields<br />
1. Click the New Setup button.<br />
2. Click the CASS button.<br />
3. <strong>MatchUp</strong> displays the CASS setup screen.<br />
The first tab shows the normal address data fields, such as a company name, street<br />
address, city, state and ZIP Code, in two columns. The column on the left (Input) shows the<br />
existing fields in the input table while the right column (Output) allows you to select the<br />
fields that will receive the verified and standardized data after processing is completed on<br />
each record.<br />
To select an input table:<br />
1. Click Browse.<br />
2. Select a file (dBase/FoxPro, ASCII, MSAccess/Excel, ODBC, SQL, Oracle, DB/2).<br />
You can SQL Server, Oracle or DB/2 files directly if you have the clients for those<br />
database system installed. If not, you can still use those file type via ODBC but<br />
processing will be slower.<br />
32
New Setup<br />
You can mix database tables of different types.<br />
3. Click OK.<br />
To write the verified data back to the same fields in the input table. click Copy Input >><br />
Output. This will copy the name of any field found in the input column to the matching data<br />
output type.<br />
If you wish to write a data type to a different field, or if the output type does not match an<br />
existing input field, you can select an existing field from the dropdown list next to that data<br />
type. When working with dBase tables, if a field does not yet exist in the input table, you can<br />
type a new name in the box. A field with this name will be added to the table when the table<br />
is processed. If you create a new field this way, you must also enter a size for the field.<br />
Note: If you are verifying the output of a Merge/Perge operation, you can only select<br />
existing field name. To create new fields, you must do so during the Output Field Mapping<br />
step.<br />
If you select the same field for the City, State, ZIP Code and Plus 4, <strong>MatchUp</strong> will<br />
concatenate the output data into a single field.<br />
Some of the fields on the Input/Output Field tab may require additional explanation.<br />
• Urbanization — This field is only used with Puerto Rican addresses to break ties<br />
between addresses in the same ZIP Code.<br />
• Delivery Point Code — This is the 10th and 11th digit of the Delivery Point<br />
Barcode number. The first nine digits are the ZIP + 4.<br />
• Delivery Point Check Digit — This is the 12th digit of the Delivery Point Barcode.<br />
Click Next to move on to Additional Output Fields.<br />
33
<strong>MatchUp</strong> <strong>Quick</strong> <strong>Start</strong> <strong>Guide</strong><br />
Additional Output Fields<br />
<strong>MatchUp</strong> matches your address data to the National database and can use these matches<br />
to insert additional information about each address into the database, if desired.<br />
Again, you can either select the name of an existing field or enter the name of a new field. If<br />
you enter a new field name, <strong>MatchUp</strong> supplies a field length that matches the standard<br />
length of that data type. For example, the City Abbreviation is 13 characters, so if you enter<br />
a new field name for City Abbreviation, <strong>MatchUp</strong> will automatically set the field length at 13.<br />
Demographics<br />
• City Abbreviation — If the city name is less than 13 characters long, the full<br />
name is returned. If more than 13 characters long, the standard USPS<br />
abbreviation is returned.<br />
• County Name — The name of the county associated with the input address.<br />
• County FIPS — The Federal Information Processing Standard number assigned<br />
to the county.<br />
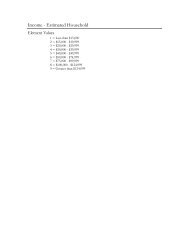
• Time Zone and Time Zone Code — The name and numeric code for the time<br />
zone containing the input address. See page 40 at the end of this guide for a full<br />
list of time zones and their codes.<br />
• MSA Number — The Metropolitan Statistical Area code assigned to the ZIP Code<br />
for the current address.<br />
• PMSA Number — The Primary Metropolitan Statistical Area code assigned to the<br />
ZIP Code for the current address.<br />
34
New Setup<br />
Geographics<br />
• Congressional District — The two-digit code for the congressional district in<br />
which a verified address is located.<br />
These two fields return the latitude and longitude of the geographic center of the ZIP + 4 in<br />
which the verified address is located.<br />
Split Components<br />
The street address is parsed into its component parts. If the address is successfully<br />
verified, then <strong>MatchUp</strong> will parse the standardized address returned by the software. If not,<br />
<strong>MatchUp</strong> will attempt to parse the address as found in the input table.<br />
Address Status<br />
Options<br />
• LACS Link - If the submitted address has been updated due to conversion from<br />
Rural Route format to standard city-style street addresses or other types of<br />
address conversion (such as renaming a street), <strong>MatchUp</strong> will match the address<br />
to the USPS database of such addresses and automatically update the field to the<br />
correct address. If these has happened for a given address, <strong>MatchUp</strong> will return a<br />
“Y” in this field.<br />
• EWS - If the address is found on the list of new addresses scheduled to be<br />
included in the national database, <strong>MatchUp</strong> will return a “Y” to this field.<br />
• Address Type - <strong>MatchUp</strong> returns a one-letter code for the type of address<br />
indicated in the national database. See the end of this guide for a table of possible<br />
return values.<br />
• DPV Footnotes - <strong>MatchUp</strong> returns a series of two letter codes indicating the<br />
degree of success it had matching the current address to a deliverable address.<br />
See the end of this guide for a table of possible return values.<br />
Click Next to move on to Options.<br />
The options screen allows you further control over how <strong>MatchUp</strong> handles the verification of<br />
your data.<br />
• Output Error Code - Select or enter a field name for <strong>MatchUp</strong> to use for the Error<br />
Code, a one-digit string which indicates the reason an address was not<br />
successfully verified and coded. See the end of this guide for a list of possible<br />
error codes.<br />
35
<strong>MatchUp</strong> <strong>Quick</strong> <strong>Start</strong> <strong>Guide</strong><br />
• Output Status Code - Select or enter a field name for <strong>MatchUp</strong> to use for the<br />
Status Code, a one-digit string which indicates <strong>MatchUp</strong>'s degree of success in<br />
verifying and coding an address. See the end of this guide for a list of possible<br />
Stacodes.<br />
• LACS Link Status Code - Select or enter a field name for <strong>MatchUp</strong> to use for the<br />
LACS Link Status Code, which indicates the degree of matching between the input<br />
address and the LACS Link database.<br />
• If there's a coding error… - If <strong>MatchUp</strong> can't verify an address record, you have<br />
the option of clearing the ZIP + 4 and Carrier Fields if they already exist in the<br />
input table. This prevents an unverified address from being mistaken for a verified<br />
one.<br />
• If joining City/State Zip… — This option controls how <strong>MatchUp</strong> formats a<br />
combined city, state and ZIP + 4 string before writing it to the output field.<br />
• Input Filter — Enter a dBase expression to limit the records from the input table<br />
that are verified. See the <strong>MatchUp</strong> help file for more information on dBase syntax<br />
and the Expression Builder.<br />
• Perform DPV verification — Uncheck this option to turn off DPV verification. This<br />
allows addresses that are not DPV matches to be ZIP + 4 coded. Because DPV is<br />
a CASS requirement, however, turning this option off will disable printing of CASS<br />
Form 3553.<br />
• Perform LACS Link verification - Uncheck this option to turn off LACS Link<br />
checking. Because LACS Link is a CASS requirement, however, turning this option<br />
off will disable printing of CASS Form 3553.<br />
36
Processing<br />
• Use CASSMate enhanced processing - Turning on this option causes <strong>MatchUp</strong><br />
to be more aggressive in attempting to verify addresses than with normal address<br />
verification. This may slow down processing but can result in more verified<br />
addresses.<br />
• Processing via ZIPIndex - Temporarily sorts your input in ZIP Code order to<br />
allow CASSMate processing. This option allows you to use CASSMate, which<br />
requires ZIP Code order, without permanently re-sequencing your input table. This<br />
option is only available for dBase tables.<br />
• Form 3553 Information - This information is required to complete the CASS<br />
Form 3553. This information can be stored for future use by selecting<br />
User Settings > CASS > Options before creating the CASS setup.<br />
Click OK to complete the CASS setup.<br />
Saving the Setup<br />
Processing<br />
1. Click OK to finish creating the new CASS setup.<br />
2. You will be warned if some of the input fields may be truncated. Click Yes to<br />
confirm.<br />
3. Click the Save Setup button.<br />
4. Specify a directory and a file name for the new setup and click OK.<br />
To process the data in the currently loaded setup, simply click the Process<br />
button.<br />
<strong>MatchUp</strong> will display the Processing dialog, which shows the progress of the<br />
operation as it proceeds.<br />
The appearance of this dialog varies depending on the type of setup being processed, but<br />
they all show continually updated statistics about the operation in progress, including the<br />
number of records already processed, the total records, the current speed in records per<br />
hour, and the estimated time when the current operation will be completed.<br />
The Processing dialog has a small slider bar near the bottom, with “Updates” at one end<br />
and “Speed” at the other. When the slider bar is moved toward the “Updates” end, the<br />
dialog will be updated more frequently. Move the slider toward “Speed” and <strong>MatchUp</strong> will<br />
dedicate more cycles to processing the list rather than updating the screen, meaning that<br />
the number will change less frequently. While this theoretically does speed up the<br />
processing, it tends to make the program less responsive to user input. If you click the<br />
Cancel or Pause button, it will take longer for <strong>MatchUp</strong> to respond. Current computers are<br />
fast enough that this setting probably does not have a noticeable effect on speed but if you<br />
are using <strong>MatchUp</strong> on an older computer, this control may improve performance.<br />
37
<strong>MatchUp</strong> <strong>Quick</strong> <strong>Start</strong> <strong>Guide</strong><br />
After processing is complete, the Processing dialog will show the final statistic and enable<br />
two new buttons: Analyzer and Reports.<br />
Analyzer<br />
This option is available on all types of Setup except CASS. The Analyzer shows<br />
a table of all records processed by the previous operation. Records that have<br />
matched in some way are color coded. The colors don't mean anything, but<br />
simply alternate to make reading the table easier.<br />
The first column of each record is also marked with one of the following status codes:<br />
• U - A unique record.<br />
• O - An output record that has duplicates.<br />
• D - A rejected duplicate record.<br />
• S/s - A suppression table record. Lower case means a match was found to this<br />
record and those records were suppressed. Upper case means no matches were<br />
found for this record.<br />
• X - This record was rejected because it matched a record in a suppression table.<br />
38
Processing<br />
• I/i - An intersection table record. Lower case means a match was found to this<br />
record and those records were not rejected. Upper case means no matches were<br />
found for this record.<br />
• Y - This record was rejected because it failed to match an intersection table<br />
record.<br />
Reports<br />
This option displays the wide variety of reports that show you, in detail, the<br />
statistics from the most recent operation.<br />
See the help file for detailed descriptions of each report.<br />
The CASS operation has a single report, called CASS. Select this report and click Print to<br />
generate a CASS Form 3553 report. This report is necessary to use the verified address for<br />
a mailing and receive postage discounts from the USPS.<br />
39
<strong>MatchUp</strong> <strong>Quick</strong> <strong>Start</strong> <strong>Guide</strong><br />
Reference<br />
The following tables contain the possible values for some of the data types that <strong>MatchUp</strong><br />
can include in its output when processing a table.<br />
Merge Status Codes<br />
These codes are returned by the Merge and Merge/Purge setups.<br />
ASCII Hexadecimal Decimal Description<br />
A 0X20 32 Record is a Dupe.<br />
B 0X10 16 Output record has a Dupe.<br />
C 0X00 0 Output record has no Dupes (it is<br />
unique).<br />
D 0X02 2 Record was suppressed.<br />
E 0X08 8 Record was not intersected.<br />
F 0X04 4 Intersection record was used to<br />
intersect.<br />
G 0X01 1 Suppression record caused a<br />
suppression.<br />
CASS Codes<br />
Time Zone Code<br />
These codes and names are returned to the Time Zone Code and Time Zone data types in<br />
a CASS setup.<br />
Code Zone Code Zone<br />
(blank) Military 9 Alaska time<br />
4 Atlantic Time 10 Hawaii Time<br />
5 Eastern Time 11 Samoa Time<br />
6 Central Time 13 Marshall Island Time<br />
7 Mountain Time 14 Guam Time<br />
8 Pacific Time 15 Palau Time<br />
40
Reference<br />
Address Type<br />
These codes are returned by the Address Type data type in a CASS setup<br />
Code Description<br />
(blank) Unverified Address<br />
F Company Address<br />
G General Delivery<br />
H High-Rise or Business Complex<br />
P PO Box<br />
R Rural Route<br />
S Residential Address<br />
DPV Footnotes<br />
Code<br />
AA<br />
A1<br />
BB<br />
CC<br />
N1<br />
M1<br />
M3<br />
P1<br />
P3<br />
RR<br />
R1<br />
Description<br />
Input address matched to the ZIP + 4 file.<br />
Input address not matched to the ZIP + 4 file.<br />
Input address matched to DPV (all components).<br />
Input address primary number (street number) matched to DPV but<br />
secondary number not matched.<br />
Input address primary number matched to DPV but secondary<br />
number missing.<br />
Input address primary number missing.<br />
Input address primary number invalid.<br />
Input address PO, RR or HC box number missing.<br />
Input address PO, RR or HC box number invalid.<br />
Input address matched to CMRA.<br />
Input address matched to CMRA but secondary number not<br />
present.<br />
F1 Address was coded to a military address.<br />
G1 Address was coded to a General Delivery address.<br />
U1 Address was coded to a unique ZIP Code.<br />
41
<strong>MatchUp</strong> <strong>Quick</strong> <strong>Start</strong> <strong>Guide</strong><br />
CASS Error Codes<br />
Code<br />
(blank)<br />
M<br />
N<br />
R<br />
T<br />
U<br />
X<br />
Z<br />
C<br />
W<br />
Description<br />
No Error<br />
Multiple Matches — More than one record matches the address<br />
and there is not enough information available in the input<br />
address to break the tie between multiple records. Passing more<br />
complete information, such as city names or urbanization<br />
names, can help reduce the number of multiple match errors.<br />
No Street <strong>Data</strong> for Zip — The ZIP Code exists but no streets<br />
begin with the same letter in that ZIP Code.<br />
Range Error — The address was found but the street number in<br />
the input address was not between the low and high range in the<br />
CASS database.<br />
Component Error — Either the directionals or the suffix field did<br />
not match the CASS database, and there was more than one<br />
choice for correcting the address. For example, if the given<br />
address was “100 Main St” and the only addresses found were<br />
“100 E Main St” and “100 Main Ave” the error code “T” would be<br />
returned because we do not know whether to add the directional<br />
“E” or to change the suffix to “Ave.”<br />
Unknown Street — An exact street name match could not be<br />
found and phonetically matching the street name resulted in<br />
either no matches or matches to more than one street name.<br />
Non-Deliverable — Address The physical location exists but<br />
there are no homes on this street. One reason might be that<br />
there are railroad tracks or a river running alongside this street,<br />
as they would prevent construction of homes in this location.<br />
Invalid ZIP Code — The ZIP Code does not exist and could not<br />
be determined by the city and state.<br />
Canadian Postal Code — The ZIP Code matches the format<br />
characteristics of a Canadian Postal Code.<br />
EWS File Record — The ZIP Code was found in the Early<br />
Warning System <strong>Data</strong>. These are new addresses scheduled to<br />
be included in the next USPS national database.<br />
42
Reference<br />
CASS Status Codes<br />
Code<br />
Description<br />
D Demo Mode — If processing with the demo CASS database,<br />
records not in the state of Nevada will be coded with “D.”<br />
E Expired <strong>Data</strong>base — The CASS database has expired.<br />
S Standardized but Not Coded — Standardization means that<br />
some conversion was done on the address (for example, changing<br />
“Post Office Box” to “PO Box”).<br />
V Street Number Validated to DPV Level — This record has been<br />
DPV validated. You can check the DPV Footnotes for more<br />
information about the level of validation.<br />
X Address Not Coded — Check the Error code and/or DPV<br />
Footnotes for more information.<br />
7 Multiple Matches — There were multiple matches for the address<br />
that were all in the same ZIP Code and Carrier Route. The<br />
returned ZIP Code and Carrier Route will be correct but you will<br />
not get any Plus 4 information.<br />
9 Fully Coded — The address was fully coded<br />
43
<strong>MatchUp</strong> <strong>Quick</strong> <strong>Start</strong> <strong>Guide</strong><br />
44