View / Download Olde Cedar Chest
View / Download Olde Cedar Chest
View / Download Olde Cedar Chest

Create successful ePaper yourself
Turn your PDF publications into a flip-book with our unique Google optimized e-Paper software.
FREE PROJECT<br />
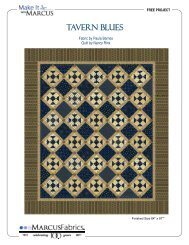
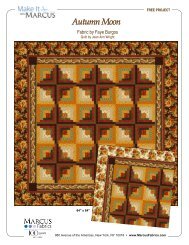
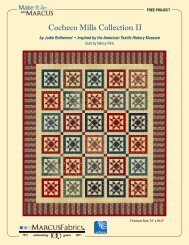
<strong>Olde</strong> <strong>Cedar</strong> <strong>Chest</strong><br />
Fabric by Faye Burgos<br />
Quilt by Nancy Rink of Nancy Rink Designs<br />
Finished Size: 76” X 99”<br />
MARCUS FABRICS • 980 Avenue of the Americas • New York, NY 10018 • www.MarcusFabrics.com
OLDE CEDAR CHEST • Fabric by Faye Burgos • Quilt by Nancy Rink of Nancy Rink Designs<br />
Skill Level: Intermediate • Finished Quilt Size: 76” X 99” • Finished Block Size: 11 ½” x 11 ½”<br />
Fabric Requirements & Cutting Guide<br />
A 3-1/8”<br />
3-1/8”<br />
J 2-3/4”<br />
2-3/4”<br />
B<br />
B<br />
5 -½”<br />
5 -½”<br />
C 7<br />
2-<br />
D<br />
D D<br />
D<br />
3-1/2”<br />
3-1/2”<br />
E<br />
7”<br />
7”<br />
F 7-3/8”<br />
2-3/4”<br />
G<br />
G<br />
4-3/8”<br />
4- 3/8”<br />
H<br />
5-3/8”<br />
5-3/8”<br />
Fabric Yardage Cutting<br />
(NOTE: WOF = Width of Fabric)<br />
Brown & Pink Dot (#2566-0113) 3/4 yard 3 (2-1/8” x WOF) strips, recut into 16 (C)<br />
8 (1 ½” x WOF), pieced end to end and recut into 2<br />
side borders (1-1/2” x 85”)<br />
and 2 top/bottom borders (1-1/2” x 64”)<br />
Green Texture (#2563-0114) 1/4 yard 3 (2-1/8” x WOF) strips, recut into 16 (C)<br />
Burgundy Texture (#2563-0126) 1/4 yard 3 (2-1/8” x WOF) strips, recut into 16 (C)<br />
Pink Dot (#2566-0126) 3/4 yard 6 (2-3/4” x WOF) strips, recut into 72 (J);<br />
2 (2-1/8” x WOF) strips, recut into 12 (C)<br />
Pink Texture (#2568-0126) 1/2 yard 3 (3-1/8” x WOF) strips, recut into 34 (A);<br />
2 (2-1/8” x WOF) strips, recut into 12 (C)<br />
Brown Large Floral (#2556-0113) 7/8 yard 3 (7” x WOF) strips, recut into 18 (E)<br />
Cream & Pink Dot (#2566-0142) 1-1/2 yard 2 (3-1/2” x WOF) strips, recut into 18 (3-1/2”) squares,<br />
cut in half twice diagonally for 72 (D) triangles<br />
6 (5-1/2” x WOF) strips, recut into 36 (5 ½”) squares,<br />
cut in half twice diagonally for 72 (B) triangles<br />
Cream Large Floral (#2556-0142) 2-1/2 yard 9 (6-1/2” x WOF) strips, pieced end to end and recut<br />
into 2 side borders (6-1/2” x 87”)<br />
and 2 top/bottom borders (6-1/2” x 76”)<br />
3 (5-3/8” x WOF) strips, recut into 17 (H)<br />
Brown & Cream Calico (#2569-0113) 1-1/8 yard 3 (3-1/8” x WOF) strips, recut into 34 (A);<br />
9 (2-1/4” x WOF) strips, joined end to end for binding<br />
Diagonal Plaid (#2562-0126) 1-1/4 yard 4 (4-3/8” x WOF) strips, recut into 34 (4-3/8”)squares,<br />
cut in half twice diagonally for 68 (G) triangles<br />
8 (2-½” X WOF) strips pieced end to end and recut<br />
into 2 side borders (2-1/2” x 81”)<br />
and 2 top/bottom borders (2-1/2” x 62”)<br />
Cream Texture (#2568-0142) 1-1/2 yard 5 (7-3/8” x WOF) strips, recut into 68 (F)<br />
Your Favorite Backing 6 ½ yards 2 (107” x WOF) panels<br />
<strong>Olde</strong> <strong>Cedar</strong> <strong>Chest</strong><br />
Fabric<br />
Batting 84” X 106”<br />
www.MarcusFabrics.com
OLDE CEDAR CHEST • Fabric by Faye Burgos • Quilt by Nancy Rink of Nancy Rink Designs<br />
Block Construction<br />
Pressed Flowers Block<br />
On the wrong side of the pink dot (J) squares, draw a diagonal line from corner to corner.<br />
Place a pink dot square right sides together on a cream and pink dot (B) triangle as<br />
shown in Diagram I. Stitch on the drawn line. Flip the pink dot fabric so the right side<br />
is facing up. Press. Cut away excess fabric if desired. Make a total of 72.<br />
Gather four matching (C) rectangles, 4 (D) cream and pink dot triangles, and one brown<br />
floral E square. Sew a (C) rectangle to opposite sides of the (E) square. Press seams<br />
toward (C) rectangles. Sew the (D) triangles to the ends of the remaining two (C) rectangles,<br />
pressing seams toward the (C) rectangles. Sew to block, pressing seams<br />
toward block center. Add the cream and pink triangles assembled in step one to the<br />
sides of the block. Make a total of 18 blocks.<br />
Antique Linens Block<br />
Finger press the (H) squares horizontally and vertically through the center. Also, finger<br />
press the plaid (G) triangles (see Diagram III) to locate the center. Sew a plaid triangle<br />
to each side of the (H) square, matching creases. Press seams toward cen-<br />
Trim to 6-7/8” square. Make 17.<br />
ter.<br />
Diagram I<br />
Make 72<br />
E<br />
C<br />
Diagram II<br />
Make 18<br />
D<br />
Place a brown and cream (A) square and a pink texture (A) square right sides<br />
together. Draw a line diagonally from corner to corner. Stitch ¼” from both<br />
sides of the drawn line. Cut on the drawn line. Press toward the brown fabric.<br />
Make 68.<br />
Diagram III<br />
Lay out block according to Diagram IV. Sew cream texture (F) rectangles to opposite sides of<br />
the center square created in step three. Sew a brown and pink half square triangle to each<br />
end of the remaining two (F) rectangles. Sew to block. Make a total of 17 blocks<br />
Quilt Assembly<br />
Lay out the Pressed Flowers blocks alternately with the Antique Linens blocks in seven rows<br />
of five blocks each. Refer to quilt image for block arrangement. Sew together in rows, then<br />
sew together the rows.<br />
Sew the plaid borders to the sides of the quilt center. Press seams toward outside edge. Add<br />
the remaining plaid borders to the top and bottom of the quilt, pressing seams outward.<br />
F<br />
H<br />
Diagram IV<br />
Make 17<br />
Add the brown and pink dot borders first to sides, then to the top and bottom, pressing seams outward.<br />
Add the large cream floral border first to the sides, then to the top and<br />
bottom of the quilt, again pressing seams toward the outer edge.<br />
Layer top, batting, and backing. Quilt as desired.<br />
Bind with the brown and cream binding strips.<br />
For A More Formal Look . . .<br />
Substitute 3½ yards of border stripe 2555-0113<br />
for the cream large floral fabric used in the<br />
outer border. Fussy cut the border stripe by<br />
centering the light stripe along the length of the<br />
border and mitering the corner to create an<br />
elegant frame for your quilt.<br />
www.MarcusFabrics.com