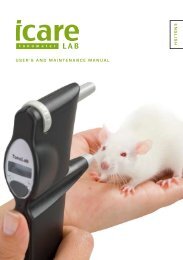
Icare ONE manual in English - Icare Finland
Icare ONE manual in English - Icare Finland
Icare ONE manual in English - Icare Finland

Create successful ePaper yourself
Turn your PDF publications into a flip-book with our unique Google optimized e-Paper software.
USER’S AN D M AIN TEN AN CE M AN UAL<br />
ENGLISH
<strong>Icare</strong> tonometer <strong>ONE</strong> <strong>manual</strong><br />
<strong>English</strong><br />
<strong>Icare</strong>® <strong>ONE</strong> (Model: TA02) INSTRUCTION MANUAL v1.1<br />
06/12 EN<br />
0044<br />
This device complies with:<br />
Medical Device Directive 93/42/EEC<br />
Canadian Medical Device Regulations<br />
Copyright © 2012 <strong>Icare</strong> F<strong>in</strong>land Oy<br />
Made <strong>in</strong> F<strong>in</strong>land<br />
<strong>Icare</strong> F<strong>in</strong>land Oy<br />
Hevosenkenkä 3, FI-02600 Espoo, F<strong>in</strong>land<br />
Tel. +358 9 8775 1150, Fax +358 9 728 6670<br />
www.icaref<strong>in</strong>land.com, <strong>in</strong>fo@icaref<strong>in</strong>land.com<br />
TABLE OF CONTESTS<br />
Table of contests ................................................................................................................................................................................................................2<br />
Safety <strong>in</strong>structions .............................................................................................................................................................................................................2<br />
Indications for use .............................................................................................................................................................................................................3<br />
Usage contra<strong>in</strong>dications ....................................................................................................................................................................................................4<br />
Introduction .......................................................................................................................................................................................................................4<br />
Package contents ...............................................................................................................................................................................................................4<br />
Turn<strong>in</strong>g the device on ........................................................................................................................................................................................................5<br />
Sett<strong>in</strong>g up the tonometer before tak<strong>in</strong>g measurements ...................................................................................................................................................6<br />
Choos<strong>in</strong>g a measurement mode ........................................................................................................................................................................................6<br />
Adjust<strong>in</strong>g the measurement position.................................................................................................................................................................................6<br />
Load<strong>in</strong>g the probe ..............................................................................................................................................................................................................7<br />
Measur<strong>in</strong>g <strong>in</strong>traocular pressure .........................................................................................................................................................................................8<br />
Patient Use Instructions .....................................................................................................................................................................................................9<br />
Error messages and <strong>in</strong>dicators .........................................................................................................................................................................................10<br />
Differences between professional user and the patient us<strong>in</strong>g the <strong>Icare</strong> <strong>ONE</strong> Tonometer ...............................................................................................10<br />
Clean<strong>in</strong>g and dis<strong>in</strong>fection .................................................................................................................................................................................................11<br />
Chang<strong>in</strong>g the batteries .....................................................................................................................................................................................................11<br />
Service procedures ..........................................................................................................................................................................................................12<br />
Spare parts .......................................................................................................................................................................................................................12<br />
Technical and performance data .....................................................................................................................................................................................12<br />
Cl<strong>in</strong>ical performance data ................................................................................................................................................................................................13<br />
Symbols ...........................................................................................................................................................................................................................14<br />
SAFETY INSTRUCTIONS<br />
WARNING!<br />
The tonometer must not come <strong>in</strong>to contact with the patient’s eyes, except for the probes, which may do so for a fraction of a second dur<strong>in</strong>g<br />
measurement. Do not br<strong>in</strong>g the tonometer <strong>in</strong>to contact with the eye or push it <strong>in</strong>to the eye (the tip of the probe should be 4-8mm, or 5/32-5/16<br />
<strong>in</strong>ch, from the eye).<br />
WARNING!<br />
The device probe tips have not been evaluated for the presence of endotox<strong>in</strong>s. The probe tips are for s<strong>in</strong>gle-use only, and are packaged sterile.<br />
WARNING!<br />
The <strong>Icare</strong> <strong>ONE</strong> Tonometer (TA02) is <strong>in</strong>tended to be used only under supervision and control of the health care professional only.<br />
www.icaretonometer.com<br />
2
<strong>Icare</strong> tonometer <strong>ONE</strong> <strong>manual</strong><br />
<strong>English</strong><br />
WARNING!<br />
Health care professionals must <strong>in</strong>form patients not to modify or discont<strong>in</strong>ue their treatment plan without receiv<strong>in</strong>g <strong>in</strong>structions from the health care<br />
professional.<br />
WARNING!<br />
Do not change your medication or dosage without consult<strong>in</strong>g your doctor.<br />
WARNING!<br />
IOP accuracy and repeatability are unknown for patients with corneal astigmatism > 3.00 D of astigmatism, irregular astigmatism and keratoconus.<br />
WARNING!<br />
Patients with hear<strong>in</strong>g loss may not detect signals that <strong>in</strong>dicat<strong>in</strong>g correct measurements.<br />
WARNING!<br />
Patients with physical challenges may experience difficulty <strong>in</strong> us<strong>in</strong>g the hand-held tonometer.<br />
WARNING!<br />
No modification of this equipment is allowed<br />
CAUTION!<br />
Before us<strong>in</strong>g the tonometer read this <strong>manual</strong> carefully. Keep it for future use. It conta<strong>in</strong>s important <strong>in</strong>formation on us<strong>in</strong>g and servic<strong>in</strong>g the<br />
tonometer.<br />
CAUTION!<br />
Federal (US) law restricts this device to sale by or on the order of a physician or properly licensed practitioner.<br />
<br />
<br />
<br />
<br />
<br />
<br />
<br />
<br />
<br />
<br />
<br />
<br />
<br />
<br />
<br />
<br />
When you have opened the package, check for any external damage or faults, particularly for damage to the case. If you suspect<br />
that there is someth<strong>in</strong>g wrong with the tonometer, contact the dealer.<br />
Use the tonometer only for measur<strong>in</strong>g <strong>in</strong>traocular pressure. Any other use is improper and the manufacturer cannot be held liable<br />
for any damage aris<strong>in</strong>g from improper use, or for the consequences thereof.<br />
Never open the cas<strong>in</strong>g of the tonometer, except for the battery compartment or to change the probe base.<br />
Never use the tonometer <strong>in</strong> wet or damp conditions nor allow the tonometer to get wet.<br />
The probe base, battery compartment cover, screws, collar and probes are so small that a child could swallow them. Keep the<br />
tonometer out of the reach of children.<br />
Do not use the device near <strong>in</strong>flammable substances, <strong>in</strong>clud<strong>in</strong>g flammable anesthetic agents.<br />
Certa<strong>in</strong> microbiological agents (for example, bacteria) can be transmitted from the forehead, eye or cheek support. To avoid this,<br />
the forehead and cheek support and eye piece must be cleaned for each new patient with dis<strong>in</strong>fectant, for example an alcohol<br />
solution.<br />
The tonometer conforms to EMC requirements (IEC 60601-1-2), but <strong>in</strong>terference may occur <strong>in</strong> it if used near (
<strong>Icare</strong> tonometer <strong>ONE</strong> <strong>manual</strong><br />
<strong>English</strong><br />
USAGE CONTRAINDICATIONS<br />
The TA02 tonometer is contra<strong>in</strong>dicated <strong>in</strong> the presence of the follow<strong>in</strong>g conditions:<br />
Corneal Scarr<strong>in</strong>g, Microphtalmos, Buphthalmos, Nystagmus, Keratoconus, abnormal central corneal thickness, and topical anesthetics.<br />
INTRODUCTION<br />
<strong>Icare</strong> <strong>ONE</strong> tonometer is <strong>in</strong>tended to monitor <strong>in</strong>tra-ocular Pressure (IOP) of the human eye. It is <strong>in</strong>dicated to be used by health care professionals and<br />
by patient under prescription use only.<br />
It is based on a patented, <strong>in</strong>duction-based rebound method, which allows <strong>in</strong>traocular pressure (IOP) to be measured accurately, rapidly and without<br />
an anesthetic.<br />
<strong>Icare</strong> One uses sterilized disposable probes <strong>in</strong> order to reduce the risk of microbiological contam<strong>in</strong>ation to a negligible level.<br />
Intraocular pressure changes are due to the effects of pulse, breath<strong>in</strong>g, eye movements, and body position. Several measurements are taken us<strong>in</strong>g<br />
the handheld device with<strong>in</strong> fractions of a second to average the micro changes of IOP that occur dur<strong>in</strong>g measurement. In the automated mode, six<br />
pre-programmed measurements are needed to obta<strong>in</strong> an accurate read<strong>in</strong>g.<br />
<strong>Icare</strong> <strong>ONE</strong> tonometer can be used by glaucoma patients to monitor their <strong>in</strong>traocular pressure. Results are stored <strong>in</strong> the <strong>in</strong>ternal memory of the<br />
tonometer and can be transferred to a PC through a USB cable us<strong>in</strong>g the <strong>Icare</strong> LINK software. Consult your doctor to <strong>in</strong>terpret the results of the<br />
self-measurement.<br />
PACKAGE CONTENTS<br />
The package conta<strong>in</strong>s:<br />
<br />
<br />
<br />
<br />
<br />
<br />
<br />
<br />
<br />
<br />
<strong>Icare</strong> <strong>ONE</strong> tonometer<br />
10 sterilized s<strong>in</strong>gle-use probes<br />
2 eye supports (small and large)<br />
2 Batteries<br />
USB cable<br />
User <strong>manual</strong><br />
Instructions for download<strong>in</strong>g <strong>Icare</strong> LINK software<br />
Warranty card<br />
Carry-on case<br />
Mode switch key<br />
www.icaretonometer.com<br />
4
<strong>Icare</strong> tonometer <strong>ONE</strong> <strong>manual</strong><br />
<strong>English</strong><br />
3.<br />
1. 2.<br />
1.<br />
2.<br />
3.<br />
4.<br />
5.<br />
4.<br />
6<br />
.<br />
7.<br />
5.<br />
6.<br />
7.<br />
1. IOP <strong>in</strong>dicator LEDs<br />
2. Mode switch<br />
3. Forehead/cheek support adjustment wheel<br />
4. PROBE ERROR LED<br />
5. POSITION ERROR LED<br />
6. REPEAT ERROR LED<br />
7. CLEAN ERROR LED<br />
1. Eye support<br />
2. Support position <strong>in</strong>dicator<br />
3. Measurement button<br />
4. Forehead support<br />
5. Probe<br />
6. Cheek support<br />
7. Probe base<br />
TURNING THE DEVICE ON<br />
6. REPEAT LED<br />
Press the measurement button to turn the tonometer on. All LEDs are displayed briefly.<br />
7. CLEAN LED<br />
One of the lower IOP <strong>in</strong>dicator LEDs rema<strong>in</strong>s lit for 2 seconds while other LEDs switch off. The LED <strong>in</strong>dicates the battery voltage.<br />
GREEN = OK<br />
YELLOW = REDUCED<br />
RED = LOW, change battery<br />
IOP <strong>in</strong>dicator LEDs<br />
One <strong>in</strong>dicator LED rema<strong>in</strong>s lit for 2 seconds to show battery voltage<br />
PROBE LED<br />
POSITION LED<br />
REPEAT LED<br />
CLEAN LED<br />
Tonometer LED panel<br />
Follow<strong>in</strong>g a brief pause, the PROBE LED bl<strong>in</strong>ks to rem<strong>in</strong>d the user to load the s<strong>in</strong>gle use probe <strong>in</strong>to the tonometer prior to measurement.<br />
www.icaretonometer.com<br />
5
<strong>Icare</strong> tonometer <strong>ONE</strong> <strong>manual</strong><br />
<strong>English</strong><br />
Accuracy of display: display is divided <strong>in</strong>to 11 ranges:<br />
5-7 mmHg<br />
7-10 mmHg<br />
10-14 mmHg<br />
14-18 mmHg<br />
18-21 mmHg<br />
21-24 mmHg<br />
24-27 mmHg<br />
27-30 mmHg<br />
30-35 mmHg<br />
35-40 mmHg<br />
40-50 mmHg<br />
SETTING UP THE TONOMETER BEFORE TAKING MEASUREMENTS<br />
Before tak<strong>in</strong>g measurements your tonometer, the measurement position must be adjusted correctly by health care professional. Set-up <strong>in</strong>cludes:<br />
Choos<strong>in</strong>g a measurement mode<br />
Adjustment of the measurement position<br />
Load<strong>in</strong>g the probe before each measurement<br />
CHOOSING A MEASUREMENT MODE<br />
The device can operate <strong>in</strong> two modes:<br />
Normal<br />
Normal mode is used to take <strong>in</strong>dividual measurements one at a time. The measurement button must be pressed once to <strong>in</strong>itiate each of<br />
the six measurements to obta<strong>in</strong> f<strong>in</strong>al IOP read<strong>in</strong>g. Normal mode is generally used when measurements are taken by someone other than<br />
the patient.<br />
Automatic<br />
Automatic mode is especially useful <strong>in</strong> self tonometry. In automatic mode a s<strong>in</strong>gle press of the measurement button <strong>in</strong>itiates the<br />
measurement function and the tonometer takes six measurements automatically to obta<strong>in</strong> f<strong>in</strong>al IOP read<strong>in</strong>g.<br />
NOTE!<br />
Device is designed to perform six subsequent movements of probe to cornea /measurements after which the device calculates the f<strong>in</strong>al IOP range.<br />
The f<strong>in</strong>al IOP range is displayed on device LED panel.<br />
To change the measurement mode:<br />
1. Turn on the tonometer.<br />
2. Insert a straight p<strong>in</strong> <strong>in</strong>to the mode switch hole on the side of the tonometer.<br />
Mode switch hole<br />
Measurement mode switch<br />
3. Push the switch with mode switch key provided with the tonometer on the bottom of the mode switch hole of the tonometer until the<br />
mode change signal is heard. The switch must be pressed for approximately three seconds for the mode to change.<br />
The audible sound <strong>in</strong>dicates the measurement mode:<br />
one beep: normal mode<br />
three beeps: automatic mode<br />
ADJUSTING THE MEASUREMENT POSITION<br />
The tonometer has two adjustable supports, one for the forehead and one for the cheek as shown <strong>in</strong> figure. These supports are adjusted to ensure<br />
accurate measurement distance and alignment. Adjust the supports us<strong>in</strong>g the adjustment wheels, so the distance from the tip of the probe to the<br />
surface of the cornea is 4-8 mm (5/32-5/16 <strong>in</strong>ch) and the probe is horizontal.<br />
www.icaretonometer.com<br />
6
<strong>Icare</strong> tonometer <strong>ONE</strong> <strong>manual</strong><br />
<strong>English</strong><br />
Forehead support<br />
Adjustment wheels<br />
Tonometer forehead and cheek supports with adjustment wheels<br />
Cheek support<br />
An optional eye support can be used for easy alignment and additional stability dur<strong>in</strong>g measurement. When the eye support is used, the cheek<br />
support is not used and needs to be adjusted to m<strong>in</strong>imum sett<strong>in</strong>g. The eye support can be used for both eyes by rotat<strong>in</strong>g it from one side.<br />
Eye support<br />
Forehead and eye support, with the cheek support <strong>in</strong> m<strong>in</strong>imum position<br />
LOADING THE PROBE<br />
The <strong>Icare</strong> <strong>ONE</strong> tonometer TA02 uses disposable tonometer probes as shown <strong>in</strong> figure. Each probe is meant for s<strong>in</strong>gle use only. The probes are packed<br />
<strong>in</strong>dividually <strong>in</strong> blister.<br />
Disposable tonometer probe and probe conta<strong>in</strong>er<br />
To load the probe:<br />
1. Open the lid of the probe conta<strong>in</strong>er as shown <strong>in</strong> figure.<br />
CAUTION!<br />
To prevent contam<strong>in</strong>ation do not touch the probe tip with f<strong>in</strong>gers.<br />
Open the probe conta<strong>in</strong>er<br />
2. Insert the probe <strong>in</strong>to the probe base by turn<strong>in</strong>g the probe conta<strong>in</strong>er upside down as shown <strong>in</strong> figure.<br />
www.icaretonometer.com<br />
7
<strong>Icare</strong> tonometer <strong>ONE</strong> <strong>manual</strong><br />
<strong>English</strong><br />
Insert<strong>in</strong>g probe <strong>in</strong>to probe base<br />
3. After the probe has been <strong>in</strong>serted, be careful not to po<strong>in</strong>t the tonometer downward to prevent the probe from fall<strong>in</strong>g out.<br />
4. Press the measurement button once to activate the <strong>in</strong>serted probe. Dur<strong>in</strong>g activation the device magnetizes the probe (probe<br />
moves rapidly back and forth).<br />
Once the probe is activated, the PROBE LED rema<strong>in</strong>s lit. The tonometer is now ready to take a measurement.<br />
MEASURING INTRAOCULAR PRESSURE<br />
<br />
<br />
<br />
A measurement sequence is a set of six measurements. The measurement value, shown after all six measurements are taken, is<br />
displayed on LED display. The measurement value is an average of four successful <strong>in</strong>terim measurements of those six <strong>in</strong>terim<br />
measurements performed. The highest and the lowest value is left out from f<strong>in</strong>al value displayed. If there is too much variation <strong>in</strong><br />
average (SD) error code REPEAT is lit on LED display. See error messages and <strong>in</strong>dicators.<br />
The tonometer can be used up to six times a day<br />
In the automatic mode the six measurements <strong>in</strong> a sequence are taken automatically and <strong>in</strong> the normal mode the user must take<br />
each measurement <strong>in</strong>dividually until all six measurements are taken.<br />
To measure <strong>in</strong>traocular pressure:<br />
1. Check that the tonometer is set up correctly and the measurement position is adjusted by a doctor or a nurse.<br />
2. The patient should relax, and look straight ahead at a specific po<strong>in</strong>t while keep<strong>in</strong>g eyes wide open.<br />
Patient with the tonometer correctly positioned<br />
3. Br<strong>in</strong>g the tonometer near the eye <strong>in</strong> front of a wall mirror as shown <strong>in</strong> Figure (Measurement step). Move the tonometer closer so<br />
that the forehead and cheek support touch the sk<strong>in</strong>. The distance from the tip of the probe to the center of the cornea must be<br />
4-8 mm (5/32-5/16 <strong>in</strong>ch).<br />
4. Press the measurement button lightly to perform the measurement, tak<strong>in</strong>g care not to shake the tonometer. The tip of the probe<br />
should make contact with the central cornea. The way you take measurements depends on the chosen mode.<br />
<br />
<br />
In Automatic mode, press the measurement button once to perform the measurement. A long beep <strong>in</strong>dicates the end of one<br />
measurement sequence (six measurements). In automatic mode s<strong>in</strong>gle measurement values are not shown.<br />
In Normal mode, press the measurement button to take one <strong>in</strong>dividual measurement at a time. A short beep sounds after each<br />
measurement. A long beep sounds when the six measurement sequence is complete.<br />
In addition to show<strong>in</strong>g the IOP range, the accurate IOP value is stored <strong>in</strong> the <strong>in</strong>ternal memory.<br />
<strong>Icare</strong> <strong>ONE</strong> is constantly controll<strong>in</strong>g the measurement position. When too far or near from eye or if the measurement angle is too tilted, the<br />
tonometer beeps twice and displays a red LED <strong>in</strong>dicat<strong>in</strong>g an error (Position). Press the measurement button aga<strong>in</strong> to clear the error message and<br />
follow the corrective actions accord<strong>in</strong>g to <strong>in</strong>dicators described on page 10.<br />
www.icaretonometer.com<br />
8
<strong>Icare</strong> tonometer <strong>ONE</strong> <strong>manual</strong><br />
<strong>English</strong><br />
In normal mode a value is shown briefly after each successful measurement. When the six measurements <strong>in</strong> sequence are completed and the<br />
measurement result is valid, the f<strong>in</strong>al value range is displayed. If there is too much variation between the measurements, the REPEAT ERROR LED is<br />
displayed and the measurement needs to be performed aga<strong>in</strong>. The device stores the quality of the measurement <strong>in</strong> its <strong>in</strong>ternal memory, which is<br />
only accessible by download<strong>in</strong>g to a PC us<strong>in</strong>g the <strong>Icare</strong>® LINK software.<br />
A new measurement needs to be taken if:<br />
<br />
<br />
REPEAT ERROR LED is displayed, for example, if the probe made contact with the eyelid.<br />
Encounter<strong>in</strong>g unusual values, for example, over 22 mmHg or below 8 mmHg.<br />
The tonometer’s <strong>in</strong>ternal memory stores the time and date of a measurement, the measurement result and the quality level of the measurement.<br />
This <strong>in</strong>formation can be uploaded to a PC through a USB cable us<strong>in</strong>g <strong>Icare</strong>® LINK software. The tonometer is taken to a health care professional who<br />
can transfer the data.<br />
NOTE<br />
When us<strong>in</strong>g <strong>Icare</strong> LINK software, it assumes by default that the first accepted measurement is for the right eye and the second accepted<br />
measurement is for the left eye.<br />
MEASUREMENT STEP<br />
Measurement position<br />
PATIENT USE INSTRUCTIONS<br />
<br />
When tak<strong>in</strong>g measurements:<br />
NOTE<br />
Before perform<strong>in</strong>g self tonometry the patient must have the tonometer set up by a health care professional. The doctor or nurse has adjusted the<br />
distance between the tip of the probe and the center of the cornea with the forehead and cheek support to be 4-8 mm, (5/32-5/16 <strong>in</strong>ch).<br />
NOTE<br />
The tonometer must be held <strong>in</strong> a vertical position. Angle of <strong>in</strong>cl<strong>in</strong>ation has limited to ± 22° to ensure reliable outcome.<br />
<br />
<br />
Doctor or nurse has adjusted the measurement position.<br />
Doctor or nurse has demonstrated to the patient how to use the tonometer<br />
1. Switch on the unit, load the probe<br />
2. Go <strong>in</strong> front of a wall mirror<br />
3. Take the tonometer <strong>in</strong> your hand with the white ma<strong>in</strong> button po<strong>in</strong>t<strong>in</strong>g upwards<br />
4. Move the tonometer sideways toward your eye so that you see <strong>in</strong> the mirror the white tip of the probe <strong>in</strong> front of the black pupil<br />
5. Move the tonometer closer so that the forehead and cheek supports touch the sk<strong>in</strong><br />
6. Check that the white tip of the probe is seen <strong>in</strong> front of the center of the cornea (pupil)<br />
7. Turn the tonometer from the sideway position so that the tonometer with the loaded probe po<strong>in</strong>ts straight to the center of the cornea<br />
(pupil)<br />
8. Open your eyes wide and try not to bl<strong>in</strong>k your eye while measur<strong>in</strong>g<br />
9. Press the measurement button once. You will get the f<strong>in</strong>al result after the probe touched you eye for six times and after one long beep.<br />
In automatic mode the six <strong>in</strong>terim measurements are taken <strong>in</strong> sequence.<br />
CAUTION!<br />
Always perform measurement on RIGHT eye first followed by LEFT eye. Complete the RIGHT eye measurement sequence before chang<strong>in</strong>g to the<br />
LEFT eye.<br />
www.icaretonometer.com<br />
9
<strong>Icare</strong> tonometer <strong>ONE</strong> <strong>manual</strong><br />
<strong>English</strong><br />
A new measurement needs to be taken if:<br />
REPEAT ERROR LED is displayed, for example, if the probe made contact with the eyelid.<br />
Encounter<strong>in</strong>g unusual values, for example, over 22 mmHg or below 8 mmHg.<br />
ERROR MESSAGES AND INDICATORS<br />
<strong>Icare</strong> Tonometer <strong>ONE</strong> display panel shows the follow<strong>in</strong>g LEDs:<br />
LED State Description and Action<br />
PROBE<br />
BLUE bl<strong>in</strong>k<strong>in</strong>g<br />
BLUE lit<br />
Load probe<br />
Ready to use<br />
POSITION RED lit Check distance and alignment<br />
REPEAT RED lit Standard deviation too high – repeat the whole measurement sequence<br />
CLEAN RED lit Clean or change the probe base<br />
DIFFERENCES BETWEEN PROFESSIONAL USER AND THE PATIENT USING THE ICARE <strong>ONE</strong><br />
TONOMETER<br />
Instructions for the health care professional<br />
Instruction for the patient<br />
1. Check that the tonometer is set up correctly by a<br />
doctor or a nurse.<br />
2. The patient should relax, and look straight ahead at a<br />
specific po<strong>in</strong>t while keep<strong>in</strong>g eyes wide open.<br />
3. Br<strong>in</strong>g the tonometer near the eye. Move the<br />
tonometer closer so that the forehead and cheek<br />
support touch the sk<strong>in</strong>. Check that the white tip of the<br />
probe is seen <strong>in</strong> front of the center of the cornea<br />
(pupil). The distance from the tip of the probe to the<br />
center of the cornea must be 4-8 mm (5/32-5/16 <strong>in</strong>ch).<br />
4. Press the measurement button lightly to perform the<br />
measurement, tak<strong>in</strong>g care not to shake the tonometer.<br />
The tip of the probe should make contact with the<br />
central cornea (pupil). The way you take<br />
measurements depends on the chosen mode.<br />
5. In normal mode a value is shown briefly after each<br />
successful measurement. When the six measurements<br />
<strong>in</strong> sequence are completed and the measurement<br />
valid, the f<strong>in</strong>al value of IOP is displayed. If there is too<br />
much variation between the measurements, the<br />
REPEAT ERROR LED is displayed and the measurement<br />
needs to be performed aga<strong>in</strong>. The device stores the<br />
quality of the measurement <strong>in</strong> its <strong>in</strong>ternal memory,<br />
which is only accessible by download<strong>in</strong>g to a PC us<strong>in</strong>g<br />
the <strong>Icare</strong> LINK software.<br />
6. A new measurement needs to be taken if:<br />
REPEAT ERROR LED is displayed, for example, if the<br />
probe made contact with the eyelid.<br />
Encounter<strong>in</strong>g unusual values, for example, over<br />
22 mmHg or below 8 mmHg.<br />
1. Switch on the unit, load the probe<br />
2. Go <strong>in</strong> front of a wall mirror<br />
3. Take the tonometer <strong>in</strong> your hand with the white<br />
ma<strong>in</strong> button po<strong>in</strong>t<strong>in</strong>g upwards<br />
4. Move the tonometer sideways toward your eye so<br />
that you see <strong>in</strong> the mirror the white tip of the probe<br />
<strong>in</strong> front of the black pupil<br />
5. Move the tonometer closer so that the forehead<br />
and cheek supports touch the sk<strong>in</strong><br />
6. Check that the white tip of the probe is seen <strong>in</strong><br />
front of the center of the cornea<br />
7. Turn the tonometer from the sideway position so<br />
that the tonometer with the loaded probe po<strong>in</strong>ts<br />
straight to the center of the cornea (pupil)<br />
8. Open your eyes wide and try not to bl<strong>in</strong>k your eye<br />
while measur<strong>in</strong>g<br />
9. Press the measurement button once. You will get<br />
the f<strong>in</strong>al result after the probe touched you eye for<br />
six times and after one long beep. In automatic<br />
mode the six <strong>in</strong>terim measurements are taken <strong>in</strong><br />
sequence.<br />
A new measurement needs to be taken if:<br />
REPEAT ERROR LED is displayed, for example, if the<br />
probe made contact with the eyelid.<br />
7. The tonometer’s <strong>in</strong>ternal memory stores the time and<br />
date of a measurement, the measurement result and<br />
the quality level of the measurement. This <strong>in</strong>formation<br />
can be uploaded to a PC through a USB cable us<strong>in</strong>g<br />
<strong>Icare</strong>® LINK software. If a patient does not have the<br />
software, the tonometer is taken to a health care<br />
professional who can transfer the data.<br />
NOTE: When us<strong>in</strong>g <strong>Icare</strong> LINK software, it assumes by default that the<br />
first accepted measurement is for the right eye and the second<br />
accepted measurement is for the left eye. In case you end up tak<strong>in</strong>g<br />
multiple measurements for some reason, the eye details can be<br />
<strong>in</strong>correct and must be fixed (See <strong>Icare</strong> LINK user <strong>manual</strong>).<br />
www.icaretonometer.com<br />
10
<strong>Icare</strong> tonometer <strong>ONE</strong> <strong>manual</strong><br />
<strong>English</strong><br />
CLEANING AND DISINFECTION<br />
The forehead and cheek supports and the eye support must be cleaned for each new patient with dis<strong>in</strong>fectant for example 70% alcohol solution<br />
us<strong>in</strong>g wipe. Do not immerse the tonometer <strong>in</strong> water or other liquid.<br />
If the tonometer displays a CLEAN error (CLEAN LED), the probe base (see Figure below) may be dirty or dusty. To clean the probe base first unscrew<br />
the probe base off the tonometer. Carefully <strong>in</strong>ject isopropyl alcohol (rubb<strong>in</strong>g alcohol) through the top of the probe base. Dry the probe base by<br />
<strong>in</strong>ject<strong>in</strong>g air <strong>in</strong>to the probe base and dry<strong>in</strong>g the part gently. If it is not possible to clean the probe base, then replace it with a new one.<br />
Probe base<br />
Tonometer probe base<br />
Probe base<br />
Tonometer probe base unscrewed<br />
CHANGING THE BATTERIES<br />
Lift the silicone lid that protects the USB-port and keeps the battery compartment cover <strong>in</strong> place. Open the battery compartment cover by press<strong>in</strong>g<br />
the silicone lid slightly and slid<strong>in</strong>g the battery compartment cover as shown <strong>in</strong> figure.<br />
Battery compartment<br />
cover<br />
Silicone lid<br />
Open<strong>in</strong>g the silicone lid and battery cover<br />
Insert two CR123A lithium batteries <strong>in</strong> the correct order: (+) end upwards as shown <strong>in</strong> figure. Close the cover firmly and press the silicone lid <strong>in</strong> place<br />
to cover the USB port.<br />
NOTE<br />
Make sure you use batteries with built-<strong>in</strong> PTC protection, For Example Energizer Lithium Photo 123 3V CR123A.<br />
www.icaretonometer.com<br />
11
<strong>Icare</strong> tonometer <strong>ONE</strong> <strong>manual</strong><br />
<strong>English</strong><br />
Insert<strong>in</strong>g new batteries<br />
SERVICE PROCEDURES<br />
Replace the batteries when the device <strong>in</strong>dicates low battery voltage.<br />
Clean or change the probe base if the probe does not move smoothly (CLEAN LED is lit).<br />
NOTE<br />
No other service procedures can be carried out by the user. All other service and repair must be carried out by the manufacturer or a certified<br />
service center.<br />
SPARE PARTS<br />
<br />
<br />
<br />
<br />
<br />
<br />
<br />
S<strong>in</strong>gle-use probes (10 <strong>in</strong>cluded with the tonometer when purchased)<br />
Probe base kit<br />
Eye supports<br />
Mode switch key<br />
USB cable<br />
Batteries<br />
carry on case<br />
These can be purchased from a local distributor of <strong>Icare</strong> products.<br />
TECHNICAL AND PERFORMANCE DATA<br />
Type TA02<br />
The device conforms to CE regulations<br />
Dimensions: approximately 11 cm x 8 cm x 3 cm<br />
Weight: approximately 150 g<br />
Power supply: 2•CR123 batteries (make sure you use batteries with built-<strong>in</strong> PTC protection, For Example Energizer Lithium Photo<br />
123 3V CR123A)<br />
Measurement range: 5-50 mmHg<br />
Display range: 5-50 mmHg<br />
Accuracy (95% tolerance <strong>in</strong>terval relatively to manometry): ± 1.8 mmHg<br />
Repeatability (coefficient of variation): < 9% @ IOP ≤20 mmHg<br />
< 3% @ IOP >20 mmHg<br />
Accuracy of display: display is divided <strong>in</strong>to 11 ranges:<br />
5-7 mmHg<br />
7-10 mmHg<br />
10-14 mmHg<br />
14-18 mmHg<br />
18-21 mmHg<br />
21-24 mmHg<br />
24-27 mmHg<br />
27-30 mmHg<br />
30-35 mmHg<br />
35-40 mmHg<br />
40-50 mmHg<br />
Display unit: mmHg<br />
The serial number is located on the <strong>in</strong>side of the battery compartment cover<br />
There are no electrical connections from the tonometer to the patient<br />
The device has BF-type electric shock protection<br />
www.icaretonometer.com<br />
12
<strong>Icare</strong> tonometer <strong>ONE</strong> <strong>manual</strong><br />
<strong>English</strong><br />
<br />
<br />
<br />
Operation environment<br />
Temperature: +10 °C to +35 °C<br />
Relative humidity: 30 % to 90 %<br />
Atmospheric pressure: 800 hPa – 1060 hPa<br />
Storage environment<br />
Temperature: -10 °C to +55 °C<br />
Relative humidity: 10 % to 95 %<br />
Atmospheric pressure: 700 hPa – 1060 hPa<br />
Transport environment<br />
Temperature: -40 °C to +70 °C<br />
Relative humidity: 10 % to 95 %<br />
Atmospheric pressure: 500 hPa – 1060 hPa<br />
CLINICAL PERFORMANCE DATA<br />
Performance data is obta<strong>in</strong>ed from a cl<strong>in</strong>ical study, performed accord<strong>in</strong>g to ANSI Z80 and ISO 8612 for tonometers.<br />
The mean of paired difference (Goldmann-<strong>Icare</strong> <strong>ONE</strong> tonometer) were 0.6 (≤16 mmHg 0.1; >16
<strong>Icare</strong> tonometer <strong>ONE</strong> <strong>manual</strong><br />
<strong>English</strong><br />
SYMBOLS<br />
<br />
Caution<br />
<br />
Keep dry<br />
<br />
See operat<strong>in</strong>g <strong>in</strong>structions<br />
for more <strong>in</strong>formation<br />
<br />
Manufactur<strong>in</strong>g date<br />
<br />
BF-type device<br />
<br />
Lot number<br />
<br />
S<strong>in</strong>gle-use disposable<br />
<br />
Sterilized us<strong>in</strong>g irradiation<br />
<br />
Serial number<br />
<br />
Stand by<br />
<br />
Use by <br />
<br />
<br />
<br />
Do not discard this product with other household-type waste.<br />
Send to appropriate facility for recovery and recycl<strong>in</strong>g.<br />
EU WEEE (European Union Directive for Waste of Electronic<br />
and Electrical Equipment)<br />
www.icaretonometer.com<br />
14