Create successful ePaper yourself
Turn your PDF publications into a flip-book with our unique Google optimized e-Paper software.
I<br />
L<br />
P<br />
ADJUSTMENTS<br />
• Rotate guard under the saw table back to a closed<br />
position and tighten screw.<br />
• Close upper and lower covers.<br />
• Replace throat plate and table pin.<br />
• Adjust blade guide assembly as described in the following<br />
section.<br />
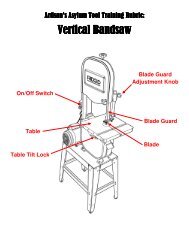
ADJUSTING BLADE GUIDE ASSEMBLY<br />
See Figure 42.<br />
To prevent the blade from twisting or breaking, the blade<br />
guide assembly should always be set approximately 1/8 in.<br />
(3 mm) above the workpiece.<br />
• Turn the blade guard adjustment knob counterclockwise<br />
to unlock the blade guide assembly.<br />
• As a guide, use a scrap piece of the same wood you are<br />
about to cut to set the height of the blade guide assembly.<br />
Adjust the blade guide assembly by raising or lowering.<br />
• Lock blade guide assembly in place by turning the blade<br />
guard adjustment knob clockwise.<br />
• Always lock the blade guide assembly in place before<br />
turning on the band saw.<br />
ON<br />
P<br />
U<br />
L<br />
U<br />
S<br />
H<br />
OFF<br />
O<br />
10°<br />
0°<br />
15°<br />
30°<br />
4<br />
P<br />
ULL<br />
LOCK<br />
SET BLADE GUIDE ASSEMBLY APPROXIMATELY<br />
1/8IN. (3 MM ) ABOVE WORKPIECE<br />
UNLOCK<br />
TO RAISE<br />
TO LOWER<br />
Fig. 42<br />
WARNING:<br />
Maintain proper adjustment of blade tension,<br />
blade guides, and thrust bearings. Failure to do so<br />
could result in possible serious personal injury.<br />
29


