


You also want an ePaper? Increase the reach of your titles
YUMPU automatically turns print PDFs into web optimized ePapers that Google loves.
ASSEMBLY<br />
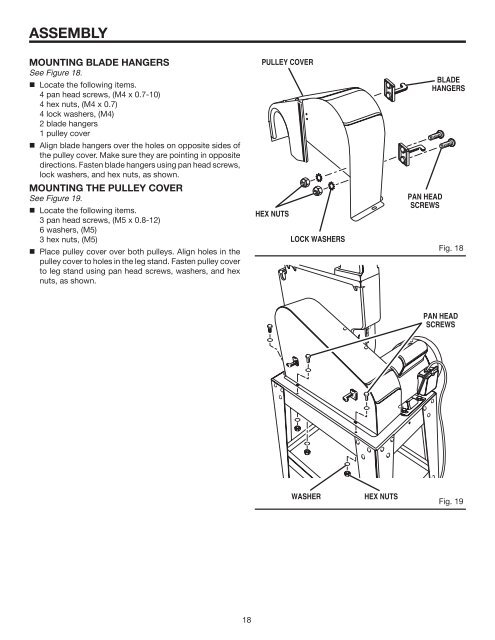
MOUNTING BLADE HANGERS<br />
See Figure 18.<br />
• Locate the following items.<br />
4 pan head screws, (M4 x 0.7-10)<br />
4 hex nuts, (M4 x 0.7)<br />
4 lock washers, (M4)<br />
2 blade hangers<br />
1 pulley cover<br />
• Align blade hangers over the holes on opposite sides of<br />
the pulley cover. Make sure they are pointing in opposite<br />
directions. Fasten blade hangers using pan head screws,<br />
lock washers, and hex nuts, as shown.<br />
MOUNTING THE PULLEY COVER<br />
See Figure 19.<br />
• Locate the following items.<br />
3 pan head screws, (M5 x 0.8-12)<br />
6 washers, (M5)<br />
3 hex nuts, (M5)<br />
• Place pulley cover over both pulleys. Align holes in the<br />
pulley cover to holes in the leg stand. Fasten pulley cover<br />
to leg stand using pan head screws, washers, and hex<br />
nuts, as shown.<br />
PULLEY COVER<br />
HEX NUTS<br />
LOCK WASHERS<br />
PAN HEAD<br />
SCREWS<br />
BLADE<br />
HANGERS<br />
Fig. 18<br />
PAN HEAD<br />
SCREWS<br />
WASHER<br />
HEX NUTS<br />
Fig. 19<br />
18


