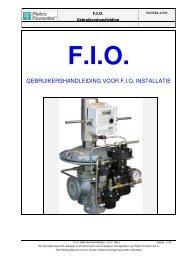
USER MANUAL FOR F.I.O. INSTALLATION - Pietro Fiorentini
USER MANUAL FOR F.I.O. INSTALLATION - Pietro Fiorentini
USER MANUAL FOR F.I.O. INSTALLATION - Pietro Fiorentini

You also want an ePaper? Increase the reach of your titles
YUMPU automatically turns print PDFs into web optimized ePapers that Google loves.
F.I.O.<br />
User’s Manual<br />
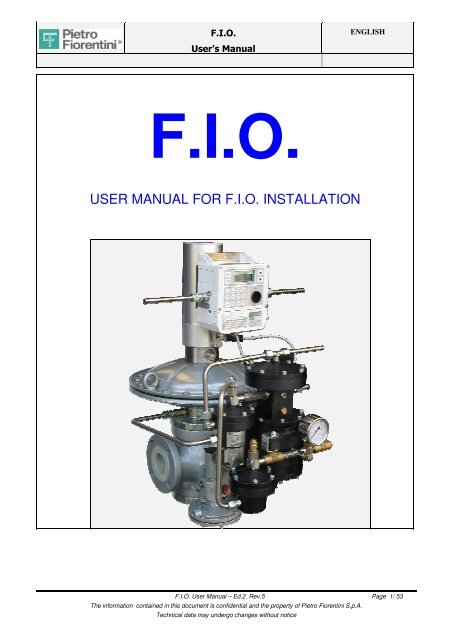
F.I.O.<br />
<strong>USER</strong> <strong>MANUAL</strong> <strong>FOR</strong> F.I.O. <strong>INSTALLATION</strong><br />
ENGLISH<br />
F.I.O. User Manual – Ed.2. Rev.5 Page 1/ 53<br />
The information contained in this document is confidential and the property of <strong>Pietro</strong> <strong>Fiorentini</strong> S.p.A.<br />
Technical data may undergo changes without notice
Index<br />
Edition<br />
2<br />
F.I.O.<br />
User’s Manual<br />
Revision<br />
5<br />
Date<br />
15/03/2012<br />
ENGLISH<br />
1. Introduction .................................................................................................................................................3<br />
2. Installation of the single components ......................................................................................................5<br />
2.1 Q-kit 5<br />
2.2 ECU Electronic Control Unit 7<br />
2.2.1 Installation on board of the regulator: 7<br />
2.2.2 Installation on the pipeline or vertical circular support: 8<br />
2.3 P-kit 9<br />
2.4 P&CD Power & Communication Device 10<br />
3. Connections ..............................................................................................................................................11<br />
3.1 Pneumatic connections 11<br />
3.2 Electrical connections 12<br />
3.2.1 General connections: 12<br />
3.2.2 Connections P&CD–230 Vac and P&CD–solar panel: 12<br />
3.2.3 Connections P&CD–external antenna: 12<br />
3.2.4 Connections ECU–meter / digital input: 12<br />
3.2.5 Connections ECU-P&CD and P&CD-solenoid valves of P-kit. 13<br />
4. Startup of the electrical devices and preliminary tests ........................................................................18<br />
4.1 ECU Startup 18<br />
4.2 P&CD Startup 18<br />
4.2.1 Battery-operated 18<br />
4.2.2 External supply 230 Vac 19<br />
4.2.3 Power supply from solar panel 19<br />
4.3 Test of solenoid valves 20<br />
4.4 Serial configurations 20<br />
4.5 Serial tests 20<br />
4.6 Test of tele-power supply 21<br />
5. Basic configurations on ECU ..................................................................................................................22<br />
5.1 Instruction for the navigation through ECU menus 22<br />
5.2 Measurement of the flow rate with direct method 23<br />
5.3 Measurement of the flow rate with indirect method 24<br />
5.3.1 Setting the full scale of the regulator (100%). 24<br />
5.3.2 Setting the zero of the regulator (0%) 24<br />
6. Basic configurations with terminal FioTerm..........................................................................................25<br />
7. Complete configuration with terminal FioTerm or with DMS...............................................................26<br />
7.1 Complete configuration with terminal FioTerm. 26<br />
7.1.1 P&CD 26<br />
7.1.2 ECU 29<br />
F.I.O. User Manual – Ed.2. Rev.5 Page 2/ 53<br />
The information contained in this document is confidential and the property of <strong>Pietro</strong> <strong>Fiorentini</strong> S.p.A.<br />
Technical data may undergo changes without notice
F.I.O.<br />
User’s Manual<br />
ENGLISH<br />
7.2 Complete configuration with DMS 36<br />
7.2.1 Alarm configuration 37<br />
7.2.2 Periodic tasks 37<br />
7.2.3 Modem 37<br />
ENCLOSURE A STRUCTURE OF “ECU” MENU<br />
ENCLOSURE B PROCEDURE <strong>FOR</strong> THE EXPORT OF THE CONFIGURATION OF P&CD AND ECU TO THE LAPTOP AND IMPORT<br />
FROM THE LAPTOP<br />
ENCLOSURE C PROCEDURE <strong>FOR</strong> THE REPLACEMENT OF THE MAIN P&CD BOARD<br />
ENCLOSURE D OVERALL DIMENSIONS Q-KIT AND P-KIT<br />
ENCLOSURE E OPTIONAL KIT AND COMPONENT LIST<br />
F.I.O. User Manual – Ed.2. Rev.5 Page 3/ 53<br />
The information contained in this document is confidential and the property of <strong>Pietro</strong> <strong>Fiorentini</strong> S.p.A.<br />
Technical data may undergo changes without notice
1. Introduction<br />
F.I.O.<br />
User’s Manual<br />
ENGLISH<br />
This document is a <strong>USER</strong> <strong>MANUAL</strong> <strong>FOR</strong> THE EXPLANATION OF THE OPERATIONS TO BE PER<strong>FOR</strong>MED ON FIELD AND REMOTELY<br />
<strong>FOR</strong> THE <strong>INSTALLATION</strong> AND COMMISSIONING OF THE F.I.O. SYSTEM.<br />
ALL THE OPERATIONS TO DO HAVE BEEN PRESENTED IN SEQUENTIAL ORDER, SO IT CAN BE ASSUMED AS A PROCEDURE<br />
<strong>FOR</strong> <strong>INSTALLATION</strong> AND COMMISSIONING OF THE PLANT (SEE GREEN COLOR INDICATIONS).<br />
It describes the phases of:<br />
-installation of the single components<br />
-pneumatic and electric wiring<br />
-startup of the equipment and preliminary verifications.<br />
-manual configurations of unit on field (ECU).<br />
-basic configurations with terminal (FioTerm).<br />
-complete configuration with terminal FioTerm or remotely with DMS.<br />
This manual does not replace the manuals of the single equipment. It has been realized in order to provide to the installer a consultation tool<br />
for the connection among them of all the equipment that are included on the system F.I.O.<br />
When the information gathered in this manual is not sufficient, please refer to the manuals of the single equipment:<br />
• FIO – User Manual Explorer ECU<br />
• FIO – SMS protocol<br />
• FIO – User Manual P&CD<br />
• User Manual FioTerm<br />
• User Manual DMS<br />
F.I.O. User Manual – Ed.2. Rev.5 Page 4/ 53<br />
The information contained in this document is confidential and the property of <strong>Pietro</strong> <strong>Fiorentini</strong> S.p.A.<br />
Technical data may undergo changes without notice
F.I.O.<br />
User’s Manual<br />
2. Installation of the single components<br />
PROCEDURE STEP 1:<br />
ENGLISH<br />
- Before starting the operations, close upstream and downstream ball or butterfly valves and discharge all the pressure in the line.<br />
- Installation of Q-kit, ECU, P-kit and P&CD. Refer to the following instructions.<br />
Note: if one of these units is not required, don’t consider the corresponding chapter.<br />
There is also a video showing all these operations.<br />
2.1 Q-kit<br />
The Q-kit consists of a device for the acquisition of the displacement % of the pressure<br />
regulator from the closing position. It is necessary for the calculation of the flow rate<br />
with the indirect method. It is composed on a resistive transducer supported by a<br />
suitable bracket and coupled to the stroke indicator of the regulator for the reading of<br />
the position. The transducer is covered by an aluminum cylinder in order to ensure the<br />
protection against atmospheric events. It is supplied already preassembled (see<br />
picture on the right). If it is an upgrade of an already installed regulator, start from Pict<br />
1, otherwise start from Pict 8:<br />
Pict 1- Disassemble the upper cover of the regulator<br />
Pict 2- Replace the upper flange with the flange supplied in the Q-kit.<br />
Pict 3- Replace the stroke indicator rod with the longer one supplied in the Q-kit.<br />
Pict 4- Move the upper cover toward the lower cover paying attention that the base of<br />
the stroke indicator rod is correctly inserted into the groove.<br />
Pict 5- Position correctly the upper cover and fix the screws.<br />
Pict 6- Insert the visual indicator of position and push it up to the end. Then insert the<br />
small glass.<br />
Pict 7- Fix the nut with anti-dust gasket.<br />
Pict 8- Position the Q-kit on the upper flange of the pressure regulator<br />
Pict 9- Insert the central screw.<br />
Pict 10- Fix the central screw.<br />
Pict 11- Couple, with the suitable junction, the position transducer with the extended<br />
rod of the pressure regulator.<br />
Pict 12- Verify, lifting manually the rod of the position transducer, that it can move for a<br />
stroke at least equal to the stroke indicated on the small glass of the visual<br />
indicator. In case the rod of the transducer is not able to translate enough,<br />
loosen the 4 fixing screws of the transducer on the bracket and lift it as<br />
needed. Fix again the 4 screws.<br />
Pict 13- Push the rod of the position transducer to the bottom so that the coupling is<br />
well fixed.<br />
Pict 14- Close the transducer with the cover<br />
Pict 15- Fixing it with the lateral screw.<br />
1 2 3<br />
F.I.O. User Manual – Ed.2. Rev.5 Page 5/ 53<br />
The information contained in this document is confidential and the property of <strong>Pietro</strong> <strong>Fiorentini</strong> S.p.A.<br />
Technical data may undergo changes without notice
4<br />
7<br />
F.I.O.<br />
User’s Manual<br />
ENGLISH<br />
F.I.O. User Manual – Ed.2. Rev.5 Page 6/ 53<br />
The information contained in this document is confidential and the property of <strong>Pietro</strong> <strong>Fiorentini</strong> S.p.A.<br />
Technical data may undergo changes without notice<br />
8<br />
10 11 regulator 12<br />
13<br />
5<br />
14<br />
Stroke of<br />
6<br />
9<br />
15
2.2 ECU Electronic Control Unit<br />
2.2.1 Installation on board of the regulator:<br />
F.I.O.<br />
User’s Manual<br />
This configuration is required in case of indirect measurement of flow rate. The<br />
application Q-kit includes the bracket and the screws necessary for the fixing of the<br />
ECU. Furthermore it includes the cable for the connection of the displacement<br />
transducer to the ECU.<br />
Pict 1- Prepare the screws with the nut screwed on the bracket.<br />
Pict 2- Install the ECU and fix the screws<br />
Pict 3- Remove one of the small fairleads. Bring the cable for the connection of<br />
the displacement transducer to the ECU. There is a fairlead<br />
already assembled on it. Remove the fixing nut of the fairlead. Pass the white<br />
connector through the threaded hole.<br />
Pict 4- Insert the fixing nut of the fairlead through the connector and fix the<br />
nut on the fairlead.<br />
Pict 5- Insert the connector on the card<br />
Pict 6- From the other side of the cable screw the male connector on the female<br />
connection of the transducer.<br />
ENGLISH<br />
1 2 3<br />
4 5 6<br />
F.I.O. User Manual – Ed.2. Rev.5 Page 7/ 53<br />
The information contained in this document is confidential and the property of <strong>Pietro</strong> <strong>Fiorentini</strong> S.p.A.<br />
Technical data may undergo changes without notice
F.I.O.<br />
User’s Manual<br />
2.2.2 Installation on the pipeline or vertical circular support:<br />
If there is no Q-kit because the indirect measurement of the flow rate is not requested,<br />
is necessary to fix the ECU in another position. The position of the ECU can be<br />
selected according to the distance from the solenoid valves and the flow rate meter.<br />
Pict 1- Fix the two brackets with the nuts<br />
Pict 2- Cut a piece of stainless steel band. The length has to be measured as the<br />
circumference of the pipeline + 150 mm (6 inch)<br />
Pict 3- Pass one side of the stainless steel band in the endless-head as shown in pict<br />
3<br />
Pict 4- Pass the opposite side of the band on the slits of the bracket as shown in<br />
picture 4.<br />
Pict 5- Pass the band around the pipe and then insert it inside the endless-head,<br />
screwing the endless screw<br />
Pict 6- Adjust the bracket in the proper position and then fix it definitively<br />
Pict 7- Prepare the screws with the nut on the bracket.<br />
Pict 8- Install the ECU and fix the screws<br />
1<br />
4<br />
7<br />
ENGLISH<br />
F.I.O. User Manual – Ed.2. Rev.5 Page 8/ 53<br />
The information contained in this document is confidential and the property of <strong>Pietro</strong> <strong>Fiorentini</strong> S.p.A.<br />
Technical data may undergo changes without notice<br />
2 3<br />
5 6<br />
8
2.3 P-kit<br />
The pilot P-kit is installed if it the pressure modulation is requested.<br />
F.I.O.<br />
User’s Manual<br />
If is an upgrade of a regulator already working, first remove the traditional pilot.<br />
Replace the traditional pilot with the new P-kit. Since there are several models of pilot,<br />
the bracketing systems varies according to the applications.<br />
The operations to be performed are the followings:<br />
Pict 1- Fix the bracket on the regulator<br />
Pict 2- Prepare and connect the feeding tube to the pilot system.<br />
Pict 3- Prepare and connect the tube of control pressure<br />
REFLUX / REVAL:<br />
APERFLUX / APERVAL:<br />
ENGLISH<br />
1 2 3<br />
1 2 3<br />
F.I.O. User Manual – Ed.2. Rev.5 Page 9/ 53<br />
The information contained in this document is confidential and the property of <strong>Pietro</strong> <strong>Fiorentini</strong> S.p.A.<br />
Technical data may undergo changes without notice
F.I.O.<br />
User’s Manual<br />
2.4 P&CD Power & Communication Device<br />
• It must be installed in a safe area and it can be fixed on the wall.<br />
The following versions are available:<br />
2.4.1- Power supply only from battery. Inside: card P&CD (a) and battery pack (b)<br />
ENGLISH<br />
2.4.2- External power supply. Inside: card P&CD (a), back-up battery (b), AC to DC power supply (c), main switch (d), switch for card<br />
P&CD and optosender (e), optosender for remote supplying of ECU (f)<br />
2.4.3- Power supply from solar panel. Inside: card P&CD (a), back-up battery (b), power supply controller(c), switch for card P&CD and<br />
optosender (e), optosender for remote supplying of ECU (f). The solar panel (g) must be fixed in a max. sun exposed zone,<br />
according to the direction and inclination specifications provided by the manufacturer.<br />
Each one of these versions can be supplied with internal antenna (no activity required) or with external antenna (in this case, by means<br />
of the incorporated magnet, the antenna must be fixed in open space and the cable connected to the P&CD through the connector).<br />
2.4.1<br />
a<br />
Battery only version:<br />
Pict 1- Fix the box on the wall with screws anchor<br />
External power supply version:<br />
Pict 1- Mark the positions on the corners of the box (see picture 1)<br />
Pict 2- Insert the brass supports on the four holes<br />
Pict 3- Beat, using an hammer and a parallel pin, in the center of the support in order to move the internal plate to the bottom position<br />
Pict 4- Fix the support with the screw in vertical position or…<br />
Pict 5- fix the support with the screw in horizontal position<br />
b<br />
Pict 6- Fix the box on the wall with screws anchor and close with the black covers<br />
1<br />
4<br />
2.4.2 c d e<br />
b<br />
2.4.3<br />
a<br />
F.I.O. User Manual – Ed.2. Rev.5 Page 10/ 53<br />
The information contained in this document is confidential and the property of <strong>Pietro</strong> <strong>Fiorentini</strong> S.p.A.<br />
Technical data may undergo changes without notice<br />
f<br />
a<br />
c<br />
b<br />
e<br />
f g<br />
2 3<br />
5 6
3. Connections<br />
PROCEDURE STEP 2:<br />
F.I.O.<br />
User’s Manual<br />
Once all the equipment have been installed, is possible to connect them together pneumatically and electrically.<br />
-Realize the pneumatic connection of P-kit and ECU. Refer to the following instructions.<br />
ENGLISH<br />
-Realize the electrical connection between P&CD, source 230 Vac or solar panel, external antenna (optional), ECU, flow meter<br />
(optional), digital input (optional), solenoid valves. Refer to the following instructions.<br />
The line has to remain vented during this step.<br />
Note: if one of these units is not provided, don’t consider the corresponding chapter.<br />
3.1 Pneumatic connections<br />
Pict 1- Screw the compression fittings on the ECU sensors.<br />
Pict 2- Prepare the tubing for the upstream and downstream pressure measurement. Connect on ECU<br />
Pict 3- Connect on the upstream line the tubing for the pressure measurement (provide a needle valve for the isolation)<br />
Pict 4- Connect on the downstream line the tubing for the pressure measurement (provide a needle valve for the isolation)<br />
Pict 5- Connect the sensing line on the pilot<br />
Pict 6- Connect the sensing line on the multiple take-off (don’t insert needle valve through this line)<br />
Pict 7- For REFLUX / REVAL: Connect the discharge tube on the upper head.<br />
Pict 8- For APERFLUX / APERVAL : Connect the discharge tube on the pilot<br />
Pict 9- Connect the discharge tube on downstream (don’t insert needle valve through this line). Only for REFLUX / REVAL: the discharge<br />
tube of the head can be connected in the same multiple take-off of the sensing line.<br />
1 2<br />
4<br />
7 REFLUX / REVAL<br />
5 6<br />
8 APERFLUX / APERVAL 9<br />
F.I.O. User Manual – Ed.2. Rev.5 Page 11/ 53<br />
The information contained in this document is confidential and the property of <strong>Pietro</strong> <strong>Fiorentini</strong> S.p.A.<br />
Technical data may undergo changes without notice<br />
3
3.2 Electrical connections<br />
3.2.1 General connections:<br />
4x1 = cable n°4 wires x min. section 1 mm² shielded *<br />
12x0.5 = cable min. n°8 wires x min. section 0.5 mm² shielded *<br />
3x2,5 = cable n°3 wires x min. section 2,5 mm²<br />
F.I.O.<br />
User’s Manual<br />
CONDUIT 25 = flexible tube recommended for mechanical protection with a minimum internal diameter of 25 mm<br />
CONDUIT 15 = flexible tube recommended for mechanical protection with a minimum internal diameter of 15 mm<br />
3.2.2 Connections P&CD–230 Vac and P&CD–solar panel:<br />
ENGLISH<br />
The connections of the displacement transducer are not mentioned in these drawing because the cable is already supplied with the Q-kit.<br />
* The shield has to be connected to ECU side (see ECU manual)<br />
In both cases (optional) the cable from the main supply or from the solar panel must be inserted in the box of the P&CD through the fairlead<br />
on the right.<br />
The terminal board of the power supply inside the box is in both cases in the lower right corner.<br />
3.2.3 Connections P&CD–external antenna:<br />
The external antenna (optional) must be connected to the P&CD through a connector positioned on the box.<br />
3.2.4 Connections ECU–meter / digital input:<br />
The meter for the direct measurement of flow rate (optional), that can be a turbine or a rotary, is interfaced with the ECU through low<br />
frequency pulse emitter LF.<br />
Furthermore 2 digital inputs are available, coming from the field.<br />
Insert each cable through the small fairleads of the ECU.<br />
F.I.O. User Manual – Ed.2. Rev.5 Page 12/ 53<br />
The information contained in this document is confidential and the property of <strong>Pietro</strong> <strong>Fiorentini</strong> S.p.A.<br />
Technical data may undergo changes without notice
F.I.O.<br />
User’s Manual<br />
3.2.5 Connections ECU-P&CD and P&CD-solenoid valves of P-kit.<br />
ENGLISH<br />
The connecting cable between ECU and P&CD allows to the user to communicate in local, or in remote from the control room, and to<br />
perform the functions of modulation/control of the pressure and limitation of the flow rate (through the energized outputs of the P&CD). Insert<br />
the shielded cable in the bigger metallic fairlead PG13 of ECU on the left, and in the bigger fairlead of blue color in the P&CD on the left.<br />
Connect the shield of the cable to the fairlead of the ECU.<br />
For the serial port connection, the transmitter TX of the ECU must be connected to the receiver RX of the P&CD and vice versa.<br />
The energized outputs of the P&CD to the solenoid valves of the pilot P-kit act the commands that come from the ECU. Use a cable of 4<br />
wires, insert the cable in one small fairlead of the P&CD.<br />
Connect according to the instruction of the following figure and table.<br />
3.2.5.1 Battery version<br />
P&CD<br />
EXPLORER<br />
ECU A<br />
Terminal Cable Terminal<br />
M7.1-RX 2 E2.1-TXA<br />
M7.2- GND 3 E2.3 - GND<br />
M7.3 -TX 1 E2.2-RXA<br />
P&CD<br />
EXPLORER<br />
ECU B<br />
Terminal Cable Terminal<br />
M8.1-RX 2 E2.1-TXA<br />
M8.2 - GND 3 E2.3 - GND<br />
M8.3 -TX 1 E2.2 -RXA<br />
F.I.O. User Manual – Ed.2. Rev.5 Page 13/ 53<br />
The information contained in this document is confidential and the property of <strong>Pietro</strong> <strong>Fiorentini</strong> S.p.A.<br />
Technical data may undergo changes without notice
3.2.5.2 Mains or solar panel version<br />
F.I.O.<br />
User’s Manual<br />
ENGLISH<br />
F.I.O. User Manual – Ed.2. Rev.5 Page 14/ 53<br />
The information contained in this document is confidential and the property of <strong>Pietro</strong> <strong>Fiorentini</strong> S.p.A.<br />
Technical data may undergo changes without notice
3.2.5.3 ECU B 2 nd stream version (optional)<br />
F.I.O.<br />
User’s Manual<br />
ENGLISH<br />
F.I.O. User Manual – Ed.2. Rev.5 Page 15/ 53<br />
The information contained in this document is confidential and the property of <strong>Pietro</strong> <strong>Fiorentini</strong> S.p.A.<br />
Technical data may undergo changes without notice
3.2.5.4 Detail of connections on the P&CD side<br />
F.I.O.<br />
User’s Manual<br />
• Battery version (the wires must be connected directly on the card P&CD):<br />
Pict 1- Connections on the left: serial connection between the devices ECU and the P&CD.<br />
ENGLISH<br />
Pict 2- Connections on the right: digital inputs connected to the digital outputs of ECU. The ECU, through these low consumption digitals,<br />
operates the energized repetition that goes to the solenoid valves from the P&CD (see 3 and 4). The wires MUST NOT pass over<br />
the card laying on the components but laterally or lifted from the card of at least 6 mm from it.<br />
Pict 3- Connector on the bottom left: decrease solenoid valve.<br />
Pict 4- Connector on the bottom right: increase solenoid valve.<br />
• External supply or solar panel version (the wires from the field must be connected on the terminal board of the P&CD on the<br />
bottom left.<br />
Pict 1- Only in the case of the solar panel version connect the wires to the back-up battery (pay attention to the polarity).<br />
Pict 2- Connect the wires of the external supply cable (230 Vac) or of the solar panel.<br />
Pict 3- Connect the wires coming from the field according to the drawing in the previous page.<br />
1<br />
1 2<br />
3 4<br />
F.I.O. User Manual – Ed.2. Rev.5 Page 16/ 53<br />
The information contained in this document is confidential and the property of <strong>Pietro</strong> <strong>Fiorentini</strong> S.p.A.<br />
Technical data may undergo changes without notice<br />
2 3
3.2.5.5 Detail of connections on the ECU side<br />
F.I.O.<br />
User’s Manual<br />
Pict 1- Extract the connector, connect the wire and reinsert the connector.<br />
Pict 2- Connect all the wires.<br />
ENGLISH<br />
Finally close the bottom door, accurately fix all the four screws and the fairlead in order to ensure the correct insulation from outside.<br />
3.2.5.6 Detail of the connections on the solenoid valves side<br />
For the connection of the wires to the prewired connectors of the solenoid valves, use the suitable joints to crimp, supplied. Is also suggested<br />
to cover these junctions with some thermo-shrinking sheathing.<br />
Pict 1- Insert with force the connector until hearing a net trigger.<br />
Pict 2- Couple the wires of the pre-wired connectors to the wires coming from the P&CD through a joint to be crimped<br />
Pict 3- Cover with thermo-shrinking sheath<br />
1 1<br />
2<br />
1 2<br />
F.I.O. User Manual – Ed.2. Rev.5 Page 17/ 53<br />
The information contained in this document is confidential and the property of <strong>Pietro</strong> <strong>Fiorentini</strong> S.p.A.<br />
Technical data may undergo changes without notice<br />
3
F.I.O.<br />
User’s Manual<br />
4. Startup of the electrical devices and preliminary tests<br />
PROCEDURE STEP 3:<br />
After all the pneumatic and electric connections has been realized, is possible to startup the electrical devices.<br />
- Switch on ECU and P&CD devices. Refer to the following instructions.<br />
ENGLISH<br />
- In order to avoid malfunctioning, verify the connections between P&CD, ECU, solenoid valves and serial connections. Refer to the<br />
following instructions.<br />
The line has to remain vented during this step.<br />
4.1 ECU Startup<br />
1- Remove the four screws of the upper panel of the<br />
ECU.<br />
2- Select the source of power supply. Set the SW1<br />
(PW Sel):<br />
a. On BATT (to the top) if the apparatus is<br />
power supplied exclusively from battery<br />
b. On REM (to the bottom) if the apparatus is<br />
tele-supplied (230 Vac or<br />
solar panel) with/without support of the<br />
battery in back-up<br />
3- Connect the lithium battery to its connector<br />
4- Finally close the upper panel and accurately fix all<br />
the four screws in order to ensure the correct<br />
insulation from outside.<br />
4.2 P&CD Startup<br />
The sequence changes according to the type of P&CD:<br />
4.2.1 Battery-operated<br />
Pict 1- Insert the SIM card into the slot<br />
Pict 2- Lower the metallic hook to block it.<br />
Pict 3- Connect the battery pack into its connector.<br />
1 2<br />
3<br />
F.I.O. User Manual – Ed.2. Rev.5 Page 18/ 53<br />
The information contained in this document is confidential and the property of <strong>Pietro</strong> <strong>Fiorentini</strong> S.p.A.<br />
Technical data may undergo changes without notice
4.2.2 External supply 230 Vac<br />
F.I.O.<br />
User’s Manual<br />
First of all check that the connections of the back-up battery are well fixed.<br />
Pict 1- Insert the SIM card into the slot<br />
Pict 2- Lower the metallic hook to block it.<br />
Pict 3- Lift the main switch.<br />
Pict 4- Lift the switch for the card P&CD and the optosender.<br />
4.2.3 Power supply from solar panel<br />
Pict 1- Insert the SIM card into the slot<br />
Pict 2- Lower the metallic hook to block it.<br />
Pict 3- Lift the switch for the card P&CD and the optosender.<br />
ENGLISH<br />
1 2<br />
3 4<br />
In all the cases, after the P&CD has been supplied, the 4 led of the card shall be ON in<br />
sequence. After few seconds of self-test, the green led starts to fast blinking.<br />
After a period of 10 to 60 seconds (depend by field conditions) the green led will be:<br />
Fixed ON: it indicates that the modem has a good/sufficient field signal.<br />
1<br />
Blinking slowly: it indicates that the field signal is insufficient but the remote communication<br />
is possible in any case.<br />
Blinking fast: it indicates that there is no SIM or that it has not been recognized by the<br />
provider.<br />
F.I.O. User Manual – Ed.2. Rev.5 Page 19/ 53<br />
The information contained in this document is confidential and the property of <strong>Pietro</strong> <strong>Fiorentini</strong> S.p.A.<br />
Technical data may undergo changes without notice<br />
2 3
4.3 Test of solenoid valves<br />
F.I.O.<br />
User’s Manual<br />
ENGLISH<br />
To check the correct wiring of the whole loop from the ECU to the P&CD up to the solenoid valves, manually force the intervention of each<br />
solenoid valve from the keyboard ECU with the following procedure:<br />
1- Verify that the jumper JP4 on the P&CD is set on “LOOP”.<br />
2- Reach the Menu “Fio- Five In One \ Maintenance \ Press. Modul. \ Press. Step Up/Dn” (see enclosure A “Structure of the menu<br />
ECU”). For the navigation through ECU menus see 5.1.<br />
3- Select “Enabled” with ENTER (after entering the password).<br />
4- Press “▲” for one single step of increase. The triggering of the increase solenoid valve (tic) should be heard.<br />
5- Press “▼” for one single step of decrease. The triggering of the decrease solenoid valve (tic) should be heard.<br />
6- Press ESC to disable and exit.<br />
7- Exit from the menu “Press.Modul.”<br />
8- Enter again in “Maintenance” to bring back the machine from the “Maintenance” status to normal status pressing Enter from the<br />
page “Main. Exit” (see Enclosure A “Structure of the menu ECU”).<br />
4.4 Serial communications configuration<br />
All the ECUs coming from the factory have the Modbus Address set to 0 (default). P&CDs are set to 20 (default).<br />
This is the usual configuration on field of F.I.O.:<br />
Modbus Address<br />
ECU1 0<br />
ECU2 10<br />
P&CD 20<br />
Before connecting with ECU2 it is necessary to set it manually from the numeric pad the Modbus Address = 10.<br />
For this modification it is necessary to reach the Menu “Settings \ System Settings \ Modbus Adr.” and modify the address from 0 to 10. For<br />
the navigation through ECU menus see 5.1.<br />
The user can change as much as he likes the addresses of the equipment (for example 1-11-21, 2-12-22, etc.), on condition that he chooses<br />
in FioTerm the same address before launching the call.<br />
4.5 Serial communications test<br />
To test the serial connection just performs with the software FioTerm a connection with each equipment installed:<br />
1- Verify that jumper JP3 on the P&CD is closed<br />
2- Connect the cable with adapter RS232/USB on the connector<br />
of the P&CD board.<br />
3- Connect the cable to the laptop<br />
4- Start the software FioTerm<br />
5- Open the window “Setup \ Communication \ Serial line”.<br />
F.I.O. User Manual – Ed.2. Rev.5 Page 20/ 53<br />
The information contained in this document is confidential and the property of <strong>Pietro</strong> <strong>Fiorentini</strong> S.p.A.<br />
Technical data may undergo changes without notice
F.I.O.<br />
User’s Manual<br />
6- Insert the COM used. If necessary verify in the operating system of the PC on “Peripheral<br />
management \ COM port” the number of COM in use.<br />
FioTerm permits to select COM from 1 to 7.<br />
7- The other parameters are 9600; 8; none; 1.<br />
8- Press OK<br />
9- Open the window “Setup \ Communication \ Communication”.<br />
10- Connection modality: Local ; phone N° not necessary; Password of connection: conn (default)<br />
11- In “Device and address” select the device “P&CD” entering the Modbus address (default 20).<br />
12- Press OK<br />
13- Press the pushbutton “ GO ” or “File \ Start connection”.<br />
14- Wait some seconds and it should connect with the P&CD.<br />
15- Exit from the connection pressing the red pushbutton with the X or “File \ Close”.<br />
16- Open the window “Setup \ Communication \ Communication”.<br />
17- In “Device and address” select the device ECU1 entering the corresponding Modbus address (default 0).<br />
18- Press the pushbutton “ GO ”or “File \ Start connection”.<br />
19- Wait some seconds and it should connect with ECU1.<br />
20- Exit from the connection pressing the red pushbutton with the X or “File \ Close”.<br />
21- Repeat the procedure eventually with ECU2 (set on ECU2 the address ModBus default 10, see 4.4).<br />
4.6 Test of tele-power supply<br />
ENGLISH<br />
To verify that the ECU on field is supplied by the P&CD (external supply 230 Vac or solar panel) verify that on the display of the ECU<br />
appears the plug symbol<br />
If this is not, verify:<br />
1- That the selector inside the ECU is in Rem (see 4.1). If no, switch to REM. If yes:<br />
2- Extract the first connector of ECU on the left and verify with a voltmeter if is coming from P&CD the inlet voltage: 5V - 6.5 VDC.<br />
3- If the correct voltage is not measured, verify the wiring connections.<br />
F.I.O. User Manual – Ed.2. Rev.5 Page 21/ 53<br />
The information contained in this document is confidential and the property of <strong>Pietro</strong> <strong>Fiorentini</strong> S.p.A.<br />
Technical data may undergo changes without notice
5. Basic configurations on ECU<br />
PROCEDURE STEP 4:<br />
F.I.O.<br />
User’s Manual<br />
After the electrical devices and connections have been verified, the first configuration has to be done on ECU.<br />
ENGLISH<br />
- In case of direct measurement of the flow rate, set the parameters for the calculation. Refer to the following instructions.<br />
- In case of indirect measurement of the flow rate, set the full scale (100%) and the zero (0%) of the regulator. Refer to the following<br />
instructions.<br />
IMPORTANT: After the first modification made directly via keypad, the ECU goes in “Maintenance” status. In this status the ECU<br />
stops all the modulation activities, so remember to bring back the ECU in “Normal working status” (see Enclosure A at the end of<br />
manual).<br />
At the end of the configuration of flow rate measurement parameters:<br />
- Pressurize the upstream line if it has not been done yet (depending from the case with the spring of the P-kit completely<br />
free and opening slowly the upstream ball or butterfly valve. Leave the downstream valve closed.<br />
- Screw the setting screw of P-kit keeping a small flow rate from the downstream side to the atmosphere through the vent<br />
valve. Increase the downstream pressure and set the spring of P-kit at the pneumatic setting agreed with the customer.<br />
When possible, latch the SSV if present.<br />
Note: if one of these units is not provided, don’t consider the corresponding chapter.<br />
5.1 Instruction for the navigation through ECU menus<br />
For the visualization/modification of variables from the keypad:<br />
-pressing ENTER is possible to go inside the next sub-menu<br />
-pressing ESC is possible to go back to the higher menu<br />
-pressing the arrows “▲” or “▼” is possible to move inside the menu<br />
For the modifications of the parameters related to the direct measurement of flow rate in menu “Settings” from the keypad:<br />
1- Press the “PROGRAM ENABLE” botton on the board of ECU. If this operation is forgotten,<br />
the message “Access denied remove seals” appear<br />
2- Press ENTER on the page where there is the value to modify (the value moves to the left)<br />
3- Write with the keypad the new value<br />
4- Press ENTER<br />
5- When all the selected values in that menu has been updated, press ESC<br />
6- Press ENTER to save the modifications<br />
For the modifications of the other parameters in menu “Settings” and “F.I.O. Five in One \ Maintenance” from the keypad:<br />
7- Press ENTER on the page where there is the value to modify<br />
8- Type the requirred password (default 0000)<br />
9- Press ENTER<br />
10- Press ENTER again (the value moves to the left)<br />
11- Write with the keypad the new value<br />
12- Press ENTER<br />
13- When all the selected values in that menu has been updated, press ESC<br />
14- Press ENTER to save the modifications<br />
F.I.O. User Manual – Ed.2. Rev.5 Page 22/ 53<br />
The information contained in this document is confidential and the property of <strong>Pietro</strong> <strong>Fiorentini</strong> S.p.A.<br />
Technical data may undergo changes without notice
F.I.O.<br />
User’s Manual<br />
5.2 Measurement of the flow rate with direct method<br />
The flow rate is measured acquiring the turbine impulses.<br />
ENGLISH<br />
€xplorer ECU FT has an input counter for the volume measurement (that can be chosen between one of the two physical LF inputs), on<br />
which it is possible to make also the correction of the turbine errors. The pressure upstream or downstream (depending where the turbine is<br />
installed) must be measured by a certified sensor. The temperature probe installed near the turbine must be connected to the input PT100.<br />
Respecting all these conditions the converted volumes and the converted flow rates can be considered custody transfer.<br />
Also the €xplorer ECU has the input counter for the volume with the same characteristic of ECU FT, but the pressure upstream or<br />
downstream where the turbine is installed is measured by a traditional sensor, while the temperature can only be entered as a parameter of<br />
calculation, using an average fixed value. In this case the correct volumes and flow rates cannot be considered as custody transfer.<br />
The main parameters to be configured on €xplorer ECU FT and €xplorer ECU are:<br />
Menu “Settings \ Calculation settings”:<br />
1- Base references (pressure and temperature at base conditions). Is possible to select base pressure and temperature for Standard<br />
or Normal conditions. Is also possible to set different user-defined conditions. In this case, before proceed with next parameters,<br />
follow this procedure: select “user-defined”, then press ESC, press ENTER to confirm, press ENTER again and proceed to<br />
References (see point 7). Than go back to Relative density (point2).<br />
2- Relative density<br />
3- References of relative density<br />
4- Temperature measurement. Only in case of €xplorer ECU, set manually the average value of temperature of the gas in the turbine.<br />
In case of €xplorer ECU FT the temperature has to be left to 0 (enable T measurement with PT100)<br />
5- Z formula.<br />
6- Gas composition: % CO2; % N2; % H2 (if requested); % CO (if requested)<br />
7- References: only in case of “user-defined” selection set the new base pressure and temperature<br />
8- Q formula<br />
9- Pulse weight<br />
10- Unit STD. Choose between Default (m³;m³/h;bar;°K,…); S.I. (m³;m³/h;MPa;°K,…); U.S. (ft³;ft³/h;psi;°F,…)<br />
Menu “Settings \ Counter settings”:<br />
1- Vm Meas. Volume: read the value in m³ or ft³ in the display of the turbine and set the same value in this location, in order to align<br />
the ECU pulse counter to the turbine display.<br />
Menu “Settings \ System settings”:<br />
1- Current date: set the current date and time<br />
2- Language: set the preferred language<br />
For more details please refer to the user’s manual of the Explorer ECU.<br />
Pressurize the line (see above instructions of PROCEDURE STEP 4).<br />
F.I.O. User Manual – Ed.2. Rev.5 Page 23/ 53<br />
The information contained in this document is confidential and the property of <strong>Pietro</strong> <strong>Fiorentini</strong> S.p.A.<br />
Technical data may undergo changes without notice
F.I.O.<br />
User’s Manual<br />
5.3 Measurement of the flow rate with indirect method<br />
The indirect measurement of the flow rate is based on the correlation between the position of the obturator of a<br />
specific regulator and the inlet and outlet pressures. The position of the obturator is measured through the resistive<br />
displacement transducer. It has a measurement range greater than the stroke of the regulator. So it is necessary for<br />
the ECU to know exactly the position of complete opening and complete closing of the regulator (see example on the<br />
right) on order to calculate by interpolation the intermediate position % during the working operation.<br />
After positioning the displacement transducer on its bracket and fixing correctly all the screws (the regulator has to<br />
do the whole stroke inside the range of the transducer, see 2.1), proceed as follows:<br />
5.3.1 Setting the full scale of the regulator (100%).<br />
5.3.1.1 Without monitor<br />
1- With the line still discharged, disconnect the steel pipe that connects the pilot with the lower chamber of<br />
the regulator (loading pressure). With Fail Open regulator is not necessary because it is already at 100%.<br />
ENGLISH<br />
2- Connect on the lower chamber an external pressure source: for regulators type Reval 200-300 mbar are sufficient, for regulators<br />
type Reflux 500-600 mbar are sufficient.<br />
3- Feed gradually the lower chamber with the pressure required and verify, through the visual indicator, that the regulator is totally<br />
open.<br />
4- Enter in Menu “Fio- Five In One \ Maintenance \ Meas. Setup \ FS Setup” (see Enclosure A “Structure of the menu ECU”).<br />
5- Press Enter (after entering the password). It is displayed the current value (max. 65536). When this value is stable press again<br />
Enter.<br />
6- Exit from the menu “FS Setup” and save pressing again Enter.<br />
7- Disconnect the external source and remove the pressure from the lower chamber<br />
8- Reconnect the original pipe.<br />
5.3.1.2 With monitor (in line or incorporated)<br />
1- Pressurize the line (see above instructions of PROCEDURE STEP 4) and create a small flow rate on the downstream side.<br />
2- Screw the spring of the pilot F.I.O. to a value higher than the setting of the monitor.<br />
3- The monitor starts to operate and the regulator with F.I.O. must reach a complete opening position. Verify through the visual<br />
indicator.<br />
4- Enter in Menu “Fio- Five In One \ Maintenance \ Meas. Setup \ FS Setup” (see Enclosure A “Structure of the menu ECU”).<br />
5- Press Enter (after entering the password). It shall be displayed the current value (max. 65536). When this value is stable press<br />
again Enter.<br />
6- Exit from the menu “FS Setup” and save by pressing again Enter.<br />
7- Unscrew the spring of the pilot F.I.O.<br />
5.3.2 Setting the zero of the regulator (0%)<br />
1- Pressurize the line (see above instructions of PROCEDURE STEP 4) if it is not yet pressurized.<br />
2- Perform all the required settings (Slam shut valve, relief valve, monitor, accelerator).<br />
3- Set as last the pilot F.I.O. setting with a ½” ball valve on downstream side open at 45° discharging in atmosphere.<br />
4- Enter the Menu “Fio- Five In One \ Maintenance \ Meas. Setup \ Zero Setup” (see Enclosure A “Structure of the menu ECU”).<br />
5- Press Enter (after entering the password). It is displayed the current value (min. 0). When this value is stable press again Enter (*).<br />
6- Exit from the menu Zero Setup and save by pressing again Enter.<br />
(*) we suggest to perform the zero setting with this small flow rate in order to be<br />
sure that the regulator is not working under lock-up pressure. In fact, in lock-up<br />
pressure case, the zero would correspond to the position of the plug while it is<br />
penetrating in the rubber (see example on the right, case A). The error that could<br />
be made in the indirect measurement of the flow rate would be with no doubt<br />
greater than the error generated when considering the zero in a condition of<br />
lamination very close to the rubber surface (see example on the right, case B).<br />
F.I.O. User Manual – Ed.2. Rev.5 Page 24/ 53<br />
The information contained in this document is confidential and the property of <strong>Pietro</strong> <strong>Fiorentini</strong> S.p.A.<br />
Technical data may undergo changes without notice<br />
A B
F.I.O.<br />
User’s Manual<br />
6. Basic configurations with terminal FioTerm<br />
PROCEDURE STEP 5:<br />
ENGLISH<br />
After the configuration on ECU, is possible to perform the basic configuration with terminal FioTerm for the setting of the type of<br />
the regulator that is assembled. Refer to the following instructions.<br />
Note: if Q-kit is not provided, don’t consider the following chapter.<br />
Here below we shall see the basic parameters that are mandatory to configure locally.<br />
Before starting the connection with the P&CD and ECU, it is suggested to set from terminal FioTerm:<br />
1- The preferred language of the terminal: from the menu bar select “Setup \ Language”.<br />
2- Initially FioTerm is protected against modifications of the configuration. In order to make the terminal enabled to perform<br />
modifications, enter the password: from the menu bar, select “Setup \ Password (default “PF”). Click on “Apply” and “OK”.<br />
3- The unit of measurement for each variable: from the menu bar select “Setup \ Units of measurement”.<br />
Now you can start the connection with the ECU (eventually review the procedure on item 4.5).<br />
CAUTION: For the decimals numbers, always enter the dot, never enter the comma on FioTerm!<br />
The ECU does not know yet on what type of regulator is being interfaced for the calculation of the flow rate.<br />
To configure the regulator, proceed as follows:<br />
1- Select the page “Flow rate measurement”.<br />
2- Click “Modify”.<br />
3- Enter the average relative density.<br />
4- Enter “Indirect measurement”.<br />
5- Click “Adjust…”<br />
6- Select the type of regulator with its configuration<br />
from the list and save.<br />
7- The page “Flow rate measurement” must appear<br />
as in the example in bottom right.<br />
List of regulators types:<br />
REFREV: both for Reflux and Reval.<br />
REFLUX: only for Reflux.<br />
REVAL: only for Reval.<br />
+DB: regulator with silencer incorporated.<br />
+SB: regulator with slam shut valve type SB incorporated.<br />
+VB: regulator with slam shut valve type VB incorporated.<br />
+PM: regulator with monitor incorporated.<br />
Q Coeff.<br />
Modify<br />
F.I.O. User Manual – Ed.2. Rev.5 Page 25/ 53<br />
The information contained in this document is confidential and the property of <strong>Pietro</strong> <strong>Fiorentini</strong> S.p.A.<br />
Technical data may undergo changes without notice
F.I.O.<br />
User’s Manual<br />
ENGLISH<br />
7. Complete configuration with terminal FioTerm or with DMS.<br />
PROCEDURE STEP 6:<br />
To proceed with the complete configuration is possible to choose to use either the FioTerm in local or the DMS remotely. Do not<br />
use the FioTerm remotely!<br />
In case of configuration with terminal FioTerm ONLY (NO DMS utilization after commissioning): Refer only to item 7.1<br />
In case of DMS utilization after commissioning:<br />
Alternative n°1:<br />
- preliminary configuration with terminal FioTerm: Verify and set the proper parameters of P&CD (set date and time, SMS for alarm<br />
notification, …); Verify and set the proper parameters of ECU (set date and time, set alarm, events). Refer to the following<br />
instructions on item 7.1<br />
- configuration parameter for GPRS/GSM modem connection (refer to item 7.2)<br />
- create only the plant profile on DMS and then connect to it. READ ON P&CD AND ECU THE CURRENT CONFIGURATION. IT WILL<br />
BE SAVED ON DMS.<br />
- following modification will be made only via DMS (*)<br />
Alternative n°2:<br />
- configuration parameter for GPRS/GSM modem connection (refer to item 7.2)<br />
- create the plant and configure totally the parameters on DMS profile of the plant. The parameters of configuration on DMS are<br />
equivalent of the parameters explained in item 7.1.<br />
- connect with DMS to the plant. WRITE ON P&CD AND ECU THE NEW CONFIGURATION<br />
- following modification will be made only via DMS (*)<br />
(*) In case of DMS utilization after commissioning , all the subsequent variations of configuration must be performed only with the DMS in<br />
order to don’t cause misalignments between the equipment and the control room, because DMS always saves in its registers the<br />
configuration before sending it, and it uses this save for its following modifications. If, after sending the configuration from DMS, some<br />
modifications are made from terminal FioTerm, it is created a misalignment between the real configuration and the saved one. The following<br />
time that the configuration is sent from DMS, the modifications performed from FioTerm will be overwritten and so cancelled.<br />
The parameters of configuration that will be described below are mainly equivalent both for FioTerm and DMS.<br />
7.1 Complete configuration with terminal FioTerm.<br />
7.1.1 P&CD<br />
To start the connection with the P&CD, open the window “Setup \ Communication \ Communication”. Connection modality: Local; phone N°<br />
not necessary; Password of connection: conn (default); “Device and address” select the device P&CD entering the Modbus address<br />
(default 20) (see item 4.5).<br />
F.I.O. User Manual – Ed.2. Rev.5 Page 26/ 53<br />
The information contained in this document is confidential and the property of <strong>Pietro</strong> <strong>Fiorentini</strong> S.p.A.<br />
Technical data may undergo changes without notice
7.1.1.1 Master Table<br />
Here are displayed the information relative to the<br />
P&CD and the status of operation, type version of<br />
the firmware, GSM field, battery status, etc…<br />
No modifications to be performed.<br />
7.1.1.2 Date and time<br />
Set the date and current time clicking on<br />
“Modify”.<br />
F.I.O.<br />
User’s Manual<br />
ENGLISH<br />
F.I.O. User Manual – Ed.2. Rev.5 Page 27/ 53<br />
The information contained in this document is confidential and the property of <strong>Pietro</strong> <strong>Fiorentini</strong> S.p.A.<br />
Technical data may undergo changes without notice
7.1.1.3 SMS Alarm configuration<br />
Enter all phone number which you wish to send<br />
an SMS after the activation and restore of the<br />
alarms, … clicking on “Modify”.<br />
Selecting the strategy “Sequential”, it is sent an<br />
SMS to the first number of the list. If the<br />
notification reply does not arrive on time, it will<br />
send the same SMS to the second number and<br />
so on.<br />
Selecting the strategy “Send to all” it will send<br />
simultaneously the same message to all<br />
numbers.<br />
7.1.1.4 Alarms and events<br />
All the changing of status of controls indicated in<br />
Master Table are saved in the events. It is also<br />
possible to enable them as alarms (some of<br />
them are by default). In this case they have a<br />
greater importance and can generate SMS.<br />
F.I.O.<br />
User’s Manual<br />
These are the minimum settings necessary for the startup of P&CD. The other settings are for an advanced use.<br />
Further information are available in the manual P&CD.<br />
ENGLISH<br />
F.I.O. User Manual – Ed.2. Rev.5 Page 28/ 53<br />
The information contained in this document is confidential and the property of <strong>Pietro</strong> <strong>Fiorentini</strong> S.p.A.<br />
Technical data may undergo changes without notice
7.1.2 ECU<br />
F.I.O.<br />
User’s Manual<br />
ENGLISH<br />
To start the connection with the ECU: open the window “Setup \ Communication \ Communication”. Connection modality: Local ; phone N°<br />
not necessary; Password of connection: conn (default); “Device and address” select the device ECU1 entering the Modbus address (default<br />
0) or ECU2 (default 10) (see item 4.5).<br />
7.1.2.1 Master Table<br />
Here are displayed information relative to the<br />
equipment type, firmware version, logging status,<br />
date and hour, etc… and the status of controls like<br />
battery status, inputs status, etc…<br />
Clicking on “Modify” it is possible to set the<br />
number of the plant (not to be confused with the<br />
Modbus address that can be set only from the<br />
keyboard of ECU), the language of the ECU, the<br />
day closing hour, the password (default 0), the<br />
date of start and end of daylight saving time<br />
hour.<br />
Clicking on “Set Date” it is possible to set the<br />
date and hour. Selecting “immediate definition”<br />
the new time is set immediately, while selecting<br />
“Progressive Setting” it moves from the old to<br />
the new one progressively without letting gaps in<br />
the log.<br />
It is possible to activate all the log configured<br />
simultaneously with “Start Log”, deactivate them<br />
simultaneously with “Stop Log”. Before<br />
reactivating them, clear the stored logs with<br />
“Clear Log”.<br />
7.1.2.2 Acquisition<br />
Here it is possible to see information relative to<br />
each analog or digital variable, see the example<br />
on the right, related to the downstream pressure.<br />
Here are also displayed the status of the alarm<br />
related to that specific variable.<br />
Modify<br />
Set Date<br />
F.I.O. User Manual – Ed.2. Rev.5 Page 29/ 53<br />
The information contained in this document is confidential and the property of <strong>Pietro</strong> <strong>Fiorentini</strong> S.p.A.<br />
Technical data may undergo changes without notice
7.1.2.3 Alarm<br />
In the general page “Alarm” clicking on “Show<br />
Log” it is possible to see all the status changes<br />
of the alarms stored in the ECU.<br />
In the page related to the variable to be<br />
monitored, clicking on “Modify” it is possible to<br />
select 3 alarm levels for high limit (“High, “High<br />
High” and “Fault High”) and 3 alarm levels of low<br />
limit (“Low, “Low Low” and “Fault Low”). It is also<br />
possible to set a value of maximum excursion of<br />
the variable (“Max range”).<br />
Each intervention can be monitored as an event,<br />
selecting it on “Event enable” (it is only recorded<br />
in the memory of the ECU) or as an alarm,<br />
selecting it on “Alarm enable” (in this case it is<br />
generated also an SMS).<br />
Finally, it is possible to display the current status<br />
of the thresholds.<br />
F.I.O.<br />
User’s Manual<br />
Modify<br />
ENGLISH<br />
F.I.O. User Manual – Ed.2. Rev.5 Page 30/ 53<br />
The information contained in this document is confidential and the property of <strong>Pietro</strong> <strong>Fiorentini</strong> S.p.A.<br />
Technical data may undergo changes without notice<br />
Show Log
7.1.2.4 Event<br />
In the page “Event” clicking on “Show Log” it is<br />
possible to see all the events stored in the ECU.<br />
7.1.2.5 Log<br />
The Log is a configurable memory location<br />
where the selected variables of that Log are<br />
stored.<br />
Clicking on “Modify” it is possible to set:<br />
- The name of the Log.<br />
- Log rate (time between two consecutive<br />
acquisitions).<br />
- “Circular” if, when it has filled the available<br />
memory, it stores the most recent value and<br />
cancels the oldest one, or “Filling” if, when it<br />
has filled the available memory, it stops the<br />
memorization of new data.<br />
- “Buffer size” is the max. size of the Log. Each<br />
record is an acquisition of the group of<br />
selected variables. If for example we wish to<br />
accumulate data for 30 days with a Log rate of<br />
3600 seconds (1 h) we must set the buffer<br />
size at:<br />
24 h x 30 days = 720 records.<br />
- Up to n°15 variables can be monitored:<br />
pressures, position, flow rates, volumes, and<br />
diagnostics.<br />
Each Log can be configured with different step,<br />
size and variables.<br />
F.I.O.<br />
User’s Manual<br />
N.B.<br />
Qm/Vm = flow rate/volume measured.<br />
Qc/Vc = flow rate/volume corrected by the error introduced of the turbine, if known.<br />
Qb/Vb = flow rate/volume converted to the reference conditions.<br />
Modify<br />
ENGLISH<br />
F.I.O. User Manual – Ed.2. Rev.5 Page 31/ 53<br />
The information contained in this document is confidential and the property of <strong>Pietro</strong> <strong>Fiorentini</strong> S.p.A.<br />
Technical data may undergo changes without notice<br />
Show Log
7.1.2.6 Flow computer<br />
Here are all the variables relative to the Flow<br />
Computer section (useful mostly in case of direct<br />
method measurements).<br />
The parameters as composition of gas,<br />
reference conditions, etc… can be set only from<br />
the keyboard of ECU.<br />
For more information see the ECU manual.<br />
7.1.2.7 ECU<br />
This page describes all the main functions of the<br />
F.I.O.:<br />
Active functions:<br />
- Measurement mode of the flow rate (EVCD<br />
ECU FT, Indirect, direct from turbine, direct<br />
from EVCD).<br />
- Limitation of flow rate.<br />
- Pressure modulation.<br />
- Remote disconnection.<br />
Diagnostics:<br />
- Generic alarm.<br />
- Battery discharged.<br />
- Status of pressure modulation (Failed,<br />
Excluded, In progress, Set-point reached).<br />
- Maintenance status.<br />
- Status of back-pressure.<br />
- Type of modulation (Excluded, Fixed Set,<br />
Profiling, Pressure Compensation).<br />
- Set-point of outlet pressure.<br />
- Outlet Pressure.<br />
- Current time range of the profiling.<br />
- Coefficient of current flow rate Cg (only with<br />
indirect method).<br />
- Current flow rate.<br />
- Status of limitation of flow rate.<br />
- N° of interventions of the limitation of flow rate<br />
and duration.<br />
- Remote disconnection.<br />
Clicking “Modify”, can be set:<br />
F.I.O.<br />
User’s Manual<br />
ENGLISH<br />
- Pressure channel for volume conversion: side in which it the turbine is installed (only in the case of direct measurement of the flow rate) for<br />
the conversion of the flow rate measured according to the reference conditions (Pu= upstream; Pd= downstream).<br />
- Alarm mode: set “SMS”. In this mode the alarm interventions shall arrive via SMS according to the procedure indicated on item 7.1.1.3.<br />
F.I.O. User Manual – Ed.2. Rev.5 Page 32/ 53<br />
The information contained in this document is confidential and the property of <strong>Pietro</strong> <strong>Fiorentini</strong> S.p.A.<br />
Technical data may undergo changes without notice
7.1.2.8 Commissioning of the system<br />
PROCEDURE STEP 7:<br />
F.I.O.<br />
User’s Manual<br />
ENGLISH<br />
- agree with the customer the fixed set-point of pressure to be entered, and the hypothetic range of the outlet pressure that will be<br />
performed from F.I.O. in the future. Agree also the minimum pressure of F.I.O. (that has to be higher than the pneumatic pressure<br />
already set) and the maximum pressure of F.I.O. according to the minimum of F.I.O. +variation range. Consider that a higher<br />
distance between pneumatic setting and F.I.O. minimum pressure permits a better modulation of pressure. Enter these values on<br />
ECU via FioTerm<br />
- enter with FioTerm the configuration of pressure modulation, pressure profiling, pressure compensation and flow rate limitation.<br />
- first activate the fixed set-point modulation (Remote or Remote+back-pressure). Refer to the following instructions.<br />
Before proceeding with the operations, is necessary to connect the downstream part of the line to the network according to this<br />
procedure:<br />
- increase manually, operating with the increment solenoid valve (see 4.3), the pressure downstream the regulator up to the value<br />
of the pressure in the network has reached.<br />
- open slowly the downstream ball or butterfly valve<br />
- To start the set-point modulation, exit from the “Maintenance” status, if present. See “Enclosure A”, end of the manual.<br />
7.1.2.9 Pressure modulation<br />
It is possible to configure and modify all the<br />
parameters related to the modulation of<br />
pressure. Clicking on “Modify” you can set:<br />
- Fixed Set-point of pressure. Enter the value<br />
agreed with the customer.<br />
- Modality of modulation of pressure:<br />
-Remote (fixed set point).<br />
-Profiling (see 7.1.2.11)<br />
-Pressure Compensation (see 7.1.2.12)<br />
Each one can be selected with or without<br />
Back-pressure. During the first commissioning<br />
is suggested to start with the fixed set-point.<br />
When the correct behavior of the system is<br />
verified, is possible to switch in Profiling or<br />
Pressure Compensation.<br />
The Back-pressure is a software control that stops the modulation in case of return of the downstream pressure from the net, superior to the<br />
set-point set on the ECU. If the pressure, which is controlled by another plant connected in loop with the regulator, is greater than its setpoint,<br />
the ECU suspends the modulation until the downstream pressure drops and is again controllable.<br />
- UP step duration: duration of opening of the<br />
increasing solenoid valve, minimum 100 ms. If<br />
with 100 ms, at each pulse, the pressure<br />
raises too slowly, it is possible to increase this<br />
time.<br />
- DOWN step duration: duration of the opening<br />
of the decreasing solenoid valve, minimum<br />
100 ms. If with 100 ms, at each pulse, the<br />
pressure drops too slowly, it is possible to<br />
increase this time.<br />
- Response time: time between one step<br />
UP/DOWN and the following, minimum 30 sec.<br />
If with 30 seconds the pressure increases or<br />
decreases too fast, it is possible to increase<br />
this time with multiples of 30 seconds (60, 90,<br />
120, etc.).<br />
- Time-out: during the RUN condition, is the<br />
time within the outlet pressure must reach the<br />
dead band of the set-point. If not, when the<br />
time-out is reached the modulation is blocked<br />
and moved to the status of FAIL. It goes back<br />
to normal status only after receiving a new<br />
command. This parameter must be set greater<br />
than the maximum time took from the<br />
modulation to cover the range from the<br />
minimum pressure to the maximum and vice<br />
versa. Maximum value is 32000 seconds in<br />
multiples of 30 seconds (60, 90, 120, etc.).<br />
F.I.O. User Manual – Ed.2. Rev.5 Page 33/ 53<br />
The information contained in this document is confidential and the property of <strong>Pietro</strong> <strong>Fiorentini</strong> S.p.A.<br />
Technical data may undergo changes without notice
F.I.O.<br />
User’s Manual<br />
ENGLISH<br />
- Dead band: in % of the set-point. The modulation continues to increase or decrease the downstream pressure until it reaches the value<br />
represented by the set-point ± the dead band. In the figure above, supposing that the pressure was initially at 1 bar, the modulation<br />
activates the increasing solenoid valve until the downstream pressure reaches 2 bar ±1%, i.e. until it reaches the range between 1.98 bar<br />
and 2.02 bar. The ECU considers reached the set-point and the modulation stops.<br />
- Sensibility: in % of the set-point. The ECU, after reaching the dead band of the set-point, verify continuously that the pressure controlled by<br />
the regulator does not exit above or below the band of sensibility (in the figure above the pressure must remain between 2 bars ±2,5%, i.e.<br />
in the range between 1.95 bar and 2.05 bar). If the pressure exits from this range, the ECU reactivates the modulation, brings back the<br />
downstream pressure inside the dead band, and stops. Is suggested to set the sensibility same as the accuracy class AC of the regulator,<br />
in order to reduce the number of interventions of the modulation.<br />
- Max output pressure: max. pressure over that is not possible to perform any intervention of increasing solenoid valve. Enter the value<br />
agreed with the customer<br />
- Min output pressure: minimum pressure below that is not possible to perform any intervention of decreasing solenoid valve. Enter the value<br />
agreed with the customer<br />
- Velocity: parameter that automatically modifies the cadence of the steps in order to reduce (if is set lower than 100%) or increase (if it is set<br />
greater than at 100%) the ramp of variation of the downstream pressure during the modulation.<br />
7.1.2.10 Emergency setting of Fixed Set-point, Pd min e Pd max from ECU<br />
In case of failure of laptop or trouble on serial connection, is possible to change directly some parameters from the ECU:<br />
1- Enter in Menu “Fio- Five In One \ Maintenance \ Press.Modul. \ Pres.SetPoint” (see Enclosure A “Structure of the menu ECU”). It is<br />
displayed the current value of Set-point.<br />
2- Press Enter (after entering the password). Write the new Set-point and press Enter again.<br />
3- Exit from the menu “Pres.SetPoint” and save pressing again Enter.<br />
4- Verify, and eventually modify, the Pd min e Pd max values<br />
5- Exit from the menu “Press.Modul.”<br />
6- Enter again in “Maintenance” to bring back the machine from the “Maintenance” status to “Normal status”, pressing Enter from the<br />
page “Main. Exit” (see Enclosure A “Structure of the menu F.I.O.”).<br />
The F.I.O. will work with these new setting, up to new modification will be made manually, via FioTerm or via DMS.<br />
7.1.2.11 Profiling<br />
Clicking on “Future profile” (menu Pressure modulation, see 7.1.2.9) it is<br />
possible to program many time ranges with a different set-point for each one.<br />
Must be selected:<br />
- The day of the week.<br />
- One of the 7 periods available every day.<br />
- Hour and minutes of start and hour and minutes of end.<br />
- The set-point that you wish in that range.<br />
- Then save the range (clicking “Save”) and select the following one.<br />
It must also be inserted the value of default relative to that day in case there<br />
are program gaps.<br />
At the end of the insertion of all ranges, click on “Download”.<br />
Clicking on “Current profile” (menu Pressure modulation, see 7.1.2.9) it is<br />
possible to visualize the programming already present.<br />
Clicking on “Activation Date” (menu Pressure modulation, see 7.1.2.9) it is<br />
possible to choose if activate the “Profiling” immediately or when reaching a<br />
certain date/hour.<br />
However, it must always be selected the Modulation mode in “Profiling” (see<br />
7.1.2.9).<br />
F.I.O. User Manual – Ed.2. Rev.5 Page 34/ 53<br />
The information contained in this document is confidential and the property of <strong>Pietro</strong> <strong>Fiorentini</strong> S.p.A.<br />
Technical data may undergo changes without notice
7.1.2.12 Pressure compensation<br />
The function pressure compensation foresees to divide the max.<br />
flow rate of the plant in 10 ranges, and into each range it is<br />
assigned a set-point. The ECU changes the set-point according to<br />
the range of flow rate passing through the regulator in that<br />
moment.<br />
The changing of the range has a hysteresis of 50%, i.e. the<br />
change of range in increase is made when exceeding the flow<br />
rates indicated in the example, (100, 200, 300, …Sm³/h) while<br />
when decreasing the change in the previous range is made at<br />
250, 150, 50 Sm³/h).<br />
In the page “Pressure compensation” clicking on “Modify” it is<br />
possible to set, facultative, the period in which the function<br />
activates and a value of default for the periods not activated (or<br />
let it always activated).<br />
The ranges are programmed in the page “Future Compensation”.<br />
Select:<br />
- The maximum flow rate (it calculates automatically the 10<br />
ranges of flow rate).<br />
- The desired set-points matched to each range. Not necessarily<br />
increasing, it is also possible decreasing.<br />
At the end of the insertion of all the set-point, click on “Download”.<br />
Clicking on “Current profile” it is possible to visualize the<br />
programming inserted.<br />
Clicking on “Activation Date” it is possible to choose if to activate<br />
the “Pressure compensation” immediately or at a certain date and<br />
hour.<br />
However, it must always be selected the Modulation mode in<br />
“Pressure Compensation” (see 7.1.2.9).<br />
F.I.O.<br />
User’s Manual<br />
ENGLISH<br />
F.I.O. User Manual – Ed.2. Rev.5 Page 35/ 53<br />
The information contained in this document is confidential and the property of <strong>Pietro</strong> <strong>Fiorentini</strong> S.p.A.<br />
Technical data may undergo changes without notice
7.1.2.13 Flow rate limitation<br />
The function “Flow rate limitation”, if enabled,<br />
always verifies that the flow rate is kept under the<br />
limit set in this page. When the flow rate starts to<br />
exceed the threshold, the ECU starts to decrease<br />
the setting of the pilot activating the decreasing<br />
solenoid valve until the flow rate is stabilized<br />
around the threshold value. When the flow rate<br />
decreases under the threshold, the ECU increases<br />
again the setting of the pilot activating the<br />
increasing solenoid valve until bringing back the<br />
downstream pressure to its set-point.<br />
Clicking on “Modify” it is possible to set:<br />
- If the limitation is enabled or disabled.<br />
- The threshold of the flow rate that the system<br />
has to limit.<br />
- Dead band: in % of the threshold of flow rate.<br />
When the flow rate exceeds the threshold, the<br />
ECU decreases the setting of the pilot until the<br />
flow rate returns within the value represented by<br />
the threshold ± the dead band. In the example,<br />
supposing that the threshold is at 1000 Sm³/h,<br />
the ECU activates the decreasing solenoid valve<br />
until the flow rate reaches 1000 Sm³/h ±5%, i.e.<br />
until it stays between 950 Sm³/h and 1050<br />
Sm³/h. in this range the ECU remains in<br />
limitation status.<br />
F.I.O.<br />
User’s Manual<br />
ENGLISH<br />
- Sensibility: in % of the threshold of flow rate. The ECU, after reaching the dead band, controls if the flow rate of the regulator exits above or<br />
below the range of sensibility. In the example the flow rate must remain between 1000 Sm³/h ±10%, i.e. between 900 Sm³/h and 1100<br />
Sm³/h. If the flow rate exceeds this range, the ECU brings back the flow rate inside the dead band, and stops. If the flow rate drops below,<br />
it increases again the setting of the pilot activating the increasing solenoid valve until is reached again the downstream pressure to its setpoint.<br />
- Minimum pressure: A value of minimum pressure under which the limitation of flow rate cannot lower the downstream pressure.<br />
- Flow rate verification time: time between a verification of the flow rate and the following one, is recommended the minimum of 30 sec. It is<br />
possible to increase this time with multiples of 30 seconds (60, 90, 120, etc.).<br />
- Limitation time-out: time within the flow rate must reach the dead band. If not, when the time-out is reached the modulation is blocked and<br />
moved to the status of FAIL. Max. value 32000 seconds in multiples of 30 seconds (60, 90, 120, etc.).<br />
7.2 Complete configuration with DMS<br />
For the remote programming through the DMS please refer to the DMS manual.<br />
In case of GPRS communication, is suggested to set the following parameters on P&CD before starting the connection with DMS:<br />
- On “Master table \ Date and time” set the current date and time (see item 7.1.1.2)<br />
- On “Master table \ Alarm configuration” (see item 7.2.1)<br />
- On “Master table \ Periodic tasks” (see item 7.2.2)<br />
- On “Master table \ Modem” (see item 7.2.3)<br />
Verify, finally, on “Master table \ Device identification”, the ID number of P&CD matching with the one configured on DMS profile.<br />
F.I.O. User Manual – Ed.2. Rev.5 Page 36/ 53<br />
The information contained in this document is confidential and the property of <strong>Pietro</strong> <strong>Fiorentini</strong> S.p.A.<br />
Technical data may undergo changes without notice
7.2.1 Alarm configuration<br />
Enter the IP address (for the GPRS), for<br />
example 151.8.135.75, or the telephone number<br />
(for the GSM), i.e. +3933576…. of the Remote<br />
center that the P&CD has to dial for the periodic<br />
or requested connection for the data download.<br />
“Phone number 1” has the higher priority,<br />
“Phone number 8” has the lower priority.<br />
In case of no connection dialing Phone n°1, the<br />
modem of P&CD will try to dial the Phone n°2,<br />
and so on.<br />
7.2.2 Periodic tasks<br />
Is possible to set the frequency of the download<br />
of the data to DMS, the hour and the minute of<br />
the call.<br />
In this example, the P&CD will call the DMS<br />
once a day at 17:30.<br />
7.2.3 Modem<br />
For the GPRS connection is necessary to enter<br />
the APN, user name and password of the mobile<br />
operator.<br />
F.I.O.<br />
User’s Manual<br />
ENGLISH<br />
F.I.O. User Manual – Ed.2. Rev.5 Page 37/ 53<br />
The information contained in this document is confidential and the property of <strong>Pietro</strong> <strong>Fiorentini</strong> S.p.A.<br />
Technical data may undergo changes without notice
ESC<br />
ENTER<br />
ESC<br />
MAIN PAGE<br />
dd mmm yyyyiiii<br />
Vb 000000000 m3<br />
Measurements<br />
Settings<br />
ENTER<br />
System Info<br />
FIO - FiveInOne<br />
Maintenance menu<br />
Maint. exit. (*)<br />
Pres. Modul. »<br />
Meas. Setup »<br />
ENTER<br />
ENTER<br />
ESC<br />
F.I.O.<br />
User’s Manual<br />
Enclosure A<br />
Structure of “ECU”<br />
menu<br />
ENTER<br />
ESC<br />
ESC<br />
Menu FIO – FiveInOne<br />
FIO status »<br />
Actual cond. »<br />
Maintenance »<br />
Menu Modul. Pres.<br />
Press. Step Up/Dn<br />
Pres. SetPoint<br />
Pd min<br />
Pd max<br />
Impost. Misure<br />
Zero setup<br />
FS setup<br />
Displacement %<br />
ENGLISH<br />
(*) The item with the message “Maint. exit.” is activated only when the machine is in maintenance status, due to some previous<br />
operations performed in the menu “Maintenance”. At the end of the maintenance activity, to bring back the machine in “normal<br />
working status”, visualize the message “Maint. exit.” and press Enter. In any case, after some hour the machine goes back<br />
automatically to normal operation.<br />
Some activities in the menu “Maintenance” are protected by password. To enter them press Enter, enter the password by max. 4<br />
digits (default is “0000”) and press again Enter.<br />
F.I.O. User Manual – Ed.2. Rev.5 Page 38/ 53<br />
The information contained in this document is confidential and the property of <strong>Pietro</strong> <strong>Fiorentini</strong> S.p.A.<br />
Technical data may undergo changes without notice<br />
ENTER<br />
ENTER<br />
ESC<br />
ESC<br />
FIO status menu<br />
ECU Diagnostics<br />
Active functions<br />
Pres.Modulation<br />
Flow Limit.<br />
Cust.Discon.<br />
Menu Current Situat.<br />
Pu Pressure<br />
Pd Pressure<br />
Pres. SetPoint<br />
Qb Base Flow Rate<br />
Cg Flow Factor<br />
Displacement %<br />
Pd Min<br />
Pd Max<br />
Flow Rate Thres.
F.I.O.<br />
User’s Manual<br />
ENGLISH<br />
ENCLOSURE B<br />
PROCEDURE <strong>FOR</strong> THE EXPORT OF THE CONFIGURATION 13 OF P&CD AND<br />
ECU TO THE LAPTOP AND IMPORT FROM THE LAPTOP<br />
B.1 P&CD<br />
B.1.1 Export of P&CD configuration on laptop<br />
Before replace the board, export on the laptop the current configuration of P&CD, so, after the replacement, will be possible to upload the<br />
current configuration on the new board. This operation is done with FioTerm.<br />
1- Connect the cable with adapter RS232/USB on the connector of the old P&CD board.<br />
2- Connect the cable USB to the laptop<br />
3- Start the software FioTerm<br />
4- Open the window “Setup \ Communication \ Serial line”.<br />
5- Insert the COM used. If necessary verify in the operating system of the PC on “Peripheral<br />
management \ COM port” the number of COM in use.<br />
FioTerm permits to select COM from 1 to 7.<br />
6- The other parameters are 9600; 8; none; 1.<br />
7- Press OK<br />
8- Open the window “Setup \ Communication \ Communication”.<br />
9- Connection modality: Local ; phone N° not necessary; Password of connection: conn (default)<br />
10- In “Device and address” select the device “”P&CD” entering the Modbus address (default 20).<br />
11- Press OK<br />
12- Press the pushbutton “ GO ” or from the top bar “File \ Start connection”.<br />
13- Wait some seconds and it should connect with the P&CD.<br />
14- From the top bar select “File \ Export”.<br />
15- Type the file name and press “Save” (see below)<br />
16- Exit from the connection pressing the red pushbutton with the X or “File \ Close”.<br />
1<br />
F.I.O. User Manual – Ed.2. Rev.5 Page 39/ 53<br />
The information contained in this document is confidential and the property of <strong>Pietro</strong> <strong>Fiorentini</strong> S.p.A.<br />
Technical data may undergo changes without notice<br />
Save<br />
2
B.1.2 Import of P&CD configuration from laptop<br />
F.I.O.<br />
User’s Manual<br />
ENGLISH<br />
After the board P&CD replacement (enclosure C), import on the new P&CD the configuration of old P&CD. This operation is done with<br />
FioTerm.<br />
1- Connect the cable with adapter RS232/USB on the connector of the new P&CD board.<br />
2- Connect the cable to the laptop<br />
3- Start the software FioTerm<br />
4- From the top bar select “File \ Import”.<br />
5- Select the file name saved from old P&CD (see below)<br />
6- Press Open<br />
7- Press the pushbutton “Download complete”.<br />
Open<br />
F.I.O. User Manual – Ed.2. Rev.5 Page 40/ 53<br />
The information contained in this document is confidential and the property of <strong>Pietro</strong> <strong>Fiorentini</strong> S.p.A.<br />
Technical data may undergo changes without notice
B.2 ECU<br />
B.2.1 Export of ECU configuration on laptop<br />
F.I.O.<br />
User’s Manual<br />
ENGLISH<br />
Before replace the ECU, export on the laptop the current configuration of ECU, so after the replacement will be possible to upload the current<br />
configuration on the new ECU. This operation is done with FioTerm.<br />
1- Connect the cable RS232 (or the cable with adapter RS232/USB) on the connector of the P&CD board.<br />
2- Connect the cable to the laptop<br />
3- Start the software FioTerm<br />
4- Open the window “Setup \ Communication \ Serial line”.<br />
5- Insert the COM used. If necessary verify in the operating system of the PC on “Peripheral<br />
management \ COM port” the number of COM in use.<br />
FioTerm permits to select COM from 1 to 7.<br />
6- The other parameters are 9600; 8; none; 1.<br />
7- Press OK<br />
8- Open the window “Setup \ Communication \ Communication”.<br />
9- Connection modality: Local ; phone N° not necessary; Password of connection: conn (default)<br />
10- In “Device and address” select the device “”ECU” entering the Modbus address (default 0).<br />
11- Press OK<br />
12- Press the pushbutton “ GO ” or from the top bar “File \ Start connection”.<br />
13- Wait some seconds and it should connect with the ECU.<br />
14- From the top bar select “File \ Export”.<br />
15- Type the file name and press “Save” (see below)<br />
16- Exit from the connection pressing the red pushbutton with the X or “File \ Close”.<br />
ECU<br />
F.I.O. User Manual – Ed.2. Rev.5 Page 41/ 53<br />
The information contained in this document is confidential and the property of <strong>Pietro</strong> <strong>Fiorentini</strong> S.p.A.<br />
Technical data may undergo changes without notice<br />
Save
B.2.2 Import of ECU configuration from laptop<br />
F.I.O.<br />
User’s Manual<br />
After the ECU replacement, import on the new ECU the configuration of old ECU. This operation is done with FioTerm.<br />
1- Connect the cable with adapter RS232/USB on the connector of the P&CD board<br />
2- Connect the cable to the laptop.<br />
3- Start the software FioTerm<br />
4- From the top bar select “File \ Import”.<br />
5- Select the file name saved from old ECU (see below)<br />
6- Press Open<br />
7- Press the pushbutton “Download complete”.<br />
ECU<br />
ECU<br />
Open<br />
ENGLISH<br />
F.I.O. User Manual – Ed.2. Rev.5 Page 42/ 53<br />
The information contained in this document is confidential and the property of <strong>Pietro</strong> <strong>Fiorentini</strong> S.p.A.<br />
Technical data may undergo changes without notice
F.I.O.<br />
User’s Manual<br />
ENGLISH<br />
ENCLOSURE C<br />
PROCEDURE <strong>FOR</strong> THE REPLACEMENT OF THE MAIN P&CD BOARD<br />
In case of up-grade of P&CD, for example when the customer needs to replace the old P&CD GSM modem with the newer P&CD<br />
GPRS/GSM modem, is sufficient to replace only the main P&CD board.<br />
Pict 1- Turn off the switch<br />
Pict 2- Push up the metallic hook and release the SIM card<br />
Pict 3- Remove the SIM card<br />
Pict 4- Unscrew the n°4 screws for the fixing of the plate for support of the old P&CD board on the box<br />
Pict 5- Release the connector of the antenna<br />
Pict 6- Pull the P&CD board outside the box (as much as possible) and unscrew the n°6 screws for the fixing of the board on the socket<br />
Pict 7- Disconnect one-by-one the wires from the old P&CD board and connect on the new one in the same position. To avoid mistakes,<br />
after the disconnection of one wire from the old board, it is suggested to connect immediately on the new one before disconnect the<br />
second wire (follow the sequence below in Pict 7).<br />
Pict 8- Fix the new P&CD board on the socket screwing the n°6 screws.<br />
Pict 9- Fix the socket on the box screwing the n°4 screws.<br />
Pict 10- Insert the SIM card<br />
Pict 11- Verify the orientation of SIM card<br />
Pict 12- Pull down the metallic hook to fix the SIM card<br />
Pict 13- Turn on the switch<br />
1 2 3<br />
4<br />
OLD P&CD<br />
F.I.O. User Manual – Ed.2. Rev.5 Page 43/ 53<br />
The information contained in this document is confidential and the property of <strong>Pietro</strong> <strong>Fiorentini</strong> S.p.A.<br />
Technical data may undergo changes without notice<br />
6<br />
5
F.I.O.<br />
User’s Manual<br />
5 3 1 6 4 2<br />
OLD P&CD<br />
7 8<br />
9 10<br />
11 12<br />
13 14<br />
15 17 19 21 23 16 18 20 22 24<br />
9<br />
7<br />
NEW P&CD<br />
ENGLISH<br />
11 12<br />
13<br />
F.I.O. User Manual – Ed.2. Rev.5 Page 44/ 53<br />
The information contained in this document is confidential and the property of <strong>Pietro</strong> <strong>Fiorentini</strong> S.p.A.<br />
Technical data may undergo changes without notice<br />
NEW P&CD<br />
8<br />
10
F.I.O.<br />
User’s Manual<br />
ENCLOSURE D - OVERALL DIMENSIONS Q-KIT AND P-KIT<br />
ENGLISH<br />
F.I.O. User Manual – Ed.2. Rev.5 Page 45/ 53<br />
The information contained in this document is confidential and the property of <strong>Pietro</strong> <strong>Fiorentini</strong> S.p.A.<br />
Technical data may undergo changes without notice<br />
Q-KIT
P-KIT<br />
F.I.O.<br />
User’s Manual<br />
ENGLISH<br />
F.I.O. User Manual – Ed.2. Rev.5 Page 46/ 53<br />
The information contained in this document is confidential and the property of <strong>Pietro</strong> <strong>Fiorentini</strong> S.p.A.<br />
Technical data may undergo changes without notice
F.I.O.<br />
User’s Manual<br />
ENCLOSURE E OPTIONAL KIT AND COMPONENT LIST<br />
P.S.<br />
ENGLISH<br />
Some of these components probably will not be used, depending on installation or optional requested.<br />
The code numbers below should be subsequently implemented or modified.<br />
Please verify them time by time.<br />
Code 7025130 PNEUMATIC CONNECTION FITTINGS KIT - ISO 7/1<br />
Code nr Description UM Quantity<br />
1 2403336 Compression fitting 1/4" GAS TUBO D.10 ISO 7/1 NR 4<br />
2 2402212 Compression fitting elbow 1/4" GAS TUBO D.10 ISO 7/1 NR 4<br />
3 8350585 Multiple take-off Female 1/2" + 2X1/4" Male 1/2" ISO 7/1 NR 2<br />
4 2400078 Plug 1/2" ISO 7/1 NR 2<br />
5 2400076 Plug 1/4" ISO 7/1 NR 2<br />
Code 7025131 PNEUMATIC CONNECTION FITTINGS KIT - NPT<br />
1<br />
1<br />
2<br />
3<br />
2<br />
4<br />
Code nr Description UM Quantity<br />
1 2403335 Compression fitting 1/4" GAS TUBO D.10 NPT NR 2<br />
2 2403336 Compression fitting 1/4" GAS TUBO D.10 ISO 7/1 NR 2<br />
3 2402247 Compression fitting elbow 1/4" GAS TUBO D.10 NPT NR 2<br />
4 2402212 Compression fitting elbow 1/4" GAS TUBO D.10 ISO 7/1 NR 2<br />
5 8350570 Multiple take-off Female 1/2" + 2X1/4" Male 1/2" NPT NR 2<br />
6 2400077 Plug 1/2" NPT NR 2<br />
7 2100185 Plug 1/4" NPT NR 2<br />
F.I.O. User Manual – Ed.2. Rev.5 Page 47/ 53<br />
The information contained in this document is confidential and the property of <strong>Pietro</strong> <strong>Fiorentini</strong> S.p.A.<br />
Technical data may undergo changes without notice<br />
3 4 5<br />
5 6 7
F.I.O.<br />
User’s Manual<br />
Code 7025132 KIT <strong>FOR</strong> FIXING THE EXPLORER ECU ON TUBE 2"÷8"<br />
1<br />
ENGLISH<br />
Code nr Description UM Quantity<br />
1 7800230 Bracket for Explorer ECU NR 1<br />
2 7800231 Bracket for tube 2"÷8" NR 1<br />
3 7800232 Bracket for Explorer ECU - top cover NR 1<br />
4 2300082 Screw M4x25 NR 2<br />
5 2320740 Nut M4 NR 2<br />
6 2321205 Nut M5 NR 2<br />
7 2320005 Washer M5 NR 2<br />
8 2759990 Stainless steel band 14 mm MT 1<br />
9 2759991 Endless-head with endless screw 14 mm NR 1<br />
ADDITIONAL PNEUMATIC PARTS AND TOOLS TO PROVIDE (<strong>FOR</strong> THE INSTALLER)<br />
1<br />
4 5<br />
2<br />
3<br />
6<br />
2<br />
7<br />
Code nr Description UM Quantity<br />
1 1170056M Tube stainless steel 10 mm<br />
2 M200202570 Cutter tube stainless steel 10 mm<br />
3 M200202569 Bender tube stainless steel 10 mm<br />
F.I.O. User Manual – Ed.2. Rev.5 Page 48/ 53<br />
The information contained in this document is confidential and the property of <strong>Pietro</strong> <strong>Fiorentini</strong> S.p.A.<br />
Technical data may undergo changes without notice<br />
3<br />
8<br />
9
F.I.O.<br />
User’s Manual<br />
Code (1) ELECTRICAL CONNECTION KIT<br />
9<br />
10<br />
17<br />
18<br />
ENGLISH<br />
Code nr Description UM Quantity<br />
1 3720584<br />
Cable n°3 wires x 2,5 mm²<br />
Distance mains/solar panel connection to P&CD<br />
MT ……<br />
2 3720564<br />
1 2 3<br />
11<br />
4 5<br />
6 7<br />
8<br />
13<br />
12<br />
15<br />
14 16 23<br />
19 20 22<br />
21<br />
Shielded cable n°4 wires x 1 mm²<br />
Distance solenoid valves to P&CD + distance meter<br />
(optional) to ECU1 + distance ECU2 (optional) to P&CD<br />
F.I.O. User Manual – Ed.2. Rev.5 Page 49/ 53<br />
The information contained in this document is confidential and the property of <strong>Pietro</strong> <strong>Fiorentini</strong> S.p.A.<br />
Technical data may undergo changes without notice<br />
MT ……<br />
3 2404675 (12x0,5)<br />
Shielded cable min.n°8 wires x min. 0,5 mm²<br />
Distance P&CD to ECU1<br />
Flexible tube in polyamide int.diam. 28 mm x ext.diam. 34<br />
MT ……<br />
4 2403953 mm<br />
Distance P&CD to ECU1 or junction box (if present)<br />
Flexible tube in polyamide int.diam. 16 mm x ext.diam. 21<br />
mm<br />
MT ……<br />
5 2403952<br />
Distance solenoid valves to ECU1 or junction box (if<br />
present) + distance meter (optional) to ECU1 + distance<br />
ECU2 (optional) to P&CD + distance mains/solar panel<br />
connection to P&CD<br />
MT ……<br />
6 2403947 Ring nut 1" NR ……<br />
7 Ring nut 1/2" NR ……<br />
8 2801300 Junction box (optional) NR ……<br />
9 2403957 Fitting 1" male gas for tube 34 mm NR ……<br />
10 2403956 Fitting 1/2" male gas for tube 21 mm NR ……<br />
11 Fitting 1" female gas for tube 34 mm NR ……<br />
12 Terminal for tube 34 mm NR ……<br />
13 Terminal for tube 21 mm NR ……
F.I.O.<br />
User’s Manual<br />
ENGLISH<br />
14 Terminal for tube 34 mm NR ……<br />
15 Terminal for tube 21 mm NR ……<br />
16 "Y" distributor from tube from 34 to 28 mm NR ……<br />
17 Fitting for junction of tube 34 mm NR ……<br />
18 Fitting for junction of tube 21 mm NR ……<br />
19 Fitting for reduction from 34 to 21 mm NR ……<br />
20 Fitting for reduction from 28 to 21 mm NR ……<br />
21 "T" distributor from tube 34 to 34 mm NR ……<br />
22 "T" distributor from tube 34 to 28 mm NR ……<br />
23 Cable gland for tube 21 mm NR ……<br />
(1) The code will be created according with: length of cables and tubes, quantity of fittings.<br />
2<br />
1<br />
ADDITIONAL ELECTRICAL PARTS TO PROVIDE (<strong>FOR</strong> THE INSTALLER)<br />
3 4 5 6<br />
Code nr Description UM Quantity<br />
1 Pipe holder clips for tube 34 mm (1")<br />
2 Pipe holder clips for tube 21 mm (1/2")<br />
3 Cable ties (different sizes)<br />
4 Thermo-reduction sheath (different sizes)<br />
5 Pre-insulated terminals for wire connection<br />
6 Wrenches for electrical connections<br />
F.I.O. User Manual – Ed.2. Rev.5 Page 50/ 53<br />
The information contained in this document is confidential and the property of <strong>Pietro</strong> <strong>Fiorentini</strong> S.p.A.<br />
Technical data may undergo changes without notice
F.I.O.<br />
User’s Manual<br />
Code KIT <strong>FOR</strong> JUCTION BOX TO BE FIXED ON PILOT OR ON TUBE<br />
ENGLISH<br />
Code nr Description UM Quantity<br />
1 2801300 Junction box NR 1<br />
2 Cable for connection of solenoid valve to junction box NR 2<br />
3 Preinsulated terminals for wire connection NR 4<br />
4 2403957 Fitting 1" male gas for tube 34 mm NR 1<br />
5 2403947 Ring nut 1" NR 1<br />
Cable gland PG11 NR 1<br />
6 Cable gland PG9 NR 2<br />
1<br />
P-KIT ELECTRICAL PARTS<br />
4<br />
Code nr Description UM Quantity<br />
1 3140601 Solenoid valve 1/4 bspt<br />
2 Internal obturator of solenoid valve + o-ring<br />
3 Coil of solenoid valve<br />
4 ED3840401 Kit connection from solenoid valves to cable<br />
2<br />
F.I.O. User Manual – Ed.2. Rev.5 Page 51/ 53<br />
The information contained in this document is confidential and the property of <strong>Pietro</strong> <strong>Fiorentini</strong> S.p.A.<br />
Technical data may undergo changes without notice<br />
3
F.I.O.<br />
User’s Manual<br />
Q-KIT ELECTRICAL SPARE PARTS<br />
ENGLISH<br />
Code nr Description UM Quantity<br />
1 POGFPY2F050S Displacement transducer 50 mm<br />
2 POGFPY2F075S Displacement transducer 75 mm<br />
3 CA0650T01M01R00LI Connection cable from displacement transducer to ECU<br />
1<br />
1<br />
5<br />
8<br />
ECU – P&CD ELECTRONIC PARTS<br />
2 3<br />
9<br />
6<br />
Code nr Description UM Quantity<br />
1 ED3721177 Battery for ECU<br />
2 ED3721095 Battery 12v 7,2 Ah for P&CD (mains version)<br />
3 ED3721096 Battery 12v 18 Ah for P&CD (solar version)<br />
4 ED3721173 Battery alkaline for P&CD (battery version)<br />
5 ED3480248 P&CD internal antenna (modem GSM/GPRS included)ATEX<br />
6 ED3480247 P&CD external antenna(modem GSM/GPRS included)ATEX<br />
7 SK0650T02M01R00 P&CD power supply module board (only main 230Vac /solar)<br />
8 ALMWAD55A Power supply 220V/12V for P&CD (mains version)<br />
9 MDXX12V6A Electronic regulator for P&CD (solar version)<br />
10 ED3480348 Optosender for ECU<br />
11 ACBTTDF82/2 Magnetothermic switch 2 x 2 A<br />
12 ACABE221-20 Circuit breaker 16 A<br />
F.I.O. User Manual – Ed.2. Rev.5 Page 52/ 53<br />
The information contained in this document is confidential and the property of <strong>Pietro</strong> <strong>Fiorentini</strong> S.p.A.<br />
2<br />
3<br />
Technical data may undergo changes without notice<br />
4<br />
7<br />
12 11<br />
10
OTHER<br />
3<br />
F.I.O.<br />
User’s Manual<br />
1 2<br />
ENGLISH<br />
Code nr Description UM Quantity<br />
1 ED3480311<br />
Antenna with magnetic base + 2 meter cable (only for P&CD<br />
external antenna)<br />
2 3825110 Irdasender data interface<br />
3 R200801066 Pulsimatic for pulse re-transmission<br />
4 PFR200901446 Kit pulsimatic screws 5/16<br />
DEVELOPER KIT <strong>FOR</strong> SCADA<br />
1<br />
Codice nr Descrizione UM Quantità<br />
1 PFP201200124 FIO Developer kit for SCADA – Kit sviluppo comunicazione 1<br />
F.I.O. User Manual – Ed.2. Rev.5 Page 53/ 53<br />
The information contained in this document is confidential and the property of <strong>Pietro</strong> <strong>Fiorentini</strong> S.p.A.<br />
4<br />
Technical data may undergo changes without notice