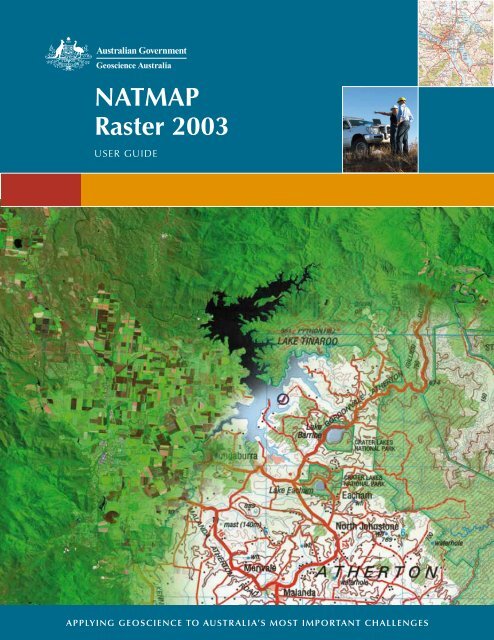
NATMAP Raster 2003 User Guide - Geoscience Australia
NATMAP Raster 2003 User Guide - Geoscience Australia
NATMAP Raster 2003 User Guide - Geoscience Australia

Create successful ePaper yourself
Turn your PDF publications into a flip-book with our unique Google optimized e-Paper software.
<strong>NATMAP</strong><br />
<strong>Raster</strong> <strong>2003</strong><br />
<strong>User</strong> <strong>Guide</strong><br />
APPLYING GEOSCIENCE TO AUSTR ALIA’S MOST IMPORTANT CHALLENGES
<strong>NATMAP</strong> <strong>Raster</strong> <strong>2003</strong> <strong>User</strong> <strong>Guide</strong><br />
Quick Help<br />
Troubleshooting<br />
Frequently Asked Questions<br />
Consumer Information<br />
About <strong>NATMAP</strong> <strong>Raster</strong> <strong>2003</strong><br />
Map Currency<br />
Installing and Starting<br />
Selecting a Map<br />
Viewing a Map<br />
Exporting<br />
Managing Layers and Maps using the <strong>Raster</strong> Configurator<br />
Using the Maps in other Applications
<strong>NATMAP</strong> <strong>Raster</strong> <strong>2003</strong> Basic Help<br />
Select a Map<br />
In the top left of the Viewer is a small map of <strong>Australia</strong> covered by five buttons. Each button corresponds to a<br />
different way of selecting a map.<br />
Click on the appropriate button on this image to select the map you want.<br />
Navigate around a map<br />
Pan: click, hold and drag<br />
Zoom In: click, hold and drag down<br />
Zoom Out: click, hold and drag up<br />
Recentre: click<br />
In Mapsheets, you can click off the map to load a neighbouring map; in Mosaic, this is the same as the<br />
Hand Pan tool<br />
Zoom to Extents: The map sheet will fill the map display window<br />
Changing layers: select the layer you want to view from the pop-up menu.<br />
Accessing the user guide and help: click on the USER GUIDE text in the lower left<br />
corner.<br />
<strong>NATMAP</strong> RASTER <strong>2003</strong> USER GUIDE
<strong>NATMAP</strong> Digital Maps - Troubleshooting <strong>2003</strong> Release<br />
Please note: <strong>Geoscience</strong> <strong>Australia</strong> no longer supports the <strong>2003</strong> Releases of <strong>NATMAP</strong> <strong>Raster</strong> Mosaic or <strong>NATMAP</strong><br />
<strong>Raster</strong> Mapsheets, and we recommend that users upgrade to the latest version of this product, <strong>NATMAP</strong> Digital<br />
Maps 2008 Release. The 2005 versions - <strong>NATMAP</strong> <strong>Raster</strong> Premium 2005 and <strong>NATMAP</strong> <strong>Raster</strong> 2005 - are now<br />
subject to limited support only and this support will be withdrawn when <strong>NATMAP</strong> Digital Maps 2008 has been<br />
available for one year.<br />
Internet Explorer 7 Issues<br />
Windows XP Service Pack 2 Issues<br />
Installing<br />
Starting the Viewer or Configurator<br />
Searching for a map<br />
Using the Viewer<br />
Map Images<br />
Exporting<br />
Printing<br />
Problems with other software<br />
Troubleshooting 2008 Release<br />
Troubleshooting 2005 Release<br />
Microsoft Internet Explorer 7 issues<br />
An issue has been identified with the latest release of Microsoft's Internet Explorer 7. If you have upgraded to<br />
Internet Explorer 7 and are now experiencing difficulties with either <strong>NATMAP</strong> <strong>Raster</strong> Mapsheets <strong>2003</strong> or <strong>NATMAP</strong><br />
<strong>Raster</strong> Mosaic <strong>2003</strong>, download a patch here (raster<strong>2003</strong>_fix_ie7.exe [15MB]). Save this file temporarily to your<br />
hard drive, then run.<br />
This patch is only available online. <strong>User</strong>s unable to download the patch should consider upgrading to the latest<br />
version of this product, <strong>NATMAP</strong> Digital Maps 2008 Release.<br />
Windows XP Service Pack 2 issues<br />
An issue has been identified with changes to the Internet Explorer 6 web browser, introduced by Windows XP<br />
Service Pack 2. More detailed information on the problem and some fixes are available.<br />
Installing<br />
I want to copy all maps to the hard drive and install the Viewer from there. Is there an easy way to do<br />
this?<br />
You can now download a file to copy the maps to your hard drive correctly and then run the Setup program. This<br />
batch file has been thoroughly tested and is virus free. It should work on all Windows platforms (not tested on<br />
Vista).<br />
1. Download the setupHD.bat file and save it to your computer<br />
2. Run the setupHD.bat file. You will be prompted to enter your CD drive letter (in most cases this is D or E)<br />
and to load CD1 into your CD drive<br />
3. Once CD1 has finished copying, insert CD2 and press any key to continue<br />
4. The installation process will begin as soon as the contents of CD2 have been copied to your hard drive.<br />
<strong>NATMAP</strong> RASTER <strong>2003</strong> USER GUIDE
Note that this batch file creates a folder on your C: drive called 'natmap'.<br />
You also need at least 1.3Gb of free space on your C: drive in order to copy all the maps from either Mapsheets or<br />
Mosaic.<br />
If you already have the latest version of the Viewer installed on your computer, click the Cancel button when the<br />
Setup program begins running.<br />
I load the CD in and nothing happens. Isn't there an AutoRun?<br />
There is no AutoRun feature on the CD.<br />
Many users have their Viewer configured to read maps off the CDs. If there was an AutoRun feature, then it would<br />
try to run the Setup program every time the user was asked to swap CDs (which isn't very desirable). Therefore,<br />
no AutoRun feature was added.<br />
I load the CD and start Setup. I get an error message that says ‘This is not a valid Win32 application’ or<br />
‘This is not a system32 application’.<br />
This is caused by one of the following:<br />
problem with your CD-ROM driver<br />
an incorrectly downloaded file (not appropriate here)<br />
a virus.<br />
To work around this problem, you need to run the Setup from your hard drive instead of the CD. You can do this<br />
by either:<br />
full hard drive installation: follow these instructions<br />
install from hard drive but leave maps on CD: Copy just the setup files (all files from the top level of your<br />
hard drive except for the ‘<strong>Raster</strong>s’ folder) to a folder on your hard drive. Run Setup.exe from your hard<br />
drive. Once the Start screen is loaded, exit from the program, and launch the <strong>Raster</strong> Configurator. Specify<br />
where on your CD your maps are located by following the steps for adding a search path. This will load the<br />
correct location of the maps into the Viewer software.<br />
If the problem is your CD-ROM driver, you will need to obtain a new driver. Check your computer manual and/or<br />
contact your place of purchase for more information (you may be able to download one for free).<br />
When installing, I get an error with error code ‘0x80040707’.<br />
This is caused by an incompatability between some Windows XP machines and InstallShield. A solution and more<br />
information is now available.<br />
When installing, I get the following error message: Error number: 0x80070725 Description: Incompatible<br />
version of the RPC stub.<br />
This happens because of an incompatible version of OLEAUT32.dll in your Windows system directory. If you are<br />
using Windows NT 4 or Windows 2000 please refer to Microsoft Knowledge Base Article Q321915 . If you are using<br />
Windows 98 please try the following steps (you will need your Windows 98 installation CD-ROM in your CD drive):<br />
<strong>NATMAP</strong> RASTER <strong>2003</strong> USER GUIDE
1. search for OLEAUT32.dll on your computer. Make a back up copy of this file somewhere on your system (in<br />
case you need to restore it)<br />
2. select Start/Run and type in sfc to activate the System File Checker utility<br />
3. select option 2 - ‘Extract one file from installation disk’<br />
4. enter oleaut32.dll in the space provided<br />
5. press Start (in the SFC box)<br />
6. in the Restore From window, enter the path to your CD (this will vary according to your PC setup) and press<br />
OK<br />
7. the original OLEAUT32.dll file will be restored - you will then need to reboot your computer to complete the<br />
process.<br />
You should now be able to install <strong>Raster</strong> Mapsheets or Mosaic <strong>2003</strong>.<br />
I am using Windows NT. Why does a desktop icon not appear?<br />
On some NT machines and systems the desktop icon for <strong>NATMAP</strong> <strong>Raster</strong> may not appear because of administrative<br />
restrictions. Please check with your system administrator. More information can be found in the Installation chapter<br />
in the <strong>User</strong> <strong>Guide</strong>.<br />
Why can't the Viewer find the maps after I have copied the maps to my hard drive?<br />
When copying maps to your C: drive or another network drive, ensure that:<br />
1. the maps from each CD are still stored in directories called ‘cd1’ and ‘cd2’ in the chosen directory. For<br />
example, you have created a directory on your C: drive called ‘C:Natmap’; in this directory you would have<br />
copied the ‘mapdata.txt’ file and created two directories called ‘cd1’ and ‘cd2’, which contain the maps on<br />
CD1 and CD2 respectively<br />
2. the search path for the Viewer to find the maps is set to the correct directory (in this example, the<br />
Configurator would need to be set to C:Natmap in order for the maps to load correctly).<br />
Refer to the <strong>Raster</strong> Viewer Configurator section for more details.<br />
I get the following self-registration error message:<br />
‘One or more files did not properly self-register.<br />
Following files did not self-register:<br />
C:Program FilesEarth Resource MappingImage Web ServerClientNCSecw.dll. The specified procedure could not<br />
be found<br />
C:Program FilesEarth Resource MappingImage Web ServerClientNCSView.dll. The specified procedure could<br />
not be found<br />
C:Program FilesEarth Resource MappingImage Web ServerClientNCSAddOn.dll. The specified procedure could<br />
not be found.’<br />
This error occurs when an ECW plug-in (such as the Arc/Info ECW plug-in) or another piece of software that can<br />
read ECW files is installed that uses later versions of shared files than that used in <strong>NATMAP</strong> <strong>Raster</strong>.<br />
If you no longer need the ECW plug-in, uninstall it. Reinstall <strong>NATMAP</strong> <strong>Raster</strong>.<br />
If you still need the ECW plug-in, or you are unable to uninstall the plug-in, try either of the following:<br />
uninstall <strong>Raster</strong>. Rename the folder C:Program FilesEarth Resource MappingImage Web ServerClient to<br />
something like Client_old or Client_plugin. Reinstall <strong>Raster</strong><br />
copy all the files in the C:Program FilesEarth Resource MappingImage Web ServerClient directory that start<br />
with NCS and have a .dll extension. If you are using Windows NT, paste these files into C:WinNTsystem32;<br />
otherwise paste the files into C:Windowssystem. Run <strong>Raster</strong>.<br />
I get the following self-registration error message:<br />
‘The following files did not self-register:<br />
<strong>NATMAP</strong> RASTER <strong>2003</strong> USER GUIDE
1. C:Program FilesNatmap<strong>NATMAP</strong> RASTER VIEWER1.4ControlsECWConverter.ocx. A device attached to the<br />
system is not functioning<br />
2. C:Program FilesNatmap<strong>NATMAP</strong> RASTER VIEWER1.4ControlsGazetteerControl.ocx. A device attached to the<br />
system is not functioning<br />
3. C:Program FilesNatmap<strong>NATMAP</strong> RASTER VIEWER1.4ControlsMapDataControl.ocx. A device attached to the<br />
system is not functioning<br />
4. C:Program FilesNatmap<strong>NATMAP</strong> RASTER VIEWER1.4ControlsRedfearn.ocx. A device attached to the system is<br />
not functioning.’<br />
Try the following:<br />
check your version of Internet Explorer. We recommend Internet Explorer v5.5 but no earlier than v5.0. You<br />
may need to reinstall a later version<br />
manually register files using the regsvr32 command. Click on Start > Run..., then in the dialog box type<br />
‘regsvr32’ plus the full path name and file name. Include quotes if any names have spaces. You can also<br />
drag the icon representing the file from Windows Explorer into the dialog box rather than typing the path and<br />
file name<br />
The line in the dialog box should read: regsvr32 ‘{installation path}{filename}’. Hit OK and the file may<br />
register<br />
you may have old versions of some operating system files, particularly if you are running Windows98. The<br />
files possibly causing the problem are msvcrt.dll and mfc42.dll, located in the System directory. Check the<br />
Microsoft website for more up-to-date versions (you need msvcrt.dll v6.10.8637.0 or later, and mfc42.dll<br />
v6.00.8665.0 or later). Rename any existing versions on your computer, and download the updated versions<br />
into the same directory.<br />
Starting the Viewer and using the Configurator<br />
Initialisation Problems<br />
If you have not inserted a <strong>NATMAP</strong> <strong>Raster</strong> CD into your CD drive or if you have changed your system since the<br />
last time it was run - for example, if you have copied all of the map data files to your hard drive - you will be<br />
presented with the following screen:<br />
If you insert a CD and choose Retry and the mapdata.txt file is still not found, you will be presented with the<br />
same screen. You should probably choose Setup at this stage.<br />
Choosing Setup will present you with the following screen:<br />
<strong>NATMAP</strong> RASTER <strong>2003</strong> USER GUIDE
Choose OK and you will be presented with the standard File Open box. Use the dialog box to select the<br />
mapsmapdata.txt file, then press OK. For example:<br />
The Viewer and other software should now run as normal.<br />
I've copied the maps to my hard drive and used the Configurator to add a new search path. When I try to<br />
load a map, I get an error message saying the map can't be found.<br />
Check that you have copied the maps correctly and maintained the correct directory structure.<br />
When you use the Configurator to add a new path, make sure you select the folder that contains the<br />
mapdata.txt file , not the folders that contain the actual maps. This file contains information used to help load<br />
the correct map.<br />
Loading a CD after an Viewer initialization error appears does not relaunch the Viewer.<br />
If the <strong>Raster</strong> Configurator is set to search for maps on CDs only, and the Viewer is launched without a CD, then<br />
an initialization error will appear. Loading a CD and pressing Retry will not work.<br />
Solution 1: Press Cancel, close the Viewer and relaunch with the CD in the CD-ROM drive.<br />
Solution 2: If disk space permits, copy data to the hard drive and reconfigure the map image search path to the<br />
folder of your choice on your computer's hard drive.<br />
I've changed the location of my maps, or added a new location, using the Configurator. The changes<br />
don't appear in the Viewer.<br />
You need to close the Viewer first before any changes you make in the Configurator are activated.<br />
I have just installed <strong>NATMAP</strong> <strong>Raster</strong> but whenever I start I get the following message: ‘An ActiveX<br />
control on this page is not safe. Your current security settings prohibit running unsafe controls on this<br />
page. As a result this page may not display as intended’.<br />
<strong>NATMAP</strong> RASTER <strong>2003</strong> USER GUIDE
I have changed my Internet Explorer security setting to LOW but I still cannot load any maps.<br />
This is an Internet Explorer problem and appears to be caused by a problem with a Windows file used by IE. To<br />
resolve the issue, you need to:<br />
1. remove Internet Explorer<br />
2. rename the COMCAT.DLL file in your %SystemRoot%System32 folder<br />
3. reinstall Internet Explorer.<br />
An error message appears requiring a screen resolution of at least 800x600.<br />
The Viewer will not run on a screen resolution of less than 800x600 pixels. This is the minimum screen resolution<br />
at which all buttons, map windows and other links will fit. At 800x600 resolution, you will need to ensure that the<br />
Autohide property setting for the Windows task bar is turned on.<br />
The bottom of the Viewer screen is cut off. I can’t change layers.<br />
When running a display at 800x600 pixels, the user should ensure that any task bars have their autohide<br />
property setting turned on. For the Windows task bar, this is done from Start > Settings > Taskbar, then ensuring<br />
that the Autohide check box is ticked.<br />
I launch the Viewer, and I get a blank coloured screen with a picture indicator, but no picture:<br />
This problem can be caused by a file association you have on your computer - the Windows name for describing<br />
which program opens which types of files. The program you already use to open these file types won't let you open<br />
them in other programs such as Internet Explorer.<br />
You would probably also find that if you can start the Viewer, the icons down the side navigation panel in the<br />
Search for a Map and View a Map windows would also be missing.<br />
Solution:<br />
1. go into Windows Explorer, select Tools > Options..., and select the File Types tab<br />
2. look for an association that refers to the program you use to open JPEGs or GIFs (e.g. ‘Photo Suite Image’) -<br />
there should also be a list of all the different image types it can open including JPEG, GIF, JPG etc<br />
3. delete this association.<br />
The Viewer should now display all images correctly. If not, you may have missing files, and you should uninstall<br />
and reinstall the Viewer.<br />
Searching for a map<br />
I am missing images from the navigation panel on the left side of the Viewer:<br />
<strong>NATMAP</strong> RASTER <strong>2003</strong> USER GUIDE
Refer to the solution for fixing file associations in Windows Explorer.<br />
I've launched the Search by <strong>NATMAP</strong> name, Search by <strong>NATMAP</strong> number, or Search by Coordinates tools. I<br />
then change the map layer, but the drop-down lists do not update.<br />
This is a known bug. To work around this, select the map layer you wish to view, and then click on the<br />
appropriate search tool button located in the top left of your screen. The correct lists of map names will appear<br />
and you will be able to load the correct map layer.<br />
Why do I get more than one result for the same place?<br />
In many cases, you may get two or more results for the same name, place type and state. This is because the<br />
original Gazetteer has hundreds of feature codes, which has been aggregated into the 20+ Place Types used in the<br />
<strong>NATMAP</strong> <strong>Raster</strong> Place Name Search and the on-line Place Name Search on the <strong>Geoscience</strong> <strong>Australia</strong> website to<br />
make searching easier. Each individual entry remains in the data; however, in the <strong>NATMAP</strong> <strong>Raster</strong> Place Name<br />
Search the results are displayed with the aggregated Place Type, not the original feature code.<br />
I can't find my Place Name, but I know it exists.<br />
Some places (mainly beginning with ‘O’) were not appearing in the Place Name results due to a sorting problem in<br />
the data files.<br />
Solution:<br />
1. download the corrected place name data files<br />
For fast connections: Download the place name data files as one ZIP file [14.1MB]<br />
For modems and slow connections: download the data files in three parts.<br />
Download Part 1 [ZIP file 4.5MB]<br />
Download Part 2 [ZIP file 4.8MB]<br />
Download Part 3 [ZIP file 4.8MB]<br />
2. unzip the 17 *.dta files into the RASTERCommon folder in the location you have installed the <strong>NATMAP</strong> <strong>Raster</strong><br />
Viewer. (In most cases this will be C:Program Files<strong>NATMAP</strong><strong>NATMAP</strong> RASTER VIEWER1.4RASTERCommon. If<br />
you can't find this folder, or don't remember where it is, do a search on ‘RASTERCommon’.) Overwrite any<br />
existing files<br />
3. run the Viewer. Search by a place name and check that it appears in the list.<br />
If you're sure that the place name is spelt correctly, try using a alternate name. Many place names have<br />
alternative names, some of which are officially recognised and some which aren't. If you think that a place name<br />
has been omitted, or is spelt incorrectly, please contact <strong>Geoscience</strong> <strong>Australia</strong>.<br />
I've clicked on the Place Name, but it's taken me to the wrong place.<br />
Check you are clicking on the correct result - see the note on multiple results. Another reason is that large area<br />
features such as administrative areas, or long linear features such as rivers, are difficult to assign one coordinate<br />
point to. If you believe that there is an error in the position of a feature, please please contact <strong>Geoscience</strong><br />
<strong>Australia</strong>.<br />
<strong>NATMAP</strong> RASTER <strong>2003</strong> USER GUIDE
I get a mountain that doesn't have an elevation.<br />
Not every mountain, hill or trig station in the Place Name Search has an elevation attached to it. At the moment<br />
around 500 of these features have elevations attached, and more will be progressively added in future versions.<br />
I've gone back to the Place Name Search and my results have disappeared.<br />
The bottom right part of the Place Name Search page is generated each time the Place Name Search is loaded. Any<br />
place name, state or place type you have previously entered will still be there - you just have to click on the<br />
Search button again to reload the results.<br />
I zoom in on the Index Map and the 1:250 000 scale map boundaries disappear.<br />
The map boundaries will disappear depending upon the current zoom level.<br />
Using the Viewer<br />
I select a map, but instead of the maps being displayed I get an error box where the map should be:<br />
This problem occurs if ER-Mapper Image Web Server IE Plugins (versions 1,7.x.x and up) are installed. It may<br />
also occur if the Arc/Info ECW plug-in is installed. This plug-in allows the display of ECW images in the Internet<br />
Explorer web browser. It is used by both the <strong>Raster</strong> viewer software as well as many ER-Mapper Image Web<br />
Server (IWS) sites and specialist software. <strong>Raster</strong> uses an earlier version than many of these plug-ins. Computers<br />
without this plug-in or those using Version 1,6.x.x or below should be unaffected.<br />
Solution 1 (do not use if the Arc/Info ECW plug-in is installed):<br />
1. navigate to the following directory<br />
95, 98, 2000, Me, XP: C:Windowssystem<br />
NT: C:WinNTsystem32<br />
2. select all files beginning with NCS which have a .dll extension<br />
3. delete these files<br />
4. close down all programs and restart your computer<br />
5. start the <strong>Raster</strong> Viewer<br />
6. select a map to check it loads correctly.<br />
Solution 2:<br />
1. uninstall <strong>Raster</strong><br />
2. rename the folder C:Program FilesEarth Resource MappingImage Web ServerClient to something like<br />
Client_old or Client_plugin<br />
<strong>NATMAP</strong> RASTER <strong>2003</strong> USER GUIDE
3. reinstall <strong>Raster</strong>.<br />
Solution 3:<br />
1. navigate to C:Program FilesEarth Resource MappingImage Web ServerClient<br />
2. copy all files in this directory beginning with NCS<br />
3. paste these files into the C:Windowssystem directory on 95/98/Me/2000/XP, or the C:WinNTsystem32<br />
directory on NT<br />
4. start the <strong>Raster</strong> Viewer. Select a map to check it loads and views correctly.<br />
I am missing images from the navigation panel on the left side of the Viewer:<br />
Refer to the solution for fixing file associations in Windows Explorer.<br />
The climate graph doesn’t update when I change maps or move around.<br />
The Climate Graph window opens a new Internet Explorer window and displays a JPEG image of the climate graph<br />
for the particular 1:250 000 scale map area you have viewed on your screen. However, if you leave the Climate<br />
Graph window open, and you move maps using either the Hand Pan or the Click Pan tool, the climate graph will<br />
not update in the new window.<br />
Solution:Reclick the Show Climate button. The correct graph will be displayed.<br />
An error message appears saying ‘Tile has no projection’.<br />
This message may appear when scrolling or point-panning on some machines with slower PC processing speeds. It<br />
is resolved by restarting the Viewer.<br />
Maps do not appear in the Locator and Magnifier windows.<br />
If there is an error message saying that 20M.ecw or 5M.ecw cannot be found, then you should uninstall the Viewer<br />
and reinstall in order to restore these maps.<br />
If there is no error message, and the Locator and Magnifier windows remain green, then the problem is caused by<br />
a limitation in Internet Explorer versions earlier than v5.5. This limitation was removed at IE5.5 Service Pack 1.<br />
You are best upgrading Internet Explorer to at least v5.5 SP1.<br />
I have loaded a map, and am not zooming or panning around. My CPU usage stays high (at least 60%).<br />
As with missing Locator or Magnifier maps, this is caused by a limitation in versions of Internet Explorer prior to<br />
v5.5 SP1. If this problem persists, you need to upgrade to at least this version of IE to better handle map display.<br />
I have moved the Locator / Magnifier / Information window completely off the screen and can't drag it<br />
back.<br />
<strong>NATMAP</strong> RASTER <strong>2003</strong> USER GUIDE
Press the Show Locator button on the left-hand side of the screen twice. This will close and reload the window so<br />
it is partially visible on the side of the screen.<br />
I'm having trouble using the Zoom tool. Why isn't there a Zoom Box tool?<br />
The version of the ECW software developers kit (SDK) used in this release of <strong>Raster</strong> did not have the Zoom Box<br />
tool available - only the standard ER Mapper Zoom tool.<br />
I click on the centre of the blue cross in the main Viewer. The map then jumps and the coordinates<br />
change slightly.<br />
This is caused by a slight incompatability between the cursor, the centre of the cross, coordinate calculations<br />
performed by the Viewer software, and maintaining the shape of the map in the browser window, which adds up to<br />
around 1-2 pixels (which for the 1:250 000 scale map layers is about 30-60 metres).<br />
It is more significant when zoomed out, as each pixel on the screen represents a larger area on the map.<br />
There is no workaround for this bug; however, the error remains less than the stated accuracy of <strong>NATMAP</strong> <strong>Raster</strong><br />
which is 150m.<br />
I have the blue cross centre hairs turned off. If I minimise the side navigation bar, the blue cross<br />
reappears.<br />
There is no workaround to this minor bug at this stage - it will be looked at in the next version.<br />
Some of the coordinate display buttons don't work.<br />
Some buttons are designed to be disabled depending upon which coordinate display mode you are in.<br />
I'm using 800x600 screen resolution and I can't see the layer pop-up menu.<br />
If you select the layer control box, and no pop-up menu appears, use the up- and down-arrow keys on your<br />
keyboard to move between the layers. Hit ENTER once you've chosen the appropriate layer.<br />
Map images<br />
The map image isn't very clear and/or the colours aren't very good.<br />
Check you have:<br />
optimised your screen colour settings<br />
optimised your screen resolution<br />
read the note on image clarity.<br />
Grid lines are missing from some of the maps.<br />
Some grid lines may disappear from the screen, especially on the index map. This is due to screen resampling of<br />
the ECW image. The grid lines will reappear when you change your zoom level.<br />
Exporting<br />
<strong>NATMAP</strong> RASTER <strong>2003</strong> USER GUIDE
I cannot export SE53-11 BRUNETTE DOWNS. (Mapsheets only).<br />
There is a problem with this ECW file that is preventing export into other formats.<br />
Download replacement ECW file for SE53-11 BRUNETTE DOWNS [ECW file 2.8MB]<br />
If you have already installed your maps onto your hard drive, then save this new file to the same location as the<br />
existing map.<br />
If you are running the maps off your CD, then follow these instructions:<br />
1. create a folder on your hard drive or network (e.g. C:<strong>NATMAP</strong>)<br />
2. vrom CD1, copy the mapdata.txt file located in X:<strong>Raster</strong>s250K-Sheets (where X: is your CD drive) to the<br />
folder you created in Step 1 above<br />
3. in this folder, create another folder called ‘mapsheets-cd1’<br />
4. save the downloaded map in the ‘mapsheets-cd1’ folder<br />
5. open the <strong>Raster</strong> Configurator<br />
6. follow the instructions for adding a search path to the Configurator. The folder you need to select will be the<br />
folder you created in Step 1<br />
7. follow the instructions for modifying the search path order in the Configurator. The folder you created in Step<br />
1 needs to be at the top of the list. Click the Apply button and then click OK to exit the Configurator<br />
8. start the Viewer and load the map.<br />
I exported the current view as an ECW file. When I load the ECW into another program, the coordinates<br />
are wrong.<br />
There is a bug with the ECW exporter. Rather than assigning the coordinates of the current view to the exported<br />
image, the ECW exporter uses the coordinates of the top left of the image file currently loaded in the Viewer. If<br />
you have loaded the Mosaic, for example, then the top left corner of the Mosaic file (250k.ecw) will be assigned to<br />
any subset images you save as ECW files. For Mapsheets images, the top left corner of each individual map image<br />
(i.e. sg5310.ecw, sk5523.ecw, etc.) will be assigned to any subset ECW files.<br />
Solution 1:<br />
Save your current views as GeoTIFFs if you want to retain correct coordinate information. If you need to convert<br />
GeoTIFFs to ECW files, you should download, install and use the free ECW compressor from ER Mapper.<br />
Solution 2:<br />
1. download the free ECW Header Editor from ER Mapper and install it on your computer<br />
2. set your current view to the extents you wish to export<br />
3. click on the Map Information window. Record the coordinates for the top left of the current view<br />
4. export the current view as an ECW file<br />
5. start the ECW Header Editor you installed in step 1. Open the ECW file you created in Step 4, and change the<br />
coordinates of the top left of this ECW file to those you recorded in Step 3. Save your changes.<br />
I have tried to export the current view as an ECW file, and I get the following message:<br />
There is a 700MB limit on exporting the current view as an ECW file. This is a limit imposed by the ECW software<br />
used in the Viewer.<br />
I tried exporting the current view or an individual map, and I get the following message.<br />
<strong>NATMAP</strong> RASTER <strong>2003</strong> USER GUIDE
There is a limit on how large a file you can export which is imposed by a combination of your computer and the<br />
Viewer software.<br />
Printing<br />
I'm having trouble printing to my Canon printer.<br />
Download and install the most recent driver for your Canon printer from the Canon website.<br />
I don't get a scale bar when I print from a Mosaic layer.<br />
This is because of the map projection used for the Mosaic layers.<br />
Problems with other software<br />
I can't run TrackRanger v3.3 to v3.5 after installing <strong>NATMAP</strong> <strong>Raster</strong> Viewer.<br />
The TrackRanger GPS navigation system produced by Advantech Design shares many ER Mapper files as the<br />
<strong>NATMAP</strong> <strong>Raster</strong> Viewer. These files have a .DLL (Dynamic Link Library) extension. TrackRanger uses different<br />
versions of these DLL files to the <strong>NATMAP</strong> <strong>Raster</strong> Viewer. If <strong>NATMAP</strong> <strong>Raster</strong> Viewer is installed after TrackRanger,<br />
TrackRanger may not work as installing <strong>NATMAP</strong> <strong>Raster</strong> Viewer overwrites these shared DLL files.<br />
Solution:<br />
TrackRanger v3.6f will detect and upgrade the DLLs installed by <strong>NATMAP</strong> <strong>Raster</strong> <strong>2003</strong>. Versions of TrackRanger<br />
earlier than this may not work with <strong>NATMAP</strong> <strong>Raster</strong> <strong>2003</strong>. Earlier versions of TrackRanger will detect and upgrade<br />
DLLs from earlier versions of <strong>NATMAP</strong> <strong>Raster</strong>.<br />
I installed the TrackRanger demo from <strong>Australia</strong>n Outback Tracks; now <strong>Raster</strong> will not work.<br />
Installation of the TrackRanger demonstration software included on the Westprint <strong>Australia</strong>n Outback Tracks CD<br />
causes the same problem as installing old versions of TrackRanger.<br />
If you want to preview these maps without installing the TrackRanger demonstration software, download the<br />
demonstration version of OziExplorer or ER Viewer software. <strong>Geoscience</strong> <strong>Australia</strong> does not take any responsibility<br />
for the use of third-party software.<br />
If you have already installed the TrackRanger demo, then you will need to uninstall TrackRanger, <strong>Raster</strong> and<br />
OziExplorer, and any other software (including plug-ins) that view ECW images. Reinstall <strong>Raster</strong> and then your<br />
other software.<br />
I have installed the ArcGIS ECW plug-in - now I can't use the Viewer.<br />
<strong>NATMAP</strong> RASTER <strong>2003</strong> USER GUIDE
As with TrackRanger, this is caused by a DLL conflict. A solution and explanation are now available.<br />
Note that this can occur with any ECW plug-in you may download which has a version number of 1.7.x.x or later.<br />
I installed the on-line viewer - now I can’t use the <strong>NATMAP</strong> <strong>Raster</strong> Viewer.<br />
Refer to the notes on the ArcGIS ECW plug-in.<br />
<strong>NATMAP</strong> RASTER <strong>2003</strong> USER GUIDE
<strong>NATMAP</strong> <strong>Raster</strong> <strong>2003</strong> - Frequently Asked Questions<br />
This FAQ list provides a comprehensive set of responses to questions asked about <strong>NATMAP</strong> <strong>Raster</strong>. To submit a<br />
question not already answered by this FAQ list, or that isn't contained in the <strong>NATMAP</strong> <strong>Raster</strong> <strong>2003</strong> <strong>User</strong> <strong>Guide</strong>,<br />
please contact <strong>Geoscience</strong> <strong>Australia</strong>.<br />
About <strong>NATMAP</strong> <strong>Raster</strong><br />
3 Jun <strong>2003</strong> Why is there a Mapsheets and a Mosaic version in <strong>2003</strong>? Why can't I use maps in the Mosaic<br />
for measuring distances and areas?<br />
21 May <strong>2003</strong> What other versions of <strong>NATMAP</strong> <strong>Raster</strong> are there?<br />
21 May <strong>2003</strong> What's new in <strong>2003</strong>?<br />
1 Sep 2002 Why do some features mask other features on the raster image but not on the paper map?<br />
1 Sep 2002 Why do the maps appear tilted when I load them into the Viewer?<br />
4 Apr <strong>2003</strong> What are the lines I can see in the satellite image?<br />
7 Jun <strong>2003</strong> Are upgrades available?<br />
11 Aug <strong>2003</strong> Why are some maps marked with an asterisk (*) in the drop-down menus and the map<br />
currency list?<br />
12 Aug <strong>2003</strong> The 1:1 000 000 scale map Mosaic doesn't appear to be accurately georeferenced.<br />
Installing and Starting the Viewer<br />
25 Jul <strong>2003</strong> What kind of internet browser do I need to view <strong>NATMAP</strong> <strong>Raster</strong> maps?<br />
11 Oct 2002 What can MacIntosh <strong>User</strong>s do?<br />
7 Jun <strong>2003</strong> Are there any restrictions on installing the Viewer as an Administrator?<br />
1 Sep 2002 What happens if I have a screen resolution of 800x600?<br />
4 Apr <strong>2003</strong> What are the lines I can see in the satellite image?<br />
7 Jun <strong>2003</strong> Are upgrades available?<br />
11 Aug <strong>2003</strong> Why are some maps marked with an asterisk (*) in the drop-down menus and the map<br />
currency list?<br />
12 Aug <strong>2003</strong> The 1:1 000 000 scale map Mosaic doesn't appear to be accurately georeferenced.<br />
1 Sep 2002 How do I install the <strong>NATMAP</strong> <strong>Raster</strong> software?<br />
1 Sep 2002 Can I keep previous versions of <strong>NATMAP</strong> <strong>Raster</strong> Viewer or AUSLIG GEODATA RASTER VIEWER<br />
on my computer?<br />
21 May <strong>2003</strong> If I already have the Mosaic, do I need to reinstall the Viewer to view Mapsheets?<br />
4 May 2004 How can I easily copy the maps to my hard drive and run the setup file?<br />
4 May 2004 I've copied the maps onto my hard drive after I've installed the Viewer. How do I get the<br />
Viewer to find the maps?<br />
Selecting a Map<br />
23 May <strong>2003</strong> Why do I get more than one result for the same place name using the Place Name Search?<br />
24 Jul <strong>2003</strong> Why don't the Place Name Search results stay on when I change map layers or go back to the<br />
Place Name Search?<br />
<strong>NATMAP</strong> RASTER <strong>2003</strong> USER GUIDE
Using the Viewer<br />
11 Oct 2002 Why aren't the maps "crystal clear" when I view them?<br />
4 Apr <strong>2003</strong> Can I measure distances?<br />
22 May <strong>2003</strong> Why is the zoom tool different?<br />
30 Jul <strong>2003</strong> How do I display the correct climate graph for the area I'm viewing?<br />
Exporting maps<br />
19 Nov <strong>2003</strong> Can I export maps directly to OZF2 format for use in OziExplorerCE?<br />
1 Sep 2002 If I want to export a map into a different format, how large will the files be?<br />
1 Sep 2002 How can I export high resolution map images from <strong>NATMAP</strong> <strong>Raster</strong>?<br />
21 May <strong>2003</strong> Is there any limit on the size of the file I can export?<br />
23 May <strong>2003</strong> Why does the Exporter only work for Mapsheets layers?<br />
Printing Maps<br />
26 May <strong>2003</strong> Why do I get a warning when I print from any of the Mosaic layers? Why is no scale bar printed<br />
Using <strong>NATMAP</strong> <strong>Raster</strong> maps in other applications or products<br />
1 Sep 2002 What should I do if I want to incorporate <strong>NATMAP</strong> <strong>Raster</strong> map images into my own product,<br />
service or report?<br />
1 Sep 2002 Does <strong>NATMAP</strong> <strong>Raster</strong> fall under the Commonwealth Spatial Data Access and Pricing Policy?<br />
4 Oct 2002 How do I use <strong>NATMAP</strong> <strong>Raster</strong> map images in other applications?<br />
4 Nov <strong>2003</strong> How can I reproject the maps in <strong>NATMAP</strong> <strong>Raster</strong>?<br />
Troubleshooting<br />
1 Sep 2002 How do I report a bug or problem?<br />
18 Sep 2002 I have TrackRanger GPS software and the <strong>Raster</strong> Viewer on my computer. I can't get either<br />
to work.<br />
This on-line version of this FAQ list will be updated regularly.<br />
<strong>NATMAP</strong> RASTER <strong>2003</strong> USER GUIDE
<strong>NATMAP</strong> <strong>Raster</strong> <strong>2003</strong> - Consumer Information<br />
Contact Information<br />
National Mapping Division<br />
Acknowledgements<br />
Conditions of Use<br />
Accuracy and Reliability of Data<br />
Contact information<br />
Up-to-date information on <strong>NATMAP</strong> <strong>Raster</strong> products can be found on the Digital Topographic Maps pages.<br />
<strong>Geoscience</strong> <strong>Australia</strong> welcomes feedback on any aspect of its products or services. Please direct your comments or<br />
any queries regarding this document or data to us via any of the methods below. If you are submitting a bug<br />
report, please read the 'how to report' document first.<br />
Email General Queries, <strong>NATMAP</strong> <strong>Raster</strong> product feedback, bug reports<br />
Topographic map errors and omissions<br />
Place Name Search errors and omissions<br />
Satellite imagery queries, errors and omissions<br />
Copyright, commercial applications, external users<br />
Phone Freecall 1800 800 173 (within <strong>Australia</strong>)<br />
(02) 6249 9966 or overseas +61 2 6249 9966<br />
Fax (02) 6249 9960 or overseas +61 2 6249 9960<br />
Mail Map Sales<br />
<strong>Geoscience</strong> <strong>Australia</strong><br />
GPO Box 378<br />
CANBERRA ACT 2601<br />
About <strong>Geoscience</strong> <strong>Australia</strong>'s national mapping division<br />
<strong>Geoscience</strong> <strong>Australia</strong> is the national agency for geoscience research and spatial information. It serves government<br />
and supports the community through its output areas of geoscience for urban centres, oceans and coasts, and<br />
regional and rural areas.<br />
The National Mapping Division within <strong>Geoscience</strong> <strong>Australia</strong> undertakes national mapping, geodetic, remote sensing,<br />
and land information coordination activities in support of <strong>Australia</strong>'s economic and social development.<br />
The National Mapping Division was formerly known as the <strong>Australia</strong>n Surveying and Land Information Group<br />
(AUSLIG), <strong>Australia</strong>'s national mapping agency. In September 2001, AUSLIG merged with the <strong>Australia</strong>n Geological<br />
Survey Organisation (AGSO - <strong>Geoscience</strong> <strong>Australia</strong>) to form <strong>Geoscience</strong> <strong>Australia</strong>, the national agency for spatial<br />
information in <strong>Australia</strong>.<br />
Acknowledgements and contributions<br />
Data acknowledgements<br />
<strong>Geoscience</strong> <strong>Australia</strong>'s National Mapping Division gratefully acknowledges contributions to map content. Information<br />
is supplied by Commonwealth, State, Territory, and local government agencies as well as private sector agencies<br />
and individuals. A comprehensive list of contributors is available on the Topographic Mapping pages on the<br />
<strong>NATMAP</strong> web site.<br />
The place name data contained within this product is from the Gazetteer of <strong>Australia</strong>. Copyright of the Gazetteer of<br />
<strong>NATMAP</strong> RASTER <strong>2003</strong> USER GUIDE
<strong>Australia</strong> resides with the relevant State, Territory and Commonwealth Governments and <strong>Australia</strong> Post © 2002.<br />
The Landsat Satellite Mosaic of <strong>Australia</strong> was created by GeoImage Pty Ltd for the <strong>Australia</strong>n Greenhouse Office as<br />
part of the National Carbon Accounting System. Scenes were acquired by the National Earth Observation Group<br />
(previously known as ACRES). Copyright Commonwealth of <strong>Australia</strong> 2001.<br />
Software acknowledgements<br />
The <strong>NATMAP</strong> RASTER VIEWER software was developed by <strong>Geoscience</strong> <strong>Australia</strong> and CSIRO Mathematical and<br />
Information Sciences to provide easy access to the images contained in <strong>NATMAP</strong> <strong>Raster</strong> products. <strong>NATMAP</strong> RASTER<br />
VIEWER provides a set of tools for selecting, displaying, printing and exporting maps.<br />
The following products were used in the development of <strong>NATMAP</strong> RASTER VIEWER:<br />
ERMapper ECW SDK license and ERMapper ECW SDK web page<br />
ImageMagick license and ImageMagick web page<br />
LibDES license and email author<br />
LibTiff license<br />
LibGeoTiff license and LibGeoTiff web page.<br />
Conditions of use<br />
<strong>Geoscience</strong> <strong>Australia</strong> retains and administers Commonwealth Copyright for all images used in <strong>NATMAP</strong> <strong>Raster</strong> in<br />
accordance with the Copyright Act 1968. The use of any maps or images from this product, with or without<br />
modification, is permitted for personal or private use only.<br />
Full details on the conditions of use can be found in the licence agreement.<br />
Where any mapping material is to be used for personal research, assignments for educational purposes, or for<br />
internal company reports, provided the words "Copyright Commonwealth of <strong>Australia</strong> <strong>2003</strong>" appear with all uses,<br />
no application to <strong>Geoscience</strong> <strong>Australia</strong> to use the material is required.<br />
A copyright licence must first be obtained from <strong>Geoscience</strong> <strong>Australia</strong> for the use of any maps or images derived<br />
from <strong>NATMAP</strong> <strong>Raster</strong> in any books, reports, advertising brochures or any other medium for public consumption or<br />
for commercial purposes.<br />
For information and/or help in facilitating your application, please contact the <strong>Geoscience</strong> <strong>Australia</strong> Copyright<br />
Officer. For further information refer to <strong>Geoscience</strong> <strong>Australia</strong>'s Copyright Policy.<br />
Commonwealth Spatial Data Access and Pricing Policy<br />
The <strong>NATMAP</strong> <strong>Raster</strong> products, along with the other <strong>NATMAP</strong> paper products, does not fall under the Spatial Data<br />
Access and Pricing Policy. The policy covers selected digital datasets. For more information, refer to the<br />
Commonwealth Office of Spatial Data Management Spatial Data Policy web site.<br />
Accuracy and reliability of data<br />
The map images used in <strong>NATMAP</strong> <strong>Raster</strong> products are constructed from digital topographic data or scanned from<br />
paper maps with a basic horizontal accuracy of approximately +/- 140 metres. The images have been computer<br />
post-processed to re-project and georeference the images to the Map Grid of <strong>Australia</strong> (MGA) for the Mapsheets<br />
product and the Geocentric Datum of <strong>Australia</strong> (GDA94) for the Mosaic product, and have undergone subsequent<br />
validation. Therefore, the accuracy of positions reported by the software should approach that of the original paper<br />
map.<br />
Topographic information included in the map images have been checked from multiple sources including SPOT<br />
imagery. Maps have not been field checked, so some information may not be accurate or up-to-date. An example<br />
of rapidly changing features are telecommunication towers which proliferate at an an ever-increasing rate.<br />
Homestead names are also subject to regular change and are difficult to keep up-to-date.<br />
Every effort has been made to make the map images a useful reference, but feedback from map users is very<br />
<strong>NATMAP</strong> RASTER <strong>2003</strong> USER GUIDE
valuable. If you discover errors or omissions on the map, please contact <strong>NATMAP</strong> customer support or send your<br />
annotated map to us (we will replace your map with the corresponding current edition). We value your assistance<br />
for the next edition.<br />
Reliability of individual map sheets are available.<br />
More information on the maps themselves can be found in the About <strong>NATMAP</strong> <strong>Raster</strong> pages.<br />
The custodians of the Gazetteer of <strong>Australia</strong> data used in the Place Name Search and <strong>Geoscience</strong> <strong>Australia</strong> do not<br />
warrant that the data is free from errors or omissions. Also, the custodians and <strong>Geoscience</strong> <strong>Australia</strong> shall not be<br />
in any way liable for any loss, damage or injury suffered by the licensed user of the data or any other person or<br />
organisation consequent upon or incidental to the existence of errors or omissions in the data.<br />
The postcode information contained in the Place Name Search tool has been reproduced with <strong>Australia</strong> Post's<br />
permission from the <strong>Australia</strong> Post Postcode Database on 4 October 2002. The contents of the Database are<br />
subject to change without notice and remain at all times the property of <strong>Australia</strong> Post and shall not be reproduced<br />
without <strong>Australia</strong> Post's permission. <strong>Australia</strong> Post is the copyright owner of the Postcode Database. In compiling<br />
the Database <strong>Australia</strong> Post has used its best endeavours to ensure that the information contained therein is<br />
correct and current at the time of publication but takes no responsibility for any error or defect therein. <strong>Australia</strong><br />
Post shall not be liable for any loss or damage arising from the use of, or reliance placed on, any information<br />
provided by it.<br />
<strong>NATMAP</strong> RASTER <strong>2003</strong> USER GUIDE
About <strong>NATMAP</strong> <strong>Raster</strong><br />
Versions<br />
Components<br />
Map Layers<br />
Coordinates<br />
Creation Process<br />
Map Image Specifications<br />
Versions<br />
<strong>2003</strong> - Mapsheets and Mosaic<br />
In <strong>2003</strong> two versions of <strong>NATMAP</strong> <strong>Raster</strong> were released. The differences are outlined below.<br />
Mapsheets: all 513 1:250 000 scale <strong>NATMAP</strong>s plus three map insets are included as separate ECW files. The<br />
1:250 000 scale maps use the Map Grid of <strong>Australia</strong> as their projection, meaning that the coordinates of the<br />
maps are measured in metres and the maps can be used for measuring distances and areas. Pixel size is<br />
31.75m<br />
Mosaic: all 513 1:250 000 scale <strong>NATMAP</strong>s plus three map insets are joined together in one ECW file. The<br />
coordinates are latitude/longitude, which are ideal for interfacing with GPS software, but are not suitable for<br />
measuring distances or areas. The pixel size in metres varies depending where you are in <strong>Australia</strong>. Mosaic<br />
also includes a single map image of all 1:1M <strong>NATMAP</strong>s and a Landsat Satellite Image Mosaic of <strong>Australia</strong>,<br />
both of which use latitude/longitude coordinates.<br />
More information on coordinate systems and why the different products are suited to different applications is found<br />
in the Coordinate Systems.<br />
Updated features for <strong>2003</strong><br />
Inclusion of over 150 new maps<br />
All 1:250 000 scale maps are created to the same specification (i.e. have the same look and feel)<br />
Mosaic version - all 1:250 000 scale <strong>NATMAP</strong>s joined together into one image<br />
Inclusion of 1:1M and Landsat satellite imagery (Mosaic only)<br />
Popup windows for legend and climate graphs<br />
More comprehensive <strong>User</strong> <strong>Guide</strong>, troubleshooting and Basic Help.<br />
Features retained in <strong>2003</strong> from 2002<br />
Updated maps from 2002<br />
Image resolution of 200dpi<br />
Access to grid coordinates<br />
Improved georeferencing<br />
<strong>Raster</strong> Viewer Configurator tool<br />
Bulk exporting<br />
Available on Windows 95, 98, 2000, XP, Me or NT4<br />
<strong>User</strong> interface via IEv5.5 or higher<br />
Map loading via latitude and longitude<br />
Panning from map to map.<br />
Finding the latitude and longitude coordinates of a point on the map<br />
Printing the entire map or the current view<br />
Exporting the entire map or current view; JPEG, BMP, PNG, TIFF and GeoTIFF image formats are supported<br />
Online help file that can be read on screen or printed as needed.<br />
All other components in the two products are the same as in previous versions.<br />
Are upgrades available?<br />
At this stage no - if you want updated maps and/or Viewing software, you need to buy the new version.<br />
<strong>NATMAP</strong> RASTER <strong>2003</strong> USER GUIDE
Previous releases<br />
Name and Version Released Images<br />
AUSLIG GEODATA <strong>Raster</strong>-<br />
250K v1.0<br />
AUSLIG GEODATA <strong>Raster</strong>-<br />
250K 2000 v1.1<br />
AUSLIG GEODATA <strong>Raster</strong>-<br />
250K 2000 Release 2 v1.2<br />
<strong>NATMAP</strong> <strong>Raster</strong> 250K<br />
Mapsheets 2002 v1.3<br />
<strong>NATMAP</strong> <strong>Raster</strong> Mapsheets<br />
v1.4 - <strong>2003</strong> Edition<br />
<strong>NATMAP</strong> <strong>Raster</strong> Mosaic v1.4 -<br />
<strong>2003</strong> Edition<br />
May 97<br />
Oct 00<br />
Jul 01<br />
Sep 02<br />
Sep 03<br />
Sep 03<br />
LZW<br />
compressed 8-<br />
bit TIFF<br />
ECW with<br />
exporter<br />
ECW with<br />
exporter<br />
ECW with<br />
exporter<br />
ECW with<br />
exporter<br />
ECW with<br />
exporter<br />
Cell<br />
Size CDs Production<br />
Method<br />
Coords<br />
150dpi 7 Scanned None<br />
150dpi 2<br />
150dpi 2<br />
200dpi 2<br />
200dpi 2<br />
200dpi 2<br />
Scanned<br />
Geocoded<br />
Scanned<br />
Geocoded<br />
EPS graphics file<br />
conversion<br />
(70%)<br />
Scanned (30%)<br />
All images<br />
rectified<br />
EPS graphics file<br />
conversion<br />
All images<br />
rectified<br />
EPS graphics file<br />
conversion<br />
All images<br />
rectified<br />
Lat/long AGD66<br />
Lat/long AGD66<br />
Easting &<br />
Northing; MGA<br />
Zone number<br />
Easting &<br />
Northing; MGA<br />
Zone number<br />
Lat/long GDA94<br />
Product components<br />
<strong>NATMAP</strong> <strong>Raster</strong> products are made up of the following components.<br />
This Product <strong>User</strong> <strong>Guide</strong> and associated documentation<br />
Digital map images (*.ecw format). These are organised into layers, with each layer equivalent to a<br />
specific map series, scale or product. The number of map images you receive will depend upon which<br />
particular <strong>NATMAP</strong> <strong>Raster</strong> product you have purchased<br />
Further information on the images that make up each layer may be found in Map Layers and Image<br />
Specifications<br />
Software for viewing, exporting and data management. The <strong>NATMAP</strong> RASTER VIEWER is the software in<br />
this package that is used for selecting and viewing maps. The stand-alone RASTER EXPORTER can be used to<br />
export the ECW map images into other graphic formats such as GeoTIFF, TIFF, JPEG, Windows Bitmap and<br />
PNG. The RASTER CONFIGURATOR allows you to manage where your maps are stored, so you are not<br />
restricted to storing all maps in the one location.<br />
Map layers<br />
Landsat 7 Satellite Image of <strong>Australia</strong> (Mosaic only)<br />
Layer ID in the <strong>Raster</strong> Viewer: ‘Satellite Mosaic’<br />
The Landsat 7 Picture Mosaic of <strong>Australia</strong> was produced by the <strong>Australia</strong>n Greenhouse Office (AGO) as part of their<br />
National Carbon Accounting System. The mosaic is comprised of 369 individual Landsat satellite scenes acquired<br />
between July 1999 and September 2000. For more information on the Landsat 7 satellite, refer to the Earth<br />
<strong>NATMAP</strong> RASTER <strong>2003</strong> USER GUIDE
Observation and Satellite Imagery.<br />
1:250 000 scale topographic map series (Mapsheets and Mosaic)<br />
Layer ID in the <strong>Raster</strong> Viewer: ‘250K Maps’ (Mapsheets); ‘250K Mosaic’ (Mosaic)<br />
The <strong>NATMAP</strong> 1:250 000 scale maps included in this <strong>NATMAP</strong> <strong>Raster</strong> product have been produced by <strong>Geoscience</strong><br />
<strong>Australia</strong>'s National Mapping Division and its predecessor, the <strong>Australia</strong>n Surveying and Land Information Group<br />
(AUSLIG), in conjunction with the private sector. This is the largest scale at which published topographic maps<br />
cover the entire continent. The maps have been revised using a variety of data sources, including SPOT and<br />
Landsat satellite imagery, other government agency information, and data supplied by private companies and<br />
individuals. Production of the new <strong>NATMAP</strong> series began in the early 1990s, and concluded in <strong>2003</strong>.<br />
For more information, please refer to the 1:250 000 scale <strong>NATMAP</strong> legend explanation. Additional information on<br />
map specifications, new maps and the current status of <strong>NATMAP</strong> revision can be found on the Topographic<br />
Mapping pages on the <strong>Geoscience</strong> <strong>Australia</strong> website.<br />
1:1 Million scale topographic map series (Mosaic only)<br />
Layer ID in the <strong>Raster</strong> Viewer: ‘1M Mosaic’<br />
The International Map of the World (IMW) <strong>Australia</strong> series was <strong>Australia</strong>'s contribution to a common effort by many<br />
international mapping agencies to map the world at 1:1M scale. It was initially conceived for planning economic<br />
development but has been used as the basis for many other maps including aeronautical charts and thematic<br />
mapping. The series was completed in 1978 and was revised regularly until the mid-1980s.<br />
Small scale reference maps (Mapsheets and Mosaic)<br />
Layer ID in the <strong>Raster</strong> Viewer: ‘5M Map’<br />
The smaller scale general reference maps provide a general overview of <strong>Australia</strong>, but still contain similar<br />
information to the larger scale maps. These maps have been regularly revised since the mid-1990s, and revision<br />
information is sourced from the same sources as the 1:250 000 scale maps. The Locator map used here is derived<br />
from GEODATA TOPO-10M, which is freely available from the <strong>Geoscience</strong> <strong>Australia</strong> website. The 1:5M scale General<br />
Reference Map of <strong>Australia</strong> is used for the 5M Map layer and the Magnifier map.<br />
Topographic Map Index (Mapsheets and Mosaic)<br />
The <strong>NATMAP</strong> Map Index shows which maps cover which areas. The version of the <strong>NATMAP</strong> Map Index used in<br />
<strong>NATMAP</strong> <strong>Raster</strong> is slightly different from the printed version. The version included here does not show 1:100 000<br />
scale maps and combines the 1:1M and 1:250 000 scale maps into the one map in order to make viewing easier.<br />
The 1:9M Compact Reference Map has been used as a base.<br />
Coordinate systems<br />
Information on coordinate systems can be found in the coordinate system pages.<br />
Creation process<br />
The images used in this version of <strong>NATMAP</strong> <strong>Raster</strong> are derived from the most current edition of the respective<br />
maps available from <strong>Geoscience</strong> <strong>Australia</strong>'s Map Sales as at August <strong>2003</strong>. A full list of the currency of all layers and<br />
individual maps in the <strong>NATMAP</strong> <strong>Raster</strong> product is included in this <strong>User</strong> <strong>Guide</strong>.<br />
‘Raw’ raster images were created from the digital EPS files used to produce the new <strong>NATMAP</strong> paper map series.<br />
Where digital EPS files were not available, the paper map was scanned to generate the ‘raw’ raster images. Each<br />
‘raw’ raster image was transformed to be positionally accurate and encoded with coordinates and projection<br />
information before being compressed in the final ECW image.<br />
<strong>NATMAP</strong> RASTER <strong>2003</strong> USER GUIDE
Why are some maps marked with an asterisk (*) in the drop-down menus and in the Map<br />
Currency list?<br />
The content of some 1:250 000 scale maps may differ from the printed map. Maps marked with an asterisk<br />
(*) after the edition number in any drop-down menu have been created from digital data that has not fully met<br />
<strong>NATMAP</strong> specifications; however, the content and structure of these maps are close enough to final specifications<br />
to be included in this product. Maps covering Tasmania have been produced from digital data; however, printed<br />
versions of these maps are not yet available.<br />
Maps which may differ from the final printed version are:<br />
SD51-12 MONTAGUE SOUND SPECIAL<br />
SD51-16 PRINCE REGENT<br />
SE52-11 BININDUDU<br />
SE52-14 BILLILUNA<br />
SF51-06 PATTERSON RANGE<br />
SF51-07 SAHARA<br />
SF51-11 TABLETOP<br />
SF51-14 GUNANYA<br />
SF52-01 CORNISH<br />
SF52-02 LUCAS<br />
SF52-06 STANSMORE<br />
SK55-20 TASMANIA NORTH-WEST (including KING ISLAND)<br />
SK55-21 TASMANIA NORTH-EAST<br />
SK55-22 TASMANIA SOUTH-WEST<br />
SK55-23 TASMANIA SOUTH-EAST<br />
Why are some features not shown on 1:250 000 scale <strong>NATMAP</strong>s?<br />
Some features on maps, especially small scale maps, are subject to what is known as cartographic generalisation.<br />
It refers to a group of techniques used by map makers which allow the level of information to be retained, while<br />
the amount of data shown on the map is reduced.<br />
These techniques include:<br />
pre-selection<br />
reshaping or smoothing lines<br />
removing small features<br />
aggregating many small features into a few large features, e.g. showing a group of buildings as a single<br />
building<br />
selecting certain features that maintain an overall shape, e.g. reducing the number of streams in a stream<br />
network without losing the overall pattern of drainage<br />
enlarging important features which may otherwise be too small to show<br />
moving features relative to each other (displacement).<br />
More on displacement<br />
Features may be located on the earthâ€s surface in such a way that they cannot be separated at the scale of the<br />
map. To make sure that the map is readable, one feature is kept in its true position, and the rest are displaced.<br />
In <strong>NATMAP</strong>s, the following features may be displaced when one or more are adjacent. The higher a feature is on<br />
the list, the more likely that it has been held in the correct position over those lower on the list.<br />
1. hydrographic lines such as coastlines, watercourses and lakes<br />
2. railways<br />
3. principal roads<br />
4. secondary roads<br />
5. minor roads<br />
6. tracks<br />
7. buildings<br />
8. vegetation boundaries<br />
<strong>NATMAP</strong> RASTER <strong>2003</strong> USER GUIDE
If two features need to be offset to one another and neither is listed, the position of the feature with greater<br />
landmark value will be maintained.<br />
For example, if a railway and road are coincident at the scale being produced, the road would be displaced. Where<br />
two or three features are close and adjacent, one may be displaced by up to 225 metres at 1:250 000 scale. In<br />
the worst case when all these features are close together, one may be displaced by up to 675 metres at 1:250 000<br />
scale. However, any features that have been displaced must maintain their relative position. See the picture below.<br />
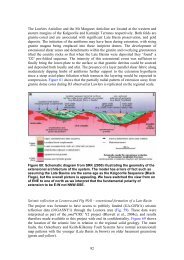
This extract from the Wangaratta 1:250 000 scale <strong>NATMAP</strong> (SJ55-02) shows<br />
displacement of the Murray Valley Highway from its true position. The blue line is a<br />
GPS track showing the highway's true position, but the highway, railway and the<br />
Hume Freeway (red/yellow double line) have all been displaced for clarity. Compare<br />
this to the Landsat 7 ETM+ satellite image of the same area, where you cannot<br />
clearly distinguish between the three features. The relative position of the highway,<br />
the railway and the freeway have been maintained.<br />
Generalisation is not a completely automatic process and some human judgement is required. Decisions are usually<br />
based upon the significance of the feature at the scale of the map being produced, how many other similar<br />
features there are nearby, and the purpose of the map itself.<br />
One major impact of generalisation is when using maps with global positioning systems (GPS). When a GPS track<br />
is overlaid on a map, the track may not match the road as it is shown on the map because of the displacement<br />
described above. This isn't an error in the position of the road as such, but one of the consequences of trying to<br />
make a map clear and readable.<br />
Feature Masking<br />
To make printing easier many features do not mask out other features. For example, if you have a close look at<br />
any of the new <strong>NATMAP</strong>s you would see that most rivers can be seen ‘underneath’ or ‘on top of’ the roads. The<br />
digital process used to manufacture the map images in <strong>NATMAP</strong> <strong>Raster</strong> can only show one layer in each pixel of<br />
the image, hence some features will be masked. The order in which the layering occurs is fixed, and in some maps<br />
may have produced some illogical results or effects that will not appear on the paper map. Significant illogical<br />
effects (such as canals covering roads) have been edited but may be incomplete.<br />
Map Rotation in the Mapsheets product<br />
The map images in Mapsheets appear tilted because they are georeferenced to the Map Grid of <strong>Australia</strong> (MGA).<br />
Each map's boundaries are based on latitude and longitude, but these boundaries do not always correspond to<br />
MGA gridlines. In order to match the map image to MGA, the image has to be rotated and stretched. Note that the<br />
blue MGA gridlines on the map are orientated vertically and horizontally in the Viewer, whilst lines of latitude and<br />
longitude will be shown at an angle.<br />
Join lines<br />
The Landsat Satellite image is made up of 369 individual images, or scenes. Most of these scenes are cloud free,<br />
and in order to achieve this images were taken at different times of the year. Whilst every effort is made to colour<br />
match the images, in some cases image matching is not perfect because of differences in ground conditions or<br />
time of year that the images were taken.<br />
Join lines will be visible in the 1:1M scale Mosaic as individual maps in this image were made to different sets of<br />
specifications.<br />
<strong>NATMAP</strong> RASTER <strong>2003</strong> USER GUIDE
Bleed edges/overlaps<br />
New <strong>NATMAP</strong>s are produced with what is known as a bleed edge. This is the overlap area along the top and righthand<br />
side of the map which allows a map user to overlay neighbouring maps easily. These edges remain in the<br />
maps in the Mapsheets product, but have been removed in the Mosaic product. This was decided upon to reduce<br />
processing time and the likelihood of features and text being cut off, and improve joining. In some cases, this may<br />
mean that slightly older information has been retained in these areas; however, this has only occurred in a handful<br />
of places around the country.<br />
Note on improving image clarity<br />
The map images in <strong>NATMAP</strong> <strong>Raster</strong> have been compressed. Images that are compressed are like files that have<br />
been ‘zipped’ - information has been removed from the image using a particular technique or algorithm to reduce<br />
the file size.<br />
Depending upon the compression technique, some information may be lost from the image altogether when it is<br />
compressed. This is called lossy compression. ECW, JPEG and MrSID are common lossy compression techniques.<br />
LZW is a lossless compression (i.e. information is not lost when an image is compressed); however, file sizes are<br />
not reduced as much.<br />
The images in this product use ECW compression. This will mean that some features will lose some of their clarity;<br />
in particular, very thin lines such as tracks and watercourses may become blurry. Colours may also not be uniform<br />
within areas (e.g. forest areas shown as green on the paper map may, on the image, contain traces of other<br />
colours). These effects are called artefacts.<br />
The resolution or cell size of an image also affects its clarity. Map images with a resolution of 150 dots per inch<br />
(dpi) will not be as clear as maps with 200 or 300dpi as there are less pixels in each image. As a result, text or<br />
other features in map images with lower resolutions will appear pixellated or blocky.<br />
Other factors affecting image clarity include your monitor specifications, the software being used to view the map<br />
images (if not using the <strong>Raster</strong> Viewer), and the the zoom scale. If viewing in other software packages often there<br />
is an option to ‘zoom to raster resolution’; this zoom level will give the clearest view of the image. Zooming in too<br />
far will cause pixellation and artefacts will appear to be very significant; clarity is also reduced if zooming out too<br />
far. For best results, you should set your zoom to around the same level as if you were looking at the paper map<br />
version at the same viewing distance.<br />
Whilst every effort has been made to minimise the number and extent of artefacts within each map image, users<br />
should be aware that artefacts exist as a result of fitting all of the <strong>NATMAP</strong> 1:250 000 scale maps onto 2 CDs at an<br />
affordable price. The map images in this product are not intended to be exact replicas of the paper map in terms<br />
of quality, but do contain the same information as shown on the paper version.<br />
The number of artefacts may be minimised by exporting the map image to TIFF or GeoTIFF; however, these will<br />
produce very large file sizes and will not remove all artefacts, and cannot be viewed using the <strong>Raster</strong> Viewer. For<br />
more information, refer to the FAQ on the size of exported files.<br />
For more information on compression techniques, refer to Image Compression in the ACRES product pages on the<br />
<strong>Geoscience</strong> <strong>Australia</strong> website.<br />
Map image specifications<br />
File Naming Convention: all images in the 250K Sheet layer in the Mapsheets product are named to the<br />
corresponding six digit <strong>NATMAP</strong> 250K map number. Where a map does not have a <strong>NATMAP</strong> 250K map number,<br />
such as North West Tasmania, a number was created for that tile. Mosaic or individual map images are named<br />
according to scale; that is 250K.ecw, 1M.ecw, 5M.ecw, 20M.ecw. The Landsat 7 satellite image mosaic of <strong>Australia</strong><br />
is named ls7_mosaic.ecw<br />
Positional Accuracy: each identifiable coordinate pixel should be within 4 pixels of the calculated position. The<br />
production of maps involves cartographic generalisation of features which adds additional inaccuracies into the<br />
images. A full listing is below.<br />
<strong>NATMAP</strong> RASTER <strong>2003</strong> USER GUIDE
Dataset Image Resolution Positional Accuracy<br />
250K Sheets (Mapsheets only) 32m 127m<br />
250K Mosaic (Mosaic only) 0.00033 degrees 0.0012 degrees<br />
1M Mosaic (Mosaic only) 0.00116 degrees 0.0047 degrees<br />
5M Sheet 0.0056 degrees 0.022 degrees<br />
20M 0.024 degrees 0.096 degrees<br />
Satellite Mosaic (Mosaic only) 0.00045 degrees (approx 50m) 0.0018 degrees<br />
Note: the size of a pixel in metres for any of the Mosaic layers varies with the degree of latitude.<br />
Location 250K 1M 5M 20M Satellite<br />
Torres Strait (Qld) 35m 127m 615m 2.6km 44m<br />
Darwin (NT), Weipa (Qld) 35m 126m 610m 2.6km 44m<br />
Cairns (Qld), the Kimberleys (WA) 34m 124m 600m 2.5km 43m<br />
Townsville (Qld), Tennant Creek (NT), Port Hedland (WA) 33m 121m 586m 2.5km 42m<br />
Rockhampton (Qld), Alice Springs (NT), Carnavon (WA) 32m 118m 570m 2.4km 41m<br />
Brisbane (Qld), Oodnadatta (SA), Leonora (WA), Geraldton (WA) 31m 114m 551m 2.3km 39m<br />
Newcastle (NSW), Broken Hill (NSW), Port Augusta (SA), Perth (WA) 30m 109m 530m 2.2km 38m<br />
Adelaide (SA), Albury (NSW) 29m 104m 505m 2.1km 36m<br />
King Island (Tas) 27m 99m 478m 2.0km 34m<br />
Hobart (Tas) 26m 93m 450m 1.9km 32m<br />
Coordinate System: Refer to the Coordinate Systems pages.<br />
Currency: Refer to the map currency pages for the reliability dates for each standard map sheet area.<br />
Legends:<br />
1:250 000 scale [JPEG image, 71KB]<br />
Expanded 1:250 000 scale<br />
1:1M scale [JPEG image, 64KB]<br />
1:5M scale [JPEG image, 26KB]<br />
Landsat Satellite Image Mosaic of <strong>Australia</strong> [JPEG image, 20KB]<br />
Gazetteer of <strong>Australia</strong> (used in Place Name Search)<br />
CD layout<br />
Your <strong>NATMAP</strong> <strong>Raster</strong> product is organised on the CDs as follows:<br />
Mapsheets<br />
CD1<br />
Maps for WA and NT<br />
1:5 000 000 map*<br />
1:20 000 000 map*<br />
Map Index*<br />
<strong>Raster</strong> Viewer Software and installation files<br />
CD2<br />
Maps for Qld, NSW, Vic, SA, ACT and Tas.<br />
<strong>NATMAP</strong> RASTER <strong>2003</strong> USER GUIDE
Mosaic<br />
<strong>User</strong> <strong>Guide</strong><br />
1:1 000 000 scale map mosaic<br />
Landsat Satellite Image<br />
1:5 000 000 map*<br />
1:20 000 000 map*<br />
Map Index*<br />
<strong>Raster</strong> Viewer Software and installation files<br />
<strong>User</strong> <strong>Guide</strong><br />
1:250 000 scale map mosaic<br />
Maps labelled * are part of the installation files, and become useable upon installation to your hard drive where<br />
they are visible in your chosen installation directory.<br />
The maps (except for those labelled * in the table above) are stored in the <strong>Raster</strong>s folder on both CDs in both<br />
products. Within this folder is another folder which will be named with the appropriate layer name. See the table<br />
below.<br />
CD1<br />
CD2<br />
Mapsheets <strong>Raster</strong>s > 250K-Sheets > cd1 <strong>Raster</strong>s > 250K-Sheets > cd2<br />
Mosaic<br />
<strong>Raster</strong>s > 1M-Mosaic > cd1<br />
<strong>Raster</strong>s > Satellite-Mosaic > cd1<br />
<strong>Raster</strong>s > 250K-Mosaic > cd2<br />
<strong>NATMAP</strong> RASTER <strong>2003</strong> USER GUIDE
<strong>NATMAP</strong> <strong>Raster</strong> <strong>2003</strong> Map Currency<br />
The list can be sorted by clicking on the column titles.<br />
1:250 000 scale maps<br />
Map Number Map Name State Edition Reliability<br />
SG53-10 ABMINGA SA ED2 2000<br />
SG55-05 ADAVALE QLD ED2 1999<br />
SI54-09 ADELAIDE SPECIAL SA ED1 1998<br />
SG50-13 AJANA WA ED2 1998<br />
SG53-09 ALBERGA SA ED2 1998<br />
SF53-10 ALCOOTA NT ED2 1999<br />
SF53-14 ALICE SPRINGS NT ED3 1996<br />
SD53-01 ALLIGATOR RIVER NT ED2 1999<br />
SE53-15 ALROY NT ED2 1998<br />
SI54-07 ANA BRANCH NSW ED2 2000<br />
SH53-12 ANDAMOOKA SA ED2 1997<br />
SH55-07 ANGLEDOOL NSW ED2 1995<br />
SF51-02 ANKETELL WA ED2 1996<br />
SH56-10 ARMIDALE SPECIAL NSW ED2 1999<br />
SD52-13 ASHTON WA ED2 2001<br />
SE55-05 ATHERTON QLD ED2 1999<br />
SG55-06 AUGATHELLA QLD ED2 1998<br />
SD52-15 AUVERGNE NT ED2 1998<br />
SF53-04 AVON DOWNS NT ED2 1998<br />
SE55-15 AYR QLD ED2 1995<br />
SJ55-07 BAIRNSDALE SPECIAL VIC ED1 1994<br />
SF51-09 BALFOUR DOWNS WA ED2 2001<br />
SI51-03 BALLADONIA WA ED3 1998<br />
SJ54-08 BALLARAT VIC ED2 1999<br />
SI54-12 BALRANALD NSW/VIC ED2 2001<br />
SG55-04 BARALABA QLD ED3 1998<br />
SI54-13 BARKER SA ED2 1998<br />
SH50-08 BARLEE WA ED2 1997<br />
SH55-13 BARNATO NSW ED2 1997<br />
<strong>NATMAP</strong> RASTER <strong>2003</strong> USER GUIDE
SG54-11 BARROLKA QLD ED3 2002<br />
SF53-06 BARROW CREEK NT ED2 1998<br />
SH53-09 BARTON SA ED2 2001<br />
SI55-08 BATHURST NSW ED2 1996<br />
SE53-03 BAUHINIA DOWNS NT ED3 1999<br />
SG54-01 BEDOURIE QLD ED4 2002<br />
SE53-06 BEETALOO NT ED2 1998<br />
SJ55-04 BEGA NSW/VIC ED3 1995<br />
SG50-11 BELELE WA ED2 2001<br />
SH50-11 BENCUBBIN WA ED2 1997<br />
SJ55-01 BENDIGO VIC/NSW ED2 1999<br />
SG52-05 BENTLEY WA ED2 2000<br />
SG54-06 BETOOTA QLD ED3 1999<br />
SH53-07 BILLA KALINA SA ED2 2001<br />
SE52-14 BILLILUNA WA ED2 2002<br />
SG54-05 BIRDSVILLE QLD ED3 2001<br />
SG52-15 BIRKSGATE SA ED2 2000<br />
SE52-11 BIRRINDUDU NT ED2* 2002<br />
SG55-01 BLACKALL QLD ED2 2001<br />
SG52-03 BLOODS RANGE NT ED2 2000<br />
SD53-07 BLUE MUD BAY NT ED2 1998<br />
SC54-07 BOIGU QLD ED2 1997<br />
SF53-02 BONNEY WELL NT ED2 1998<br />
SI55-05 BOOLIGAL NSW ED2 1998<br />
SH51-13 BOORABBIN WA ED2 1996<br />
SF54-10 BOULIA QLD ED2 1997<br />
SE54-02 BOUNTIFUL ISLANDS INSET QLD ED1 1998<br />
SH55-10 BOURKE NSW ED2 1997<br />
SF55-03 BOWEN QLD ED2 1998<br />
SI50-12 BREMER BAY WA ED2 1996<br />
SF54-15 BRIGHTON DOWNS QLD ED2 2001<br />
SG56-15 BRISBANE SPECIAL QLD/NSW ED2 2000<br />
SH54-15 BROKEN HILL NSW ED2 2000<br />
SE51-06 BROOME WA ED2 2001<br />
SG51-08 BROWNE WA ED2 2000<br />
SD51-11 BROWSE ISLAND INSET WA ED1 2001<br />
<strong>NATMAP</strong> RASTER <strong>2003</strong> USER GUIDE
SE53-11 BRUNETTE DOWNS NT ED2 2000<br />
SF55-06 BUCHANAN QLD ED2 1996<br />
SG51-01 BULLEN WA ED2 2001<br />
SH54-04 BULLOO QLD ED2 2001<br />
SG56-02 BUNDABERG QLD ED3 1995<br />
SE54-06 BURKETOWN QLD ED2 1999<br />
SI54-05 BURRA SA ED2 1994<br />
SI50-05 BUSSELTON SPECIAL WA ED1 1996<br />
SG50-10 BYRO WA ED2 2001<br />
SE55-02 CAIRNS QLD ED2 1996<br />
SH54-06 CALLABONNA SA ED2 2001<br />
SE53-08 CALVERT HILLS NT ED2 2000<br />
SD52-14 CAMBRIDGE GULF WA ED3 1997<br />
SD51-15 CAMDEN SOUND SPECIAL WA ED1 2001<br />
SE54-13 CAMOOWEAL QLD ED2 2001<br />
SI55-16 CANBERRA NSW ED3 1998<br />
SG54-07 CANTERBURY QLD ED2 1999<br />
SD55-09 CAPE MELVILLE QLD ED2 1996<br />
SD52-07 CAPE SCOTT SPECIAL NT ED1 1995<br />
SD54-04 CAPE WEYMOUTH QLD ED2 1996<br />
SC54-12 CAPE YORK QLD ED2 1997<br />
SI55-06 CARGELLIGO NSW ED2 1995<br />
SG49-04 CARNAVON SPECIAL WA ED1 2000<br />
SG55-10 CHARLEVILLE QLD ED2 1999<br />
SE51-04 CHARNLEY WA ED2 2001<br />
SF55-02 CHARTERS TOWERS QLD ED2 1999<br />
SH53-14 CHILDARA SA ED2 1998<br />
SG56-09 CHINCHILLA QLD ED2 1998<br />
SI54-06 CHOWILLA SA ED2 1997<br />
SE55-13 CLARKE RIVER QLD ED2 1997<br />
SF55-11 CLERMONT QLD ED2 1996<br />
SF54-02 CLONCURRY QLD ED2 1997<br />
SH55-14 COBAR NSW ED2 1997<br />
SG52-01 COBB WA ED2 2000<br />
SH54-11 COBHAM LAKE NSW ED2 2000<br />
SC53-13 COBOURG PENINSULA SPECIAL NT ED1 1997<br />
<strong>NATMAP</strong> RASTER <strong>2003</strong> USER GUIDE
SD54-08 COEN QLD ED2 1996<br />
SJ54-12 COLAC VIC ED3 1995<br />
SI50-06 COLLIE WA ED2 2000<br />
SG50-04 COLLIER WA ED2 1998<br />
SG54-03 CONNEMARA QLD ED2 2001<br />
SH53-06 COOBER PEDY SA ED2 1999<br />
SH52-11 COOK SA ED2 2001<br />
SD55-13 COOKTOWN QLD ED2 1996<br />
SH52-15 COOMPANA SA ED3 2001<br />
SG52-10 COOPER WA ED2 2001<br />
SI55-11 COOTAMUNDRA NSW ED2 1994<br />
SH54-09 COPLEY SA ED2 1998<br />
SG54-10 CORDILLO SA ED2 1999<br />
SF52-01 CORNISH WA ED2* 2001<br />
SI50-03 CORRIGIN WA ED2 1997<br />
SE51-16 CROSSLAND WA ED2 2001<br />
SE54-11 CROYDON QLD ED2 2001<br />
SG50-15 CUE WA ED2 2001<br />
SI51-04 CULVER WA ED3 1998<br />
SH51-11 CUNDEELEE WA ED2 2001<br />
SH55-02 CUNNAMULLA QLD ED2 2001<br />
SH53-08 CURDIMURKA SA ED2 1997<br />
SH54-14 CURNAMONA SA ED3 1997<br />
SG56-13 DALBY QLD ED2 1999<br />
SG53-11 DALHOUSIE SA ED2 1999<br />
SE53-01 DALY WATERS NT ED2 1998<br />
SF50-02 DAMPIER SPECIAL WA ED1 1996<br />
SC54-08 DARU QLD ED2 1997<br />
SD52-04 DARWIN NT ED5 1999<br />
SJ55-15 DEAL ISLAND INSET VIC ED1 1998<br />
SD52-16 DELAMERE NT ED2 2001<br />
SI55-13 DENILIQUIN NSW/VIC ED2 1997<br />
SE51-07 DERBY WA ED3 1999<br />
SH55-03 DIRRANBANDI QLD ED2 1995<br />
SE52-06 DIXON RANGE WA ED2 1996<br />
SE54-14 DOBBYN QLD ED2 2001<br />
<strong>NATMAP</strong> RASTER <strong>2003</strong> USER GUIDE
SH50-05 DONGARA WA ED2 1996<br />
SE54-10 DONORS HILL QLD ED2 1999<br />
SD52-09 DRYSDALE WA ED2 2001<br />
SF55-16 DUARINGA QLD ED2 1996<br />
SI55-04 DUBBO NSW ED2 1997<br />
SF54-06 DUCHESS QLD ED2 1997<br />
SG51-14 DUKETON WA ED2 2002<br />
SI50-07 DUMBLEYUNG WA ED2 1999<br />
SF51-04 DUMMER WA ED2 2001<br />
SG54-15 DURHAM DOWNS QLD ED2 1999<br />
SD54-12 EBAGOOLA QLD ED2 1995<br />
SG55-07 EDDYSTONE QLD ED2 2001<br />
SH51-06 EDJUDINA WA ED2 1998<br />
SF50-14 EDMUND WA ED2 1996<br />
SE55-09 EINASLEIGH QLD ED3 2002<br />
SF53-07 ELKEDRA NT ED2 2001<br />
SI53-06 ELLISTON SA ED2 1999<br />
SF55-15 EMERALD QLD ED2 2001<br />
SH55-06 ENNGONIA NSW ED2 1997<br />
SG54-12 EROMANGA QLD ED2 2001<br />
SI51-06 ESPERANCE SPECIAL WA ED1 1997<br />
SH52-14 EUCLA SPECIAL WA ED1 1998<br />
SH55-01 EULO QLD ED2 2001<br />
SG53-13 EVERARD SA ED2 1998<br />
SD52-12 FERGUSSON RIVER NT ED3 2001<br />
SG53-06 FINKE NT ED2 1999<br />
SI55-07 FORBES NSW ED2 1997<br />
SH52-10 FORREST WA ED2* 2001<br />
SH53-13 FOWLER SA ED3 1998<br />
SG56-03 FRASER ISLAND SPECIAL QLD ED3 1998<br />
SF53-03 FREW RIVER NT ED2 1998<br />
SH54-10 FROME SA ED3 2001<br />
SH53-15 GAIRDNER SA ED2 1997<br />
SE54-03 GALBRAITH QLD ED2 2001<br />
SF55-10 GALILEE QLD ED2 1996<br />
SD53-03 GALIWINKU SPECIAL NT ED1 1998<br />
<strong>NATMAP</strong> RASTER <strong>2003</strong> USER GUIDE
SG54-13 GASON SA ED2 2001<br />
SE54-12 GEORGETOWN QLD ED2 2000<br />
SH50-01 GERALDTON SPECIAL WA ED1 1995<br />
SE54-16 GILBERTON QLD ED2 2000<br />
SH53-01 GILES SA ED2 2001<br />
SH55-16 GILGANDRA NSW ED2 1996<br />
SG50-06 GLENBURGH WA ED2 2001<br />
SG50-12 GLENGARRY WA ED2 1999<br />
SF54-09 GLENORMISTON QLD ED2 2001<br />
SH56-01 GOONDIWINDI QLD/NSW ED2 1999<br />
SE52-10 GORDON DOWNS WA ED2 2001<br />
SI55-12 GOULBURN NSW ED2 1994<br />
SD53-04 GOVE PENINSULA SPECIAL NT ED1 1998<br />
SH56-06 GRAFTON NSW/QLD ED3 1994<br />
SE53-13 GREEN SWAMP WELL NT ED2 2001<br />
SD53-08 GROOTE ELYANDT SPECIAL NT ED1 1996<br />
SF51-14 GUNANYA WA ED2* 2002<br />
SG56-10 GYMPIE QLD ED2 1995<br />
SG53-03 HALE RIVER NT ED2 2001<br />
SJ54-07 HAMILTON SPECIAL VIC ED1 1994<br />
SD54-16 HANN RIVER QLD ED3 1999<br />
SH56-14 HASTINGS NSW ED3 1999<br />
SI55-09 HAY NSW ED2 1997<br />
SF53-16 HAY RIVER NT ED2 2001<br />
SE53-10 HELEN SPRINGS NT ED2 1998<br />
SF52-05 HELENA WA ED2 2002<br />
SG53-01 HENBURY NT ED2 1996<br />
SG51-07 HERBERT WA ED2 2002<br />
SF53-13 HERMANNSBURG NT ED2 1996<br />
SF56-14 HERON ISLAND QLD ED2 1996<br />
SF52-07 HIGHLAND ROCKS NT ED2 2001<br />
SH50-09 HILL RIVER WA ED2 1998<br />
SD53-14 HODGSON DOWNS NT ED3 1999<br />
SD54-11 HOLROYD SPECIAL QLD ED1 1999<br />
SG55-15 HOMEBOIN QLD ED2 2001<br />
SJ54-03 HORSHAM VIC ED2 1996<br />
<strong>NATMAP</strong> RASTER <strong>2003</strong> USER GUIDE
SF53-11 HUCKITTA NT ED2 2001<br />
SF55-01 HUGHENDEN QLD ED2 1998<br />
SI50-04 HYDEN WA ED2 1997<br />
SF53-15 ILLOGWA CREEK NT ED3 2001<br />
SE55-10 INGHAM QLD ED2 1998<br />
SG54-14 INNAMINCKA SA ED2 1999<br />
SE55-06 INNISFAIL QLD ED2 1998<br />
SH56-05 INVERELL NSW/QLD ED3 1999<br />
SG56-14 IPSWICH QLD ED3 2000<br />
SI55-01 IVANHOE NSW ED2 1998<br />
SH50-12 JACKSON WA ED2 1997<br />
SC54-15 JARDINE RIVER QLD ED2 1996<br />
SF55-14 JERICHO QLD ED2 2001<br />
SI55-14 JERILDERIE NSW/VIC ED2 1994<br />
SF51-03 JOANNA SPRING WA ED2 2002<br />
SH52-05 JUBILEE WA ED2 2001<br />
SF54-03 JULIA CREEK QLD ED2 1997<br />
SG54-04 JUNDAH QLD ED2 2000<br />
SH51-09 KALGOORLIE WA ED2 1996<br />
SI53-16 KANGAROO ISLAND SPECIAL SA ED1 1994<br />
SD53-09 KATHERINE NT ED3 1998<br />
SH50-15 KELLERBERRIN WA ED3 1997<br />
SG50-01 KENNEDY RANGE WA ED2 1996<br />
SI53-07 KIMBA SA ED2 1996<br />
SH53-11 KINGOONYA SA ED2 2001<br />
SG51-10 KINGSTON WA ED2 2002<br />
SH50-03 KIRKALOCKA WA ED2 1997<br />
SH54-01 KOPPERAMANNA SA ED2 1998<br />
SG53-05 KULGERA NT ED2 1998<br />
SH51-10 KURNALPI WA ED2 1996<br />
SE51-10 LAGRANGE WA ED2 2001<br />
SG52-04 LAKE AMADEUS NT ED2 1996<br />
SH53-04 LAKE EYRE SA ED2 1997<br />
SI51-01 LAKE JOHNSTON WA ED2 1996<br />
SF52-11 LAKE MACKAY NT ED2 2001<br />
SF53-01 LANDER RIVER NT ED2 2001<br />
<strong>NATMAP</strong> RASTER <strong>2003</strong> USER GUIDE
SE52-05 LANSDOWNE WA ED2 2001<br />
SD53-13 LARRIMAH NT ED2 1998<br />
SH51-02 LAVERTON WA ED2 1998<br />
SE54-09 LAWN HILL QLD ED2 1998<br />
SE51-08 LENNARD RIVER WA ED3 2001<br />
SG52-13 LENNIS WA ED2 2001<br />
SH51-01 LEONORA WA ED2 1996<br />
SE52-07 LIMBUNYA NT ED2 1999<br />
SI53-11 LINCOLN SPECIAL SA ED2 1998<br />
SG52-16 LINDSAY SA ED2 2000<br />
SH56-07 LISMORE SPECIAL NSW ED2 2000<br />
SE52-02 LISSADELL WA ED2 1997<br />
SD52-05 LONDONDERRY WA ED2 2001<br />
SF55-13 LONGREACH QLD ED3 2002<br />
SH52-09 LOONGANA WA ED2 2001<br />
SH55-09 LOUTH NSW ED2 1997<br />
SF52-02 LUCAS WA ED2* 2002<br />
SF52-14 MACDONALD WA ED2 2001<br />
SG54-02 MACHATTIE QLD ED3 2001<br />
SF55-08 MACKAY QLD ED2 1996<br />
SF54-11 MACKUNDA QLD ED2 2001<br />
SG51-03 MADLEY WA ED2 2002<br />
SH52-13 MADURA SPECIAL WA ED1 1998<br />
SC55-05 MAER QLD ED2 1997<br />
SI51-07 MALCOLM SPECIAL WA ED1 1998<br />
SJ55-08 MALLACOOTA VIC/NSW ED2 1995<br />
SI54-04 MANARA NSW ED2 1998<br />
SE51-13 MANDORA WA ED2 2001<br />
SF54-16 MANEROO QLD ED2 2000<br />
SH56-09 MANILLA NSW ED2 1999<br />
SG52-11 MANN SA ED2 2000<br />
SF54-08 MANUKA QLD ED2 2000<br />
SF50-08 MARBLE BAR WA ED2 1996<br />
SH54-05 MARREE SA ED3 1998<br />
SG56-06 MARYBOROUGH QLD ED2 1998<br />
SH52-06 MASON WA ED2 2000<br />
<strong>NATMAP</strong> RASTER <strong>2003</strong> USER GUIDE
SH52-08 MAURICE SA ED2 2001<br />
SG53-07 MCDILLS NT ED2 1999<br />
SF54-07 MCKINLAY QLD ED2 1997<br />
SE51-15 MCLARTY HILLS WA ED3 2002<br />
SD52-10 MEDUSA BANKS WA ED2 1998<br />
SJ55-05 MELBOURNE VIC ED2 1998<br />
SC52-16 MELVILLE ISLAND SPECIAL NT ED1 1998<br />
SI54-03 MENINDEE NSW ED2 2000<br />
SH51-05 MENZIES WA ED2 1996<br />
SI54-11 MILDURA VIC/NSW ED2 1998<br />
SD53-02 MILINGIMBI SPECIAL NT ED1 1998<br />
SE54-15 MILLUNGERA QLD ED2 2001<br />
SH54-07 MILPARINKA NSW ED2 2001<br />
SH51-07 MINIGWAL WA ED2 2001<br />
SF49-16 MINILYA SPECIAL WA ED1 2000<br />
SG55-11 MITCHELL QLD ED2 1996<br />
SG49-12 MONKEY MIA SPECIAL WA ED1 2000<br />
SD51-12 MONTAGUE SOUND SPECIAL WA ED2* 2001<br />
SG56-01 MONTO QLD ED3 1995<br />
SH50-10 MOORA WA ED2 1998<br />
SH55-08 MOREE NSW ED2 1996<br />
SE54-01 MORNINGTON ISLAND SPECIAL QLD ED1 1998<br />
SF51-16 MORRIS WA ED2 2001<br />
SE55-01 MOSSMAN QLD ED3 1994<br />
SE51-11 MOUNT ANDERSON WA ED2 2001<br />
SE52-13 MOUNT BANNERMAN WA ED2 2001<br />
SI50-11 MOUNT BARKER SPECIAL WA ED1 1994<br />
SF50-11 MOUNT BRUCE WA ED2 2001<br />
SF55-07 MOUNT COOLON QLD ED2 1996<br />
SF52-12 MOUNT DOREEN NT ED2 2001<br />
SE53-12 MOUNT DRUMMOND NT ED2 2000<br />
SG50-03 MOUNT EGERTON WA ED2 1996<br />
SE52-01 MOUNT ELIZABETH WA ED2 2001<br />
SD53-05 MOUNT EVELYN NT ED3 2001<br />
SF54-01 MOUNT ISA QLD ED3 1997<br />
SF52-16 MOUNT LIEBIG NT ED2 2001<br />
<strong>NATMAP</strong> RASTER <strong>2003</strong> USER GUIDE
SD53-06 MOUNT MARUMBA NT ED2 1998<br />
SF53-05 MOUNT PEAKE NT ED2 2001<br />
SG50-02 MOUNT PHILLIPS WA ED2 1996<br />
SE52-09 MOUNT RAMSAY WA ED2 2001<br />
SF52-15 MOUNT RENNIE NT ED2 2001<br />
SF52-04 MOUNT SOLITAIRE NT ED2 2001<br />
SF52-08 MOUNT THEO NT ED2 2001<br />
SF54-13 MOUNT WHELAN QLD ED2 2001<br />
SD53-15 MOUNT YOUNG NT ED2 1999<br />
SG56-05 MUNDUBBERA QLD ED3 1998<br />
SE51-14 MUNRO WA ED2 2001<br />
SG50-14 MURGOO WA ED2 2001<br />
SH53-02 MURLOOCOPPIE SA ED2 1999<br />
SF55-09 MUTTABURRA QLD ED3 2002<br />
SG51-05 NABBERU WA ED2 2001<br />
SF53-09 NAPPERBY NT ED3 1999<br />
SJ54-02 NARACOORTE SA ED3 1998<br />
SH51-16 NARETHA WA ED2 1998<br />
SH55-12 NARRABRI NSW ED2 1996<br />
SI55-10 NARRANDERA NSW ED2 1997<br />
SI55-03 NARROMINE NSW ED2 1994<br />
SH51-04 NEALE WA ED2 2001<br />
SI56-02 NEWCASTLE NSW ED3 1999<br />
SE53-05 NEWCASTLE WATERS NT ED2 1998<br />
SI50-08 NEWDEGATE WA ED2 1997<br />
SF50-16 NEWMAN WA ED2 1994<br />
SH50-07 NINGHAN WA ED2 1997<br />
SG53-16 NOOLYEANA SA ED2 2001<br />
SE51-12 NOONKANBAH WA ED3 1999<br />
SH52-03 NOORINA SA ED2 2001<br />
SE54-07 NORMANTON QLD ED2 1994<br />
SI51-02 NORSEMAN WA ED2 1996<br />
SF51-05 NULLAGINE WA ED3 1997<br />
SH52-16 NULLARBOR SA ED3 1998<br />
SI53-01 NUYTS SA ED3 1999<br />
SI55-02 NYMAGEE NSW ED2 1998<br />
<strong>NATMAP</strong> RASTER <strong>2003</strong> USER GUIDE
SH55-15 NYNGAN NSW ED2 1995<br />
SI54-02 OLARY SA ED2 1997<br />
SF50-05 ONSLOW WA ED2 1996<br />
SG53-15 OODNADATTA SA ED2 2001<br />
SH52-12 OOLDEA SA ED2 2001<br />
SC54-16 ORFORD BAY QLD ED2 1996<br />
SI54-01 ORROROO SA ED2 1999<br />
SI54-15 OUYEN VIC ED2 1998<br />
SG54-09 PANDIE PANDIE SA ED2* 2001<br />
SH54-13 PARACHILNA SA ED2 1997<br />
SF51-06 PATERSON RANGE WA ED2* 2002<br />
SG50-08 PEAK HILL WA ED2 1999<br />
SI50-10 PEMBERTON SPECIAL WA ED1 2000<br />
SE51-02 PENDER WA ED3 1999<br />
SJ54-06 PENOLA SPECIAL SA ED1 1999<br />
SF51-08 PERCIVAL WA ED2 2002<br />
SF56-05 PERCY ISLES QLD ED2 1996<br />
SH50-06 PERENJORI WA ED2 1996<br />
SH50-14 PERTH SPECIAL WA ED1 2000<br />
SG52-07 PETERMANN RANGES NT ED2 2000<br />
SD52-08 PINE CREEK NT ED3 2001<br />
SI50-02 PINJARRA WA ED2 2000<br />
SI54-14 PINNAROO SA ED2 1995<br />
SH51-08 PLUMRIDGE WA ED2 2001<br />
SG53-12 POOLOWANNA SA ED2 2001<br />
SI54-08 POONCARIE NSW ED2 1997<br />
SI53-04 PORT AUGUSTA SA ED2 1997<br />
SF56-09 PORT CLINTON QLD ED4 1997<br />
SF50-04 PORT HEDLAND SPECIAL WA ED1 1995<br />
SD52-11 PORT KEATS NT ED3 1998<br />
SJ55-09 PORT PHILLIP SPECIAL VIC ED1 1998<br />
SD51-16 PRINCE REGENT WA ED2* 2001<br />
SF55-04 PROSERPINE QLD ED2 1999<br />
SF50-07 PYRAMID WA ED2 1996<br />
SG55-09 QUILPIE QLD ED2 1998<br />
SE53-16 RANKEN NT ED2 1998<br />
<strong>NATMAP</strong> RASTER <strong>2003</strong> USER GUIDE
SH51-03 RASON WA ED2 2001<br />
SI51-05 RAVENSTHORPE WA ED2 1996<br />
SG52-02 RAWLINSON WA ED2 2000<br />
SE54-08 RED RIVER QLD ED2 2000<br />
SI54-10 RENMARK SA ED2 1995<br />
SF54-04 RICHMOND QLD ED2 2000<br />
SG51-11 ROBERT WA ED2 2002<br />
SF51-13 ROBERTSON WA ED2 2001<br />
SG50-07 ROBINSON RANGE WA ED2 2001<br />
SE53-04 ROBINSON RIVER SPECIAL NT ED1 1996<br />
SF56-13 ROCKHAMPTON QLD ED3 1996<br />
SG53-02 RODINGA NT ED2 1996<br />
SF50-03 ROEBOURNE WA ED2 1997<br />
SG55-12 ROMA QLD ED2 1995<br />
SD53-11 ROPER RIVER NT ED2 1995<br />
SF50-12 ROY HILL WA ED2 2001<br />
SF51-10 RUDALL WA ED2 2002<br />
SF51-15 RUNTON WA ED2 2002<br />
SD54-15 RUTLAND PLAINS QLD ED2 2001<br />
SF52-13 RYAN WA ED2 2001<br />
SF51-07 SAHARA WA ED2* 2002<br />
SF53-08 SANDOVER RIVER NT ED2 1998<br />
SG50-16 SANDSTONE WA ED2 1999<br />
SG52-06 SCOTT WA ED2 2000<br />
SH51-12 SEEMORE WA ED2 2001<br />
SG53-04 SIMPSON DESERT NORTH NT ED2 2001<br />
SG53-08 SIMPSON DESERT SOUTH NT ED2 2001<br />
SI56-01 SINGLETON NSW ED3 1999<br />
SG51-13 SIR SAMUEL WA ED2 2001<br />
SE53-09 SOUTH LAKE WOODS NT ED2 2001<br />
SH50-16 SOUTHERN CROSS WA ED2 1997<br />
SG55-03 SPRINGSURE QLD ED2 2001<br />
SF54-14 SPRINGVALE QLD ED2 2001<br />
SJ54-04 ST ARNAUD VIC ED2 2001<br />
SH55-04 ST GEORGE QLD/NSW ED2 1994<br />
SF55-12 ST LAWRENCE QLD ED2 1996<br />
<strong>NATMAP</strong> RASTER <strong>2003</strong> USER GUIDE
SG51-06 STANLEY WA ED2 2002<br />
SF52-06 STANSMORE WA ED2* 2002<br />
SI53-02 STREAKY BAY SA ED2 1998<br />
SH54-02 STRZELECKI SA ED2 2001<br />
SG55-16 SURAT QLD ED2 1999<br />
SI54-16 SWAN HILL VIC/NSW ED2 2001<br />
SI56-05 SYDNEY SPECIAL NSW ED2 1998<br />
SF51-11 TABLETOP WA ED2* 2002<br />
SG52-09 TALBOT WA ED2 2001<br />
SJ55-03 TALLANGATTA VIC/NSW ED2 1998<br />
SH53-05 TALLARINGA SA ED2 2001<br />
SG55-02 TAMBO QLD ED2 2001<br />
SH56-13 TAMWORTH NSW ED3 2000<br />
SE52-15 TANAMI NT ED2 2002<br />
SE52-16 TANAMI EAST NT ED2 2001<br />
SF55-05 TANGORIN QLD ED2 2001<br />
SE53-02 TANUMBIRINI NT ED2 1999<br />
SH53-10 TARCOOLA SA ED2 1999<br />
SG55-08 TAROOM QLD ED3 1998<br />
SK55-21 TASMANIA NORTH EAST TAS ED4* 2001<br />
SK55-20 TASMANIA NORTH WEST TAS ED4* 2002<br />
SK55-23 TASMANIA SOUTH EAST TAS ED4* 2001<br />
SK55-22 TASMANIA SOUTH WEST TAS ED4* 2002<br />
SE53-14 TENNANT CREEK NT ED3 1998<br />
SG54-16 THARGOMINDAH QLD ED2 2001<br />
SF52-03 THE GRANITES NT ED2 1998<br />
SG51-15 THROSSELL WA ED2 2002<br />
SC54-11 THURSDAY ISLAND QLD ED2 1997<br />
SH54-03 TICKALARA QLD ED2 2001<br />
SF53-12 TOBERMOREY NT ED2 2001<br />
SG55-13 TOOMPINE QLD ED2 1998<br />
SH53-16 TORRENS SA ED2 1997<br />
SE55-14 TOWNSVILLE QLD ED2 1998<br />
SG51-02 TRAINOR WA ED2 2002<br />
SF50-15 TUREE CREEK WA ED2 1996<br />
SG52-08 ULURU / AYERS ROCK NT ED5 2002<br />
<strong>NATMAP</strong> RASTER <strong>2003</strong> USER GUIDE
SF51-12 URAL WA ED2 2002<br />
SF54-05 URANDANGI QLD ED2 1997<br />
SD53-10 URAPUNGA NT ED2 1998<br />
SH54-08 URISINO NSW ED2 2001<br />
SH52-01 VERNON WA ED2 2001<br />
SE52-04 VICTORIA RIVER DOWNS NT ED2 2001<br />
SI55-15 WAGGA WAGGA NSW/VIC ED2 1994<br />
SG52-14 WAIGEN WA ED2 2000<br />
SH55-11 WALGETT NSW ED2 1995<br />
SE53-07 WALLHALLOW NT ED2 2000<br />
SE54-04 WALSH QLD ED2 2000<br />
SJ55-02 WANGARATTA VIC/NSW ED2 1995<br />
SH52-02 WANNA WA ED2 2000<br />
SJ55-06 WARBURTON VIC ED2 2000<br />
SJ55-10 WARRAGUL SPECIAL VIC ED1 1994<br />
SG51-04 WARRI WA ED2 2001<br />
SH53-03 WARRINA SA ED2 2001<br />
SH56-02 WARWICK QLD/NSW ED3 2000<br />
SE52-03 WATERLOO NT ED2 1999<br />
SE52-08 WAVE HILL NT ED2 2001<br />
SF52-10 WEBB WA ED2 2001<br />
SD54-03 WEIPA SPECIAL QLD ED1 1996<br />
SH52-04 WELLS SA ED2 2001<br />
SC53-16 WESSEL ISLANDS SPECIAL NT ED1 1996<br />
SE54-05 WESTMORELAND QLD ED3 1998<br />
SG51-16 WESTWOOD WA ED2 2001<br />
SH54-12 WHITE CLIFFS NSW ED2 1997<br />
SI53-08 WHYALLA SA ED3 1999<br />
SH51-14 WIDGIEMOOLTHA WA ED2 1996<br />
SH54-16 WILCANNIA NSW ED2 1997<br />
SF52-09 WILSON WA ED2 2002<br />
SG51-09 WILUNA WA ED2 2001<br />
SG54-08 WINDORAH QLD ED2 2001<br />
SE52-12 WINNECKE CREEK NT ED2 2001<br />
SF50-13 WINNING POOL WA ED2 1996<br />
SG53-14 WINTINNA SA ED2 1999<br />
<strong>NATMAP</strong> RASTER <strong>2003</strong> USER GUIDE
SF54-12 WINTON QLD ED2 2000<br />
SI56-13 WOLLONGONG SPECIAL NSW ED1 1995<br />
SG52-12 WOODROFFE SA ED2 2000<br />
SG50-05 WOORAMEL WA ED2 1994<br />
SG55-14 WYANDRA QLD ED2 1999<br />
SF50-10 WYLOO WA ED2 1994<br />
SH52-07 WYOLA SA ED2 2001<br />
SH50-02 YALGOO WA ED2 1995<br />
SE51-03 YAMPI WA ED2 1999<br />
SF50-09 YANREY SPECIAL WA ED1 2000<br />
SH55-05 YANTABULLA NSW ED2 2001<br />
SI53-03 YARDEA SA ED2 1996<br />
SG50-09 YARINGA WA ED3 2001<br />
SF50-06 YARRALOOLA WA ED2 1996<br />
SF51-01 YARRIE WA ED3 1996<br />
SI53-12 YORKE PENINSULA SPECIAL SA ED2 2002<br />
SH50-04 YOUANMI WA ED3 2002<br />
SG51-12 YOWALGA WA ED2 2001<br />
SH51-15 ZANTHUS WA ED2 2001<br />
1:1 000 000 scale maps (Mosaic only)<br />
Map Number Map Name Edition Reliability<br />
SC52 MELVILLE ISLAND ED2 1982<br />
SC53 CAPE WESSEL ED1 1972<br />
SC54 TORRES STRAIT ED1 1974<br />
SD51 BRUNSWICK BAY ED1 1972<br />
SD52 DARWIN ED2 1975<br />
SD53 ROPER RIVER ED2 1981<br />
SD54 MITCHELL RIVER ED1 1974<br />
SD55 COOKTOWN ED1 1973<br />
SE50 ROWLEY SHOALS ED1 1977<br />
SE51 BROOME ED1 1977<br />
SE52 HALLS CREEK ED1 1976<br />
SE53 NEWCASTLE WATERS ED2 1979<br />
SE54 NORMANTON ED2 1978<br />
SE55 TOWNSVILLE ED2 1972<br />
<strong>NATMAP</strong> RASTER <strong>2003</strong> USER GUIDE
SF49 CLOATES ED1 1977<br />
SF50 HAMERSLEY RANGE ED1 1977<br />
SF51 OAKOVER RIVER ED1 1981<br />
SF52 LAKE MACKAY ED2 1978<br />
SF53 ALICE SPRINGS ED1 1974<br />
SF54 CLONCURRY ED3 1978<br />
SF55 CLERMONT ED1 1978<br />
SF56 ROCKHAMPTON ED2 1977<br />
SG49 CARNARVON ED1 1977<br />
SG50 MEEKATHARRA ED1 1977<br />
SG51 WILUNA ED2 1975<br />
SG52 PETERMANN RANGES ED1 1975<br />
SG53 OODNADATTA ED2 1973<br />
SG54 COOPER CREEK ED1 1973<br />
SG55 CHARLEVILLE ED2 1979<br />
SG56 BRISBANE ED1 1978<br />
SH49 HOUTMAN ABROLHOS ED1 1974<br />
SH50 PERTH ED2 1975<br />
SH51 KALGOORLIE ED2 1973<br />
SH52 NULLARBOR PLAIN ED2 1981<br />
SH53 TARCOOLA ED2 1977<br />
SH54 BROKEN HILL ED1 1977<br />
SH55 BOURKE ED4 1973<br />
SH56 ARMIDALE ED1 1976<br />
SI50 ALBANY ED1 1977<br />
SI51 ESPERANCE ED2 1980<br />
SI53 PORT AUGUSTA ED2 1979<br />
SI54 ADELAIDE ED2 1977<br />
SI55 CANBERRA ED3 1980<br />
SI56 SYDNEY ED3 1979<br />
SJ53 DU COUEDIC ED1 1972<br />
SJ54 HAMILTON ED3 1972<br />
SJ55 MELBOURNE ED3 1983<br />
SJ56 BODALLA ED2 1977<br />
SK55 TASMANIA ED2 1981<br />
<strong>NATMAP</strong> RASTER <strong>2003</strong> USER GUIDE
Other layers<br />
MAP NAME EDITION RELIABILITY<br />
AUSTRALIA 1:5M GENERAL REFERENCE MAP ED3 1996<br />
AUSTRALIA REPORT MAP (Approx scale 1:20 000 000) ED1 1996<br />
LANDSAT 7 SATELLITE IMAGE OF AUSTRALIA<br />
(Mosaic only)<br />
ED1 07/1999<br />
to 09/2000<br />
Note: Map editions marked with an asterisk (*) indicate interim raster maps. These maps may differ slightly from<br />
the printed version of the map.<br />
<strong>NATMAP</strong> RASTER <strong>2003</strong> USER GUIDE
Installing and Starting <strong>NATMAP</strong> <strong>Raster</strong><br />
System Requirements<br />
Uninstalling previous versions<br />
Installing the New Viewer<br />
Starting<br />
System requirements<br />
Recommended<br />
Minimum<br />
CPU 233MHz Pentium or faster 133MHz Pentium<br />
Memory 64MB 32MB<br />
Disk<br />
At least 26MB free for software; At least 26MB free for software<br />
1.2GB for maps<br />
Display 1024 x 768 with true colour<br />
800 x 600 with 64K colours [see<br />
below]<br />
Optical drive 4x or faster CD-ROM drive CD-ROM drive required<br />
Browser IE5.5 IE5.0<br />
Screen colour display settings<br />
To obtain the best quality on-screen display of the maps, a true colour (24 bit) display is strongly recommended.<br />
To utilise printing capabilities, a colour printer is recommended. A black and white printer may be used; however,<br />
the usefulness of the printed map images will be reduced.<br />
Macintosh users<br />
<strong>NATMAP</strong> <strong>Raster</strong> <strong>2003</strong> only exists as a Windows-based software package because much of the core third-party<br />
functionality is only supported in a Windows environment. We cannot support <strong>Raster</strong> on a Mcintosh Virtual PC -<br />
users can install it at their own risk.<br />
800x600 screen resolutions<br />
If you operate your display at 800x600 pixels, you should ensure that any task bars have their autohide property<br />
setting turned on. For the Windows task bar this is done from Start > Settings>Taskbar then ensuring that the<br />
Autohide check box is ticked.<br />
Installing/Updating Internet Explorer<br />
The <strong>NATMAP</strong> <strong>Raster</strong> application and setup program will not function unless an appropriate version of Internet<br />
Explorer (IE5.5 or higher) is available on your system. No other browsers, including Netscape Navigator, are<br />
supported by the core third party functionality.<br />
You can run <strong>NATMAP</strong> <strong>Raster</strong> using IE versions earlier than 5.5 and later than 5.0. However, you may find that CPU<br />
usage blows out and the Locator and Magnifier maps may not display properly.<br />
It is recommended that users install the latest version of Internet Explorer, which is available from Microsoft on<br />
the Internet at http://www.microsoft.com.<br />
If Internet Explorer version 5 or above is installed on your machine and you still receive an error message, please<br />
ensure you are running the Viewer correctly (see Starting the Viewer).<br />
Network Restrictions<br />
<strong>NATMAP</strong> RASTER <strong>2003</strong> USER GUIDE
If you are planning on running the <strong>NATMAP</strong> <strong>Raster</strong> Viewer and associated software on a network, your ability to<br />
install the software and to change layers using the <strong>Raster</strong> Viewer Configurator will depend upon your<br />
administrative privileges. If you are a restricted user, and the system administrator has installed the Viewer, you<br />
may not be able to:<br />
install a desktop icon<br />
install any of the software.<br />
In the case where a standard user cannot install software, then the administrator will need to follow the<br />
installation procedures for installing from a network. The administrator will need to:<br />
install the software from its location on the network to each computer<br />
add a desktop icon into the \Desktop directory<br />
create a folder in the \Desktop\Start Menu\Programs\ directory called <strong>NATMAP</strong> RASTER<br />
VIEWER, and create shortcuts to the Exporter, the Configurator, the Viewer and the <strong>User</strong> <strong>Guide</strong>.<br />
This will ensure that the Viewer and the Configurator will operate correctly.<br />
Network XP users should also be aware of incompatabilities between the InstallShield installation software and XP.<br />
If you get an error message with an error code '0x80040707', then you should use this solution suggested by<br />
InstallShield to fix the problem.<br />
Uninstalling old viewers<br />
Note: Before installing a new version of <strong>NATMAP</strong> <strong>Raster</strong> you will need to remove any previous versions of<br />
the <strong>NATMAP</strong> <strong>Raster</strong> Viewer.<br />
To do this, go to Start Menu > Settings > Add/Remove Programs, and then select <strong>NATMAP</strong> RASTER VIEWER or<br />
AUSLIG RASTER VIEWER and the program will be removed.<br />
From release version 1.3 the <strong>Raster</strong> Viewer had a name change from ‘AUSLIG RASTER VIEWER’ to ‘<strong>NATMAP</strong><br />
RASTER VIEWER’. If you have a <strong>Raster</strong> Viewer version prior to 1.3 then it will be prefixed with ‘AUSLIG’ rather<br />
than ‘<strong>NATMAP</strong>’.<br />
If you have not uninstalled any previous versions of the Viewer, and you attempt to install the new <strong>Raster</strong> Viewer,<br />
you will get an warning message. You should exit out of the installation process and use the above procedure to<br />
remove the previous version.<br />
Installing the new viewer<br />
The Setup.exe Program<br />
The setup program:<br />
copies a series of OCXs and DLL files to your hard disk<br />
registers the OCXs and DLLs<br />
copies HTML files and program (.exe) files to the installation directory you specify<br />
copies the encrypted data files for the Place Name Search to the installation directory you specify<br />
creates registry keys that describe the configuration of the installed <strong>NATMAP</strong> <strong>Raster</strong> - that is, where the map<br />
images and data layers are located.<br />
These files require approximately 26MB of space on your hard disk.<br />
Note: On some systems, the installation program may report that some DLLs cannot be copied because the file is<br />
'currently in use'. In general, it is safe to press the Ignore button to continue the installation. These files are<br />
usually already installed on Windows 98, Windows Me and Windows NT systems. However, they need to be in<br />
the installation package to accommodate Windows 95 systems.<br />
Options for installing<br />
There are three ways of installing the <strong>NATMAP</strong> <strong>Raster</strong> Viewer - the method you choose is really determined by<br />
<strong>NATMAP</strong> RASTER <strong>2003</strong> USER GUIDE
where you want to store the map images and your system configuration.<br />
The map images used by the system are stored on the CDs in compressed form. The images are decompressed by<br />
software. Thus, the performance of the system is largely determined by the speed of the CPU. The next factor that<br />
affects performance is the speed of CD-ROM drive. On a system with a fast CPU ( > 600MHz) and sufficient disk<br />
space, performance can be improved by using the first installation procedure as outlined below. Otherwise, use the<br />
second installation procedure.<br />
Installation Procedures Advantage Disadvantage<br />
1. Copy to and install from hard<br />
disk/network drive<br />
2. Install directly from CD<br />
3. Install software from CD, and copy<br />
some or all maps/layers at a later date<br />
No need to change CDs<br />
when changing layers or<br />
maps<br />
Faster system response<br />
when loading maps<br />
Do not need to use hard<br />
disk space to store maps<br />
Do not need to use all hard<br />
disk space to store maps<br />
Requires 1.2GB of hard drive space for<br />
each product<br />
Requires user to swap CDs if changing<br />
layers and maps<br />
Slower system response when loading<br />
maps<br />
May require user to insert CDs if some<br />
layers and maps are still accessed via<br />
CD<br />
Best for advanced users<br />
Copying CDs to Hard Disk<br />
Automatic installation<br />
1. Uninstall any old versions of the Viewer<br />
2. Download this batch file and follow the instructions.<br />
Manual installation<br />
If you want to run <strong>NATMAP</strong> <strong>Raster</strong> without the CDs, the data on the CDs should be copied to a local, or<br />
networked, hard disk on your system. You will need 1.2GB of free space on your hard disk for all the <strong>Raster</strong> map<br />
images in each individual product.<br />
1. Uninstall any old versions of the Viewer<br />
2. Create a directory at the desired network location (eg 'C:\<strong>NATMAP</strong>\')<br />
3. Copy all of CD1 to the new network directory<br />
4. From CD2, copy the \<strong>Raster</strong>s\\ directory into the \<strong>Raster</strong>s\ directory on your hard drive<br />
5. setup.exe can be run from the hard disk to install the <strong>NATMAP</strong> RASTER VIEWER software. Follow the onscreen<br />
instructions.<br />
Note that if you are installing the software on a network with security restrictions, you should NOT install as<br />
'Administrator' but as 'Normal <strong>User</strong>'.<br />
Installing and running from CD<br />
Note: There is no AutoRun feature on the CD.<br />
After uninstalling any old versions of the Viewer, run Setup.exe which is located in the top level directory on CD1.<br />
To run this file, insert the CD-ROM labelled CD1 into your CD drive. Then either:<br />
browse to the top directory of the CD in Windows Explorer and double click on Setup.exe; or<br />
go to Start > Run..., and in the box type D:\Setup.exe (if your CD drive is not D: then use the appropriate<br />
letter.<br />
Follow the on-screen directions.<br />
<strong>NATMAP</strong> RASTER <strong>2003</strong> USER GUIDE
Installing from CD and copying maps/layers later<br />
If you have already installed the <strong>NATMAP</strong> RASTER VIEWER from the CD-ROM and you want to access the data<br />
from a local or networked hard drive, then:<br />
Uninstall any old versions of the Viewer<br />
Download this batch file and follow the instructions to copy maps to your hard drive.<br />
When the setup file begins to run, hit Cancel.<br />
When you next run the <strong>NATMAP</strong> RASTER VIEWER, without the matching CD in the drive, the software will prompt<br />
you to specify the new location for the map files. Follow the on-screen instructions to adjust the configuration of<br />
the software.<br />
The <strong>NATMAP</strong> RASTER VIEWER is able to operate with some map data files located on the hard disk and some<br />
located on the CDs. This type of configuration is intended for advanced users only. The <strong>Raster</strong> Viewer Configurator<br />
tool is provided to configure how the software locates map data files.<br />
Installing other <strong>NATMAP</strong> <strong>Raster</strong> <strong>2003</strong> products<br />
If, for example, you have purchased Mapsheets <strong>2003</strong>, and then purchased Mosaic <strong>2003</strong> (or vice versa), you do<br />
NOT need to reinstall the Viewer. The registry keys that are installed as part of the installation process include<br />
keys for ALL layers - all you need to do is use the <strong>Raster</strong> Viewer Configurator to enable the Viewer software to<br />
locate the maps from the other product - the same process you would use if you had installed the software from<br />
the CD and then copied the maps to your hard drive. This is only applicable to the <strong>2003</strong> releases.<br />
Uninstalling the new Viewer<br />
To remove the software, run Start > Settings > Control Panel > Add/Remove Software Select <strong>NATMAP</strong> RASTER<br />
VIEWER, then Add/Remove. The uninstallation software will then remove the files, registry entries and Start menu<br />
items. Any maps or layers you have copied to your hard drive will not be uninstalled.<br />
STARTING THE VIEWER<br />
via Start Menu<br />
The Viewer is started by selecting the <strong>NATMAP</strong> RASTER VIEWER item available via the Start menu. This may be<br />
done by selecting Start > Programs > <strong>NATMAP</strong> RASTER VIEWER (or the name provided by the user on installation)<br />
> <strong>NATMAP</strong> RASTER VIEWER.<br />
via Windows Explorer / Command Prompt<br />
This Viewer may also be started by executing the <strong>Raster</strong>Viewer.exe file located in the Html directory of the path<br />
to which the Map Viewer was installed.<br />
via Internet Explorer<br />
If you are already using Internet Explorer, the Map Viewer can be loaded through the File|Open dialog box. Note:<br />
Only the html page <strong>Raster</strong>Viewer.html should be loaded in this manner. Attempting to load other pages will fail<br />
as they are designed to work only as part of a whole, and cannot be accessed separately.<br />
via the Desktop icon<br />
A desktop icon will be created at installation. Double-clicking on this icon will launch the <strong>NATMAP</strong> <strong>Raster</strong> Viewer.<br />
Please note that a desktop icon will not be created on some network systems with restricted security privileges for<br />
users.<br />
<strong>NATMAP</strong> RASTER <strong>2003</strong> USER GUIDE
Selecting Maps Using the <strong>Raster</strong> Viewer<br />
Select a Layer<br />
Search by <strong>NATMAP</strong> name or number<br />
Search by Coordinates<br />
Search by Index Map<br />
Search by Place Name<br />
Selecting a layer<br />
You can also choose which map series, scale or dataset to use. In <strong>NATMAP</strong> <strong>Raster</strong> <strong>2003</strong> this is called a layer<br />
<strong>NATMAP</strong> <strong>Raster</strong> product contains different layers - for specific information refer to Product Components.<br />
. Each<br />
The pop-up menu located at the bottom-right of the screen lists the layers available to view. The largest scale<br />
which is part of each product is the default layer. You can change the layer to view at any time by clicking on the<br />
arrow and selecting the appropriate layer.<br />
You can add or remove layers using the RASTER VIEWER CONFIGURATOR. However, you must have a valid<br />
mapdata.txt file associated with the layer which contains information about the map images making up the layer.<br />
Selecting a map - Overview<br />
In the top left of the Viewer is a small map of <strong>Australia</strong> covered by five buttons. Each button corresponds to a<br />
different way of selecting a map.<br />
You can select a map by:<br />
<strong>NATMAP</strong> name or number<br />
coordinates as latitude and longitude<br />
coordinates as easting, northing and zone<br />
the <strong>NATMAP</strong> Index Map<br />
the Place Name Search.<br />
<strong>NATMAP</strong> RASTER <strong>2003</strong> USER GUIDE
Viewing Maps Using the <strong>NATMAP</strong> <strong>Raster</strong> Viewer<br />
Overview<br />
Map Pane<br />
Moving around the map<br />
Accessing help and the Web<br />
Changing Layers<br />
Map Windows<br />
Window control buttons<br />
Coordinate Display<br />
Exporting<br />
Printing<br />
Viewing a map - Overview<br />
The following image shows the appearance of the view a map screen.<br />
The screen contains windows, buttons and text boxes. This section provides an overview of the screen. Subsequent<br />
sections provide more detail about each button, text box, etc.<br />
The screen is divided into two broad areas: the right pane that displays the map, and the left pane that contains<br />
controls. These are called the map pane and the tools pane respectively.<br />
The map pane contains:<br />
the main image of the map<br />
a blue cross hair that marks the centre point of the map<br />
two overlay windows: the Locator window and the Magnifier window (the three other overlay and popup<br />
windows - Map Information, Legend, and Climate - are not shown in the example). More information about<br />
these windows is available in the Map Windows page<br />
the current map name and sheet number displayed at the top right of the screen for the appropriate layer<br />
you are viewing. Note that the Satellite Image layer in the Mosaic displays the 1:250 000 scale map name<br />
and number<br />
the icons for the pan, zoom, click-pan, and zoom-to-extents tools at the top left of the screen.<br />
The tools pane is split into vertical sections.<br />
At the top is the select-a-map graphic that allows you to return to the Select Map mode. In the middle of the left<br />
pan are a series of buttons and text boxes. From top to bottom these are:<br />
buttons to show or hide the locator, magnifier or map information window, and the centre marker<br />
buttons that select the type of position information: latitude/longitude or grid; its format: decimal degrees or<br />
degrees/minutes/seconds; and the datum for the co-ordinate system: GDA or AGD for lat/long, MGA or AMG<br />
for grid<br />
text boxes to display the position information<br />
buttons to export or print the entire map or the current map view.<br />
To maximise the clarity of the map, check that you have optimised your screen colour settings. You should also<br />
<strong>NATMAP</strong> RASTER <strong>2003</strong> USER GUIDE
efer to the note on image clarity for other tips on improving the display of the map.<br />
The Map Pane toggle button<br />
The fraction of the screen used by map image can be increased by hiding the left pane. To hide the left pane of<br />
the map screen, click on the icon at the top left side of the map screen.<br />
The icon acts as a toggle: one click hides the left pane. Another click un-hides the left pane.<br />
Moving around a map<br />
At the top left side of the map pane are four buttons with icons. These buttons are used to select particular<br />
modes. When the cursor is over the map display area, its shape is determined by which mode has been selected.<br />
The Zoom to Extents tool<br />
The Zoom to Extents button will cause the map to be redisplayed showing its full extents. The map sheet will fill<br />
the map display window.<br />
The Hand-Pan Tool<br />
Clicking on this tool selects Hand-Pan mode. To pan the map, place the mouse over the map, press and hold<br />
down the left mouse button. Drag the mouse in the direction you wish the map to pan. To complete the pan,<br />
release the left mouse button.<br />
Notes :<br />
it is possible to drag the map completely off the screen. To relocate the map into the viewable area, use the<br />
Zoom to Extents button described below<br />
this tool only allows panning on a single map sheet. To move to another map sheet, use the click-pan<br />
method described below, or select the desired map using the select map methods.<br />
You can switch from Pan mode to Zoom mode temporarily by pressing both the left and right mouse buttons<br />
simultaneously, or by pressing the shift key followed by the left mouse button.<br />
The Zoom Tool<br />
Clicking on this tool selects Zoom mode. To increase the zoom of the map, place the mouse over the map and<br />
press and hold down the left mouse button. Move the icon towards the bottom of the screen. As the mouse moves<br />
the map will zoom. When the map has been zoomed enough, release the mouse button. The map will now refresh<br />
itself and show greater detail. There may be a short pause as additional image data is read from the CD and<br />
decompressed. To zoom out drag the icon towards the top of the screen.<br />
Note that even in zoom mode, the map will recentre onto the position you clicked.<br />
You can switch from Zoom mode to Pan mode temporarily by pressing both the left and right mouse buttons<br />
simultaneously, or by pressing the shift key followed by the left mouse button.<br />
This style of Zoom tool is standard to all ER Mapper applications. No Zoom Box tool, which is the more common<br />
style of Zoom tool used in Windows applications, is available as yet with the standard ER Mapper software<br />
developers kit which was used in developing the <strong>NATMAP</strong> <strong>Raster</strong> Viewer. At some point in the future ER Mapper<br />
may include the Zoom Box tool in their software developers kit, in which case it will be added to the <strong>NATMAP</strong><br />
<strong>Raster</strong> Viewer.<br />
<strong>NATMAP</strong> RASTER <strong>2003</strong> USER GUIDE
Click-Pan and Panning from map to map<br />
Clicking on this icon selects Pointer mode, which is used to:<br />
obtain the position of locations on the map<br />
click-pan mode.<br />
In Click-Pan mode, clicking on the map will cause the map to be panned so that the clicked point is now the<br />
centre of the map (as indicated by the blue cross hair).<br />
In Mapsheets, if you click on a point that is beyond the edges of the current map region then a new map will be<br />
loaded that contains the clicked location. The new map will be at the same zoom level as the previous view and<br />
will be centred on the clicked point. There is no difference between the Click-Pan tool and the Hand-Pan tool for<br />
Mosaic images, as there is only one image to be loaded.<br />
Click-Pan is intended to make it easy to pan the map to follow a feature such as a road or river. Simply click on a<br />
point on the road or river you wish to follow and the map will be centred over the clicked position. For Mapsheets<br />
layers, if the river or road moves off the current map simply click on the blank spot next to the current map and<br />
the neighbouring map will be loaded in the position that you clicked.<br />
Click-Pan is also provided by the Locator and Magnifier windows. Clicking on the maps within the Magnifier and<br />
Locator windows causes the map that matches the clicked point's location to be loaded in the main map view,<br />
centred on the clicked point. In this way the magnifier and locator windows can be used to select and load a new<br />
map.<br />
How to access on-line and help documents<br />
In the bottom left-hand corner of your screen, there are four links to on-line and help documents:<br />
clicking on the BASIC HELP text will open a new window with the Quick Help <strong>Guide</strong>. This page contains<br />
an overview of basic searching and viewing tools<br />
clicking on the USER GUIDE text will open a new window with this <strong>User</strong> <strong>Guide</strong><br />
clicking on the BUY MAP text will open a new window which links to the on-line <strong>NATMAP</strong> Retailers page<br />
on the <strong>Geoscience</strong> <strong>Australia</strong> website. You can find your nearest <strong>NATMAP</strong> retailer using this tool. You will<br />
need an Internet connection for this tool to work<br />
clicking on the <strong>NATMAP</strong> logo will take you to the <strong>Geoscience</strong> <strong>Australia</strong> web site. You will need an Internet<br />
connection for this tool to work.<br />
<strong>NATMAP</strong> RASTER <strong>2003</strong> USER GUIDE
Exporting <strong>NATMAP</strong> <strong>Raster</strong> Maps<br />
Overview<br />
File Sizes<br />
Exporting from the Viewer<br />
Exporting from the DOS prompt<br />
<strong>Raster</strong>Export software<br />
Exporting overview<br />
There are three ways in which the maps in <strong>NATMAP</strong> <strong>Raster</strong> <strong>2003</strong> can be converted into other common image<br />
formats such as TIFF, GeoTIFF, JPEG, Windows Bitmap (BMP) and Portable Network Graphics (PNG) formats:<br />
using the exporting functions in the Viewer<br />
from the DOS prompt using <strong>Raster</strong>Convert (Mapsheets only), which enables a batch file to be written<br />
automatically to convert multiple files<br />
using the <strong>Raster</strong> Exporter, a stand-along software package for providing a simple graphical user interface for<br />
selecting maps and output image options (Mapsheets only).<br />
Can I directly export to OziExplorer OZF2 format for use with OziExporerCE?<br />
At this stage no. There are a couple of ways to do this:<br />
for individual maps in the Mapsheets product, simply import the ECW into OziExplorer and then convert it to<br />
OZF2<br />
for subset areas of the Mosaic layers or Mapsheets, export to GeoTIFF first. If your GeoTIFF file is large,<br />
download the free ECW compressor from ER Mapper and compress the GeoTIFF to an ECW before importing<br />
into OziExplorer. (Note that there is a bug with saving the current view to an ECW file).<br />
Why doesn't <strong>Raster</strong>Convert or the <strong>Raster</strong> Exporter work for all layers?<br />
<strong>Raster</strong>Convert and the <strong>Raster</strong> Exporter only work for Mapsheets layers, or for the small-scale Mosaic layers,<br />
because they are designed to export single files only. The 1:250 000 scale, 1:1 000 000 scale and Satellite Image<br />
Mosaics are all very large files, so they cannot be exported using these extra pieces of software because of the file<br />
size limitations for exporting large files that are imposed by the ER Viewer software used in the Viewer and your<br />
computer's processing power.<br />
These utilities are only included in the Mapsheets product. However, if the Mosaic layers are added to a Viewer<br />
installed from Mapsheets, then both utilities will recognise these layers and allow you to attempt an export. If you<br />
do, then the export warning dialog box will appear.<br />
Installation<br />
The ECW Conversion Utilities are automatically installed when you install the <strong>NATMAP</strong> RASTER VIEWER.<br />
File sizes<br />
Approximate exported file sizes at 100% resolution are:<br />
JPEG - 2-3 times the size of the original ECW; file size approx 3-7MB<br />
Bitmap, PNG or TIFF/GeoTIFF - 20-50 times original size; file size approx 70-120MB<br />
Note that there is a limit on the size and quality of the file you can export.<br />
<strong>NATMAP</strong> RASTER <strong>2003</strong> USER GUIDE
Exporting from the viewer (Mapsheets and Mosaic)<br />
Refer to the Viewer help.<br />
Exporting from the DOS prompt using <strong>Raster</strong>Convert (Mapsheets only)<br />
1. From the Start Menu, open an MSDOS Command Prompt window<br />
2. Change to the directory containing the ECW Conversion utilities. These utilities are located in the Tools subdirectory<br />
of the path to which <strong>NATMAP</strong> RASTER VIEWER was installed. In this example we will assume that<br />
the Map Viewer was installed in C:\Program Files\<strong>NATMAP</strong>\<strong>NATMAP</strong> RASTER VIEWER\1.4<br />
3. Run the ECWConvert program. For example:<br />
C:\Program Files\<strong>NATMAP</strong> RASTER VIEWER\1.4\Tools> <strong>Raster</strong>Convert d:\maps\cd2\sf5504.ecw<br />
sf5504.jpg<br />
where d:\maps\cd2\sf5504.ecw is the input ECW file and sf5504.jpg is the filename of the image to<br />
create. Because the extension ".jpg" was given for the output file a JPEG image will be created.<br />
The <strong>Raster</strong>Convert program can take up to three command line parameters. Its usage is as follows:<br />
Where:<br />
<strong>Raster</strong>Convert ecwfile [outputfile [geotiff | tiff | jpg| png | bmp]]<br />
ecwfile is the ECW file to convert<br />
outputfile is the filename of the image to create. This parameter is optional. If it is not specified then the<br />
output file produced will be the same as the ECW file with the extension changed to ".tif". For example, if the<br />
input file is sf5504.ecw the output image will be sf5504.tif. The output format will be GeoTIFF.<br />
The third optional parameter specifies what type of image to create. If this parameter is not specified then the<br />
output image type is determined from the output file name. If no type can be determined then GeoTIFF will be<br />
used.<br />
<strong>Raster</strong> Exporter (Mapsheets only)<br />
1. You can run <strong>Raster</strong>Export from the Start menu by selecting Programs > <strong>NATMAP</strong> RASTER VIEWER ><br />
<strong>Raster</strong>Export. Or, using Windows Explorer, you can double click on the <strong>Raster</strong>Export.exe file located in the<br />
Tools directory of the path to which <strong>NATMAP</strong> RASTER VIEWER was installed.<br />
2. The <strong>Raster</strong>Export program will start and you will be presented with the main window:<br />
<strong>NATMAP</strong> RASTER <strong>2003</strong> USER GUIDE
3. Select the map you wish to export from the lists. The lists are synchronised, so selecting a map name from<br />
the left list will update the selected map number in the right list. To quickly find a map name, click in the<br />
selected map name box and type the first letter of the map you are after. You should then be taken to the<br />
first map starting with that letter. Note that more than one map name (or map number) can be selected<br />
using the standard Windows keyboard modifiers and .<br />
4. Once you have selected a map(s), click on the Export button.<br />
5. The window that you will see depends on whether you selected one map, or more than one map.<br />
Single Map selected<br />
You will be presented with a standard Save As window where you can enter the name of the image file you<br />
wish to create. For example:<br />
Once you have entered the name of the image you want to create, click on the Save button.<br />
6. If you have entered a TIFF file name then you will be presented with the following window asking you to<br />
select which TIFF format to save in: GeoTIFF or TIFF. You can also choose whether to use LZW compression.<br />
<strong>NATMAP</strong> RASTER <strong>2003</strong> USER GUIDE
Select which TIFF format and compression you require and click on OK.<br />
7. You will then be presented with a window asking for the required resolution of the output image.<br />
Select, or enter, the output resolution you require and click on OK.<br />
Note: Most of the ECW images are quite large and maintaining the original resolution (100%) will require<br />
significant amounts of memory. Also, depending on the output format, very large image files (50 to 100MB)<br />
may be produced.<br />
8. Your output image file will now be created and you will be taken back to the main <strong>Raster</strong>Export window<br />
where you can select another map to export, or click on the "Exit" button to exit the program.<br />
Two or more maps selected<br />
If you selected more than one map, then you will be shown the following window:<br />
<strong>NATMAP</strong> RASTER <strong>2003</strong> USER GUIDE
9. Press the Browse button to browse to the folder in which you want the exported maps to be created.<br />
Use output image combo box to select the format for the exported maps.<br />
Select the output resolution.<br />
10. If you selected GEOTIFF or TIFF format you will be shown the following window, which allows you to choose<br />
to use either LZW compression or no compression.<br />
When all the settings for the export operation are correct, press the OK button.<br />
The selected maps will be exported.<br />
11. If the maps were selected using Map Names, the files created will have the same name as the map. For<br />
example exporting the Alice Springs map to a TIFF file this way will produce a file called "ALICE SPRINGS<br />
ED2 - 1996.tif". If the maps were selected using Map Numbers then the files created will have the same<br />
name as the map number. Exporting the Alice Springs map this way would produce a file called 'SF53-14.tif'<br />
<strong>NATMAP</strong> RASTER <strong>2003</strong> USER GUIDE
Using the <strong>Raster</strong> Configurator<br />
Configurator overview<br />
Warning: incorrect use of this tool may render the <strong>NATMAP</strong> <strong>Raster</strong> Viewer inoperative. Please spend time<br />
reading and understanding these instructions before making modifications to the default configuration.<br />
<strong>NATMAP</strong> <strong>Raster</strong> Viewer can view maps and layers located in different places - on different CDs, on your computer's<br />
hard drive, or on a shared computer through a network. When you install the <strong>NATMAP</strong> <strong>Raster</strong> software, the Viewer<br />
will only search for maps in one of the above locations (which one depends upon from where you ran the Setup<br />
program and whether you have installed the Viewer from the Mapsheets or Mosaic products).<br />
The Configurator is a tool that helps you manage where your maps and layers are located, and tells the Viewer<br />
where to look for maps to load. This is especially useful when you have moved the location of your maps (for<br />
example copying some maps from the CD to your hard drive).<br />
You can use the Configurator to:<br />
search for maps in more than one location<br />
add search paths for new layers<br />
change a search path for a layer<br />
The viewer searches for a required map data file in the order and location specified by each element of the search<br />
path until the required map data file is found or the search path is exhausted. The default configuration provides<br />
only one element in the search path. Hence, map data can only be found in one location. Adding a new element to<br />
the search path for a particular map series will configure the viewer to look in two or more locations. The<br />
configurator provides the ability view, change, add, re-order and delete map search paths for each map series,<br />
and for each release version of the viewer software.<br />
Administrators of computer networks or XP machines should read this important notice on using the Configurator<br />
over a computer network with restricted administrative privileges for users.<br />
I've changed the location of my maps, or added a new location, using the Configurator. The changes<br />
don't appear in the Viewer.<br />
If you make changes in the Configurator, make sure you have closed the Viewer so that changes will update<br />
properly. As the Viewer runs in an Internet Explorer window, any changes you make to map layers will not be<br />
refreshed in the window. The Viewer needs to be closed and restarted for changes to be activated.<br />
Check that you have selected the correct folder.<br />
Running <strong>Raster</strong> Viewer Configurator<br />
The <strong>NATMAP</strong> RASTER VIEWER Configurator is automatically installed when you install the <strong>NATMAP</strong> RASTER<br />
VIEWER.<br />
You can run the Configurator from the Start menu by selecting Programs > <strong>NATMAP</strong> RASTER VIEWER > <strong>Raster</strong><br />
Viewer Configurator. Or, using Windows Explorer, you can double click on the <strong>Raster</strong>ViewerConfigurator.exe file<br />
located in the Tools directory of the path to which <strong>NATMAP</strong> RASTER VIEWER was installed.<br />
The <strong>Raster</strong> Viewer Configurator program will start and you will be presented with the main window:<br />
<strong>NATMAP</strong> RASTER <strong>2003</strong> USER GUIDE
Adding a search path for a map layer<br />
Removing a search path for a map layer<br />
Modifying a search path<br />
<strong>NATMAP</strong> RASTER <strong>2003</strong> USER GUIDE
Using <strong>NATMAP</strong> <strong>Raster</strong> in Other Applications<br />
Using with GIS/CAD or graphics programs<br />
Using with GPS<br />
Using <strong>NATMAP</strong> <strong>Raster</strong> maps in GIS, CAD or graphics programs<br />
The simplest method for using the <strong>NATMAP</strong> <strong>Raster</strong> images as a backdrop within a GIS environment or a graphics<br />
package is to obtain the appropriate ECW plugin for the software you are running from the ER Mapper web site.<br />
<strong>Geoscience</strong> <strong>Australia</strong> does not take any responsibility for the use of these plug-ins. For more information or<br />
support, please contact ER Mapper.<br />
If you don't want to use the ECW format, then the images will need to be exported using the <strong>Raster</strong> Exporter for<br />
Mapsheets or the exporting tool in the Viewer for Mosaic and/or Mapsheets. You can convert map images to<br />
GeoTIFF (to retain coordinate information) or TIFF, JPEG, BMP or PNG files.<br />
If you want to access the vector information from which the <strong>NATMAP</strong> <strong>Raster</strong> images are made, then you will need<br />
to obtain GEODATA TOPO-250K data for your area of interest.<br />
How do I reproject maps in <strong>NATMAP</strong> <strong>Raster</strong> for use in other applications?<br />
<strong>NATMAP</strong> <strong>Raster</strong> does not have the functionality to reproject maps. You need to use a third-party imaging or GIS<br />
software (such as ER Mapper, ERDAS Imagine, or ESRI ArcGIS) to reproject the maps.<br />
Using <strong>NATMAP</strong> <strong>Raster</strong> maps with GPS<br />
<strong>NATMAP</strong> <strong>Raster</strong> maps are an ideal set of base maps for use in conjunction with Global Positioning Systems (GPS).<br />
To use <strong>NATMAP</strong> <strong>Raster</strong> with a GPS you will require a GPS receiver and probably some additional software and a<br />
portable computer. Because <strong>NATMAP</strong> <strong>Raster</strong> has not been specifically designed to work with any particular GPS<br />
system, the integration of <strong>NATMAP</strong> <strong>Raster</strong> images into each system will be different. You should fully investigate<br />
what is required to make such a system work. A quick option to see what is available in the way of software that<br />
will integrate GPS and <strong>NATMAP</strong> <strong>Raster</strong>, is to search the Internet for the category GPS,mapping,software and<br />
review the range of products on offer from different suppliers. Two major <strong>Australia</strong>n software vendors who support<br />
<strong>NATMAP</strong> <strong>Raster</strong> images in their software are OziExplorer and Advantech Design (producers of TrackRanger).<br />
Alternatively, you could visit your local specialist map shop or GPS distributor for advice.<br />
Many additional GPS software programs such as OziExplorer require additional calibration files in order to read the<br />
<strong>NATMAP</strong> <strong>Raster</strong> maps. Check with the software vendor for these; often, they are freely available.<br />
<strong>NATMAP</strong> RASTER <strong>2003</strong> USER GUIDE
Windows XP Service Pack 2 Issues<br />
Description of the Problem<br />
When starting <strong>Raster</strong> <strong>2003</strong> or earlier versions, users may be prevented from<br />
running the <strong>Raster</strong> Program. A yellow ‘Information Bar’ will appear between<br />
the toolbar and the content window in Internet Explorer. It will read ‘To help<br />
protect your security, Internet Explorer has restricted this files from showing<br />
active content that could access your computer. Click here for options...’<br />
You will be unable to click on any of the menu options.<br />
Cause of the problem<br />
The <strong>Raster</strong> program copies a number of HTML files to your local drive, which are accessed when you start the<br />
program. Some of these HTML files contain Javascript code to perform some basic functions e.g. to check that the<br />
browser is Internet Explorer.<br />
Windows XP Service Pack 2 includes improvements to Internet Explorer security, that prevent local web pages (i.e.<br />
pages stored on your computer) from running when they contain active content. This active content includes<br />
Javascript, Java applets and ActiveX controls. XP SP2 also includes a number of other add-ons that restrict popwindows<br />
and downloading of files in Internet Explorer.<br />
A full list of browser changes implemented in Windows XP SP2 can be found on the Microsoft website.<br />
Fixes for the problem<br />
Option 1: <strong>User</strong>s can opt to ‘allow blocked content’ by clicking<br />
on the yellow information bar, and selecting ‘Allow Blocked<br />
Content’.<br />
You will then be prompted with a dialog box, asking you<br />
whether you wish to let this file run active content. The active<br />
content in <strong>Raster</strong> (Javascript), will not harm your computer<br />
- you should select Yes to allow the file to run.<br />
Unfortunately this will only enable active content for the<br />
current Explorer window. You will need to repeat the above<br />
process for subsequent windows that you open (e.g. <strong>Raster</strong><br />
Viewer window).<br />
Option 2: Turn off the active content check in your browser. From the Tools menu in Internet Explorer select<br />
Internet Options. Under the Advanced Tab place a tick next to the box titled ‘Allow active content to run in<br />
files on My Computer’.<br />
<strong>NATMAP</strong> RASTER <strong>2003</strong> USER GUIDE
Please note that this may allow malicious active content in files on your local computer to cause problems so you<br />
should only do this if you feel confident in your computer’s security measures (i.e. you should have an up to date<br />
virus scanner and firewall). You may wish to uncheck this box when you have finished running <strong>Raster</strong>, to prevent<br />
malicious active content from running when not using <strong>Raster</strong>. If you opt to leave this box checked (and therefore<br />
allow active content to run for local files), then it is recommended that you check that your antivirus program will<br />
block malicious content from running locally.<br />
<strong>NATMAP</strong> RASTER <strong>2003</strong> USER GUIDE
<strong>NATMAP</strong> <strong>Raster</strong> Troubleshooting and Bugs<br />
Reporting a bug or problem<br />
Installing<br />
Starting the Viewer or Configurator<br />
Searching for a map<br />
Using the Viewer<br />
Map Images<br />
Exporting<br />
Printing<br />
Problems with other software<br />
Reporting bugs and problems<br />
How do I report a bug in <strong>NATMAP</strong> <strong>Raster</strong> <strong>2003</strong>?<br />
Bug reports should be submitted to <strong>Geoscience</strong> <strong>Australia</strong>. Find out how to contact us.<br />
Please ensure that you record as much detail as you can about the fault as non-specific faults are difficult to<br />
replicate.<br />
If you are reporting an error related to the content of <strong>NATMAP</strong> <strong>Raster</strong>, please state the map sheet name, number<br />
and latitude, longitude coordinates and what the error is.<br />
If you are reporting an error or crash in the software, please include:<br />
the details of your operating system<br />
computer specifications (Type and speed of CPU, amount of RAM, capacity of hard disk)<br />
what you were doing when you encountered the bug, including other software you had running<br />
any other non-Office software you have on your computer<br />
screen dumps of any error messages which appear.<br />
In <strong>2003</strong> the following bugs have been fixed:<br />
registration page location is set to installation drive rather than C: drive<br />
missing place names added.<br />
In 2002 the following bugs were fixed:<br />
GeoTIFF export function retains correct georeferencing information<br />
inaccuracies in image positions removed by regenerating and regeoreferencing all map images<br />
Print Current View bug in W9x systems removed (printing patch is now part of software).<br />
Installing<br />
I load the CD in and nothing happens. Isn't there an AutoRun?<br />
There is no AutoRun feature on the CD.<br />
Many users have their Viewer configured to read maps off the CDs. If there was an AutoRun feature, then it would<br />
try to run the Setup program every time the user was asked to swap CDs (which isn't very desirable). Therefore,<br />
no AutoRun feature was added.<br />
<strong>NATMAP</strong> RASTER <strong>2003</strong> USER GUIDE
Information on how to install the Viewer software from the CD can be found here.<br />
I load the CD and start Setup. I get an error message that says ‘This is not a valid Win32 application’ or<br />
‘This is not a system32 application’.<br />
This is caused by one of the following:<br />
problem with your CD-ROM driver<br />
an incorrectly downloaded file (not appropriate here)<br />
a virus.<br />
To work around this problem, you need to run the Setup from your hard drive instead of the CD. You can do this<br />
by either:<br />
full hard drive installation: Copy all your CDs to the hard drive (requires at least 1.2GB for 2 CDs). More<br />
information on installing from the hard drive, can be found here<br />
install from hard drive but leave maps on CD: Copy just the setup files (all files from the top level of your<br />
hard drive except for the '<strong>Raster</strong>s' folder) to a folder on your hard drive. Run Setup.exe from your hard<br />
drive. Once the Start screen is loaded, exit from the program, and launch the <strong>Raster</strong> Configurator. Specify<br />
where on your CD your maps are located by following the steps for adding a search path. This will load the<br />
correct location of the maps into the Viewer software.<br />
If the problem is your CD-ROM driver, you will need to obtain a new driver. Check your computer manual and/or<br />
contact your place of purchase for more information (you may be able to download one for free).<br />
When installing, I get an error with error code ‘0x80040707’.<br />
This is caused by an incompatibility between some Windows XP machines and InstallShield. More information and<br />
a solution can be found here.<br />
I am using Windows NT. Why does a desktop icon not appear?<br />
On some NT machines and systems the desktop icon for <strong>NATMAP</strong> <strong>Raster</strong> may not appear because of administrative<br />
restrictions. Please check with your system administrator. More information can be found in the Installation chapter<br />
in the <strong>User</strong> <strong>Guide</strong>.<br />
Why can't the Viewer find the maps after I have copied the maps to my hard drive?<br />
When copying maps to your C: drive or another network drive, ensure that:<br />
the maps from each CD are still stored in directories called ‘cd1’and ‘cd2’ in the chosen directory. For<br />
example, you have created a directory on your C: drive called ‘C:\Natmap’; in this directory you would have<br />
copied the ‘mapdata.txt’ file and created two directories called ‘cd1’and ‘cd2’, which contain the maps on CD1<br />
and CD2 respectively<br />
the search path for the Viewer to find the maps is set to the correct directory (in this example, the<br />
Configurator would need to be set to C:\Natmap in order for the maps to load correctly). Refer to the <strong>Raster</strong><br />
Viewer Configurator section for more details.<br />
Some files do not self-register when installing.<br />
e.g. ‘The following files did not self-register:<br />
C:\Program Files\Natmap\<strong>NATMAP</strong> RASTER VIEWER\1.4\Controls\ECWConverter.ocx. A device attached to the<br />
system is not functioning<br />
C:\Program Files\Natmap\<strong>NATMAP</strong> RASTER VIEWER\1.4\Controls\GazetteerControl.ocx. A device attached to<br />
the system is not functioning<br />
C:\Program Files\Natmap\<strong>NATMAP</strong> RASTER VIEWER\1.4\Controls\MapDataControl.ocx. A device attached to<br />
the system is not functioning<br />
C:\Program Files\Natmap\<strong>NATMAP</strong> RASTER VIEWER\1.4\Controls\Redfearn.ocx. A device attached to the<br />
system is not functioning.’<br />
Try the following:<br />
<strong>NATMAP</strong> RASTER <strong>2003</strong> USER GUIDE
check your version of Internet Explorer. We recommend Internet Explorer v5.5 but no earlier than v5.0. You<br />
may need to reinstall a later version.<br />
manually register files using the regsvr32 command. Click on Start > Run..., then in the dialog box type<br />
‘regsvr32’plus the full path name and file name. Include quotes if any names have spaces. You can also drag<br />
the icon representing the file from Windows Explorer into the dialog box ‘{installation path}\{filename}’. Hit<br />
OK and the file may register.<br />
you may have old versions of some operating system files, particularly if you are running Windows98. The<br />
files possibly causing the problem are msvcrt.dll and mfc42.dll, located in the System directory. Check the<br />
Microsoft website for more up-to-date versions (you need msvcrt.dll v6.10.8637.0 or later, and mfc42.dll<br />
v6.00.8665.0 or later). Rename any existing versions on your computer, and download the updated versions<br />
into the same directory.<br />
Starting the Viewer and using the Configurator<br />
Initialisation Problems<br />
If you have not inserted a <strong>NATMAP</strong> <strong>Raster</strong> CD into your CD drive or if you have changed your system since the<br />
last time it was run - for example, if you have copied all of the map data files to your hard drive - you will be<br />
presented with the following screen:<br />
If you insert a CD and choose Retry and the mapdata.txt file is still not found, you will be presented with the<br />
same screen. You should probably choose Setup at this stage.<br />
Choosing Setup will present you with the following screen:<br />
Choose OK and you will be presented with the standard File Open box. Use the dialog box to select the<br />
maps\mapdata.txt file, then press OK. For example:<br />
<strong>NATMAP</strong> RASTER <strong>2003</strong> USER GUIDE
The Viewer and other software should now run as normal.<br />
Loading a CD after an Viewer initialization error appears does not relaunch the Viewer.<br />
If the <strong>Raster</strong> Configurator is set to search for maps on CDs only, and the Viewer is launched without a CD, then<br />
an initialization error will appear. Loading a CD and pressing Retry will not work.<br />
Solution 1: Press Cancel, close the Viewer and relaunch with the CD in the CD-ROM drive.<br />
Solution 2: If disk space permits, copy data to the hard drive and reconfigure the map image search path to the<br />
folder of your choice on your computer's hard drive.<br />
I've changed the location of my maps, or added a new location, using the Configurator. The changes<br />
don't appear in the Viewer.<br />
You need to close the Viewer first before any changes you make in the Configurator are activated. More<br />
information can be found here.<br />
I have just installed <strong>NATMAP</strong> <strong>Raster</strong> but whenever I start I get the following message:<br />
‘An ActiveX control on this page is not safe. Your current security settings prohibit running unsafe<br />
controls on this page. As a result this page may not display as intended.’<br />
I have changed my Internet Explorer security setting to LOW but I still cannot load any maps.<br />
This is an Internet Explorer problem and appears to be caused by a problem.<br />
1. Remove Internet Explorer<br />
2. Rename the COMCAT.DLL file in your %SystemRoot%\System32 folder<br />
3. Reinstall Internet Explorer.<br />
An error message appears requiring a screen resolution of at least 800x600.<br />
The Viewer will not run on a screen resolution of less than 800x600 pixels. This is the minimum screen resolution<br />
at which all buttons, map windows and other links will fit. At 800x600 resolution, you will need to ensure that the<br />
Autohide property setting for the Windows task bar is turned on.<br />
The bottom of the Viewer screen is cut off. I can't change layers.<br />
When running a display at 800x600 pixels, the user should ensure that any task bars have their autohide<br />
property setting turned on. For the Windows task bar, this is done from Start > Settings > Taskbar, then ensuring<br />
that the Autohide check box is ticked.<br />
<strong>NATMAP</strong> RASTER <strong>2003</strong> USER GUIDE
Searching for a map<br />
I've launched the Search by <strong>NATMAP</strong> name, Search by <strong>NATMAP</strong> number, or Search by Coordinates tools. I<br />
then change the map layer, but the drop-down lists do not update.<br />
This is a known bug. To work around this, select the map layer you wish to view, and then click on the<br />
appropriate search tool button located in the top left of your screen. The correct lists of map names will appear<br />
and you will be able to load the correct map layer.<br />
Why do I get more than one result for the same place?<br />
In many cases, you may get two or more results for the same name, place type and state. This is because the<br />
original Gazetteer has hundreds of feature codes, which has been aggregated into the 20+ Place Types used in the<br />
<strong>NATMAP</strong> <strong>Raster</strong> Place Name Search and the on-line Place Name Search on the <strong>Geoscience</strong> <strong>Australia</strong> website to<br />
make searching easier. Each individual entry remains in the data; however, in the <strong>NATMAP</strong> <strong>Raster</strong> Place Name<br />
Search the results are displayed with the aggregated Place Type, not the original feature code.<br />
I can't find my Place Name, but I know it exists<br />
If you're sure that the place name is spelt correctly, try using a alternate name. Many place names have<br />
alternative names, some of which are officially recognised and some which aren't. If you think that a place name<br />
has been omitted, or is spelt incorrectly, please contact <strong>Geoscience</strong> <strong>Australia</strong>.<br />
I've clicked on the Place Name, but it's taken me to the wrong place.<br />
Check you are clicking on the correct result - see the note on multiple results. Another reason is that large area<br />
features such as administrative areas, or long linear features such as rivers, are difficult to assign one coordinate<br />
point to. If you believe that there is an error in the position of a feature, please please contact <strong>Geoscience</strong><br />
<strong>Australia</strong>.<br />
I get a mountain that doesn't have an elevation.<br />
Not every mountain, hill or trig station in the Place Name Search has an elevation attached to it. At the moment<br />
around 500 of these features have elevations attached, and more will be progressively added in future versions.<br />
I've gone back to the Place Name Search and my results have disappeared.<br />
The bottom right part of the Place Name Search page is generated each time the Place Name Search is loaded. Any<br />
place name, state or place type you have previously entered will still be there - you just have to click on the<br />
Search button again to reload the results.<br />
I zoom in on the Index Map and the 1:250 000 scale map boundaries disappear.<br />
An explanation can be found here.<br />
Using the Viewer<br />
The climate graph doesn't update when I change maps or move around.<br />
The Climate Graph window opens a new Internet Explorer window and displays a JPEG image of the climate graph<br />
for the particular 1:250 000 scale map area you have viewed on your screen. However, if you leave the Climate<br />
Graph window open, and you move maps using either the Hand Pan or the Click Pan tool, the climate graph will<br />
not update in the new window.<br />
<strong>NATMAP</strong> RASTER <strong>2003</strong> USER GUIDE
Solution:Reclick the Show Climate button. The correct graph will be displayed.<br />
An error message appears saying ‘Tile '' has ’.<br />
This message may appear when scrolling or point-panning on some machines with slower PC processing speeds. It<br />
is resolved by restarting the Viewer.<br />
Maps do not appear in the Locator and Magnifier windows.<br />
If there is an error message saying that \20M.ecw or \5M.ecw cannot be found, then you<br />
should uninstall the Viewer and reinstall in order to restore these maps.<br />
If there is no error message, and the Locator and Magnifier windows remain green, then the problem is caused by<br />
a limitation in Internet Explorer versions earlier than v5.5. This limitation was removed at IE5.5 Service Pack 1.<br />
You are best upgrading Internet Explorer to at least v5.5 SP1.<br />
I have loaded a map, and am not zooming or panning around. My CPU usage stays high (at least 60%).<br />
As with missing Locator or Magnifier maps, this is caused by a limitation in versions of Internet Explorer prior to<br />
v5.5 SP1. If this problem persists, you need to upgrade to at least this version of IE to better handle map display.<br />
I have moved the Locator / Magnifier / Information window completely off the screen and can't drag it<br />
back.<br />
Press the Show Locator button on the left-hand side of the screen twice. This will close and reload the window so<br />
it is partially visible on the side of the screen.<br />
I'm having trouble using the Zoom tool. Why isn't there a Zoom Box tool?<br />
Find out more about the Zoom tool here.<br />
I click on the centre of the blue cross in the main Viewer. The map then jumps and the coordinates<br />
change slightly.<br />
This is caused by a slight incompatability between the cursor, the centre of the cross, coordinate calculations<br />
performed by the Viewer software, and maintaining the shape of the map in the browser window, which adds up to<br />
around 1-2 pixels (which for the 1:250 000 scale map layers is about 30-60 metres).<br />
It is more significant when zoomed out, as each pixel on the screen represents a larger area on the map.<br />
There is no workaround for this bug; however, the error remains less than the stated accuracy of <strong>NATMAP</strong> <strong>Raster</strong><br />
which is 150m.<br />
Some of the coordinate display buttons don't work<br />
Some buttons are designed to be disabled depending upon which coordinate display mode you are in. More<br />
information can be found here.<br />
I'm using 800x600 screen resolution and I can't see the layer pop-up menu<br />
If you select the layer control box, and no pop-up menu appears, use the up- and down-arrow keys on your<br />
keyboard to move between the layers. Hit ENTER once you've chosen the appropriate layer.<br />
Map images<br />
<strong>NATMAP</strong> RASTER <strong>2003</strong> USER GUIDE
The map image isn't very clear and/or the colours aren't very good.<br />
Check you have:<br />
optimised your screen colour settings<br />
optimised your screen resolution<br />
read the note on image clarity.<br />
Grid lines are missing from some of the maps<br />
Some grid lines may disappear from the screen, especially on the index map. This is due to screen resampling of<br />
the ECW image. The grid lines will reappear when you change your zoom level.<br />
Exporting<br />
I have tried to export the current view as an ECW file, and I get the following message:<br />
There is a 700MB limit on exporting the current view as an ECW file. This is a limit imposed by the ECW software<br />
used in the Viewer.<br />
I tried exporting the current view or an individual map, and I get the following message:<br />
There is a limit on how large a file you can export which is imposed by a combination of your computer and the<br />
Viewer software. More information can be found here.<br />
Printing<br />
I'm having trouble printing to my Canon printer.<br />
Download and install the most recent driver for your Canon printer from the Canon website.<br />
I don't get a scale bar when I print from a Mosaic layer.<br />
This is because of the map projection used for the Mosaic layers.<br />
<strong>NATMAP</strong> RASTER <strong>2003</strong> USER GUIDE
More details can be found here.<br />
Problems with other software<br />
I can't run TrackRanger v3.3 to v3.5 after installing <strong>NATMAP</strong> <strong>Raster</strong> Viewer.<br />
The TrackRanger GPS navigation system produced by Advantech Design shares many ER Mapper files as the<br />
<strong>NATMAP</strong> <strong>Raster</strong> Viewer. These files have a .DLL (Dynamic Link Library) extension. TrackRanger uses different<br />
versions of these DLL files to the <strong>NATMAP</strong> <strong>Raster</strong> Viewer.<br />
If <strong>NATMAP</strong> <strong>Raster</strong> Viewer is installed after TrackRanger, TrackRanger may not work as installing <strong>NATMAP</strong> <strong>Raster</strong><br />
Viewer overwrites these shared DLL files.<br />
Solution:<br />
TrackRanger v3.6f will detect and upgrade the DLLs installed by <strong>NATMAP</strong> <strong>Raster</strong> <strong>2003</strong>. Versions of TrackRanger<br />
earlier than this may not work with <strong>NATMAP</strong> <strong>Raster</strong> <strong>2003</strong>.<br />
Earlier versions of TrackRanger will detect and upgrade DLLs from earlier versions of <strong>NATMAP</strong> <strong>Raster</strong>.<br />
I have installed the ArcGIS ECW plug-in - now I can't use the Viewer.<br />
As with TrackRanger, this is caused by a DLL conflict. As at the time of release we are working on a fix. An update<br />
will be posted on the <strong>NATMAP</strong> <strong>Raster</strong> web page.<br />
<strong>NATMAP</strong> RASTER <strong>2003</strong> USER GUIDE
The <strong>Raster</strong> Configurator<br />
Adding a search path for a map layer<br />
1. Select Version to change (most users will only have one version, the current one).<br />
2. Select the map series whose path you wish to change.<br />
3. Enter the new search path.<br />
Either type the new path in the Sub path text box, or click the ‘Browse...’ button to use a file explorer to select a<br />
sub path.<br />
<strong>NATMAP</strong> RASTER <strong>2003</strong> USER GUIDE
4. Click the Add button. The new path should be added to the list of search paths.<br />
5. Click the ‘Apply’ button to save these changes.<br />
Important note when adding or modifying a search path<br />
When you add (or modify) a search path, you need to select the folder above the folders containing the maps.<br />
The Configurator works by using information in a file in this location, rather than by pointing directly to the ‘cd1’ or<br />
‘cd2’ folders.<br />
<strong>NATMAP</strong> RASTER <strong>2003</strong> USER GUIDE
Installing and Starting <strong>NATMAP</strong> <strong>Raster</strong><br />
System Requirements<br />
Uninstalling previous versions<br />
Installing the New Viewer<br />
Registration<br />
Starting<br />
System requirements<br />
Recommended Minimum<br />
233MHz<br />
133MHz<br />
CPU: Pentium or<br />
Pentium<br />
faster<br />
Memory 64MB 32MB<br />
Disk<br />
Display<br />
Optical<br />
drive<br />
At least 26MB<br />
free for<br />
software; 1.2Gb<br />
for maps<br />
1024 x 768 with<br />
true colour<br />
4x or faster CD-<br />
ROM drive<br />
Browser IE5.5 IE5.0<br />
At least 26MB<br />
free for<br />
software<br />
800 x 600 with<br />
64K colours<br />
[see below]<br />
CD-ROM drive<br />
required<br />
Screen colour display settings<br />
To obtain the best quality on-screen display of the maps, a true colour (24 bit) display is strongly recommended.<br />
To utilise printing capabilities, a colour printer is recommended. A black and white printer may be used;<br />
however, the usefulness of the printed map images will be reduced.<br />
Macintosh users<br />
<strong>NATMAP</strong> <strong>Raster</strong> <strong>2003</strong> only exists as a Windows-based software package because much of the core third-party<br />
functionality is only supported in a Windows environment. We cannot support <strong>Raster</strong> on a Mcintosh Virtual PC -<br />
users can install it at their own risk.<br />
800x600 screen resolutions<br />
If you operate your display at 800x600 pixels, you should ensure that any task bars have their autohide<br />
property setting turned on. For the Windows task bar this is done from Start > Settings > Taskbar then ensuring<br />
that the Autohide check box is ticked.<br />
Installing/updating Internet Explorer<br />
The <strong>NATMAP</strong> <strong>Raster</strong> application and setup program will not function unless an appropriate version of Internet<br />
Explorer (IE5.5 or higher) is available on your system. No other browsers, including Netscape Navigator, are<br />
supported by the core third party functionality.<br />
You can run <strong>NATMAP</strong> <strong>Raster</strong> using IE versions earlier than 5.5 and later than 5.0. However, you may find that<br />
CPU usage blows out and the Locator and Magnifier maps may not display properly.<br />
It is recommended that users install the latest version of Internet Explorer, which is available from Microsoft on<br />
the Internet at http://www.microsoft.com.<br />
<strong>NATMAP</strong> RASTER <strong>2003</strong> USER GUIDE
If Internet Explorer version 5 or above is installed on your machine and you still receive an error message,<br />
please ensure you are running the Viewer correctly (see Starting the Viewer).<br />
Network restrictions<br />
If you are planning on running the <strong>NATMAP</strong> <strong>Raster</strong> Viewer and associated software on a network, your ability to<br />
install the software and to change layers using the <strong>Raster</strong> Viewer Configurator will depend upon your<br />
administrative privileges. If you are a restricted user, and the system administrator has installed the Viewer, you<br />
may not be able to:<br />
install a desktop icon;<br />
install any of the software.<br />
In the case where a standard user cannot install software, then the administrator will need to follow the<br />
installation procedures for installing from a network. The administrator will need to:<br />
install the software from its location on the network to each computer;<br />
add a desktop icon into the \Desktop directory;<br />
create a folder in the \Desktop\Start Menu\Programs\ directory called <strong>NATMAP</strong> RASTER VIEWER,<br />
and create shortcuts to the Exporter, the Configurator, the Viewer and the <strong>User</strong> <strong>Guide</strong>.<br />
This will ensure that the Viewer and the Configurator will operate correctly.<br />
Network XP users should also be aware of incompatabilities between the InstallShield installation software and<br />
XP. If you get an error message with an error code "0x80040707", then you should use this solution suggested<br />
by InstallShield to fix the problem.<br />
Uninstalling old viewers<br />
Note: Before installing a new version of <strong>NATMAP</strong> <strong>Raster</strong> you will need to remove any previous versions<br />
of the <strong>NATMAP</strong> <strong>Raster</strong> Viewer.<br />
To do this, go to Start Menu > Settings > Add/Remove Programs, and then select <strong>NATMAP</strong> RASTER VIEWER or<br />
AUSLIG RASTER VIEWER and the program will be removed.<br />
From release version 1.3 the <strong>Raster</strong> Viewer had a name change from "AUSLIG RASTER VIEWER" to "<strong>NATMAP</strong><br />
RASTER VIEWER". If you have a <strong>Raster</strong> Viewer version prior to 1.3 then it will be prefixed with ‘AUSLIG’ rather<br />
than ‘<strong>NATMAP</strong>’.<br />
If you have not uninstalled any previous versions of the Viewer, and you attempt to install the new <strong>Raster</strong><br />
Viewer, you will get an warning message. You should exit out of the installation process and use the above<br />
procedure to remove the previous version.<br />
Installing the new viewer<br />
The Setup.exe Program<br />
The setup program:<br />
<strong>NATMAP</strong> RASTER <strong>2003</strong> USER GUIDE
copies a series of OCXs and DLL files to your hard disk<br />
registers the OCXs and DLLs<br />
copies HTML files and program (.exe) files to the installation directory you specify<br />
copies the encrypted data files for the Place Name Search to the installation directory you specify<br />
creates registry keys that describe the configuration of the installed <strong>NATMAP</strong> <strong>Raster</strong> - that is, where the map<br />
images and data layers are located.<br />
These files require approximately 26MB of space on your hard disk.<br />
Note: On some systems, the installation program may report that some DLLs cannot be copied because the file<br />
is 'currently in use'. In general, it is safe to press the Ignore button to continue the installation. These files are<br />
usually already installed on Windows 98, Windows Me and Windows NT systems. However, they need to be in<br />
the installation package to accommodate Windows 95 systems.<br />
Options for installing<br />
There are three ways of installing the <strong>NATMAP</strong> <strong>Raster</strong> Viewer - the method you choose is really determined by<br />
where you want to store the map images and your system configuration.<br />
The map images used by the system are stored on the CDs in compressed form. The images are decompressed<br />
by software. Thus, the performance of the system is largely determined by the speed of the CPU. The next<br />
factor that affects performance is the speed of CD-ROM drive. On a system with a fast CPU ( > 600MHz) and<br />
sufficient disk space, performance can be improved by using the first installation procedure as outlined below.<br />
Otherwise, use the second installation procedure.<br />
Installation Procedures<br />
1. Copy to and install from hard<br />
disk/network drive<br />
2. Install directly from CD<br />
3. Install software from CD, and copy<br />
some or all maps/layers at a later<br />
date<br />
Copying CDs to Hard Disk<br />
Automatic installation<br />
Advantage<br />
No need to change CDs<br />
when changing layers or<br />
maps<br />
Faster system response<br />
when loading maps<br />
Do not need to use hard<br />
disk space to store maps<br />
Do not need to use all<br />
hard disk space to store<br />
maps<br />
Disadvantage<br />
Requires 1.2Gb of hard drive space for<br />
each product<br />
Requires user to swap CDs if changing<br />
layers and maps<br />
Slower system response when loading<br />
maps<br />
May require user to insert CDs if some<br />
layers and maps are still accessed via<br />
CD<br />
Best for advanced users<br />
1. Uninstall any old versions of the Viewer<br />
2. Download this batch file and follow the instructions.<br />
Manual installation<br />
If you want to run <strong>NATMAP</strong> <strong>Raster</strong> without the CDs, the data on the CDs should be copied to a local, or<br />
networked, hard disk on your system. You will need 1.2GB of free space on your hard disk for all the <strong>Raster</strong><br />
map images in each individual product.<br />
1. Uninstall any old versions of the Viewer<br />
<strong>NATMAP</strong> RASTER <strong>2003</strong> USER GUIDE
2. Create a directory at the desired network location (eg ‘C:\<strong>NATMAP</strong>\’)<br />
3. Copy all of CD1 to the new network directory<br />
4. From CD2, copy the \<strong>Raster</strong>s\\ directory into the \<strong>Raster</strong>s\ directory on your hard<br />
drive<br />
5. setup.exe can be run from the hard disk to install the <strong>NATMAP</strong> RASTER VIEWER software. Follow the onscreen<br />
instructions.<br />
Note that if you are installing the software on a network with security restrictions, you should NOT install as<br />
‘Administrator’ but as ‘Normal <strong>User</strong>’.<br />
Installing and running from CD<br />
Note: There is no AutoRun feature on the CD.<br />
After uninstalling any old versions of the Viewer, run Setup.exe which is located in the top level directory on<br />
CD1. To run this file, insert the CD-ROM labelled CD1 into your CD drive. Then either:<br />
browse to the top directory of the CD in Windows Explorer and double click on Setup.exe; or<br />
go to Start > Run..., and in the box type D:\Setup.exe (if your CD drive is not D: then use the appropriate<br />
letter.<br />
Follow the on-screen directions.<br />
Installing from CD and copying maps/layers later<br />
If you have already installed the <strong>NATMAP</strong> RASTER VIEWER from the CD-ROM and you want to access the data<br />
from a local or networked hard drive, then:<br />
Uninstall any old versions of the Viewer<br />
Download this batch file and follow the instructions to copy maps to your hard drive.<br />
When the setup file begins to run, hit Cancel.<br />
When you next run the <strong>NATMAP</strong> RASTER VIEWER, without the matching CD in the drive, the software will<br />
prompt you to specify the new location for the map files. Follow the on-screen instructions to adjust the<br />
configuration of the software.<br />
The <strong>NATMAP</strong> RASTER VIEWER is able to operate with some map data files located on the hard disk and some<br />
located on the CDs. This type of configuration is intended for advanced users only. The <strong>Raster</strong> Viewer<br />
Configurator tool is provided to configure how the software locates map data files.<br />
Installing other <strong>NATMAP</strong> <strong>Raster</strong> <strong>2003</strong> products<br />
If, for example, you have purchased Mapsheets <strong>2003</strong>, and then purchased Mosaic <strong>2003</strong> (or vice versa), you do<br />
NOT need to reinstall the Viewer. The registry keys that are installed as part of the installation process<br />
include keys for ALL layers - all you need to do is use the <strong>Raster</strong> Viewer Configurator to enable the Viewer<br />
software to locate the maps from the other product - the same process you would use if you had installed the<br />
software from the CD and then copied the maps to your hard drive. This is only applicable to the <strong>2003</strong> releases.<br />
Registering your <strong>NATMAP</strong> <strong>Raster</strong> product<br />
You are no longer required to register the geoMAP 250K DVD-ROM and the <strong>NATMAP</strong> Digital Maps 250K 2008<br />
(formerly <strong>NATMAP</strong> <strong>Raster</strong>). Information on using <strong>Geoscience</strong> <strong>Australia</strong> Products.<br />
Uninstalling the new Viewer<br />
<strong>NATMAP</strong> RASTER <strong>2003</strong> USER GUIDE
To remove the software, run Start > Settings > Control Panel > Add/Remove Software. Select <strong>NATMAP</strong> RASTER<br />
VIEWER, then Add/Remove. The uninstallation software will then remove the files, registry entries and Start<br />
menu items. Any maps or layers you have copied to your hard drive will not be uninstalled.<br />
Starting the Viewer<br />
Via Start Menu<br />
The Viewer is started by selecting the <strong>NATMAP</strong> RASTER VIEWER item available via the Start menu. This may<br />
be done by selecting Start > Programs > <strong>NATMAP</strong> RASTER VIEWER (or the name provided by the user on<br />
installation) > <strong>NATMAP</strong> RASTER VIEWER.<br />
Via Windows Explorer / Command Prompt<br />
This Viewer may also be started by executing the <strong>Raster</strong>Viewer.exe file located in the Html directory of the<br />
path to which the Map Viewer was installed.<br />
Via Internet Explorer<br />
If you are already using Internet Explorer, the Map Viewer can be loaded through the File|Open dialog box.<br />
Note: Only the html page <strong>Raster</strong>Viewer.html should be loaded in this manner. Attempting to load other pages<br />
will fail as they are designed to work only as part of a whole, and cannot be accessed separately.<br />
Via the Desktop icon<br />
A desktop icon will be created at installation. Double-clicking on this icon will launch the <strong>NATMAP</strong> <strong>Raster</strong> Viewer.<br />
Please note that a desktop icon will not be created on some network systems with restricted security privileges<br />
for users.<br />
<strong>NATMAP</strong> RASTER <strong>2003</strong> USER GUIDE
Using the <strong>Raster</strong> Configurator<br />
Configurator overview<br />
Warning: incorrect use of this tool may render the <strong>NATMAP</strong> <strong>Raster</strong> Viewer inoperative. Please spend time<br />
reading and understanding these instructions before making modifications to the default configuration.<br />
<strong>NATMAP</strong> <strong>Raster</strong> Viewer can view maps and layers located in different places - on different CDs, on your computer's<br />
hard drive, or on a shared computer through a network. When you install the <strong>NATMAP</strong> <strong>Raster</strong> software, the Viewer<br />
will only search for maps in one of the above locations (which one depends upon from where you ran the Setup<br />
program and whether you have installed the Viewer from the Mapsheets or Mosaic products).<br />
The Configurator is a tool that helps you manage where your maps and layers are located, and tells the Viewer<br />
where to look for maps to load. This is especially useful when you have moved the location of your maps (for<br />
example copying some maps from the CD to your hard drive).<br />
You can use the Configurator to:<br />
search for maps in more than one location<br />
add search paths for new layers<br />
change a search path for a layer.<br />
The viewer searches for a required map data file in the order and location specified by each element of the search<br />
path until the required map data file is found or the search path is exhausted. The default configuration provides<br />
only one element in the search path. Hence, map data can only be found in one location. Adding a new element to<br />
the search path for a particular map series will configure the viewer to look in two or more locations. The<br />
configurator provides the ability view, change, add, re-order and delete map search paths for each map series,<br />
and for each release version of the viewer software.<br />
Administrators of computer networks or XP machines should read this important notice on using the Configurator<br />
over a computer network with restricted administrative privileges for users.<br />
I've changed the location of my maps, or added a new location, using the Configurator. The changes<br />
don't appear in the Viewer.<br />
If you make changes in the Configurator, make sure you have closed the Viewer so that changes will update<br />
properly. As the Viewer runs in an Internet Explorer window, any changes you make to map layers will not be<br />
re/freshed in the window. The Viewer needs to be closed and restarted for changes to be activated.<br />
Check that you have selected the correct folder.<br />
Running <strong>Raster</strong> Viewer Configurator<br />
The <strong>NATMAP</strong> RASTER VIEWER Configurator is automatically installed when you install the <strong>NATMAP</strong> RASTER<br />
VIEWER.<br />
You can run the Configurator from the Start menu by selecting Programs > <strong>NATMAP</strong> RASTER VIEWER > <strong>Raster</strong><br />
Viewer Configurator. Or, using Windows Explorer, you can double click on the <strong>Raster</strong>ViewerConfigurator.exe file<br />
located in the Tools directory of the path to which <strong>NATMAP</strong> RASTER VIEWER was installed.<br />
The <strong>Raster</strong> Viewer Configurator program will start and you will be presented with the main window:<br />
<strong>NATMAP</strong> RASTER <strong>2003</strong> USER GUIDE
Adding a search path for a map layer<br />
Removing a search path for a map layer<br />
Modifying a search path<br />
<strong>NATMAP</strong> RASTER <strong>2003</strong> USER GUIDE
Selecting Maps Using the <strong>Raster</strong> Viewer<br />
Search by Index Map<br />
The Index Map is an intuitive way to locate a particular map, allowing you to simply browse to a region of<br />
<strong>Australia</strong> and load the corresponding map.<br />
When the Index Map is first activated the screen displays an image of <strong>Australia</strong> with a grid detailing how it is<br />
broken up into map sheets. The following image shows an example of this screen.<br />
The index map can be zoomed and panned using the tools shown on the top left side of the index map frame. The<br />
operation of the map viewer tools is described in Moving around a map.<br />
To select a particular map, use the panning tool (hand) or zooming tool (magnifying glass) to pan and zoom the<br />
map. (For help using the map display tools, see Moving around a map). Once you are satisfied that you can see<br />
the feature you're looking for, or the grid lines are clear enough to place the mouse within the rectangle for the<br />
desired map, then select the arrow tool and click the mouse in that region. At the bottom right of the index map<br />
page, the name and number of the map corresponding to the location selected is displayed.<br />
The following image shows the display after clicking on Albany in Western <strong>Australia</strong>.<br />
To view this map click the Load button.<br />
In order to improve image clarity, the index map used in <strong>NATMAP</strong> <strong>Raster</strong> <strong>2003</strong> does not show 1:100 000 scale<br />
maps.<br />
Why do the lines showing the 1:250 000 scale map boundaries disappear?<br />
Depending upon the scale the Index Map is zoomed to, some of the map boundary lines may disappear. This is<br />
due to the Viewer resampling the image in order to fit the area you've zoomed to onto your monitor. As the lines<br />
are only a few pixels wide, sometimes they are not resampled. If you change your zoom scale slightly, the lines<br />
will reappear.<br />
<strong>NATMAP</strong> RASTER <strong>2003</strong> USER GUIDE
Viewing Maps using the <strong>NATMAP</strong> <strong>Raster</strong> Viewer<br />
Overview<br />
Map Pane<br />
Moving around the map<br />
Accessing help and the Web<br />
Changing Layers<br />
Map Windows<br />
Window control buttons<br />
Coordinate Display<br />
Exporting<br />
Printing<br />
Viewing a map - Overview<br />
The following image shows the appearance of the view a map screen.<br />
The screen contains windows, buttons and text boxes. This section provides an overview of the screen. Subsequent<br />
sections provide more detail about each button, text box, etc.<br />
The screen is divided into two broad areas: the right pane that displays the map, and the left pane that contains<br />
controls. These are called the map pane and the tools pane respectively.<br />
The map pane contains:<br />
the main image of the map<br />
a blue cross hair that marks the centre point of the map<br />
two overlay windows: the Locator window and the Magnifier window<br />
(the three other overlay and popup windows - Map Information, Legend, and Climate - are not shown in the<br />
example). More information about these windows is available in the Map Windows page<br />
the current map name and sheet number displayed at the top right of the screen for the appropriate layer<br />
you are viewing. Note that the Satellite Image layer in the Mosaic displays the 1:250 000 scale map name<br />
and number<br />
the icons for the pan, zoom, click-pan, and zoom-to-extents tools at the top left of the screen.<br />
The tools pane is split into vertical sections.<br />
At the top is the select-a-map graphic that allows you to return to the Select Map mode.<br />
In the middle of the left pan are a series of buttons and text boxes. From top to bottom these are:<br />
buttons to show or hide the locator, magnifier or map information window, and the centre marker<br />
buttons that select the type of position information: latitude/longitude or grid; its format: decimal degrees or<br />
degrees/minutes/seconds; and the datum for the co-ordinate system: GDA or AGD for lat/long, MGA or AMG<br />
for grid<br />
text boxes to display the position information<br />
buttons to export or print the entire map or the current map view.<br />
To maximise the clarity of the map, check that you have optimised your screen colour settings. You should also<br />
refer to the note on image clarity for other tips on improving the display of the map.<br />
<strong>NATMAP</strong> RASTER <strong>2003</strong> USER GUIDE
The Map Pane toggle button<br />
The fraction of the screen used by map image can be increased by hiding the left pane. To hide the left pane of<br />
the map screen, click on the icon at the top left side of the map screen.<br />
The icon acts as a toggle: one click hides the left pane. Another click un-hides the left pane.<br />
Moving around a map<br />
At the top left side of the map pane are four buttons with icons. These buttons are used to select particular<br />
modes. When the cursor is over the map display area, its shape is determined by which mode has been selected.<br />
The Zoom to Extents tool<br />
The Zoom to Extents button will cause the map to be redisplayed showing its full extents. The map sheet will fill<br />
the map display window.<br />
The Hand-Pan Tool<br />
Clicking on this tool selects Hand-Pan mode. To pan the map, place the mouse over the map, press and hold<br />
down the left mouse button. Drag the mouse in the direction you wish the map to pan. To complete the pan,<br />
release the left mouse button.<br />
Notes<br />
It is possible to drag the map completely off the screen. To relocate the map into the viewable area, use the<br />
Zoom to Extents button described below<br />
This tool only allows panning on a single map sheet. To move to another map sheet, use the click-pan<br />
method described below, or select the desired map using the select map methods.<br />
You can switch from Pan mode to Zoom mode temporarily by pressing both the left and right mouse buttons<br />
simultaneously, or by pressing the shift key followed by the left mouse button.<br />
The Zoom Tool<br />
Clicking on this tool selects Zoom mode. To increase the zoom of the map, place the mouse over the map and<br />
press and hold down the left mouse button. Move the icon towards the bottom of the screen. As the mouse moves<br />
the map will zoom. When the map has been zoomed enough, release the mouse button. The map will now refresh<br />
itself and show greater detail. There may be a short pause as additional image data is read from the CD and<br />
decompressed. To zoom out drag the icon towards the top of the screen.<br />
Note that even in zoom mode, the map will recentre onto the position you clicked.<br />
You can switch from Zoom mode to Pan mode temporarily by pressing both the left and right mouse buttons<br />
simultaneously, or by pressing the shift key followed by the left mouse button.<br />
This style of Zoom tool is standard to all ER Mapper applications. No Zoom Box tool, which is the more common<br />
style of Zoom tool used in Windows applications, is available as yet with the standard ER Mapper software<br />
developers kit which was used in developing the <strong>NATMAP</strong> <strong>Raster</strong> Viewer. At some point in the future ER Mapper<br />
may include the Zoom Box tool in their software developers kit, in which case it will be added to the <strong>NATMAP</strong><br />
<strong>Raster</strong> Viewer.<br />
Click-Pan and panning from map to map<br />
Clicking on this icon selects Pointer mode, which is used to:<br />
<strong>NATMAP</strong> RASTER <strong>2003</strong> USER GUIDE
obtain the position of locations on the map<br />
click-pan mode.<br />
In Click-Pan mode, clicking on the map will cause the map to be panned so that the clicked point is now the<br />
centre of the map (as indicated by the blue cross hair).<br />
In Mapsheets, if you click on a point that is beyond the edges of the current map region then a new map will be<br />
loaded that contains the clicked location. The new map will be at the same zoom level as the previous view and<br />
will be centred on the clicked point. There is no difference between the Click-Pan tool and the Hand-Pan tool for<br />
Mosaic images, as there is only one image to be loaded.<br />
Click-Pan is intended to make it easy to pan the map to follow a feature such as a road or river. Simply click on a<br />
point on the road or river you wish to follow and the map will be centred over the clicked position. For Mapsheets<br />
layers, if the river or road moves off the current map simply click on the blank spot next to the current map and<br />
the neighbouring map will be loaded in the position that you clicked.<br />
Click-Pan is also provided by the Locator and Magnifier windows. Clicking on the maps within the Magnifier and<br />
Locator windows causes the map that matches the clicked point's location to be loaded in the main map view,<br />
centred on the clicked point. In this way the magnifier and locator windows can be used to select and load a new<br />
map.<br />
How to access on-line and help documents<br />
In the bottom left-hand corner of your screen, there are four links to on-line and help documents:<br />
Clicking on the BASIC HELP text will open a new window with the Quick Help <strong>Guide</strong>. This<br />
page contains an overview of basic searching and viewing tools.<br />
Clicking on the USER GUIDE text will open a new window with this <strong>User</strong> <strong>Guide</strong>.<br />
Clicking on the BUY MAP text will open a new window which links to the on-line <strong>NATMAP</strong><br />
Retailers page on the <strong>Geoscience</strong> <strong>Australia</strong> website. You can find your nearest <strong>NATMAP</strong><br />
retailer using this tool. You will need an Internet connection for this tool to work.<br />
Clicking on the <strong>NATMAP</strong> logo will take you to the <strong>Geoscience</strong> <strong>Australia</strong> web site. You will<br />
need an Internet connection for this tool to work.<br />
<strong>NATMAP</strong> RASTER <strong>2003</strong> USER GUIDE
Viewing Maps Using the <strong>NATMAP</strong> <strong>Raster</strong> Viewer<br />
Coordinate display<br />
For more information on the coordinate systems used in <strong>NATMAP</strong> <strong>Raster</strong> <strong>2003</strong>, please refer to the Coordinate<br />
Systems section.<br />
Whenever the map is panned (either using the pan tool, or using click-pan) the co-ordinates of the centre point of<br />
the map are displayed on the left pane as shown in the following image:<br />
The type and format of the location displayed depends on the values of the buttons immediately above the location<br />
values. Locations can be display as either latitude/longitude or as grid.<br />
Latitude and Longitude Coordinates<br />
To display the centre location in latitude and longitude click the ‘LAT/LONG’ button. Values can be displayed in<br />
either decimal degrees (as shown in the example above) or Degrees, Minutes and Seconds, eg. Lat: 32° 26' 12" S,<br />
Long: 148° 35' 54" E. The reference datum for the latitude and longitude can be selected as either Geocentric<br />
Datum of <strong>Australia</strong> (GDA) or <strong>Australia</strong>n Geodetic Datum (AGD). Using the mouse, simply left click on the<br />
appropriate button to select the format you require. Latitudes and longitudes referenced to GDA are directly<br />
compatible values from GPS receivers.<br />
Grid Coordinates<br />
To display the centre location in grid coordinates click the ‘GRID’ button. This will hide the latitude and longitude<br />
and display the current position in Easting/Northing/Zone format. The reference datum for the Easting and<br />
Northing can be selected as either Map Grid of <strong>Australia</strong> (MGA) or <strong>Australia</strong>n Map Grid (AMG). Simply click on the<br />
appropriate button to select the format you require. Note that MGA is the default reference datum for grid<br />
coordinates. The Decimal and DEG buttons are disabled when in Grid mode as they are irrelevant.<br />
The image below illustrates the centre coordinates displayed in grid mode.<br />
Note on disabled buttons: When in GRID mode, you will not be able to select the DECIMAL or DEG buttons as<br />
they are disabled, although a tool tip will still appear when you hover the mouse over the button. You need to<br />
select LAT/LONG mode first, and then select either DECIMAL or DEG.<br />
<strong>NATMAP</strong> RASTER <strong>2003</strong> USER GUIDE
About <strong>NATMAP</strong> <strong>Raster</strong><br />
Versions<br />
Components<br />
Map Layers<br />
Coordinates<br />
Creation Process<br />
Map Image Specifications<br />
Versions<br />
<strong>2003</strong> - Mapsheets and Mosaic<br />
In <strong>2003</strong> two versions of <strong>NATMAP</strong> <strong>Raster</strong> were released. The differences are outlined below.<br />
Mapsheets: all 513 1:250 000 scale <strong>NATMAP</strong>s plus three map insets are included as separate ECW files. The<br />
1:250 000 scale maps use the Map Grid of <strong>Australia</strong> as their projection, meaning that the coordinates of the<br />
maps are measured in metres and the maps can be used for measuring distances and areas. Pixel size is<br />
31.75m<br />
Mosaic: all 513 1:250 000 scale <strong>NATMAP</strong>s plus three map insets are joined together in one ECW file. The<br />
coordinates are latitude/longitude, which are ideal for interfacing with GPS software, but are not suitable for<br />
measuring distances or areas. The pixel size in metres varies depending where you are in <strong>Australia</strong>. Mosaic<br />
also includes a single map image of all 1:1 million <strong>NATMAP</strong>s and a Landsat Satellite Image Mosaic of<br />
<strong>Australia</strong>, both of which use latitude/longitude coordinates.<br />
More information on coordinate systems and why the different products are suited to different applications is found<br />
in the Coordinate Systems.<br />
Updated features for <strong>2003</strong><br />
Inclusion of over 150 new maps<br />
All 1:250 000 scale maps are created to the same specification (i.e. have the same look and feel)<br />
Mosaic version - all 1:250 000 scale <strong>NATMAP</strong>s joined together into one image<br />
Inclusion of 1:1 million and Landsat satellite imagery (Mosaic only)<br />
Popup windows for legend and climate graphs<br />
More comprehensive <strong>User</strong> <strong>Guide</strong>, troubleshooting and Basic Help.<br />
Features retained in <strong>2003</strong> from 2002<br />
Updated maps from 2002<br />
Image resolution of 200dpi<br />
Access to grid coordinates<br />
Improved georeferencing<br />
<strong>Raster</strong> Viewer Configurator tool<br />
Bulk exporting<br />
Available on Windows 95, 98, 2000, XP, Me or NT4<br />
<strong>User</strong> interface via IEv5.5 or higher<br />
Map loading via latitude and longitude<br />
Panning from map to map<br />
Finding the latitude and longitude coordinates of a point on the map<br />
Printing the entire map or the current view<br />
Exporting the entire map or current view; JPEG, BMP, PNG, TIFF and GeoTIFF image formats are supported<br />
Online help file that can be read on screen or printed as needed.<br />
All other components in the two products are the same as in previous versions.<br />
Are upgrades available?<br />
At this stage no - if you want updated maps and/or Viewing software, you need to buy the new version.<br />
<strong>NATMAP</strong> RASTER <strong>2003</strong> USER GUIDE
Previous releases<br />
Name and Version Released Images Cell<br />
Size<br />
AUSLIG GEODATA <strong>Raster</strong>-250K<br />
v1.0<br />
AUSLIG GEODATA <strong>Raster</strong>-250K<br />
2000 v1.1<br />
AUSLIG GEODATA <strong>Raster</strong>-250K<br />
2000 Release 2 v1.2<br />
<strong>NATMAP</strong> <strong>Raster</strong> 250K Mapsheets<br />
2002 v1.3<br />
<strong>NATMAP</strong> <strong>Raster</strong> Mapsheets v1.4<br />
- <strong>2003</strong> Edition<br />
<strong>NATMAP</strong> <strong>Raster</strong> Mosaic v1.4 -<br />
<strong>2003</strong> Edition<br />
May 97<br />
Oct 00<br />
Jul 01<br />
Sep 02<br />
Sep 03<br />
Sep 03<br />
LZW<br />
compressed 8-<br />
bit TIFF<br />
ECW with<br />
exporter<br />
ECW with<br />
exporter<br />
ECW with<br />
exporter<br />
ECW with<br />
exporter<br />
ECW with<br />
exporter<br />
CDs<br />
Production<br />
Method<br />
Coords<br />
150dpi 7 Scanned None<br />
150dpi 2 Scanned<br />
Geocoded<br />
150dpi 2 Scanned<br />
Geocoded<br />
200dpi 2 EPS graphics file<br />
conversion (70%)<br />
Scanned (30%)<br />
All images<br />
rectified<br />
200dpi 2 EPS graphics file<br />
conversion<br />
All images<br />
rectified<br />
200dpi 2 EPS graphics file<br />
conversion<br />
All images<br />
rectified<br />
Lat/long AGD66<br />
Lat/long AGD66<br />
Easting & Northing;<br />
MGA Zone number<br />
Easting & Northing;<br />
MGA Zone number<br />
Lat/long GDA94<br />
Product components<br />
<strong>NATMAP</strong> <strong>Raster</strong> products are made up of the following components:<br />
this Product <strong>User</strong> <strong>Guide</strong> and associated documentation<br />
digital map images (*.ecw format). These are organised into layers, with each layer equivalent to a<br />
specific map series, scale or product. The number of map images you receive will depend upon which<br />
particular <strong>NATMAP</strong> <strong>Raster</strong> product you have purchased. Further information on the images that make up each<br />
layer may be found in Map Layers and Image Specifications<br />
software for viewing, exporting and data management. The <strong>NATMAP</strong> RASTER VIEWER is the software in<br />
this package that is used for selecting and viewing maps. The stand-alone RASTER EXPORTER can be used to<br />
export the ECW map images into other graphic formats such as GeoTIFF, TIFF, JPEG, Windows Bitmap and<br />
PNG. The RASTER CONFIGURATOR allows you to manage where your maps are stored, so you are not<br />
restricted to storing all maps in the one location.<br />
Map layers<br />
Landsat 7 Satellite Image of <strong>Australia</strong> (Mosaic only)<br />
Layer ID in the <strong>Raster</strong> Viewer: “Satellite Mosaic"<br />
The Landsat 7 Picture Mosaic of <strong>Australia</strong> was produced by the <strong>Australia</strong>n Greenhouse Office (AGO) as part of their<br />
National Carbon Accounting System. The mosaic is comprised of 369 individual Landsat satellite scenes acquired<br />
between July 1999 and September 2000. For more information on the Landsat 7 satellite, refer to the Satellite<br />
Remote Sensing pages on the <strong>Geoscience</strong> <strong>Australia</strong> website.<br />
1:250 000 scale topographic map series (Mapsheets and Mosaic)<br />
<strong>NATMAP</strong> RASTER <strong>2003</strong> USER GUIDE
Layer ID in the <strong>Raster</strong> Viewer: "250K Maps" (Mapsheets); "250K Mosaic" (Mosaic)<br />
The <strong>NATMAP</strong> 1:250 000 scale maps included in this <strong>NATMAP</strong> <strong>Raster</strong> product have been produced by <strong>Geoscience</strong><br />
<strong>Australia</strong>'s National Mapping Division and its predecessor, the <strong>Australia</strong>n Surveying and Land Information Group<br />
(AUSLIG), in conjunction with the private sector. This is the largest scale at which published topographic maps<br />
cover the entire continent. The maps have been revised using a variety of data sources, including SPOT and<br />
Landsat satellite imagery, other government agency information, and data supplied by private companies and<br />
individuals. Production of the new <strong>NATMAP</strong> series began in the early 1990s, and concluded in <strong>2003</strong>.<br />
For more information, please refer to the 1:250 000 scale <strong>NATMAP</strong> legend explanation. Additional information on<br />
map specifications, new maps and the current status of <strong>NATMAP</strong> revision can be found on the Topographic<br />
Mapping pages on the <strong>Geoscience</strong> <strong>Australia</strong> website.<br />
1:1 million scale topographic map series (Mosaic only)<br />
Layer ID in the <strong>Raster</strong> Viewer: "1M Mosaic"<br />
The International Map of the World (IMW) <strong>Australia</strong> series was <strong>Australia</strong>'s contribution to a common effort by many<br />
international mapping agencies to map the world at 1:1 million scale. It was initially conceived for planning<br />
economic development but has been used as the basis for many other maps including aeronautical charts and<br />
thematic mapping. The series was completed in 1978 and was revised regularly until the mid-1980s.<br />
Small scale reference maps (Mapsheets and Mosaic)<br />
Layer ID in the <strong>Raster</strong> Viewer: "5M Map"<br />
The smaller scale general reference maps provide a general overview of <strong>Australia</strong>, but still contain similar<br />
information to the larger scale maps. These maps have been regularly revised since the mid-1990s, and revision<br />
information is sourced from the same sources as the 1:250 000 scale maps. The Locator map used here is derived<br />
from GEODATA TOPO-10M, which is freely available from the <strong>Geoscience</strong> <strong>Australia</strong> website. The 1:5 million scale<br />
General Reference Map of <strong>Australia</strong> is used for the 5M Map layer and the Magnifier map.<br />
Topographic Map Index (Mapsheets and Mosaic)<br />
The <strong>NATMAP</strong> Map Index shows which maps cover which areas. The version of the <strong>NATMAP</strong> Map Index used in<br />
<strong>NATMAP</strong> <strong>Raster</strong> is slightly different from the printed version. The version included here does not show 1:100 000<br />
scale maps and combines the 1:1 million and 1:250 000 scale maps into the one map in order to make viewing<br />
easier. The 1:9 million Compact Reference Map has been used as a base.<br />
Coordinate systems<br />
Information on coordinate systems can be found in the coordinate system pages.<br />
Creation process<br />
The images used in this version of <strong>NATMAP</strong> <strong>Raster</strong> are derived from the most current edition of the respective<br />
maps available from <strong>Geoscience</strong> <strong>Australia</strong>'s Map Sales as at August <strong>2003</strong>. full list of the currency of all layers and<br />
individual maps in the <strong>NATMAP</strong> <strong>Raster</strong> product is included in this <strong>User</strong> <strong>Guide</strong>.<br />
"Raw" raster images were created from the digital EPS files used to produce the new <strong>NATMAP</strong> paper map series.<br />
Where digital EPS files were not available, the paper map was scanned to generate the "raw" raster images. Each<br />
"raw" raster image was transformed to be positionally accurate and encoded with coordinates and projection<br />
information before being compressed in the final ECW image.<br />
Why are some maps marked with an asterisk (*) in the drop-down menus and in the Map Currency list?<br />
The content of some 1:250 000 scale maps may differ from the printed map. Maps marked with an asterisk<br />
(*) after the edition number in any drop-down menu have been created from digital data that has not fully met<br />
<strong>NATMAP</strong> specifications; however, the content and structure of these maps are close enough to final specifications<br />
<strong>NATMAP</strong> RASTER <strong>2003</strong> USER GUIDE
to be included in this product. Maps covering Tasmania have been produced from digital data; however, printed<br />
versions of these maps are not yet available.<br />
Maps which may differ from the final printed version are:<br />
SD51-12 MONTAGUE SOUND SPECIAL<br />
SD51-16 PRINCE REGENT<br />
SE52-11 BININDUDU<br />
SE52-14 BILLILUNA<br />
SF51-06 PATTERSON RANGE<br />
SF51-07 SAHARA<br />
SF51-11 TABLETOP<br />
SF51-14 GUNANYA<br />
SF52-01 CORNISH<br />
SF52-02 LUCAS<br />
SF52-06 STANSMORE<br />
SK55-20 TASMANIA NORTH-WEST (including KING ISLAND)<br />
SK55-21 TASMANIA NORTH-EAST<br />
SK55-22 TASMANIA SOUTH-WEST<br />
SK55-23 TASMANIA SOUTH-EAST<br />
Why are some features not shown on 1:250 000 scale <strong>NATMAP</strong>s?<br />
Some features on maps, especially small scale maps, are subject to what is known as cartographic generalisation.<br />
It refers to a group of techniques used by map makers which allow the level of information to be retained, while<br />
the amount of data shown on the map is reduced.<br />
These techniques include:<br />
pre-selection<br />
reshaping or smoothing lines<br />
removing small features<br />
aggregating many small features into a few large features, eg showing a group of buildings as a single<br />
building<br />
selecting certain features that maintain an overall shape, eg reducing the number of streams in a stream<br />
network without losing the overall pattern of drainage<br />
enlarging important features which may otherwise be too small to show<br />
moving features relative to each other (displacement).<br />
More on displacement<br />
Features may be located on the earth’s surface in such a way that they cannot be separated at the scale of the<br />
map. To make sure that the map is readable, one feature is kept in its true position, and the rest are displaced.<br />
In <strong>NATMAP</strong>s, the following features may be displaced when one or more are adjacent.<br />
The higher a feature is on the list, the more likely that it has been held in the correct position over those lower on<br />
the list.<br />
hydrographic lines such as coastlines, watercourses and lakes<br />
railways<br />
principal roads<br />
secondary roads<br />
minor roads<br />
tracks<br />
buildings<br />
vegetation boundaries.<br />
If two features need to be offset to one another and neither is listed, the position of the feature with greater<br />
landmark value will be maintained.<br />
For example, if a railway and road are coincident at the scale being produced, the road would be displaced. Where<br />
two or three features are close and adjacent, one may be displaced by up to 225 metres at 1:250 000 scale. In<br />
<strong>NATMAP</strong> RASTER <strong>2003</strong> USER GUIDE
the worst case when all these features are close together, one may be displaced by up to 675 metres at 1:250 000<br />
scale. However, any features that have been displaced must maintain their relative position. See the picture below.<br />
This extract from the Wangaratta 1:250 000 scale <strong>NATMAP</strong> (SJ55-02) shows displacement of the Murray Valley<br />
Highway from its true position. The blue line is a GPS track showing the highway's true position, but the<br />
highway, railway and the Hume Freeway (red/yellow double line) have all been displaced for clarity. Compare<br />
this to the Landsat 7 ETM+ satellite image of the same area, where you cannot clearly distinguish between the<br />
three features. The relative position of the highway, the railway and the freeway have been maintained.<br />
Generalisation is not a completely automatic process and some human judgement is required. Decisions are usually<br />
based upon the significance of the feature at the scale of the map being produced, how many other similar<br />
features there are nearby, and the purpose of the map itself.<br />
One major impact of generalisation is when using maps with global positioning systems (GPS). When a GPS track<br />
is overlaid on a map, the track may not match the road as it is shown on the map because of the displacement<br />
described above. This isn't an error in the position of the road as such, but one of the consequences of trying to<br />
make a map clear and readable.<br />
Feature Masking<br />
To make printing easier many features do not mask out other features. For example, if you have a close look at<br />
any of the new <strong>NATMAP</strong>s you would see that most rivers can be seen "underneath" or "on top of" the roads. The<br />
digital process used to manufacture the map images in <strong>NATMAP</strong> <strong>Raster</strong> can only show one layer in each pixel of<br />
the image, hence some features will be masked. The order in which the layering occurs is fixed, and in some maps<br />
may have produced some illogical results or effects that will not appear on the paper map. Significant illogical<br />
effects (such as canals covering roads) have been edited but may be incomplete.<br />
Map Rotation in the Mapsheets product<br />
The map images in Mapsheets appear tilted because they are georeferenced to the Map Grid of <strong>Australia</strong> (MGA).<br />
Each map's boundaries are based on latitude and longitude, but these boundaries do not always correspond to<br />
MGA gridlines. In order to match the map image to MGA, the image has to be rotated and stretched. Note that the<br />
blue MGA gridlines on the map are orientated vertically and horizontally in the Viewer, whilst lines of latitude and<br />
longitude will be shown at an angle.<br />
Join lines<br />
The Landsat Satellite image is made up of 369 individual images, or scenes. Most of these scenes are cloud free,<br />
and in order to achieve this images were taken at different times of the year. Whilst every effort is made to colour<br />
match the images, in some cases image matching is not perfect because of differences in ground conditions or<br />
time of year that the images were taken.<br />
Join lines will be visible in the 1:1 million scale Mosaic as individual maps in this image were made to different sets<br />
of specifications.<br />
Bleed edges/overlaps<br />
<strong>NATMAP</strong> RASTER <strong>2003</strong> USER GUIDE
New <strong>NATMAP</strong>s are produced with what is known as a bleed edge. This is the overlap area along the top and righthand<br />
side of the map which allows a map user to overlay neighbouring maps easily. These edges remain in the<br />
maps in the Mapsheets product, but have been removed in the Mosaic product. This was decided upon to reduce<br />
processing time and the likelihood of features and text being cut off, and improve joining. In some cases, this may<br />
mean that slightly older information has been retained in these areas; however, this has only occurred in a handful<br />
of places around the country.<br />
Note on improving image clarity<br />
The map images in <strong>NATMAP</strong> <strong>Raster</strong> have been compressed. Images that are compressed are like files that have<br />
been "zipped" - information has been removed from the image using a particular technique or algorithm to reduce<br />
the file size.<br />
Depending upon the compression technique, some information may be lost from the image altogether when it is<br />
compressed. This is called lossy compression. ECW, JPEG and MrSID are common lossy compression techniques.<br />
LZW is a lossless compression (i.e. information is not lost when an image is compressed); however, file sizes are<br />
not reduced as much.<br />
The images in this product use ECW compression. This will mean that some features will lose some of their clarity;<br />
in particular, very thin lines such as tracks and watercourses may become blurry. Colours may also not be uniform<br />
within areas (e.g. forest areas shown as green on the paper map may, on the image, contain traces of other<br />
colours). These effects are called artefacts.<br />
The resolution or cell size of an image also affects its clarity. Map images with a resolution of 150 dots per inch<br />
(dpi) will not be as clear as maps with 200 or 300dpi as there are less pixels in each image. As a result, text or<br />
other features in map images with lower resolutions will appear pixellated or blocky.<br />
Other factors affecting image clarity include your monitor specifications, the software being used to view the map<br />
images (if not using the <strong>Raster</strong> Viewer), and the the zoom scale. If viewing in other software packages often there<br />
is an option to "zoom to raster resolution"; this zoom level will give the clearest view of the image. Zooming in<br />
too far will cause pixellation and artefacts will appear to be very significant; clarity is also reduced if zooming out<br />
too far. For best results, you should set your zoom to around the same level as if you were looking at the paper<br />
map version at<br />
Whilst every effort has been made to minimise the number and extent of artefacts within each map image, users<br />
should be aware that artefacts exist as a result of fitting all of the <strong>NATMAP</strong> 1:250 000 scale maps onto 2 CDs at an<br />
affordable price. The map images in this product are not intended to be exact replicas of the paper map in terms<br />
of quality, but do contain the same information as shown on the paper version.<br />
The number of artefacts may be minimised by exporting the map image to TIFF or GeoTIFF; however, these will<br />
produce very large file sizes and will not remove all artefacts, and cannot be viewed using the <strong>Raster</strong> Viewer. For<br />
more information, refer to the FAQ on the size of exported files.<br />
Map image specifications<br />
File Naming Convention: all images in the 250K Sheet layer in the Mapsheets product are named to the<br />
corresponding six digit <strong>NATMAP</strong> 250K map number. Where a map does not have a <strong>NATMAP</strong> 250K map number,<br />
such as North West Tasmania, a number was created for that tile. Mosaic or individual map images are named<br />
according to scale; that is 250K.ecw, 1M.ecw, 5M.ecw, 20M.ecw. The Landsat 7 satellite image mosaic of <strong>Australia</strong><br />
is named ls7_mosaic.ecw<br />
Positional Accuracy: each identifiable coordinate pixel should be within 4 pixels of the calculated position. The<br />
production of maps involves cartographic generalisation of features which adds additional inaccuracies into the<br />
images. A full listing is below.<br />
Dataset Image Resolution Positional Accuracy<br />
250K Sheets (Mapsheets only) 32m 127m<br />
<strong>NATMAP</strong> RASTER <strong>2003</strong> USER GUIDE
250K Mosaic (Mosaic only) 0.00033 degrees 0.0012 degrees<br />
1M Mosaic (Mosaic only) 0.00116 degrees 0.0047 degrees<br />
5M Sheet 0.0056 degrees 0.022 degrees<br />
20M 0.024 degrees 0.096 degrees<br />
Satellite Mosaic (Mosaic only) 0.00045 degrees (approx 50m) 0.0018 degrees<br />
Note: the size of a pixel in metres for any of the Mosaic layers varies with the degree of latitude.<br />
Location 250K 1M 5M 20M Satellite<br />
Torres Strait (Qld) 35m 127m 615m 2.6km 44m<br />
Darwin (NT), Weipa (Qld) 35m 126m 610m 2.6km 44m<br />
Cairns (Qld), the Kimberleys (WA) 34m 124m 600m 2.5km 43m<br />
Townsville (Qld), Tennant Creek (NT), Port Hedland (WA) 33m 121m 586m 2.5km 42m<br />
Rockhampton (Qld), Alice Springs (NT), Carnavon (WA) 32m 118m 570m 2.4km 41m<br />
Brisbane (Qld), Oodnadatta (SA), Leonora (WA), Geraldton (WA) 31m 114m 551m 2.3km 39m<br />
Newcastle (NSW), Broken Hill (NSW), Port Augusta (SA), Perth (WA) 30m 109m 530m 2.2km 38m<br />
Adelaide (SA), Albury (NSW) 29m 104m 505m 2.1km 36m<br />
King Island (Tas) 27m 99m 478m 2.0km 34m<br />
Hobart (Tas) 26m 93m 450m 1.9km 32m<br />
Coordinate System: Refer to the Coordinate Systems pages.<br />
Currency: Refer to the map currency pages for the reliability dates for each standard map sheet area.<br />
Legends:<br />
1:250 000 scale [JPEG image, 71KB]<br />
Expanded 1:250 000 scale<br />
1:1 million scale [JPEG image, 64KB]<br />
1:5 million scale [JPEG image, 26KB]<br />
Landsat Satellite Image Mosaic of <strong>Australia</strong> [JPEG image, 20KB]<br />
Gazetteer of <strong>Australia</strong> (used in Place Name Search)<br />
CD layout<br />
Your <strong>NATMAP</strong> <strong>Raster</strong> product is organised on the CDs as follows:<br />
Mapsheets<br />
CD1<br />
Maps for WA and NT<br />
1:5 million map*<br />
1:20 million map*<br />
Map Index*<br />
<strong>Raster</strong> Viewer Software and installation files<br />
<strong>User</strong> <strong>Guide</strong><br />
CD2<br />
Maps for Qld, NSW, Vic, SA, ACT and Tas.<br />
1:1 million scale map mosaic 1:250 000 scale map mosaic<br />
<strong>NATMAP</strong> RASTER <strong>2003</strong> USER GUIDE
Mosaic<br />
Landsat Satellite Image<br />
1:5 million map*<br />
1:20 million map*<br />
Map Index*<br />
<strong>Raster</strong> Viewer Software and installation files<br />
<strong>User</strong> <strong>Guide</strong><br />
Maps labelled * are part of the installation files, and become usable upon installation to your hard drive where<br />
they are visible in your chosen installation directory.<br />
The maps (except for those labelled * in the table above) are stored in the <strong>Raster</strong>s folder on both CDs in both<br />
products. Within this folder is another folder which will be named with the appropriate layer name. See the table<br />
below.<br />
CD1<br />
CD2<br />
Mapsheets <strong>Raster</strong>s > 250K-Sheets > cd1 <strong>Raster</strong>s > 250K-Sheets > cd2<br />
Mosaic<br />
<strong>Raster</strong>s > 1M-Mosaic > cd1<br />
<strong>Raster</strong>s > Satellite-Mosaic > cd1<br />
<strong>Raster</strong>s > 250K-Mosaic > cd2<br />
<strong>NATMAP</strong> RASTER <strong>2003</strong> USER GUIDE
The <strong>Raster</strong> Configurator<br />
Modifying the order of your search paths<br />
1. Select <strong>Raster</strong> Viewer Version to change (most users will only have one version, the current one).<br />
2. Select the map series whose path you wish to change.<br />
3. Click on the search path whose order you wish to modify.<br />
4. Click the ‘Move Up’ button to move the search path up in the list, or Click the ‘Move Down’ button to move the<br />
search path lower in the list.<br />
5. Click the ‘Apply’ button to save these changes.<br />
Important note when adding or modifying a search path<br />
When you add (or modify) a search path, you need to select the folder above the folders containing the maps.<br />
The Configurator works by using information in a file in this location, rather than by pointing directly to the ‘cd1’ or<br />
‘cd2’ folders.<br />
<strong>NATMAP</strong> RASTER <strong>2003</strong> USER GUIDE
Viewing Maps Using the <strong>NATMAP</strong> <strong>Raster</strong> Viewer<br />
Other map windows<br />
All map windows described here can be turned on and off using the Map Window control buttons.<br />
Locator and Magnifier Overlay Windows<br />
The Locator and Magnifier windows provide a convenient indication of the location of the<br />
current map in relation to <strong>Australia</strong>, and the region surrounding the current location. The<br />
Locator window displays a map of <strong>Australia</strong>, with a blue cross hair marking the centre point<br />
of the current location of the viewed map. The Magnifier window displays a magnified view<br />
of the current location.<br />
These windows can be repositioned simply by holding the left mouse button down over the<br />
window's title bar and dragging the window to a new position by moving the mouse, then<br />
releasing the mouse button. The windows can be closed by either clicking the X in the top<br />
right corner of the window; or by clicking on the Show Locator button to close the locator,<br />
on the Show Magnifier button to close the magnifier, or on the Show Info button to close<br />
the Map Information window.<br />
Clicking on the maps within the Magnifier and Locator windows causes the map that<br />
matches the clicked point's location to be loaded in the main map view. In this way the<br />
magnifier and locator may be used to search and load a map. Note that the magnifier and<br />
locator maps cannot be panned or zoomed.<br />
Map Information Window<br />
The Map Information window lists the map name, <strong>NATMAP</strong> map number and datum; the<br />
spheroidal distances in the N-S and E-W directions on the part of the map displayed on<br />
screen (in kilometres); and the top left and bottom right coordinates (lat/long and<br />
easting/northing) of the part of the map displayed on screen. Changing the zoom level will<br />
affect the spheroidal distances and the coordinate values shown in the Map Information<br />
window.<br />
Note on distance measurement<br />
In the <strong>2003</strong> release, there is no separate distance measuring tool. It may be included in<br />
future releases. You can use the distances in the Map Information window as a start, and<br />
there are distance measuring tools in many other freely available and commercial GIS,<br />
CAD, graphics and GPS products that will read <strong>NATMAP</strong> <strong>Raster</strong> map images.<br />
Note: It is possible for these three windows to be dragged entirely off the screen. If this happens, simply press<br />
the Show button twice. This will reposition the matching window so that it is partially visible on the right side of<br />
the screen.<br />
The Legend Window<br />
The Legend window shows the legend for the map series currently being displayed. For<br />
1:250 000 scale map images, there is also an option to view an expanded legend which<br />
explains the definition of features and the criteria used to determine whether a feature<br />
should be shown on the map.<br />
<strong>NATMAP</strong> RASTER <strong>2003</strong> USER GUIDE
The Show Climate graph Window<br />
The Show Climate graph window shows the climate graph for the map currently being<br />
displayed. It uses the climate graph that would normally appear in the marginalia of the<br />
1:250 000 scale <strong>NATMAP</strong>.<br />
There will be either one or two Climate Graphs appearing in the popup window depending<br />
on the geographic location of the sheet. Those maps representing areas subject to different<br />
regional climatic variations will have two graphs.<br />
The bottom of the graph is divided into squares representing each month. Temperature is<br />
measured along the left axis, and rainfall on the right.<br />
The average maximum and minimum temperatures for each month are shown as two<br />
curved lines separated by a red band. Average rainfall is represented by a single blue line.<br />
Climate graphs will only be displayed for 250K Maps, 250K Mosaic and the Satellite Mosaic<br />
layers. Some 1:250 000 scale maps do not have climate graphs available as at time of<br />
release - if you select a climate graph for one of these maps, the following graph will<br />
appear in the Show Climate window:<br />
Please note that there is a minor bug in this function - a workaround is now available..<br />
<strong>NATMAP</strong> RASTER <strong>2003</strong> USER GUIDE
Viewing Maps Using the <strong>NATMAP</strong> <strong>Raster</strong> Viewer<br />
Export entire map or current view<br />
This option allows you to save either the entire current map sheet or the current map view as an image file. A<br />
range of image formats are supported: JPEG, BMP, PNG, TIFF and GeoTIFF. You may also export to ECW format<br />
when exporting the current view (however there is a bug with ECW exporting). Selecting Export Current View will<br />
save only the portion of the map that is currently visible.<br />
1. To export an image, click on the appropriate button in the left hand side panel<br />
2. You will be presented with a standard Save As window where you can enter the name of the image file you<br />
wish to create, and select the format in which the image is to be saved. For example :<br />
Once you have entered the name of the image you want to create and selected the type of file, click on the<br />
Save button.<br />
3. If the image is being saved in TIFF format you will be presented with the following window asking you to<br />
select either TIFF format or GeoTIFF format, and whether you wish to use LZW compression.<br />
Select which TIFF format and compression you require and click on OK.<br />
4. You will then be presented with a window asking for the required resolution of the output image.<br />
<strong>NATMAP</strong> RASTER <strong>2003</strong> USER GUIDE
Select or enter the output resolution you require and click on OK. Depending upon the size of the image, you<br />
may get a warning pop-up (see below).<br />
Limitations on exporting<br />
If you are exporting an entire image from the Mapsheets product or a large region from the Mosaic product,<br />
maintaining the original resolution (100%) will require significant amounts of memory (~40MB) and may take over<br />
30 minutes to complete. Also, depending on the output format, very large image files (30 to 100MB) may be<br />
produced.<br />
You also cannot export areas that are larger than about 10000x10000 pixels - the actual figure depends upon your<br />
computer. Computers with very large RAMs may be able to export slightly larger files than this. If you attempt to<br />
export an area larger than this figure, you will get the following warning message:<br />
You may also get a virtual memory warning as well as this error.<br />
In general, exporting areas of this size is done most reliably with TIFF/GeoTIFF format - exporting to other formats<br />
at this size may crash your system.<br />
Exporting the current view as an ECW file has a 700MB output limit.<br />
If you want to export larger areas than this, you will either need to export smaller areas and join them together,<br />
or use other software. (Free software such as ER Viewer is available from the Downloads page on the ER Mapper<br />
website.)<br />
Note on exporting high resolution map images<br />
<strong>NATMAP</strong> <strong>Raster</strong> map images have a resolution of 200dpi. (The size of a pixel on the ground in metres varies with<br />
your location in <strong>Australia</strong>.) This resolution was chosen as a compromise between image quality and size so that all<br />
map images could fit onto 2 CDs.<br />
The <strong>Raster</strong>Export and <strong>Raster</strong>Convert utilities can export map images up to 100% of their original size. These<br />
utilities cannot increase the resolution of the output image and any compression artefacts existing in the ECW file<br />
will also exist in any exported file.<br />
<strong>NATMAP</strong> RASTER <strong>2003</strong> USER GUIDE
A user could increase the resolution of an exported image in another software package; however, this would just<br />
produce a very big file with no improvement in image quality.<br />
If you want to produce a higher resolution image, then you should contact the Copyright officer.<br />
<strong>NATMAP</strong> RASTER <strong>2003</strong> USER GUIDE
About <strong>NATMAP</strong> <strong>Raster</strong><br />
Coordinate systems<br />
Overview of coordinate systems<br />
Coordinates are numbers which describe the position of a point. These numbers are always given relative to a<br />
system of lines or angles ("coordinate system"). There are two main types of coordinate systems used in mapping:<br />
Geographic coordinate systems. Position is defined by angles measured from the centre of the earth and is<br />
usually measured in degrees. This is ideal for measuring position on a globe.<br />
Latitude is the angle measured north or south from the Equator. East-west lines have the same latitude. Lines of<br />
latitude are always parallel.<br />
Longitude is the angle measured east or west from an imaginary north-south line - often a line called the<br />
Greenwich meridian is used which passes through the Greenwich observatory east of London. Lines of longitude<br />
are called meridians. All meridians meet at the North and South Poles.<br />
The closer you get to the Poles (i.e. the larger the latitude value), the distance between meridians gets closer and<br />
closer. This means that one degree of longitude actually represents a smaller distance the closer to the Poles you<br />
are. For example, at the latitude of Darwin (about 12 degrees S), one degree of longitude is about 106km, but at<br />
Hobart (about 43 degrees S), one degree of longitude is only 79km. In the diagram below, the red line at Darwin<br />
is longer than the blue line at Hobart, yet they both measure 10 degrees of longitude.<br />
<strong>NATMAP</strong> RASTER <strong>2003</strong> USER GUIDE
Note that one degree of latitude is basically the same no matter where you are on the Earth (depending upon the<br />
type of datum you are using as the basis for your coordinate system).<br />
Cartesian or rectangular coordinate systems. Position is defined by a linear distance from an origin point. This<br />
is best for measuring position on a flat surface such as a piece of paper or a computer screen. In mapping,<br />
eastings are the X-coordinate (the vertical lines that divide the map from west to east), and get larger to the east;<br />
northings are the Y-coordinate (the horizontal lines that divide the map from north to south), and get larger to the<br />
north. Together, these are called grid coordinates. On 1:250 000 scale maps, these lines are 10 000 metres or<br />
10km apart. You can accurately measure distances between points using a ruler on these maps.<br />
Map projections<br />
It is not easy to convert the round earth to a flat map. If you peeled an orange and tried to lay the skin out flat,<br />
the skin would tear or distort. The same thing happens when you try to convert latitude and longitude into<br />
rectangular coordinates using a mathematical formula called a projection.<br />
Some particular properties of the globe, whether it is shape, area or distance, will be distorted. However, you can<br />
stop or minimise distortion for one of these properties depending upon which projection is used, and this will work<br />
well depending upon what the map will be used for. This is explained below.<br />
What is a datum?<br />
A datum is a mathematical figure that best fits the shape of the Earth. The simplest datum is a globe. All datums<br />
have a certain size, and a centre point or origin somewhere in space, as well as other properties not explained<br />
here.<br />
Before GPS, <strong>NATMAP</strong>s used a datum called the <strong>Australia</strong>n Geodetic Datum, or AGD. <strong>NATMAP</strong>s used a version of<br />
AGD called AGD66. This datum was used as it best represented the shape of the earth over <strong>Australia</strong>.<br />
From the year 2000, all <strong>Australia</strong>n mapping authorities are using a new datum called the Geocentric Datum of<br />
<strong>Australia</strong> 1994. This datum is based on a mathematical surface that best fits the shape of the Earth as a whole,<br />
with its origin at the Earth's centre of mass (hence the term geocentric).<br />
The main reason for this change is the widespread use of satellite-based navigation systems such as the Global<br />
Positioning System (GPS), which is based on a geocentric datum known as the World Geocentric System 1984<br />
(WGS84). For most practical purposes, WGS84 and GDA94 are the same.<br />
A major implication of this change is that GDA coordinates (both latitude/longitude and easting/northing) differ<br />
from their AGD predecessors by approximately 200 metres in a north-easterly direction.<br />
Datum used for 1:1 million scale maps<br />
Note that the lines of latitude and longitude shown on the 1:1 million scale maps in the Mosaic product are shown<br />
relative to AGD66 - however, the map images have been projected to GDA94. Therefore, the lines of latitude and<br />
longitude shown on the 1:1 million maps differ from their true position by around 200m (about 5") in a northeasterly<br />
direction.<br />
For more information on coordinate systems and datums, please refer to the <strong>Geoscience</strong> <strong>Australia</strong> Geodesy & GPS<br />
pages.<br />
Coordinate systems and map projections used in <strong>NATMAP</strong> <strong>Raster</strong><br />
All layers in <strong>NATMAP</strong> <strong>Raster</strong> use rectangular coordinates, and use the GDA94 datum. However, the main difference<br />
<strong>NATMAP</strong> RASTER <strong>2003</strong> USER GUIDE
etween the Mapsheets and the Mosaic products is the map projection used.<br />
The maps in <strong>NATMAP</strong> <strong>Raster</strong> Mosaic uses what is known as an Equirectangular map projection. This assumes that<br />
one degree of latitude equals one degree of longitude. The maps use degrees as the unit of measurement. (Note:<br />
when a map is said to be "on GDA94", this means that it uses latitude and longitude as coordinates based on the<br />
GDA94 datum.)<br />
It is simple to make maps using this projection, and is popular for using in conjunction with GPS or computer<br />
mapping applications. However, as described above one degree of latitude does not equal one degree of longitude<br />
in reality, and this means that shapes and areas of features become very distorted and most distances are<br />
incorrect. As you can see in the above diagram, the shape of Tasmania is severely distorted from its true shape<br />
using this map projection. A scale bar does not make sense as the units of measurement (degrees) are angles, not<br />
straight line units such as metres.<br />
Therefore, maps in <strong>NATMAP</strong> <strong>Raster</strong> Mosaic should only be used in conjunction with GPS or computer<br />
mapping applications. They should never be used for measuring distances or areas. If you need map<br />
images for measuring, then you should use <strong>NATMAP</strong> <strong>Raster</strong> Mapsheets.<br />
The maps in <strong>NATMAP</strong> <strong>Raster</strong> Mapsheets uses a projection known as Universal Transverse Mercator or UTM. In this<br />
projection, the world is divided onto 60 zones, and within each zone shapes of features are preserved and<br />
distances are accurate enough for topographic mapping. Mainland <strong>Australia</strong> and Tasmania fall into seven of these<br />
zones.<br />
Within each zone, there is a rectangular coordinate system that uses Eastings and Northings in metres.<br />
<strong>NATMAP</strong> RASTER <strong>2003</strong> USER GUIDE
The main problem with UTM maps is that you can measure outside a zone boundary by about 80km without too<br />
much trouble, but beyond this, distortion becomes so bad that measurements will be significantly inaccurate. This<br />
also means you cannot join maps together that lie in different zones.<br />
The name of the coordinate system used for these maps is the Map Grid of <strong>Australia</strong>, or MGA. This means that a<br />
UTM projection was used to convert GDA94 geographic coordinates to grid coordinates. Older <strong>NATMAP</strong>s use a<br />
coordinate system called the <strong>Australia</strong>n Map Grid (AMG), which used a UTM projection to convert AGD66<br />
geographic coordinates to grid coordinates.<br />
Summary of coordinate systems used in <strong>NATMAP</strong> <strong>Raster</strong><br />
Product Layer Coordinate System CD Layout Default Units<br />
250K Maps<br />
Map Grid of <strong>Australia</strong><br />
(MGA94)<br />
Easting & Northing (metres)<br />
Mapsheets<br />
5M Sheet<br />
20M<br />
Map Index<br />
Geocentric Datum<br />
of <strong>Australia</strong><br />
(GDA94)<br />
latitude & longitude (degrees)<br />
Satellite Mosaic<br />
250K Mosaic<br />
Mosaic<br />
1M Mosaic<br />
5M Sheet<br />
Geocentric Datum<br />
of <strong>Australia</strong><br />
(GDA94)<br />
latitude & longitude (degrees)<br />
20M<br />
Map Index<br />
<strong>NATMAP</strong> <strong>Raster</strong> Viewer has the ability to convert between MGA and AMG grid coordinates, and GDA94 and AGD66<br />
geographic coordinates, for display purposes within the Viewer only. All maps will keep the GDA94 datum (and<br />
MGA grid coordinates for maps in <strong>NATMAP</strong> <strong>Raster</strong> Mapsheets) when used outside the Viewer.<br />
<strong>NATMAP</strong> RASTER <strong>2003</strong> USER GUIDE
<strong>NATMAP</strong> <strong>Raster</strong> <strong>2003</strong> Consumer Information<br />
Contact Information<br />
National Mapping Division<br />
Acknowledgements<br />
Conditions of Use<br />
Accuracy and Reliability of Data<br />
Contact information<br />
Up-to-date information on <strong>NATMAP</strong> <strong>Raster</strong> products can be found on the <strong>NATMAP</strong> <strong>Raster</strong> product pages.<br />
<strong>Geoscience</strong> <strong>Australia</strong> welcomes feedback on any aspect of its products or services.<br />
Please direct your comments or any queries regarding this document or data to us via any of the methods below.<br />
If you are submitting a bug report, please read this first.<br />
Email General Queries, <strong>NATMAP</strong> <strong>Raster</strong> product feedback, bug reports<br />
Topographic map errors and omissions<br />
Place Name Search errors and omissions<br />
Satellite imagery queries, errors and omissions<br />
Copyright, commercial applications, external users<br />
Phone Freecall 1800 800 173 (within <strong>Australia</strong>)<br />
(02) 6249 9966 or overseas +61 2 6249 9966<br />
Fax (02) 6249 9960 or overseas +61 2 6249 9960<br />
Map Sales<br />
<strong>Geoscience</strong> <strong>Australia</strong><br />
Mail<br />
GPO Box 378<br />
CANBERRA ACT 2601<br />
About <strong>Geoscience</strong> <strong>Australia</strong>'s national mapping division<br />
<strong>Geoscience</strong> <strong>Australia</strong> is the national agency for geoscience research and spatial information. It serves government<br />
and supports the community through its output areas of geoscience for urban centres, oceans and coasts, and<br />
regional and rural areas.<br />
The National Mapping Division within <strong>Geoscience</strong> <strong>Australia</strong> undertakes national mapping, geodetic, remote sensing,<br />
and land information coordination activities in support of <strong>Australia</strong>'s economic and social development.<br />
The National Mapping Division was formerly known as the <strong>Australia</strong>n Surveying and Land Information Group<br />
(AUSLIG), <strong>Australia</strong>'s national mapping agency. In September 2001, AUSLIG merged with the <strong>Australia</strong>n Geological<br />
Survey Organisation (AGSO - <strong>Geoscience</strong> <strong>Australia</strong>) to form <strong>Geoscience</strong> <strong>Australia</strong>, the national agency for spatial<br />
information in <strong>Australia</strong>.<br />
Acknowledgements and contributions<br />
Data Acknowledgements<br />
<strong>Geoscience</strong> <strong>Australia</strong>'s National Mapping Division gratefully acknowledges contributions to map content. Information<br />
is supplied by Commonwealth, State, Territory, and local government agencies as well as private sector agencies<br />
and individuals. A comprehensive list of contributors is available on the Topographic Mapping pages on the<br />
<strong>NATMAP</strong> website.<br />
<strong>NATMAP</strong> RASTER <strong>2003</strong> USER GUIDE
The place name data contained within this product is from the Gazetteer of <strong>Australia</strong>. Copyright of the Gazetteer of<br />
<strong>Australia</strong> resides with the relevant State, Territory and Commonwealth Governments and <strong>Australia</strong> Post © 2002.<br />
The Landsat Satellite Mosaic of <strong>Australia</strong> was created by GeoImage Pty Ltd for the <strong>Australia</strong>n Greenhouse Office as<br />
part of the National Carbon Accounting System. Scenes were acquired by the <strong>Australia</strong>n Centre for Remote Sensing<br />
(ACRES), <strong>Geoscience</strong> <strong>Australia</strong>. Copyright Commonwealth of <strong>Australia</strong> 2001.<br />
Software acknowledgements<br />
The <strong>NATMAP</strong> RASTER VIEWER software was developed by <strong>Geoscience</strong> <strong>Australia</strong> and CSIRO Mathematical and<br />
Information Sciences to provide easy access to the images contained in <strong>NATMAP</strong> <strong>Raster</strong> products. <strong>NATMAP</strong> RASTER<br />
VIEWER provides a set of tools for selecting, displaying, printing and exporting maps.<br />
The following products were used in the development of <strong>NATMAP</strong> RASTER VIEWER:<br />
ERMapper ECW SDK license and Web page<br />
ImageMagick license and Web page<br />
LibDES license and email author<br />
LibTiff license<br />
LibGeoTiff license and Web page.<br />
Conditions of use<br />
<strong>Geoscience</strong> <strong>Australia</strong> retains and administers Commonwealth Copyright for all images used in <strong>NATMAP</strong> <strong>Raster</strong> in<br />
accordance with the Copyright Act 1968. The use of any maps or images from this product, with or without<br />
modification, is permitted for personal or private use only.<br />
Full details on the conditions of use can be found in the licence agreement.<br />
Where any mapping material is to be used for personal research, assignments for educational purposes, or for<br />
internal company reports, provided the words ‘Copyright Commonwealth of <strong>Australia</strong> <strong>2003</strong>‘ appear with all uses, no<br />
application to <strong>Geoscience</strong> <strong>Australia</strong> to use the material is required.<br />
A copyright licence must first be obtained from <strong>Geoscience</strong> <strong>Australia</strong> for the use of any maps or images derived<br />
from <strong>NATMAP</strong> <strong>Raster</strong> in any books, reports, advertising brochures or any other medium for public consumption or<br />
for commercial purposes.<br />
For information and/or help in facilitating your application, please contact the <strong>Geoscience</strong> <strong>Australia</strong> Copyright<br />
Officer.<br />
For further information refer to <strong>Geoscience</strong> <strong>Australia</strong>'s Copyright Policy.<br />
Commonwealth Spatial Data Access and Pricing Policy<br />
The <strong>NATMAP</strong> <strong>Raster</strong> products, along with the other <strong>NATMAP</strong> paper products, does not fall under the Spatial Data<br />
Access and Pricing Policy. The policy covers selected digital datasets. For more information, refer to the<br />
Commonwealth Office of Spatial Data Management Spatial Data Policy web site.<br />
Accuracy and reliability of data<br />
The map images used in <strong>NATMAP</strong> <strong>Raster</strong> products are constructed from digital topographic data or scanned from<br />
paper maps with a basic horizontal accuracy of approximately +/- 140 metres. The images have been computer<br />
post-processed to re-project and georeference the images to the Map Grid of <strong>Australia</strong> (MGA) for the Mapsheets<br />
product and the Geocentric Datum of <strong>Australia</strong> (GDA94) for the Mosaic product, and have undergone subsequent<br />
validation. Therefore, the accuracy of positions reported by the software should approach that of the original paper<br />
map.<br />
<strong>NATMAP</strong> RASTER <strong>2003</strong> USER GUIDE
Topographic information included in the map images have been checked from multiple sources including SPOT<br />
imagery. Maps have not been field checked, so some information may not be accurate or up-to-date. An example<br />
of rapidly changing features are telecommunication towers which proliferate at an an ever-increasing rate.<br />
Homestead names are also subject to regular change and are difficult to keep up-to-date.<br />
Every effort has been made to make the map images a useful reference, but feedback from map users is very<br />
valuable. If you discover errors or omissions on the map, please contact <strong>NATMAP</strong> customer support or send your<br />
annotated map to us (we will replace your map with the corresponding current edition). We value your assistance<br />
for the next edition.<br />
Reliability of individual map sheets can be found here.<br />
More information on the maps themselves can be found in the About <strong>NATMAP</strong> <strong>Raster</strong> pages.<br />
The custodians of the Gazetteer of <strong>Australia</strong> data used in the Place Name Search and <strong>Geoscience</strong> <strong>Australia</strong> do not<br />
warrant that the data is free from errors or omissions. Also, the custodians and <strong>Geoscience</strong> <strong>Australia</strong> shall not be<br />
in any way liable for any loss, damage or injury suffered by the licensed user of the data or any other person or<br />
organisation consequent upon or incidental to the existence of errors or omissions in the data.<br />
The postcode information contained in the Place Name Search tool has been reproduced with <strong>Australia</strong> Post's<br />
permission from the <strong>Australia</strong> Post Postcode Database on 4 October 2002. The contents of the Database are<br />
subject to change without notice and remain at all times the property of <strong>Australia</strong> Post and shall not be reproduced<br />
without <strong>Australia</strong> Post's permission. <strong>Australia</strong> Post is the copyright owner of the Postcode Database. In compiling<br />
the Database <strong>Australia</strong> Post has used its best endeavours to ensure that the information contained therein is<br />
correct and current at the time of publication but takes no responsibility for any error or defect therein. <strong>Australia</strong><br />
Post shall not be liable for any loss or damage arising from the use of, or reliance placed on, any information<br />
provided by it.<br />
<strong>NATMAP</strong> RASTER <strong>2003</strong> USER GUIDE
Using <strong>NATMAP</strong> <strong>Raster</strong> in Other Applications<br />
Using with GIS/CAD or graphics programs<br />
Using with GPS<br />
Using <strong>NATMAP</strong> <strong>Raster</strong> Maps in GIS, CAD or graphis programs<br />
The simplest method for using the <strong>NATMAP</strong> <strong>Raster</strong> images as a backdrop within a GIS environment or a graphics<br />
package is to obtain the appropriate ECW plugin for the software you are running from the ER Mapper web site.<br />
<strong>Geoscience</strong> <strong>Australia</strong> does not take any responsibility for the use of these plug-ins. For more information or<br />
support, please contact ER Mapper.<br />
If you don't want to use the ECW format, then the images will need to be exported using the <strong>Raster</strong> Exporter for<br />
Mapsheets or the exporting tool in the Viewer for Mosaic and/or Mapsheets. You can convert map images to<br />
GeoTIFF (to retain coordinate information) or TIFF, JPEG, BMP or PNG files.<br />
If you want to access the vector information from which the <strong>NATMAP</strong> <strong>Raster</strong> images are made, then you will need<br />
to obtain GEODATA TOPO-250K data for your area of interest.<br />
How do I reproject maps in <strong>NATMAP</strong> <strong>Raster</strong> for use in other applications?<br />
<strong>NATMAP</strong> <strong>Raster</strong> does not have the functionality to reproject maps. You need to use a third-party imaging or GIS<br />
software (such as ER Mapper, ERDAS Imagine, or ESRI ArcGIS) to reproject the maps.<br />
Using <strong>NATMAP</strong> <strong>Raster</strong> maps with GPS<br />
<strong>NATMAP</strong> <strong>Raster</strong> maps are an ideal set of base maps for use in conjunction with Global Positioning Systems (GPS).<br />
To use <strong>NATMAP</strong> <strong>Raster</strong> with a GPS you will require a GPS receiver and probably some additional software and a<br />
portable computer. Because <strong>NATMAP</strong> <strong>Raster</strong> has not been specifically designed to work with any particular GPS<br />
system, the integration of <strong>NATMAP</strong> <strong>Raster</strong> images into each system will be different. You should fully investigate<br />
what is required to make such a system work.<br />
A quick option to see what is available in the way of software that will integrate GPS and <strong>NATMAP</strong> <strong>Raster</strong>, is to<br />
search the Internet for the category GPS,mapping,software and review the range of products on offer from<br />
different suppliers. Two major <strong>Australia</strong>n software vendors who support <strong>NATMAP</strong> <strong>Raster</strong> images in their software<br />
are OziExplorer and Advantech Design (producers of TrackRanger). Alternatively, you could visit your local<br />
specialist map shop or GPS distributor for advice.<br />
Many additional GPS software programs such as OziExplorer require additional calibration files in order to read the<br />
<strong>NATMAP</strong> <strong>Raster</strong> maps. Check with the software vendor for these; often, they are freely available.<br />
<strong>NATMAP</strong> RASTER <strong>2003</strong> USER GUIDE
Viewing Maps Using the <strong>NATMAP</strong> <strong>Raster</strong> Viewer<br />
Print entire map or current view<br />
This option allows you to print either the entire current map sheet or the current map view on your printer.<br />
Selecting Print Entire Map will produce a printed version of the whole map sheet. This will be printed in landscape<br />
mode if the dimensions of the map sheet fit better that way. Selecting Print Current View will print only the visible<br />
portion of the map. Other information such as the map sheet name and number, the coordinates of the region,<br />
and a scale bar will also be printed out.<br />
1. To print an image, click on the appropriate button in the left hand side panel<br />
2. A window asking you to select the desired print quality is displayed. Printing either the entire map sheet or a<br />
large region at high quality will require large amounts of memory (~40MB) and generate large print spool<br />
files (~40MB). Selecting Average Quality generally has little or no visible effect on the print quality for full<br />
map sheets or large images since the image must be reduced in scale even when printed on an A3 page.<br />
Click OK to continue.<br />
3. Next, the standard Print dialogue is shown.<br />
<strong>NATMAP</strong> RASTER <strong>2003</strong> USER GUIDE
4. Select the required printer options and click OK.<br />
5. The map will now be printed.<br />
Note: Some black and white printers may produce poor quality results. This occurs because these printers (and<br />
associated drivers) are unable to convert the colour map images to simulated greyscales (this is called dithering).<br />
If this is the case for your printer, then export the map you wish to print to an image file and use another<br />
program to print it. For example, you can save the map in JPEG format and then use Internet Explorer to open<br />
and print the .JPG file.<br />
Warning when printing Mosaic layers<br />
The following message will appear on any print-out of any Mosaic layer:<br />
‘WARNING: This printout uses a map projection that is designed for use with GPS and computer<br />
mapping. It is not suitable for measuring long distances and large areas. A full explanation is in the<br />
<strong>NATMAP</strong> <strong>Raster</strong> <strong>User</strong> <strong>Guide</strong>. Please use the maps from <strong>NATMAP</strong> <strong>Raster</strong> Mapsheets for accurate<br />
measurements of distances and areas.’<br />
No scale bar will appear either.<br />
This is because of the map projection used for the Mosaic images.<br />
<strong>NATMAP</strong> RASTER <strong>2003</strong> USER GUIDE
<strong>NATMAP</strong> <strong>Raster</strong> Licence<br />
IMPORTANT!<br />
BY USING THE PRODUCT YOU AGREE TO THE FOLLOWING:<br />
This document is a legal agreement between the Commonwealth of <strong>Australia</strong> (‘the Commonwealth’) and you<br />
(‘the Licensee’) in relation to the product enclosed in this package (‘the Product’). By opening and using the<br />
Product you indicate your acceptance of the licence conditions (‘the Conditions’). In the event that you do not<br />
agree with any of the terms in the Conditions, you must refrain from using the Product and return it to the place<br />
of purchase within seven (7) days of purchase to obtain a full refund.<br />
Additional Definitions of Terms in this Licence Agreement:<br />
‘<strong>Geoscience</strong> <strong>Australia</strong>’ means the Commonwealth represented by <strong>Geoscience</strong> <strong>Australia</strong>, and includes any agency<br />
which succeeds to the functions of that agency.<br />
‘Commercialise’, in respect of the Product or a product or service derived from the Product, includes distributing,<br />
giving away, selling, letting for hire, or by way of trade, offering or exposing for sale or hire any article embodying<br />
the Product or any product or service derived from or incorporating the Product.<br />
‘Data’ means the data embodied in machine readable media in this data package.<br />
‘Intellectual Property’ includes all copyright, and all rights in relation to registered and unregistered trademarks<br />
(including service marks), registered designs and confidential information (including trade secrets and know-how),<br />
and all other rights resulting from intellectual activity in the industrial, scientific, literary or artistic fields.<br />
‘Product’ means the Data and RASTER VIEWER and includes any documentation, forms and packaging provided<br />
along with it.<br />
‘RASTER VIEWER’ means ALL the machine readable software code, either as html, compiled or otherwise,<br />
embodied in this Product.<br />
Licence Conditions Relating to <strong>NATMAP</strong> <strong>Raster</strong> Products<br />
Licence Duration: The Agreement commences when the seal on the data package is broken, and continues in<br />
force indefinitely unless terminated in accordance with the termination provisions below. The Licensee must print,<br />
complete and sign the digital registration card, and forward it to <strong>Geoscience</strong> <strong>Australia</strong>, within thirty (30) days of<br />
the date of commencement.<br />
Licence Granted: <strong>Geoscience</strong> <strong>Australia</strong> grants to the Licensee a non-exclusive, non-transferable licence to access,<br />
display, reproduce, adapt and print the Product, and combine it with other data held by the Licensee. The Licence<br />
is limited to personal use of the Product or use within the Licensee's organisation only. The Licensee shall not<br />
Commercialise the Product or any product or service derived from the Product. Any other requests for permission<br />
(including provision of data within the Product to third parties, or through WWW access) should be referred to<br />
<strong>Geoscience</strong> <strong>Australia</strong>. <strong>Geoscience</strong> <strong>Australia</strong> warrants that the grant of the Licence does not infringe the Intellectual<br />
Property rights of any person.<br />
Restrictions on Use: The Licensee shall not (a) Commercialise the Product or any product or service derived from<br />
or incorporating the Product, or (b) make the Product available via external access such as the World Wide Web,<br />
without the prior consent in writing from <strong>Geoscience</strong> <strong>Australia</strong>. <strong>Geoscience</strong> <strong>Australia</strong> may grant or refuse consent in<br />
its absolute discretion and subject to any condition whatsoever, including the payment of royalties. The Licensee<br />
shall not remove, obscure or interfere with any copyright notice, trademark, warning or disclaimer affixed to,<br />
incorporated in or otherwise applied in connection with the Product.<br />
Intellectual Property in the Product: All rights not expressly granted to the Licensee are reserved. The Licensee<br />
acknowledges that the Product is a special, unique and valuable product in which the copyright and other<br />
applicable Intellectual Property rights vest in <strong>Geoscience</strong> <strong>Australia</strong>. <strong>Geoscience</strong> <strong>Australia</strong> retains ownership of the<br />
Product, whether in its original form or as modified by the Licensee, and of the Intellectual Property rights therein.<br />
Safekeeping of the Product: The Licensee shall maintain the Product in safe custody. The Licensee shall take all<br />
reasonable steps to ensure that any person given access to the Product is aware of these Conditions and uses the<br />
Product only in accordance with the Agreement.<br />
Licensee not to assign its rights: The rights granted under the Licence are restricted solely to the Licensee and<br />
may not be assigned, transferred or sub-licensed without the prior written consent of <strong>Geoscience</strong> <strong>Australia</strong>.<br />
<strong>Geoscience</strong> <strong>Australia</strong> may grant or refuse consent in its absolute discretion and subject to any condition<br />
<strong>NATMAP</strong> RASTER <strong>2003</strong> USER GUIDE
whatsoever.<br />
Limited Warranty and Customer remedies: <strong>Geoscience</strong> <strong>Australia</strong> cannot guarantee that the Product is free from<br />
errors, and does not warrant the quality, performance or suitability of the Product for any purpose. The Licensee<br />
assumes responsibility for selection of the Product to achieve any intended results, and for its installation and use.<br />
The Licensee assumes responsibility for the interpretation of any results obtained from use of the Product, and<br />
must exercise all appropriate precautions before placing reliance on those results. If the Product is found<br />
significantly defective and is returned to <strong>Geoscience</strong> <strong>Australia</strong> with proof of purchase within ninety days (90) of<br />
delivery specifying details of the defect, <strong>Geoscience</strong> <strong>Australia</strong> may, at its option: (a) replace the Product; or (b)<br />
refund the price paid by the Licensee for the Product.<br />
No other warranties, either express or implied, are given or offered for the Product except as provided in this<br />
condition.<br />
Where any statute implies into the agreement any condition or warranty, and that statute prohibits provisions<br />
excluding or modifying the application or exercise of, or liability under, such condition or warranty, such condition<br />
or warranty shall be deemed to be included in the agreement. <strong>Geoscience</strong> <strong>Australia</strong>'s liability for any breach of<br />
such statutory condition or warranty shall be limited, at its option, to: (a) the replacement of the Product or the<br />
supply of an equivalent Product; and/ or (b) the repair of the Product.<br />
Licensee's agreement to release and indemnify: Except as provided above, the Licensee (a) releases<br />
<strong>Geoscience</strong> <strong>Australia</strong>, the Commonwealth and their employees and agents in respect of all liability for loss, damage<br />
or injury which may be suffered by it arising from the Licensee's use of the Product; and (b) indemnifies<br />
<strong>Geoscience</strong> <strong>Australia</strong>, the Commonwealth and their employees and agents in respect of all liability for loss, damage<br />
or injury, which may be suffered by any person arising from that person's use of the Product.<br />
Termination of this Licence and Waiver: If the Licensee breaches any of these Conditions, <strong>Geoscience</strong> <strong>Australia</strong><br />
may terminate the Agreement immediately by notice in writing to the Licensee. Such termination of the Agreement<br />
shall be without prejudice to the rights of either party accrued under the Agreement prior to termination. The<br />
Licensee shall cease using the Product, the Product and the RASTER VIEWER for any purpose from the date of<br />
termination of the Agreement and shall return the Product and any copies made of it to <strong>Geoscience</strong> <strong>Australia</strong><br />
within 30 days of the date of termination. No forbearance, delay or indulgence by a party in enforcing the<br />
provisions of the Agreement shall prejudice or restrict the rights of that party, nor shall waiver of those rights<br />
operate as a waiver of any subsequent breach.<br />
Interpretation of this Agreement: The Agreement supersedes all prior agreements and understandings between<br />
the parties relating to the Product and constitutes the entire agreement between the parties. No addition to or<br />
modification of any provision of the Agreement shall be binding unless in writing signed by both parties. The<br />
Agreement shall be governed by and construed in accordance with the laws for the time being in force in the<br />
<strong>Australia</strong>n Capital Territory. Any reading down or severance of a particular provision does not affect the remaining<br />
provisions of the Agreement.<br />
Application to Commonwealth Agencies: Where <strong>Geoscience</strong> <strong>Australia</strong> and the Licensee are agencies of the<br />
Commonwealth of <strong>Australia</strong>, such that neither is permitted to enter into a binding legal agreement except as the<br />
Commonwealth, then the Conditions shall be read as giving rise merely to an arrangement.<br />
<strong>NATMAP</strong> RASTER <strong>2003</strong> USER GUIDE
<strong>NATMAP</strong> 1:250 000 Scale Legend<br />
Feature descriptions<br />
Roads<br />
Railways<br />
Road and Railway associated features<br />
Population centres<br />
Aircraft facilities<br />
Cultural features<br />
Relief<br />
Vegetation<br />
Hydography<br />
Offshore and Coastal features<br />
Boundaries<br />
Feature capture guide<br />
In predominantly wet and/or heavily developed regions, features such as fences, windpumps, tanks and bores<br />
proliferate and therefore lose their significance as a feature at 1:250 000 scale and are not shown on maps that<br />
fall within the dark area in the diagram below. These features are identified in the legend explanation with an<br />
asterisk (*).<br />
Map and Data Production<br />
<strong>NATMAP</strong>s and their companion GIS digital data product, GEODATA TOPO 250K Series 3 are produced in parallel.<br />
The digital data is the source for continuous revisions of map and data products as well as on-line products at<br />
1:250 000 scale. Geo-referenced satellite imagery is used to plot the position of features, together with<br />
information from a wide variety of sources. All products have adopted the Geocentric Datum of <strong>Australia</strong> 1994<br />
(GDA94) - for more information on GDA94 please refer to the <strong>Geoscience</strong> <strong>Australia</strong> Geodesy and GPS pages.<br />
Specifications<br />
Full Specifications can be viewed on the Topographic Mapping pages on the <strong>Geoscience</strong> <strong>Australia</strong> website.<br />
Names on the Map<br />
<strong>NATMAP</strong> RASTER <strong>2003</strong> USER GUIDE
Inclusion of names on the map does not imply approval by the relevant Geographic Names Board. The National<br />
Gazetteer is the primary source used on products. Refer to the Place Name Search on the <strong>Geoscience</strong> <strong>Australia</strong><br />
website.<br />
Map reliability<br />
1:250 000 scale <strong>NATMAP</strong>s are not field checked, which means that some included information may not be accurate<br />
or up to date. Many other sources of information, including recently captured satellite imagery, have been used to<br />
identify change in an effort to make the product a useful reference. The date which is shown in the map marginalia<br />
as the map reliability date is the date of the latest imagery used during the production of the <strong>NATMAP</strong>.<br />
Minimum size criteria<br />
Certain types of features depicted on <strong>NATMAP</strong>s often have minimum size criteria applied. This is a generalisation<br />
technique which is applied to maintain map clarity.<br />
Length and/or height criteria may apply to linear features such as levees or vertical features such as towers. This<br />
criteria will not apply to features that join two or more features in the same network at each end.<br />
Area criteria may apply to area type features.<br />
The minimum area indicated for polygon features is the minimum area for the whole feature regardless of how<br />
many maps it falls on. Likewise, for linear features the minimum length applies to the whole feature, not just that<br />
part of the feature which falls on the map.<br />
Unless identified as an exception, or confirmed to be no longer in existence, all features sourced from previous<br />
data or printed maps will be included regardless of their compliance to size criteria stated in the specifications for<br />
the product. All additional features captured from any other source must comply with the size criteria as stated in<br />
the map specifications (these are listed below in the table).<br />
<strong>NATMAP</strong> RASTER <strong>2003</strong> USER GUIDE
<strong>NATMAP</strong> 1:250 000 Scale Legend<br />
Roads<br />
Railways<br />
Road and Railway associated features<br />
Population centres<br />
Aircraft facilities<br />
Cultural features<br />
Relief<br />
Vegetation<br />
Hydography<br />
Offshore & Coastal features<br />
Boundaries<br />
Roads<br />
Road surface (sealed and unsealed) is indicated by the use of full or broken line symbology. Classification is based<br />
on function, not road width. Access, particularly via minor roads and vehicle tracks may be subject to private<br />
property access restrictions, variable weather conditions, changes to surface quality and locked gates.<br />
Dual<br />
carriageway<br />
Principal<br />
road<br />
Secondary<br />
road<br />
Minor road<br />
Vehicle<br />
track<br />
Divided highway, freeway, tollway or other major road with<br />
separated carriageways.<br />
Highways and major through-routes as well as major connecting<br />
roads<br />
Connecting road between major roads and/or population centres.<br />
Scale may dictate that only some of these local area access roads<br />
can be shown in settled areas and built-up areas (BUA) and only<br />
some are named.<br />
Public or private roads with minimum or no construction. Where<br />
fences and farm tracks are side by side, only one of these features<br />
may be shown.<br />
Railways<br />
Some railway lines as well as railway stations may not be shown within built-up areas.<br />
Multiple<br />
track;<br />
Single<br />
track<br />
Indicated by double or single bar symbology.<br />
Abandoned<br />
railway<br />
Light<br />
railway<br />
Railway<br />
station or<br />
siding<br />
Non-operating but are not dismantled. Dismantled lines<br />
are not shown on <strong>NATMAP</strong>s.<br />
A lightly constructed line, eg cane railway, scenic railway<br />
or monorail.<br />
A recognised stopping place for trains for passengers or<br />
freight. Abandoned stations on operational and<br />
abandoned lines are shown (on operational lines these<br />
may be labelled ‘frmer rwy stn’, ‘abandoned’ or ‘aband’).<br />
Abandoned stations on dismantled lines may be shown as<br />
a locality.<br />
<strong>NATMAP</strong> RASTER <strong>2003</strong> USER GUIDE
Road and Railway associated features<br />
Bridge<br />
Tunnel<br />
Causeway<br />
Gate<br />
Kilometric<br />
distance<br />
indicator &<br />
associated<br />
distance<br />
National &<br />
State route<br />
marker<br />
Ferry Route<br />
Ford<br />
A structure erected over a depression or obstacle<br />
carrying road or rail traffic. Only significant features are<br />
shown.<br />
An underground or underwater passage carrying a road<br />
or railway. The underground section of road or railway is<br />
not drawn, only the transition points.<br />
An embankment of earth or masonry erected across<br />
open water or area subject to inundation and carrying a<br />
railway or road. Only features longer than 500m are<br />
shown.<br />
An opening in a fence or wall for the passage of<br />
vehicles, people or animals and which may contain a<br />
device to limit passage. Only shown on vermin proof<br />
fences and at State borders.<br />
A symbol used to indicate points between which road<br />
distances are given. Distances along major through<br />
routes are calculated from the mapping road data and<br />
therefore may not reflect roadside signage.<br />
The symbol printed over a road indicating a national or<br />
state route. Markers are positioned on a map at<br />
sufficient intervals to enable the map user to identify a<br />
highway for its whole length.<br />
A route across a river, lake, reservoir or sea used by a<br />
vessel for the regular transport of vehicles or<br />
passengers from one terminal point to another. Only<br />
vehicle-carrying routes are shown.<br />
A shallow or flat portion of the bed of a watercourse or<br />
lake where a crossing may be effected. Only features<br />
longer than 750m are shown.<br />
Population centres<br />
Built-up<br />
area<br />
(BUA)<br />
An area where buildings are close together and have associated road and other<br />
infrastructure. A selection of suburbs may be named in larger BUAs if space allows.<br />
Locality<br />
A named place with a population of more than 200 people. Places with fewer than<br />
200 people are not symbolised but a place name may be shown.<br />
Aircraft facilities<br />
A paved or cleared strip on which aircraft take off and land. Information is provided by Airservices <strong>Australia</strong>,<br />
Aircraft Owners and Pilots Association <strong>Australia</strong>, Royal Flying Doctor Service, and other sources. The direction of<br />
runways are shown.<br />
<strong>NATMAP</strong> RASTER <strong>2003</strong> USER GUIDE
Airport<br />
An aircraft facility labelled as 'licenced' according to Airservices <strong>Australia</strong>.<br />
Landing<br />
ground<br />
An aircraft facility not listed in Airservices <strong>Australia</strong> information or listed as<br />
'unlicensed'.<br />
Heliport<br />
Not shown within BUAs or other aircraft facilities.<br />
Cultural features<br />
Powerline<br />
Substation<br />
Pipeline (water, gas<br />
and oil)<br />
Storage tank<br />
Water tank*<br />
Homestead/Outstation*<br />
Building/s*; Ruin<br />
Landmark<br />
Wire or wires supported on poles, towers or pylons, used<br />
for the transmission of high voltage electricity. Only lines<br />
of 110 kilovolts or greater are shown. Parallel powerlines<br />
closer than 1mm at map scale are symbolised by one<br />
line. Powerlines are not shown within built-up areas.<br />
A feature associated with the generation or distribution of<br />
electricity.<br />
A pipe used for carrying gases and/or liquids. They may<br />
be above, on, or under the ground. Parallel pipelines<br />
closes than 1mm at map scale are symbolised by one<br />
line.<br />
Large vessel for storage of liquids or gas (not water)<br />
often associated with refineries or chemical plants.<br />
A construction on or below ground level used for water<br />
storage. This feature is only shown on selected<br />
1:250 000 scale <strong>NATMAP</strong>s - refer to the Feature Capture<br />
<strong>Guide</strong>.<br />
A residence or large building in a rural area. This feature<br />
is only shown on selected 1:250 000 scale <strong>NATMAP</strong>s -<br />
refer to the Feature Capture <strong>Guide</strong>.<br />
A permanent walled and roofed construction or the ruin<br />
of such a construction. A group of buildings that cannot<br />
be shown individually may be shown by a representative<br />
pattern. Only significant buildings are shown within builtup<br />
areas. Very large buildings may be drawn to scale.<br />
Man-made permanent features having landmark value or<br />
useful for navigation. Structures taller than 45m are<br />
labelled if a height is known. Includes:<br />
cooling towers, microwave towers, masts, and other<br />
towers<br />
lookouts and monuments<br />
silos, smokestacks, and chimneys<br />
solar panels and wind turbines<br />
weather stations.<br />
A yard is a small area of land enclosed by a fence and<br />
<strong>NATMAP</strong> RASTER <strong>2003</strong> USER GUIDE
Yard*; Fence*<br />
Levee<br />
Open cut quarry; Mine<br />
Parkland<br />
generally used for confining stock. A fence is a structure<br />
which encloses, bounds or divides a property or part<br />
thereof. Vermin proof fences are labelled. Property fences<br />
are omitted when parallel with a road or track.<br />
A wall higher than 2 metres used for restraining<br />
floodwaters or containing irrigation water.<br />
A mine is an excavation for the extraction of minerals.<br />
An open cut/mining area or a quarry is an excavation<br />
made by the removal of stone, gravel, clay or mineral<br />
from the ground for commercial or industrial purposes<br />
and tailings dumps from mining operations. Open cut<br />
mines with an area greater than 14ha are shown using<br />
the symbol on the left. The point symbol may be used to<br />
indicate a small group of mines. Abandoned mines are<br />
labelled ‘abandoned’, ‘aband’, or ‘ab’. Small quarries and<br />
scrapes may not be shown.<br />
An area of land greater than 140ha developed for<br />
recreation purposes. Golf courses, ovals and cemeteries<br />
are labelled.<br />
There are a number of features not listed above which may appear on the maps, including:<br />
aerial cableway (a conveyor system in which carrier units run on wire cables strung between supports)<br />
conveyor (a continuous belt or series of belts mounted on rollers and used to move large quantities of goods,<br />
especially grain or ore)<br />
gas or oil well (a pipe sunk in the ground for the purpose of obtaining subterranean oil or gas)<br />
seismic or cleared line (a graded line in a straight path).<br />
These features have an accompanying descriptive label or are named features.<br />
Relief<br />
Vegetation<br />
Hydography<br />
Offshore & Coastal features<br />
Boundaries<br />
<strong>NATMAP</strong> RASTER <strong>2003</strong> USER GUIDE
<strong>NATMAP</strong> 1:250 000 Scale Legend<br />
Relief<br />
Vegetation<br />
Hydography<br />
Offshore & Coastal features<br />
Boundaries<br />
Roads<br />
Railways<br />
Road and Railway associated features<br />
Population centres<br />
Aircraft facilities<br />
Cultural features<br />
Relief Features<br />
Contour with<br />
value;<br />
Depression<br />
contour<br />
Horizontal<br />
control point<br />
Spot<br />
height/Elevation<br />
Pinnacle<br />
Contours are lines representing an imaginary line on the ground<br />
joining points of equal elevation in relation to the <strong>Australia</strong>n Height<br />
Datum. The 1:250 000 scale <strong>NATMAP</strong>s shown contours at intervals<br />
of 50 metres.<br />
A point on the ground determined by geodetic survey. Only<br />
prominent points are shown.<br />
A selection of spot elevations are made that best show terrain,<br />
change of slope and the high and low points. The highest spot<br />
elevation on the map is shown in large type<br />
Significant tall slender spire shaped rock. May be labelled.<br />
Cave or<br />
sinkhole<br />
Cliff<br />
The mouth of a subterranean chamber.<br />
A high, steep, significant or overhanging face of rock. Only features<br />
higher than 25m are shown.<br />
Sand<br />
Areas greater than 39ha predominantly covered by sand and devoid<br />
of vegetation.<br />
Sand dunes<br />
Areas greater than 39ha where mounds of crescent shaped loose<br />
sand exist that are usually at right angles to the prevailing winds.<br />
Sand ridges<br />
Distorted<br />
surface<br />
Rocky outcrop<br />
Sand drifts (longer than 250 metres) in long ridges tending parallel<br />
to and elongating in the direction of the prevailing winds. The<br />
average height of the sand ridges above the surrounding terrain is<br />
shown.<br />
Area larger than 39ha characterised by fractures, joints, faults,<br />
gilgai or broken stone that is difficult or impassable for vehicles.<br />
Area larger than 39ha of large rocks or boulders.<br />
Craters may be shown as a labelled feature only.<br />
Vegetation<br />
Forest or scrubland<br />
An area greater than 25ha with greater than 20% canopy cover<br />
of trees or scrub.<br />
<strong>NATMAP</strong> RASTER <strong>2003</strong> USER GUIDE
Rainforest<br />
An area greater than 39ha of dense mixed forest generally in<br />
excess of 25m high and having greater than 85% ground cover.<br />
Windbreak<br />
Pine plantation<br />
A line of trees or scrub longer than 1.25km positioned to break<br />
the force of the prevailing wind.<br />
Coniferous trees planted in an orderly pattern. Area is greater<br />
than 39ha.<br />
Orchard, Vineyard,<br />
Plantation other than<br />
pine<br />
Orderly planting of trees, bushes or vines greater than 39ha.<br />
Hydrographic Features<br />
Watercourse<br />
Canal or<br />
drain<br />
Perennial<br />
lake or<br />
Reservoir;<br />
Nonperennial<br />
lake<br />
*Bore or<br />
*well; *tank<br />
or *small<br />
dam;<br />
*Windpump<br />
Waterhole<br />
or Spring<br />
Land<br />
A natural channel along which water may flow from time<br />
to time. The rainfall graph in the map marginalia is<br />
provided to assist map users to assess the likelihood of<br />
water.<br />
An artificial watercourse used for inland navigation,<br />
irrigation or drainage.<br />
A lake is a naturally occurring body of mainly static water<br />
surrounded by land. A reservoir is a body of water<br />
collected and stored behind a constructed barrier (dam)<br />
for some specific use (i.e. artificial). Features that hold<br />
water for 1 whole year for at least 9 years out of ten are<br />
classed perennial. Reservoirs less than 39ha and lakes<br />
less than 6ha use the tank point symbol.<br />
Man-made water and associated features. Only selected<br />
features are shown in some areas - see the Feature<br />
Capture <strong>Guide</strong>.<br />
Bore or well: a small diameter hole in the ground<br />
for the purpose of obtaining subterranean water by<br />
natural flow or mechanical pumping<br />
Tank or small dam: a feature constructed on or<br />
below the ground for the storage of water<br />
Reservoirs less than 39ha and lakes less than 6ha<br />
which do not lie on a watercourse may be shown<br />
using this symbol<br />
Windpump: A tower fitted with a wind-driven pump.<br />
Where a windpump and other water features are<br />
situated together, only the windpump is shown as it<br />
usually has the greater landmark value.<br />
Naturally occurring water features. A waterhole is a<br />
natural depression which holds water, within a nonperennial<br />
watercourse or a non-perennial lake. Lakes less<br />
than 6ha in size which lie on non-perennial watercourses<br />
may be shown using this symbol. A spring is a place<br />
where water issues from the ground naturally (i.e. not in<br />
a watercourse or lake).<br />
An area of land greater than 140ha regularly covered<br />
<strong>NATMAP</strong> RASTER <strong>2003</strong> USER GUIDE
subject to<br />
inundation<br />
Swamp<br />
with floodwater for short periods.<br />
An area of land greater than 156ha that is so saturated<br />
with water that it is not suitable for agricultural or<br />
pastoral use.<br />
There are a number of features not listed above which may appear on the maps, including:<br />
lock (an enclosure in a waterbody with gates at both ends to raise or lower the water level to enable vessels<br />
to pass from one level to another)<br />
rapids (an area of broken, fast flowing water in a watercourse, where the slope of the bed increases, or<br />
where a gently dipping bar of harder rock outcrops above the water<br />
spillway (a channel or duct formed around the side of a reservoir past the end of a dam, to convey flood<br />
discharge from the watercourse above the reservoir into the watercourse below the dam)<br />
settling pond (shallow beds, usually segmented by constructed walls, for the treatment of sewage or other<br />
wastes, or used for aquaculture)<br />
waterfall (a sudden descent of water over a step or ledge in the bed of a watercourse.<br />
These features have an accompanying descriptive label or are named features.<br />
Offshore & Coastal Features<br />
Saline<br />
coastal flat<br />
A nearly level tract of land between mean high water and the line of highest<br />
tide. Area is greater than 39ha.<br />
Foreshore<br />
flat<br />
Seabed or estuarine area greater than 39ha between mean high water and the<br />
lowest tide.<br />
Wreck<br />
Lighthouse<br />
Mangrove<br />
Visible wrecks, as well as submerged features which are a danger to shipping<br />
and those of historic significance.<br />
Building or structure housing a light used as a navigation aid. Lighthouses are<br />
shown for their landmark value and may not be operational.<br />
An area of land greater than 39ha, between low and high water vegetated with<br />
mangrove plants.<br />
Reef;<br />
shoal<br />
Sea wall<br />
A reef consists of rock or coral exposed between mean high water and<br />
approximate lowest tide; a shoal consists of rock, mud or sand just below<br />
approximate lowest tide. Both features are visually prominent or a hazard to<br />
shipping. Reefs and shoals shown at 1:250 000 scale are greater than 39ha.<br />
Structure longer than 250m used to prevent erosion by the sea.<br />
Breakwater<br />
Wharf,<br />
jetty or<br />
pier<br />
Rock, bare<br />
A solid structure longer than 250m used to break the force of the waves to<br />
protect an anchorage.<br />
Structure used as a promenade or platform for loading passengers or cargo.<br />
A hazard to shipping<br />
<strong>NATMAP</strong> RASTER <strong>2003</strong> USER GUIDE
or awash<br />
There are a number of features not listed above which may appear on the maps, including:<br />
dry dock (a structure or basin providing support for a vessel and from which water can be removed so that<br />
the bottom of the vessel is exposed)<br />
boat ramp (a sloping construction to facilitate launching or retrieving vessels from water)<br />
These features have an accompanying descriptive label or are named features.<br />
Boundaries<br />
State /<br />
territory<br />
border<br />
International<br />
border<br />
Reserve<br />
area<br />
Prohibited<br />
area<br />
Borders that do not follow physical features are drawn<br />
according to the surveyed monuments on the ground.<br />
May be shown as the line of seabed jurisdictions.<br />
Refer to the Maritime Boundaries pages on the<br />
<strong>Geoscience</strong> <strong>Australia</strong> website. The line is thicker than<br />
the State Border line.<br />
Public land reserved for forestry, conservation of<br />
native species, fossils, aboriginal areas, historic<br />
mining areas etc. Information is provided by the<br />
relevant State authorities. Small reserves may be<br />
amalgamated to improve map legibility.<br />
Area where permission is likely to be required for<br />
entry.<br />
Roads<br />
Railways<br />
Road and Railway associated features<br />
Population centres<br />
Aircraft facilities<br />
Cultural features<br />
<strong>NATMAP</strong> RASTER <strong>2003</strong> USER GUIDE
Selecting Maps Using the <strong>Raster</strong> Viewer<br />
Search by <strong>NATMAP</strong> name or number<br />
In this search window, all the maps available are listed according to their map sheet name and map sheet number<br />
for the appropriate scale. To load a map using its name or number, simply click on the appropriate selectable list.<br />
The correct map may then be selected by scrolling through the list, highlighting an entry, and pressing Load Map.<br />
The following image shows the screen when selecting the ADELAIDE SPECIAL 1:250 000 scale map by name...<br />
...or by map number.<br />
These lists can be searched quickly by using the keyboard to enter the first letter of the entry (map name or map<br />
number) for which you are searching. For example, pressing Y on the keyboard when the list of map names is<br />
opened will cause the list to jump to the first entry starting with Y. Subsequently pressing a letter will scroll<br />
through the entries starting with that letter, one by one.<br />
Changing the map scale using the pop-up menu at the bottom left corner of the screen will automatically update<br />
these lists.<br />
<strong>NATMAP</strong> RASTER <strong>2003</strong> USER GUIDE
Please note that if you are using this option with Mosaic data, the area that will be displayed is approximately the<br />
same as the area shown on the standard map sheet.<br />
There is a minor bug with this search mechanism - a workaround is available.<br />
<strong>NATMAP</strong> RASTER <strong>2003</strong> USER GUIDE
Selecting Maps Using the <strong>Raster</strong> Viewer<br />
Search by coordinates<br />
By latitude and longitude<br />
The Map Viewer can load a map given a location's latitude and longitude. These are coordinates of a point on the<br />
earth measured relative to the equator and the Greenwich Meridian (an imaginary line passing through London),<br />
and are measured in degrees. For more specific information, refer to the Geodesy and GPS pages on the<br />
<strong>Geoscience</strong> <strong>Australia</strong> website.<br />
The latitude and longitude can be specified in two ways: as decimal degrees or as Degrees, Minutes and Seconds.<br />
If any field is left blank, the value of that field is assumed to be 0.<br />
In either case, the latitude should be entered as a value South of the equator, and the longitude as a value<br />
East of Greenwich. Thus, these values will never need to be negative for locations within <strong>Australia</strong>.<br />
The following image illustrates these two ways. The example shows how to enter the latitude and longitude for<br />
Sydney Airport (latitude 33.94 S, longitude 151.18 E). Pressing Load Map next to either of these sections will<br />
display a map of Sydney centred on the airport.<br />
Note: The example shows values entered for the position in both decimal degrees and degree/minutes/seconds.<br />
You only need to enter one or the other for this search tool to work.<br />
By grid coordinates<br />
The Map Viewer can load a map that contains a specific location, given by its grid coordinates. The grid coordinates<br />
include the Easting, the Northing and the Zone.<br />
The Zone refers to the Universal Transverse Mercator (UTM) Zone. In the UTM system, the world is divided into 60<br />
<strong>NATMAP</strong> RASTER <strong>2003</strong> USER GUIDE
zones, each 6 degrees wide. The maps in <strong>NATMAP</strong> <strong>Raster</strong> lie in Zones 49 through to 56. Easting coordinates are<br />
referenced to the centre line of the zone known as the central meridian. Northing coordinates are measured<br />
relative to the equator. The units of grid values are metres. To ensure that all coordinates are positive in a zone,<br />
the central meridian is given a ‘false’ easting coordinate of 500 000 and in the southern hemisphere the equator is<br />
given a ‘false’ northing coordinate of 10 million.<br />
The example shows how to enter the latitude and longitude for Sydney Airport (Easting: 331805, Northing:<br />
6242637, Zone: 56). Pressing Load Map next to this section will display a map of Sydney centred on the airport<br />
(as shown in the ‘By Latitude and Longitude’ section).<br />
<strong>NATMAP</strong> RASTER <strong>2003</strong> USER GUIDE
Selecting Maps Using the <strong>Raster</strong> Viewer<br />
Search by Place Name<br />
The Place Name Search uses the Gazetteer of <strong>Australia</strong> database of place names in <strong>Australia</strong> and their matching<br />
locations. The search facility enables you to quickly find locations anywhere in <strong>Australia</strong> and show the map of the<br />
select location.<br />
The Place Name Search database provided with your <strong>NATMAP</strong> <strong>Raster</strong> product is derived from the Gazetteer of<br />
<strong>Australia</strong> 2008 with information about each location reduced to State, Location Name, Generalised Feature Codes,<br />
Latitude and Longitude. Postcode information is available for selected towns, homesteads and localities. Elevation<br />
for selected spot heights and mountains is also available.<br />
The locations identified in the gazetteer have been provided by the relevant State and Territory geographic names<br />
board (or equivalent body). The Postcodes are derived from <strong>Australia</strong> Post’s Postcode Database. For more<br />
information, please refer to the Consumer Information pages in this <strong>User</strong> <strong>Guide</strong>.<br />
General Place Name searching<br />
1. Select the Place Name Search tool in the top left part of your screen<br />
2. Enter the first few letters of the place name and click the Search button. The database is searched and any<br />
place names that start with the letters entered will be displayed. The following image shows the screen after<br />
the letters ‘bartle’ have been entered and the Search button pressed.<br />
<strong>NATMAP</strong> RASTER <strong>2003</strong> USER GUIDE
Clicking on any of the localities displayed will load the appropriate map, centred on the place selected. If the list<br />
of names is large, scroll bars will appear. It may be necessary to scroll through the list to find the place name you<br />
had in mind.<br />
Restricting a search to a State or to a Place Type<br />
You may restrict a search to a particular state or to a particular Place Type. Restrict the search to a state by<br />
selecting the appropriate state from the State drop down menu. Restrict the search by Place Type by selecting the<br />
desired Place Type from the Code drop down menu.<br />
The image below shows the screen using the same search term as above, ‘Bartle’, but the search results have been<br />
restricted to be in Queensland (‘QLD’) and of Place Type Hills and Mountains.<br />
<strong>NATMAP</strong> RASTER <strong>2003</strong> USER GUIDE
Explanation of Place Types used in the Place Name Search<br />
PLACE TYPE<br />
(full<br />
description)<br />
PLACE TYPE<br />
(abbreviated)<br />
FEATURES<br />
AND<br />
INCLUDED<br />
TERMS<br />
Administrative<br />
Airfields<br />
Bathymetric<br />
Bays & Gulfs<br />
Bores, Tanks<br />
& Waterpoints<br />
ADMN<br />
AIRF<br />
BATH<br />
BAY<br />
WATP<br />
Agricultural area, County, District, Local<br />
Government Area, Parish, Region<br />
Continent<br />
County<br />
Parish<br />
State<br />
Aerodrome, Airfield, Airport, Landing ground,<br />
Airstrip<br />
Bank, Basin, Canyon, Discordance, Escarpment,<br />
Fracture zone, Gap, Guyot, Knoll, Plain, Reef,<br />
Ridge, Rise, Saddle, Seamount, Shelf, Shoal, Spur,<br />
Terrace, Trench, Trough<br />
Offshore channel<br />
Ledge<br />
Ocean<br />
Sea<br />
Bay<br />
Bight<br />
Cove, Inlet<br />
Gulf<br />
Bore, Well<br />
Native well, Soak, Soakage<br />
Rockhole, Gnamma hole<br />
Spring, Pool spring, Hot springs, Mineral spring<br />
<strong>NATMAP</strong> RASTER <strong>2003</strong> USER GUIDE
Built<br />
Structures<br />
Caves<br />
Coastal<br />
Features<br />
Dams & Locks<br />
Forests &<br />
Agriculture<br />
Hills &<br />
Mountains<br />
BLDG<br />
CAVE<br />
CSTL<br />
DAM<br />
FRST<br />
HILL<br />
Tank<br />
Agricultural establishment, Asylum, Barn, Chalet,<br />
Coal depot, Guard house, Hotel, Inn, Institute,<br />
Museum, Observatory, Rest house, Sanatorium,<br />
Shelter, Tavern, Telephone exchange, Tower, Town<br />
hall, Warehouse, Abbey, Hut, Bell tower, Chapel,<br />
Church, Convent, Brewery, Factory, Plant, Power<br />
station, Steel works, Tannery, Winery, Works,<br />
Hospital, Prison, Pumping station, Pump, Police<br />
station, Stadium, Telegraph office, Telephone office,<br />
Fire station, Abattoir, Barracks, Busway station,<br />
Battery, Roadhouse, Mill, Sawmill, Mission, Post<br />
office<br />
Broadcasting station (radio and television)<br />
Campsite, Camp<br />
Commune, Community centre<br />
Historical site<br />
Homestead, Outstation, Outcamp, Woolshed,<br />
Aboriginal outstation<br />
Railway station<br />
Ruin<br />
School, College<br />
Special purpose farm, Research establishment<br />
Yard<br />
Cave, Blowhole, Cavern , Grotto<br />
Bank, Bar, Sandbar<br />
Beach<br />
Beacon, Light, Buoy<br />
Breakwater, Groyne, Levee, Mole<br />
Entrance<br />
Estuary<br />
Lighthouse<br />
Shoal, Shallows, Patches<br />
Sound<br />
Strait<br />
Wreck<br />
Dam, Weir , Catchment, Barrage<br />
Lock<br />
Forest, Wood, Thicket, Scrub, Copse, Brushwood,<br />
Glade, Grove<br />
Garden, Vineyards<br />
Plantation<br />
Hill, Knoll, Knob, Mesa, Sugarloaf, Lookout, Butte,<br />
Hillock, Kopje<br />
Mountain, Peak<br />
Mountain peak, Summit, Point (inland), Rock<br />
column, Butte<br />
Pass, Passage, Gap, Col<br />
Range, Mountain range, Hills, Mountains<br />
Ridge<br />
Slope, Hillside, Terrace<br />
<strong>NATMAP</strong> RASTER <strong>2003</strong> USER GUIDE
Islands &<br />
Reefs<br />
Landmarks<br />
Mine & Fuel<br />
Sites<br />
Other<br />
Landforms<br />
Parks &<br />
Reserves<br />
Points, Capes<br />
& Peninsulas<br />
Ports & Docks<br />
Roads &<br />
Trails<br />
Towns &<br />
Localities<br />
REEF<br />
LAND<br />
MINE<br />
OTHR<br />
PARK<br />
CAPE<br />
PORT<br />
ROAD<br />
TOWN<br />
Archipelago<br />
Breaker<br />
Island, Island group, Cay, Isle, Islet, Clumps<br />
Reef<br />
Bench mark, Cairn, Column, Marker, Monument,<br />
Obelisk<br />
Tower<br />
Tree<br />
Gasfield (Well), Oil well<br />
Mine, Goldfield, Opalfield, Shaft, Mining centre<br />
Quarry<br />
Claypan, Clayhole, Clay pit, Clay flat<br />
Bluff, Cliff, Breakaway, Escarpment, Jumpup,<br />
Precipice, Buttress<br />
Boulder, Crag, Needle, Rock, Pillar, Pinnacle, Rock<br />
formation, Rocks (offshore), Rocks (on land), Tor<br />
Desert<br />
Dunes<br />
Plateau, Tableland<br />
Plain, Downs, Prairie, Flat , Heath, Field<br />
Salt pan<br />
Cemetery<br />
Reserve, Park, National park, Conservation park,<br />
Common<br />
Cape<br />
Isthmus, Neck<br />
Peninsula<br />
Point, Head, Headland, Spit, Ness, Promontory, Bill<br />
Sandspit<br />
Anchorage<br />
Dock, Basin, Wetdock, Dry dock<br />
Harbour, Haven, Roadstead, Marina<br />
Pier, Wharf, Landing, Quay<br />
Port<br />
Bridge, Culvert<br />
Crossing, Ford<br />
Gate, City exit<br />
Racetrack, Auto track, Cycle racing track,<br />
Velodrome<br />
Stock route<br />
Track (walking), Path (bridle), Trail<br />
Tunnel<br />
Locality (bounded), Town, Village, Local government<br />
town, Town site (no population)<br />
Locality (unbounded), Place name, Road corner,<br />
Road bend, Corner, Meteorological station, Ocean<br />
place name, Surfing spot<br />
Suburb<br />
<strong>NATMAP</strong> RASTER <strong>2003</strong> USER GUIDE
Trig Stations<br />
Valleys &<br />
Depressions<br />
Water Bodies<br />
Water<br />
Courses<br />
TRIG<br />
VALY<br />
WATB<br />
WATC<br />
Urban area, City<br />
Trig. Station<br />
Crater<br />
Depression, Basin , Donga<br />
Gorge, Ravine, Canyon, Glen, Chasm<br />
Valley, Dale, Dell, Vale<br />
Intermittent lake<br />
Lagoon<br />
Lake, Tarn, Loch, Lough<br />
Reservoir, Pondage, Pond, Artificial Lake<br />
Swamp, Marsh, Morass, Saltmarsh, Wetland<br />
Waterhole, Lagoon, Hole, Pool, Billabong, Oxbow,<br />
Washpool<br />
Bend, Loop, Meander<br />
Canal, Waterway, Aqueduct, Bore drain, Channel<br />
Drain<br />
Glacier<br />
Reach, Arm<br />
Stream, Brook, Watercourse, Anabranch, Backwash,<br />
Backwater, Run, Creek, River, Gully, Rivulet, Beck,<br />
Backwater, Burn<br />
Waterfall, Cascade, Cataract, Falls, Rapids<br />
Understanding the results of a search<br />
To make it easier to find the desired locality, the following attributes are displayed in the Search Results frame:<br />
the full name<br />
a two- or three-letter State Code<br />
a four-letter abbreviated Place Type. Clicking on each 4-letter code will link to the list of Place Types<br />
Use your Backspace key to go back to the Search Results frame;<br />
latitude, in decimal degrees<br />
longitude, in decimal degrees<br />
postcode, if available<br />
elevation, if available. Note that currently elevation values exist for only 500 mountains, hills, peaks, and<br />
trigonometric stations. Elevations values for other localities will be progressively added into future revisions.<br />
More information on the following can be found in the Troubleshooting page:<br />
multiple results for the same place name, type and state<br />
alternate names or missing names<br />
place names in the wrong location<br />
results have been cleared after going back to the Place Name Search.<br />
Search limitations<br />
Only place and locality names that start with the given search letters are displayed. For example, searching for<br />
‘BART’ will find Bart Creek and Barton's Gully, but will not find Hobart. Similarly, a search on ‘KOSCIUSKO’ may<br />
not return any results, but ’MOUNT KOSCIUSKO’ will.<br />
<strong>NATMAP</strong> RASTER <strong>2003</strong> USER GUIDE
To improve performance the number of search results that are displayed at once is limited to 500. If searching for<br />
a particular string returns an error complaining that there are too many matches, simply re-try the search with a<br />
more specific search string - that is, a string that contains more letters.<br />
<strong>NATMAP</strong> RASTER <strong>2003</strong> USER GUIDE
Viewing Maps Using the <strong>NATMAP</strong> <strong>Raster</strong> Viewer<br />
Overlay window control buttons<br />
Icon<br />
Description<br />
If the ‘Show Locator’ button is pressed, as it is in the image, the Locator is<br />
visible. Clicking this button will hide the Locator window and display the<br />
non-highlighted button seen below.<br />
If the ‘Show Locator’ button is raised, the Locator is hidden. Clicking this<br />
button will display the Locator window and highlight the ‘Show Locator’<br />
button.<br />
If the "‘Show Magnifier’ button is pressed, as it is in the image, the<br />
Magnifier is visible. Clicking this button will hide the Magnifier window and<br />
display the non-highlighted button seen below.<br />
If the ‘Show Magnifier’ button is raised, the Magnifier is hidden. Clicking this<br />
button will display the Magnifier window and highlight the ‘Show Magnifier’<br />
button.<br />
If the "‘Show Info’ button is pressed, as it is in the image, the Map<br />
Information window is visible. Clicking this button will hide the Map<br />
Information window and display the non-highlighted button seen below.<br />
If the ‘Show Info’ button is raised, the Map Information window is hidden.<br />
Clicking this button will display the Map Information window and highlight<br />
the ‘Show Map Information’ button.<br />
If the ‘Unmark Centre’ button is highlighted, the blue centre cross hairs,<br />
marking the centre of the main map view, are visible. Clicking on this<br />
button will hide the cross hairs and display the non-highlighted ‘Unmark<br />
Centre’ button shown below.<br />
If the ‘Unmark Centre’ button is not highlighted the blue cross hairs for the<br />
main map view are hidden. Clicking on this button will display the cross<br />
hairs marking the centre of the map view and highlight the ‘Unmark Centre’<br />
button.<br />
Clicking on this button launches the Show Legend window.<br />
When the Show Legend button looks like this, the Show Legend window is<br />
open. Clicking on this button closes the Show Legend window.<br />
Clicking on this button launches the Show Climate graph window.<br />
<strong>NATMAP</strong> RASTER <strong>2003</strong> USER GUIDE
The <strong>Raster</strong> Configurator<br />
Removing a search path for a map layer<br />
1. Select Version to change (most users will only have one version, the current one).<br />
2. Select the map scale series whose path you wish to change. (For example, select RASTER_250K_SHEET.)<br />
<strong>NATMAP</strong> RASTER <strong>2003</strong> USER GUIDE
3. Click to highlight the search path you wish to remove.<br />
4. Click the Remove button.<br />
The search path should no longer be in the list of search paths.<br />
5. Click the ‘Apply’ button to save these changes.<br />
<strong>NATMAP</strong> RASTER <strong>2003</strong> USER GUIDE