German Sport Guns Gmbh GSG-1911
German Sport Guns Gmbh GSG-1911
German Sport Guns Gmbh GSG-1911

Create successful ePaper yourself
Turn your PDF publications into a flip-book with our unique Google optimized e-Paper software.
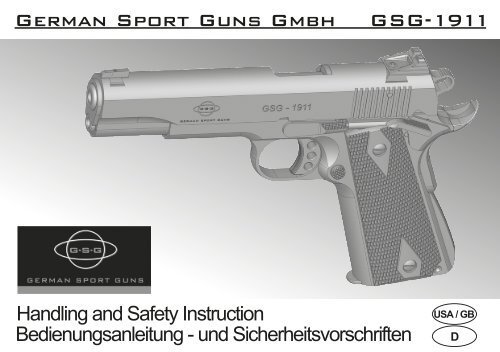
<strong>German</strong> <strong>Sport</strong> <strong>Guns</strong> <strong>Gmbh</strong><br />
<strong>GSG</strong>-<strong>1911</strong><br />
Handling and Safety Instruction<br />
Bedienungsanleitung - und Sicherheitsvorschriften<br />
USA / GB<br />
D
Personal Datas:<br />
1. Owner<br />
First Name:<br />
Name:<br />
Street<br />
P.O. Box:<br />
Town:<br />
Birthday:<br />
Place of birth:<br />
Passportnumber.:<br />
Date of gun owner ship:<br />
Personal Datas:<br />
2. Owner<br />
First Name:<br />
Name:<br />
Street<br />
P.O. Box:<br />
Town:<br />
Birthday:<br />
Place of birth:<br />
Passportnumber.:<br />
Date of gun owner ship:<br />
Informationen of buying the <strong>GSG</strong>-<strong>1911</strong><br />
Date of purchase:<br />
Buying by:<br />
Name:<br />
Adress:<br />
P.O. Box /Town:<br />
Phone:<br />
E-Mail:<br />
Serialnumber of the Weapon:<br />
Typenumber of the Weapon:<br />
Kind of Weapon:<br />
page 03
Contents<br />
Description:<br />
Section Page<br />
Product description D-01 06<br />
Safety regulations D-01.1 07<br />
Technical Data D-01.2 08<br />
Main parts / assembly groups of <strong>GSG</strong>-<strong>1911</strong> D-01.3 09<br />
Safety mechanisms / Unlock the Pistol D-02 / D.02.1 10<br />
Disconnector D-02.2<br />
11<br />
Firing pin safety D-02.3 11<br />
Transporting the gun D-03 12<br />
Handling the pistol D-04 12<br />
General D-04.1 12<br />
Ammunition D-04.2 12<br />
Loading the magazine D-04.3 13<br />
Loading the pistol ( ready for firing ) D-04.4 14<br />
Firing D-04.5 15<br />
Firing with a silencer D-04.6 15<br />
Reloading during firing D-04.7 16<br />
Unloading the pistol D-04.8 17-18<br />
Setting the Sight D-05 19<br />
Setting the rear sight D-05.1 19<br />
Height adjustment of the front sight D-05.2 19<br />
Maintenance of the pistol D-06 20<br />
Stripping the pistol D-06.1 20-23<br />
Cleaning the pistol D-06.2 24<br />
Pistol assembly D-06.3 25-27<br />
Verification of functions D-06.4 28<br />
Grip Safety D-06.5 29<br />
Magazine and outside condition of the pistol D-06.6 29<br />
Maintenance D-07 30<br />
Shipping the pistol to manufacturer D-07.1 31<br />
Accessories D-08 32<br />
Disposal D-09 32<br />
Spare-Part-List D-10 32-34<br />
Exploded view <strong>GSG</strong>-<strong>1911</strong> D-11 35<br />
page 04
<strong>GSG</strong>-<strong>1911</strong><br />
page 05
D-01: Product Description / main features<br />
Dear valued customer,<br />
The <strong>GSG</strong>-<strong>1911</strong> pistol has been constructed according to updated knowledge of modern<br />
gun manufacturing for caliber .22 long rifle HV ammunition.<br />
Because of the high bandwidth of caliber .22 ammunition we decided to adjust the<br />
<strong>GSG</strong>-<strong>1911</strong> to the high quality standard-ammunition as well as the HV-ammunition.<br />
It works with spring-blowback-system with semi-automatic reloading.<br />
The firing pin safety, the hammer safety lock and the grip safety are manual<br />
safeties to ensure secure carrying of the gun and to allow a quick shooting.<br />
The compact construction of the pistol avoids contamination due to outside influences.<br />
The Model <strong>GSG</strong>-<strong>1911</strong> is exclusively available with Single Action and with the manual<br />
safeties.<br />
We wish you much pleasure with our product.<br />
info@gsg-<strong>1911</strong>.de<br />
www.gsg-<strong>1911</strong>.de<br />
<strong>GSG</strong>-<strong>1911</strong><br />
page 06
D-01.1: General instructions / Safety regulations<br />
Never use the gun under the influence of drugs or alcohol, while ill or suffering other<br />
such difficulties. These conditions can impair your powers of judgment and reflexes.<br />
Always think of the gun as being loaded and with the safety off until you have<br />
established the opposite through the unloading procedure.<br />
Always keep the muzzle of the gun in a safe direction when handling. A safe direction<br />
is towards an area where there are no people, other life forms or property that is not a recognized target.<br />
Never point the gun at doors, panes of glass, walls, concrete, stone or flat surfaces<br />
(water included). A bullet can penetrate such surfaces or be ricocheted in an unsafe direction.<br />
Never aim at yourself or other life forms.<br />
Never rely on safety mechanisms alone. Safety mechanisms are not a substitute for<br />
careful, correct and secure handling of the gun.<br />
Always treat your gun as if the safety mechanisms were not functioning.<br />
The best safety precaution is a correct, well-trained and safe handling of the gun.<br />
Never shoot with a gun which has been penetrated by water, sand, dirt or other foreign bodies.<br />
Never let a loaded gun out of your hand.<br />
Always unload the gun immediately after firing, before putting the gun away, putting<br />
into a holster or handing to another authorized person.<br />
Never give the gun to a person who has not thoroughly familiarized himself or herself<br />
with the safety instructions and handling of the gun, by reading the corresponding instructions.<br />
Never leave the gun lying unattended and protect the gun from unauthorized access.<br />
Never store the gun loaded, but rather remove the magazine and ensure that no<br />
cartridge is left in the chamber of the barrel.<br />
Always keep the gun and the ammunition separate from one another, and ensure that<br />
neither is obtained by unauthorized persons or children.<br />
The shooter and other people in the area must wear ear protection and protective eye glasses.<br />
page 07
D-01.2: Technical Data<br />
<strong>GSG</strong>-<strong>1911</strong><br />
Caliber<br />
.22 Long Rifle HV<br />
Overall length<br />
218 mm<br />
Overall height<br />
140 mm<br />
Overall width<br />
36,5 mm<br />
Barrel length<br />
127 mm<br />
Rifling length<br />
406 mm<br />
Numbers of grooves 6<br />
Sight length<br />
136 mm<br />
Weight incl. empty magazine<br />
975 g<br />
Trigger pullweight<br />
SA 1,9 - 2,5 kg<br />
SA 18,6 - 24,5 N<br />
Magazine capacity<br />
10 rounds<br />
Included are:<br />
1 Pistol<br />
1 Magazine<br />
1 Handbook with instruction manual<br />
and safety regulations<br />
1 Case<br />
2 Substitute front sights<br />
1 Allen Key<br />
1 Open End Wrench<br />
<strong>GSG</strong>-<strong>1911</strong><br />
page 08
D-01.3: Main parts / Assembly groups of <strong>GSG</strong>-<strong>1911</strong><br />
Pos.<br />
description<br />
1 Slide<br />
2 Receiver<br />
3 Slide stop<br />
5 Magazine<br />
12 Front sight<br />
13 Rear sight<br />
16 Barrel<br />
44 Hammer<br />
47 Trigger<br />
49 Grip safety<br />
50 Manual safety<br />
60 Magazine catch<br />
63 Magazine safety (inside of mainspring housing)<br />
page 09
D-02: Safety mechanism<br />
D-02.1 unlock the pistol<br />
Safetylever<br />
Gripsafety<br />
Fig. 1: safety is active<br />
Fig. 2: safety is deactivated,<br />
Pistol is cocked and ready for firing<br />
Fig. 3: Grip safety<br />
Push safety downwards as far as it will go (Figure 2)<br />
The gripsafety (Figure 3) is behind the receiver and blocks the trigger.<br />
Firing is only possible if the gripsafety will be pushed by hand.<br />
Now the hammer can release.<br />
(The safety can only be activated, when the hammer is in a cocked position.)<br />
page 10
D-02.2: Disconnector<br />
The disconnector is a passive safety which locks and unlocks automatically while the slide<br />
moves. The disconnector releases the sear when slide is moving and avoids firing before pistol<br />
is ready for firing.<br />
D-02.3: firing pin safety<br />
The firing pin safety is a passive safety which keeps the firing pin in its position until the<br />
trigger is pulled. Hereby the firing pin will be prevented from moving. Furthermore, this<br />
safety avoids an unintended shot, for example if the pistol is dropped.<br />
page 11
D-03: Transporting the gun<br />
Always transport the pistol unloaded, decocked and locked.<br />
Never carry the pistol if it is cocked and a round is in the chamber.<br />
Always ensure that the direction of the muzzle will be under your control in case of fall or slip.<br />
Always transport the pistol and the ammunition separate from one another.<br />
Make sure to observe the regional and national laws regarding the transport of guns.<br />
D-04: Handling the pistol<br />
D-04.1: General<br />
The gun is generally delivered preserved with a thin, protective grease and oil coating.<br />
D-04.2: Ammunition<br />
For your gun, use only commercial grade ammunition in its original packaging that<br />
corresponds with the caliber of the gun. The correct caliber is imprinted on the gun.<br />
Never use reloaded, “refurbished”, hand-loaded or non standard ammunition of a different caliber.<br />
Never use dirty, wet, corroded, bent, damaged or oiled ammunition.<br />
Never leave the ammunition lying unattended.<br />
Information:<br />
The .22 ammunition spectrum ranges from very light loads for single loader guns to sport<br />
load, utility load and on through to high speed rounds. Unfortunately, however, it is not<br />
possible to adjust a semi-automatic gun to all loads. We have therefore decided to make an<br />
adjustment to the loads that have priority for use with the <strong>GSG</strong>-<strong>1911</strong>. These are the two big<br />
groups of Standard and High Speed rounds.<br />
page 12
D-04.3: Loading the magazine<br />
Procedure<br />
Put the cartridge on the follower, near the magazine slice. (figure 1)<br />
Pull down the follower pin of the magazine.<br />
Push the bullet to the back stop of the magazine.<br />
Load only the quantity of rounds into the magazine, you want to fire. (max. 10 rounds)<br />
Quantity of rounds in the magazine can be checked by the magazine-slot.<br />
magazine slice<br />
follower<br />
cartridge<br />
bolt<br />
Fig. 1: Loading the magazine<br />
page 13
D-04.4: Loading the gun (ready for firing)<br />
Notice<br />
Never load or reload the gun in a vehicle, a room or another small area (except a shooting range).<br />
Before loading always wipe off excess grease and oil and check to see if there<br />
are any foreign objects/material in the barrel.<br />
Always keep the muzzle of the gun pointed in a safe direction.<br />
Do not put your finger on the trigger. Keep your finger outside the trigger guard.<br />
Load the gun by inserting the magazine directly before firing.<br />
Never pull the hammer back by hand but with the slide to cock it and to avoid an<br />
accidentally discharge.<br />
Never rely on safety mechanisms alone. Safety mechanisms are not a substitute<br />
for careful, correct and secure handling of the gun.<br />
Never let a loaded gun out of your hand.<br />
Procedure<br />
Point the gun in a safe direction.<br />
Insert full magazine and ensure that it is fully engaged.<br />
Pull the slide back until stop and allow slide to spring forward.<br />
The pistol is cocked and ready for firing with Single-Action-trigger.<br />
page 14
D-04.5: Firing<br />
Ensure that the target and surroundings allow shots to be fired without danger.<br />
Be certain when firing that your fingers, hands or other parts of the body are not in<br />
front of, above or beside the barrel muzzle or the ejector port.<br />
Never allow a person to stand next to you where they could be hit by ejected<br />
cartridge cases.<br />
When shooting, always wear ear protection and protective eye glasses.<br />
Inform other people close to you about the need to wear ear protection and protective<br />
eye glasses.<br />
Interrupt shooting immediately and unload the gun if you suspect that a round is not<br />
inserted correctly, a case is jammed, a round may have blocked the barrel or a shot<br />
sounds or gives sensation that it may be “weak” or unusual.<br />
Never try to dislodge a blockage by firing another round.<br />
D-04.6: Firing with a silencer<br />
Unscrew the threaded cap with the open end wrench<br />
Screw on an adapter (accessory part) which connects<br />
the silencer with the pistol<br />
page 15
D-04.7: Reloading during firing<br />
When the magazine is empty, the slide will be kept in an open position.<br />
Information<br />
Remove your finger from the trigger.<br />
Remove the empty magazine.<br />
Put one hand under the magazine.<br />
Push the magazine catch.<br />
Pull out the magazine by hand.<br />
Insert full magazine and ensure that it is fully engaged.<br />
Pull the slide stop downwards or pull back the slide until it stops.<br />
Then release allowing the slide to spring forward.<br />
The pistol is loaded again and ready to fire.<br />
page 16
D-04.8: Unloading the pistol<br />
With magazine not empty and with a cartridge in the chamber<br />
Procedure<br />
Push the manual safety from the bottom up<br />
Keep the muzzle of the pistol in a safe direction<br />
Remove your finger from the trigger.<br />
Remove the empty magazine (5) by means of the magazine catch (60).<br />
Unlock the safety with the safety lever.<br />
Pull back the slide until it stops. The cartridge will be ejected.<br />
Push the slide stop from the bottom up and push the safety lever<br />
upwords in order to keep the slide in<br />
the rear position.<br />
Check the pistol visually and manually.<br />
60<br />
5<br />
page 17
chamber<br />
Level indicator<br />
visual check of the chamber<br />
Pull down the slide stop. The slide flies forward.<br />
Decock the hammer as follows: Hold the hammer back, then pull the trigger<br />
and bring the hammer to its decocked position.<br />
Empty the magazine<br />
You may now clean the pistol.<br />
page 18
D-05: Setting the Sight<br />
D-05.1: Setting the Rear Sight<br />
Sight Adjustment<br />
Setting target mechanism.<br />
Sideways adjustment of target mechanism<br />
Sight adjustment.<br />
adjustment<br />
screw<br />
Attention: Unscrewing the adjustment screw counter<br />
clockwise allows the rear sight to move to the right<br />
and to the left for windage adjustment.<br />
Left-shot: adjust the rear sight to the right.<br />
Right-shot: adjust the rear sight to the left.<br />
D-05.2: Height adjustment of the Front Sight<br />
setscrew<br />
Height adjustment of target mechanism<br />
Changing the front sight to a deeper (higher) rear<br />
sight meets a point of impact from approximately<br />
20 cm to a distance of 25 m.<br />
Before you change the front sight, unscrew the setscrew.<br />
page 19
D-06: Maintenance of the pistol<br />
Information<br />
Before disassembling, remove the magazine.<br />
Check before cleaning if the pistol is decocked and unloaded.<br />
Do not put your finger into the slide.<br />
Procedure<br />
Unload and decock the pistol (see 4.7 & 4.8).<br />
Make sure that the muzzle shows upwards and the backside<br />
of the receiver rests on the table.<br />
Attention!<br />
Recoil spring and recoil spring plug are under pressure. The slide spring is cocked.<br />
When removing the barrel bushing uncontrolled, the recoil<br />
spring and the recoil spring plug could spring from the pistol.<br />
disassembling mark<br />
D-06.1: Disassembling the pistol<br />
Pull the slide backwards until the slide stop and the disassembling mark are on the same level.<br />
Pull out the slide stop and the barrel fixing pin as follows.<br />
Press the slide stop on the right side and remove the slide stop from the left side.<br />
Push barrel fixing pin from right to left to remove (see fig. 2 page 21).<br />
Unscrew the screw with an allen key (fig. 3 page 21).<br />
Hereby the complete slide can be removed by sliding forward (fig. 4 page 21).<br />
page 20
Fig. 1: Slide stop removed<br />
Fig. 2: Barrel fixing pin removed<br />
Fig. 3: Before ending the Procedure D-06,<br />
please unscrew the screw on the right<br />
side of the pistol with the allen Key.<br />
Fig. 4: Slide completely removed<br />
page 21
Pos. 2<br />
Pos. 1<br />
Pull back the slide about 2 cm<br />
Depress the recoil spring plug (Pos. 1) and give the barrel bushing<br />
a quarter counterclockwise rotation (Pos. 2)<br />
When barrel bushing is turned, the recoil spring and the recoil<br />
spring plug are released.<br />
Fig. 1: Barrel bushing<br />
Make sure to hold the recoil spring and release it slowly, controlled by your hand.<br />
recoil spring plug<br />
Fig. 2: Removal of recoil spring plug and recoil spring<br />
Remove recoil spring plug from recoil spring.<br />
Lift the recoil spring guide and pull backwards out of the slide the barrel bushing and<br />
the recoil spring.<br />
Give a half counterclockwise rotation to the barrel bushing and remove it from the slide.<br />
page 22
threaded<br />
cap<br />
barrel<br />
slide<br />
barrel bushing<br />
spring<br />
recoil spring guide<br />
Removal of barrel bushing from the slide<br />
Removal of barrel out of the slide<br />
Take off the barrel bushing from the barrel<br />
Push the barrel forward out of the slide<br />
Information:<br />
This disassembling is sufficient for an efficient cleaning of the pistol after firing.<br />
In case of improper handling of the pistol, the warranty will expire.<br />
A further disassembling of the pistol may only be made by a qualified person.<br />
page 23
D-06.2: Cleaning the pistol<br />
Never clean the barrel from the muzzle side (in front)<br />
Do not use a steel brush. This will damage the surface of the barrel. Use only a<br />
suitable cleaning rod and brushes of the right caliber.<br />
Thinner could damage the surface of the pistol.<br />
Before using any cleaner or thinner, please note the advice of the manufacturer.<br />
Procedure<br />
Lubricate the cleaning brush with gun oil and insert it into the barrel (16) via the<br />
chamber. Use the brush to carefully remove all powders, residues and dirt in the barrel<br />
and chamber.<br />
Wipe powder, powder residues and oil from the barrel bore and chamber with<br />
cleaning patches.<br />
Clean the outside surface with the cleaning cloth and gun oil.<br />
Remove dirt from metal rail in the receiver (2), inside and outside the slide (1), slide<br />
stop (3), barrel bushing (20), recoil spring plug (19), recoil spring guide (17) and recoil<br />
spring (18) with a brush. After that, wipe down with a cloth dampened with gun oil or gun grease.<br />
Lubricate the chamber and the barrelhole with gunoil and remove surplus gun grease.<br />
page 24
Assembly while cleaning process<br />
page 25
D-06.3: Assembling the pistol<br />
Procedure<br />
Check the inside of the pistol and remove all foreign objects.<br />
Turnover the slide and insert the barrel.<br />
Put the recoil spring with the thin side on the recoil spring guide and place both into the slide.<br />
Put the recoil spring plug from the front onto the recoil spring and press it into the slide.<br />
Slide the barrel bushing on the barrel and turn clockwise.<br />
Put the barrel bushing from the front on the recoil spring guide and ensure by<br />
twisting the barrel bushing.<br />
Push the slide on the gun. The holes for the fixing pin and the stop must match.<br />
First insert the barrel fixing pin.<br />
Insert the slide stop, but do not puncture fully re-fix the screw on the right side of the pistol.<br />
Cock the hammer and return the slide up to the marking on the lower edge of the slide.<br />
Press the slide stop up to the stop.<br />
page 26
Disassembling notch<br />
Insertion and removal of Slide stop<br />
page 27
D-06.4: Verification of functions<br />
Information<br />
Verify the operation of parts with the assembled pistol, with no ammunition.<br />
Verify after finishing repair work.<br />
Verify after every cleaning and assembling of the pistol.<br />
Procedure<br />
Check the power of the recoil spring and the cycle of the slide (no clamp).<br />
Pull back the slide until it stops and allow it to spring.<br />
Check if the slide springs forward and closes tight against the breach.<br />
Check trigger-way and trigger-break.<br />
Pull the slide backwards until it stops with cocked hammer and pulled trigger.<br />
Then release the slide.<br />
Check if the hammer remains in cocked position (while continuing to pull trigger backwards).<br />
Simple check of trigger function.<br />
Release the trigger<br />
Check if the disconnector catches or if the hammer releases when pulling the trigger again.<br />
Check the slide stop<br />
Insert an empty magazine and pull backwards the slide until it stops, then release.<br />
Check if the slide will be held in backward position.<br />
Remove the magazine.<br />
Apply the slide stop.<br />
Check if the slide stop is released and if the slide flies forward strongly. Decock the hammer.<br />
page 28
D-06.5: Grip safety<br />
Cock the hammer, pull the trigger and use the grip safety.<br />
The hammer should stay cocked.<br />
Push the safety lever downwards, pull the trigger and use the grip safety.<br />
The hammer should release.<br />
Hold the muzzle downwards and pull the trigger. without using the grip safety.<br />
The hammer should remain cocked.<br />
Remove the magazine.<br />
The grip safety is active, the pistol is not ready for firing.<br />
Insert the magazine. The grip safety is released. The pistol is ready for firing.<br />
Check the safety lock<br />
Pull the hammer backwards slowly, without touching the trigger.<br />
You should hear a “click” when the sear catches into the safety catch.<br />
Pull the trigger<br />
The hammer should not release.<br />
D-06.6: The Magazine and the outside condition of the pistol<br />
Check if there is any dirt or damage on the magazine body (follower and bottom).<br />
Check the mobility and springing of the follower.<br />
Check the easy insert of the magazine into the receiver.<br />
Check the correct catch and unlatch of the magazine.<br />
Outside condition of the pistol<br />
Check if there is any dirt or damage with the grips and the disassembling-lever.<br />
Check if front sight, rear sight and grips are fastened tight.<br />
Fig. 1: Grip safety is cocked<br />
page 29
D-07: Maintenance<br />
Part / Fault Possible cause of fault / defect Possible fault / defect removal<br />
Ammunition feed:<br />
No round chambered.<br />
Breech:<br />
Breech does not close properly.<br />
Case ejection:<br />
Spent case stuck in chamber or<br />
jams in ejection port<br />
Misfire:<br />
Hammer strikes, but no discharge<br />
Magazine not properly inserted,<br />
deformed or dirty.<br />
Gun or rounds dirty or too heavily<br />
greased<br />
Weak recoil spring<br />
When pistol still defective<br />
Recoil insufficient because of fouling.<br />
Under loaded ammunition.<br />
When pistol still defective<br />
Firing pin sticks in its guide.<br />
Slide not fully in Battery<br />
Defective ammunition<br />
When pistol still defective<br />
Insert Magazine properly or<br />
Replace it<br />
Strip, clean and lubricate pistol.<br />
Clean or replace ammunition<br />
Replace recoil spring<br />
Repair by manufacturer / gun maker.<br />
Strip, clean and lubricate pistol.<br />
Replace ammunition.<br />
Repair by manufacturer / gun maker.<br />
Strip, clean and lubricate pistol.<br />
Have gun checked by armourer.<br />
Manually cycle slide to chamber<br />
New round.<br />
Repair by manufacturer / gun maker.<br />
page 30
D-07.1: Shipping the pistol to manufacturer<br />
Warning<br />
Familiarize yourself fully with local legislation governing the shipping and transportation of firearms.<br />
Procedure<br />
1. Check the gun to ensure that it is unloaded and decocked.<br />
2. Pack the gun well (if possible in its original packaging) to prevent damage in transit.<br />
3. Use an additional covering box for the original packaging.<br />
4. Do not include, telescopic sights, scope mounts or other accessories<br />
in the shipment.<br />
5. Enclose a letter stating the following:<br />
- Your full name<br />
- Your full address (mention street, not P.O. Box)<br />
- Your daytime telephone number<br />
- Detailed description of the problem encountered or the service work to be performed.<br />
6. Send the gun properly insured and carriage-paid (packages without correct postage<br />
will not be accepted).<br />
7. Send the pistol or contact:<br />
- The sales outlet from which you purchased the gun.<br />
- The <strong>GSG</strong> agent (importer) for your country.<br />
- If there exists no local appointed <strong>German</strong> <strong>Sport</strong> <strong>Guns</strong> GmbH dealer or no <strong>German</strong><br />
<strong>Sport</strong> <strong>Guns</strong> GmbH agent for your country send directly to <strong>German</strong> <strong>Sport</strong> <strong>Guns</strong>.<br />
(You find the address on the backside of the instruction manual.)<br />
page 31
D-08: Accessories<br />
Wooden grips (walnut)<br />
Speedsec Holster<br />
Speemag Holster<br />
Speedrigs<br />
Optics<br />
Silencer Adapter<br />
Mounts and much more, you find under www.gsg-<strong>1911</strong>.de<br />
D-09: Disposal<br />
Strictly observe any current national legislation governing the disposal of handguns.<br />
Provided this is not contrary to current national legislation, we recommend shipping<br />
the gun to one of the addresses listed under Sect. D-07.1 for disposal.<br />
When shipping the gun, strictly observe the instructions listed under Sect. D-07.1.<br />
D-10: Spare part list<br />
Essential information when ordering spare parts<br />
Pistol Model (caliber, designation)<br />
Pistol number<br />
Part number<br />
Part description<br />
page 32
Pos.-No.<br />
1<br />
2<br />
3<br />
4<br />
5<br />
6<br />
7<br />
8<br />
9<br />
411.40.01.0<br />
Verschluss<br />
Slide<br />
411.20.01.0 Griffstück Receiver<br />
411.20.38.0<br />
Verschlussfanghebel<br />
Slide Stop<br />
411.20.39.1 Bolzen für Laufbefestigung Barrel Fixing<br />
Pin<br />
411.60.01.0 Magazin Magazine<br />
411.60.03.1 Zubringer<br />
411.60.04.1<br />
Bolzen für Zubringer<br />
411.60.08.1 Stift für Zubringer<br />
400.60.06.1<br />
Magazinfeder<br />
Magazine Spring<br />
10<br />
411.60.06.1<br />
Magazinfederhalter<br />
Magazine Spring Holder<br />
11<br />
12<br />
13<br />
14<br />
15<br />
16<br />
17<br />
18<br />
411.60.02.1<br />
Magazinschuh<br />
Magazine Base<br />
411.50.0002 Korn<br />
Front Sight<br />
411.50.0001 Kimme<br />
Rear Sight<br />
411.40.02.0<br />
Verschlussblock<br />
411.40.11.0<br />
Stift 3x22 DIN 6325<br />
Beech Bolt Pin<br />
411.30.01.0 Laufblock Barrel<br />
411.40.06.1<br />
400.40.10.1<br />
Federführungsstange<br />
Druckfeder 0,7x5,7x90<br />
Recoil Spring Guide<br />
19<br />
411.40.04.0<br />
Verschlussfederhülse<br />
Recoil Spring Plug<br />
20<br />
411.40.03.0<br />
Laufführung<br />
Barrel Bushing<br />
24<br />
25<br />
26<br />
27<br />
28<br />
29<br />
30<br />
31<br />
32<br />
411.30.09.1<br />
411.30.04.3<br />
411.30.03.1<br />
400.40.19.3<br />
Mündungskappe<br />
Stift 2x8 DIN 1472<br />
Auswerferblech<br />
Stift 1,5x8 DIN 1472<br />
Muzzle cap<br />
Ejector<br />
400.40.06.1 Auszieher Extractor<br />
400.40.23.1<br />
Distanzblech<br />
Extractor Spacer<br />
400.40.21.1<br />
411.40.12.1<br />
411.40.13.1<br />
Druckfeder 0,6x2,9x4,9<br />
Federaufnahme<br />
Druckfeder 0,35x2,3x12,5<br />
33<br />
411.40.07.1<br />
Schlagbolzensicherung<br />
Firing Pin Safety<br />
34<br />
35<br />
36<br />
37<br />
38<br />
Standard No.<br />
407.20.40.3<br />
<strong>German</strong> Description<br />
Stift 2,5x16 DIN 6325<br />
411.40.05.0<br />
Schlagbolzen<br />
411.40.10.1 Druckfeder 0,63x1,6x20<br />
English Description<br />
Magazine Follower<br />
Magazine Follower Pin<br />
Magazine Follower Tab<br />
Beech Bolt<br />
Recoil Spring<br />
Ejector Pin<br />
Extractor Pin<br />
Extractor Spring<br />
Firing Pin Safety Spring Plunger<br />
Firing Pin Safety Spring<br />
Firing Pin Retainer<br />
Firing Pin<br />
411.20.26.1 Bolzen für Verschlussfanghebel Slide Stop Plunger<br />
411.20.09.1 Druckfeder 0,35x2,3x27<br />
Firing Pin Spring<br />
Plunger Spring<br />
Sparepartlist Part I<br />
page 33
page 34<br />
Sparepartlist Part II<br />
Pos.-No.<br />
Standard No. <strong>German</strong> Description English Description<br />
39<br />
411.20.27.1 Bolzen für Sicherungshebel Safety Lock Plunger<br />
40<br />
411.20.13.0<br />
Sicherungsfederhülse<br />
Plunger Tube<br />
41<br />
411.20.05.0<br />
Einsatz für Griffstück<br />
Inset for Receiver<br />
42<br />
411.20.11.1<br />
Unterbrecher<br />
Disconnector<br />
43<br />
411.20.12.1<br />
Fangklinke<br />
Sear<br />
44<br />
411.20.0003<br />
Schlaghebel<br />
Hammer<br />
45<br />
411.20.17.1<br />
Auslösehebel<br />
Firing Pin Plunger Lever<br />
46<br />
411.20.16.1 Übersetzung für Schlagbolzensicherung Trigger Bar Lever<br />
47<br />
411.20.10.0 Abzug Trigger<br />
48<br />
411.20.22.0<br />
Sicherungshebel rechts<br />
Safety Lock Right<br />
49<br />
411.20.04.0<br />
Handballen<br />
Grip Safety<br />
50<br />
411.20.20.1<br />
Sicherungshebel links<br />
Safety Lock Left<br />
51<br />
411.20.08.1<br />
Abzugfeder<br />
Sear Spring<br />
52<br />
411.20.18.0<br />
Schlagfedergehäuse<br />
Mainspring Housing<br />
53<br />
411.20.28.1 Bolzen für Schlagfedergehäuse<br />
Mainspring Housing Pin<br />
54<br />
411.20.23.1 Gewindeeinsatz für Griffstück Grip Screw Bushing<br />
55<br />
411.20.44.1<br />
Griffschale links<br />
Left Grip<br />
56<br />
411.20.43.1<br />
Griffschale rechts<br />
Right Grip<br />
57<br />
411.20.24.1<br />
Schraube für Griffhälften<br />
Grip Screw<br />
58<br />
411.20.29.1<br />
Bolzen für Schlaghebel<br />
Hammer Pin<br />
59<br />
411.20.30.1<br />
Bolzen für Fangklinke<br />
Sear Pin<br />
60<br />
411.20.0004<br />
Magazinhalter<br />
Magazine Catch<br />
63<br />
411.20.40.1<br />
Magazinsicherung<br />
Magazine Safety<br />
64<br />
411.20.19.1<br />
Federlagereinsatz<br />
Mainspring Retainer Pin<br />
65<br />
402.20.17.1<br />
Feder für Schlagstange<br />
Mainspring<br />
66<br />
411.20.35.1<br />
Schlagfederkappe<br />
Mainspring Cap<br />
67<br />
411.20.49.1<br />
Bolzen für Schlagfeder<br />
Mainspring Cap Pin<br />
70<br />
71<br />
72<br />
73<br />
74<br />
75<br />
76<br />
77<br />
411.50.07.3<br />
411.20.53.0<br />
411.20.50.3<br />
411.30.17.3<br />
411.30.15.3<br />
411.30.16.3<br />
402.90.01.1<br />
402.70.26.1<br />
Gewindestift M2x5<br />
Gewindestift M3x8<br />
Stift 1,5x6<br />
Scheibe<br />
Pufferscheibe<br />
Schraube<br />
Pufferpatrone<br />
Führungsbolzen<br />
Grub screw M2x5<br />
Grub screw M3x8<br />
Bolt 1,5x6<br />
Disk<br />
Cachedisk<br />
Screw<br />
Cachecartridge<br />
Guiding bolt
D-11: Exploded View <strong>GSG</strong>-<strong>1911</strong><br />
page 35
Art. Nr.: 411.70.01.1 08/10<br />
Hersteller / Manufacturer<br />
<strong>German</strong> <strong>Sport</strong> <strong>Guns</strong> GmbH<br />
Oesterweg 21<br />
59469 Ense-Höingen<br />
<strong>German</strong>y<br />
www.gsg-<strong>1911</strong>.de<br />
www.germansportguns.de<br />
info@germansportguns.de<br />
phone: +49 (0) 2938-97837-0<br />
fax: +49 (0) 2938-97837-130