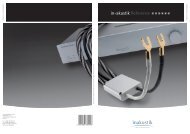
LS-A1 - In-Akustik
LS-A1 - In-Akustik
LS-A1 - In-Akustik

Create successful ePaper yourself
Turn your PDF publications into a flip-book with our unique Google optimized e-Paper software.
<strong>LS</strong>-<strong>A1</strong> Referenz<br />
Operating manual<br />
O P E R A T I N G M A N U A L
2<br />
REFERENZ<br />
black&white reference - the in-akustik<br />
class for perfectionists. The benchmark for<br />
uncompromising sound experience. World<br />
leading value and price/performance ratio.<br />
Gets under your skin..<br />
Our quality<br />
standards<br />
PREMIUM<br />
Premium - the in-akustik class for state-<br />
of-the-art technology. Gets the most from<br />
your audio / video system. Built on a love<br />
of superior performance<br />
A passionate family<br />
EXZELLENZ<br />
Excellence - the in-akustik class for<br />
discerning tastes. The finest materials,<br />
outstanding workmanship. With a passion<br />
for high end audio enjoyment<br />
STAR<br />
Star - the in-akustik class for beginners<br />
with ambition. Always the right choice.<br />
More performance at lower cost. Striving<br />
to be better<br />
in-akustik is a quality brand and respected around<br />
the world.. For more than 25 years in-akustik has<br />
put its heart and soul into the business of audio<br />
and video enjoyment. Perfect images and perfect<br />
fidelity are our passion. Made in Germany and<br />
always leading the way in value and incredible<br />
performance. With our own brand of CD and DVD<br />
labels, Focal home and car hifi loudspeakers and of<br />
course our cables, our family of products make<br />
passionate statements
INTRO<br />
SAFETY INSTRUCTIONS<br />
SCOPE OF DELIVERY<br />
INSTALLATION<br />
VIEW OF APPILANCE<br />
CENNECTION<br />
CONNECTION DIAGRAMM<br />
SETUP<br />
OPERATION<br />
BURN-IN PERIOD<br />
ADDITIONAL FUNCTIONS<br />
MEINTENCE<br />
Congratulations on your purchase of a<br />
black&white <strong>LS</strong>-<strong>A1</strong> active loudspeaker cable set.<br />
You have obtained a high-tech product, which is<br />
also currently the only one of its kind. It was<br />
developed drawing on the latest technological<br />
discoveries and is equipped with the most up-todate<br />
technological features. So that you can enjoy<br />
your new product from the very beginning, we ask<br />
you to read the following operating manual<br />
attentively.<br />
04-07<br />
07<br />
07<br />
08<br />
09<br />
10<br />
10<br />
11<br />
11<br />
12<br />
12<br />
TROUBLESHOOTING<br />
TECHNICAL DATA<br />
PRESS<br />
13<br />
13<br />
14<br />
3
Operating manual <strong>LS</strong>-<strong>A1</strong><br />
4<br />
Safety instructions<br />
1. General information<br />
Read, observe and obey the following safety instructions.<br />
Please save the operating instructions. Observe all the warning<br />
notices on the device and in the operating instructions.<br />
2. Proper use<br />
Connect the product as indicated in the operating instructions.<br />
Only use the cables and accessories provided by the<br />
manufacturer. Use only appropriate stands, brackets, shelves<br />
and other devices for the attachment and support of the<br />
products. When moving the support surfaces upon which<br />
products are placed, be very careful in order to avoid injuries<br />
and damage resulting from falling products.<br />
3. Humidity<br />
Keep the products in locations which do not have a high level<br />
of relative humidity. Never use this device near water.<br />
Wetness can bypass the electrical insulation and thus present<br />
a fatal danger, as it can for all devices not specially designed<br />
to be water-resistant. The devices may not be exposed to<br />
dripping or sprayed water. Objects which are filled with water,<br />
such as vases, may not under any circumstances be placed on<br />
the devices.<br />
4. Product protection<br />
Do not under any circumstances expose the devices to high<br />
levels of humidity. Extreme temperature fluctuations, humidity<br />
and extended exposure to light can damage the devices and<br />
alter their appearance.<br />
Make sure that no foreign bodies or liquids enter the device.<br />
5. Positioning<br />
Do not position the product near sources of heat, heaters,<br />
heating valves, ovens or other heat-producing devices.<br />
Never block the ventilation slots on the devices. The devices<br />
may only be stored and operated in a temperature range from<br />
+5 to + 40 °C.
<strong>LS</strong>-<strong>A1</strong><br />
The devices heat up during operation. To prevent unnecessary<br />
activation of the excess temperature protection, air circulation<br />
must be afforded the devices.<br />
Products without a magnetic shield may discolour or distort a<br />
nearby television. A distance of 0.5 m or greater is normally<br />
sufficient to prevent such disturbances. Most televisions have a<br />
built-in corrector switch for such occurrences. When these<br />
devices are switched off and switched on again a few minutes<br />
later, the images should be largely corrected.<br />
Do not place credit cards or other magnetic data carriers on<br />
the devices; the information saved on them could be<br />
destroyed.<br />
6. Connection<br />
The devices may only be connected to the mains voltage which<br />
is indicated on the devices!<br />
Improper handling of the mains voltage may cause fatal<br />
injuries! The loudspeaker cables are not connected to the<br />
mains. The connections of the loudspeaker cables may only be<br />
connected with the corresponding amplifier output terminals or<br />
loudspeaker connecting terminals.<br />
Connecting the loudspeaker cables directly to the mains is not<br />
permitted under any circumstances! This is fatally dangerous<br />
and leads to the immediate destruction of the product.<br />
All cables must be positioned in such a way that there is no<br />
danger of them being damaged (e.g. by being stepped on,<br />
furniture or so-called “spikes” under the loudspeakers). Never<br />
remove cables by pulling the cable; instead, always hold the<br />
plug when removing.<br />
When the devices are in stand-by mode, they are not<br />
completely separated from the mains, as is indicated on the<br />
LED. <strong>In</strong> order to avoid unnecessary risks and energy<br />
consumption, the mains switch on the back of the device<br />
should be switched off during extended absences.<br />
The mains plug and the on/off switch for the devices should be<br />
easily accessible.<br />
Operating manual<br />
5
Operating manual <strong>LS</strong>-<strong>A1</strong><br />
6<br />
7. Loudspeaker connection<br />
The loudspeaker cable may only be connected with the<br />
corresponding amplifier output terminals or loudspeaker<br />
terminals. Any other type of direct connection to the mains<br />
(230 volts) presents a fatal danger and leads to the almost<br />
immediate destruction of the devices. For this reason,<br />
loudspeaker cables may not be provided with plugs which may<br />
be mistaken for mains plugs.<br />
When cables are connected to the loudspeaker connecting<br />
terminal of a high-performance amplifier, the terminals may be<br />
subject to voltages of more than 30 volts at high volumes.<br />
Never touch non-insulated cable ends or connection contacts<br />
during operation.<br />
8. Overload<br />
<strong>In</strong> the case of extreme overload, it is possible for individual<br />
components to burn through despite multiple fuses. It is also<br />
theoretically possible (though we are not familiar such a case<br />
actually happening) that such overload could cause a fire to be<br />
start in the interior of the device. Therefore, you should not<br />
leave the devices unattended when operating an at extremely<br />
high level.<br />
9. Servicing<br />
Servicing of the devices should be performed exclusively by<br />
the service personnel. Servicing is necessary in all cases of<br />
damage, i.e. in the case of damaged cables and plugs, as well<br />
after liquid spills or objects falling on the devices, devices<br />
falling down, foreign bodies entering the devices, exposure of<br />
devices to rain or humidity, or other influences impairing the<br />
functioning of the devices.<br />
<strong>In</strong> order to avoid endangerment through electrical current, the<br />
device may only be opened by qualified personnel, unless<br />
permission is expressly given in the operating manual.<br />
Opening the housing is strictly prohibited, unless permission is<br />
specified in the operating manual, since the components and<br />
conductors may carry a fatally high voltage level.<br />
10. Fuses<br />
There are many types of device malfunctions: When<br />
necessary, replace the device fuse only with a fuse of the type<br />
indicated on the fuse holder. Never use a fuse of another type.
<strong>In</strong> case of doubt, the replacement must be carried out by a<br />
qualified technician! If the replaced fuse blows immediately,<br />
the appliance should be handed in to be serviced. No liability is<br />
accepted for damage cause by unassisted interventions or<br />
incorrect fuse types. A replacement fuse is located in the fuse<br />
holder (underneath the mains connection).<br />
11. Maintenance<br />
Always clean the products with a soft, dry and lint-free cloth,<br />
or with a brush. Do not under any circumstances use scouring<br />
powder, alcohol, benzine, furniture polish or similar<br />
substances.<br />
Scope of delivery<br />
1 x <strong>LS</strong>-A01 cable driver<br />
2 x Double <strong>LS</strong>-1302 with system cables<br />
1 x black&white AC-1502 mains connection cable<br />
1 x Operating manual<br />
<strong>In</strong>stallation<br />
<strong>LS</strong>-<strong>A1</strong><br />
The <strong>LS</strong>-<strong>A1</strong> cable driver is a high-performance current source which<br />
heats up during operation. <strong>In</strong> order to avoid malfunctions and<br />
damage, the <strong>LS</strong>-<strong>A1</strong> cable driver should not be covered and must be<br />
well ventilated. To ensure sufficient heat removal, a minimum<br />
distance of 10 cm to the wall should be observed above, to the side of<br />
and behind the device. The standard length of the system cables is<br />
1.5 m. For this reason, we recommend you install it in proximity to<br />
the integrated amp or the power amp.<br />
Operating manual<br />
7
Operating manual <strong>LS</strong>-<strong>A1</strong><br />
8<br />
1<br />
3<br />
View of appliance<br />
2 4<br />
7<br />
5 6 8<br />
1 - Standby key<br />
2 - Standby LED<br />
3 - <strong>In</strong>dicator LED<br />
4 - Level controller<br />
5 - Setup key<br />
6 - Left channel system connection<br />
7 - Right channel system connection<br />
8 - Mains connection<br />
9 - Fuse<br />
10 - Main switch<br />
11 - Connection - amplifier side<br />
12 - Connection - loudspeaker side<br />
13 - System cables<br />
14 - System plugs<br />
15 – Speaker Cable <strong>LS</strong>-1302 (2x)<br />
9<br />
10<br />
11<br />
13<br />
14<br />
15<br />
12
Connection<br />
<strong>LS</strong>-<strong>A1</strong><br />
1.) Before you connect the black&white <strong>LS</strong>-<strong>A1</strong> cable driver or<br />
the loudspeaker cables, please switch off all components<br />
and pull out the mains plugs. The central mains plug of the<br />
multiple outlet strip is sufficient.<br />
2.) If your system already has a loudspeaker cable, please<br />
remove it.<br />
3.) Lay the “Double <strong>LS</strong>-1302” between your amplifier and the<br />
loudspeakers. Ensure that the cable is laid unobstructed<br />
and as far as possible from other cables in order to avoid<br />
interference and a deterioration in sound quality. Note the<br />
running direction of the cable (system cables on the<br />
amplifier side in each case).<br />
4.) Connect the cables to the loudspeakers and the amplifier.<br />
Note the polarity (plus/minus) here.<br />
5.) Now put your amplifier’s <strong>LS</strong>-<strong>A1</strong> cable driver in the rack.<br />
The appliance must not be covered and should be<br />
sufficiently ventilated (see the section on installation).<br />
6.) Now plug the system cables of the loudspeaker cables into<br />
the system sockets (pos. 6 & 7) of the <strong>LS</strong>-<strong>A1</strong> cable driver.<br />
The label informs you as to the appropriate channel<br />
(left/right) in each case. Make sure to insert the system<br />
plug in the correct position (rotation angle). The small<br />
projection in the plug must point upwards. Do not insert<br />
forcefully! Gently secure the plug by turning the blue ring<br />
clockwise.<br />
7.) Plug the accompanying mains cable AC-1502 into the <strong>LS</strong>-<br />
<strong>A1</strong> cable driver (pos. 8).<br />
8.) Before reconnecting all components to the power system,<br />
please check the entire installation once more.<br />
Operating manual<br />
9
Operating manual <strong>LS</strong>-<strong>A1</strong><br />
10<br />
Connection diagram<br />
IN<br />
16<br />
18<br />
Right Out<br />
Right Cannel Left Cannel<br />
Left Out<br />
16 – Loudspeaker right channel<br />
17 – Loudspeaker left channel<br />
18 – Speaker cable with system cable right channel<br />
19 – Speaker cable with system cable left channel<br />
20 – <strong>LS</strong>-<strong>A1</strong> Cable Driver<br />
21 – Amplifier<br />
Set Up:<br />
Please carry out the basic setup of the <strong>LS</strong>-<strong>A1</strong> cable driver on the rear of the<br />
appliance. Check here what rated impedance your connected loudspeakers<br />
possess, and bring the setup key (pos. 5) into the corresponding position.<br />
20<br />
21<br />
19<br />
IN<br />
17
Operation<br />
After you have carried out and tested the connection, please switch<br />
on the <strong>LS</strong>-<strong>A1</strong> cable driver via the mains switch (pos. 10). The<br />
appliance is now in the standby mode and the red LED (pos. 2) is lit.<br />
Now switch on the remaining components and start the playback. You<br />
may well already be able to notice a difference in sound as compared<br />
to that provided by your previous cable.<br />
Bring the level controller (pos. 4) to the middle position (0) and<br />
switch the <strong>LS</strong>-<strong>A1</strong> cable driver on with the standby key (pos. 1). The<br />
red LED goes out and the green LED lights up.<br />
When you have switched on the <strong>LS</strong>-<strong>A1</strong> cable driver, you will perceive<br />
a changed acoustic pattern with improved treble tone reproduction<br />
and three-dimensionality. Via the level controller (pos. 4), you have<br />
the opportunity of adapting the acoustic characteristics of the <strong>LS</strong>-<strong>A1</strong><br />
to your components and to your personal taste. The middle position<br />
of the level controller (pos. 4) can be used as a rough guide and<br />
corresponds to the theoretically optimal adaptation of the <strong>LS</strong>-<strong>A1</strong> to<br />
the connected loudspeakers, which have already been identified<br />
during the setup.<br />
Note:<br />
The <strong>LS</strong>-<strong>A1</strong> cable driver is equipped with a soft-start function. It can<br />
take a few minutes before all operating points of the electronics have<br />
been set up and stabilised. For this reason, the influence on sound we<br />
have already described can be somewhat delayed. If you would like to<br />
verify the operation of the active cable in an unambiguous manner,<br />
plug out the system plugs while the <strong>LS</strong>-<strong>A1</strong> cable driver is switched on<br />
or turn the level controller as far left as it goes and make an A-B<br />
comparison.<br />
Burn-in period<br />
<strong>LS</strong>-<strong>A1</strong><br />
As is the case with all cables and components, it also takes the active<br />
loudspeaker cable some time before it gets going properly. After<br />
approximately 20 seconds at room volume, the <strong>LS</strong>-<strong>A1</strong> has built up its<br />
full sound potential.<br />
Operating manual<br />
11
Operating manual <strong>LS</strong>-<strong>A1</strong><br />
12<br />
Additional functions<br />
The indicator LED (pos. 3) is lit up green during normal operation. If<br />
the <strong>LS</strong>-<strong>A1</strong> cable driver has been brought to the limits of its capacity<br />
(extreme volume level), the indicator LED (pos. 3) begins to flicker.<br />
Overloading can also under circumstances manifest itself as<br />
scratching in the loudspeakers. The <strong>LS</strong>-<strong>A1</strong> does have a soft-clipping<br />
function, but nevertheless immediately reduce the volume or the level<br />
of the <strong>LS</strong>-<strong>A1</strong> cable driver if this occurs in order to avoid damage to<br />
the loudspeakers. The <strong>LS</strong>-<strong>A1</strong> cable driver has enough reserves at its<br />
disposal to make overloading practically impossible. However, if the<br />
setup has not been carried out correctly and/or the level controller is<br />
turned all the way to the right, this can most certainly arise. Check<br />
the settings in this case.<br />
The <strong>LS</strong>-<strong>A1</strong> cable driver possesses an excess temperature protection<br />
mechanism. If the appliance should overheat, it switches off<br />
automatically and the indicator LED (pos. 3) begins to flash. When<br />
the appliance has reached normal operating temperature again, it<br />
switches to standby and the red LED (pos. 2) lights. The <strong>LS</strong>-<strong>A1</strong> cable<br />
driver does not switch back on automatically, rather must be switched<br />
on manually.3-6).<br />
Maintenance<br />
The <strong>LS</strong>-<strong>A1</strong> cable driver and the loudspeaker cable may NOT be<br />
cleaned with aggressive or corrosive cleaning agents. Remove dust<br />
and dirt with a soft cloth or brush. The connections of the loudspeaker<br />
cable should be cleaned from time to time (every six months) with a<br />
silver cloth in order to ensure a good contact.
Troubleshooting<br />
The standby LED (pos. 2) is not lit and the appliance won’t switch on<br />
-> Check the mains connection (pos. 8)<br />
->Check the fuse (pos. 9), observe note<br />
Note: A defective fuse may only be replaced by a fuse with the same<br />
characteristics. <strong>In</strong> case of doubt, the replacement must be carried out<br />
by a qualified technician! If the replaced fuse blows immediately, the<br />
appliance should be handed in to be serviced. We accept no liability<br />
for damage caused by interventions you make unassisted.<br />
The indicator LED (pos. 3) flashes and the appliance won’t switch on<br />
-> The appliance is still overheated<br />
The indicator LED (pos. 3) already flickers at medium volume<br />
-> Check the setup<br />
-> Check the position of the level controller (pos. 4)<br />
The appliance switches off after operating for only a short while and<br />
the indicator LED (pos. 3) flashes<br />
-> Check the installation and ventilation<br />
Technical data<br />
<strong>LS</strong>-<strong>A1</strong><br />
Measurements: approx. 435 x 75 x 270 mm (WxHxD)<br />
Weight: approx. 7.0 kg<br />
Temperature range: +5 to +40 °C<br />
Power consumption: Standby = 1.5 VA<br />
On = 17 – 250 VA max<br />
Max. output current: 2 x 20 A effective max.<br />
Bandwidth: 10 Hz – 75 kHz<br />
Dynamic range: > 90dB at 0.07 %<br />
Distortion factor: 0.07 %<br />
The in-akustik team now takes the opportunity of wishing you many<br />
hours of enjoyment with your <strong>LS</strong>-<strong>A1</strong> active loudspeaker cable.<br />
Operating manual<br />
13
Operating manual <strong>LS</strong>-<strong>A1</strong><br />
14<br />
Press<br />
Stereoplay says: “... you get the feeling that a curtain has been<br />
raised … the sound characteristics open up. The detail increased<br />
enormously… The articulation of the singers became almost<br />
frighteningly real.”<br />
SPEAKER CABEL <strong>LS</strong>-<strong>A1</strong><br />
ITEM NO.<br />
007 813521<br />
007 813522<br />
007 813523<br />
007 813524<br />
DESIGNATION<br />
Screw Type<br />
<strong>LS</strong>-<strong>A1</strong> 2x3,0m SW (inkl electronic; 100 V; 1,5m mains connection)<br />
<strong>LS</strong>-<strong>A1</strong> 2x3,0m SW (inkl electronic; 100V; 1,5m mains connection)<br />
<strong>LS</strong>-<strong>A1</strong> 2x3,0m SW (inkl electronic; 100V; 1,5m mains connection)<br />
CONNECTION<br />
Easy Plug<br />
BFA Banana<br />
Kabelschuh 6/8mm<br />
<strong>LS</strong>-<strong>A1</strong> 2x3,0m SW (inkl electronic; 100V; 1,5m mains connection) Screw Type
<strong>LS</strong>-<strong>A1</strong><br />
Operating manual<br />
15
O P E R A T I N G M A N U A L<br />
in-akustik GmbH & Co. KG<br />
Untermatten 12-14<br />
D-79282 Ballrechten-Dottingen<br />
Tel.:<br />
Fax.:<br />
E-Mail:<br />
Web:<br />
+49 (0) 7634-5610-0<br />
+49 (0) 7634-5610-80<br />
mailto@in-akustik.com<br />
www.in-akustik.com Note: All product illustrations are approximate. Specifications subject to change