Create successful ePaper yourself
Turn your PDF publications into a flip-book with our unique Google optimized e-Paper software.
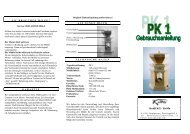
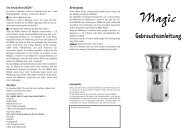
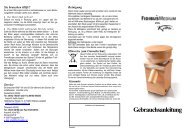
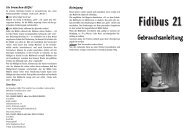
Congratulations<br />
on the purchase of your new <strong>hawos</strong> <strong>easy</strong>.<br />
So that you are assured of having many years of<br />
enjoyable use of your grain mill, we ask you to read<br />
the following operating instructions.<br />
Please keep these operating instructions.<br />
This household grain mill is simply constructed,<br />
simple to use, and simple to clean.<br />
The basic principle of <strong>hawos</strong> <strong>easy</strong><br />
hopper cover<br />
handwheel<br />
brake screw<br />
hopper input<br />
stationary<br />
stone<br />
rotating<br />
stone<br />
flour chamber<br />
standard motor<br />
360 watts<br />
on/off switch<br />
The milling works<br />
brake skrew<br />
rubber gasket<br />
By turning the hand wheel, the hopper input is<br />
raised or lowered along with the upper millstone.<br />
The stiffness of the hand wheel is adjusted using the<br />
brake screw. When turning the brake screw, avoid<br />
pressing on the rubber gasket.<br />
Important tip<br />
Grain<br />
1. Use only clean grain, or sort it carefully yourself.<br />
Grain can often contain small stones or other<br />
foreign bodies which can damage the milling<br />
works.<br />
2. Always use dry grain. You can recognize dry<br />
grain by the fact that the kernels crack loudly<br />
when crushed with a spoon on a hard surface.<br />
Wet grain can be flattened and will then look like<br />
a cornflake or oat flake. After harvest, rye should<br />
be stored at least a half a year.<br />
3. Do not grind flour a second time.<br />
4. If you would like to grind corn, use only food<br />
corn.<br />
Housing<br />
5. Your mill has a beautiful wood housing. You can<br />
protect and care for it best by avoiding storing it<br />
near heaters or directly next to the range or oven<br />
(steam or dampness).<br />
Power supply, milling quantities<br />
6. Connect the mill to alternating current only.<br />
Check that the voltage available matches the<br />
voltage specified on the panel on the underside<br />
of the mill.<br />
7. This device is constructed to process household<br />
amounts, and is not intended for commercial<br />
use.<br />
Safety<br />
8. If the power cord of this device is damaged, it<br />
must be replaced by the manufacturer, the<br />
manufacturer’s service representatives, or a similarly<br />
qualified person, in order to avoid injury.<br />
Safety for children<br />
9. Grain mills should be used under the supervision<br />
of an adult and should not be stored in the reach<br />
of children.<br />
Positioning the mill<br />
10. Place the grain mill on a hard, level surface<br />
during use, such as a kitchen counter. The ventilation<br />
slit for the motor on the underside of the<br />
device must be free of obstructions.<br />
11. Be sure that the container for the flour is large<br />
enough, so that flour does not block the outlet.<br />
Rule of thumb: ground grain requires twice the<br />
room.<br />
Installation<br />
First, read the important tip (left page)!<br />
Fill grain hopper<br />
Switch machine on<br />
Adjust fineness<br />
If the metal button the hand<br />
wheel is on top, the millstone<br />
is raised. The mill will grind<br />
coarse flour.<br />
Turn to left or right. The<br />
hopper input and the millstone<br />
move smoothly downwards,<br />
and the flour becomes<br />
finer.<br />
Removing hopper input<br />
Loosen brake screw<br />
Remove hand wheel<br />
Remove hopper input<br />
Clean machine or remove<br />
foreign bodies<br />
Reassemble in reverse order<br />
Always unplug the power cord when working on<br />
machine.<br />
Cleaning<br />
After prolonged storage, clean all flour from the<br />
milling works so that you always get fresh flour.<br />
This can be done easily using a vacuum cleaner:<br />
Set the mill to “coarse”, switch on, and then hold<br />
the intake of the vacuum cleaner (with appropriate<br />
hose) to the outlet of the mill.<br />
The outer surface of the grain mill can easily be<br />
wiped clean with a damp cloth.<br />
Under no circumstances should you use abrasive<br />
cleaners or clean under running water. Never submerge<br />
the grain mill!<br />
If the millstones are smeared:<br />
• Remove brake screw and hand wheel, remove<br />
hopper input<br />
• Vacuum mill works area<br />
• Reassemble mill works<br />
Or: grind approximately 100 g of wheat or rice.<br />
Problems<br />
Problems arise very seldom with <strong>hawos</strong> <strong>easy</strong>.<br />
You can fix the following problems yourself:<br />
1. Motor doesn’t start:<br />
Is the mill plugged in? Is the safety switch on?<br />
Check both. Set fineness adjustment to “coarse”<br />
(metal button on hand wheel on top).<br />
2. The mill stops during use:<br />
If the motor should stop due to improper use or<br />
extreme load, the thermal fuse in the power<br />
switch will automatically shut off. After cooling<br />
off for a few minutes, the grain mill is again ready<br />
for use. Please switch it back on. If the problem<br />
reoccurs, determine the cause: is the grain too<br />
wet? Is the milling work jammed? Are there<br />
foreign bodies lodged between the millstones,<br />
etc.?<br />
3. The mill cannot be adjusted in the “fine”<br />
direction:<br />
A flour jam, that is, if the flour bowl is too full,<br />
then the milling work can jam, or there may be a<br />
foreign body in the mill work.<br />
Solution:<br />
• Remove brake screw and handwheel, remove<br />
hopper input<br />
• Vacuum mill work part<br />
• Reassemble mill work