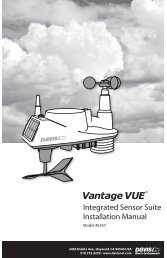
DriveRight 600 User's Guide - Davis Instruments Corp.
DriveRight 600 User's Guide - Davis Instruments Corp.
DriveRight 600 User's Guide - Davis Instruments Corp.

You also want an ePaper? Increase the reach of your titles
YUMPU automatically turns print PDFs into web optimized ePapers that Google loves.
USING THE DRIVERIGHT <strong>600</strong><br />
This section briefly describes the use of the <strong>DriveRight</strong> <strong>600</strong> display<br />
unit. The use of the four buttons (PLUS, MINUS, MODE, SET/<br />
CLEAR) and the sequence of data screens and settings screens is<br />
explained. Descriptions of the information and options available from<br />
each screen are explained separately in “Data Screens” starting on<br />
page 10 and “Settings Screens” starting on page 18.<br />
Using the Four Buttons<br />
The <strong>DriveRight</strong> <strong>600</strong> has four buttons: PLUS, MINUS, MODE, and<br />
SET/CLEAR. The general use of each button is explained briefly<br />
below:<br />
❏<br />
❏<br />
❏<br />
PLUS/MINUS<br />
When a digit or segment (e.g., MPH or KPH) is flashing, use<br />
the PLUS and MINUS keys to scroll forward or backward<br />
(respectively) through the available options (usually 0 to 9).<br />
When viewing any logged trip information screen, use the PLUS<br />
and MINUS keys to page forward or backward (respectively)<br />
through the stored trips.<br />
SET/CLEAR<br />
When entering codes or setting limits, the flashing digit/segment<br />
indicates what will change if PLUS or MINUS is<br />
pressed. Pressing and releasing SET/CLEAR causes the next<br />
digit/segment to begin flashing.<br />
From the Driver ID Code screen, press and hold SET/CLEAR (for<br />
at least 2 seconds) to “log out.” The driver ID code is reset to 0000.<br />
MODE<br />
Press and release MODE to move to the next data or information<br />
screen.<br />
Press and hold MODE to switch between the group of data screens<br />
and the group of settings screens.<br />
When the unit is in sleep mode, press MODE to “wake” the unit up.<br />
Changing Units of Measure<br />
To change units of measure, press and hold SET/CLEAR for at least 2<br />
seconds while viewing the Current Readings screen. You may also<br />
change units from the Limit and Units Settings screen by pressing<br />
SET/CLEAR until either the km/h or MPH segment is flashing, and<br />
then pressing PLUS to toggle between the two units of measure.<br />
You may change the date display format from the Date Entry screen<br />
and the time display format from the Time Entry screen.<br />
3