You also want an ePaper? Increase the reach of your titles
YUMPU automatically turns print PDFs into web optimized ePapers that Google loves.
Backing Track Functions<br />
When you record a Song using a Style, the Style data is<br />
recorded in the first measure of the Song. When you play back<br />
this Song, playback will begin from measure indication “2.”<br />
When you re-record the Song, the ANALOG MODIFY settings<br />
other than the MASTER EQ settings (p. 37; Reverb Send,<br />
Chorus Send, Attack, Release, Cutoff and Resonance) cannot<br />
be changed.<br />
1. Press [SONG] so the button is lit.<br />
2. Press [PART VIEW] so the button is lit.<br />
The SONG TRACK screen will appear.<br />
As needed, make Song settings as described in step 7 of<br />
“Recording a specified Part (SONG TRACK).”<br />
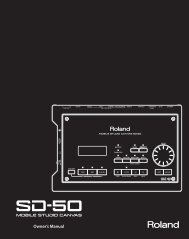
3. Press [SONG REC].<br />
[SONG REC] will blink.<br />
The Song Rec Standby screen will appear.<br />
4. Use the cursor buttons to select a parameter, and turn the<br />
VALUE dial to set the value.<br />
Parameter Value Explanation<br />
Rec<br />
Mode<br />
Count<br />
In<br />
Input<br />
Quantize<br />
Punch<br />
Sw<br />
REPLACE<br />
MIX<br />
OFF<br />
1MEAS<br />
2MEAS<br />
WAIT NOTE<br />
OFF, 1/4,<br />
1/8, 1/8T,<br />
1/16, 1/16T,<br />
1/32, 1/32T,<br />
1/64<br />
OFF, ON<br />
New material is recorded as<br />
previously recorded material is<br />
erased.<br />
New notes are recorded on top<br />
of notes previously recorded.<br />
No count-in. Recording starts as<br />
soon as you press [ ].<br />
Recording starts after a 1-bar<br />
count-in.<br />
Recording starts after a 2-bar<br />
count-in.<br />
Recording starts as soon as you<br />
play a note on the keyboard.<br />
(There will be no count-in.)<br />
Quantize corrects the timing of<br />
your notes by shifting them to the<br />
nearest grid mark. This specifies<br />
the number of steps per measure<br />
(i.e., the resolution).<br />
If this is turned “ON,” recording<br />
will occur from the “Punch In”<br />
measure to the “Punch Out”<br />
measure that you specify below.<br />
When the song playback reaches<br />
the measure you specified for<br />
“Punch In,” recording will begin<br />
automatically, and recording will<br />
stop at the “Punch Out” measure.<br />
Parameter Value Explanation<br />
Punch<br />
In<br />
Punch<br />
Out<br />
If you assign the pedal to “PUNCH IN/OUT” in “Pedal<br />
Assign” (p. 46), you’ll be able to specify the record-start and<br />
record-end locations by pressing the pedal. In this case, turn<br />
the above “Punch Sw” to the “OFF” setting.<br />
5. Press [ ] to start recording.<br />
6. Perform.<br />
0001–<br />
0002–<br />
7. Press [ ] to stop recording.<br />
Saving a Song ([WRITE])<br />
Here’s how you can save a Song from the temporary Song<br />
memory to a user Song memory.<br />
1. Press [WRITE].<br />
2. Use [ ] [ ] to select “Song,” and then press [ENTER].<br />
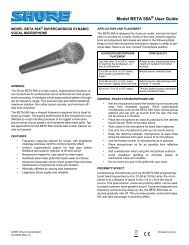
Input a name for your user Song<br />
3. Use [ ] [ ] to move the cursor, and turn the VALUE<br />
dial to change each character.<br />
Enter a Song name of up to 16 characters.<br />
The following characters are available.<br />
A–Z 0–9 ! # $ % & ‘ ( ) - @ ^ _ ` { }<br />
Button<br />
[0]<br />
4. Press [ENTER].<br />
A confirmation window will appear.<br />
5. Press [ENTER] to save the Song.<br />
Measure at which recording<br />
will begin<br />
Measure at which recording<br />
will end<br />
Explanation<br />
Selects the type of character. Each time you press<br />
this, you will alternately select the first character<br />
of a character set: uppercase (A), or numerals<br />
and symbols (0).<br />
[1] Deletes the character at the cursor location.<br />
[2] Inserts a space at the cursor location.<br />
If you press [EXIT], you’re returned to the previous screen<br />
without the Song being saved.<br />
29