
Create successful ePaper yourself
Turn your PDF publications into a flip-book with our unique Google optimized e-Paper software.
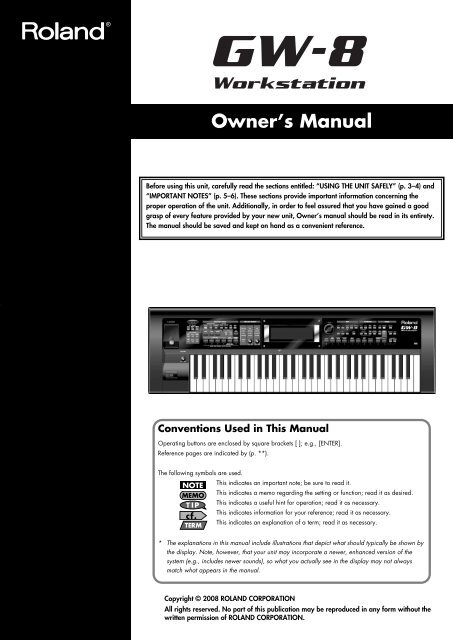
Owner’s <strong>Manual</strong><br />
201a<br />
Before using this unit, carefully read the sections entitled: “USING THE UNIT SAFELY” (p. 3–4) and<br />
“IMPORTANT NOTES” (p. 5–6). These sections provide important information concerning the<br />
proper operation of the unit. Additionally, in order to feel assured that you have gained a good<br />
grasp of every feature provided by your new unit, Owner’s manual should be read in its entirety.<br />
The manual should be saved and kept on hand as a convenient reference.<br />
Conventions Used in This <strong>Manual</strong><br />
Operating buttons are enclosed by square brackets [ ]; e.g., [ENTER].<br />
Reference pages are indicated by (p. **).<br />
The following symbols are used.<br />
This indicates an important note; be sure to read it.<br />
This indicates a memo regarding the setting or function; read it as desired.<br />
This indicates a useful hint for operation; read it as necessary.<br />
This indicates information for your reference; read it as necessary.<br />
This indicates an explanation of a term; read it as necessary.<br />
* The explanations in this manual include illustrations that depict what should typically be shown by<br />
the display. Note, however, that your unit may incorporate a newer, enhanced version of the<br />
system (e.g., includes newer sounds), so what you actually see in the display may not always<br />
match what appears in the manual.<br />
202<br />
Copyright © 2008 ROLAND CORPORATION<br />
All rights reserved. No part of this publication may be reproduced in any form without the<br />
written permission of ROLAND CORPORATION.
For the U.K.<br />
IMPORTANT: THE WIRES IN THIS MAINS LEAD ARE COLOURED IN ACCORDANCE WITH THE FOLLOWING CODE.<br />
BLUE:<br />
BROWN:<br />
NEUTRAL<br />
LIVE<br />
As the colours of the wires in the mains lead of this apparatus may not correspond with the coloured markings identifying<br />
the terminals in your plug, proceed as follows:<br />
The wire which is coloured BLUE must be connected to the terminal which is marked with the letter N or coloured BLACK.<br />
The wire which is coloured BROWN must be connected to the terminal which is marked with the letter L or coloured RED.<br />
Under no circumstances must either of the above wires be connected to the earth terminal of a three pin plug.
USING THE UNIT SAFELY<br />
Used for instructions intended to alert the<br />
user to the risk of death or severe injury<br />
should the unit be used improperly.<br />
Used for instructions intended to alert the<br />
user to the risk of injury or material<br />
damage should the unit be used<br />
improperly.<br />
* Material damage refers to damage or<br />
other adverse effects caused with<br />
respect to the home and all its<br />
furnishings, as well to domestic animals<br />
or pets.<br />
The symbol alerts the user to important instructions or<br />
warnings.The specific meaning of the symbol is<br />
determined by the design contained within the triangle.<br />
In the case of the symbol at left, it is used for general<br />
cautions, warnings, or alerts to danger.<br />
The symbol alerts the user to items that must never be<br />
carried out (are forbidden). The specific thing that must<br />
not be done is indicated by the design contained within<br />
the circle. In the case of the symbol at left, it means that<br />
the unit must never be disassembled.<br />
The ● symbol alerts the user to things that must be<br />
carried out. The specific thing that must be done is<br />
indicated by the design contained within the circle. In<br />
the case of the symbol at left, it means that the powercord<br />
plug must be unplugged from the outlet.<br />
002c<br />
• Do not open (or modify in any way) the unit or its<br />
AC adaptor.<br />
..........................................................................................................<br />
003<br />
• Do not attempt to repair the unit, or replace parts<br />
within it (except when this manual provides specific<br />
instructions directing you to do so). Refer all<br />
servicing to your retailer, the nearest <strong>Roland</strong><br />
Service Center, or an authorized <strong>Roland</strong><br />
distributor, as listed on the “Information” page.<br />
..........................................................................................................<br />
004<br />
• Never use or store the unit in places that are:<br />
• Subject to temperature extremes (e.g., direct<br />
sunlight in an enclosed vehicle, near a heating<br />
duct, on top of heat-generating equipment); or<br />
are<br />
• Damp (e.g., baths, washrooms, on wet floors);<br />
or are<br />
• Humid; or are<br />
• Exposed to rain; or are<br />
• Dusty; or are<br />
• Subject to high levels of vibration.<br />
..........................................................................................................<br />
005<br />
• This unit should be used only with a rack or stand<br />
that is recommended by <strong>Roland</strong>.<br />
..........................................................................................................<br />
006<br />
• When using the unit with a rack or stand recommended<br />
by <strong>Roland</strong>, the rack or stand must be<br />
carefully placed so it is level and sure to remain<br />
stable. If not using a rack or stand, you still need to<br />
make sure that any location you choose for placing<br />
the unit provides a level surface that will properly<br />
support the unit, and keep it from wobbling.<br />
..........................................................................................................<br />
008c<br />
• Be sure to use only the AC adaptor supplied with<br />
the unit. Also, make sure the line voltage at the<br />
installation matches the input voltage specified on<br />
the AC adaptor’s body. Other AC adaptors may<br />
use a different polarity, or be designed for a<br />
different voltage, so their use could result in<br />
damage, malfunction, or electric shock.<br />
..........................................................................................................<br />
008e<br />
• Use only the attached power-supply cord. Also, the<br />
supplied power cord must not be used with any<br />
other device.<br />
..........................................................................................................<br />
009<br />
• Do not excessively twist or bend the power cord,<br />
nor place heavy objects on it. Doing so can<br />
damage the cord, producing severed elements and<br />
short circuits. Damaged cords are fire and shock<br />
hazards!<br />
..........................................................................................................<br />
010<br />
• This unit, either alone or in combination with an<br />
amplifier and headphones or speakers, may be<br />
capable of producing sound levels that could cause<br />
permanent hearing loss. Do not operate for a long<br />
period of time at a high volume level, or at a level<br />
that is uncomfortable. If you experience any<br />
hearing loss or ringing in the ears, you should<br />
immediately stop using the unit, and consult an<br />
audiologist.<br />
..........................................................................................................<br />
011<br />
• Do not allow any objects (e.g., flammable material,<br />
coins, pins); or liquids of any kind (water, soft<br />
drinks, etc.) to penetrate the unit.<br />
..........................................................................................................<br />
3
012b<br />
• Immediately turn the power off, remove the AC<br />
adaptor from the outlet, and request servicing by<br />
your retailer, the nearest <strong>Roland</strong> Service Center, or<br />
an authorized <strong>Roland</strong> distributor, as listed on the<br />
“Information” page when:<br />
• The AC adaptor, the power-supply cord, or the<br />
plug has been damaged; or<br />
• If smoke or unusual odor occurs<br />
• Objects have fallen into, or liquid has been<br />
spilled onto the unit; or<br />
• The unit has been exposed to rain (or otherwise<br />
has become wet); or<br />
• The unit does not appear to operate normally or<br />
exhibits a marked change in performance.<br />
..........................................................................................................<br />
013<br />
• In households with small children, an adult should<br />
provide supervision until the child is capable of<br />
following all the rules essential for the safe<br />
operation of the unit.<br />
..........................................................................................................<br />
014<br />
• Protect the unit from strong impact.<br />
(Do not drop it!)<br />
..........................................................................................................<br />
015<br />
• Do not force the unit’s power-supply cord to share<br />
an outlet with an unreasonable number of other<br />
devices. Be especially careful when using<br />
extension cords—the total power used by all<br />
devices you have connected to the extension cord’s<br />
outlet must never exceed the power rating (watts/<br />
amperes) for the extension cord. Excessive loads<br />
can cause the insulation on the cord to heat up and<br />
eventually melt through.<br />
..........................................................................................................<br />
016<br />
• Before using the unit in a foreign country, consult<br />
with your retailer, the nearest <strong>Roland</strong> Service<br />
Center, or an authorized <strong>Roland</strong> distributor, as<br />
listed on the “Information” page.<br />
..........................................................................................................<br />
023<br />
• DO NOT play a CD-ROM disc on a conventional<br />
audio CD player. The resulting sound may be of a<br />
level that could cause permanent hearing loss.<br />
Damage to speakers or other system components<br />
may result.<br />
..........................................................................................................<br />
101b<br />
• The unit and the AC adaptor should be located so<br />
their location or position does not interfere with<br />
their proper ventilation.<br />
..........................................................................................................<br />
101c<br />
• This (GW-8) for use only with <strong>Roland</strong> stand KS-12.<br />
Use with other stands is capable of resulting in<br />
instability causing possible injury.<br />
..........................................................................................................<br />
102c<br />
• Always grasp only the plug on the AC adaptor<br />
cord when plugging into, or unplugging from, an<br />
outlet or this unit.<br />
..........................................................................................................<br />
103b<br />
• At regular intervals, you should unplug the AC<br />
adaptor and clean it by using a dry cloth to wipe<br />
all dust and other accumulations away from its<br />
prongs. Also, disconnect the power plug from the<br />
power outlet whenever the unit is to remain unused<br />
for an extended period of time. Any accumulation<br />
of dust between the power plug and the power<br />
outlet can result in poor insulation and lead to fire.<br />
..........................................................................................................<br />
104<br />
• Try to prevent cords and cables from becoming<br />
entangled. Also, all cords and cables should be<br />
placed so they are out of the reach of children.<br />
..........................................................................................................<br />
106<br />
• Never climb on top of, nor place heavy objects on<br />
the unit.<br />
..........................................................................................................<br />
107c<br />
• Never handle the AC adaptor or its plugs with wet<br />
hands when plugging into, or unplugging from, an<br />
outlet or this unit.<br />
..........................................................................................................<br />
108b<br />
• Before moving the unit, disconnect the AC adaptor<br />
and all cords coming from external devices.<br />
..........................................................................................................<br />
109b<br />
• Before cleaning the unit, turn off the power and<br />
unplug the AC adaptor from the outlet (p. 15).<br />
..........................................................................................................<br />
110b<br />
• Whenever you suspect the possibility of lightning in<br />
your area, disconnect the AC adaptor from the<br />
outlet.<br />
..........................................................................................................<br />
118b<br />
• Keep the screw that fastens the USB MEMORY<br />
connector box cover in a safe place out of<br />
children’s reach, so there is no chance of it being<br />
swallowed accidentally.<br />
..........................................................................................................<br />
4
IMPORTANT NOTES<br />
Power Supply<br />
301<br />
• Do not connect this unit to same electrical outlet that is being<br />
used by an electrical appliance that is controlled by an<br />
inverter (such as a refrigerator, washing machine,<br />
microwave oven, or air conditioner), or that contains a<br />
motor. Depending on the way in which the electrical<br />
appliance is used, power supply noise may cause this unit to<br />
malfunction or may produce audible noise. If it is not<br />
practical to use a separate electrical outlet, connect a power<br />
supply noise filter between this unit and the electrical outlet.<br />
302<br />
• The AC adaptor will begin to generate heat after long<br />
hours of consecutive use. This is normal, and is not a cause<br />
for concern.<br />
307<br />
• Before connecting this unit to other devices, turn off the<br />
power to all units. This will help prevent malfunctions and/<br />
or damage to speakers or other devices.<br />
Placement<br />
351<br />
• Using the unit near power amplifiers (or other equipment<br />
containing large power transformers) may induce hum. To<br />
alleviate the problem, change the orientation of this unit; or<br />
move it farther away from the source of interference.<br />
352a<br />
• This device may interfere with radio and television reception.<br />
Do not use this device in the vicinity of such receivers.<br />
352b<br />
• Noise may be produced if wireless communications<br />
devices, such as cell phones, are operated in the vicinity of<br />
this unit. Such noise could occur when receiving or initiating<br />
a call, or while conversing. Should you experience<br />
such problems, you should relocate such wireless devices<br />
so they are at a greater distance from this unit, or switch<br />
them off.<br />
354a<br />
• Do not expose the unit to direct sunlight, place it near<br />
devices that radiate heat, leave it inside an enclosed<br />
vehicle, or otherwise subject it to temperature extremes.<br />
Excessive heat can deform or discolor the unit.<br />
355b<br />
• When moved from one location to another where the<br />
temperature and/or humidity is very different, water<br />
droplets (condensation) may form inside the unit. Damage<br />
or malfunction may result if you attempt to use the unit in<br />
this condition. Therefore, before using the unit, you must<br />
allow it to stand for several hours, until the condensation<br />
has completely evaporated.<br />
358<br />
• Do not allow objects to remain on top of the keyboard. This<br />
can be the cause of malfunction, such as keys ceasing to<br />
produce sound.<br />
360<br />
• Depending on the material and temperature of the surface<br />
on which you place the unit, its rubber feet may discolor or<br />
mar the surface.<br />
You can place a piece of felt or cloth under the rubber feet<br />
to prevent this from happening. If you do so, please make<br />
sure that the unit will not slip or move accidentally.<br />
Maintenance<br />
401a<br />
• For everyday cleaning wipe the unit with a soft, dry cloth or<br />
one that has been slightly dampened with water. To remove<br />
stubborn dirt, use a cloth impregnated with a mild, nonabrasive<br />
detergent. Afterwards, be sure to wipe the unit<br />
thoroughly with a soft, dry cloth.<br />
402<br />
• Never use benzine, thinners, alcohol or solvents of any<br />
kind, to avoid the possibility of discoloration and/or deformation.<br />
Repairs and Data<br />
452<br />
• Please be aware that all data contained in the unit’s<br />
memory may be lost when the unit is sent for repairs.<br />
Important data should always be backed up on a USB<br />
memory, or written down on paper (when possible). During<br />
repairs, due care is taken to avoid the loss of data.<br />
However, in certain cases (such as when circuitry related to<br />
memory itself is out of order), we regret that it may not be<br />
possible to restore the data, and <strong>Roland</strong> assumes no<br />
liability concerning such loss of data.<br />
Additional Precautions<br />
551<br />
• Please be aware that the contents of memory can be<br />
irretrievably lost as a result of a malfunction, or the<br />
improper operation of the unit. To protect yourself against<br />
the risk of loosing important data, we recommend that you<br />
periodically save a backup copy of important data you<br />
have stored in the unit’s memory or on a USB memory.<br />
552<br />
• Unfortunately, it may be impossible to restore the contents<br />
of data that was stored in the unit’s memory or on a USB<br />
memory once it has been lost. <strong>Roland</strong> Corporation assumes<br />
no liability concerning such loss of data.<br />
553<br />
• Use a reasonable amount of care when using the unit’s<br />
buttons, sliders, or other controls; and when using its jacks<br />
and connectors. Rough handling can lead to malfunctions.<br />
554<br />
• Never strike or apply strong pressure to the display.<br />
556<br />
• When connecting / disconnecting all cables, grasp the<br />
connector itself—never pull on the cable. This way you will<br />
avoid causing shorts, or damage to the cable’s internal<br />
elements.<br />
558a<br />
• To avoid disturbing your neighbors, try to keep the unit’s<br />
volume at reasonable levels. You may prefer to use<br />
headphones, so you do not need to be concerned about<br />
those around you (especially when it is late at night).<br />
559a<br />
• When you need to transport the unit, package it in the box<br />
(including padding) that it came in, if possible. Otherwise,<br />
you will need to use equivalent packaging materials.<br />
561<br />
• Use only the specified expression pedal (EV-5; sold<br />
separately). By connecting any other expression pedals,<br />
you risk causing malfunction and/or damage to the unit.<br />
5
IMPORTANT NOTES<br />
562<br />
• Some connection cables contain resistors. Do not use<br />
cables that incorporate resistors for connecting to this unit.<br />
The use of such cables can cause the sound level to be<br />
extremely low, or impossible to hear. For information on<br />
cable specifications, contact the manufacturer of the cable.<br />
563<br />
• Unauthorized duplication, reproduction, hiring, and<br />
lending prohibited.<br />
566b<br />
• The sensitivity of the D Beam controller will change<br />
depending on the amount of light in the vicinity of the unit.<br />
If it does not function as you expect, adjust the sensitivity as<br />
appropriate for the brightness of your location.<br />
Using USB Memory<br />
704<br />
• When connecting USB memory, firmly insert it all the way<br />
in.<br />
705<br />
• Do not touch the pins of the USB memory connector, or<br />
allow them to become dirty.<br />
708<br />
• USB memory is made using high-precision electronic<br />
components, so please observe the following points when<br />
handling it.<br />
• To prevent damage from static electrical charges,<br />
discharge any static electricity that might be present in<br />
your body before handling USB memory.<br />
• Do not touch the terminals with your fingers or any metal<br />
object.<br />
• Do not bend or drop USB memory, or subject it to strong<br />
impact.<br />
• Do not leave USB memory in direct sunlight or in<br />
locations such as a closed-up automobile. (Storage<br />
temperature: 0–50 degrees C)<br />
• Do not allow USB memory to become wet.<br />
• Do not disassemble or modify USB memory.<br />
Addition<br />
• When connecting USB memory, position it horizontally with<br />
the USB memory connector and insert it without using<br />
excessive force. The USB memory connector may be<br />
damaged if you use excessive force when inserting USB<br />
memory.<br />
Addition<br />
• Do not insert anything other than USB memory (e.g., wire,<br />
coins, other types of device) into the USB memory<br />
connector. Doing so will damage the USB memory<br />
connector.<br />
Addition<br />
• Do not apply excessive force to the connected USB<br />
memory.<br />
Addition<br />
• Attach the USB memory cover when you’re not using USB<br />
memory.<br />
Copyright<br />
204<br />
* Microsoft and Windows are registered trademarks of<br />
Microsoft Corporation.<br />
206e<br />
* The screen shots in this document are used in compliance<br />
with the guidelines of the Microsoft Corporation.<br />
213<br />
* Pentium is a registered trademark of Intel Corporation.<br />
220<br />
* All product names mentioned in this document are trademarks<br />
or registered trademarks of their respective owners.<br />
238<br />
* MPEG Layer-3 audio compression technology is licensed<br />
from Fraunhofer IIS Corporation and THOMSON Multimedia<br />
Corporation.<br />
add<br />
* MatrixQuest 2008 TEPCO UQUEST, LTD.<br />
All rights reserved.<br />
The GW-8’s USB functionality uses Matrix-<br />
Quest middleware technology from TEPCO<br />
UQUEST, LTD.<br />
Handling CD-ROMs<br />
801<br />
• Avoid touching or scratching the shiny underside (encoded<br />
surface) of the disc. Damaged or dirty CD-ROM discs may<br />
not be read properly. Keep your discs clean using a<br />
commercially available CD cleaner.<br />
6
Main Features<br />
The Ideal Workstation for On-Stage Performance<br />
High-quality sounds<br />
● The latest sounds generated by a top-level sound generator with 128 voice polyphony<br />
● High-quality localized sounds<br />
Three backing functions that assist your stage performances<br />
● High-quality Music Style engine with the latest Styles<br />
❍ Four variations each for Intro, Main, and Ending.<br />
❍ Included “StyleConverter” software lets you create Styles on your computer.<br />
Styles you’ve created can be installed in the GW-8 as User Styles via USB memory.<br />
● USB Memory Player function lets you play MP3/WAV/AIFF/SMF data<br />
❍ You can apply the Center Cancel function to audio, or enjoy “minus-one” performance using<br />
SMF data.<br />
❍ Included “Playlist Editor” software lets you create playlists on your computer.<br />
You can easily create a playlist for each of your live performances.<br />
● 16-track song sequencer is built-in, allowing you to record your performances on the GW-8<br />
❍ SMF data can be stored in internal memory, and played back or used for “minus-one”<br />
performance.<br />
Designed for easy use in live performance<br />
● Lightweight and compact body designed for portability<br />
● Large, full-graphic white LCD for excellent visibility<br />
● Friendly user interface featuring Style Select buttons for direct selection<br />
● Intuitive controllers such as ANALOG MODIFY knobs and D Beam controller<br />
Import sounds via USB memory<br />
● USB Import function allows you to add sounds (Tones)<br />
New sounds can be added via USB memory.<br />
7
Contents<br />
USING THE UNIT SAFELY ........................... 3<br />
IMPORTANT NOTES .................................. 5<br />
Main Features....................................7<br />
Panel Descriptions............................10<br />
Front Panel ........................................................10<br />
Rear Panel.........................................................12<br />
Introduction .....................................13<br />
About the GW-8 ...................................... 13<br />
About Memory ...................................................13<br />
Making Connections................................. 14<br />
Connecting the AC Adaptor.................................14<br />
Connecting External Equipment ............................15<br />
Connecting a pedal and switch ......................15<br />
Connecting a portable audio player to<br />
the EXT INPUT jack .......................................15<br />
Turning the Power On/Off ........................ 15<br />
Turning the power on ....................................15<br />
Turning the power off ....................................15<br />
Adjusting the Display Contrast<br />
([LCD CONTRAST] knob) .......................... 16<br />
Listening to the Demo Song ....................... 16<br />
Restoring the GW-8 to Its Factory Settings ... 16<br />
Preserving Certain Settings Even When You<br />
Switch Performances ([LOCK]) ................... 16<br />
Input settings for the EXT INPUT jack........... 17<br />
Basic Operation....................................... 17<br />
Changing a Value ..............................................17<br />
Moving the cursor ........................................17<br />
Changing a value .........................................17<br />
Main Screen ......................................................18<br />
Keyboard Mode Functions................19<br />
Playing Sounds from the Keyboard<br />
(Keyboard Mode)..................................... 19<br />
Using Single Mode .............................................19<br />
Using Piano setting .......................................19<br />
Using Split Mode ([SPLIT])....................................19<br />
Changing the Split Point ................................19<br />
Using Dual Mode ([DUAL]) ..................................19<br />
Selecting a Tone ([TONE])......................... 20<br />
Using the VALUE dial ....................................20<br />
Choosing from the Tone list ............................20<br />
Registering Frequently Used Tones or<br />
Performances in a Button (FAVORITE Buttons)20<br />
Registering a Favorite Tone/Performance .............. 20<br />
Selecting a Favorite Tone/Performance................. 20<br />
Checking or Changing the Registered Bank........... 20<br />
Viewing or Editing the Favorite List ....................... 21<br />
Switching to an Arabian Scale or<br />
Other Temperament ([KEY SCALE]) ............ 21<br />
Changing the Key Touch ([KEY TOUCH]) .... 22<br />
Shifting the Keyboard Pitch in Octave Steps<br />
(OCTAVE Buttons) .................................... 22<br />
Transposing Keyboard Sounds and Songs<br />
Played Back ([TRANSPOSE]) ..................... 22<br />
Adding Harmony to the Upper Tone<br />
([MELODY INTELLIGENCE])....................... 23<br />
Using the Metronome ............................... 23<br />
Other Functions ....................................... 23<br />
Backing Track Functions................... 24<br />
Selecting the Backing Types<br />
(Style/Song/USB Memory Player) ........................ 24<br />
Adjusting the Volume Balance between Backing and<br />
Keyboard (BALANCE buttons).............................. 24<br />
Adjusting the Tempo ([TAP TEMPO]) ..................... 24<br />
Using the metronome .................................... 24<br />
Style (Playing with an Accompaniment)....... 25<br />
Playing Back a Style ([STYLE]) .............................. 25<br />
Changing the Variations ............................... 25<br />
Stopping a Style .......................................... 25<br />
Adjusting the Part Balance ([PART VIEW]) ....... 25<br />
Sync Start/Stop (SYNC buttons) ..................... 26<br />
Saving the Current Settings in a Performance......... 26<br />
Selecting a Music Style ....................................... 26<br />
Selecting a Style .......................................... 26<br />
Adding User Styles (Importing from USB memory) .. 26<br />
Deleting a User Style .................................... 26<br />
Back up User Style (Exporting to USB memory) ....27<br />
Using the Recommended Sound Settings for a Style<br />
([ONE TOUCH]) ................................................ 27<br />
Other Functions Related to Music Style.................. 27<br />
Song ...................................................... 27<br />
Recording a New Song ([SONG REC])................. 27<br />
Recording in the Main screen ........................ 27<br />
Recording a specified Part (SONG TRACK) ..... 28<br />
Re-recording Your Performance ............................ 28<br />
Saving a Song ([WRITE])..................................... 29<br />
Loading Song Data from USB Memory.................. 30<br />
8
Contents<br />
Deleting a Song .................................................30<br />
Selecting and Playing a Song ([SONG]) ...............30<br />
Moving the playback location of a song ..........30<br />
Performing along with a song<br />
([MINUS ONE/CENTER CANCEL]) ................30<br />
Back Up Song Files.............................................30<br />
Other Functions Related to Song...........................30<br />
USB Memory Player<br />
(SMF/Audio File Player)............................ 31<br />
Playing Back SMF/Audio Files .............................31<br />
USB Memory Player Screens ................................31<br />
Song Playback ([USB MEMORY PLAYER])..............32<br />
Selecting a playlist and playing it ...................32<br />
Selecting and playing a song from within<br />
a songlist .....................................................32<br />
Performing along with a song<br />
([MINUS ONE/CENTER CANCEL]) ................32<br />
Editing Playlist....................................................33<br />
Selecting the playback mode .........................33<br />
Changing the song order ..............................33<br />
Deleting the song .........................................33<br />
Adjusting the volume of each song .................33<br />
Saving playlist settings to USB memory ([WRITE]) ....33<br />
Performance Functions and Effects....34<br />
Performance Features ............................... 34<br />
D Beam Controller ..............................................34<br />
Making detailed settings for the Solo Synth ......34<br />
Assigning a function to the D Beam controller ..35<br />
Pitch Bend and Modulation Lever..........................37<br />
Modifying the Sound (ANALOG MODIFY).............37<br />
Adjusting the MASTER EQ .............................37<br />
Adjusting the currently selected Tone ...............38<br />
Assignable Pedal................................................38<br />
Using Preset Performances......................... 38<br />
Selecting a Performance ([PERFORM])...................38<br />
Using the VALUE dial ....................................38<br />
Choosing from the Performance list .................39<br />
Editing a Performance.........................................39<br />
Editing a Tone....................................................40<br />
Editing a Tone in detail .................................40<br />
Saving a Performance ([WRITE])...........................41<br />
Other Functions Related to Performance ................41<br />
Using Effects ([EFFECTS])........................... 42<br />
Editing the Effects ...............................................42<br />
Using MIDI ...................................... 43<br />
Connection example ..................................... 43<br />
MIDI Channels......................................... 43<br />
MIDI Parameters ...................................... 43<br />
Local Switch ................................................ 43<br />
Using the GW-8 as a MIDI Sound Module .. 44<br />
Connecting to a Computer via the USB MIDI<br />
Connector............................................... 45<br />
If connection to your computer is unsuccessful... 45<br />
Making the Settings for the USB Driver.................. 45<br />
System Settings ............................... 46<br />
How to Make System Settings ([MENU]) ..... 46<br />
System Parameters.............................................. 46<br />
Viewing Information about GW-8<br />
(System Version Info Screens)............................... 48<br />
Using USB Memory.......................... 49<br />
Initializing USB Memory<br />
(USB Memory Format) .............................. 49<br />
Saving User Data to USB Memory (Backup) .. 49<br />
Loading User Data Saved on USB Memory<br />
(Import) ............................................................. 49<br />
Deleting user data that you loaded ................. 50<br />
Data Structure in USB Memory............................. 50<br />
Importing Data You’ve Saved in USB Memory<br />
([USB IMPORT]) ....................................... 50<br />
About V-LINK .................................. 51<br />
How to Use the V-LINK ([V-LINK]) ......................... 51<br />
V-LINK Settings (V-LINK SETUP) ............................ 51<br />
Appendices ..................................... 53<br />
Troubleshooting ....................................... 53<br />
Error Messages........................................ 55<br />
Effects List ............................................... 56<br />
Multi-Effects Parameters ................................. 56<br />
Chorus Parameters ....................................... 82<br />
Reverb Parameters ........................................ 83<br />
Tone List ................................................. 84<br />
Rhythm Set List......................................... 92<br />
Chord Intelligence.................................. 102<br />
MIDI Implementation Chart...................... 104<br />
Specifications ........................................ 105<br />
Index ............................................ 106<br />
9
Panel Descriptions<br />
Front Panel<br />
3<br />
7<br />
9 10<br />
15<br />
16<br />
4 5<br />
11<br />
8<br />
1<br />
6<br />
12 13<br />
14<br />
2<br />
1. USB MEMORY connector<br />
Connect a USB memory here and use the GW-8 to play<br />
back files (songs) that have been stored on USB memory.<br />
You can also back up data to USB memory.<br />
2. VOLUME knob<br />
This knob controls the volume of the entire GW-8.<br />
3. D BEAM controller<br />
Use this controller simply by moving your hand above it<br />
(p. 34).<br />
4. SOLO SYNTH button<br />
Play the GW-8 as a monophonic synthesizer (p. 34).<br />
5. ASSIGNABLE 1/2 buttons<br />
Use these buttons to turn the D Beam controller on/off, or<br />
to select the D Beam function (p. 35).<br />
6. STYLE SELECT buttons<br />
These buttons allow you to select one of the twelve Style<br />
categories.<br />
BACKING TRACK section<br />
7. BACKING TYPE buttons<br />
Use these buttons to select the backing type (p. 24).<br />
8. BALANCE buttons<br />
Use these buttons to adjust the volume balance between<br />
the backing and the keyboard. (p. 24)<br />
9. PART VIEW button<br />
Use this to adjust the volume, etc. of each part (p. 25, p.<br />
28).<br />
10. SONG REC button<br />
Press this button to record a Song (p. 27).<br />
11. STYLE CONTROL buttons<br />
Use these buttons to select the desired Style pattern (p. 25).<br />
12. SYNC buttons<br />
These buttons allow you to start/stop the Style by playing<br />
a note in the left side of the keyboard (p. 26).<br />
13. TAP TEMPO button<br />
Use this button to set the tempo (p. 24).<br />
14. VARIATION [1]–[4], AUTO FILL-IN, START/STOP, and<br />
SONG/USB MEMORY PLAYER CONTROL buttons<br />
The operation of these buttons will depend on the<br />
BACKING TYPE buttons (7).<br />
If you’ve used the BACKING TYPE buttons (7) to select<br />
“STYLE,” these buttons will start/stop the Style or select<br />
variations (p. 25).<br />
If you’ve used the BACKING TYPE buttons (7) to select<br />
“SONG” or “USB MEMORY PLAYER,” these buttons control<br />
the song playback as the SONG/USB MEMORY PLAYER<br />
CONTROL buttons (p. 30, p. 32).<br />
15. ANALOG MODIFY section<br />
Turn the knobs to control the functions you select by<br />
pressing the SELECT button (p. 37).<br />
16. Display<br />
This displays various information according to the<br />
operations you perform.<br />
17. VALUE dial<br />
Use this to edit the value of the parameters (settings) in the<br />
screen.<br />
EDIT section<br />
18. Cursor buttons ([ ] [ ] [ ] [ ])<br />
Use these buttons to move the cursor in the screen.<br />
19. EXIT/ENTER buttons<br />
Pressed to issue the “Cancel” (EXIT) or “Execute” (ENTER)<br />
commands in screens that prompt you to make such a<br />
selection.<br />
You’ll also use the ENTER button to access lists of Tones,<br />
Performances, Styles, Songs, or Favorites.<br />
20. MENU button<br />
This button takes you to the settings screen for various<br />
parameters (p. 46).<br />
10
Panel Descriptions<br />
17<br />
19 20 21 23 24 25 26 30 31 32<br />
18<br />
22<br />
27 28 29 33 34 35 36<br />
37<br />
38<br />
21. EFFECTS button<br />
This button lets you make effect settings (p. 42).<br />
22. WRITE button<br />
Press this button to save various types of settings (p. 29, p.<br />
33, p. 41).<br />
KEYBOARD section<br />
23. SPLIT button<br />
This button selects “Split mode,” whereby the keyboard is<br />
divided into two regions, allowing you to play separate<br />
sounds with the right and left hands (p. 19).<br />
24. DUAL button<br />
Switches the GW-8 to “Dual mode,” which enables<br />
performances with two separate Tones layered together<br />
(p. 19).<br />
25. KEY SCALE button<br />
Press this button to make Scale Tune settings (p. 21).<br />
26. KEY TOUCH button<br />
Press this button to make the keyboard’s touch sensitivity<br />
lighter or heavier (p. 22).<br />
27. OCTAVE buttons<br />
Use these buttons to raise or lower the pitch of the<br />
keyboard in one-octave steps (p. 22).<br />
28. TRANSPOSE button<br />
These button allow you to transpose the GW-8 up or<br />
down in semitone steps (p. 22).<br />
29. MELODY INTELLIGENCE button<br />
Press this button to add an automatic counter-melody<br />
(second and third voice) to your solos or melodies (p. 23).<br />
MODE section<br />
30. TONE button<br />
Press this button when you want to select or edit a Tone<br />
(p. 20).<br />
Tones you edit are stored in the Performance (p. 40).<br />
31. PERFORM button<br />
Press this button when you want to select or edit a<br />
Performance (p. 38).<br />
32. V-LINK button<br />
Switching this on lets you control external V-LINK<br />
compatible video equipment (p. 51).<br />
33. ONE TOUCH button<br />
This applies the recommended sound settings for the<br />
currently selected Style (p. 27).<br />
34. USB IMPORT button<br />
You can use USB memory to add Tones or update the<br />
system (p. 50).<br />
35. NUMERIC button<br />
You can input numerical values with the TONE SELECT<br />
buttons (37) when this button is lit (p. 17).<br />
36. LOCK button<br />
This button “locks” settings (such as tempo) so that they<br />
will not change when you switch Performances (p. 16).<br />
37. [PIANO]–[SPECIAL] (TONE SELECT buttons)/[0]–[9]<br />
Use these buttons to select Tones by category (p. 20).<br />
You can also input numerical values with these buttons<br />
when the NUMERIC button is on (p. 17).<br />
When using the Favorite function, use these buttons to<br />
select a Favorite Tone or Performance (p. 20).<br />
38. FAVORITE buttons<br />
Use this button to access Favorite Tones or Favorite<br />
Performances (p. 20).<br />
11
Panel Descriptions<br />
39<br />
39.Pitch Bend/Modulation lever<br />
You can raise or lower the pitch by<br />
moving this lever to the left or right. Push<br />
the lever away from yourself to apply<br />
modulation (normally vibrato) to the sound<br />
(p. 37).<br />
Rear Panel<br />
1 2 3 4 5 6 7 8 9<br />
10<br />
11<br />
1. LCD CONTRAST knob<br />
Adjusts the display’s contrast (p. 16).<br />
2. MIDI OUT/IN connectors<br />
Connect MIDI devices to these connectors (p. 43).<br />
3. CONTROL PEDAL jack<br />
Connect a separately available pedal switch (<strong>Roland</strong> DP<br />
Series), a separately available foot switch (BOSS FS-5U)<br />
or a separately available expression pedal (<strong>Roland</strong> EV-5)<br />
to this jack (p. 15, p. 38).<br />
4. HOLD PEDAL jack<br />
Connect a separately available pedal switch (<strong>Roland</strong> DP<br />
Series) to this jack (p. 15).<br />
5. EXT INPUT jack<br />
Connect a portable audio player or other audio source<br />
here (p. 15, p. 17).<br />
6. OUTPUT R, L/MONO jacks<br />
These jacks output the audio signal to the connected<br />
mixer/amplifier system in stereo. For mono output, use the<br />
L jack (p. 15).<br />
7. PHONES jack<br />
Connect a separately available pair of headphones to this<br />
jack.<br />
Sound will be output from the OUTPUT jacks even if you<br />
connect headphones.<br />
8. USB MIDI connector<br />
Use a USB cable to connect the GW-8 to your computer<br />
via this connector (p. 49).<br />
9. Cord hook<br />
Use this to secure the AC adaptor cord (p. 14).<br />
10. DC IN jack<br />
Connect the included AC adaptor here (p. 14).<br />
11. POWER switch<br />
This turns the power on/off (p. 15).<br />
12
Introduction<br />
About the GW-8<br />
What is a Performance? (p. 38)<br />
A “Performance” is a group of settings that specifies the Tone<br />
and Style, the keyboard mode, and various other parameters.<br />
What is a Tone? (p. 20)<br />
On the GW-8, each of the sounds you normally play is called<br />
a “Tone.” If we use the analogy of an orchestra, a Tone<br />
corresponds to an instrument played by one of the musicians.<br />
Tone settings, such as those for effects and filters, are stored in<br />
the Performance.<br />
What is Backing? (p. 24)<br />
“Backing” refers to the automatic accompaniment functionality<br />
of the GW-8.<br />
There are three types of backing: you can choose from<br />
“STYLE,” “SONG,” and “USB MEMORY PLAYER.”<br />
What is a Music Style? (p. 25)<br />
A “Music Style” is a musical template used by a Backing. The<br />
GW-8 contains a variety of Music Styles such as rock, pop,<br />
Latin, and jazz. You can also add Style data by using a USB<br />
memory (p. 49).<br />
* You can use the included “StyleConverter” software to<br />
create Styles on your computer.<br />
What is a Song? (p. 27)<br />
The GW-8 contains a 16-track MIDI song sequencer, which<br />
you can use to record the music you play. You can add a<br />
Backing to the performance you play on the keyboard, and<br />
save the result as a Song. You can also load Song data by<br />
using a USB memory.<br />
What is a USB Memory Player? (p. 31)<br />
This plays audio files or SMF data that has been stored in USB<br />
memory.<br />
You can perform on the GW-8 accompanied by backing from<br />
an audio file or SMF.<br />
About Memory<br />
Performance settings are stored in what is referred to as<br />
memory. There are three kind of memory: temporary,<br />
rewritable, and non-rewritable.<br />
fig.Memory-Flow.eps<br />
GW-8<br />
System<br />
System/<br />
Sound<br />
USB Memory<br />
Performance<br />
Performance<br />
Temporary memory<br />
Temporary area<br />
User<br />
Favorite<br />
Tone<br />
Performance<br />
Import and export<br />
Style<br />
Preset<br />
Tone<br />
Song<br />
Style<br />
This area holds the data of the Performance you’ve selected<br />
using the front panel buttons, and also holds the playlist you<br />
edited on the GW-8.<br />
When you play the GW-8, sound is produced based on data<br />
in the temporary area. When you edit a performance, you do<br />
not directly modify the data in memory; rather, you call up the<br />
data into the temporary area, and edit it there.<br />
Settings in the temporary area are temporary, and will be lost<br />
when the power is turned off or when you select another<br />
performance. To keep the settings you have modified, you<br />
must write them into rewritable memory.<br />
Rewritable memory<br />
Style<br />
Song<br />
Playlist<br />
Playlist<br />
Song file<br />
Select<br />
Write<br />
Load<br />
Write<br />
Temporary<br />
area<br />
Performance<br />
Tone<br />
Style<br />
Song<br />
Playlist<br />
System memory<br />
System memory stores system parameter settings that<br />
determine how the GW-8 functions.<br />
* Some settings cannot be overwritten. For details, refer to<br />
“System settings that are not stored” (p. 48).<br />
User memory<br />
User memory is where you normally store the data you need.<br />
To store a Performance or a Song, execute Write procedure<br />
(p. 29, p. 41).<br />
13
Introduction<br />
Non-Rewritable memory<br />
Preset memory<br />
Data in Preset memory cannot be rewritten. However, you can<br />
call up settings from preset Performances into the temporary<br />
area, modify them and then store the modified data in<br />
rewritable memory.<br />
USB memory<br />
You can back up your settings to USB memory in the following<br />
units of data. (p. 49)<br />
• Sound/System<br />
User Performances, Favorite Tones/Performances, system<br />
settings<br />
• Style<br />
User Styles<br />
• Song<br />
User Songs<br />
• All<br />
Style and Song in addition to the Sound/System data<br />
listed above<br />
Making Connections<br />
To prevent malfunction and/or damage to speakers or other<br />
devices, always turn down the volume, and turn off the power<br />
on all devices before making any connections.<br />
When connection cables with resistors are used, the volume<br />
level of equipment connected to the input (EXT INPUT jack)<br />
may be low. If this happens, use connection cables that do not<br />
contain resistors.<br />
Connecting the AC Adaptor<br />
1. Make sure that the [POWER] switch is off.<br />
2. Move the VOLUME knob all the way to the left to minimize<br />
the volume.<br />
3. Connect the included power cord to the included AC<br />
adaptor.<br />
The indicator will light when you plug the AC adaptor into<br />
an AC outlet.<br />
fig.ACadap.eps<br />
AC adaptor<br />
Power cord<br />
Indicator<br />
to an AC outlet<br />
Place the AC adaptor so the side with the indicator (see<br />
illustration) faces upwards and the side with textual<br />
information faces downwards.<br />
Depending on your region, the included AC adaptor may be<br />
a different type than the one shown above. If so, omit step 3<br />
and proceed.<br />
4. Connect the AC adaptor to the DC IN jack on the GW-8’s<br />
rear panel, and then plug the AC adaptor into an electrical<br />
outlet.<br />
To prevent the inadvertent disruption of power to your unit<br />
(should the plug be pulled out accidentally), and to avoid<br />
applying undue stress to the AC adaptor jack, anchor the<br />
power cord using the cord hook, as shown in the illustration.<br />
Even if the cord is fastened, strong tension applied to the cord<br />
may cause it to be damaged or broken. Be careful not to pull<br />
the cord accidentally, or to apply strong pressure to it.<br />
14
Introduction<br />
fig.codef.eps<br />
Cord hook<br />
Use only the specified expression pedal (EV-5; sold<br />
separately). By connecting any other expression pedals, you<br />
risk causing malfunction and/or damage to the unit.<br />
Connecting External Equipment<br />
The GW-8 is not equipped with an amplifier or speakers. In<br />
order to produce sound, you need to hook up audio<br />
equipment such as a monitor speaker or a stereo set, or use<br />
headphones.<br />
You can record your playing (or a song recorded on the GW-<br />
8) onto an audio recording device. Connect the OUTPUT jacks<br />
on the GW-8’s rear panel to the input jacks of your external<br />
device.<br />
fig.connect.eps<br />
GW-8 rear panel<br />
Connecting a portable audio player to<br />
the EXT INPUT jack<br />
You can connect an MP3 player or other audio device to the<br />
GW-8’s EXT INPUT jack, and listen to the playback.<br />
“Input settings for the EXT INPUT jack” (p. 17)<br />
Turning the Power On/Off<br />
Turning the power on<br />
Once the connections have been completed, turn on power to<br />
your various devices in the order specified. By turning on<br />
devices in the wrong order, you risk causing malfunction and/<br />
or damage to speakers and other devices.<br />
Stereo<br />
headphones<br />
1. Before you turn on the power, turn the [VOLUME] knob all<br />
the way to the left to minimize the volume.<br />
2. Press the rear panel [POWER] switch to turn on the power.<br />
Monitor speakers, etc.<br />
Connecting a pedal and switch<br />
You must switch off the GW-8’s power before you connect a<br />
pedal and/or switch.<br />
Connect a separately available pedal switch (<strong>Roland</strong> DP<br />
Series) to the HOLD PEDAL jack on the rear panel. You can<br />
use this pedal switch to sustain notes even after taking your<br />
hands off the keyboard.<br />
Connect a separately available pedal switch (<strong>Roland</strong> DP<br />
Series), a separately available foot switch (Boss FS-5U) or<br />
separately available expression pedal (<strong>Roland</strong> EV-5) to the<br />
rear panel CONTROL PEDAL jack. You can use this to control<br />
various functions that you assign (p. 38).<br />
This unit is equipped with a protection circuit. A brief interval<br />
(a few seconds) after power up is required before the unit will<br />
operate normally.<br />
If the GW-8 is connected to a keyboard amp or audio amp,<br />
turn on the power of the GW-8 first, and then switch on your<br />
amp.<br />
3. Turn the [VOLUME] knob to adjust the volume of the GW-8.<br />
Turning the power off<br />
1. Before you turn off the power, turn the [VOLUME] knob all<br />
the way to the left to minimize the volume.<br />
2. Press the [POWER] switch once again to turn off the power.<br />
If the GW-8 is connected to a keyboard amp or audio amp,<br />
switch off the power to your amp first, then turn off the power<br />
on the GW-8.<br />
15
Introduction<br />
Adjusting the Display Contrast<br />
([LCD CONTRAST] knob)<br />
1. Turn the [LCD CONTRAST] knob on the rear panel.<br />
Listening to the Demo Song<br />
1. Press [MENU].<br />
2. Use [ ] [ ] to select “Demo Play” then press [ENTER].<br />
3. Use the cursor buttons to select the song you want to hear<br />
then press [ENTER].<br />
Press [PIANO (0)] to play back all of the demo songs.<br />
4. Press [START/STOP] to stop demo playback.<br />
5. Press [EXIT] to return to the Main screen.<br />
All rights reserved. Unauthorized use of this material for<br />
purposes other than private, personal enjoyment is a violation<br />
of applicable laws.<br />
No data for the music that is played will be output from MIDI<br />
OUT.<br />
4. Press [ENTER] to execute the Factory Reset.<br />
If you press [EXIT] instead, you’re returned to the previous<br />
screen and no Factory Reset takes place.<br />
5. Turn the power off and then on again.<br />
Restoring the factory settings will initialize the System, User<br />
Performance and Favorite Tone/Performance settings.<br />
Preserving Certain Settings<br />
Even When You Switch<br />
Performances ([LOCK])<br />
If you turn [LOCK] on (button lit), the settings for which you<br />
select the “ON” position (as described below) will not change<br />
even when you switch performances.<br />
Choosing the settings that will be locked<br />
1. Press and hold [LOCK] (for approximately one second).<br />
2. Use [ ] [ ] to select the parameter, and turn the<br />
VALUE dial to select the value.<br />
Parameter Explanation Value<br />
Style<br />
The Style will not change when<br />
you switch Performances.<br />
ON, OFF<br />
Restoring the GW-8 to Its<br />
Factory Settings<br />
You can return all of GW-8’s settings to the factory-set state.<br />
This is called “Factory Reset.”<br />
If GW-8’s internal memory already contains important data<br />
that you’ve created, all of this data will be lost when you<br />
execute a Factory Reset. If you want to keep your data, you<br />
must save it to USB memory (p. 49).<br />
1. Press [MENU].<br />
Tone<br />
Style<br />
Tempo<br />
Transpose<br />
3. Press [EXIT].<br />
The Tones will not change when<br />
you switch Performances.<br />
The Style tempo will not change<br />
when you switch Performances.<br />
The transpose setting (p. 22) will<br />
not change when you switch<br />
Performances.<br />
These settings are system parameters (p. 46).<br />
ON, OFF<br />
ON, OFF<br />
ON, OFF<br />
2. Use [ ] [ ] to select “Utility” then press [ENTER].<br />
3. Use the cursor buttons to select “Factory Reset” then press<br />
[ENTER].<br />
The confirmation message will appear.<br />
16
Introduction<br />
Input settings for the EXT<br />
INPUT jack<br />
Here you can specify whether the sound from the EXT INPUT<br />
jack (p. 15) will be used.<br />
You can also specify whether the Center Cancel function will<br />
be applied to the sound from the EXT INPUT jack.<br />
Center Cancel function minimizes the playback volume of the<br />
sound that’s heard from the center (e.g., vocal or melody<br />
instrument).<br />
1. Press [MENU].<br />
2. Use [ ] [ ] to select “Ext Input Setting” then press<br />
[ENTER].<br />
3. Use [ ] [ ] to select the item that you want to change.<br />
Parameter Explanation Value<br />
Basic Operation<br />
Changing a Value<br />
Moving the cursor<br />
A single screen or window displays multiple parameters or<br />
items for selection. To edit the setting of a parameter, move the<br />
cursor to the value of that parameter. To select an item, move<br />
the cursor to that item. When selected with the cursor, a<br />
parameter value or other selection is highlighted.<br />
Move the cursor with the [ ], [ ], [ ] and [ ]<br />
(cursor buttons).<br />
Changing a value<br />
To change the value, use the VALUE dial.<br />
Entering numerical values ([NUMERIC])<br />
External<br />
Input<br />
Turns the input from the EXT<br />
INPUT jack ON or OFF.<br />
OFF, ON<br />
If you turn [NUMERIC] on, you’ll be able to use the TONE<br />
SELECT buttons ([PIANO]–[SPECIAL]) to enter numerical values.<br />
Center<br />
Cancel<br />
Specifies whether the Center<br />
Cancel function will be applied to<br />
the sound from the EXT INPUT<br />
jack (ON) or will not be applied<br />
(OFF).<br />
OFF, ON<br />
This is convenient when selecting Tones (p. 20), Styles (p. 26),<br />
Performances (p. 38), or Songs (p. 30).<br />
1. Use the cursor buttons to move the cursor to the numerical<br />
value you want to change.<br />
4. Turn the VALUE dial to set the value.<br />
5. When you’re finished making settings, press [EXIT].<br />
2. Press [NUMERIC].<br />
All of the TONE SELECT buttons will light.<br />
3. Use the TONE SELECT buttons to enter the desired value,<br />
and press [ENTER].<br />
17
Introduction<br />
Main Screen<br />
The following screen, which appears after you turn on the<br />
power, is called the “Main screen.” This screen will be shown<br />
most of the time you’re performing with the GW-8.<br />
fig.disp-main.eps<br />
1<br />
2<br />
5<br />
6<br />
3 4<br />
1. The number and name of the currently selected Style, or the<br />
number and name of the currently selected Song<br />
2. The group, number, and name of the currently selected<br />
Performance<br />
3. The number and name of the Tone selected for the Lower<br />
Part<br />
4. The number and name of the Tone selected for the Upper<br />
Part<br />
5. The measure number, tempo, and time signature of the Style<br />
or Song<br />
6. Chord indication<br />
Window<br />
The somewhat smaller screens that appear temporarily on<br />
top of the normal screens are called windows. Various<br />
types of windows appears according to the situation.<br />
Some display allow you to make settings, and others ask<br />
you to confirm an operation.<br />
fig.disp-tempo.eps_80<br />
Press [EXIT] to close the window. Some windows will close<br />
automatically when an operation is performed.<br />
18
Keyboard Mode Functions<br />
Playing Sounds from the<br />
Keyboard (Keyboard Mode)<br />
Immediately after you turn on the power, the GW-8 will be in<br />
a state where you can use the entire keyboard to play a piano<br />
sound. The GW-8’s keyboard can operate in one of the<br />
following three modes.<br />
SINGLE<br />
SPLIT<br />
DUAL<br />
The entire keyboard plays one Tone.<br />
The region of the keyboard to the left of the Split<br />
Point becomes the Lower Part, while the region of<br />
the keyboard to the right of the Split Point<br />
becomes the Upper Part. Each part plays a<br />
different Tone.<br />
The entire keyboard plays two Tones<br />
simultaneously.<br />
Using Split Mode ([SPLIT])<br />
Such a division of the keyboard into right- and left-hand<br />
sections is called a “Split,” and the key where the division<br />
takes place is called the “Split Point.”<br />
While in Split mode, a sound played in the right side is called<br />
an “Upper Tone,” and the sound played in the left side is<br />
called a “Lower Tone.” The Split-Point key is included in the<br />
upper section.<br />
The Split Point has been set at the factory to C4.<br />
1. Press [SPLIT] so the button is lit.<br />
The Tone you selected in Single mode will be the Tone for<br />
the Upper Part.<br />
2. To exit Split mode, press [SPLIT] once again so its light<br />
goes out.<br />
If BACKING TYPE [STYLE] is on, the left region of the<br />
keyboard (the Lower Part) is used to enter chords (p. 25).<br />
Regardless of the current settings, you can easily select Single<br />
mode by choosing the “Piano setting” described below.<br />
Using Single Mode<br />
If the [SPLIT] and [DUAL] are off, the keyboard will be in<br />
Single mode, meaning that the entire keyboard will play a<br />
single Tone.<br />
When you turn on the power, the GW-8 will be in this mode.<br />
Using Piano setting<br />
Regardless of the keyboard mode that is currently selected,<br />
you can use the following operation to call up the “Piano<br />
setting.”<br />
This “Piano setting” will make the appropriate settings for<br />
playing piano on the GW-8; the entire keyboard will play a<br />
piano sound.<br />
In Split mode, the most suitable octave settings for each Tone<br />
are applied automatically.<br />
Changing the Split Point<br />
1. Press and hold [SPLIT] (for approximately two seconds).<br />
The Split Point setting screen will appear.<br />
2. Turn the VALUE dial to change the Split Point.<br />
3. When you’re finished making the setting, press [EXIT].<br />
You can also change the Split Point by holding down [SPLIT]<br />
and playing the desired key.<br />
Using Dual Mode ([DUAL])<br />
“Dual” is the mode in which two Tones are layered, so that<br />
they sound together.<br />
In Dual mode, one Tone is called the “Upper Tone,” and the<br />
other is called the “Lower Tone.”<br />
1. Press [SPLIT] and [DUAL] simultaneously.<br />
1. Press [DUAL] so the button is lit.<br />
The Tone you selected in Single mode will be the Tone for<br />
the Upper Part.<br />
2. To exit Dual mode, press [DUAL] once again so its light<br />
goes out.<br />
19
Keyboard Mode Functions<br />
Selecting a Tone ([TONE])<br />
The GW-8 contains more than 1000 different Tones. You can<br />
use these Tones in the three keyboard modes (Single, Split,<br />
Dual).<br />
In Split mode or Dual mode, you can use the cursor buttons to<br />
move the cursor to the Tone number of the Upper Tone or<br />
Lower Tone, and select a different Tone for each.<br />
Using the VALUE dial<br />
1. Press [TONE] so the button is lit.<br />
Alternatively, use the cursor buttons in the Main screen to<br />
move the cursor to the Tone number.<br />
2. Turn the VALUE dial to step through the Tones one by one.<br />
Alternatively, you can press one of the TONE SELECT<br />
buttons ([PIANO]–[SPECIAL]) to select a Tone by<br />
category.<br />
When the cursor in the screen is at the Tone number, you can<br />
also select a Tone by turning [NUMERIC] on, using the TONE<br />
SELECT buttons to enter a Tone number, and then pressing<br />
[ENTER].<br />
Choosing from the Tone list<br />
1. In the Main screen, use the cursor buttons to move the<br />
cursor to the Tone number.<br />
2. Press [ENTER].<br />
3. Use [ ] [ ] or the VALUE dial to select a Tone.<br />
You can press one of the TONE SELECT buttons<br />
([PIANO]–[SPECIAL]) to select a Tone by category.<br />
4. Press [ENTER] to set the Tone.<br />
If you press [EXIT] without pressing [ENTER], the list will<br />
close without the currently selected Tone being changed.<br />
Registering Frequently Used<br />
Tones or Performances in a<br />
Button (FAVORITE Buttons)<br />
The Favorite function lets you register frequently used Tones or<br />
Performances at TONE SELECT buttons ([0]–[9]) so that they can<br />
be called up easily.<br />
At each of the ten buttons you can register ten Tones or<br />
Performances.<br />
When you turn FAVORITE [BANK] on, the ten TONE SELECT<br />
buttons are used to specify the bank, allowing you to switch<br />
between the ten banks. This allows you to register a total of<br />
one hundred Favorite Tones or Performances (ten banks of<br />
ten).<br />
For more about Performances, refer to p. 38.<br />
Registering a Favorite Tone/Performance<br />
After selecting a Tone or a Performance, hold down FAVORITE<br />
[ON/OFF] and press one of [0]–[9] in which you want to<br />
register that Tone or Performance.<br />
Selecting a Favorite Tone/Performance<br />
Press FAVORITE [ON/OFF] so the button is lit, and press one of<br />
[0]–[9] in which you registered the desired Tone or<br />
Performance.<br />
Checking or Changing the Registered<br />
Bank<br />
If you press FAVORITE [BANK] so it’s lit, one of the [0]–[9]<br />
buttons corresponding to the currently selected bank will light.<br />
To change the bank, press the button of the desired bank ([0]–<br />
[9]) while FAVORITE [BANK] is lit.<br />
You can use [ ] [ ] to step through the categories one<br />
by one.<br />
You can edit the currently selected Tone and store it in the<br />
Performance. For details, refer to “Editing a Tone” (p. 40).<br />
20
Keyboard Mode Functions<br />
Viewing or Editing the Favorite List<br />
If you press FAVORITE [ON/OFF] and [ENTER] simultaneously,<br />
the Favorite list for the currently selected bank will appear.<br />
Button<br />
Operation<br />
Parameter Explanation Value<br />
Preset<br />
Equal<br />
Equal Tuning: This tuning divides<br />
the octave into 12 equal parts,<br />
and is the most widely used<br />
method of temperament used in<br />
Western music.<br />
Press<br />
[ENTER]<br />
VALUE dial<br />
Selects the Favorite number to be edited.<br />
[ ] [ ] Select the Favorite number to be edited.<br />
[ ] [ ] Change the bank displayed in the list.<br />
[PIANO]<br />
[KBD/ORGAN]<br />
[EXIT]<br />
Deletes the Tone or Performance of the<br />
selected Favorite number from the list.<br />
Adds the currently selected Tone or<br />
Performance to the selected Favorite<br />
number.<br />
Closes the list display.<br />
Preset<br />
Arabic<br />
Arabic Scale: In this scale, E and<br />
B are a quarter note lower and<br />
C#, F# and G# are a quarter-note<br />
higher compared to equal<br />
temperament. The intervals<br />
between G and B, C and E, F and<br />
G#, Bb and C#, and Eb and F#<br />
have a natural third the interval<br />
between a major third and a<br />
minor third. On the GW-8, you<br />
can use Arabian temperament in<br />
the three keys of G, C and F.<br />
Press<br />
[ENTER]<br />
Switching to an Arabian<br />
Scale or Other Temperament<br />
([KEY SCALE])<br />
As an alternative to the temperament commonly used in<br />
Western music, you can adjust the pitch of each note to create<br />
temperaments used in other musical cultures or historical<br />
periods (e.g., Oriental temperaments, or temperaments used<br />
in the Baroque era).<br />
You can independently adjust the pitch of each note in the<br />
octave (C, C#, D, Eb, E, F, F#, G, Ab, A, Bb, B).<br />
1. Press [KEY SCALE] so the button is lit.<br />
The Key Scale window will open.<br />
2. Use the cursor buttons to select the item that you want to<br />
change, and use the VALUE dial to change the value.<br />
You can also adjust the pitch by holding down [KEY SCALE]<br />
and pressing the key whose note pitch you want to adjust. The<br />
pitch will be lowered by 1/4 tone.<br />
To return a note to its original pitch, hold down [KEY SCALE]<br />
and press the same key you pressed.<br />
Lower Sw<br />
Upper Sw<br />
Style Sw<br />
Use the Key Scale for the Lower<br />
Part<br />
Use the Key Scale for the Upper<br />
Part<br />
Use the Key Scale for the Style<br />
Part<br />
OFF, ON<br />
OFF, ON<br />
OFF, ON<br />
C Key Scale C -64–+63<br />
C# Key Scale C# -64–+63<br />
D Key Scale D -64–+63<br />
Eb Key Scale Eb -64–+63<br />
E Key Scale E -64–+63<br />
F Key Scale F -64–+63<br />
F# Key Scale F# -64–+63<br />
G Key Scale G -64–+63<br />
G# Key Scale G# -64–+63<br />
A Key Scale A -64–+63<br />
Bb Key Scale Bb -64–+63<br />
B Key Scale B -64–+63<br />
3. When you’ve finished making settings, press [KEY SCALE]<br />
once again to close the window.<br />
21
Keyboard Mode Functions<br />
Changing the Key Touch<br />
([KEY TOUCH])<br />
This setting determines how the volume changes in response to<br />
the force used to play the keyboard (Velocity Sensitivity).<br />
The velocity—the force with which you play the keyboard—<br />
can affect the volume or timbre of a sound.<br />
1. Press [KEY TOUCH] so the button is lit.<br />
The Key Touch window will open.<br />
2. Use the cursor buttons to select the item that you want to<br />
change, and use the VALUE dial to change the value.<br />
Parameter Value Explanation<br />
Curve<br />
LIGHT<br />
MEDIUM<br />
HEAVY<br />
FIXED<br />
Value 1–127<br />
Select this setting if you do not<br />
want velocity changes to bring<br />
about major volume changes.<br />
Medium velocity sensitivity. The<br />
keyboard responds to velocity<br />
changes, but the maximum<br />
volume can be obtained more<br />
easily than with “HEAVY.”<br />
Select this setting for maximum<br />
expressiveness. Even small<br />
variations of the force with which<br />
you strike a key produce audible<br />
changes. The tradeoff is,<br />
however, that you have to strike<br />
the keys forcefully to achieve the<br />
maximum volume.<br />
Select this setting if all notes you<br />
play on the keyboard should have<br />
the same velocity value.<br />
Specifies the volume value used<br />
when “Curve” is set to “FIXED.”<br />
3. When you’ve finished making settings, press [KEY TOUCH]<br />
once again to close the window.<br />
If you want to keep this setting, press [WRITE] to store it into<br />
the Performance (p. 41).<br />
Shifting the Keyboard Pitch in<br />
Octave Steps (OCTAVE Buttons)<br />
You can shift the pitch of the currently selected Tone upward<br />
or downward in steps of an octave, over a maximum of four<br />
octaves upward or downward.<br />
1. Press OCTAVE [ ] or [ ].<br />
The Octave Shift window will open, and will then close a<br />
few moments after you release the button.<br />
2. While holding down OCTAVE [ ] or [ ], use Cursor<br />
[ ] [ ] to select the Tone whose pitch you want to<br />
shift.<br />
3. Use OCTAVE [ ] [ ] to change the octave.<br />
Transposing Keyboard<br />
Sounds and Songs Played<br />
Back ([TRANSPOSE])<br />
By using the “Transpose function,” you can transpose your<br />
performance without changing the notes you play. You can<br />
also use this function to play back a song in a different key.<br />
1. Press [TRANSPOSE].<br />
The Transpose window will open, and will then close a<br />
few moments after you release the button.<br />
2. While holding down [TRANSPOSE], use [ ] [ ] to<br />
select the item whose setting you want to change.<br />
Parameter Explanation Value<br />
Song Trans<br />
KBD Trans<br />
C→<br />
The playback of Songs and of<br />
SMF data (p. 30, p. 32) will be<br />
transposed.<br />
The sound of the keyboard will<br />
be transposed.<br />
The transposed pitch<br />
ON, OFF<br />
ON, OFF<br />
3. Hold down [TRANSPOSE], and use the VALUE dial to<br />
specify the desired value.<br />
[TRANSPOSE] will light if the setting is anything other than<br />
C.<br />
By holding down [TRANSPOSE] and using OCTAVE [ ]<br />
[ ], you can change the Transpose value regardless of<br />
where the cursor is located.<br />
22
Keyboard Mode Functions<br />
Adding Harmony to the Upper<br />
Tone ([MELODY INTELLIGENCE])<br />
While a Music Style is playing (p. 25), the matching harmony<br />
is automatically added to the notes you are playing in the<br />
Upper Part. This function is called “Melody Intelligence.”<br />
Those automatic harmonies are based on the chords you play<br />
in the lower section.<br />
The Melody Intelligence function will be on when you turn<br />
[MELODY INTELLIGENCE] on (button lit).<br />
Selecting the type of harmony<br />
Using the Metronome<br />
It’s convenient to use the metronome when you’re practicing a<br />
new song.<br />
1. Press [MENU].<br />
2. Use [ ] [ ] to select “System” then press [ENTER].<br />
3. Use [ ] [ ] to select “METRONOME” page, and use<br />
[ ] [ ] to select a parameter.<br />
4. Turn the VALUE dial to select the value.<br />
1. Press [MELODY INTELLIGENCE] so the button is lit.<br />
When you play something in the Upper Part, harmony is<br />
added.<br />
2. Press and hold [MELODY INTELLIGENCE], and turn the<br />
VALUE dial to select the Melody Intelligence type.<br />
Parameter<br />
Value<br />
Parameter Value Explanation<br />
Metronome<br />
Switch<br />
OFF, ON<br />
Turns the metronome on/off.<br />
Specifies how the metronome will be<br />
sounded.<br />
ALWAYS<br />
The metronome will sound at<br />
all times if it is turned on.<br />
Type<br />
DUET, ORGAN, COMBO, STRINGS, CHOIR,<br />
BLOCK, BIG BAND, COUNTRY,<br />
TRADITIONAL, BROADWAY, GOSPEL,<br />
ROMANCE, LATIN, COUNTRY GUITAR,<br />
COUNTRY BALLAD, WALTZ ORGAN,<br />
OCTAVE TYPE 1, OCTAVE TYPE 2<br />
3. Press [EXIT] to return to the Main screen.<br />
Metronome<br />
Mode<br />
REC<br />
PLAY<br />
The metronome will sound<br />
only while you’re recording a<br />
Song (p. 27).<br />
The metronome will sound<br />
when you’re playing a Style<br />
and when you’re playing a<br />
Song (p. 25, p. 30).<br />
4. To turn the Melody Intelligence off, press [MELODY<br />
INTELLIGENCE] so its light goes out.<br />
Metronome<br />
Level<br />
LOW,<br />
MEDIUM,<br />
HIGH<br />
Adjusts the volume of the<br />
metronome. The metronome<br />
will be quiet at “Low” and<br />
loud at “High.”<br />
5. When you’ve finished making settings, press [EXIT].<br />
Other Functions<br />
“Performance Functions and Effects” (p. 34)<br />
“Editing a Tone” (p. 40)<br />
“Master Tune” (p. 46)<br />
“System Transpose” (p. 46)<br />
23
Backing Track Functions<br />
Selecting the Backing Types<br />
(Style/Song/USB Memory Player)<br />
The GW-8 allows you to use the following three types of<br />
musical backing. To switch the backing type, use BACKING<br />
TYPE [STYLE], [SONG] and [USB MEMORY PLAYER].<br />
[STYLE] (p. 25)<br />
This backing uses the Music Styles. The GW-8 Style function<br />
automatically generates a backing with multiple instruments;<br />
simply choose one of a variety of Music Styles (Styles), then<br />
use your left hand to specify a chord. You can also choose<br />
Variations to change the backing in addition to the Intro,<br />
Main, and Ending backing types.<br />
Using only the drum part of a Style as the<br />
backing<br />
If you turn all of BACKING TYPE [STYLE], [SONG] and<br />
[USB MEMORY PLAYER] off, you’ll hear only the drum<br />
part of the currently selected Style. Just as when [STYLE] is<br />
on, you’ll be able to use the STYLE CONTROL buttons and<br />
VARIATION buttons to choose different variations.<br />
[SONG] (p. 27)<br />
You can use the recording function to record your own<br />
performance into the GW-8. Since a 16-track sequencer is<br />
built in, you can use multi-track recording to create a song by<br />
recording a different sound on each track. A song you’ve<br />
created can also be used as the backing for your keyboard<br />
performance.<br />
SMF data can be loaded into the user Song and played back.<br />
[USB MEMORY PLAYER] (p. 31)<br />
This allows you to play back audio files or SMF data that’s<br />
been saved on USB memory. You can use this playback as the<br />
backing for your keyboard performance.<br />
Adjusting the Tempo ([TAP TEMPO])<br />
You can’t adjust the tempo of audio data.<br />
1. Press [TAP TEMPO] three or more times at the desired<br />
interval.<br />
The tempo setting window will appear, and the tempo will<br />
be specified by the interval at which you pressed the<br />
button.<br />
You can also specify the tempo by pressing [TAP TEMPO] to<br />
access the tempo setting window, and then using the cursor<br />
buttons and VALUE dial to specify the tempo. Press [EXIT] to<br />
close the tempo setting window.<br />
Using the metronome<br />
1. Press [TAP TEMPO].<br />
The tempo setting window will appear.<br />
2. Use the cursor buttons to move the cursor to “Metronome,”<br />
and use the VALUE dial to turn it on.<br />
When you turn the metronome on, it will begin sounding.<br />
3. To stop the metronome, turn off “Metronome.”<br />
4. Press [EXIT] to return to the Main screen.<br />
For details on volume and other settings for the metronome,<br />
refer to “Using the Metronome” (p. 23).<br />
Adjusting the Volume Balance between<br />
Backing and Keyboard (BALANCE buttons)<br />
Use BALANCE [BACKING] and [KEYBOARD] to adjust the<br />
volume balance between the backing and your keyboard<br />
performance.<br />
If you press BALANCE [BACKING] and [KEYBOARD]<br />
simultaneously, the volume balance will return to its original<br />
value.<br />
If you’ve changed the volume balance, the button whose<br />
volume is higher will be lit.<br />
This setting cannot be stored.<br />
24
Backing Track Functions<br />
Style (Playing with an<br />
Accompaniment)<br />
Playing Back a Style ([STYLE])<br />
1. Press [STYLE] so the button is lit.<br />
At this time, the keyboard Split Point will be set to C4.<br />
If you press and hold [SPLIT] (for approximately two seconds),<br />
the Split Point setting screen will appear. You can turn the<br />
VALUE dial to change the Split Point. When you’re finished,<br />
press [EXIT].<br />
2. Press [START/STOP]; the backing will start playing.<br />
If [STYLE] is unlit, pressing [START/STOP] will cause only the<br />
drums to start playing.<br />
3. Use your left hand to play a chord (or a single note).<br />
Use your left hand to play the backing chord, and your<br />
right hand to play the melody.<br />
Changing the Variations<br />
You can press the VARIATION buttons to change the type of<br />
ensemble that will play the backing.<br />
The button you press flashes until the new pattern is used (after<br />
which the button lights steadily.)<br />
VARIATION [1] produces the simplest arrangement, and<br />
VARIATION [4] produces the most florid.<br />
For an intro or ending, VARIATION [1] is the shortest and<br />
simplest.<br />
Using the Auto Fill-in Function<br />
If you leave [AUTO FILL-IN] on (button lit), a fill-in will play<br />
when you switch between accompaniment Variations. The fillin<br />
that is played between the current and the next Variation<br />
pattern depends on where you come from.<br />
What’s a “Fill-In”?–A short improvisational phrase inserted at<br />
the bar line is called a “Fill In.” The GW-8 automatically plays<br />
the appropriate phrase for the selected Style.<br />
Stopping a Style<br />
1. Press [START/STOP] once again to make the backing stop.<br />
If you’re not using the lower area of the keyboard (the Lower<br />
Part area) to enter chords, only the drum pattern of the Style<br />
will be heard.<br />
4. If you play a different chord (or single note), the backing<br />
key will change.<br />
The chord name is displayed in the backing chord area of the<br />
screen.<br />
5. Use the STYLE CONTROL buttons to select a different<br />
pattern for the currently selected Style.<br />
If you press [ENDING] instead of [START/STOP], the ending<br />
phrase will play and then the backing will stop.<br />
Adjusting the Part Balance ([PART VIEW])<br />
If [STYLE] is on, or if all of the BACKING TYPE buttons are off,<br />
you can access the PERFORM MIXER screen by pressing [PART<br />
VIEW].<br />
In the PERFORM MIXER screen you can adjust the volume for<br />
each Part of the Style. You can also mute (silence) a specific<br />
Part, or play only a specific Part.<br />
[INTRO]<br />
[MAIN]<br />
[ENDING]<br />
A backing pattern suitable for an<br />
introduction.<br />
This is the main accompaniment pattern for<br />
the song.<br />
A backing pattern suitable for an ending.<br />
1. With [STYLE] turned on, press [PART VIEW].<br />
The PERFORM MIXER screen will appear.<br />
2. Use [ ] [ ] to select the part whose settings you<br />
want to make, and use [ ] [ ] to select the item that<br />
you want to set.<br />
Display<br />
Part<br />
LWR LOWER<br />
UPR UPPER<br />
ADR Accompaniment Drum<br />
ABS Accompaniment Bass<br />
AC1–AC6 Accompaniment 1–6<br />
25
Backing Track Functions<br />
Parameter Value Explanation<br />
LEVEL 0–127 Adjusts the volume of the Part.<br />
MUTE<br />
SOLO<br />
OFF,<br />
ON<br />
OFF,<br />
ON<br />
Specifies whether the sound will be<br />
muted (ON) or heard (OFF).<br />
Specifies whether this Part alone will<br />
be heard by itself (ON) or not (OFF).<br />
3. To exit the PERFORM MIXER screen, press [EXIT] or press<br />
[PART VIEW] so its light is turned off.<br />
Sync Start/Stop (SYNC buttons)<br />
If you leave SYNC [START] on (button lit), the accompaniment<br />
will start the moment you play a note at the left side of the Split<br />
Point (i.e., in the Lower Part area).<br />
If you leave SYNC [STOP] on (button lit), the accompaniment<br />
will stop the moment you take your hand off of the Lower Part<br />
area. This is great for songs where you need breaks (i.e. one<br />
or several beats of silence).<br />
To defeat this setting, press the button so it goes out.<br />
Saving the Current Settings in a<br />
Performance<br />
See “Saving a Performance ([WRITE])” (p. 41).<br />
Selecting a Music Style<br />
The Style memory locations are organized as follows.<br />
3. Turn the VALUE dial to step through the Styles one by one.<br />
When the cursor in the screen is at the Style number, you can<br />
also select a Style by turning [NUMERIC] on, using the TONE<br />
SELECT buttons to enter a Style number, and then pressing<br />
[ENTER].<br />
Choosing from the Style List<br />
1. In the Main screen, use the cursor buttons to move the<br />
cursor to the Style number.<br />
2. Press [ENTER].<br />
3. Use [ ] [ ] to select a Style genre.<br />
To select a User style, select “USER” or press [USER].<br />
4. Use [ ] [ ] or the VALUE dial to select a Style.<br />
5. Press [ENTER] to set the Style.<br />
If you press [EXIT] without pressing [ENTER], the list will<br />
close without the currently selected Style being changed.<br />
Adding User Styles<br />
(Importing from USB memory)<br />
Style data saved on USB memory can be imported into the GW-8.<br />
Before you continue, the Style data you created on your<br />
computer using the included “StyleConverter” software must<br />
be saved to USB memory.<br />
For details, refer to “Loading User Data Saved on USB<br />
Memory (Import)” (p. 49).<br />
Type<br />
PRST<br />
(Preset)<br />
USER<br />
Explanation<br />
These are the Styles built into the GW-8.<br />
They cannot be overwritten.<br />
When you create Style data on your computer,<br />
save it to USB memory, and load it into the GW-<br />
8, it will be written into this USER area (p. 49).<br />
Deleting a User Style<br />
Here’s how you can delete the specified Style or all Styles<br />
from User Style memory.<br />
1. Press [MENU].<br />
2. Use [ ] [ ] to select “Utility” then press [ENTER].<br />
Selecting a Style<br />
Using the VALUE dial<br />
1. Press [STYLE] so the button is lit.<br />
2. Use the STYLE SELECT buttons to select a Style by genre.<br />
Immediately after you press one of the STYLE SELECT<br />
buttons, the screen will show the name of the first Style in<br />
the selected genre.<br />
To select a User Style, press [USER].<br />
3. Use the cursor buttons to select “Delete” then press [ENTER].<br />
4. Use the cursor buttons to select “Style” or “All Styles,” then<br />
press [ENTER].<br />
5. If you selected “Style” in step 4, use the VALUE dial to<br />
select the Style that you want to delete, then press [ENTER].<br />
A confirmation window will appear.<br />
6. Press [ENTER] to delete the Style(s).<br />
If you press [EXIT], you’re returned to the previous screen<br />
without deleting the Style(s).<br />
26
Backing Track Functions<br />
Back up User Style<br />
(Exporting to USB memory)<br />
For details, refer to “Saving User Data to USB Memory<br />
(Backup)” (p. 49).<br />
Using the Recommended Sound<br />
Settings for a Style ([ONE TOUCH])<br />
When [STYLE] is on, turning [ONE TOUCH] on (button lit) will<br />
assign the most suitable Tones for the currently selected Style<br />
as the Upper Tone and Lower Tone. This is called the “One<br />
Touch” function.<br />
If [ONE TOUCH] is on when you switch Styles, the keyboard<br />
Tones will also switch to the Tones that are most suitable for<br />
the Style you selected.<br />
To turn off the One Touch function, turn [ONE TOUCH] off<br />
(button unlit).<br />
Song<br />
Recording a New Song ([SONG REC])<br />
You can use the 16-track recorder of the GW-8 to record your<br />
own performances.<br />
You can record your keyboard performance while listening to<br />
an accompaniment, and then listen to the playback of your<br />
recorded performance.<br />
Recorded performances are discarded when another Song is<br />
selected, or when the power is turned off. If you don’t want to<br />
lose the Song, you must save it (p. 29).<br />
On the GW-8, there are two ways to record a Song.<br />
• Refer to “Recording in the Main screen” (p. 27).<br />
• Refer to “Recording a specified Part (SONG TRACK)” (p.<br />
28).<br />
The Keyboard Mode (p. 19) will change depending on the<br />
selected Style.<br />
Switching the Style when [ONE TOUCH] is on will not change<br />
the Split Point (p. 19).<br />
You can’t change the Tones that are assigned to each Style by<br />
the One Touch function.<br />
Other Functions Related to Music Style<br />
“Using Split Mode ([SPLIT])” (p. 19)<br />
“Selecting a Tone ([TONE])” (p. 20)<br />
“Adding Harmony to the Upper Tone ([MELODY<br />
INTELLIGENCE])” (p. 23)<br />
“Using Preset Performances” (p. 38)<br />
“Chord Mode” (p. 39)<br />
“Backing Hold” (p. 39)<br />
“Bass Inversion” (p. 39)<br />
“Pedal Assign” (p. 46)<br />
“Saving User Data to USB Memory (Backup)” (p. 49)<br />
“Loading User Data Saved on USB Memory (Import)” (p. 49)<br />
Song settings (e.g., tempo and time signature) are determined<br />
by the settings of the Style that’s saved in the selected<br />
Performance. You’ll probably find it convenient to first select the<br />
Style and Tones that you want to use (p. 38). If you are<br />
performing without using a Style, you can specify the tempo and<br />
time signature of the Song in the SONG TRACK screen (p. 28).<br />
Recording in the Main screen<br />
If you want to record the Style playback as well, turn [STYLE]<br />
on.<br />
If you want to record only your keyboard performance without<br />
playing a Style, turn [SONG] on.<br />
If [STYLE] and [SONG] are both turned off, the rhythm pattern<br />
of the Style selected by the STYLE SELECT buttons will be<br />
recorded together with the keyboard performance.<br />
If you do the following procedure when any Song has been<br />
selected, you can record your performance on top of it.<br />
If you want to record a new Song, use the Song Initializing<br />
operation. Refer to “Recording a specified Part (SONG<br />
TRACK)” (p. 28).<br />
1. Select the Performance that you want to use (p. 38).<br />
2. Press [SONG REC].<br />
[SONG REC] will blink.<br />
3. Press [ ] to start recording.<br />
Even without pressing [<br />
you play the keyboard.<br />
], recording starts when<br />
4. Perform.<br />
27
Backing Track Functions<br />
5. Press [ ] to stop recording.<br />
When you stop recording, the SONG TRACK screen will<br />
appear.<br />
If you want to continue recording, refer to step 7 and<br />
following of “Recording a specified Part (SONG TRACK)”<br />
below, or step 3 and following of “Re-recording Your<br />
Performance” (p. 28).<br />
Press [EXIT] to return to the Main screen.<br />
MFX (p. 42) will apply only to the realtime performance of the<br />
Part (Upper Part or Lower Part) you play by hand. Be aware<br />
that MFX will not apply to the recorded Song data.<br />
A performance you record using a Style is recorded to parts<br />
1–16 as follows.<br />
Track Part Name Track Part Name<br />
1 Accomp 1 9 Accomp 6<br />
2 Accomp bass 10 Accomp drums<br />
3 Accomp 2 11 Lower Part<br />
4 Upper Part 12<br />
5 Accomp 3 13<br />
6 14<br />
7 Accomp 4 15 Melody Intelligence<br />
8 Accomp 5 16<br />
You can specify whether the metronome will sound during<br />
recording. See “Using the Metronome” (p. 23).<br />
Recording a specified Part (SONG TRACK)<br />
In the SONG TRACK screen you can specify the Part that you<br />
want to record. A performance using one Tone will be<br />
recorded on each Part.<br />
If you’re recording on a specified Part, recording with a Style<br />
may cause your performance to be recorded together with the<br />
performance generated by the Style, depending on the Part<br />
you’ve specified. If you’re recording on a specified Part, we<br />
recommend that you play without using Styles.<br />
MFX (p. 42) will apply only to the realtime performance of the<br />
Part (Upper Part or Lower Part) you play by hand. Be aware<br />
that MFX will not apply to the recorded Song data.<br />
When [SONG] is on, you can press [PART VIEW] repeatedly<br />
to switch from the Main screen to SONG TRACK → PERFORM<br />
MIXER (p. 25) → Main screen.<br />
1. Press [SONG] so the button is lit.<br />
2. Press [PART VIEW] so the button is lit.<br />
The SONG TRACK screen will appear.<br />
Initializing a Song<br />
3. Use the cursor buttons to select the INIT icon then press<br />
[ENTER].<br />
The Song Initialize window will appear.<br />
4. As needed, use the cursor buttons and VALUE dial to<br />
specify the tempo and time signature of the Song.<br />
5. Use the cursor buttons to select the INIT icon once again<br />
then press [ENTER].<br />
A confirmation window will appear.<br />
6. Press [ENTER].<br />
If you press [EXIT] twice instead of [ENTER], the Song<br />
Initialize window will close without initializing a Song.<br />
The SONG TRACK screen will appear.<br />
7. Use the cursor buttons to select an item, and turn the<br />
VALUE dial to set the value.<br />
Item Explanation Value<br />
Part Part to record 1–16<br />
Tone<br />
Mute<br />
Solo<br />
8. Press [SONG REC].<br />
[SONG REC] will blink.<br />
The Song Rec Standby screen will appear.<br />
If you are recording a new Song, there’s no need to make<br />
settings in this screen. Proceed to the next step.<br />
9. Press [ ] to start recording.<br />
10. Perform.<br />
The Tone number for each Part<br />
Mute On (no sound) or Off (sound) setting for each Part<br />
Solo On (hear only this part) or Off setting for each Part<br />
11. Press [ ] to stop recording.<br />
Re-recording Your Performance<br />
In the SONG TRACK screen you can overdub additional<br />
material onto your recorded performance, or re-record the<br />
specified measures of a performance.<br />
You can use the following ways of re-recording.<br />
• Replace–New material is recorded as previously recorded<br />
material is erased.<br />
• Mix–New notes are recorded on top of notes previously<br />
recorded.<br />
• Punch In/Out– Replace or Mix recording is performed<br />
only in the region you specify for re-recording.<br />
28
Backing Track Functions<br />
When you record a Song using a Style, the Style data is<br />
recorded in the first measure of the Song. When you play back<br />
this Song, playback will begin from measure indication “2.”<br />
When you re-record the Song, the ANALOG MODIFY settings<br />
other than the MASTER EQ settings (p. 37; Reverb Send,<br />
Chorus Send, Attack, Release, Cutoff and Resonance) cannot<br />
be changed.<br />
1. Press [SONG] so the button is lit.<br />
2. Press [PART VIEW] so the button is lit.<br />
The SONG TRACK screen will appear.<br />
As needed, make Song settings as described in step 7 of<br />
“Recording a specified Part (SONG TRACK).”<br />
3. Press [SONG REC].<br />
[SONG REC] will blink.<br />
The Song Rec Standby screen will appear.<br />
4. Use the cursor buttons to select a parameter, and turn the<br />
VALUE dial to set the value.<br />
Parameter Value Explanation<br />
Rec<br />
Mode<br />
Count<br />
In<br />
Input<br />
Quantize<br />
Punch<br />
Sw<br />
REPLACE<br />
MIX<br />
OFF<br />
1MEAS<br />
2MEAS<br />
WAIT NOTE<br />
OFF, 1/4,<br />
1/8, 1/8T,<br />
1/16, 1/16T,<br />
1/32, 1/32T,<br />
1/64<br />
OFF, ON<br />
New material is recorded as<br />
previously recorded material is<br />
erased.<br />
New notes are recorded on top<br />
of notes previously recorded.<br />
No count-in. Recording starts as<br />
soon as you press [ ].<br />
Recording starts after a 1-bar<br />
count-in.<br />
Recording starts after a 2-bar<br />
count-in.<br />
Recording starts as soon as you<br />
play a note on the keyboard.<br />
(There will be no count-in.)<br />
Quantize corrects the timing of<br />
your notes by shifting them to the<br />
nearest grid mark. This specifies<br />
the number of steps per measure<br />
(i.e., the resolution).<br />
If this is turned “ON,” recording<br />
will occur from the “Punch In”<br />
measure to the “Punch Out”<br />
measure that you specify below.<br />
When the song playback reaches<br />
the measure you specified for<br />
“Punch In,” recording will begin<br />
automatically, and recording will<br />
stop at the “Punch Out” measure.<br />
Parameter Value Explanation<br />
Punch<br />
In<br />
Punch<br />
Out<br />
If you assign the pedal to “PUNCH IN/OUT” in “Pedal<br />
Assign” (p. 46), you’ll be able to specify the record-start and<br />
record-end locations by pressing the pedal. In this case, turn<br />
the above “Punch Sw” to the “OFF” setting.<br />
5. Press [ ] to start recording.<br />
6. Perform.<br />
0001–<br />
0002–<br />
7. Press [ ] to stop recording.<br />
Saving a Song ([WRITE])<br />
Here’s how you can save a Song from the temporary Song<br />
memory to a user Song memory.<br />
1. Press [WRITE].<br />
2. Use [ ] [ ] to select “Song,” and then press [ENTER].<br />
Input a name for your user Song<br />
3. Use [ ] [ ] to move the cursor, and turn the VALUE<br />
dial to change each character.<br />
Enter a Song name of up to 16 characters.<br />
The following characters are available.<br />
A–Z 0–9 ! # $ % & ‘ ( ) - @ ^ _ ` { }<br />
Button<br />
[0]<br />
4. Press [ENTER].<br />
A confirmation window will appear.<br />
5. Press [ENTER] to save the Song.<br />
Measure at which recording<br />
will begin<br />
Measure at which recording<br />
will end<br />
Explanation<br />
Selects the type of character. Each time you press<br />
this, you will alternately select the first character<br />
of a character set: uppercase (A), or numerals<br />
and symbols (0).<br />
[1] Deletes the character at the cursor location.<br />
[2] Inserts a space at the cursor location.<br />
If you press [EXIT], you’re returned to the previous screen<br />
without the Song being saved.<br />
29
Backing Track Functions<br />
Loading Song Data from USB Memory<br />
Song data saved on USB memory can be loaded into the<br />
GW-8. SMF data also can be stored into the user Song.<br />
For details, refer to “Loading User Data Saved on USB<br />
Memory (Import)” (p. 49).<br />
Deleting a Song<br />
Here’s how you can delete the specified Song or all Songs<br />
from User Song memory.<br />
1. Press [MENU].<br />
2. Use [ ] [ ] to select “Utility” then press [ENTER].<br />
3. Use the cursor buttons to select “Delete” then press [ENTER].<br />
4. Use the cursor buttons to select “Song” or “All Songs,”<br />
then press [ENTER].<br />
5. If you selected “Song” in step 4, use the VALUE dial to<br />
select the Song that you want to delete, then press [ENTER].<br />
A confirmation window will appear.<br />
6. Press [ENTER] to delete the Song(s).<br />
If you press [EXIT], you’re returned to the previous screen<br />
without deleting the Song(s).<br />
Selecting and Playing a Song ([SONG])<br />
1. Press [SONG] so the button is lit.<br />
2. Turn the VALUE dial to select a Song.<br />
When the cursor is at the Song number, you can also<br />
select a Song from the Song list. Press [ENTER] to access<br />
the Song list, using [ ] [ ] to select a Song, and then<br />
pressing [ENTER].<br />
You can use [NUMERIC] to select a Song (p. 17).<br />
3. Press [ ] to play the Song.<br />
To stop, press [<br />
] once again.<br />
When you record a Song using a Style, the Style data is<br />
recorded in the first measure of the Song. When you play back<br />
this Song, playback will begin from measure indication “2.”<br />
When you select a user Song, the temporary Song memory<br />
will be overwritten by the user Song you selected.<br />
Moving the playback location of a song<br />
Use the SONG/USB MEMORY PLAYER CONTROL buttons to<br />
specify the song playback location.<br />
[ ] Returns to the beginning of the song.<br />
[ ] Rewinds the song.<br />
[ ] Fast-forwards the song.<br />
[ ] Moves to the end of the song.<br />
[ ] Plays or pauses the song.<br />
Performing along with a song<br />
([MINUS ONE/CENTER CANCEL])<br />
You can press [MINUS ONE/CENTER CANCEL] to mute<br />
(silence) the specified Part. This is called the “Minus One”<br />
function. To specify the Part that will be muted, see below.<br />
Each time you press [MINUS ONE/CENTER CANCEL], the Minus<br />
One function will be turned on (button lit) or off (button unlit).<br />
Specifying the Part that will be muted<br />
1. Press [MENU].<br />
2. Use [ ] [ ] to select “Minus One Setting” then press<br />
[ENTER].<br />
3. Use the cursor buttons to select the Part that you want to<br />
mute.<br />
4. Turn the VALUE dial to set it to ON or OFF.<br />
5. When you’re finished making settings, press [EXIT].<br />
This setting is system parameter.<br />
Back Up Song Files<br />
Song data you created on the GW-8 can be saved on USB<br />
memory.<br />
For details, refer to “Saving User Data to USB Memory<br />
(Backup)” (p. 49).<br />
Other Functions Related to Song<br />
“Using Preset Performances” (p. 38)<br />
“Using the Metronome” (p. 23)<br />
“Saving User Data to USB Memory (Backup)” (p. 49)<br />
“Loading User Data Saved on USB Memory (Import)” (p. 49)<br />
You can’t play back SMF data that contains more than 16 parts.<br />
30
Backing Track Functions<br />
USB Memory Player<br />
(SMF/Audio File Player)<br />
Playlist: Playlist is a function that lets you create a list of songs in a<br />
specified order, and play them back consecutively on the GW-8.<br />
You can use the included “Playlist Editor” to create a playlist on<br />
your computer.<br />
Songlist: The list of songs specified in the playlist is called a<br />
Songlist.<br />
USB Memory Player Screens<br />
Main Screen<br />
When you connect USB memory to the GW-8 and press [USB<br />
MEMORY PLAYER], the Main screen will appear as follows.<br />
fig.disp-USBmp.eps<br />
1 2<br />
7<br />
3<br />
4<br />
5 6<br />
Creating a playlist<br />
Start up Playlist Editor and create a playlist.<br />
* For details on creating a playlist, refer to<br />
“PlaylistEditor<strong>Manual</strong>E.pdf,” which is installed together<br />
with “Playlist Editor.”<br />
• Use the included “Playlist Editor” to create playlists.<br />
You cannot create playlists on GW-8 itself.<br />
• You can play back individual songs even without<br />
creating a playlist. To do this, place the SMF or audio<br />
files in the root directory of your USB memory.<br />
• Only audio files whose sampling frequency is 44.1<br />
kHz can be played.<br />
• The GW-8 can handle up to a maximum of 999 songs<br />
and playlists. (The Playlist Editor can handle up to 999<br />
playlists.)<br />
1. PLAYLIST icon: Indicates the PLAYLIST SELECT screen.<br />
2. SONG icon: Indicates the SONG SELECT screen.<br />
3. The number and name of the currently selected Song<br />
4. The group, number, and name of the currently selected<br />
Performance<br />
5. The number and name of the Tone selected for the Lower Part<br />
6. The number and name of the Tone selected for the Upper Part<br />
7. The measure number and tempo or time of the Song<br />
PLAYLIST SELECT Screen<br />
In the Main screen, select the PLAYLIST icon and press [ENTER]<br />
to access the PLAYLIST SELECT screen.<br />
fig.disp-USBmp-songlist.eps<br />
2<br />
1<br />
Playing Back SMF/Audio Files<br />
You can play back SMF files or audio files saved in USB memory.<br />
SMF/Audio files that can be played<br />
WAV/<br />
AIFF<br />
MP3<br />
SMF<br />
0 or 1<br />
* With format 1 SMFs, there are<br />
Format<br />
limitations on the tracks that will be<br />
played.<br />
240 KB maximum (Note that this<br />
File Size will vary slightly based on the SMF<br />
content.)<br />
System Exclusive Packet sizes of 512 bytes or less<br />
Audio File<br />
Sampling Rate 44.1 kHz<br />
Bit Depth 8/16/24 bits<br />
Format MPEG-1 audio layer 3<br />
Sampling Rate 44.1 kHz<br />
32/40/48/56/64/80/96/<br />
Bit Rates 112/128/160/192/224/256/<br />
320 kbps, VBR (Variable Bit Rate)<br />
1. PLAYLIST list<br />
In the list, choose playlist and press [ ]; the cursor will<br />
move to the icon in the right side of the screen. Select an<br />
icon and press [ENTER] to perform the following operations.<br />
Playlists that show a at the left of the name don’t allow you<br />
to edit the playlist settings or the settings of the songs in the<br />
playlist.<br />
2. P INFO icon: Displays information for the currently selected<br />
playlist.<br />
31
Backing Track Functions<br />
SONG SELECT Screen<br />
In the Main screen, select the SONG icon and press [ENTER]<br />
to access the SONG SELECT screen.<br />
fig.disp-USBmp-songlist.eps<br />
1<br />
2. Use [ ] [ ] to select the playlist that you want to play.<br />
3. When you press [ ], the songs in the selected<br />
playlist will be played in the specified order.<br />
Press [EXIT] to return to the Main screen.<br />
2<br />
3<br />
4<br />
5<br />
6<br />
4. To stop the song playback, press [ ].<br />
If you then press [ ], playback will start from the<br />
point at which you stopped.<br />
1. The name of the currently selected playlist<br />
2. Song List<br />
Select a song from the list and press [ ] to move the<br />
cursor to the icons in the right side of the screen. Select an<br />
icon and press [ENTER] to perform the following operations.<br />
3. P INFO icon: Displays information for the currently selected<br />
playlist.<br />
4. S INFO icon: Displays information for the currently selected<br />
song.<br />
5. CHANGE icon: Changes the playback order of the<br />
currently selected song. For details, refer to “Changing the<br />
song order” (p. 33).<br />
6. DELETE icon: Deletes the currently selected song from the<br />
playlist. For details, refer to “Deleting the song” (p. 33).<br />
Song Playback ([USB MEMORY PLAYER])<br />
Connect the USB memory containing the playlist and songs to<br />
the GW-8, and turn [USB MEMORY PLAYER] on.<br />
Play the songs as described below. Use the SONG/USB<br />
MEMORY PLAYER CONTROL buttons to specify the song<br />
playback location.<br />
[ ]<br />
Returns to the beginning of the song.<br />
Pressing this button at the beginning of the<br />
song moves to the previous song.<br />
Selecting and playing a song from<br />
within a songlist<br />
1. In the Main screen, move the cursor to “SONG” in the<br />
upper line of the screen, and press [ENTER].<br />
The songlist for the currently selected playlist will appear.<br />
Alternatively, you can view the songlist by selecting a<br />
playlist in step 2 of “Selecting a playlist and playing it”<br />
(above), and pressing [ENTER].<br />
2. Use [ ] [ ] to select the song that you want to play.<br />
3. Press [ ] to play the selected song.<br />
Press [EXIT] to return to the Main screen.<br />
4. To stop the song playback, press [ ].<br />
If you then press [ ], playback will start from the<br />
point at which you stopped.<br />
Performing along with a song<br />
([MINUS ONE/CENTER CANCEL])<br />
By pressing [MINUS ONE/CENTER CANCEL] you can perform<br />
the following operations depending on the type of song data.<br />
File Function Explanation<br />
[ ] Rewinds the song.<br />
[ ] Fast-forwards the song.<br />
[ ] Moves to the next song.<br />
[ ] Plays or pauses the song.<br />
Selecting a playlist and playing it<br />
SMF<br />
Audio file<br />
Minus<br />
One<br />
Center<br />
Cancel<br />
Mutes the specified Part. To<br />
specify the Part that will be muted,<br />
refer to “Specifying the Part that<br />
will be muted” (p. 30).<br />
Minimizes the playback volume<br />
of the sound that’s heard from the<br />
center (e.g., vocal or melody<br />
instrument).<br />
1. In the Main screen, move the cursor to the PLAYLIST icon in<br />
the upper line of the screen, and press [ENTER].<br />
The PLAYLIST SELECT screen will appear.<br />
Alternatively, you can access the PLAYLIST SELECT screen<br />
from the Main screen by pressing [USB MEMORY PLAYER]<br />
with [USB MEMORY PLAYER] turned on (button lit).<br />
Each time you press [MINUS ONE/CENTER CANCEL], the<br />
function will turn on (button lit) or off (button unlit).<br />
32
Backing Track Functions<br />
Editing Playlist<br />
Adjusting the volume of each song<br />
1. In the SONG SELECT screen (p. 32), choose the S INFO icon<br />
If you modify the content of the playlist, an “*” will be shown<br />
before the playlist name. If you want to keep the playlist you<br />
changed, execute the Write operation (see the right column). If<br />
you select a different playlist without writing your settings, they<br />
will revert to their original state.<br />
Selecting the playback mode<br />
1. In the PLAYLIST SELECT (p. 31),or SONG SELECT screen (p.<br />
32), choose the P INFO icon and then press [ENTER].<br />
2. Use [ ] to select “Chain Play” or “Repeat All” for the<br />
Playback Mode.<br />
3. Turn the VALUE dial to add or remove a check mark (✔).<br />
A function is on when a check mark has been added.<br />
Parameter<br />
Chain<br />
Play<br />
Repeat<br />
All<br />
Explanation<br />
If this is on, the songs in the playlist will play<br />
consecutively.<br />
Playback will stop when the last song has ended.<br />
If this is on, when the last song in the playlist has<br />
ended, the unit returns to the first song and enters<br />
pause mode.<br />
If Chain Play is on, consecutive playback will<br />
continue repeating.<br />
Changing the song order<br />
1. In the SONG SELECT screen (p. 32), choose the CHANGE<br />
icon and then press [ENTER].<br />
The song order change window will appear.<br />
2. Turn the VALUE dial to specify the desired position of the<br />
currently selected song.<br />
3. When you’ve specified the desired position, press [ENTER].<br />
If you do not want to change the position, press [EXIT].<br />
Deleting the song<br />
and then press [ENTER].<br />
2. Use [ ] to select “Level Edit,” and then press [ENTER].<br />
The SONG INFO (LEVEL) screen will appear.<br />
This item is not shown for songs in the USB Memory playlist.<br />
3. Use the cursor buttons to select a parameter.<br />
4. Turn the VALUE dial to adjust the value.<br />
Parameter Value Explanation<br />
Level<br />
Adjust<br />
Part<br />
1–16<br />
Level<br />
-12–0–<br />
+12<br />
0–127<br />
When [USB MEMORY PLAYER] is on, you can press [PART<br />
VIEW] repeatedly to switch from the Main screen to SONG<br />
INFO (LEVEL) → PERFORM MIXER (p. 25) → Main screen.<br />
Saving playlist settings to USB memory<br />
([WRITE])<br />
Here’s how Playlist settings you’ve edited on the GW-8 can be<br />
saved to USB memory.<br />
1. Press [WRITE].<br />
Assuming that the original volume (the<br />
volume of the song in USB memory) is<br />
0, you can adjust the volume within<br />
this range: -12–0–+12.<br />
If the song’s file type is SMF, you can<br />
adjust the volume individually for Parts<br />
1–16. Move the cursor to the Part<br />
number shown at the bottom of the<br />
screen and press [ENTER], and you’ll<br />
be able to adjust the volume of that<br />
Part.<br />
2. Use [ ] [ ] to select “Playlist,” and then press [ENTER].<br />
The confirmation window will appear.<br />
3. Press [ENTER] to save playlists on the USB memory.<br />
If you press [EXIT], you’re returned to the previous screen<br />
without playlists being saved.<br />
1. In the SONG SELECT screen (p. 32), choose the DELETE icon<br />
and then press [ENTER].<br />
A confirmation window will appear.<br />
2. Press [ENTER].<br />
If you do not want to delete, press [EXIT].<br />
33
Performance Functions and Effects<br />
Performance Features<br />
Making detailed settings for<br />
the Solo Synth<br />
D Beam Controller<br />
The D Beam controller can be used simply by waving your<br />
hand over it. It can be used to apply various effects,<br />
depending on the function that is assigned to it. On the GW-8,<br />
the D Beam controller can be used not only to modify the<br />
sounds, but also to control the pitch of a monophonic (solo)<br />
synthesizer sound.<br />
1. Press either D BEAM [SOLO SYNTH], [ASSIGNABLE 1], or<br />
[ASSIGNABLE 2] to turn on the D Beam controller.<br />
1. Press and hold [SOLO SYNTH].<br />
The D BEAM SOLO SYNTH screen will appear.<br />
2. Use [ ] [ ] to select the parameter that you want to<br />
edit.<br />
3. Turn the VALUE dial to set the value.<br />
4. When you’ve finished making settings, press [EXIT].<br />
The Main screen will appear.<br />
These settings are system parameters (p. 46).<br />
Button<br />
[SOLO SYNTH]<br />
[ASSIGNABLE 1]<br />
[ASSIGNABLE 2]<br />
Explanation<br />
Lets you use the D Beam controller as a<br />
monophonic synthesizer.<br />
Operates the function assigned to the D<br />
Beam controller.<br />
Solo Synth Parameters<br />
Parameter Value Explanation<br />
Level & Range<br />
Level 0–127 Sets the volume.<br />
Chorus<br />
Send Level<br />
0–127<br />
Level of the signal sent to<br />
chorus<br />
You can’t use these buttons at the same time.<br />
2. While you play the keyboard to produce sound, place<br />
your hand above the D Beam controller and move it slowly<br />
up and down.<br />
Reverb<br />
Send Level<br />
Range<br />
0–127<br />
2OCT–<br />
8OCT<br />
Level of the signal sent to<br />
reverb<br />
Range in which the pitch of the<br />
solo synth will vary<br />
3. To turn off the D Beam controller, once again press the<br />
button you pressed in step 1 so the indicator goes out.<br />
Osc1<br />
Osc 1<br />
Waveform<br />
SAW, SQR<br />
Waveform<br />
SAW: Sawtooth wave<br />
SQR: Square wave<br />
The usable range of the D Beam controller<br />
The diagram shows the usable range of<br />
the D Beam controller. Waving your<br />
hand outside this range will produce no<br />
effect.<br />
The usable range of the D Beam<br />
controller will become extremely small<br />
when used under strong direct sunlight. Please be aware<br />
of this when using the D Beam controller outside.<br />
Osc 1 Pulse<br />
Width<br />
Osc 1<br />
Coarse<br />
Tune<br />
0–127<br />
-48– +48<br />
Pulse width of the waveform<br />
By cyclically modifying the<br />
pulse width you can create<br />
subtle changes in the tone.<br />
* The Pulse Width is<br />
activated when “SQR” is<br />
selected with OSC1/2<br />
waveform.<br />
Pitch of the Tone’s sound (in<br />
semitones, +/-4 octaves)<br />
The sensitivity of the D Beam controller will change depending<br />
on the amount of light in the vicinity of the unit. If it does not<br />
function as you expect, adjust the D Beam Sens parameter as<br />
appropriate for the brightness of your location. Increase this<br />
value will raise the sensitivity (p. 47).<br />
Osc 1 Fine<br />
Tune<br />
-50– +50<br />
Pitch of the Tone’s sound (in 1-<br />
cent steps)<br />
34
Performance Functions and Effects<br />
Parameter Value Explanation<br />
Osc2 & Sync<br />
Osc 2<br />
Waveform<br />
Osc 2 Pulse<br />
Width<br />
Osc 2<br />
Coarse<br />
Tune<br />
Osc 2 Fine<br />
Tune<br />
(same as Osc 1)<br />
Osc 2 Level 0–127 Adjust the level.<br />
Osc Sync<br />
Switch<br />
OFF, ON<br />
Turning this switch on<br />
produces a complex sound<br />
with many harmonics.<br />
This is effective when the<br />
OSC1 pitch is higher than the<br />
OSC2 pitch.<br />
Parameter Value Explanation<br />
LFO<br />
LFO Rate 0–127 Modulation speed of the LFO<br />
LFO Osc 1<br />
Pitch Depth<br />
LFO Osc 2<br />
Pitch Depth<br />
LFO Osc 1<br />
Pulse<br />
Width<br />
Depth<br />
LFO Osc 2<br />
Pulse<br />
Width<br />
Depth<br />
-63– +63<br />
-63– +63<br />
Depth to which the LFO will<br />
modulate the Osc 1/2 pitch<br />
Depth to which the LFO will<br />
modulate the pulse width of the<br />
Osc 1/2 waveform<br />
* The Pulse Width is<br />
activated when “SQR” is<br />
selected with Osc 1/2<br />
waveform.<br />
Assigning a function to the D Beam<br />
controller<br />
Filter<br />
Filter Type<br />
OFF, LPF,<br />
BPF, HPF,<br />
PKG<br />
Cutoff 0–127<br />
Resonance 0–127<br />
Type of filter<br />
OFF: No filter is used.<br />
LPF: Low Pass Filter. This<br />
reduces the volume of all<br />
frequencies above the cutoff<br />
frequency (Cutoff) in order to<br />
round off, or un-brighten the<br />
sound.<br />
BPF: Band Pass Filter. This<br />
leaves only the frequencies in<br />
the region of the cutoff<br />
frequency, and cuts the rest.<br />
HPF: High Pass Filter. This cuts<br />
the frequencies in the region<br />
below the cutoff frequency.<br />
PKG: Peaking Filter. This<br />
emphasizes the frequencies in<br />
the region of the cutoff<br />
frequency.<br />
Frequency at which the filter<br />
begins to have an effect on the<br />
waveform’s frequency<br />
components<br />
Emphasizes the portion of the<br />
sound in the region of the<br />
cutoff frequency, adding<br />
character to the sound.<br />
* Excessively high settings can<br />
produce oscillation, causing<br />
the sound to distort.<br />
1. Press and hold [ASSIGNABLE 1] or [ASSIGNABLE 2].<br />
The D BEAM screen will appear.<br />
2. Use [ ] [ ] to select a parameter.<br />
3. Turn the VALUE dial to select the desired D Beam function.<br />
4. When you’ve finished making settings, press [EXIT].<br />
The Main screen will appear.<br />
These settings are system parameters (p. 46).<br />
Functions that can be assigned<br />
D Beam<br />
function<br />
DRUM<br />
ROLL<br />
CHIMES<br />
BUBBLE<br />
Explanation<br />
A snare drum roll will continue as long as your<br />
hand is positioned over the D Beam. Move<br />
your hand closer to increase the volume, and<br />
move your hand rapidly away to play a<br />
cymbal.<br />
Chimes will sound when you position your<br />
hand above the D Beam. The volume is greater<br />
when you move your hand more rapidly.<br />
The sound of bubbles will continue as long as<br />
your hand is positioned above the D Beam. The<br />
volume will increase as you move your hand<br />
closer.<br />
35
Performance Functions and Effects<br />
D Beam<br />
function<br />
Explanation<br />
D Beam<br />
function<br />
Explanation<br />
STREAM<br />
The sound of running water will continue as<br />
long as your hand is positioned above the D<br />
Beam. The volume will increase as you move<br />
your hand closer.<br />
EXPRES-<br />
SION<br />
The volume will increase when you bring your<br />
hand closer to the D Beam. The volume will<br />
return to the original level when you take your<br />
hand away.<br />
EXPLO-<br />
SION<br />
GUN<br />
SHOT<br />
ENGINE<br />
An explosion will sound when you position<br />
your hand over the D Beam. The volume is<br />
greater when you move your hand more<br />
rapidly.<br />
A pistol shot will sound when you position your<br />
hand over the D Beam. The volume is greater<br />
when you move your hand more rapidly.<br />
An engine will continue sounding as long as<br />
your hand is positioned above the D Beam. The<br />
volume will increase as you move your hand<br />
closer.<br />
BEND UP<br />
BEND<br />
DOWN<br />
EXP+UP<br />
The pitch will rise when you bring your hand<br />
closer to the D Beam. The pitch will return to the<br />
original level when you take your hand away.<br />
The pitch will fall when you bring your hand<br />
closer to the D Beam. The pitch will return to the<br />
original level when you take your hand away.<br />
When you bring your hand closer to the D<br />
Beam, the volume of the keyboard<br />
performance will increase and the pitch will<br />
rise. The pitch and volume will return to the<br />
original level when you take your hand away.<br />
APPLAUSE<br />
LAUGH-<br />
ING<br />
SCREAM-<br />
ING<br />
BIRD<br />
DOG<br />
SEA-<br />
SHORE<br />
RAIN<br />
THUNDER<br />
MODULA-<br />
TION<br />
Applause will continue sounding as long as<br />
your hand is positioned above the D Beam. The<br />
volume will increase as you move your hand<br />
closer.<br />
Laughter will sound when you position your<br />
hand over the D Beam. The volume is greater<br />
when you move your hand more rapidly.<br />
A scream will sound when you position your<br />
hand over the D Beam. The volume is greater<br />
when you move your hand more rapidly.<br />
A bird call will sound when you position your<br />
hand over the D Beam. The volume is greater<br />
when you move your hand more rapidly.<br />
A dog’s bark will sound when you position<br />
your hand over the D Beam. The volume is<br />
greater when you move your hand more<br />
rapidly.<br />
Surf will sound when you position your hand<br />
over the D Beam. The volume will increase as<br />
you move your hand closer.<br />
The sound of rain will continue as long as your<br />
hand is positioned above the D Beam. The<br />
volume will increase as you move your hand<br />
closer.<br />
The sound of thunder will continue as long as<br />
your hand is positioned above the D Beam. The<br />
volume will increase as you move your hand<br />
closer.<br />
The D Beam controller will apply the same<br />
effect as the Modulation lever (p. 37).<br />
EXP+<br />
DOWN<br />
TEMPO<br />
UP<br />
TEMPO<br />
DOWN<br />
START/<br />
STOP<br />
FILL UP<br />
FILL<br />
DOWN<br />
FADE<br />
OUT<br />
When you bring your hand closer to the D<br />
Beam, the volume of the keyboard<br />
performance will increase and the pitch will<br />
fall. The pitch and volume will return to the<br />
original level when you take your hand away.<br />
The tempo will become faster when you bring<br />
your hand closer to the D Beam. The tempo will<br />
return to the original value when you take your<br />
hand away.<br />
The tempo will become slower when you bring<br />
your hand closer to the D Beam. The tempo will<br />
return to the original value when you take your<br />
hand away.<br />
Playback will start when you position your<br />
hand over the D Beam. Playback will stop<br />
when you position your hand over the D Beam<br />
once again.<br />
If you position your hand over the D Beam<br />
while the backing is playing, a fill-in will sound<br />
(p. 25).<br />
If you position your hand over the D Beam, the<br />
volume will begin decreasing and will then<br />
reach zero. The backing performance will stop,<br />
and then the original volume will return after<br />
two or three seconds.<br />
If you turn off the power while the D BEAM screen is<br />
displayed, the D Beam setting you chose will not be<br />
remembered by the GW-8. You must press [EXIT] before you<br />
turn off the power.<br />
36
Performance Functions and Effects<br />
A performance using a function that produces a sound such as<br />
DRUM ROLL can’t be recorded in a Song.<br />
Pitch Bend and Modulation Lever<br />
The Pitch Bend/Modulation lever located at the left of the<br />
keyboard can be used to apply two types of effect to the<br />
sound you’re playing in Keyboard mode.<br />
Pitch Bend is an effect that lowers the pitch of the sound you’re<br />
playing when you move the lever toward the left, or raises it<br />
when you move the lever toward the right.<br />
Modulation is an effect that applies vibrato to the sound you’re<br />
playing when you push the lever away from yourself.<br />
If the MFX type is ROTARY, this will switch the rotational speed<br />
instead of Modulation.<br />
fig.bendlever.eps<br />
Modifying the Sound<br />
(ANALOG MODIFY)<br />
You can use the two ANALOG MODIFY knobs to modify the<br />
sound of the GW-8.<br />
Use ANALOG MODIFY [SELECT] to choose the effect that the<br />
knobs will have.<br />
MASTER EQ settings are stored in System settings (p. 46), and<br />
the other settings are stored in the Tone settings of the<br />
Performance (p. 41).<br />
Adjusting the MASTER EQ<br />
If you press ANALOG MODIFY [SELECT] to select MASTER EQ,<br />
the two knobs will operate as [LOW] and [HIGH] knobs.<br />
Master EQ is applied to the overall output of the GW-8 that is<br />
sent from OUTPUT and PHONES.<br />
Pitch Bend<br />
Modulation<br />
Knob<br />
Explanation<br />
LOW GAIN<br />
Adjusts the volume of the low-frequency range.<br />
Pitch Bend<br />
Modulation<br />
HIGH GAIN<br />
Adjusts the volume of the high-frequency range.<br />
If you press the lever away from yourself while moving it to left<br />
or right, both effects will be applied at the same time.<br />
The extent of the pitch change can be assigned for each Tone.<br />
For details, refer to “Pitch Bend Range” (p. 41).<br />
If you want to keep these settings, press [WRITE] to save them<br />
in “SYSTEM.”<br />
“Bend Mode” (p. 46)<br />
37
Performance Functions and Effects<br />
Adjusting the currently selected Tone<br />
Use [SELECT] to choose “EFFECT,” “FILTER,” or “ENVELOPE,”<br />
and use the knobs to adjust the Tone settings.<br />
The knob settings will apply only to the currently selected<br />
Tone.<br />
If you’ve used [SELECT] to choose “EFFECT”<br />
Knob<br />
REVERB<br />
CHORUS<br />
Explanation<br />
Reverb adds the reverberation characteristics<br />
of halls or auditoriums. This adjusts the level<br />
of the signal sent to Reverb.<br />
Chorus adds depth and spaciousness to the<br />
sound. This adjusts the level of the signal sent<br />
to Chorus.<br />
If you’ve used [SELECT] to choose “FILTER”<br />
Knob<br />
CUTOFF<br />
You can connect a separately available foot switch (Boss FS-<br />
5U) or a separately available expression pedal (<strong>Roland</strong> EV-5)<br />
to the CONTROL PEDAL jack on the rear panel.<br />
You can assign a variety of functions to this pedal. For details,<br />
refer to “System Parameters” (p. 46).<br />
RESO-<br />
NANCE<br />
Explanation<br />
This specifies the cutoff frequency at which<br />
the filter will begin affecting the spectral<br />
components of the sound. Turn the knob<br />
toward the right to brighten the sound, or<br />
toward the left to darken the sound.<br />
This boosts the sound in the region of the<br />
cutoff frequency, adding a distinctive<br />
character to the sound. Turn the knob toward<br />
the right to strengthen this character, or<br />
toward the left to decrease it.<br />
If you’ve used [SELECT] to choose “ENVELOPE”<br />
Knob<br />
ATTACK<br />
RELEASE<br />
Assignable Pedal<br />
Explanation<br />
Adjusts the attack time (the time from when<br />
you press a key until the sound reaches its full<br />
volume). Turn the knob toward the right to<br />
lengthen the attack time, or toward the left to<br />
shorten it.<br />
Adjusts the release time (the time from when<br />
you release a key until the sound disappears).<br />
Turn the knob toward the right to lengthen the<br />
release time, or toward the left to shorten it.<br />
Using Preset Performances<br />
By selecting a preset Performance, you can quickly recall<br />
settings that are appropriate for the song you’re playing.<br />
When you select a preset performance, settings for the<br />
following items will be recalled.<br />
• Keyboard mode<br />
• Upper Tone/Lower Tone settings<br />
• Style settings<br />
• Song settings<br />
• Effects settings<br />
• Transpose<br />
• Octave shift<br />
• D Beam settings<br />
• Keyboard touch<br />
• Chord mode<br />
• Melody Intelligence<br />
Selecting a Performance ([PERFORM])<br />
The Performance memory locations are organized as follows.<br />
Type<br />
PRST<br />
(Preset)<br />
USER<br />
Using the VALUE dial<br />
Explanation<br />
These are the Performances built into the GW-8.<br />
They cannot be overwritten.<br />
You can use these memory locations to store<br />
Performances you’ve edited.<br />
1. Press [PERFORM] so the button is lit.<br />
2. Use the cursor buttons to move the cursor to the right of<br />
“PERFORM,” located in the upper left of the screen, then<br />
use the VALUE dial to choose “PRST” or “USER.”<br />
You’ll be able to select preset Performances if you choose<br />
“PRST,” or user Performances if you choose “USER.”<br />
3. Use the cursor buttons to move the cursor to the<br />
Performance number, and use the VALUE dial to select a<br />
Performance.<br />
When the cursor in the screen is at the Performance number,<br />
you can also select a Performance by turning [NUMERIC] on,<br />
using the TONE SELECT buttons to enter a Performance<br />
number, and then pressing [ENTER].<br />
38
Performance Functions and Effects<br />
Choosing from the Performance list<br />
Parameter Value Explanation<br />
1. In the Main screen, use the cursor buttons to move the<br />
cursor to the Performance number.<br />
2. Press [ENTER].<br />
Octave<br />
Lower<br />
-4–+4<br />
STANDARD<br />
Raises or lowers the pitch in steps<br />
of one octave for the Lower Tone.<br />
This lets you use simple fingering<br />
to specify a chord without having<br />
to play all the notes in the chord.<br />
3. Use [ ] [ ] to select “Preset” or “User.”<br />
You’ll be able to select preset Performances if you choose<br />
“Preset,” or user Performances if you choose “User.”<br />
PIANO<br />
The chord will consist of only the<br />
note(s) you play on the keyboard<br />
in the Lower Part.<br />
4. Use [ ] [ ] or the VALUE dial to select a Performance.<br />
5. Press [ENTER] to set the Performance.<br />
If you press [EXIT] without pressing [ENTER], the list will<br />
close without the currently selected Performance being<br />
changed.<br />
Editing a Performance<br />
You can edit the settings of a Performance, and store them as<br />
a user Performance.<br />
1. Press [MENU].<br />
2. Use [ ] [ ] to select “Perform Edit” then press [ENTER].<br />
3. Use [ ] [ ] to select a parameter, and turn the VALUE<br />
dial to select the value.<br />
4. When you’ve finished making settings, press [EXIT].<br />
The Main screen will appear.<br />
“Saving a Performance ([WRITE])” (p. 41)<br />
Performance Parameters<br />
Parameter Value Explanation<br />
Split Point<br />
Octave<br />
Upper<br />
C#2–C7<br />
-4–+4<br />
Specifies the Split Point (the key at<br />
which the keyboard will be<br />
divided) used in Split mode. This<br />
will be the highest note of the<br />
Lower Part.<br />
Raises or lowers the pitch in steps<br />
of one octave for the Upper Tone.<br />
* In the case of a rhythm set,<br />
this does not transpose the<br />
pitch; rather, it shifts the set of<br />
drum/percussion sounds that<br />
are assigned to the keyboard.<br />
Chord<br />
Mode<br />
Backing<br />
Hold<br />
Bass<br />
Inversion<br />
INTEL<br />
EASY<br />
You can play chords as described<br />
in “Chord Intelligence” (p. 102).<br />
You can specify chords in the<br />
following four ways.<br />
Major chords: Play the root note<br />
of the chord<br />
Minor chords: Play the root note<br />
and the black key located at its<br />
left<br />
Seventh chords: Play the root note<br />
and the white key located at its<br />
left<br />
Minor seventh chords: Play the<br />
root note + black key at left +<br />
white key at left<br />
Selects how the backing part will sound.<br />
OFF<br />
ON<br />
When you take your hand off the<br />
left side of the keyboard,<br />
instrumental sounds other than the<br />
drums of the backing part will<br />
stop; only the rhythm part will<br />
continue sounding.<br />
The chord you played in the left<br />
hand will be remembered. The<br />
backing will continue playing<br />
with that chord until you play<br />
another chord.<br />
Specifies how Chord Bass will be sounded.<br />
OFF<br />
ON<br />
The root note of the chord you<br />
play will sound.<br />
The lowest note of the chord you<br />
play will sound.<br />
39
Performance Functions and Effects<br />
Editing a Tone<br />
You can turn the ANALOG MODIFY knobs to edit the currently<br />
selected Tone (including rhythm set Tones).<br />
For details on using ANALOG MODIFY, refer to “Modifying<br />
the Sound (ANALOG MODIFY)” (p. 37).<br />
The Tone settings you edit are stored in the Performance (p.<br />
41).<br />
The current Tone is the Tone at whose Tone number the cursor<br />
is located in the screen when you press [TONE].<br />
Editing a Tone in detail<br />
You can edit the currently selected Tone (including rhythm set<br />
Tones) in more detail. The Tone settings you edit are stored in<br />
the Performance (p. 38).<br />
1. Press [MENU].<br />
Parameter Value Explanation<br />
Attack Time -64–+63<br />
Decay Time -64–+63<br />
Release<br />
Time<br />
Vibrato<br />
Rate<br />
Vibrato<br />
Depth<br />
-64–+63<br />
-64–+63<br />
-64–+63<br />
The same as ATTACK described<br />
in page 38.<br />
Adjusts the decay time (the time<br />
from when the attack has<br />
finished until the volume reaches<br />
the level at which it will remain<br />
as long as you hold down the<br />
key). Higher settings produce a<br />
longer decay time.<br />
The same as RELEASE described<br />
in page 38.<br />
Adjusts the modulation speed of<br />
vibrato. Higher settings produce<br />
faster vibrato.<br />
Adjusts the modulation depth<br />
vibrato. Higher settings produce<br />
more intense vibrato.<br />
2. Use [ ] [ ] to select “Perform Tone Edit” then press<br />
[ENTER].<br />
Vibrato<br />
Delay<br />
-64–+63<br />
Adjusts the time until vibrato begins.<br />
Higher settings produce a longer<br />
delay until vibrato will begin.<br />
3. Use [ ] [ ] to select the Upper or Lower Tone that<br />
you want to edit.<br />
4. Use [ ] [ ] to select a parameter, and turn the VALUE<br />
dial to adjust the value.<br />
5. When you’ve finished making settings, press [EXIT].<br />
The Main screen will appear.<br />
Mono/Poly<br />
MONO<br />
POLY<br />
TONE<br />
Only the last-played note will<br />
sound. This setting is effective<br />
when playing a solo instrument<br />
patch such as sax or flute.<br />
Two or more notes can be<br />
played simultaneously.<br />
Uses the Tone’s Mono/Poly setting.<br />
Tone Parameters<br />
Parameter Value Explanation<br />
Level 0–127 Adjusts the volume of the Tone.<br />
Pan<br />
Chorus<br />
Send Level<br />
Reverb<br />
Send Level<br />
L64–0–<br />
R63<br />
0–127<br />
0–127<br />
Cutoff -64–+63<br />
Adjusts the panning (left/right<br />
stereo position) of the Tone.<br />
Values beginning with “L” place<br />
the sound at the left, 0 at the<br />
center, and “R” at the right.<br />
Level of the signal sent to<br />
Chorus.<br />
Level of the signal sent to<br />
Reverb.<br />
The same as CUTOFF described<br />
in page 38.<br />
Legato<br />
Switch<br />
OFF,<br />
ON,<br />
TONE<br />
This setting specifies whether the<br />
Legato Switch will be used (ON)<br />
or not (OFF). Legato Switch is<br />
valid when the Mono/Poly<br />
parameter is set to “MONO.”<br />
With the Legato Switch “ON,”<br />
pressing a key while continuing<br />
to press a previous key causes<br />
the note to change pitch to the<br />
pitch of the most recently pressed<br />
key, sounding all the while. This<br />
creates a smooth transition<br />
between notes, which is effective<br />
when you wish to simulate the<br />
hammering on and pulling-off<br />
techniques used by a guitarist.<br />
When “TONE” is selected, the<br />
Tone’s own settings take effect.<br />
Resonance -64–+63<br />
The same as RESONANCE<br />
described i n page 38.<br />
40
Performance Functions and Effects<br />
Parameter Value Explanation<br />
Portamento<br />
Switch<br />
Portamento<br />
Time<br />
Pitch Bend<br />
Range<br />
Hold Pedal<br />
Switch<br />
Control<br />
Pedal<br />
Switch<br />
OFF,<br />
ON,<br />
TONE<br />
0–127,<br />
TONE<br />
0–24,<br />
TONE<br />
ON, OFF<br />
ON, OFF<br />
Specifies whether portamento<br />
will be applied (ON) or not<br />
(OFF). When “TONE” is<br />
selected, the Tone’s own settings<br />
take effect.<br />
Adjusts the speed at which the<br />
pitch will change when<br />
portamento is used. Higher<br />
settings will lengthen the time over<br />
which the pitch changes to the next<br />
note. When “TONE” is selected,<br />
the Tone’s own settings take effect.<br />
Specifies the range of pitch<br />
change that can be controlled<br />
using the Pitch Bend controller.<br />
When “TONE” is selected, the<br />
Tone’s own settings take effect.<br />
Specifies whether the hold<br />
pedal will apply to the Tone<br />
(ON) or will not apply (OFF).<br />
Specifies whether the control<br />
pedal will apply to the Tone (ON)<br />
or will have no effect (OFF).<br />
This is enabled when “Pedal<br />
Assign” in “System settings” is set<br />
to EXPRESSION, SOSTENUTO,<br />
or SOFT (p. 46).<br />
Portamento is an effect that smoothly changes the pitch from<br />
one note to the next.<br />
Vibrato is an effect that uses an LFO (Low Frequency<br />
Oscillator) to cyclically vary the pitch.<br />
Saving a Performance ([WRITE])<br />
Here’s how the settings of the current Performance (including<br />
the Tone settings you’ve edited) can be saved in the GW-8 as<br />
a new Performance.<br />
1. Press [WRITE].<br />
2. Use [ ] [ ] to select “Performance,” and then press<br />
[ENTER].<br />
Input a name for your user Performance<br />
3. Use [ ] [ ] to move the cursor, and turn the VALUE<br />
dial to change each character, and then press [ENTER].<br />
Enter a Performance name of up to 16 characters.<br />
The following characters are available.<br />
space A–Z a–z 0–9 ! “ # $ % & ‘ ( ) * + , - . / : ; < = > ?<br />
@ [ \ ] ^ _ ` { | }<br />
Button<br />
[0]<br />
Explanation<br />
Selects the type of character. Each time you press<br />
this, you will alternately select the first character of a<br />
character set: uppercase (A), lowercase (a), or<br />
numerals and symbols (0).<br />
[1] Deletes the character at the cursor location.<br />
[2] Inserts a space at the cursor location.<br />
4. Turn the VALUE dial to select the desired destination, and<br />
then press [ENTER].<br />
A confirmation window will appear.<br />
5. Press [ENTER] to save the Performance.<br />
If you press [EXIT], you’re returned to the previous screen<br />
without the Performance being saved.<br />
Other Functions Related to Performance<br />
“Preserving Certain Settings Even When You Switch<br />
Performances ([LOCK])” (p. 16)<br />
“Registering Frequently Used Tones or Performances in a<br />
Button (FAVORITE Buttons)” (p. 20)<br />
“Style (Playing with an Accompaniment)” (p. 25)<br />
“Bend Mode” (p. 46)<br />
“Saving User Data to USB Memory (Backup)” (p. 49)<br />
“Loading User Data Saved on USB Memory (Import)” (p. 49)<br />
41
Performance Functions and Effects<br />
Using Effects ([EFFECTS])<br />
The GW-8 contains built-in reverb, chorus, and multi-effect<br />
(MFX) processors. You can choose an effect type for each<br />
processor.<br />
MFX will apply only to the realtime performance of the part<br />
you play by hand (the Upper Part or Lower Part). Be aware<br />
that MFX will not apply to recorded song data.<br />
Editing the Effects<br />
1. Press [EFFECTS].<br />
The Effect setting screen will appear.<br />
2. Use [ ] [ ] to select a page, and use [ ] [ ] to<br />
select the parameter that you want to edit.<br />
3. Turn the VALUE dial to edit the value.<br />
4. When you’re finished editing the effect settings, press<br />
[EFFECTS] or [EXIT].<br />
The Main screen will appear.<br />
Effect Parameters<br />
Page Parameter Explanation Value<br />
EFFECT<br />
SEND<br />
Upper<br />
MFX<br />
Chorus<br />
Send<br />
Upper<br />
MFX<br />
Reverb<br />
Send<br />
Lower<br />
MFX<br />
Chorus<br />
Send<br />
Specifies the amount of<br />
chorus that will be<br />
applied to the sound of<br />
the Upper Part that has<br />
passed through MFX. Set<br />
this to “0” if you don’t<br />
want to apply chorus.<br />
Specifies the amount of<br />
reverb that will be<br />
applied to the sound of<br />
the Upper Part that has<br />
passed through MFX. Set<br />
this to “0” if you don’t<br />
want to apply reverb.<br />
Specifies the amount of<br />
chorus that will be<br />
applied to the sound of<br />
the Lower Part that has<br />
passed through MFX. Set<br />
this to “0” if you don’t<br />
want to apply chorus.<br />
0–127<br />
0–127<br />
0–127<br />
Page Parameter Explanation Value<br />
EFFECT<br />
SEND<br />
LOWER<br />
MFX<br />
UPPER<br />
MFX<br />
Lower<br />
MFX<br />
Reverb<br />
Send<br />
Chorus<br />
Output<br />
Select<br />
Specifies the amount of<br />
reverb that will be<br />
applied to the sound of<br />
the Lower Part that has<br />
passed through MFX. Set<br />
this to “0” if you don’t<br />
want to apply reverb.<br />
Specifies how the sound<br />
routed through chorus<br />
will be output.<br />
MAIN: Output to the<br />
OUTPUT jacks in stereo.<br />
REV: Output to reverb in<br />
mono.<br />
M+R: Output to the<br />
OUTPUT jacks in stereo,<br />
and to reverb in mono.<br />
See “Multi-Effects Parameters” (p. 56)<br />
CHORUS See “Chorus Parameters” (p. 82)<br />
REVERB See “Reverb Parameters” (p. 83)<br />
EFFECT<br />
SOURCE<br />
Upper<br />
MFX<br />
Source<br />
Lower<br />
MFX<br />
Source<br />
Specifies the MFX<br />
settings that will be used<br />
for the Upper Part.<br />
If you choose<br />
“PERFORM,” the MFX<br />
settings of the<br />
Performance will be<br />
used. If you choose<br />
“UPPER TONE,” the<br />
Upper MFX settings of<br />
the Tone will be used.<br />
Specifies the MFX<br />
settings that will be used<br />
for the Lower Part.<br />
If you choose<br />
“PERFORM,” the MFX<br />
settings of the<br />
Performance will be<br />
used. If you choose<br />
“LOWER TONE,” the<br />
Lower MFX settings of<br />
the Tone will be used.<br />
0–127<br />
MAIN,<br />
REV,<br />
M+R<br />
PERFORM,<br />
UPPER<br />
TONE<br />
PERFORM,<br />
LOWER<br />
TONE<br />
42
Using MIDI<br />
The GW-8 can transmit and receive performance data when<br />
connected to an external MIDI device, which enables the two<br />
devices to control each other’s performance. For example, one<br />
device can play or switch sounds on the other device.<br />
MIDI stands for “Musical Instrument Digital Interface.” It is a<br />
universal standard for exchanging musical performance data<br />
among electronic musical instruments and computers.<br />
The GW-8’s MIDI connectors allow it to transmit performance<br />
data to, and receive such data from other devices. You can<br />
use the GW-8 in a wide range of ways by connecting external<br />
devices to these connectors.<br />
Connection example<br />
Before making connections with other devices, you must turn<br />
down the volume of all devices and turn off the power to avoid<br />
malfunctions or speaker damage.<br />
fig.midi.eps<br />
GW-8<br />
Play the GW-8’s sounds from your MIDI sequencer<br />
MIDI sound module/<br />
sequencer<br />
MIDI channel Track Style<br />
1 1 Accomp 1<br />
2 2 Accomp bass<br />
3 3 Accomp 2<br />
4 4 Upper Part<br />
5 5 Accomp 3<br />
6 6<br />
7 7 Accomp 4<br />
8 8 Accomp 5<br />
9 9 Accomp 6<br />
10 10 Accomp drums<br />
11 11 Lower Part<br />
12 12<br />
13 13<br />
14 14<br />
15 15 Melody Intelligence<br />
16 16<br />
MIDI Parameters<br />
For details on how to make these settings, refer to “How to<br />
Make System Settings ([MENU])” (p. 46).<br />
MIDI parameters other than “Local Switch” will be saved as<br />
soon as you exit system edit mode.<br />
MIDI Channels<br />
Use the GW-8 to play your MIDI sound module<br />
MIDI provides sixteen channels, numbered 1–16. Even if two<br />
MIDI devices are connected, you won’t be able to select or<br />
play sounds on the other device unless both devices are set to<br />
the same MIDI channel. The GW-8 is capable of receiving on<br />
all channels, 1–16.<br />
If the GW-8’s BACKING TYPE [SONG] is on, MIDI channels<br />
1–16 will be received by “Track” 1–16.<br />
If the GW-8’s BACKING TYPE [STYLE] is on, MIDI channels 1–<br />
16 will be received by the “Style” Parts.<br />
Local Switch<br />
If the notes you play on the keyboard are sent to the sound<br />
generator via both of the two routes (1) and (2) as shown in<br />
the diagram, the notes will be duplicated or interrupted. To<br />
prevent this, you can disconnect route (1) by using the “Local<br />
Off” setting.<br />
You should turn this setting Off if you’ve connected a MIDI<br />
sequencer to the GW-8.<br />
fig.local.eps<br />
(1) Local on<br />
Sound<br />
generator<br />
MIDI<br />
IN<br />
MIDI<br />
OUT<br />
Sequencer<br />
Memory<br />
MIDI<br />
OUT<br />
MIDI<br />
IN<br />
Play a note once;<br />
it‘s sounded twice<br />
(2) Thru setting turned on<br />
Immediately after the power is turned on, this setting will be<br />
On.<br />
43
Using MIDI<br />
MIDI Parameters<br />
Parameter Explanation Value<br />
MIDI Tx<br />
Switch<br />
Upper Tx<br />
Channel<br />
Lower Tx<br />
Channel<br />
MIDI Rx<br />
Switch<br />
Upper Rx<br />
Channel<br />
Lower Rx<br />
Channel<br />
Tx Pitch<br />
Bend<br />
Tx<br />
Modulation<br />
Tx Program<br />
Change<br />
Tx Clock<br />
Tx Start-<br />
Stop<br />
Specifies whether MIDI messages<br />
will not be transmitted (OFF) or<br />
will be transmitted (ON).<br />
Specifies the transmit channel<br />
for the Upper Part.<br />
Specifies the transmit channel<br />
for the Lower Part.<br />
Specifies whether MIDI<br />
messages will not be received<br />
(OFF) or will be received (ON).<br />
Specifies the receive channel for<br />
the Upper Part.<br />
Specifies the receive channel for<br />
the Lower Part.<br />
This is an on/off switch for Pitch<br />
Bend message transmission.<br />
These messages temporarily<br />
raise or lower the pitch of the<br />
keyboard mode Tone.<br />
This is an on/off switch for<br />
Modulation message transmission.<br />
These messages apply vibrato to<br />
the keyboard mode Tone (control<br />
change CC#01).<br />
This is an on/off switch for<br />
Program Change message<br />
transmission. These messages<br />
are used to select Tones.<br />
This specifies whether MIDI Clock<br />
messages will be transmitted. Use<br />
this when you want a connected<br />
external MIDI device to<br />
synchronize to the GW-8.<br />
This specifies whether Start/<br />
Stop/Continue messages will<br />
be transmitted.<br />
Song mode: Start/Stop/Continue<br />
Style mode: Start/Stop<br />
OFF, ON<br />
1–16<br />
1–16<br />
OFF, ON<br />
1–16<br />
1–16<br />
OFF, ON<br />
OFF, ON<br />
OFF, ON<br />
OFF, ON<br />
OFF, ON<br />
Parameter Explanation Value<br />
Rx Sync<br />
Rx Pitch<br />
Bend<br />
Rx<br />
Modulation<br />
Rx<br />
Program<br />
Change<br />
This specifies how the GW-8<br />
will synchronize to an external<br />
MIDI device. Synchronization is<br />
available if the MIDI OUT<br />
connector of your external MIDI<br />
device is connected to the GW-<br />
8’s MIDI IN connector. (If you’ve<br />
made the opposite connection,<br />
refer to the owner’s manual for<br />
your external device.)<br />
This is an on/off switch for Pitch<br />
Bend message reception. These<br />
messages temporarily raise or<br />
lower the pitch of the keyboard<br />
mode Tone.<br />
This is an on/off switch for<br />
Modulation message reception.<br />
These messages apply vibrato<br />
to the keyboard mode Tone<br />
(control change CC#01).<br />
This is an on/off switch for<br />
Program Change message<br />
reception. These messages are<br />
used to select Tones.<br />
Using the GW-8 as a MIDI<br />
Sound Module<br />
If you want to use the GW-8 with an external MIDI sequencer,<br />
for example to create Styles, proceed as follows.<br />
1. Press [SONG] to put the GW-8 in Song mode.<br />
OFF, ON<br />
OFF, ON<br />
OFF, ON<br />
OFF, ON<br />
2. Press [PERFORM] so it’s lit, then use the VALUE dial to<br />
select the preset Performance “128: Init Performance.”<br />
MFX (p. 42) will apply only to the part that you play manually<br />
on the GW-8 (the Upper Part or Lower Part).<br />
Tx Song<br />
Position<br />
This specifies whether Song<br />
Position Pointer messages will<br />
be transmitted to indicate the<br />
currently playing position in<br />
Song mode. If you don’t want<br />
this message to be transmitted,<br />
choose the Off setting. This is<br />
valid only if [SONG] is lit.<br />
OFF, ON<br />
44
Using MIDI<br />
Connecting to a Computer via<br />
the USB MIDI Connector<br />
If you use a USB cable (commercially available) to connect the<br />
USB MIDI connector located on the GW-8’s rear panel to the<br />
USB connector of your computer, you’ll be able to do the<br />
following things.<br />
• Use the GW-8 to play SMF played back by MIDI<br />
compatible software.<br />
• By transferring MIDI data between the GW-8 and your<br />
sequencer software, you’ll be able to enjoy a wide range<br />
of possibilities for music production and editing.<br />
Connect the GW-8 to your computer as shown below.<br />
fig.PCconnect.eps<br />
USB cable<br />
To USB connector<br />
of computer<br />
Computer<br />
If connection to your computer is<br />
unsuccessful...<br />
Normally, you don’t need to install a driver in order to connect<br />
the GW-8 to your computer. However, if some problem<br />
occurs, or if the performance is poor, using the <strong>Roland</strong><br />
original driver may solve the problem.<br />
For details on downloading and installing the <strong>Roland</strong> original<br />
driver, refer to the <strong>Roland</strong> website.<br />
<strong>Roland</strong> website:http://www.roland.com/<br />
Caution<br />
• To avoid the risk of malfunction and/or speaker<br />
damage, always make sure to turn the volume all the<br />
way down and turn off the power on all equipment<br />
before you make any connections.<br />
• Only MIDI data can be transmitted and received via<br />
USB.<br />
• A USB cable is not included. If you need to obtain<br />
one, ask the dealer where you purchased the GW-8.<br />
USB MIDI connector<br />
• Switch on power to the GW-8 before you start up the<br />
MIDI application on your computer. Don’t turn the<br />
GW-8’s power on/off while your MIDI application is<br />
running.<br />
GW-8<br />
Refer to the <strong>Roland</strong> website for system requirements.<br />
<strong>Roland</strong> website: http://www.roland.com/<br />
If you are using Windows XP/Windows Vista, you must log<br />
onto Windows as one of the following users in order to<br />
complete the USB connection correctly.<br />
• A user name belonging to the Administrators group, such<br />
as Administrator<br />
• A user name whose account type is a computer administrator<br />
Do not connect two or more GW-8 units to one computer via<br />
USB. The system will not operate correctly with such connections.<br />
Making the Settings for the USB Driver<br />
Specify the USB driver you want to use, and then install the<br />
driver.<br />
1. Press [MENU].<br />
2. Use [ ] [ ] to select “System” then press [ENTER].<br />
3. Use [ ] [ ] to select “SYSTEM GENERAL” page.<br />
4. Use [ ] [ ] to select “USB Driver.”<br />
5. Turn the VALUE dial to select the driver.<br />
The file name for a Style or Song that can be used by the GW-<br />
8 must be no longer than sixteen characters (not including the<br />
filename extension). You can use the following characters.<br />
A–Z 0–9 ! # $ % & ‘ ( ) - @ ^ _ ` { }<br />
You must assign a filename extension of “.stl” to Style files,<br />
and a filename extension of “.mid” to Song files.<br />
Depending on the type of characters you use, it may not be<br />
possible to display the file name in some cases.<br />
Value<br />
VENDER<br />
GENERIC<br />
6. Press [EXIT].<br />
Explanation<br />
Select this if you use the supplied driver.<br />
Select this if you use a generic USB driver<br />
included with the OS.<br />
7. Turn the power off and then on again.<br />
45
System Settings<br />
Settings that affect the entire operating environment of the<br />
GW-8, such as tuning and MIDI message reception, are<br />
referred to as “system settings.”<br />
How to Make System Settings<br />
([MENU])<br />
1. Press [MENU].<br />
2. Use [ ] [ ] to select “System” then press [ENTER].<br />
3. Use [ ] [ ] to select a page, and use [ ] [ ] to<br />
select the parameter that you want to edit.<br />
For details, refer to “System Parameters” (below).<br />
4. Turn the VALUE dial to edit the value.<br />
5. When you’re finished making system settings, press [EXIT].<br />
System Parameters<br />
SYSTEM GENERAL<br />
Parameter Value Explanation<br />
Master<br />
Tune<br />
Local<br />
Switch*<br />
System<br />
Transpose<br />
Bend<br />
Mode<br />
Screen<br />
Saver<br />
Time<br />
415.3–<br />
466.2Hz<br />
Adjusts the tuning of the entire GW-<br />
8. The displayed value is the<br />
frequency of the A4 key (middle A).<br />
OFF, ON Refer to “Local Switch” (p. 43).<br />
-6–+5<br />
NORMAL<br />
CATCH+<br />
LAST<br />
OFF, 5,<br />
10–60<br />
(min)<br />
Transposes the pitch of the GW-8<br />
in semitone steps.<br />
The pitch bend lever will operate in<br />
the conventional way.<br />
If you play a note when the pitch<br />
bend lever is already moved to one<br />
side, the pitch will sound as though<br />
the lever were in the center position.<br />
When the lever passes through the<br />
center position, it will once again<br />
begin affecting the pitch. This will<br />
apply only to the most recently<br />
played note. You can use this to<br />
simulate the double-bending<br />
technique of an electric guitarist.<br />
Set the time (minutes) until the<br />
screen saver begins working. If this<br />
is “OFF,” the screen saver will not<br />
appear.<br />
USB<br />
Driver<br />
SYSTEM PEDAL<br />
VENDER,<br />
GENERIC<br />
Refer to “Making the Settings for<br />
the USB Driver” (p. 45).<br />
Parameter Value Explanation<br />
Pedal<br />
Assign<br />
Selects the function that will be controlled when<br />
you press a separately available pedal<br />
connected to the CONTROL PEDAL jack.<br />
EXPRESSION<br />
CHORD<br />
OFF<br />
CHORD<br />
TOGGLE<br />
SOSTENUTO<br />
SOFT<br />
ROTARY<br />
SLOW/<br />
FAST<br />
START/<br />
STOP<br />
BASS<br />
INVERSION<br />
PUNCH<br />
IN/OUT<br />
The pedal will function as an<br />
Expression pedal.<br />
Chord detection in the Lower Part<br />
area of the keyboard will be off<br />
while you hold down the pedal,<br />
allowing you to perform using the<br />
entire keyboard. The setting will<br />
return to its previous state when<br />
you release the pedal.<br />
Chord detection in the Lower Part<br />
area will turn off when you press<br />
the pedal, allowing you to perform<br />
using the entire keyboard. The<br />
setting will return to its previous<br />
state when you press the pedal<br />
once again, so that chord detection<br />
will be on for the Lower Part area.<br />
The pedal will function as a<br />
Sostenuto pedal. When you press<br />
the pedal, notes that are already<br />
being held down will be sustained.<br />
(This function can be used only for<br />
the keyboard part.)<br />
The pedal will function as a Soft<br />
pedal. Notes you play while<br />
holding down the pedal will have a<br />
softer tone. (This function can be<br />
used only for the keyboard part.)<br />
The pedal will switch the speed of<br />
the rotary effect. This is valid only if<br />
the ROTARY type is selected for<br />
MFX (p. 42).<br />
The pedal will start/stop the<br />
backing or song playback.<br />
The pedal will switch the Bass Inversion<br />
function on/off (p. 39).<br />
The pedal will control punch-in and<br />
punch-out during song recording<br />
(p. 29).<br />
46
System Settings<br />
FILL UP<br />
The pedal will trigger a fill-in, and<br />
then the next variation will play<br />
(e.g., from MAIN “1” to “2”).<br />
Once you reach variation “4,”<br />
subsequent presses of the pedal<br />
will not change the variation any<br />
farther.<br />
SYSTEM D BEAM<br />
Parameter Value Explanation<br />
D Beam<br />
Sens<br />
0–127<br />
This sets the D Beam controller’s<br />
sensitivity. The higher the value set,<br />
the more readily the D Beam<br />
controller goes to into erect.<br />
FILL<br />
DOWN<br />
PERFORM<br />
UP<br />
The pedal will trigger a fill-in, and<br />
then the previous variation will play<br />
(e.g., from MAIN “4” to “3”).<br />
Once you reach variation “1,”<br />
subsequent presses of the pedal<br />
will not change the variation any<br />
farther.<br />
The pedal will switch to the next<br />
Performance (i.e., from PERFORM<br />
001 to 002).<br />
D Beam<br />
Assignable<br />
1<br />
Type<br />
D Beam<br />
Assignable<br />
2<br />
Type<br />
Refer to “Functions that can be assigned” (p. 35).<br />
SYSTEM D BEAM SOLO SYNTH<br />
Refer to “Solo Synth Parameters” (p. 34).<br />
Pedal<br />
Assign<br />
PERFORM<br />
DOWN<br />
FAV<br />
PERFORM<br />
UP<br />
FAV<br />
PERFORM<br />
DOWN<br />
The pedal will switch to the<br />
previous Performance (i.e., from<br />
PERFORM 002 to 001).<br />
The pedal will switch to the FAVORITE<br />
Performance of the next number or<br />
bank (e.g., from FAVORITE PERFORM<br />
BANK 1-1 to 1-2).<br />
The pedal will switch to the FAVORITE<br />
Performance of the previous number<br />
or bank (e.g., from FAVORITE<br />
PERFORM BANK 1-2 to 1-1).<br />
SYSTEM MIDI<br />
Parameter Value Explanation<br />
MIDI Tx<br />
Switch<br />
Upper Tx<br />
Channel<br />
Lower Tx<br />
Channel<br />
MIDI Rx<br />
Switch<br />
OFF, ON<br />
1–16<br />
1–16<br />
OFF, ON<br />
Refer to “MIDI Parameters” (p. 44).<br />
FAV<br />
TONE UP<br />
The pedal will switch to the<br />
FAVORITE Tone of the next number<br />
or bank (e.g., from FAVORITE<br />
TONE BANK 1-1 to 1-2).<br />
Upper Rx<br />
Channel<br />
Lower Rx<br />
Channel<br />
1–16<br />
1–16<br />
Pedal<br />
Polarity<br />
FAV<br />
TONE<br />
DOWN<br />
STANDARD,<br />
REVERSE<br />
The pedal will switch to the<br />
FAVORITE Tone of the previous<br />
number or bank (e.g., from<br />
FAVORITE TONE BANK 1-2 to 1-1).<br />
Switches the polarity of the pedal<br />
connected to the CONTROL PEDAL<br />
jack. Some pedals will operate in<br />
the opposite of the expected way<br />
when you press them. If you’re<br />
using this type of pedal, set this<br />
parameter to “REVERSE.” If you’re<br />
using a <strong>Roland</strong> pedal (without a<br />
polarity switch), use “STANDARD.”<br />
Tx<br />
Tx Pitch<br />
Bend<br />
Tx<br />
Modulation<br />
Tx<br />
Program<br />
Change<br />
Tx Clock<br />
Tx Start-<br />
Stop<br />
OFF, ON<br />
OFF, ON<br />
OFF, ON<br />
OFF, ON<br />
OFF, ON<br />
Refer to “MIDI Parameters” (p. 44).<br />
Hold<br />
Polarity<br />
STANDARD,<br />
REVERSE<br />
Switches the polarity of the pedal<br />
connected to the HOLD PEDAL<br />
jack. (See “Pedal Polarity,” above)<br />
Tx Song<br />
Position<br />
OFF, ON<br />
47
System Settings<br />
Rx<br />
Rx Sync<br />
Rx Pitch<br />
Bend<br />
Rx<br />
Program<br />
Change<br />
OFF, ON<br />
OFF, ON<br />
OFF, ON<br />
OFF, ON<br />
SYSTEM METRONOME<br />
Refer to “MIDI Parameters” (p. 44).<br />
Parameter Value Explanation<br />
Metronome<br />
Switch*<br />
Metronome<br />
Mode<br />
OFF, ON<br />
ALWAYS,<br />
REC,<br />
PLAY<br />
Refer to “Using the Metronome” (p.<br />
23).<br />
Viewing Information about GW-8<br />
(System Version Info Screens)<br />
Here’s how to view information about the GW-8 such as its<br />
software version.<br />
1. Press [MENU].<br />
2. Use [ ] [ ] to select “Version” then press [ENTER].<br />
3. Use [ ] [ ] to select a page.<br />
You can view information about the imported Special<br />
Tones as well as the version of software used by the<br />
GW-8.<br />
4. Press [EXIT] to return to the Main screen.<br />
Metronome<br />
Level<br />
LOW,<br />
MEDIUM,<br />
HIGH<br />
SYSTEM LOCK<br />
Parameter Value Explanation<br />
Style<br />
Tone<br />
Style<br />
Tempo<br />
Rx<br />
Modulation<br />
Transpose<br />
OFF, ON<br />
OFF, ON<br />
OFF, ON<br />
OFF, ON<br />
Refer to “Preserving Certain<br />
Settings Even When You Switch<br />
Performances ([LOCK])” (p. 16).<br />
MASTER EQ settings (p. 37) are stored in System settings.<br />
Settings cannot be stored for the parameters marked by “*” in<br />
the table. When the power is turned on, these parameter will<br />
always return to the same value (the default value).<br />
System settings that are not stored<br />
In addition to the parameters marked by “*” in the above<br />
table, the following settings cannot be stored.<br />
• BALANCE button setting (p. 24)<br />
• Recording setting (p. 28)<br />
Rec Mode/Count In/Punch In/Out setting/Input Quantize<br />
• D Beam controller on/off (p. 34)<br />
• LOCK button on/off (p. 16)<br />
• ANALOG MODIFY SELECT button setting (p. 37)<br />
• External input Center Cancel (p. 17)<br />
• MINUS ONE/CENTER CANCEL button on/off (p. 30, p. 32)<br />
48
Using USB Memory<br />
You can save GW-8 user data to USB memory (i.e., back up<br />
data), or load data from USB memory into the GW-8. Data<br />
you’ve downloaded to your computer can also be saved to<br />
USB memory and then loaded into the GW-8.<br />
3. Use the cursor buttons to select “Export” then press [ENTER].<br />
4. Use the cursor buttons to select an item then press [ENTER].<br />
Item<br />
Explanation<br />
Carefully insert the USB memory all the way in-until it is firmly<br />
in place.<br />
Initializing USB Memory<br />
(USB Memory Format)<br />
Style<br />
Song<br />
Sound/<br />
System<br />
All<br />
All user Styles will be saved to USB memory.<br />
All user Songs will be saved to USB memory.<br />
User Performances, Favorite Tones/<br />
Performances, and system settings will be<br />
saved to USB memory.<br />
All user data will be saved to USB memory.<br />
Here’s how to initialize the USB memory. This operation is<br />
called “USB Memory Format.”<br />
USB memory cannot be used with the GW-8 unless it is<br />
formatted suitably for the GW-8.<br />
This operation will erase all data on your USB memory. Use<br />
this operation with caution.<br />
1. Press [MENU].<br />
2. Use [ ] [ ] to select “Utility” then press [ENTER].<br />
3. Use the cursor buttons to select “USB Memory Format”<br />
then press [ENTER].<br />
A confirmation window will appear.<br />
If you do not want to format the USB memory, press [EXIT].<br />
A confirmation window will appear.<br />
If you do not want to export the data to the USB memory,<br />
press [EXIT].<br />
5. Press [ENTER] to export the data.<br />
Loading User Data Saved on USB<br />
Memory (Import)<br />
1. Press [MENU].<br />
2. Use [ ] [ ] to select “Utility” then press [ENTER].<br />
3. Use the cursor buttons to select “Import” then press [ENTER].<br />
4. Use the cursor buttons to select an item then press [ENTER].<br />
4. Press [ENTER] to execute the format.<br />
Don’t remove the USB memory until formatting is completed.<br />
Saving User Data to USB<br />
Memory (Backup)<br />
The following user data of the GW-8 can be saved on USB<br />
memory.<br />
Style<br />
Song<br />
Item<br />
Sound/<br />
System<br />
All<br />
Explanation<br />
All Style data will be loaded into the GW-8’s<br />
user Styles.<br />
All Song data will be loaded into the GW-8’s<br />
user Songs.<br />
User Performances, Favorite Tones/<br />
Performances, and system settings will be<br />
loaded into the GW-8.<br />
All data will be loaded into the GW-8.<br />
• User Performance (p. 38)<br />
• Favorite Tone (p. 20)<br />
• Favorite Performance (p. 20)<br />
• User Style (p. 26)<br />
• User Song (p. 29)<br />
• System settings (p. 46)<br />
1. Press [MENU].<br />
2. Use [ ] [ ] to select “Utility” then press [ENTER].<br />
The amount of data loaded into the GW-8 will depend on the<br />
amount of free memory in the GW-8.<br />
A confirmation window will appear.<br />
If you do not want to load the data, press [EXIT].<br />
5. Press [ENTER] to load the data.<br />
Any file with a name consisting of seventeen or more<br />
characters (not including the filename extension) cannot be<br />
loaded into the GW-8.<br />
49
Using USB Memory<br />
Deleting user data that you loaded<br />
To delete User Styles, refer to “Deleting a User Style” (p. 26).<br />
To delete User Songs, refer to “Deleting a Song” (p. 30).<br />
Data Structure in USB Memory<br />
The folders and files that will be created are as follows.<br />
fig.USBmemfolder.eps<br />
Root directory<br />
ROLAND folder<br />
SOUND folder<br />
GW8.svd<br />
Importing Data You’ve Saved<br />
in USB Memory ([USB IMPORT])<br />
Before you continue, save the downloaded data from your<br />
computer to the USB memory you’re using. Connect the USB<br />
memory to the GW-8, and import the data you saved.<br />
If you add Tones, the imported Tones will be added to<br />
[WORLD] and [SPECIAL].<br />
Refer to the <strong>Roland</strong> website; http://www.roland.com/<br />
SONG folder<br />
***.mid<br />
STYLE folder<br />
***.stl<br />
PLAYLIST folder<br />
PLAYLIST.scp<br />
UPDATE folder<br />
Updater<br />
ROM folder<br />
The folders and files created on USB memory will be visible<br />
from your computer.<br />
By manipulating the files from your computer, you can do the<br />
following things.<br />
• You can place SMF files in the SONG folder and import<br />
them into the GW-8 (p. 49).<br />
• You can drag and drop files from the SONG folder to<br />
copy them.<br />
• You can place Style files in the STYLE folder and import<br />
them into the GW-8 (p. 49).<br />
• You can drag and drop files from the STYLE folder to copy<br />
them.<br />
50
About V-LINK<br />
Connecting the GW-8 to a V-LINK compatible image device<br />
allows you to control the images with the GW-8.<br />
To prevent malfunction and/or damage to speakers or other<br />
devices, always turn down the volume, and turn off the power<br />
on all devices before making any connections.<br />
V-LINK<br />
V-LINK (<br />
) is a function that allows music and<br />
images to be performed together. By using MIDI to connect<br />
two or more V-LINK compatible devices, you can easily enjoy<br />
performing a wide range of visual effects that are linked to the<br />
expressive elements of a music performance.<br />
How to Use the V-LINK ([V-LINK])<br />
2. With the V-LINK screen shown, press [V-LINK] again.<br />
The V-LINK button will go dark, and the V-LINK setting will<br />
be off.<br />
V-LINK Settings (V-LINK SETUP)<br />
1. Press [V-LINK] to access the V-LINK screen.<br />
2. Press [2] (Setup).<br />
The V-LINK SETUP screen will appear.<br />
3. Use [ ] [ ] to move the cursor to the parameter you<br />
want to edit.<br />
4. Use the VALUE dial to set the value.<br />
1. Press [V-LINK] so the indicator is lit.<br />
The V-LINK screen will appear, and the V-LINK setting will<br />
be on.<br />
Operations on the GW-8<br />
By operating the GW-8’s keyboard and knobs, you can<br />
control the image along with your performance on the<br />
GW-8.<br />
• [0] (Clip Reset): Turns the image off (solid black).<br />
• [1] (All Reset): Resets the effect applied to the image, and<br />
restores all settings such as brightness and hue to their<br />
default values.<br />
• [2] (Setup): Accesses the V-LINK SETUP screen.<br />
• Black keys: Switch tabs.<br />
• White keys: Switch clips.<br />
• ANALOG MODIFY knobs: Transmit the following control<br />
changes.<br />
For details on the content that can be controlled by these<br />
control changes, refer to the “D BEAM” settings in “V-LINK<br />
SETUP Parameters,” below.<br />
[SELECT] indicator Knob Control Change No.<br />
EFFECT<br />
FILTER<br />
ENVELOPE<br />
REVERB<br />
CHORUS<br />
CUTOFF<br />
RESONANCE<br />
ATTACK<br />
RELEASE<br />
CC91<br />
CC93<br />
CC74<br />
CC71<br />
CC73<br />
CC72<br />
• D Beam controller: Controls the parameter specified in V-<br />
LINK setup.<br />
* When you turn V-LINK on, the settings in V-LINK setup will<br />
take priority for D Beam operation.<br />
5. Press [EXIT] to return to the previous screen.<br />
V-LINK SETUP Parameters<br />
Parameter Value Explanation<br />
Note Tx<br />
Channel A<br />
Note Tx<br />
Channel B<br />
Note Tx<br />
Channel C<br />
D BEAM<br />
1–16<br />
Controls the V-<br />
LINK device.<br />
Specify the MIDI<br />
channel. (*)<br />
Assigns a V-LINK function to the<br />
D Beam controller.<br />
OFF<br />
ColorEQ<br />
Fore<br />
ColorEQ<br />
Back<br />
Scratch<br />
SW<br />
Speed<br />
Knob<br />
Total<br />
Fader<br />
Cross<br />
Fader<br />
The operation<br />
selected by D<br />
BEAM buttons will<br />
occur regardless<br />
of whether V-LINK<br />
is on or off.<br />
CC1 (Modulation)<br />
CC71<br />
(Resonance)<br />
CC3<br />
CC8 (Balance)<br />
CC10 (Panpot)<br />
CC11 (Expression)<br />
Used with<br />
motion<br />
dive .tokyo<br />
Performanc<br />
e Package<br />
51
About V-LINK<br />
Parameter Value Explanation<br />
BPM<br />
Sync SW CC64 (Hold) Used with<br />
Clip<br />
Loop SW<br />
Assign<br />
Knob<br />
Fade<br />
Time SW<br />
Visual<br />
Knob<br />
AB SW<br />
Tap SW<br />
Total<br />
Select<br />
FX Select<br />
Play Pos<br />
CC65<br />
(Portamento)<br />
CC72 (Release)<br />
CC73 (Attack)<br />
CC74 (Cutoff)<br />
CC81 (General–6)<br />
CC83 (General–8)<br />
CC85<br />
CC86<br />
CC91 (Reverb)<br />
motion<br />
dive .tokyo<br />
Performanc<br />
e Package<br />
D BEAM<br />
Loop<br />
StartPos<br />
Loop End<br />
Pos<br />
Layer<br />
ModeSel<br />
CC92 (Tremolo)<br />
CC93 (Chorus)<br />
CC94 (Celeste)<br />
Dissolve<br />
Time<br />
Color Cb<br />
Ctrl<br />
Color Cr<br />
Ctrl<br />
Brightness<br />
Ctrl<br />
VFX1 Ctrl<br />
VFX2 Ctrl<br />
VFX3 Ctrl<br />
VFX4 Ctrl<br />
Fade Ctrl<br />
CC73 (Attack)<br />
CC1 (Modulation)<br />
CC71<br />
(Resonance)<br />
CC74 (Cutoff)<br />
CC72 (Release)<br />
CC91 (Reverb)<br />
CC92 (Tremolo)<br />
CC93 (Chorus)<br />
CC10 (Panpot)<br />
Used with<br />
the DV-7PR<br />
and similar<br />
devices.<br />
* On V-LINK compatible devices such as the Edirol DV-7PR/P-<br />
1, only Note Tx Channel A is used.<br />
In motion dive .tokyo Performance Package, the Note Tx<br />
Channel corresponds as follows.<br />
A: The MIDI channel that controls section A<br />
B: The MIDI channel that controls section B<br />
C: The MIDI channel that controls the MIDI note plug-in<br />
52
Appendices<br />
Troubleshooting<br />
This section provides points to check and actions to take when the GW-8 does not function as you expect. Refer to the appropriate<br />
section for the problem you are experiencing.<br />
Problem Check/Solution Page<br />
Power Does Not Turn On<br />
Is the included AC adaptor/power cord correctly connected to an AC outlet and<br />
to the GW-8?<br />
• Do not use any AC adaptor and power cord other than the one included.<br />
Doing so will cause malfunctions.<br />
p. 14<br />
Could the VOLUME knob be turned down? —<br />
No Sound from the GW-8<br />
If playing the keyboard does not produce sound, could Local Switch be turned<br />
OFF?<br />
• Turn Local Switch ON.<br />
Could pedal operations or MIDI messages (exclusive or volume) received from<br />
an external MIDI device have lowered the volume?<br />
Could the volume of the Part be turned down?<br />
• Adjust the volume parameters in the PERFORM MIXER screen.<br />
p. 43<br />
p. 46<br />
p. 25<br />
—<br />
No Sound from a Specific Part<br />
Could you have used the Minus-One function to mute (silence) a specific Part? p. 30<br />
Does the MIDI receive channel of the part match the MIDI transmit channel of the<br />
connected MIDI device?<br />
• Set the MIDI channel of the connected external device to match the GW-8.<br />
p. 43<br />
p. 46<br />
No Sound from a Connected MIDI<br />
Device<br />
Effects Are Not Applied<br />
The Effect Sounds Wrong<br />
Pitch Bend Not Obtained When<br />
Pitch Bend Lever Is Moved<br />
Sound Is Distorted<br />
Are MIDI messages being transmitted?<br />
• Turn MIDI TxRx to a setting other than OFF.<br />
Does the MIDI transmit channel of the GW-8’s keyboard controller section match<br />
the MIDI receive channel of the connected MIDI device?<br />
• Set the MIDI channel of the connected external device to match the GW-8.<br />
The reverb and chorus effects for the keyboard parts won’t be applied if their<br />
amounts are set to 0.<br />
• Check the Effect Send settings.<br />
MFX will apply only to the realtime performance of the part you play by hand<br />
(the Upper Part or Lower Part). Be aware that MFX will not apply to recorded<br />
song data.<br />
Some combinations of Tones and effects may sound different in comparison to<br />
other Tones.<br />
• Check the Effect Source settings.<br />
Could the Pitch Bend Range be set to 0?<br />
• Set the Pitch Bend Range to a value other than 0.<br />
For some effect or Part volume settings, the sound may distort. Adjust the following<br />
parameters.<br />
• Volume parameters in the PERFORM MIXER screen<br />
• Amount of reverb or chorus for the Effect Send settings<br />
• Overall volume and volume balance<br />
Could you be applying an effect such as overdrive or distortion which intentionally<br />
distorts the sound?<br />
p. 44<br />
p. 46<br />
p. 44<br />
p. 46<br />
p. 42<br />
p. 42<br />
p. 41<br />
—<br />
p. 25<br />
p. 42<br />
p. 24<br />
p. 42<br />
53
Troubleshooting<br />
Problem Check/Solution Page<br />
Pitch Is Wrong<br />
Notes Are Cut Off<br />
USB memory is not detected.<br />
The files are not shown.<br />
Can’t back up to USB memory<br />
Playlists are not shown<br />
Songs are not shown<br />
Songs or Styles saved on USB<br />
memory are not shown<br />
Songs won’t play<br />
For some Tones, the pitch in certain ranges may sound different than other<br />
Tones.<br />
Could the tuning of the GW-8 be incorrect?<br />
• Check the Master Tune setting.<br />
Could the pitch have been changed by pedal operations or by pitch bend messages<br />
received from an external MIDI device?<br />
If you attempt to play more than 128 voices simultaneously, currently sounding<br />
notes may be cut off.<br />
Check the format of your USB memory.<br />
The GW-8 can use USB memory that has been formatted as FAT. If your USB<br />
memory was formatted using any other method, please re-format it using FAT.<br />
Check the following points.<br />
• Could the USB memory be write protected?<br />
• Is there sufficient free space on the USB memory?<br />
This may be due to the following reasons.<br />
• Playlists may not be shown if you directly add/delete/modify the song<br />
data in the ROLAND folder without using Playlist Editor.<br />
• For some reason the USB memory is not recognized.<br />
• It is possible that the USB memory was not formatted correctly. The GW-8<br />
can use USB memory that has been formatted as FAT. If your USB memory<br />
was formatted using any other method, please re-format it using FAT.<br />
• Are the songs placed in the root directory?<br />
Songs may not be shown if you directly add/delete/modify the song data<br />
in the ROLAND folder without using Playlist Editor.<br />
• It is possible that the USB memory was not formatted correctly. The GW-8<br />
can use USB memory that has been formatted as FAT. If your USB memory<br />
was formatted using any other method, please re-format it using FAT.<br />
Check the file name.<br />
• The file name for a Style or Song that can be used by the GW-8 must be<br />
no longer than sixteen characters (not including the filename extension).<br />
You can use the following characters.<br />
A–Z 0–9 ! # $ % & ‘ ( ) - @ ^ _ ` { }<br />
• You must assign a filename extension of “.stl” to Style files, and a filename<br />
extension of “.mid” to Song files.<br />
This may be due to the following reasons.<br />
• The file type of the song is not one of the file types that the GW-8 can<br />
play.<br />
• It may be that the song data is damaged.<br />
• Songs cannot be played if you directly add/delete/modify the song data<br />
in the ROLAND folder without using Playlist Editor.<br />
p. 46<br />
p. 50<br />
p. 50<br />
—<br />
—<br />
—<br />
—<br />
—<br />
—<br />
p. 31<br />
p. 50<br />
54
Error Messages<br />
If an incorrect operation is performed, or if processing could not be performed as you specified, an error message will appear.<br />
Refer to the explanation for the error message that appears, and take the appropriate action.<br />
Message Meaning Action<br />
USB Memory Not Ready! USB memory is not connected. Connect USB memory.<br />
Read Error!<br />
Write Error!<br />
Incorrect File!<br />
System Memory<br />
Damaged!<br />
File Not Found!<br />
MIDI Buffer Full!<br />
MIDI Offline!<br />
Now Playing!<br />
Now Recording!<br />
Memory Full!<br />
Cannot Record!<br />
Cannot Store Anymore<br />
Styles!<br />
Cannot Store Anymore<br />
Songs!<br />
The data could not be read.<br />
Failed to load data from USB memory.<br />
It may be that the file is damaged.<br />
This file cannot be loaded since its format is incorrect.<br />
Failed to write the data.<br />
Failed to write data to USB memory.<br />
Data cannot be written because the USB memory<br />
has no more free space.<br />
The file or the USB memory itself is write protected.<br />
This is a file that the GW-8 is unable to play.<br />
This song has not been transferred from Playlist<br />
Editor to USB memory.<br />
The file uses a sampling rate that the GW-8<br />
cannot play.<br />
It is possible that the contents of system memory<br />
have been damaged.<br />
The file was not found in user memory.<br />
The file was not found in USB memory.<br />
An unusually large amount of MIDI data was<br />
received, and could not be processed.<br />
The MIDI IN connection was broken.<br />
The Style/Song/USB Memory Player is currently<br />
playing.<br />
That operation cannot be executed because<br />
recording is in progress.<br />
The Style/Song could not be saved because<br />
there is insufficient user memory.<br />
Recording could not be started.<br />
No more Styles can be saved.<br />
No more Songs can be saved.<br />
Load the data once again.<br />
Make sure that USB memory is correctly connected.<br />
Do not use this file.<br />
Do not use this file.<br />
Write the data once again.<br />
Make sure that USB memory is correctly connected.<br />
Delete unneeded files from the USB memory. Alternatively,<br />
use a different USB memory device, one<br />
that has more free space available.<br />
Make sure that the file or the USB memory is not<br />
write protected.<br />
Do not use this file.<br />
Select the song for transfer from Playlist Editor, and<br />
transfer the data once again to USB memory.<br />
Use a song whose sampling rate is 44.1 kHz.<br />
Please execute a Factory Reset.<br />
If this does not resolve the problem, contact your<br />
dealer or a nearby <strong>Roland</strong> service center.<br />
Save the file once again in user memory.<br />
Save the file once again in USB memory.<br />
Reduce the amount of MIDI messages that are being<br />
transmitted.<br />
Check that there is no problem with the MIDI cable<br />
connected to the GW-8’s MIDI IN, and that the MIDI<br />
cable was not disconnected.<br />
Either stop playback, or wait until playback has ended.<br />
Either stop recording, or wait until recording is finished.<br />
Delete unneeded user data.<br />
You cannot record if BACKING TYPE [USB MEMO-<br />
RY PLAYER] is on. Set BACKING TYPE to something<br />
other than [USB MEMORY PLAYER].<br />
Please delete unneeded user Styles.<br />
Please delete unneeded user Songs.<br />
55
Effects List<br />
Multi-Effects Parameters<br />
The multi-effects feature 78 different kinds of effects. Some of the effects consist of two or more different effects connected in series.<br />
FILTER (10 types)<br />
01 EQUALIZER P.58<br />
02 SPECTRUM P.58<br />
03 ISOLATOR P.58<br />
04 LOW BOOST P.58<br />
05 SUPER FILTER P.59<br />
06 STEP FILTER P.59<br />
07 ENHANCER P.59<br />
08 AUTO WAH P.60<br />
09 HUMANIZER P.60<br />
10 SPEAKER SIMULATOR P.60<br />
MODULATION (12 types)<br />
11 PHASER P.61<br />
12 STEP PHASER P.61<br />
13 MULTI STAGE PHASER P.61<br />
14 INFINITE PHASER P.62<br />
15 RING MODULATOR P.62<br />
16 STEP RING MODULATOR P.62<br />
17 TREMOLO P.62<br />
18 AUTO PAN P.63<br />
19 STEP PAN P.63<br />
20 SLICER P.63<br />
21 ROTARY P.64<br />
22 VK ROTARY P.64<br />
CHORUS (12 types)<br />
23 CHORUS P.64<br />
24 FLANGER P.65<br />
25 STEP FLANGER P.65<br />
26 HEXA-CHORUS P.65<br />
27 TREMOLO CHORUS P.66<br />
28 SPACE-D P.66<br />
29 3D CHORUS P.66<br />
30 3D FLANGER P.67<br />
31 3D STEP FLANGER P.67<br />
32 2BAND CHORUS P.67<br />
33 2BAND FLANGER P.68<br />
34 2BAND STEP FLANGER P.68<br />
DYNAMICS (8 types)<br />
35 OVERDRIVE P.69<br />
36 DISTORTION P.69<br />
37 VS OVERDRIVE P.69<br />
38 VS DISTORTION P.69<br />
39 GUITAR AMP SIMULATOR P.69<br />
40 COMPRESSOR P.70<br />
41 LIMITER P.70<br />
42 GATE P.70<br />
DELAY (13 types)<br />
43 DELAY P.71<br />
44 LONG DELAY P.71<br />
45 SERIAL DELAY P.71<br />
46 MODULATION DELAY P.72<br />
47 3TAP PAN DELAY P.72<br />
48 4TAP PAN DELAY P.72<br />
49 MULTI TAP DELAY P.73<br />
50 REVERSE DELAY P.73<br />
51 SHUFFLE DELAY P.73<br />
52 3D DELAY P.74<br />
53 TIME CTRL DELAY P.74<br />
54 LONG TIME CTRL DLY P.74<br />
55 TAPE ECHO P.75<br />
LO-FI (5 types)<br />
56 LOFI NOISE P.75<br />
57 LOFI COMPRESS P.75<br />
58 LOFI RADIO P.76<br />
59 TELEPHONE P.76<br />
60 PHONOGRAPH P.76<br />
PITCH (3 types)<br />
61 PITCH SHIFTER P.76<br />
62 2VOI PITCH SHIFTER P.77<br />
63 STEP PITCH SHIFTER P.77<br />
REVERB (2 types)<br />
64 REVERB P.77<br />
65 GATED REVERB P.78<br />
COMBINATION (12 types)<br />
66 OVERDRIVE → CHORUS P.78<br />
67 OVERDRIVE → FLANGER P.78<br />
68 OVERDRIVE → DELAY P.78<br />
69 DISTORTION → CHORUS P.79<br />
70 DISTORTION → FLANGER P.79<br />
71 DISTORTION → DELAY P.79<br />
72 ENHANCER → CHORUS P.79<br />
73 ENHANCER → FLANGER P.79<br />
74 ENHANCER → DELAY P.80<br />
75 CHORUS → DELAY P.80<br />
76 FLANGER → DELAY P.80<br />
77 CHORUS → FLANGER P.81<br />
PIANO (1 type)<br />
78 SYMPATHETIC RESO P.81<br />
56
Effects List<br />
About Note<br />
Some effect parameters (such as Rate or Delay Time) can be set in<br />
terms of a note value.<br />
Such parameters have a num/note switch that lets you specify whether<br />
you will set the value as a note value or as a numerical value.<br />
If you want to set Rate (Delay Time) as a numerical value, set the num/<br />
note switch to “Hz” (“msec”). If you want to set it as a note value, set<br />
the num/note switch to “NOTE.”<br />
Num/note switch<br />
The following 3D effects utilize RSS (<strong>Roland</strong> Sound Space) technology<br />
to create a spaciousness that cannot be produced by delay, reverb,<br />
chorus, etc.<br />
52: 3D DELAY<br />
29: 3D CHORUS<br />
30: 3D FLANGER<br />
31: 3D STEP FLANGER<br />
When using these effects, we recommend that you place your<br />
speakers as follows. Also, make sure that the speakers are at a<br />
sufficient distance from the walls on either side.<br />
fig.33-002<br />
When Using 3D Effects<br />
* If the Rate is specified as a note value, the modulation will be<br />
synchronized with the tempo when you play back SMF song<br />
data.<br />
30˚<br />
30˚<br />
note:<br />
fig.MFX-note2.e_88<br />
Sixty-fourth-note triplet Sixty-fourth note Thirty-second-note triplet<br />
Thirty-second note Sixteenth-note triplet Dotted thirty-second note<br />
Sixteenth note Eighth-note triplet Dotted sixteenth note<br />
Eighth note<br />
Quarter-note triplet Dotted eighth note<br />
Quarter note<br />
Half-note triplet Dotted quarter note<br />
Half note<br />
Whole-note triplet Dotted half note<br />
Whole note<br />
Double-note triplet Dotted whole note<br />
If the left and right speakers are too far apart, or if there is too much<br />
reverberation, the full 3D effect may not appear.<br />
Each of these effects has an “Output Mode” parameter. If the sound<br />
from the OUTPUT jacks is to be heard through speakers, set this<br />
parameter to “SPEAKER.” If the sound is to be heard through<br />
headphones, set it to “PHONES.” This will ensure that the optimal 3D<br />
effect will be heard. If this parameter is not set correctly, the full 3D<br />
effect may not appear.<br />
Double note<br />
If you specify the delay time as a note value, slowing down the<br />
tempo will not change the delay time beyond a certain length.<br />
This is because there is an upper limit for the delay time; if the<br />
delay time is specified as a note value and you slow down the<br />
tempo until this upper limit is reached, the delay time cannot<br />
change any further. This upper limit is the maximum value that<br />
can be specified when setting the delay time as a numerical<br />
value.<br />
57
Effects List<br />
01: EQUALIZER<br />
This is a four-band stereo equalizer (low, mid x 2, high).<br />
fig.MFX-01<br />
L in<br />
4-Band EQ<br />
L out<br />
03: ISOLATOR<br />
This is an equalizer which cuts the volume greatly, allowing you to<br />
add a special effect to the sound by cutting the volume in varying<br />
ranges.<br />
fig.MFX-03<br />
R in<br />
4-Band EQ<br />
R out<br />
L in<br />
Isolator<br />
Low Boost<br />
L out<br />
Parameter Value Description<br />
Low Freq 200, 400 Hz Frequency of the low range<br />
Low Gain -15– +15 dB Gain of the low range<br />
Mid1 Freq 200–8000 Hz Frequency of the middle range 1<br />
Mid1 Gain -15– +15 dB Gain of the middle range 1<br />
Mid1 Q 0.5, 1.0, 2.0, 4.0, 8.0<br />
This is a stereo spectrum. Spectrum is a type of filter which modifies<br />
the timbre by boosting or cutting the level at specific frequencies.<br />
fig.MFX-02<br />
Width of the middle range 1<br />
Set a higher value for Q to<br />
narrow the range to be affected.<br />
Mid2 Freq 200–8000 Hz Frequency of the middle range 2<br />
Mid2 Gain -15– +15 dB Gain of the middle range 2<br />
Mid2 Q 0.5, 1.0, 2.0, 4.0, 8.0<br />
Width of the middle range 2<br />
Set a higher value for Q to<br />
narrow the range to be affected.<br />
High Freq 2000, 4000, 8000 Hz Frequency of the high range<br />
High Gain -15– +15 dB Gain of the high range<br />
Level 0–127 Output Level<br />
02: SPECTRUM<br />
L in<br />
R in<br />
Spectrum<br />
Spectrum<br />
L out<br />
R out<br />
R in<br />
Parameter Value Description<br />
Boost/<br />
Cut Low<br />
Boost/<br />
Cut Mid<br />
Boost/<br />
Cut High<br />
Anti Phase Low<br />
Sw<br />
Anti Phase Low<br />
Level<br />
Anti Phase Mid<br />
Sw<br />
Anti Phase Mid<br />
Level<br />
Low Boost Sw<br />
Isolator<br />
-60– +4 dB<br />
OFF, ON<br />
0–127<br />
OFF, ON<br />
0–127<br />
OFF, ON<br />
Low Boost Level 0–127<br />
Low Boost<br />
Level 0–127 Output Level<br />
R out<br />
These boost and cut each of the High,<br />
Middle, and Low frequency ranges.<br />
At -60 dB, the sound becomes inaudible.<br />
0 dB is equivalent to the input level<br />
of the sound.<br />
Turns the Anti-Phase function on and off<br />
for the Low frequency ranges.<br />
When turned on, the counter-channel<br />
of stereo sound is inverted and added<br />
to the signal.<br />
Adjusts the level settings for the Low frequency<br />
ranges.<br />
Adjusting this level for certain frequencies<br />
allows you to lend emphasis<br />
to specific parts. (This is effective only<br />
for stereo source.)<br />
Settings of the Anti-Phase function for the<br />
Middle frequency ranges<br />
The parameters are the same as for<br />
the Low frequency ranges.<br />
Turns Low Booster on/off.<br />
This emphasizes the bottom to create<br />
a heavy bass sound.<br />
Increasing this value gives you a heavier<br />
low end.<br />
* Depending on the Isolator and filter<br />
settings this effect may be hard to distinguish.<br />
Parameter Value Description<br />
Band1 (250Hz)<br />
Band2 (500Hz)<br />
Band3 (1000Hz)<br />
Band4 (1250Hz)<br />
Band5 (2000Hz)<br />
Band6 (3150Hz)<br />
Band7 (4000Hz)<br />
Band8 (8000Hz)<br />
Q<br />
-15– +15 dB Gain of each frequency band<br />
0.5, 1.0, 2.0, 4.0,<br />
8.0<br />
Level 0–127 Output Level<br />
Simultaneously adjusts the width of<br />
the adjusted ranges for all the frequency<br />
bands.<br />
04: LOW BOOST<br />
Boosts the volume of the lower range, creating powerful lows.<br />
fig.MFX-04<br />
L in<br />
R in<br />
Parameter Value Description<br />
Boost<br />
Frequency<br />
Boost Gain<br />
Boost Width<br />
Low Boost<br />
Low Boost<br />
50–125 Hz<br />
0– +12 dB<br />
WIDE, MID,<br />
NARROW<br />
2-Band EQ<br />
2-Band EQ<br />
Center frequency at which the lower<br />
range will be boosted<br />
Amount by which the lower range will<br />
be boosted<br />
Width of the lower range that will be<br />
boosted<br />
Low Gain -15– +15 dB Gain of the low frequency range<br />
High Gain -15– +15 dB Gain of the high frequency range<br />
Level 0–127 Output level<br />
L out<br />
R out<br />
58
Effects List<br />
05: SUPER FILTER<br />
This is a filter with an extremely sharp slope. The cutoff frequency can<br />
be varied cyclically.<br />
fig.MFX-05<br />
L in<br />
Super Filter<br />
L out<br />
06: STEP FILTER<br />
This is a filter whose cutoff frequency can be modulated in steps. You<br />
can specify the pattern by which the cutoff frequency will change.<br />
fig.MFX-06<br />
L in<br />
Step Filter<br />
L out<br />
R in<br />
Super Filter<br />
R out<br />
R in<br />
Step Filter<br />
R out<br />
Parameter Value Description<br />
Filter Type<br />
Filter Slope<br />
Filter<br />
Cutoff<br />
Filter<br />
Resonance<br />
LPF, BPF, HPF,<br />
NOTCH<br />
-12, -24, -36 dB<br />
0–127<br />
0–127<br />
Filter type<br />
Frequency range that will pass through<br />
each filter<br />
LPF: frequencies below the cutoff<br />
BPF: frequencies in the region of the cutoff<br />
HPF: frequencies above the cutoff<br />
NOTCH: frequencies other than the region<br />
of the cutoff<br />
Amount of attenuation per octave<br />
-36 dB: extremely steep<br />
-24 dB: steep<br />
-12 dB: gentle<br />
Cutoff frequency of the filter<br />
Increasing this value will raise the cutoff<br />
frequency.<br />
Filter resonance level<br />
Increasing this value will emphasize the<br />
region near the cutoff frequency.<br />
Filter Gain 0– +12 dB Amount of boost for the filter output<br />
Modulation Sw OFF,ON On/off switch for cyclic change<br />
Modulation<br />
Wave<br />
Rate<br />
TRI, SQR, SIN,<br />
SAW1, SAW2<br />
SAW1<br />
0.05–10.00 Hz,<br />
note<br />
How the cutoff frequency will be modulated<br />
TRI: triangle wave<br />
SQR: square wave<br />
SIN: sine wave<br />
SAW1: sawtooth wave (upward)<br />
SAW2: sawtooth wave (downward)<br />
SAW2<br />
Rate of modulation<br />
Depth 0–127 Depth of modulation<br />
Attack 0–127<br />
Level 0–127 Output level<br />
Speed at which the cutoff frequency will<br />
change<br />
This is effective if Modulation Wave is<br />
SQR, SAW1, or SAW2.<br />
Parameter Value Description<br />
Step 01–16 0–127 Cutoff frequency at each step<br />
Rate<br />
Attack 0–127<br />
Filter Type<br />
Filter Slope<br />
Filter<br />
Resonance<br />
Controls the overtone structure of the high frequencies, adding sparkle<br />
and tightness to the sound.<br />
fig.MFX-07<br />
0.05–10.00 Hz,<br />
note<br />
LPF, BPF, HPF,<br />
NOTCH<br />
-12, -24, -36 dB<br />
0–127<br />
Rate of modulation<br />
Speed at which the cutoff frequency<br />
changes between steps<br />
Filter type<br />
Frequency range that will pass through<br />
each filter<br />
LPF: frequencies below the cutoff<br />
BPF: frequencies in the region of the cutoff<br />
HPF: frequencies above the cutoff<br />
NOTCH: frequencies other than the region<br />
of the cutoff<br />
Amount of attenuation per octave<br />
-12 dB: gentle<br />
-24 dB: steep<br />
-36 dB: extremely steep<br />
Filter resonance level<br />
Increasing this value will emphasize the<br />
region near the cutoff frequency.<br />
Filter Gain 0– +12 dB Amount of boost for the filter output<br />
Level 0–127 Output level<br />
07: ENHANCER<br />
L in<br />
R in<br />
Enhancer<br />
Enhancer<br />
Parameter Value Description<br />
Sens 0–127 Sensitivity of the enhancer<br />
Mix 0–127<br />
Mix<br />
Mix<br />
2-Band<br />
EQ<br />
2-Band<br />
EQ<br />
Level of the overtones generated<br />
by the enhancer<br />
Low Gain -15– +15 dB Gain of the low range<br />
High Gain -15– +15 dB Gain of the high range<br />
Level 0–127 Output Level<br />
L out<br />
R out<br />
59
Effects List<br />
08: AUTO WAH<br />
Cyclically controls a filter to create cyclic change in timbre.<br />
fig.MFX-08<br />
L in<br />
R in<br />
Parameter Value Description<br />
Filter Type<br />
Adds a vowel character to the sound, making it similar to a human<br />
voice.<br />
fig.MFX-09<br />
LPF, BPF<br />
<strong>Manual</strong> 0–127<br />
Peak 0–127<br />
Sens 0–127<br />
Polarity<br />
Rate<br />
UP, DOWN<br />
0.05–10.00 Hz,<br />
note<br />
Type of filter<br />
LPF: The wah effect will be applied over<br />
a wide frequency range.<br />
BPF: The wah effect will be applied over<br />
a narrow frequency range.<br />
Adjusts the center frequency at which the<br />
effect is applied.<br />
Adjusts the amount of the wah effect that<br />
will occur in the range of the center frequency.<br />
Set a higher value for Q to narrow the<br />
range to be affected.<br />
Adjusts the sensitivity with which the filter<br />
is controlled.<br />
Sets the direction in which the frequency<br />
will change when the auto-wah filter is<br />
modulated.<br />
UP: The filter will change toward a higher<br />
frequency.<br />
DOWN: The filter will change toward a<br />
lower frequency.<br />
Frequency of modulation<br />
Depth 0–127 Depth of modulation<br />
Phase<br />
0–180 deg<br />
Adjusts the degree of phase shift of the left<br />
and right sounds when the wah effect is<br />
applied.<br />
Low Gain -15– +15 dB Gain of the low range<br />
High Gain -15– +15 dB Gain of the high range<br />
Level 0–127 Output Level<br />
09: HUMANIZER<br />
L in<br />
R in<br />
Parameter Value Description<br />
Drive Sw OFF, ON Turns Drive on/off.<br />
Drive 0–127<br />
Vowel1<br />
Vowel2<br />
Rate<br />
a, e, i, o, u<br />
a, e, i, o, u<br />
0.05–10.00 Hz,<br />
note<br />
Degree of distortion<br />
Also changes the volume.<br />
Selects the vowel.<br />
Depth 0–127 Effect depth<br />
Input Sync<br />
Sw<br />
Input Sync<br />
Threshold<br />
Auto Wah<br />
Auto Wah<br />
Overdrive<br />
OFF, ON<br />
2-Band EQ<br />
2-Band EQ<br />
Formant<br />
L out<br />
R out<br />
2-Band<br />
EQ<br />
L out<br />
Pan L<br />
Pan R<br />
R out<br />
Frequency at which the two vowels switch<br />
Determines whether the LFO for switching<br />
the vowels is reset by the input signal (ON)<br />
or not (OFF).<br />
0–127 Volume level at which reset is applied<br />
Parameter Value Description<br />
<strong>Manual</strong> 0–100<br />
Simulates the speaker type and mic settings used to record the speaker<br />
sound.<br />
fig.MFX-10<br />
Specifications of each Speaker Type<br />
Point at which Vowel 1/2 switch<br />
49 or less: Vowel 1 will have a longer<br />
duration.<br />
50: Vowel 1 and 2 will be of equal duration.<br />
51 or more: Vowel 2 will have a longer<br />
duration.<br />
Low Gain -15– +15 dB Gain of the low frequency range<br />
High Gain -15– +15 dB Gain of the high frequency range<br />
Pan L64–63R Stereo location of the output<br />
Level 0–127 Output level<br />
10: SPEAKER SIMULATOR<br />
L in<br />
R in<br />
Speaker<br />
Speaker<br />
Parameter Value Description<br />
Speaker Type (See the table below.) Type of speaker<br />
Mic Setting 1, 2, 3<br />
L out<br />
R out<br />
Adjusts the location of the mic<br />
that is recording the sound of the<br />
speaker.<br />
This can be adjusted in three<br />
steps, with the mic becoming<br />
more distant in the order of 1,<br />
2, and 3.<br />
Mic Level 0–127 Volume of the microphone<br />
Direct Level 0–127 Volume of the direct sound<br />
Level 0–127 Output Level<br />
The speaker column indicates the diameter of each speaker unit (in<br />
inches) and the number of units.<br />
Type Cabinet Speaker<br />
Microphone<br />
SMALL 1 small open-back enclosure 10 dynamic<br />
SMALL 2 small open-back enclosure 10 dynamic<br />
MIDDLE open back enclosure 12 x 1 dynamic<br />
JC-120 open back enclosure 12 x 2 dynamic<br />
BUILT-IN 1 open back enclosure 12 x 2 dynamic<br />
BUILT-IN 2 open back enclosure 12 x 2 condenser<br />
BUILT-IN 3 open back enclosure 12 x 2 condenser<br />
BUILT-IN 4 open back enclosure 12 x 2 condenser<br />
BUILT-IN 5 open back enclosure 12 x 2 condenser<br />
BG STACK 1 sealed enclosure 12 x 2 condenser<br />
BG STACK 2 large sealed enclosure 12 x 2 condenser<br />
MS STACK 1 large sealed enclosure 12 x 4 condenser<br />
MS STACK 2 large sealed enclosure 12 x 4 condenser<br />
METAL STACK large double stack 12 x 4 condenser<br />
2-STACK large double stack 12 x 4 condenser<br />
3-STACK large triple stack 12 x 4 condenser<br />
60
Effects List<br />
11: PHASER<br />
A phase-shifted sound is added to the original sound and modulated.<br />
fig.MFX-11<br />
L in<br />
R in<br />
Parameter Value Description<br />
Mode<br />
<strong>Manual</strong> 0–127<br />
The phaser effect will be varied gradually.<br />
fig.MFX-12<br />
4-STAGE, 8-STAGE, 12-<br />
STAGE<br />
Number of stages in the phaser<br />
Adjusts the basic frequency from<br />
which the sound will be modulated.<br />
Rate 0.05–10.00 Hz, note Frequency of modulation<br />
Depth 0–127 Depth of modulation<br />
Polarity<br />
INVERSE,<br />
SYNCHRO<br />
Selects whether the left and right<br />
phase of the modulation will be<br />
the same or the opposite.<br />
INVERSE: The left and right<br />
phase will be opposite. When<br />
using a mono source, this<br />
spreads the sound.<br />
SYNCHRO: The left and right<br />
phase will be the same. Select<br />
this when inputting a stereo<br />
source.<br />
Resonance 0–127 Amount of feedback<br />
Cross<br />
Feedback<br />
-98– +98%<br />
Adjusts the proportion of the<br />
phaser sound that is fed back<br />
into the effect. Negative (-) settings<br />
will invert the phase.<br />
Mix 0–127 Level of the phase-shifted sound<br />
Low Gain -15– +15 dB Gain of the low range<br />
High Gain -15– +15 dB Gain of the high range<br />
Level 0–127 Output Level<br />
12: STEP PHASER<br />
L in<br />
R in<br />
Phaser<br />
Phaser<br />
Step Phaser<br />
Step Phaser<br />
Mix<br />
Mix<br />
Mix<br />
Mix<br />
2-Band<br />
EQ<br />
2-Band<br />
EQ<br />
2-Band<br />
EQ<br />
2-Band<br />
EQ<br />
L out<br />
R out<br />
L out<br />
R out<br />
Parameter Value Description<br />
Polarity<br />
Extremely high settings of the phase difference produce a deep phaser<br />
effect.<br />
fig.MFX-13<br />
INVERSE,<br />
SYNCHRO<br />
Selects whether the left and right<br />
phase of the modulation will be<br />
the same or the opposite.<br />
INVERSE: The left and right<br />
phase will be opposite. When<br />
using a mono source, this<br />
spreads the sound.<br />
SYNCHRO: The left and right<br />
phase will be the same. Select<br />
this when inputting a stereo<br />
source.<br />
Resonance 0–127 Amount of feedback<br />
Cross<br />
Feedback<br />
Step Rate<br />
-98– +98%<br />
0.10–20.00 Hz, note<br />
Adjusts the proportion of the<br />
phaser sound that is fed back<br />
into the effect. Negative (-) settings<br />
will invert the phase.<br />
Rate of the step-wise change in<br />
the phaser effect<br />
Mix 0–127 Level of the phase-shifted sound<br />
Low Gain -15– +15 dB Gain of the low range<br />
High Gain -15– +15 dB Gain of the high range<br />
Level 0–127 Output Level<br />
13: MULTI STAGE PHASER<br />
L in<br />
R in<br />
Parameter Value Description<br />
Mode<br />
<strong>Manual</strong> 0–127<br />
4-STAGE, 8-STAGE,<br />
12-STAGE, 16-STAGE,<br />
20-STAGE, 24-STAGE<br />
Number of phaser stages<br />
Adjusts the basic frequency<br />
from which the sound will be<br />
modulated.<br />
Rate 0.05–10.00 Hz, note Frequency of modulation<br />
Depth 0–127 Depth of modulation<br />
Resonance 0–127 Amount of feedback<br />
Mix 0–127 Level of the phase-shifted sound<br />
Pan<br />
Multi Stage<br />
Phaser<br />
Resonance<br />
L64–63R<br />
Mix<br />
2-Band<br />
EQ<br />
Stereo location of the output<br />
sound<br />
Low Gain -15– +15 dB Gain of the low range<br />
High Gain -15– +15 dB Gain of the high range<br />
Level 0–127 Output Level<br />
L out<br />
Pan L<br />
Pan R<br />
R out<br />
Parameter Value Description<br />
Mode<br />
<strong>Manual</strong> 0–127<br />
4-STAGE, 8-STAGE, 12-<br />
STAGE<br />
Number of stages in the phaser<br />
Adjusts the basic frequency from<br />
which the sound will be modulated.<br />
Rate 0.05–10.00 Hz, note Frequency of modulation<br />
Depth 0–127 Depth of modulation<br />
61
Effects List<br />
14: INFINITE PHASER<br />
A phaser that continues raising/lowering the frequency at which the<br />
sound is modulated.<br />
fig.MFX-14<br />
L in<br />
R in<br />
Parameter Range Explanation<br />
Mode 1, 2, 3, 4<br />
Speed -100– +100<br />
Higher values will produce a<br />
deeper phaser effect.<br />
Speed at which to raise or lower<br />
the frequency at which the sound<br />
is modulated<br />
(+: upward / -: downward)<br />
Resonance 0–127 Amount of feedback<br />
Mix 0–127<br />
Volume of the phase-shifted<br />
sound<br />
Pan L64–63R Panning of the output sound<br />
Low Gain<br />
High Gain<br />
Infinite Phaser<br />
-15– +15 dB<br />
-15– +15 dB<br />
2-Band EQ<br />
Level 0–127 Output volume<br />
L out<br />
Pan L<br />
Pan R<br />
R out<br />
Amount of boost/cut for the lowfrequency<br />
range<br />
Amount of boost/cut for the highfrequency<br />
range<br />
16: STEP RING MODULATOR<br />
This is a ring modulator that uses a 16-step sequence to vary the<br />
frequency at which modulation is applied.<br />
fig.MFX-16<br />
L in<br />
R in<br />
Parameter Range Explanation<br />
Step 01–16 0–127<br />
Rate<br />
Attack 0–127<br />
Low Gain<br />
High Gain<br />
Step Ring Mod<br />
Step Ring Mod<br />
0.05–10.00 Hz, note<br />
-15– +15 dB<br />
-15– +15 dB<br />
Balance D100:0W–D0:100W<br />
2-Band EQ<br />
2-Band EQ<br />
Level 0–127 Output volume<br />
L out<br />
R out<br />
Frequency of ring modulation at<br />
each step<br />
Rate at which the 16-step sequence<br />
will cycle<br />
Speed at which the modulation frequency<br />
changes between steps<br />
Amount of boost/cut for the lowfrequency<br />
range<br />
Amount of boost/cut for the highfrequency<br />
range<br />
Volume balance of the original<br />
sound (D) and effect sound (W)<br />
15: RING MODULATOR<br />
This is an effect that applies amplitude modulation (AM) to the input<br />
signal, producing bell-like sounds. You can also change the<br />
modulation frequency in response to changes in the volume of the<br />
sound sent into the effect.<br />
fig.MFX-15<br />
L in<br />
R in<br />
Parameter Value Description<br />
Frequency 0–127<br />
Sens 0–127<br />
Polarity<br />
UP, DOWN<br />
Adjusts the frequency at which modulation is<br />
applied.<br />
Adjusts the amount of frequency modulation<br />
applied.<br />
Determines whether the frequency modulation<br />
moves towards higher frequencies (UP)<br />
or lower frequencies (DOWN).<br />
Low Gain -15– +15 dB Gain of the low frequency range<br />
High Gain -15– +15 dB Gain of the high frequency range<br />
Balance<br />
Ring Mod<br />
Ring Mod<br />
D100:0W–<br />
D0:100W<br />
2-Band EQ<br />
2-Band EQ<br />
Level 0–127 Output level<br />
L out<br />
R out<br />
Volume balance between the direct sound<br />
(D) and the effect sound (W)<br />
17: TREMOLO<br />
Cyclically modulates the volume to add tremolo effect to the sound.<br />
fig.MFX-17a<br />
L in<br />
R in<br />
Parameter Value Description<br />
Mod Wave<br />
Tremolo<br />
Tremolo<br />
TRI, SQR, SIN, SAW1,<br />
SAW2<br />
SAW1<br />
2-Band EQ<br />
2-Band EQ<br />
Modulation Wave<br />
TRI: triangle wave<br />
SQR: square wave<br />
SIN: sine wave<br />
SAW1/2: sawtooth wave<br />
SAW2<br />
Rate 0.05–10.00 Hz, note Frequency of the change<br />
Depth 0–127 Depth to which the effect is applied<br />
Low Gain -15– +15 dB Gain of the low range<br />
High Gain -15– +15 dB Gain of the high range<br />
Level 0–127 Output Level<br />
L out<br />
R out<br />
62
Effects List<br />
18: AUTO PAN<br />
Cyclically modulates the stereo location of the sound.<br />
fig.MFX-18a<br />
L in<br />
R in<br />
Parameter Value Description<br />
Mod Wave<br />
This uses a 16-step sequence to vary the panning of the sound.<br />
fig.MFX-19<br />
TRI, SQR, SIN, SAW1,<br />
SAW2<br />
Modulation Wave<br />
TRI: triangle wave<br />
SQR: square wave<br />
SIN: sine wave<br />
SAW1/2: sawtooth wave<br />
Rate 0.05–10.00 Hz, note Frequency of the change<br />
Depth 0–127 Depth to which the effect is applied<br />
Low Gain -15– +15 dB Gain of the low range<br />
High Gain -15– +15 dB Gain of the high range<br />
Level 0–127 Output Level<br />
19: STEP PAN<br />
L in<br />
R in<br />
Auto Pan<br />
Auto Pan<br />
SAW1<br />
R<br />
L<br />
Step Pan<br />
Step Pan<br />
2-Band EQ<br />
2-Band EQ<br />
SAW2<br />
R<br />
L<br />
L out<br />
R out<br />
L out<br />
R out<br />
20: SLICER<br />
By applying successive cuts to the sound, this effect turns a<br />
conventional sound into a sound that appears to be played as a<br />
backing phrase. This is especially effective when applied to sustaintype<br />
sounds.<br />
fig.MFX-20<br />
L in<br />
R in<br />
Parameter Value Description<br />
Step 01–16 L64–63R Level at each step<br />
Rate<br />
0.05–10.00<br />
Hz, note<br />
Attack 0–127<br />
Input Sync Sw<br />
Input Sync<br />
Threshold<br />
Mode<br />
OFF, ON<br />
0–127<br />
LEGATO,<br />
SLASH<br />
Shuffle 0–127<br />
Slicer<br />
Slicer<br />
Level 0–127 Output level<br />
L out<br />
R out<br />
Rate at which the 16-step sequence will cycle<br />
Speed at which the level changes between<br />
steps<br />
Specifies whether an input note will cause<br />
the sequence to resume from the first step of<br />
the sequence (ON) or not (OFF)<br />
Volume at which an input note will be detected<br />
Sets the manner in which the volume changes<br />
as one step progresses to the next.<br />
LEGATO: The change in volume from one<br />
step’s level to the next remains unaltered.<br />
If the level of a following step is the same<br />
as the one preceding it, there is no<br />
change in volume.<br />
SLASH: The level is momentarily set to 0<br />
before progressing to the level of the next<br />
step. This change in volume occurs even<br />
if the level of the following step is the<br />
same as the preceding step.<br />
Timing of volume changes in levels for evennumbered<br />
steps (step 2, step 4, step 6...).<br />
The higher the value, the later the beat<br />
progresses.<br />
Parameter Range Explanation<br />
Step 01–16 L64–63R Pan at each step<br />
Rate<br />
Attack 0–127<br />
Input Sync Sw<br />
Input Sync<br />
Threshold<br />
0.05–10.00 Hz, note<br />
OFF, ON<br />
0–127<br />
Level 0–127 Output volume<br />
Rate at which the 16-step sequence<br />
will cycle<br />
Speed at which the pan changes<br />
between steps<br />
Specifies whether an input note<br />
will cause the sequence to resume<br />
from the first step of the sequence<br />
(ON) or not (OFF)<br />
Volume at which an input note will<br />
be detected<br />
63
Effects List<br />
21: ROTARY<br />
The Rotary effect simulates the sound of the rotary speakers often used<br />
with the electric organs of the past. Since the movement of the high<br />
range and low range rotors can be set independently, the unique type<br />
of modulation characteristic of these speakers can be simulated quite<br />
closely. This effect is most suitable for electric organ Patches.<br />
fig.MFX-21<br />
L in<br />
R in<br />
Parameter Value Description<br />
Speed<br />
Woofer Slow<br />
Speed<br />
Woofer Fast<br />
Speed<br />
Woofer<br />
Acceleration<br />
This type provides modified response for the rotary speaker, with the<br />
low end boosted further.<br />
This effect features the same specifications as the VK-7’s built-in rotary<br />
speaker.<br />
fig.MFX-22<br />
SLOW, FAST<br />
0.05–10.00 Hz<br />
0.05–10.00 Hz<br />
0–15<br />
Simultaneously switch the rotational<br />
speed of the low frequency rotor<br />
and high frequency rotor.<br />
SLOW: Slows down the rotation<br />
to the Slow Rate.<br />
FAST: Speeds up the rotation to<br />
the Fast Rate.<br />
Slow speed (SLOW) of the low frequency<br />
rotor<br />
Fast speed (FAST) of the low frequency<br />
rotor<br />
Adjusts the time it takes the low frequency<br />
rotor to reach the newly selected<br />
speed when switching from<br />
fast to slow (or slow to fast) speed.<br />
Lower values will require longer<br />
times.<br />
Woofer Level 0–127 Volume of the low frequency rotor<br />
Tweeter Slow<br />
Speed<br />
Tweeter Fast<br />
Speed<br />
Tweeter<br />
Acceleration<br />
0.05–10.00 Hz<br />
0.05–10.00 Hz<br />
0–15<br />
Tweeter Level 0–127<br />
Settings of the high frequency rotor<br />
The parameters are the same as<br />
for the low frequency rotor<br />
Separation 0–127 Spatial dispersion of the sound<br />
Level 0–127 Output Level<br />
22: VK ROTARY<br />
L in<br />
R in<br />
Parameter Value Description<br />
Speed<br />
Brake<br />
Woofer Slow<br />
Speed<br />
Woofer Fast<br />
Speed<br />
Rotary<br />
Rotary<br />
SLOW, FAST<br />
OFF, ON<br />
0.05–10.00 Hz<br />
0.05–10.00 Hz<br />
L out<br />
R out<br />
2-Band EQ<br />
2-Band EQ<br />
L out<br />
R out<br />
Rotational speed of the rotating<br />
speaker<br />
Switches the rotation of the rotary<br />
speaker.<br />
When this is turned on, the rotation<br />
will gradually stop.<br />
When it is turned off, the rotation<br />
will gradually resume.<br />
Low-speed rotation speed of the<br />
woofer<br />
High-speed rotation speed of the<br />
woofer<br />
Parameter Value Description<br />
Woofer Trans Up 0–127<br />
Woofer Trans<br />
Down<br />
This is a stereo chorus. A filter is provided so that you can adjust the<br />
timbre of the chorus sound.<br />
fig.MFX-23<br />
0–127<br />
Adjusts the rate at which the<br />
woofer rotation speeds up when<br />
the rotation is switched from<br />
Slow to Fast.<br />
Adjusts the rate at which the<br />
woofer rotation speeds up when<br />
the rotation is switched from Fast<br />
to Slow.<br />
Woofer Level 0–127 Volume of the woofer<br />
Tweeter Slow<br />
Speed<br />
Tweeter Fast<br />
Speed<br />
Tweeter Trans Up 0–127<br />
Tweeter Trans<br />
Down<br />
0.05–10.00 Hz<br />
0.05–10.00 Hz<br />
0–127<br />
Tweeter Level 0–127<br />
Spread 0–10<br />
Settings of the tweeter<br />
The parameters are the same<br />
as for the woofer.<br />
Sets the rotary speaker stereo image.<br />
The higher the value set, the<br />
wider the sound is spread out.<br />
Low Gain -15– +15 dB Gain of the low range<br />
High Gain -15– +15 dB Gain of the high range<br />
Level 0–127 Output Level<br />
23: CHORUS<br />
L in<br />
R in<br />
Parameter Value Description<br />
Filter Type<br />
OFF, LPF, HPF<br />
Type of filter<br />
OFF: no filter is used<br />
LPF: cuts the frequency range<br />
above the Cutoff Freq<br />
HPF: cuts the frequency range<br />
below the Cutoff Freq<br />
Cutoff Freq 200–8000 Hz Basic frequency of the filter<br />
Pre Delay<br />
Chorus<br />
Chorus<br />
Balance D<br />
Balance D<br />
0.0–100.0 ms<br />
Adjusts the delay time from the direct<br />
sound until the chorus sound<br />
is heard.<br />
Rate 0.05–10.00 Hz, note Frequency of modulation<br />
Depth 0–127 Depth of modulation<br />
Phase 0–180 deg Spatial spread of the sound<br />
Low Gain -15– +15 dB Gain of the low range<br />
High Gain -15– +15 dB Gain of the high range<br />
Balance D100:0W–D0:100W<br />
Balance W<br />
Balance W<br />
2-Band<br />
EQ<br />
2-Band<br />
EQ<br />
Level 0–127 Output Level<br />
L out<br />
R out<br />
Volume balance between the direct<br />
sound (D) and the chorus sound (W)<br />
64
Effects List<br />
24: FLANGER<br />
This is a stereo flanger. (The LFO has the same phase for left and<br />
right.) It produces a metallic resonance that rises and falls like a jet<br />
airplane taking off or landing. A filter is provided so that you can<br />
adjust the timbre of the flanged sound.<br />
fig.MFX-24<br />
L in<br />
R in<br />
Parameter Value Description<br />
Filter Type<br />
This is a flanger in which the flanger pitch changes in steps. The speed<br />
at which the pitch changes can also be specified in terms of a notevalue<br />
of a specified tempo.<br />
fig.MFX-25<br />
OFF, LPF, HPF<br />
Type of filter<br />
OFF: no filter is used<br />
LPF: cuts the frequency range<br />
above the Cutoff Freq<br />
HPF: cuts the frequency range<br />
below the Cutoff Freq<br />
Cutoff Freq 200–8000 Hz Basic frequency of the filter<br />
Pre Delay<br />
0.0–100.0 ms<br />
Adjusts the delay time from when<br />
the direct sound begins until the<br />
flanger sound is heard.<br />
Rate 0.05–10.00 Hz, note Frequency of modulation<br />
Depth 0–127 Depth of modulation<br />
Phase 0–180 deg Spatial spread of the sound<br />
Feedback -98– +98%<br />
Adjusts the proportion of the<br />
flanger sound that is fed back into<br />
the effect. Negative (-) settings will<br />
invert the phase.<br />
Low Gain -15– +15 dB Gain of the low range<br />
High Gain -15– +15 dB Gain of the high range<br />
Balance D100:0W–D0:100W<br />
Level 0–127 Output Level<br />
25: STEP FLANGER<br />
L in<br />
Flanger<br />
Feedback<br />
Feedback<br />
Flanger<br />
Step Flanger<br />
Balance D<br />
Balance D<br />
Balance D<br />
2-Band<br />
EQ<br />
Balance W<br />
Balance W<br />
2-Band<br />
EQ<br />
L out<br />
R out<br />
Volume balance between the direct<br />
sound (D) and the flanger sound (W)<br />
2-Band<br />
EQ<br />
Balance W<br />
L out<br />
Parameter Value Description<br />
Pre Delay<br />
Uses a six-phase chorus (six layers of chorused sound) to give richness<br />
and spatial spread to the sound.<br />
fig.MFX-26<br />
0.0–100.0 ms<br />
Adjusts the delay time from when<br />
the direct sound begins until the<br />
flanger sound is heard.<br />
Rate 0.05–10.00 Hz, note Frequency of modulation<br />
Depth 0–127 Depth of modulation<br />
Phase 0–180 deg Spatial spread of the sound<br />
Feedback -98– +98%<br />
Adjusts the proportion of the<br />
flanger sound that is fed back into<br />
the effect. Negative (-) settings will<br />
invert the phase.<br />
Step Rate 0.10–20.00 Hz, note Rate (period) of pitch change<br />
Low Gain -15– +15 dB Gain of the low range<br />
High Gain -15– +15 dB Gain of the high range<br />
Balance<br />
D100:0W–D0:100W<br />
Level 0–127 Output Level<br />
26: HEXA-CHORUS<br />
L in<br />
R in<br />
Parameter Value Description<br />
Pre Delay<br />
0.0–100.0 ms<br />
Volume balance between the direct<br />
sound (D) and the flanger<br />
sound (W)<br />
Adjusts the delay time from the direct<br />
sound until the chorus sound is<br />
heard.<br />
Rate 0.05–10.00 Hz, note Frequency of modulation<br />
Depth 0–127 Depth of modulation<br />
Pre Delay<br />
Deviation<br />
Depth<br />
Deviation<br />
0–20<br />
-20– +20<br />
Pan Deviation 0–20<br />
Balance D<br />
Hexa Chorus<br />
Balance D<br />
Balance D100:0W–D0:100W<br />
L out<br />
Balance W<br />
Balance W<br />
R out<br />
Level 0–127 Output Level<br />
Adjusts the differences in Pre Delay<br />
between each chorus sound.<br />
Adjusts the difference in modulation<br />
depth between each chorus sound.<br />
Adjusts the difference in stereo location<br />
between each chorus sound.<br />
0: All chorus sounds will be in the<br />
center.<br />
20: Each chorus sound will be<br />
spaced at 60 degree intervals<br />
relative to the center.<br />
Volume balance between the direct<br />
sound (D) and the chorus sound (W)<br />
Feedback<br />
Feedback<br />
Step Flanger<br />
Balance W<br />
R in<br />
Balance D<br />
2-Band<br />
EQ<br />
R out<br />
Parameter Value Description<br />
Filter Type<br />
OFF, LPF, HPF<br />
Type of filter<br />
OFF: no filter is used<br />
LPF: cuts the frequency range<br />
above the Cutoff Freq<br />
HPF: cuts the frequency range<br />
below the Cutoff Freq<br />
Cutoff Freq 200–8000 Hz Basic frequency of the filter<br />
65
Effects List<br />
27: TREMOLO CHORUS<br />
This is a chorus effect with added Tremolo (cyclic modulation of<br />
volume).<br />
fig.MFX-27<br />
L in<br />
R in<br />
Parameter Value Description<br />
Pre Delay<br />
Chorus Rate<br />
Chorus Depth 0–127<br />
Tremolo Rate<br />
Tremolo<br />
Separation<br />
This is a multiple chorus that applies two-phase modulation in stereo. It<br />
gives no impression of modulation, but produces a transparent chorus<br />
effect.<br />
fig.MFX-28<br />
0.0–100.0 ms<br />
0.05–10.00 Hz, note<br />
0.05–10.00 Hz, note<br />
Adjusts the delay time from the direct<br />
sound until the chorus sound<br />
is heard.<br />
Modulation frequency of the chorus<br />
effect<br />
Modulation depth of the chorus effect<br />
Modulation frequency of the tremolo<br />
effect<br />
0–127 Spread of the tremolo effect<br />
Tremolo Phase 0–180 deg Spread of the tremolo effect<br />
Balance<br />
D100:0W–D0:100W<br />
Level 0–127 Output Level<br />
28: SPACE-D<br />
L in<br />
Tremolo Chorus<br />
Space D<br />
Balance D<br />
Balance D<br />
Balance D<br />
L out<br />
Balance W<br />
Balance W<br />
Volume balance between the direct<br />
sound (D) and the tremolo<br />
chorus sound (W)<br />
Balance W<br />
R out<br />
2-Band<br />
EQ<br />
L out<br />
29: 3D CHORUS<br />
This applies a 3D effect to the chorus sound. The chorus sound will be<br />
positioned 90 degrees left and 90 degrees right.<br />
fig.MFX-29<br />
L<br />
R<br />
Parameter Value Description<br />
Filter Type<br />
OFF, LPF, HPF<br />
Type of filter<br />
OFF: no filter is used<br />
LPF: cuts the frequency range<br />
above the Cutoff Freq<br />
HPF: cuts the frequency range<br />
below the Cutoff Freq<br />
Cutoff Freq 200–8000 Hz Basic frequency of the filter<br />
Pre Delay<br />
0.0–100.0 ms<br />
Adjusts the delay time from the direct<br />
sound until the chorus sound is<br />
heard.<br />
Rate 0.05–10.00 Hz, note Frequency of modulation<br />
Depth 0–127<br />
Modulation depth of the chorus effect<br />
Phase 0–180 deg Spatial spread of the sound<br />
Output Mode<br />
SPEAKER, PHONES<br />
Adjusts the method that will be<br />
used to hear the sound that is output<br />
to the OUTPUT jacks. The optimal<br />
3D effect will be achieved if<br />
you select SPEAKER when using<br />
speakers, or PHONES when using<br />
headphones.<br />
Low Gain -15– +15 dB Gain of the low range<br />
High Gain -15– +15 dB Gain of the high range<br />
Balance<br />
3D Chorus<br />
D100:0W–D0:100W<br />
2-Band<br />
EQ<br />
2-Band<br />
EQ<br />
Level 0–127 Output Level<br />
L out<br />
R out<br />
Volume balance between the direct<br />
sound (D) and the chorus<br />
sound (W)<br />
Space D<br />
Balance W<br />
R in<br />
Balance D<br />
2-Band<br />
EQ<br />
R out<br />
Parameter Value Description<br />
Pre Delay<br />
0.0–100.0 ms<br />
Adjusts the delay time from the<br />
direct sound until the chorus<br />
sound is heard.<br />
Rate 0.05–10.00 Hz, note Frequency of modulation<br />
Depth 0–127 Depth of modulation<br />
Phase 0–180 deg Spatial spread of the sound<br />
Low Gain -15– +15 dB Gain of the low range<br />
High Gain -15– +15 dB Gain of the high range<br />
Balance<br />
D100:0W–D0:100W<br />
Level 0–127 Output Level<br />
Volume balance between the<br />
direct sound (D) and the chorus<br />
sound (W)<br />
66
Effects List<br />
30: 3D FLANGER<br />
This applies a 3D effect to the flanger sound. The flanger sound will<br />
be positioned 90 degrees left and 90 degrees right.<br />
fig.MFX-30<br />
L<br />
R<br />
Parameter Value Description<br />
Filter Type<br />
This applies a 3D effect to the step flanger sound. The flanger sound<br />
will be positioned 90 degrees left and 90 degrees right.<br />
fig.MFX-31<br />
OFF, LPF, HPF<br />
Type of filter<br />
OFF: no filter is used<br />
LPF: cuts the frequency range<br />
above the Cutoff Freq<br />
HPF: cuts the frequency range<br />
below the Cutoff Freq<br />
Cutoff Freq 200–8000 Hz Basic frequency of the filter<br />
Pre Delay<br />
0.0–100.0 ms<br />
Adjusts the delay time from when<br />
the direct sound begins until the<br />
flanger sound is heard.<br />
Rate 0.05–10.00 Hz, note Frequency of modulation<br />
Depth 0–127 Depth of modulation<br />
Phase 0–180 deg Spatial spread of the sound<br />
Feedback -98– +98%<br />
Output Mode<br />
SPEAKER, PHONES<br />
Adjusts the proportion of the<br />
flanger sound that is fed back into<br />
the effect. Negative (-) settings will<br />
invert the phase.<br />
Adjusts the method that will be<br />
used to hear the sound that is output<br />
to the OUTPUT jacks. The optimal<br />
3D effect will be achieved if<br />
you select SPEAKER when using<br />
speakers, or PHONES when using<br />
headphones.<br />
Low Gain -15– +15 dB Gain of the low range<br />
High Gain -15– +15 dB Gain of the high range<br />
Balance<br />
D100:0W–D0:100W<br />
Level 0–127 Output Level<br />
31: 3D STEP FLANGER<br />
L<br />
R<br />
Parameter Value Description<br />
Filter Type<br />
OFF, LPF, HPF<br />
Volume balance between the direct<br />
sound (D) and the flanger<br />
sound (W)<br />
Type of filter<br />
OFF: no filter is used<br />
LPF: cuts the frequency range<br />
above the Cutoff Freq<br />
HPF: cuts the frequency range<br />
below the Cutoff Freq<br />
Cutoff Freq 200–8000 Hz Basic frequency of the filter<br />
Pre Delay<br />
3D Flanger<br />
3D Step Flanger<br />
0.0–100.0 ms<br />
2-Band<br />
EQ<br />
2-Band<br />
EQ<br />
2-Band<br />
EQ<br />
2-Band<br />
EQ<br />
Adjusts the delay time from when<br />
the direct sound begins until the<br />
flanger sound is heard.<br />
Rate 0.05–10.00 Hz, note Frequency of modulation<br />
Depth 0–127 Depth of modulation<br />
L out<br />
R out<br />
L out<br />
R out<br />
Phase 0–180 deg Spatial spread of the sound<br />
Parameter Value Description<br />
Feedback -98– +98%<br />
A chorus effect that lets you apply an effect independently to the lowfrequency<br />
and high-frequency ranges.<br />
fig.MFX-32<br />
Adjusts the proportion of the<br />
flanger sound that is fed back into<br />
the effect. Negative (-) settings will<br />
invert the phase.<br />
Step Rate 0.10–20.00 Hz, note Rate (period) of pitch change<br />
Output Mode<br />
SPEAKER, PHONES<br />
Adjusts the method that will be<br />
used to hear the sound that is output<br />
to the OUTPUT jacks. The optimal<br />
3D effect will be achieved if<br />
you select SPEAKER when using<br />
speakers, or PHONES when using<br />
headphones.<br />
Low Gain -15– +15 dB Gain of the low range<br />
High Gain -15– +15 dB Gain of the high range<br />
Balance<br />
D100:0W–D0:100W<br />
Level 0–127 Output Level<br />
32: 2BAND CHORUS<br />
L in<br />
R in<br />
Parameter Range Explanation<br />
Split Freq<br />
Low Pre Delay<br />
Low Rate<br />
Low Depth 0–127<br />
Low Phase<br />
High Pre Delay<br />
High Rate<br />
200–8000 Hz<br />
0.0–100.0 ms<br />
0.05–10.00 Hz, note<br />
0–180 deg<br />
High Depth 0–127<br />
High Phase<br />
Split<br />
Split<br />
0.0–100.0 ms<br />
0.05–10.00 Hz, note<br />
0–180 deg<br />
Balance D100:0W–D0:100W<br />
High Band Chorus<br />
Low Band Chorus<br />
High Band Chorus<br />
Low Band Chorus<br />
Volume balance between the direct<br />
sound (D) and the flanger<br />
sound (W)<br />
Frequency at which the low and<br />
high ranges will be divided<br />
Delay time from when the original<br />
sound is heard to when the<br />
low-range chorus sound is heard<br />
Rate at which the low-range chorus<br />
sound is modulated<br />
Modulation depth for the lowrange<br />
chorus sound<br />
Level 0–127 Output volume<br />
L out<br />
R out<br />
Spaciousness of the low-range<br />
chorus sound<br />
Delay time from when the original<br />
sound is heard to when the<br />
high-range chorus sound is<br />
heard<br />
Rate at which the low-range chorus<br />
sound is modulated<br />
Modulation depth for the highrange<br />
chorus sound<br />
Spaciousness of the high-range<br />
chorus sound<br />
Volume balance of the original<br />
sound (D) and chorus sound (W)<br />
67
Effects List<br />
33: 2BAND FLANGER<br />
A flanger that lets you apply an effect independently to the lowfrequency<br />
and high-frequency ranges.<br />
fig.MFX-33<br />
L in<br />
Split<br />
High Band Flanger<br />
High Band Feedback<br />
Low Band Flanger<br />
Low Band Feedback<br />
High Band Feedback<br />
L out<br />
34: 2BAND STEP FLANGER<br />
A step flanger that lets you apply an effect independently to the lowfrequency<br />
and high-frequency ranges.<br />
fig.MFX-34<br />
L in<br />
Split<br />
High Band Step Flanger<br />
High Band Feedback<br />
Low Band Step Flanger<br />
Low Band Feedback<br />
High Band Feedback<br />
L out<br />
High Band Flanger<br />
High Band Step Flanger<br />
Split<br />
Low Band Feedback<br />
Split<br />
Low Band Feedback<br />
R in<br />
Low Band Flanger<br />
R out<br />
R in<br />
Low Band Step Flanger<br />
R out<br />
Parameter Range Explanation<br />
Split Freq<br />
Low Pre Delay<br />
Low Rate<br />
Low Depth 0–127<br />
Low Phase<br />
Low<br />
Feedback<br />
High Pre Delay<br />
High Rate<br />
200–8000 Hz<br />
0.0–100.0 ms<br />
0.05–10.00 Hz, note<br />
0–180 deg<br />
-98– +98%<br />
High Depth 0–127<br />
High Phase<br />
High<br />
Feedback<br />
0.0–100.0 ms<br />
0.05–10.00 Hz, note<br />
0–180 deg<br />
-98– +98%<br />
Balance D100:0W–D0:100W<br />
Frequency at which the low and<br />
high ranges will be divided<br />
Delay time from when the original<br />
sound is heard to when the<br />
low-range flanger sound is heard<br />
Rate at which the low-range<br />
flanger sound is modulated<br />
Modulation depth for the lowrange<br />
flanger sound<br />
Spaciousness of the low-range<br />
flanger sound<br />
Proportion of the low-range<br />
flanger sound that is to be returned<br />
to the input (negative values<br />
invert the phase)<br />
Delay time from when the original<br />
sound is heard to when the<br />
high-range flanger sound is<br />
heard<br />
Rate at which the high-range<br />
flanger sound is modulated<br />
Level 0–127 Output volume<br />
Modulation depth for the highrange<br />
flanger sound<br />
Spaciousness of the high-range<br />
flanger sound<br />
Proportion of the high-range<br />
flanger sound that is to be returned<br />
to the input (negative values<br />
invert the phase)<br />
Volume balance of the original<br />
sound (D) and flanger sound (W)<br />
Parameter Range Explanation<br />
Split Freq<br />
Low Pre Delay<br />
Low Rate<br />
Low Depth 0–127<br />
Low Phase<br />
Low<br />
Feedback<br />
Low Step<br />
Rate<br />
High Pre Delay<br />
High Rate<br />
200–8000 Hz<br />
0.0–100.0 ms<br />
0.05–10.00 Hz, note<br />
0–180 deg<br />
-98– +98%<br />
High Depth 0–127<br />
High Phase<br />
High<br />
Feedback<br />
High Step<br />
Rate<br />
0.10–20.00 Hz, note<br />
0.0–100.0 ms<br />
0.05–10.00 Hz, note<br />
0–180 deg<br />
-98– +98%<br />
0.10–20.00 Hz, note<br />
Balance D100:0W–D0:100W<br />
Frequency at which the low and<br />
high ranges will be divided<br />
Delay time from when the original<br />
sound is heard to when the<br />
low-range flanger sound is heard<br />
Rate at which the low-range<br />
flanger sound is modulated<br />
Modulation depth for the lowrange<br />
flanger sound<br />
Spaciousness of the low-range<br />
flanger sound<br />
Proportion of the low-range<br />
flanger sound that is to be returned<br />
to the input (negative values<br />
invert the phase)<br />
Rate at which the steps will cycle<br />
for the low-range flanger sound<br />
Delay time from when the original<br />
sound is heard to when the<br />
high-range flanger sound is<br />
heard<br />
Rate at which the high-range<br />
flanger sound is modulated<br />
Level 0–127 Output volume<br />
Modulation depth for the highrange<br />
flanger sound<br />
Spaciousness of the high-range<br />
flanger sound<br />
Proportion of the high-range<br />
flanger sound that is to be returned<br />
to the input (negative values<br />
invert the phase)<br />
Rate at which the steps will cycle<br />
for the high-range flanger sound<br />
Volume balance of the original<br />
sound (D) and flanger sound (W)<br />
68
Effects List<br />
35: OVERDRIVE<br />
Creates a soft distortion similar to that produced by vacuum tube<br />
amplifiers.<br />
fig.MFX-35<br />
L in<br />
R in<br />
Parameter Value Description<br />
Drive 0–127<br />
Amp Type<br />
Produces a more intense distortion than Overdrive. The parameters<br />
are the same as for “35: OVERDRIVE.”<br />
fig.MFX-36<br />
This is an overdrive that provides heavy distortion.<br />
fig.MFX-37<br />
SMALL, BUILT-IN,<br />
2-STACK, 3-STACK<br />
Degree of distortion<br />
Also changes the volume.<br />
Type of guitar amp<br />
SMALL: small amp<br />
BUILT-IN: single-unit type amp<br />
2-STACK: large double stack<br />
amp<br />
3-STACK: large triple stack<br />
amp<br />
Low Gain -15– +15 dB Gain of the low range<br />
High Gain -15– +15 dB Gain of the high range<br />
Pan<br />
L64–63R<br />
Level 0–127 Output Level<br />
36: DISTORTION<br />
L in<br />
R in<br />
37: VS OVERDRIVE<br />
L in<br />
R in<br />
Parameter Value Description<br />
Drive 0–127<br />
Stereo location of the output<br />
sound<br />
Degree of distortion<br />
Also changes the volume.<br />
Tone 0–127 Sound quality of the Overdrive effect<br />
Amp Sw OFF, ON Turns the Amp Simulator on/off.<br />
Amp Type<br />
Over<br />
drive<br />
Distortion<br />
Overdrive<br />
Amp<br />
Simulator<br />
Amp<br />
Simulator<br />
Amp<br />
Simulator<br />
SMALL, BUILT-IN, 2-<br />
STACK, 3-STACK<br />
2-Band<br />
EQ<br />
2-Band<br />
EQ<br />
2-Band<br />
EQ<br />
Type of guitar amp<br />
SMALL: small amp<br />
BUILT-IN: single-unit type amp<br />
2-STACK: large double stack amp<br />
3-STACK: large triple stack amp<br />
Low Gain -15– +15 dB Gain of the low range<br />
High Gain -15– +15 dB Gain of the high range<br />
Pan L64–63R Stereo location of the output sound<br />
Level 0–127 Output Level<br />
L out<br />
Pan L<br />
Pan R<br />
R out<br />
L out<br />
Pan L<br />
Pan R<br />
R out<br />
L out<br />
Pan L<br />
Pan R<br />
R out<br />
38: VS DISTORTION<br />
This is a distortion effect that provides heavy distortion. The<br />
parameters are the same as for “37: VS OVERDRIVE.”<br />
fig.MFX-38<br />
L in<br />
R in<br />
39: GUITAR AMP SIMULATOR<br />
This is an effect that simulates the sound of a guitar amplifier.<br />
fig.MFX-39<br />
L in<br />
R in<br />
Parameter Value Description<br />
Pre Amp Sw OFF, ON Turns the amp switch on/off.<br />
Pre Amp Type<br />
Pre Amp<br />
Volume<br />
Pre Amp<br />
Master<br />
JC-120,<br />
CLEAN TWIN, MATCH<br />
DRIVE,<br />
BG LEAD, MS1959I,<br />
MS1959II, MS1959I+II,<br />
SLDN LEAD,<br />
METAL5150,<br />
METAL LEAD, OD-1, OD-<br />
2 TURBO,<br />
DISTORTION, FUZZ<br />
0–127<br />
Type of guitar amp<br />
Volume and amount of distortion<br />
of the amp<br />
0–127 Volume of the entire pre-amp<br />
Pre Amp Gain LOW, MIDDLE, HIGH Amount of pre-amp distortion<br />
Pre Amp Bass<br />
Pre Amp<br />
Middle<br />
Pre Amp Treble<br />
Pre Amp<br />
Presence<br />
Pre Amp Bright<br />
Speaker Sw<br />
Distortion<br />
0–127<br />
0–127<br />
OFF, ON<br />
OFF, ON<br />
Tone of the bass/mid/treble frequency<br />
range<br />
* Middle cannot be set if “Match<br />
Drive” is selected as the Pre<br />
Amp Type.<br />
Tone for the ultra-high frequency<br />
range<br />
Speaker Type (See the table right.) Type of speaker<br />
Mic Setting 1, 2, 3<br />
Pre Amp<br />
Amp<br />
Simulator<br />
2-Band<br />
EQ<br />
Speaker<br />
Turning this “On” produces a<br />
sharper and brighter sound.<br />
* This parameter applies to the<br />
“JC-120,” “Clean Twin,” and<br />
“BG Lead” Pre Amp Types.<br />
Determines whether the signal<br />
passes through the speaker (ON),<br />
or not (OFF).<br />
Adjusts the location of the mic that’s<br />
capturing the sound of the speaker.<br />
This can be adjusted in three<br />
steps, from 1 to 3, with the mic<br />
becoming more distant as the<br />
value increases.<br />
Mic Level 0–127 Volume of the microphone<br />
Direct Level 0–127 Volume of the direct sound<br />
Pan L64–63R Stereo location of the output<br />
Level 0–127 Output level<br />
L out<br />
Pan L<br />
Pan R<br />
R out<br />
L out<br />
Pan L<br />
Pan R<br />
R out<br />
69
Effects List<br />
Specifications for each Speaker Type<br />
The speaker column indicates the diameter of each speaker unit (in<br />
inches) and the number of units.<br />
Type<br />
Cabinet<br />
Speaker<br />
Microphone<br />
SMALL 1 small open-back enclosure 10 dynamic<br />
SMALL 2 small open-back enclosure 10 dynamic<br />
MIDDLE open back enclosure 12 x 1 dynamic<br />
JC-120 open back enclosure 12 x 2 dynamic<br />
BUILT-IN 1 open back enclosure 12 x 2 dynamic<br />
BUILT-IN 2 open back enclosure 12 x 2 condenser<br />
BUILT-IN 3 open back enclosure 12 x 2 condenser<br />
BUILT-IN 4 open back enclosure 12 x 2 condenser<br />
BUILT-IN 5 open back enclosure 12 x 2 condenser<br />
BG STACK 1 sealed enclosure 12 x 2 condenser<br />
BG STACK 2 large sealed enclosure 12 x 2 condenser<br />
MS STACK 1 large sealed enclosure 12 x 4 condenser<br />
MS STACK 2 large sealed enclosure 12 x 4 condenser<br />
METAL STACK large double stack 12 x 4 condenser<br />
2-STACK large double stack 12 x 4 condenser<br />
3-STACK large triple stack 12 x 4 condenser<br />
41: LIMITER<br />
Compresses signals that exceed a specified volume level, preventing<br />
distortion from occurring.<br />
fig.MFX-41<br />
L in<br />
R in<br />
Parameter Value Description<br />
Release 0–127<br />
Threshold 0–127<br />
Ratio<br />
Limiter<br />
Limiter<br />
1.5:1, 2:1,<br />
4:1,<br />
100:1<br />
2-Band EQ<br />
2-Band EQ<br />
Adjusts the time after the signal volume falls<br />
below the Threshold Level until compression<br />
is no longer applied.<br />
Adjusts the volume at which compression<br />
begins<br />
Compression ratio<br />
Post Gain 0– +18 dB Adjusts the output gain.<br />
Low Gain -15– +15 dB Gain of the low frequency range<br />
High Gain -15– +15 dB Gain of the high frequency range<br />
Level 0–127 Output level<br />
L out<br />
R out<br />
40: COMPRESSOR<br />
Flattens out high levels and boosts low levels, smoothing out<br />
fluctuations in volume.<br />
fig.MFX-40<br />
L in<br />
R in<br />
Compressor<br />
Compressor<br />
Parameter Value Description<br />
Attack 0–127 Sets the speed at which compression starts<br />
Threshold 0–127<br />
2-Band EQ<br />
2-Band EQ<br />
Adjusts the volume at which compression<br />
begins<br />
Post Gain 0– +18 dB Adjusts the output gain.<br />
Low Gain -15– +15 dB Gain of the low frequency range<br />
High Gain -15– +15 dB Gain of the high frequency range<br />
Level 0–127 Output level<br />
L out<br />
R out<br />
42: GATE<br />
Cuts the reverb’s delay according to the volume of the sound sent into<br />
the effect. Use this when you want to create an artificial-sounding<br />
decrease in the reverb’s decay.<br />
fig.MFX-42<br />
L in<br />
R in<br />
Parameter Value Description<br />
Threshold 0–127 Volume level at which the gate begins to close<br />
Mode<br />
GATE,<br />
DUCK<br />
Attack 0–127<br />
Hold 0–127<br />
Release 0–127<br />
Balance<br />
Gate<br />
Gate<br />
D100:0W–<br />
D0:100W<br />
Level 0–127 Output level<br />
L out<br />
R out<br />
Type of gate<br />
GATE: The gate will close when the volume<br />
of the original sound decreases, cutting<br />
the original sound.<br />
DUCK (Ducking): The gate will close when<br />
the volume of the original sound increases,<br />
cutting the original sound.<br />
Adjusts the time it takes for the gate to fully<br />
open after being triggered.<br />
Adjusts the time it takes for the gate to start<br />
closing after the source sound falls beneath<br />
the Threshold.<br />
Adjusts the time it takes the gate to fully<br />
close after the hold time.<br />
Volume balance between the direct sound<br />
(D) and the effect sound (W)<br />
70
Effects List<br />
43: DELAY<br />
This is a stereo delay.<br />
When Feedback Mode is NORMAL:<br />
fig.MFX-43a<br />
L in<br />
R in<br />
Delay<br />
Feedback<br />
Feedback<br />
Delay<br />
Balance D<br />
Balance D<br />
2-Band<br />
EQ<br />
Balance W<br />
Balance W<br />
2-Band<br />
EQ<br />
L out<br />
R out<br />
Parameter Range Explanation<br />
Feedback -98– +98%<br />
HF Damp<br />
200–8000 Hz,<br />
BYPASS<br />
Proportion of the delay sound<br />
that is to be returned to the input<br />
(negative values invert the phase)<br />
Frequency at which the high-frequency<br />
content of the delayed<br />
sound will be cut (BYPASS: no<br />
cut)<br />
Pan L64–63R Panning of the delay sound<br />
Low Gain<br />
High Gain<br />
-15– +15 dB<br />
-15– +15 dB<br />
Balance D100:0W–D0:100W<br />
Level 0–127 Output volume<br />
Amount of boost/cut for the highfrequency<br />
range<br />
Amount of boost/cut for the highfrequency<br />
range<br />
Volume balance of the original<br />
sound (D) and delay sound (W)<br />
When Feedback Mode is CROSS:<br />
fig.MFX-43b<br />
Balance D<br />
L in<br />
Delay<br />
2-Band<br />
EQ<br />
Balance W<br />
L out<br />
45: SERIAL DELAY<br />
This delay connects two delay units in series. Feedback can be<br />
applied independently to each delay unit, allowing you to produce<br />
complex delay sounds.<br />
R in<br />
Parameter Value Description<br />
Delay Left<br />
Delay Right<br />
Phase Left<br />
Phase Right<br />
Feedback<br />
Mode<br />
A delay that provides a long delay time.<br />
fig.MFX-44<br />
0–1300 ms,<br />
note<br />
NORMAL,<br />
INVERSE<br />
NORMAL,<br />
CROSS<br />
Feedback -98– +98%<br />
HF Damp<br />
200–8000 Hz,<br />
BYPASS<br />
Adjusts the time until the delay sound is<br />
heard.<br />
Phase of the delay sound<br />
Selects the way in which delay sound is fed<br />
back into the effect. (See the figures above.)<br />
Adjusts the amount of the delay sound that’s<br />
fed back into the effect. Negative<br />
(-) settings invert the phase.<br />
Adjusts the frequency above which sound fed<br />
back to the effect is filtered out. If you don’t<br />
want to filter out any high frequencies, set this<br />
parameter to BYPASS.<br />
Low Gain -15– +15 dB Gain of the low frequency range<br />
High Gain -15– +15 dB Gain of the high frequency range<br />
Balance<br />
Feedback<br />
Feedback<br />
Delay<br />
D100:0W–<br />
D0:100W<br />
Level 0–127 Output level<br />
44: LONG DELAY<br />
L in<br />
R in<br />
Feedback<br />
Balance D<br />
Long Delay<br />
Balance W<br />
2-Band<br />
EQ<br />
R out<br />
Volume balance between the direct sound<br />
(D) and the delay sound (W)<br />
Pan L<br />
Pan R<br />
2-Band<br />
EQ<br />
2-Band<br />
EQ<br />
L out<br />
R out<br />
fig.MFX-45<br />
L in<br />
R in<br />
Parameter Range Explanation<br />
Delay1 Time<br />
Delay1<br />
Feedback<br />
Delay1 HF Damp<br />
Delay2 Time<br />
Delay2<br />
Feedback<br />
Delay2 HF Damp<br />
0–1300 ms, note<br />
-98– +98%<br />
200–8000 Hz,<br />
BYPASS<br />
0–1300 ms, note<br />
-98– +98%<br />
200–8000 Hz,<br />
BYPASS<br />
Delay time from when sound is<br />
input to delay 1 until the delay<br />
sound is heard<br />
Proportion of the delay sound<br />
that is to be returned to the input<br />
of delay 1 (negative values invert<br />
the phase)<br />
Frequency at which the high-frequency<br />
content of the delayed<br />
sound of delay 1 will be cut (BY-<br />
PASS: no cut)<br />
Delay time from when sound is<br />
input to delay 2 until the delay<br />
sound is heard<br />
Proportion of the delay sound<br />
that is to be returned to the input<br />
of delay 2 (negative values invert<br />
the phase)<br />
Frequency at which the high-frequency<br />
content of the delayed<br />
sound of delay 2 will be cut (BY-<br />
PASS: no cut)<br />
Pan L64–63R Panning of the delay sound<br />
Low Gain<br />
High Gain<br />
Delay 1<br />
Feedback 1<br />
-15– +15 dB<br />
-15– +15 dB<br />
Balance D100:0W–D0:100W<br />
Delay 2<br />
Feedback 2<br />
Level 0–127 Output volume<br />
Pan L<br />
Pan R<br />
L out<br />
R out<br />
Amount of boost/cut for the lowfrequency<br />
range<br />
Amount of boost/cut for the highfrequency<br />
range<br />
Volume balance of the original<br />
sound (D) and delay sound (W)<br />
Parameter Range Explanation<br />
Delay Time<br />
Phase<br />
0–2600 ms, note<br />
NORMAL, INVERSE<br />
Delay time from when the original<br />
sound is heard to when the<br />
delay sound is heard<br />
Phase of the delay (NORMAL:<br />
non-inverted, INVERT: inverted)<br />
71
Effects List<br />
46: MODULATION DELAY<br />
Adds modulation to the delayed sound.<br />
When Feedback Mode is NORMAL:<br />
fig.MFX-46a<br />
L in<br />
R in<br />
When Feedback Mode is CROSS:<br />
fig.MFX-46b<br />
L in<br />
R in<br />
Parameter Value Description<br />
Delay Left<br />
Delay Right<br />
Feedback<br />
Mode<br />
0–1300 ms,<br />
note<br />
NORMAL,<br />
CROSS<br />
Feedback -98– +98%<br />
HF Damp<br />
Rate<br />
200–8000 Hz,<br />
BYPASS<br />
0.05–10.00 Hz,<br />
note<br />
Adjusts the time until the delay sound is<br />
heard.<br />
Selects the way in which delay sound is fed<br />
back into the effect (See the figures above.)<br />
Adjusts the amount of the delay sound<br />
that’s fed back into the effect. Negative (-)<br />
settings invert the phase.<br />
Adjusts the frequency above which sound<br />
fed back to the effect is filtered out. If you<br />
don’t want to filter out any high frequencies,<br />
set this parameter to BYPASS.<br />
Frequency of modulation<br />
Depth 0–127 Depth of modulation<br />
Phase 0-180 deg Spatial spread of the sound<br />
Low Gain -15– +15 dB Gain of the low frequency range<br />
High Gain -15– +15 dB Gain of the high frequency range<br />
Balance<br />
Delay<br />
Feedback<br />
Feedback<br />
Delay<br />
Delay<br />
Feedback<br />
Feedback<br />
Delay<br />
D100:0W–<br />
D0:100W<br />
Balance D<br />
Modulation<br />
Modulation<br />
Balance D<br />
Balance D<br />
Modulation<br />
Modulation<br />
Balance D<br />
Level 0–127 Output level<br />
2-Band<br />
EQ<br />
Balance W<br />
Balance W<br />
2-Band<br />
EQ<br />
2-Band<br />
EQ<br />
Balance W<br />
Balance W<br />
2-Band<br />
EQ<br />
L out<br />
R out<br />
L out<br />
R out<br />
Volume balance between the direct sound<br />
(D) and the delay sound (W)<br />
47: 3TAP PAN DELAY<br />
Produces three delay sounds; center, left and right.<br />
fig.MFX-47<br />
L in<br />
R in<br />
Parameter Value Description<br />
Delay Left/<br />
Right/Center<br />
Center<br />
Feedback<br />
HF Damp<br />
Left/Right/<br />
Center Level<br />
This effect has four delays.<br />
fig.MFX-48a<br />
0–2600 ms,<br />
note<br />
-98– +98%<br />
200–8000 Hz,<br />
BYPASS<br />
Adjusts the time until the delay sound is<br />
heard.<br />
Adjusts the amount of the delay sound<br />
that’s fed back into the effect. Negative (-)<br />
settings invert the phase.<br />
Adjusts the frequency above which sound<br />
fed back to the effect is filtered out. If you<br />
do not want to filter out any high frequencies,<br />
set this parameter to BYPASS.<br />
0–127 Volume of each delay<br />
Low Gain -15– +15 dB Gain of the low frequency range<br />
High Gain -15– +15 dB Gain of the high frequency range<br />
Balance<br />
D100:0W–<br />
D0:100W<br />
Level 0–127 Output level<br />
48: 4TAP PAN DELAY<br />
L in<br />
R in<br />
1<br />
Triple Tap Delay<br />
Feedback<br />
2 3<br />
Feedback<br />
Left Tap<br />
Right Tap<br />
Balance D<br />
Center Tap<br />
Quadruple Tap Delay<br />
4<br />
Volume balance between the direct sound<br />
(D) and the delay sound (W)<br />
Delay 1<br />
Delay 4<br />
Balance D<br />
Delay 2<br />
Delay 3<br />
2-Band<br />
EQ<br />
Balance W<br />
Balance D<br />
Balance W<br />
2-Band<br />
EQ<br />
Balance D<br />
fig.MFX-48b<br />
Stereo location of each delay<br />
L out<br />
R out<br />
L out<br />
Balance W<br />
Balance W<br />
R out<br />
L<br />
R<br />
Parameter Value Description<br />
Delay 1–4 Time<br />
Delay 1<br />
Feedback<br />
HF Damp<br />
0–2600 ms,<br />
note<br />
-98– +98%<br />
200–8000 Hz,<br />
BYPASS<br />
Adjusts the time until the delay sound is<br />
heard.<br />
Adjusts the amount of the delay sound<br />
that’s fed back into the effect. Negative (-)<br />
settings invert the phase.<br />
Adjusts the frequency above which sound<br />
fed back to the effect is filtered out. If you<br />
do not want to filter out any high frequencies,<br />
set this parameter to BYPASS.<br />
Delay 1–4 Level 0–127 Volume of each delay<br />
Low Gain -15– +15 dB Gain of the low frequency range<br />
High Gain -15– +15 dB Gain of the high frequency range<br />
Balance<br />
D100:0W–<br />
D0:100W<br />
Level 0–127 Output level<br />
Volume balance between the direct sound<br />
(D) and the delay sound (W)<br />
72
Effects List<br />
49: MULTI TAP DELAY<br />
This effect provides four delays. Each of the Delay Time parameters<br />
can be set to a note length based on the selected tempo. You can also<br />
set the panning and level of each delay sound.<br />
fig.MFX-49<br />
L in<br />
R in<br />
Parameter Value Description<br />
Delay 1–4 Time<br />
Delay 1<br />
Feedback<br />
HF Damp<br />
This is a reverse delay that adds a reversed and delayed sound to the<br />
input sound. A tap delay is connected immediately after the reverse<br />
delay.<br />
fig.MFX-50<br />
0–2600 ms,<br />
note<br />
-98– +98%<br />
200–8000 Hz,<br />
BYPASS<br />
Adjusts the time until Delays 1–4 are<br />
heard.<br />
Adjusts the amount of the delay sound<br />
that’s fed back into the effect. Negative (-)<br />
settings invert the phase.<br />
Adjusts the frequency above which sound<br />
fed back to the effect is filtered out. If you<br />
don’t want to filter out any the high frequencies,<br />
set this parameter to BYPASS.<br />
Delay 1–4 Pan L64–63R Stereo location of Delays 1–4<br />
Delay 1–4 Level 0–127 Output level of Delays 1–4<br />
Low Gain -15– +15 dB Gain of the low frequency range<br />
High Gain -15– +15 dB Gain of the high frequency range<br />
Balance<br />
D100:0W–<br />
D0:100W<br />
Level 0–127 Output level<br />
50: REVERSE DELAY<br />
L in<br />
R in<br />
Volume balance between the direct sound<br />
(D) and the effect sound (W)<br />
Parameter Range Explanation<br />
Threshold 0–127<br />
Rev Delay Time<br />
Rev Delay<br />
Feedback<br />
Feed<br />
back<br />
Rev Delay HF<br />
Damp<br />
Rev Delay Pan<br />
Multi Tap Delay<br />
Feedback<br />
Delay 1<br />
Delay 2<br />
Rev. Delay<br />
0–1300 ms, note<br />
-98– +98%<br />
200–8000 Hz,<br />
BYPASS<br />
L64–63R<br />
Rev Delay Level 0–127<br />
Delay 3<br />
Delay 4<br />
Balance D<br />
Balance D<br />
Rev<br />
D1<br />
Delay<br />
D2<br />
D3<br />
2-Band<br />
EQ<br />
Balance W<br />
Balance W<br />
2-Band<br />
EQ<br />
2-Band<br />
EQ<br />
2-Band<br />
EQ<br />
L out<br />
R out<br />
Volume at which the reverse delay<br />
will begin to be applied<br />
Delay time from when sound is<br />
input into the reverse delay until<br />
the delay sound is heard<br />
Proportion of the delay sound<br />
that is to be returned to the input<br />
of the reverse delay (negative<br />
values invert the phase)<br />
Frequency at which the high-frequency<br />
content of the reverse-delayed<br />
sound will be cut (BYPASS:<br />
no cut)<br />
Panning of the reverse delay<br />
sound<br />
Volume of the reverse delay<br />
sound<br />
L out<br />
R out<br />
Parameter Range Explanation<br />
Delay 1 – 3 Time<br />
Adds a shuffle to the delay sound, giving the sound a bouncy delay<br />
effect with a swing feel.<br />
fig.MFX-51<br />
0–1300 ms, note<br />
Delay 3 Feedback -98– +98%<br />
Delay HF Damp<br />
Delay 1 Pan’,<br />
‘Delay 2 Pan<br />
Delay 1 Level’,<br />
‘Delay 2 Level<br />
Low Gain<br />
High Gain<br />
200–8000 Hz, BYPASS<br />
L64–63R<br />
Delay time from when sound is<br />
input into the tap delay until the<br />
delay sound is heard<br />
Proportion of the delay sound<br />
that is to be returned to the input<br />
of the tap delay (negative values<br />
invert the phase)<br />
Frequency at which the low-frequency<br />
content of the tap delay<br />
sound will be cut (BYPASS: no<br />
cut)<br />
Panning of the tap delay sounds<br />
0–127 Volume of the tap delay sounds<br />
-15– +15 dB<br />
-15– +15 dB<br />
Balance D100:0W–D0:100W<br />
Level 0–127 Output volume<br />
51: SHUFFLE DELAY<br />
L in<br />
R in<br />
Parameter Value Description<br />
Delay Time<br />
Shuffle<br />
Rate<br />
0–2600 ms,<br />
note<br />
0–100%<br />
Acceleration 0–15<br />
Feedback -98– +98%<br />
HF Damp<br />
200–8000 Hz,<br />
BYPASS<br />
Amount of boost/cut for the lowfrequency<br />
range<br />
Amount of boost/cut for the highfrequency<br />
range<br />
Volume balance of the original<br />
sound (D) and delay sound (W)<br />
Adjusts the time until the delay sound is<br />
heard.<br />
Adjusts the ratio (as a percentage) of the<br />
time that elapses before Delay B sounds relative<br />
to the time that elapses before the Delay<br />
A sounds.<br />
When set to 100%, the delay times are<br />
the same.<br />
Adjusts the speed which the Delay Time<br />
changes from the current setting to its specified<br />
new setting.<br />
Adjusts the amount of the delay that’s fed<br />
back into the effect. Negative (-) settings invert<br />
the phase.<br />
Adjusts the frequency above which sound<br />
fed back to the effect is filtered out. If you<br />
don’t want to filter out any high frequencies,<br />
set this parameter to BYPASS.<br />
Pan A/B 0–127 Stereo location of Delay A/B<br />
Level A/B 0–127 Volume of delay A/B<br />
Low Gain -15– +15 dB Gain of the low frequency range<br />
High Gain -15– +15 dB Gain of the high frequency range<br />
Balance<br />
Feedback<br />
Delay<br />
D100:0W–<br />
D0:100W<br />
Delay A<br />
Delay B<br />
Level 0–127 Output level<br />
A<br />
B<br />
2-Band<br />
EQ<br />
2-Band<br />
EQ<br />
Volume balance between the direct sound<br />
(D) and the effect sound (W)<br />
L out<br />
R out<br />
73
Effects List<br />
52: 3D DELAY<br />
This applies a 3D effect to the delay sound. The delay sound will be<br />
positioned 90 degrees left and 90 degrees right.<br />
fig.MFX-52<br />
L<br />
R<br />
Parameter Value Description<br />
Delay Left<br />
Delay Right<br />
Delay Center<br />
Center<br />
Feedback<br />
HF Damp<br />
Left Level<br />
Right Level<br />
Center Level<br />
Output Mode<br />
A stereo delay in which the delay time can be varied smoothly.<br />
fig.MFX-53<br />
0–2600 ms, note<br />
-98– +98%<br />
200–8000 Hz, BYPASS<br />
Adjusts the delay time from the<br />
direct sound until the delay<br />
sound is heard.<br />
Adjusts the proportion of the delay<br />
sound that is fed back into the<br />
effect. Negative (-) settings will<br />
invert the phase.<br />
Adjusts the frequency above<br />
which sound fed back to the effect<br />
will be cut. If you do not want<br />
to cut the high frequencies, set<br />
this parameter to BYPASS.<br />
0–127 Output level of the delay sound<br />
SPEAKER, PHONES<br />
Adjusts the method that will be<br />
used to hear the sound that is output<br />
to the OUTPUT jacks. The optimal<br />
3D effect will be achieved if<br />
you select SPEAKER when using<br />
speakers, or PHONES when using<br />
headphones.<br />
Low Gain -15– +15 dB Gain of the low range<br />
High Gain -15– +15 dB Gain of the high range<br />
Balance D100:0W–D0:100W<br />
Level 0–127 Output Level<br />
53: TIME CTRL DELAY<br />
L in<br />
3D Delay L<br />
3D Delay C<br />
Feedback<br />
3D Delay R<br />
Level<br />
2-Band<br />
EQ<br />
2-Band<br />
EQ<br />
Volume balance between the direct<br />
sound (D) and the effect sound (W)<br />
2-Band EQ<br />
L out<br />
R out<br />
L out<br />
Parameter Value Description<br />
HF Damp<br />
A delay in which the delay time can be varied smoothly, and allowing<br />
an extended delay to be produced.<br />
fig.MFX-54<br />
200–8000 Hz,<br />
BYPASS<br />
Adjusts the frequency above which<br />
sound fed back to the effect is filtered<br />
out. If you do not want to filter<br />
out any high frequencies, set this<br />
parameter to BYPASS.<br />
Low Gain -15– +15 dB Gain of the low frequency range<br />
High Gain -15– +15 dB Gain of the high frequency range<br />
Balance<br />
D100:0W–<br />
D0:100W<br />
Level 0–127 Output level<br />
54:<br />
L in<br />
R in<br />
LONG TIME CTRL DLY<br />
(LONG TIME CONTROL DELAY)<br />
Parameter Value Description<br />
Delay Time<br />
Acceleration 0–15<br />
0–2600 ms,<br />
note<br />
Feedback -98– +98%<br />
HF Damp<br />
200–8000 Hz,<br />
BYPASS<br />
Volume balance between the direct<br />
sound (D) and the delay sound (W)<br />
Adjusts the time until the delay is heard.<br />
Adjusts the speed which the Delay Time<br />
changes from the current setting to a specified<br />
new setting.<br />
The rate of change for the Delay Time directly<br />
affects the rate of pitch change.<br />
Adjusts the amount of the delay that’s fed<br />
back into the effect. Negative (-) settings invert<br />
the phase.<br />
Adjusts the frequency above which sound<br />
fed back to the effect is filtered out. If you do<br />
not want to filter out any high frequencies,<br />
set this parameter to BYPASS.<br />
Pan L64–63R Stereo location of the delay<br />
Low Gain -15– +15 dB Gain of the low frequency range<br />
High Gain -15– +15 dB Gain of the high frequency range<br />
Balance<br />
D100:0W–<br />
D0:100W<br />
Balance D<br />
Time Control Delay<br />
Feedback<br />
Balance D<br />
Level 0–127 Output level<br />
2-Band<br />
EQ<br />
Balance W<br />
Balance W<br />
2-Band<br />
EQ<br />
L out<br />
R out<br />
Volume balance between the direct sound<br />
(D) and the delay sound (W)<br />
Time Ctrl Delay<br />
Pan L<br />
Feedback<br />
Feedback<br />
Time Ctrl Delay<br />
Pan R<br />
R in<br />
2-Band EQ<br />
R out<br />
Parameter Value Description<br />
Delay Time<br />
Acceleration 0–15<br />
0–1300 ms, note<br />
Feedback -98– +98%<br />
Adjusts the time until the delay is<br />
heard.<br />
Adjusts the speed which the Delay Time<br />
changes from the current setting to a<br />
specified new setting.<br />
The rate of change for the Delay Time<br />
directly affects the rate of pitch change.<br />
Adjusts the amount of the delay<br />
that’s fed back into the effect. Negative<br />
(-) settings invert the phase.<br />
74
Effects List<br />
55: TAPE ECHO<br />
A virtual tape echo that produces a realistic tape delay sound. This<br />
simulates the tape echo section of a <strong>Roland</strong> RE-201 Space Echo.<br />
fig.MFX-55<br />
L in<br />
R in<br />
Parameter Value Description<br />
Mode<br />
In addition to a lo-fi effect, this adds various types of noise such as<br />
white noise and disc noise.<br />
fig.MFX-56<br />
S, M, L, S+M,<br />
S+L, M+L,<br />
S+M+L<br />
Repeat Rate 0–127<br />
Combination of playback heads to use<br />
Select from three different heads with different<br />
delay times.<br />
S: short, M: middle, L: long<br />
Tape speed<br />
Increasing this value will shorten the spacing<br />
of the delayed sounds.<br />
Intensity 0–127 Amount of delay repeats<br />
Bass -15– +15 dB Boost/cut for the lower range of the echo sound<br />
Treble -15– +15 dB Boost/cut for the upper range of the echo sound<br />
Head S Pan<br />
Head M Pan<br />
Head L Pan<br />
Tape Distortion 0–5<br />
Wow/Flutter<br />
Rate<br />
Wow/Flutter<br />
Depth<br />
L64–63R<br />
0–127<br />
Independent panning for the short, middle,<br />
and long playback heads<br />
Amount of tape-dependent distortion to be<br />
added<br />
This simulates the slight tonal changes<br />
that can be detected by signal-analysis<br />
equipment. Increasing this value will increase<br />
the distortion.<br />
Speed of wow/flutter (complex variation in<br />
pitch caused by tape wear and rotational irregularity)<br />
0–127 Depth of wow/flutter<br />
Echo Level 0–127 Volume of the echo sound<br />
Direct Level 0–127 Volume of the original sound<br />
Level 0–127 Output level<br />
56: LOFI NOISE<br />
L in<br />
R in<br />
Tape Echo<br />
Lo-Fi<br />
Direct Level<br />
Direct Level<br />
Noise Gen.<br />
Lo-Fi<br />
L out<br />
Echo Level<br />
Echo Level<br />
R out<br />
2-Band<br />
EQ<br />
2-Band<br />
EQ<br />
L out<br />
R out<br />
Parameter Value Description<br />
W/P Noise<br />
LPF<br />
W/P Noise<br />
Level<br />
Disc Noise<br />
Type<br />
Disc Noise<br />
LPF<br />
Disc Noise<br />
Level<br />
Hum Noise<br />
Type<br />
Hum Noise<br />
LPF<br />
Hum Noise<br />
Level<br />
This is an effect that intentionally degrades the sound quality for<br />
creative purposes.<br />
fig.MFX-57<br />
200–8000 Hz,<br />
BYPASS<br />
Center frequency of the low pass filter applied<br />
to the white/pink noise (BYPASS: no cut)<br />
0–127 Volume of the white/pink noise<br />
LP, EP, SP,<br />
RND<br />
200–8000 Hz,<br />
BYPASS<br />
Type of record noise<br />
The frequency at which the noise is heard<br />
depends on the selected type.<br />
Adjusts the cutoff frequency of the low pass<br />
filter applied to the record noise. If you don’t<br />
want to filter out any high frequencies, set<br />
this parameter to BYPASS.<br />
0–127 Volume of the record noise<br />
50 Hz, 60 Hz Frequency of the hum noise<br />
200–8000 Hz,<br />
BYPASS<br />
Center frequency of the low pass filter applied<br />
to the hum noise (BYPASS: no cut)<br />
0–127 Volume of the hum noise<br />
Low Gain -15– +15 dB Gain of the low range<br />
High Gain -15– +15 dB Gain of the high range<br />
Balance<br />
D100:0W–<br />
D0:100W<br />
Level 0–127 Output level<br />
57: LOFI COMPRESS<br />
L in<br />
R in<br />
Parameter Value Description<br />
Pre Filter Type 1–6<br />
LoFi Type 1–9<br />
Post Filter Type<br />
Post Filter<br />
Cutoff<br />
OFF, LPF, HPF<br />
Volume balance between the direct sound<br />
(D) and the effect sound (W)<br />
Selects the type of filter applied to the sound<br />
before it passes through the Lo-Fi effect.<br />
1: Compressor off<br />
2–6: Compressor on<br />
Degrades the sound quality. The sound quality<br />
grows poorer as this value is increased.<br />
Type of filter<br />
OFF: no filter is used<br />
LPF: cuts the frequency range above the<br />
Cutoff<br />
HPF: cuts the frequency range below the<br />
Cutoff<br />
200–8000 Hz Basic frequency of the Post Filter<br />
Low Gain -15– +15 dB Gain of the low range<br />
High Gain -15– +15 dB Gain of the high range<br />
Balance<br />
Compressor<br />
Compressor<br />
D100:0W–<br />
D0:100W<br />
Lo-Fi<br />
Lo-Fi<br />
Level 0–127 Output level<br />
2-Band<br />
EQ<br />
2-Band<br />
EQ<br />
L out<br />
R out<br />
Volume balance between the direct sound<br />
(D) and the effect sound (W)<br />
Parameter Value Description<br />
LoFi Type 1–9<br />
Filter Type<br />
OFF, LPF,<br />
HPF<br />
Degrades the sound quality. The sound quality<br />
grows poorer as this value is increased.<br />
Type of filter<br />
OFF: no filter is used<br />
LPF: cuts the frequency range above the<br />
Cutoff<br />
HPF: cuts the frequency range below the<br />
Cutoff<br />
Filter Cutoff 200–8000 Hz Center frequency of the filter<br />
W/P Noise<br />
Type<br />
WHITE, PINK<br />
Switch between white noise and pink noise.<br />
75
Effects List<br />
58: LOFI RADIO<br />
In addition to a Lo-Fi effect, this effect also generates radio noise.<br />
fig.MFX-58<br />
L in<br />
R in<br />
Parameter Value Description<br />
LoFi Type 1–9<br />
Filter Type<br />
OFF, LPF,<br />
HPF<br />
Degrades the sound quality. The sound quality<br />
grows poorer as this value is increased.<br />
Type of filter<br />
OFF: no filter is used<br />
LPF: cuts the frequency range above the<br />
Cutoff<br />
HPF: cuts the frequency range below the<br />
Cutoff<br />
Filter Cutoff 200–8000 Hz Basic frequency of the Post Filter<br />
Radio<br />
Detune<br />
Radio Noise<br />
Level<br />
Balance<br />
Radio<br />
0–127<br />
Lo-Fi<br />
Lo-Fi<br />
Simulates the tuning noise of a radio. As this<br />
value is raised, the tuning drifts further.<br />
0–127 Volume of the radio noise<br />
D100:0W–<br />
D0:100W<br />
Level 0–127 Output level<br />
2-Band<br />
EQ<br />
2-Band<br />
EQ<br />
L out<br />
R out<br />
Volume balance between the direct sound<br />
(D) and the effect sound (W)<br />
Parameter Value Description<br />
Signal<br />
Distortion<br />
Frequency<br />
Range<br />
Disc Type<br />
Scratch Noise<br />
Level<br />
Dust Noise<br />
Level<br />
Hiss Noise<br />
Level<br />
Total Noise<br />
Level<br />
0–127 Depth of distortion<br />
0–127<br />
LP, EP, SP<br />
0–127<br />
Frequency response of the playback system<br />
Decreasing this value will produce the impression<br />
of an old system with a poor frequency<br />
response.<br />
Rotational speed of the turntable<br />
This will affect the frequency of the<br />
scratch noise.<br />
Amount of noise due to scratches on the<br />
record<br />
0–127 Volume of noise due to dust on the record<br />
0–127 Volume of continuous “hiss”<br />
0–127 Volume of overall noise<br />
Wow 0–127 Depth of long-cycle rotational irregularity<br />
Flutter 0–127 Depth of short-cycle rotational irregularity<br />
Random 0–127<br />
Total Wow/<br />
Flutter<br />
Balance<br />
Depth of indefinite-cycle rotational irregularity<br />
0–127 Depth of overall rotational irregularity<br />
D100:0W–<br />
D0:100W<br />
Level 0–127 Output level<br />
61:<br />
PITCH SHIFTER<br />
(Feedback Pitch Shifter)<br />
Volume balance between the direct sound<br />
(D) and the effect sound (W)<br />
A stereo pitch shifter.<br />
59: TELEPHONE<br />
fig.MFX-61<br />
L in<br />
2-Band EQ<br />
L out<br />
fig.MFX-59<br />
L in<br />
Telephone<br />
L out<br />
Pitch Shifter<br />
Pitch Shifter<br />
R in<br />
Telephone<br />
R out<br />
R in<br />
2-Band EQ<br />
R out<br />
Parameter Value Description<br />
Voice<br />
Quality<br />
Simulates a sound recorded on an analog record and played back on a<br />
record player. This effect also simulates the various types of noise that are<br />
typical of a record, and even the rotational irregularities of an old turntable.<br />
fig.MFX-60<br />
0–15 Audio quality of the telephone voice<br />
Treble -15– +15 dB Bandwidth of the telephone voice<br />
Balance<br />
D100:0–<br />
D0:100W<br />
Level 0–127 Output level<br />
60: PHONOGRAPH<br />
L in<br />
Balance D<br />
Volume balance between the direct sound<br />
(D) and the effect sound (W)<br />
L out<br />
Parameter Value Description<br />
Coarse<br />
Fine<br />
Delay Time<br />
-24– +12 semi<br />
-100– +100 cent<br />
0–1300 ms, note<br />
Feedback -98– +98%<br />
Adjusts the pitch of the pitch shifted<br />
sound in semitone steps.<br />
Adjusts the pitch of the pitch shifted<br />
sound in 2-cent steps.<br />
Adjusts the delay time from the<br />
direct sound until the pitch shifted<br />
sound is heard.<br />
Adjusts the proportion of the<br />
pitch shifted sound that is fed<br />
back into the effect. Negative (-)<br />
settings will invert the phase.<br />
Low Gain -15– +15 dB Gain of the low range<br />
High Gain -15– +15 dB Gain of the high range<br />
Balance<br />
D100:0W–D0:100W<br />
Level 0–127 Output Level<br />
Volume balance between the direct<br />
sound (D) and the pitch shifted<br />
sound (W)<br />
Phonograph<br />
Phonograph<br />
Balance W<br />
Balance W<br />
R in<br />
Balance D<br />
R out<br />
76
Effects List<br />
62: 2VOI PITCH SHIFTER (2VOICE PITCH SHIFTER)<br />
Shifts the pitch of the original sound. This 2-voice pitch shifter has two<br />
pitch shifters, and can add two pitch shifted sounds to the original<br />
sound.<br />
fig.MFX-62<br />
L in<br />
R in<br />
Parameter Value Description<br />
Pitch 1:<br />
Coarse<br />
Pitch 1:Fine<br />
Pitch 1:Delay<br />
A pitch shifter in which the amount of pitch shift is varied by a 16-step<br />
sequence.<br />
fig.MFX-63<br />
-24-+12 semi<br />
-100-+100 cent<br />
0–1300 ms, note<br />
Pitch 1:Feedback -98– +98%<br />
Pitch 1:Pan<br />
L64-63R<br />
Adjusts the pitch of Pitch Shift 1<br />
in semitone steps.<br />
Adjusts the pitch of Pitch Shift<br />
Pitch 1 in 2-cent steps.<br />
Adjusts the delay time from the<br />
direct sound until the Pitch Shift 1<br />
sound is heard.<br />
Adjusts the proportion of the<br />
pitch shifted sound that is fed<br />
back into the effect. Negative (-)<br />
settings will invert the phase.<br />
Stereo location of the Pitch Shift<br />
1 sound<br />
Pitch 1:Level 0–127 Volume of the Pitch Shift1 sound<br />
Pitch 2:<br />
Coarse<br />
Pitch 2:Fine<br />
Pitch 2:Delay<br />
-24-+12 semi<br />
-100-+100 cent<br />
0–1300 ms, note<br />
Pitch 2:Feedback -98– +98%<br />
Pitch 2:Pan<br />
L64-63R<br />
Pitch 2:Level 0–127<br />
Settings of the Pitch Shift 2<br />
sound.<br />
The parameters are the same as<br />
for the Pitch Shift 1 sound.<br />
Low Gain -15– +15 dB Gain of the low range<br />
High Gain -15– +15 dB Gain of the high range<br />
Level Balance<br />
Balance<br />
A100:0B-A0:100B<br />
D100:0W-D0:100W<br />
Level 0-127 Output Level<br />
63: STEP PITCH SHIFTER<br />
L in<br />
R in<br />
Level 1<br />
Pan 1 R<br />
2Voice Pitch Shifter<br />
Pan 2 L<br />
Level 1<br />
Step Pitch Shifter<br />
Step Pitch Shifter<br />
Balance D<br />
Pan 1 L<br />
Pan 2 R<br />
Balance D<br />
L out<br />
Balance W<br />
Balance W<br />
R out<br />
Volume balance between the<br />
Pitch Shift 1 and Pitch Shift 2<br />
sounds<br />
Volume balance between the direct<br />
sound (D) and the pitch shifted<br />
sound (W)<br />
2-Band<br />
EQ<br />
2-Band<br />
EQ<br />
L out<br />
R out<br />
Parameter Range Explanation<br />
Attack 0–127<br />
Gate Time 0–127<br />
Fine<br />
Delay Time<br />
Adds reverberation to the sound, simulating an acoustic space.<br />
fig.MFX-64<br />
-100– +100 cent<br />
0–1300 ms, note<br />
Feedback -98– +98%<br />
Low Gain<br />
High Gain<br />
-15– +15 dB<br />
-15– +15 dB<br />
Balance D100:0W–D0:100W<br />
Speed at which the amount of<br />
pitch shift changes between steps<br />
Duration of the pitch shifted<br />
sound at each step<br />
Pitch shift adjustment for all steps<br />
(2-cent units)<br />
Delay time from the original<br />
sound until the pitch-shifted<br />
sound is heard<br />
Level 0–127 Output volume<br />
64: REVERB<br />
L in<br />
R in<br />
Parameter Value Description<br />
Type<br />
Pre Delay<br />
ROOM1, ROOM2,<br />
STAGE1, STAGE2,<br />
HALL1, HALL2<br />
0.0–100.0 ms<br />
Proportion of the pitch-shifted sound<br />
that is to be returned to the input<br />
(negative values invert the phase)<br />
Amount of boost/cut for the lowfrequency<br />
range<br />
Amount of boost/cut for the highfrequency<br />
range<br />
Volume balance of the original sound<br />
(D) and pitch-shifted sound (W)<br />
Type of reverb<br />
ROOM1: dense reverb with<br />
short decay<br />
ROOM2: sparse reverb with<br />
short decay<br />
STAGE1: reverb with greater<br />
late reverberation<br />
STAGE2: reverb with strong<br />
early reflections<br />
HALL1: reverb with clear reverberance<br />
HALL2: reverb with rich reverberance<br />
Adjusts the delay time from the direct<br />
sound until the reverb sound<br />
is heard.<br />
Time 0–127 Time length of reverberation<br />
HF Damp<br />
Balance D<br />
Reverb<br />
Balance D<br />
200–8000 Hz,<br />
BYPASS<br />
Adjusts the frequency above which<br />
the reverberant sound will be cut.<br />
As the frequency is set lower,<br />
more of the high frequencies<br />
will be cut, resulting in a softer<br />
and more muted reverberance.<br />
If you do not want to cut the<br />
high frequencies, set this parameter<br />
to BYPASS.<br />
Low Gain -15– +15 dB Gain of the low range<br />
High Gain -15– +15 dB Gain of the high range<br />
Balance D100:0W–D0:100W<br />
2-Band<br />
EQ<br />
Balance W<br />
Balance W<br />
2-Band<br />
EQ<br />
Level 0–127 Output Level<br />
L out<br />
R out<br />
Volume balance between the direct<br />
sound (D) and the reverb sound (W)<br />
Parameter Range Explanation<br />
Step 01–16<br />
Rate<br />
-24–+12 semi<br />
0.05–10.00 Hz, note<br />
Amount of pitch shift at each step<br />
(semitone units)<br />
Rate at which the 16-step sequence<br />
will cycle<br />
77
Effects List<br />
65: GATED REVERB<br />
This is a special type of reverb in which the reverberant sound is cut<br />
off before its natural length.<br />
fig.MFX-65<br />
L in<br />
R in<br />
Parameter Value Description<br />
Type<br />
Pre Delay<br />
Gate Time<br />
NORMAL, REVERSE,<br />
SWEEP1, SWEEP2<br />
0.0–100.0 ms<br />
5–500 ms<br />
Type of reverb<br />
NORMAL: conventional gated<br />
reverb<br />
REVERSE: backwards reverb<br />
SWEEP1: the reverberant<br />
sound moves from right to left<br />
SWEEP2: the reverberant<br />
sound moves from left to right<br />
Adjusts the delay time from the<br />
direct sound until the reverb<br />
sound is heard.<br />
Adjusts the time from when the reverb<br />
is heard until it disappears.<br />
Low Gain -15– +15 dB Gain of the low range<br />
High Gain -15– +15 dB Gain of the high range<br />
Balance<br />
Balance D<br />
Gated Reverb<br />
Balance D<br />
D100:0W–D0:100W<br />
2-Band<br />
EQ<br />
Balance W<br />
Balance W<br />
2-Band<br />
EQ<br />
Level 0–127 Output Level<br />
L out<br />
R out<br />
Volume balance between the direct<br />
sound (D) and the reverb<br />
sound (W)<br />
67: OVERDRIVE → FLANGER<br />
fig.MFX-67<br />
L in<br />
R in<br />
Parameter Value Description<br />
Overdrive Drive 0–127<br />
Overdrive Pan<br />
Flanger Pre<br />
Delay<br />
L64–63R<br />
0.0–100.0 ms<br />
Degree of distortion<br />
Also changes the volume.<br />
Stereo location of the overdrive<br />
sound<br />
Adjusts the delay time from when<br />
the direct sound begins until the<br />
flanger sound is heard.<br />
Flanger Rate 0.05–10.00 Hz, note Frequency of modulation<br />
Flanger Depth 0–127 Depth of modulation<br />
Flanger<br />
Feedback<br />
Flanger Balance<br />
Overdrive<br />
-98– +98%<br />
D100:0W–D0:100W<br />
Balance D<br />
Feedback<br />
Flanger<br />
Balance D<br />
Level 0–127 Output Level<br />
L out<br />
Balance W<br />
Balance W<br />
R out<br />
Adjusts the proportion of the<br />
flanger sound that is fed back into<br />
the effect. Negative (-) settings will<br />
invert the phase.<br />
Adjusts the volume balance between<br />
the sound that is sent<br />
through the flanger (W) and the<br />
sound that is not sent through the<br />
flanger (D).<br />
66: OVERDRIVE → CHORUS<br />
68: OVERDRIVE → DELAY<br />
fig.MFX-66<br />
L in<br />
R in<br />
Overdrive<br />
Balance D<br />
Chorus<br />
Balance D<br />
L out<br />
Balance W<br />
Balance W<br />
R out<br />
fig.MFX-68<br />
L in<br />
R in<br />
Overdrive<br />
Balance D<br />
Delay<br />
Feedback<br />
Balance D<br />
L out<br />
Balance W<br />
Balance W<br />
R out<br />
Parameter Value Description<br />
Overdrive Drive 0–127<br />
Overdrive Pan<br />
Chorus Pre<br />
Delay<br />
L64–63R<br />
0.0–100.0 ms<br />
Degree of distortion<br />
Also changes the volume.<br />
Stereo location of the overdrive<br />
sound<br />
Adjusts the delay time from the direct<br />
sound until the chorus sound is<br />
heard.<br />
Chorus Rate 0.05–10.00 Hz, note Frequency of modulation<br />
Chorus Depth 0–127 Depth of modulation<br />
Chorus Balance<br />
D100:0W–D0:100W<br />
Level 0–127 Output Level<br />
Adjusts the volume balance between<br />
the sound that is sent<br />
through the chorus (W) and the<br />
sound that is not sent through the<br />
chorus (D).<br />
Parameter Value Description<br />
Overdrive Drive 0–127<br />
Overdrive Pan<br />
Delay Time<br />
Delay<br />
Feedback<br />
Delay HF Damp<br />
Delay Balance<br />
L64–63R<br />
0–2600 ms, note<br />
-98– +98%<br />
200–8000 Hz,<br />
BYPASS<br />
D100:0W–D0:100W<br />
Level 0–127 Output Level<br />
Degree of distortion<br />
Also changes the volume.<br />
Stereo location of the overdrive<br />
sound<br />
Adjusts the delay time from the<br />
direct sound until the delay<br />
sound is heard.<br />
Adjusts the proportion of the delay<br />
sound that is fed back into the<br />
effect. Negative (-) settings will<br />
invert the phase.<br />
Adjusts the frequency above<br />
which sound fed back to the effect<br />
will be cut. If you do not want<br />
to cut the high frequencies, set<br />
this parameter to BYPASS.<br />
Adjusts the volume balance between<br />
the sound that is sent<br />
through the delay (W) and the<br />
sound that is not sent through the<br />
delay (D).<br />
78
Effects List<br />
69: DISTORTION → CHORUS<br />
The parameters are essentially the same as in “66: OVERDRIVE →<br />
CHORUS,” with the exception of the following two.<br />
Overdrive Drive → Distortion Drive, Overdrive Pan → Distortion Pan<br />
fig.MFX-69<br />
L in<br />
R in<br />
70: DISTORTION → FLANGER<br />
The parameters are essentially the same as in “67: OVERDRIVE →<br />
FLANGER,” with the exception of the following two.<br />
Overdrive Drive → Distortion Drive, Overdrive Pan → Distortion Pan<br />
fig.MFX-70<br />
L in<br />
R in<br />
71: DISTORTION → DELAY<br />
The parameters are essentially the same as in “68: OVERDRIVE →<br />
DELAY,” with the exception of the following two.<br />
Overdrive Drive → Distortion Drive, Overdrive Pan → Distortion Pan<br />
fig.MFX-71<br />
L in<br />
R in<br />
Distortion<br />
Distortion<br />
Distortion<br />
Balance D<br />
Chorus<br />
Balance D<br />
Balance D<br />
Feedback<br />
Flanger<br />
Balance D<br />
Balance D<br />
Delay<br />
Feedback<br />
Balance D<br />
L out<br />
Balance W<br />
Balance W<br />
R out<br />
L out<br />
Balance W<br />
Balance W<br />
R out<br />
L out<br />
Balance W<br />
Balance W<br />
R out<br />
Parameter Value Description<br />
Chorus Rate<br />
fig.MFX-73<br />
0.05–10.00 Hz,<br />
note<br />
Frequency of modulation<br />
Chorus Depth 0–127 Depth of modulation<br />
Chorus Balance<br />
D100:0W–<br />
D0:100W<br />
Level 0–127 Output Level<br />
73: ENHANCER → FLANGER<br />
L in<br />
R in<br />
Parameter Value Description<br />
Adjusts the volume balance between<br />
the sound that is sent through the chorus<br />
(W) and the sound that is not sent<br />
through the chorus (D).<br />
Enhancer Sens 0–127 Sensitivity of the enhancer<br />
Enhancer Mix 0–127<br />
Flanger Pre Delay<br />
Flanger Rate<br />
0.0–100.0 ms<br />
0.05–10.00 Hz,<br />
note<br />
Level of the overtones generated<br />
by the enhancer<br />
Adjusts the delay time from when<br />
the direct sound begins until the<br />
flanger sound is heard.<br />
Frequency of modulation<br />
Flanger Depth 0–127 Depth of modulation<br />
Flanger Feedback -98– +98%<br />
Flanger Balance<br />
Enhancer<br />
Enhancer<br />
Mix<br />
Mix<br />
D100:0W–<br />
D0:100W<br />
Balance D<br />
Feedback<br />
Flanger<br />
Balance D<br />
Level 0–127 Output Level<br />
L out<br />
Balance W<br />
Balance W<br />
R out<br />
Adjusts the proportion of the<br />
flanger sound that is fed back into<br />
the effect. Negative (-) settings will<br />
invert the phase.<br />
Adjusts the volume balance between<br />
the sound that is sent through the<br />
flanger (W) and the sound that is not<br />
sent through the flanger (D).<br />
72: ENHANCER → CHORUS<br />
fig.MFX-72<br />
L in<br />
Enhancer<br />
Mix<br />
Balance D<br />
Chorus<br />
L out<br />
Balance W<br />
Balance W<br />
R in<br />
Enhancer<br />
Mix<br />
Balance D<br />
R out<br />
Parameter Value Description<br />
Enhancer Sens 0–127 Sensitivity of the enhancer<br />
Enhancer Mix 0–127<br />
Chorus Pre Delay<br />
0.0–100.0 ms<br />
Level of the overtones generated<br />
by the enhancer<br />
Adjusts the delay time from the direct<br />
sound until the chorus sound is<br />
heard.<br />
79
Effects List<br />
74: ENHANCER → DELAY<br />
76: FLANGER → DELAY<br />
fig.MFX-74<br />
fig.MFX-76<br />
L in<br />
R in<br />
Enhancer<br />
Enhancer<br />
Mix<br />
Mix<br />
Balance D<br />
Delay<br />
Feedback<br />
Balance D<br />
L out<br />
Balance W<br />
Balance W<br />
R out<br />
L in<br />
R in<br />
Balance D<br />
Feedback<br />
Flanger<br />
Balance D<br />
Balance W<br />
Balance W<br />
Balance D<br />
Delay<br />
Feedback<br />
Balance D<br />
L out<br />
Balance W<br />
Balance W<br />
R out<br />
Parameter Value Description<br />
Enhancer Sens 0–127 Sensitivity of the enhancer<br />
Enhancer Mix 0–127<br />
Delay Time<br />
Delay<br />
Feedback<br />
Delay HF Damp<br />
Delay Balance<br />
fig.MFX-75<br />
0–2600 ms, note<br />
-98– +98%<br />
200–8000 Hz,<br />
BYPASS<br />
D100:0W–D0:100W<br />
Level 0–127 Output Level<br />
75: CHORUS → DELAY<br />
L in<br />
R in<br />
Balance D<br />
Balance W<br />
Chorus<br />
Balance W<br />
Balance D<br />
Level of the overtones generated<br />
by the enhancer<br />
Adjusts the delay time from the<br />
direct sound until the delay<br />
sound is heard.<br />
Adjusts the proportion of the delay<br />
sound that is fed back into the<br />
effect. Negative (-) settings will<br />
invert the phase.<br />
Adjusts the frequency above<br />
which sound fed back to the effect<br />
will be cut. If you do not want<br />
to cut the high frequencies, set<br />
this parameter to BYPASS.<br />
Adjusts the volume balance between<br />
the sound that is sent<br />
through the delay (W) and the<br />
sound that is not sent through the<br />
delay (D).<br />
Balance D<br />
Delay<br />
Feedback<br />
Balance D<br />
L out<br />
Balance W<br />
Balance W<br />
R out<br />
Parameter Value Description<br />
Flanger Pre Delay<br />
0.0–100.0 ms<br />
Adjusts the delay time from when<br />
the direct sound begins until the<br />
flanger sound is heard.<br />
Flanger Rate 0.05–10.00 Hz, note Frequency of modulation<br />
Flanger Depth 0–127 Depth of modulation<br />
Flanger Feedback -98– +98%<br />
Flanger Balance<br />
Delay Time<br />
Delay<br />
Feedback<br />
Delay HF Damp<br />
Delay<br />
Balance<br />
D100:0W–D0:100W<br />
0–2600 ms, note<br />
-98– +98%<br />
200–8000 Hz,<br />
BYPASS<br />
D100:0W–D0:100W<br />
Level 0–127 Output Level<br />
Adjusts the proportion of the<br />
flanger sound that is fed back into<br />
the effect. Negative (-) settings will<br />
invert the phase.<br />
Volume balance between the direct<br />
sound (D) and the flanger<br />
sound (W)<br />
Adjusts the delay time from the direct<br />
sound until the delay sound is<br />
heard.<br />
Adjusts the proportion of the delay<br />
sound that is fed back into the<br />
effect. Negative (-) settings will invert<br />
the phase.<br />
Adjusts the frequency above<br />
which sound fed back to the effect<br />
will be cut. If you do not want to<br />
cut the high frequencies, set this<br />
parameter to BYPASS.<br />
Adjusts the volume balance between<br />
the sound that is sent through the delay<br />
(W) and the sound that is not sent<br />
through the delay (D).<br />
Parameter Value Description<br />
Chorus Pre<br />
Delay<br />
0.0–100.0 ms<br />
Adjusts the delay time from the direct<br />
sound until the chorus sound is<br />
heard.<br />
Chorus Rate 0.05–10.00 Hz, note Frequency of modulation<br />
Chorus Depth 0–127 Depth of modulation<br />
Chorus Balance<br />
Delay Time<br />
Delay<br />
Feedback<br />
Delay HF Damp<br />
Delay<br />
Balance<br />
D100:0W–D0:100W<br />
0–2600 ms, note<br />
-98– +98%<br />
200–8000 Hz,<br />
BYPASS<br />
D100:0W–D0:100W<br />
Level 0–127 Output Level<br />
Volume balance between the direct<br />
sound (D) and the chorus<br />
sound (W)<br />
Adjusts the delay time from the direct<br />
sound until the delay sound is<br />
heard.<br />
Adjusts the proportion of the delay<br />
sound that is fed back into the effect.<br />
Negative (-) settings will invert<br />
the phase.<br />
Adjusts the frequency above which<br />
sound fed back to the effect will be<br />
cut. If you do not want to cut the<br />
high frequencies, set this parameter<br />
to BYPASS.<br />
Adjusts the volume balance between<br />
the sound that is sent<br />
through the delay (W) and the<br />
sound that is not sent through the<br />
delay (D).<br />
80
Effects List<br />
77: CHORUS → FLANGER<br />
fig.MFX-77<br />
78:<br />
SYMPATHETIC RESO<br />
(SYMPATHETIC RESONANCE)<br />
L in<br />
Balance D<br />
Balance W<br />
Chorus<br />
Balance W<br />
Balance D<br />
Feedback<br />
Flanger<br />
L out<br />
Balance W<br />
Balance W<br />
On an acoustic piano, holding down the damper pedal allows other<br />
strings to resonate in sympathy with the notes you play, creating rich<br />
and spacious resonances. This effect simulates these sympathetic<br />
resonances.<br />
fig.MFX-78<br />
R in<br />
Balance D<br />
Balance D<br />
R out<br />
L in<br />
3-Band<br />
EQ<br />
L out<br />
Parameter Value Description<br />
Chorus Pre<br />
Delay<br />
Chorus Rate<br />
0.0–100.0 ms<br />
0.05–10.00 Hz, note<br />
Adjusts the delay time from the direct<br />
sound until the chorus sound is heard.<br />
Modulation frequency of the chorus<br />
effect<br />
Chorus Depth 0–127 Modulation depth of the chorus effect<br />
Chorus Balance D100:0W–D0:100W<br />
Flanger Pre<br />
Delay<br />
Flanger Rate<br />
0.0–100.0 ms<br />
0.05–10.00 Hz, note<br />
Volume balance between the direct<br />
sound (D) and the chorus sound (W)<br />
Adjusts the delay time from when<br />
the direct sound begins until the<br />
flanger sound is heard.<br />
Modulation frequency of the flanger<br />
effect<br />
Flanger Depth 0–127 Modulation depth of the flanger effect<br />
Flanger<br />
Feedback<br />
Flanger Balance<br />
-98– +98%<br />
D100:0W–D0:100W<br />
Level 0–127 Output Level<br />
Adjusts the proportion of the flanger<br />
sound that is fed back into the effect.<br />
Negative (-) settings will invert<br />
the phase.<br />
Adjusts the volume balance between<br />
the sound that is sent through the<br />
flanger (W) and the sound that is not<br />
sent through the flanger (D).<br />
R in<br />
Parameter Range Explanation<br />
Depth 0–127 Depth of the effect<br />
Damper 0–127<br />
Pre LPF<br />
Pre HPF<br />
Peaking Freq<br />
Peaking Gain<br />
Peaking Q<br />
HF Damp<br />
LF Damp<br />
Lid 1–6<br />
16–15000 Hz,<br />
BYPASS<br />
BYPASS,<br />
16–15000 Hz<br />
200–8000 Hz<br />
-15– +15 dB<br />
0.5, 1.0, 2.0, 4.0,<br />
8.0<br />
16–15000 Hz,<br />
BYPASS<br />
BYPASS,<br />
16–15000 Hz<br />
Depth to which the damper pedal is<br />
pressed (controls the resonant<br />
sound)<br />
Frequency of the filter that cuts the<br />
high-frequency content of the input<br />
sound (BYPASS: no cut)<br />
Frequency of the filter that cuts the<br />
low-frequency content of the input<br />
sound (BYPASS: no cut)<br />
Frequency of the filter that boosts/<br />
cuts a specific frequency region of<br />
the input sound<br />
Amount of boost/cut produced by<br />
the filter at the specified frequency<br />
region of the input sound<br />
Width of the frequency region<br />
boosted/cut by the ‘Peaking Gain’<br />
parameter (larger values make the<br />
region narrower)<br />
Frequency at which the high-frequency<br />
content of the resonant<br />
sound will be cut (BYPASS: no cut)<br />
Frequency at which the low-frequency<br />
content of the resonant sound will<br />
be cut (BYPASS: no cut)<br />
This simulates the actual changes in<br />
sound that occur when the lid of a<br />
grand piano is set at different<br />
heights.<br />
EQ Low Freq 200, 400 Hz Frequency of the low-range EQ<br />
EQ Low Gain -15– +15 dB Amount of low-range boost/cut<br />
EQ Mid Freq 200–8000 Hz Frequency of the midrange EQ<br />
EQ Mid Gain -15– +15 dB Amount of midrange boost/cut<br />
EQ Mid Q<br />
EQ High Freq<br />
Sym. Resonance<br />
0.5, 1.0, 2.0, 4.0,<br />
8.0<br />
2000, 4000, 8000<br />
Hz<br />
Width of midrange (larger values<br />
make the region narrower)<br />
Frequency of the high-range EQ<br />
EQ High Gain -15–+15 dB Amount of high-range boost/cut<br />
Level 0–127 Output Level<br />
3-Band<br />
EQ<br />
R out<br />
81
Effects List<br />
Chorus Parameters<br />
The GW-8’s Chorus effect unit can also be used as a stereo delay unit.<br />
These settings allow you to select chorus or delay, and the characteristics of the selected effect type.<br />
Parameter Value Description<br />
Chorus Type<br />
01: CHORUS<br />
Rate<br />
0 (OFF),<br />
1 (CHORUS),<br />
2 (DELAY),<br />
3 (GM2 CHORUS)<br />
0.05–10.00 Hz,<br />
note<br />
Selects either Chorus or Delay.<br />
0 (OFF): Neither Chorus or Delay is<br />
used.<br />
1 (CHORUS): Chorus is used.<br />
2 (DELAY): Delay is used.<br />
3 (GM2 CHORUS): GM2 Chorus is<br />
used.<br />
Frequency of modulation<br />
Depth 0–127 Depth of modulation<br />
Pre Delay<br />
Feedback 0–127<br />
Filter Type<br />
0.0–100.0 ms<br />
OFF, LPF, HPF<br />
Adjusts the delay time from the direct<br />
sound until the chorus sound is heard.<br />
Adjusts the amount of the chorus sound<br />
that is fed back into the effect.<br />
Type of filter<br />
OFF: no filter is used<br />
LPF: cuts the frequency range above<br />
the Cutoff Freq<br />
HPF: cuts the frequency range below<br />
the Cutoff Freq<br />
Cutoff Freq 200–8000 Hz Basic frequency of the filter<br />
Phase 0–180˚ Spatial spread of the sound<br />
02: DELAY<br />
Delay Left<br />
Delay Right<br />
Delay Center<br />
Center Feedback<br />
HF Damp<br />
Left Level<br />
Right Level<br />
Center Level<br />
0–1000 ms, note<br />
-98–+98%<br />
200–8000 Hz,<br />
BYPASS<br />
03: GM2 CHORUS<br />
Adjusts the delay time from the direct<br />
sound until the delay sound is heard.<br />
Adjusts the proportion of the delay<br />
sound that is fed back into the effect.<br />
Negative (-) settings will invert the<br />
phase.<br />
Adjusts the frequency above which<br />
sound fed back to the effect will be cut.<br />
If you do not want to cut the high frequencies,<br />
set this parameter to BY-<br />
PASS.<br />
0–127 Volume of each delay sound<br />
note:<br />
If you specify the delay time as a note value, slowing down the<br />
tempo will not change the delay time beyond a certain length.<br />
This is because there is an upper limit for the delay time; if the<br />
delay time is specified as a note value and you slow down the<br />
tempo until this upper limit is reached, the delay time cannot<br />
change any further. This upper limit is the maximum value that<br />
can be specified when setting the delay time as a numerical<br />
value.<br />
fig.MFX-note2.e<br />
Sixty-fourth-note triplet Sixty-fourth note Thirty-second-note triplet<br />
Thirty-second note<br />
Whole note<br />
Double note<br />
Sixteenth-note triplet<br />
Dotted thirty-second note<br />
Sixteenth note Eighth-note triplet Dotted sixteenth note<br />
Eighth note<br />
Quarter note<br />
Half note<br />
Quarter-note triplet<br />
Half-note triplet<br />
Whole-note triplet<br />
Double-note triplet<br />
Dotted eighth note<br />
Dotted quarter note<br />
Dotted half note<br />
Dotted whole note<br />
Pre-LPF 0–7<br />
Cuts the high frequency range of the<br />
sound coming into the chorus.<br />
Higher values will cut more of the<br />
high frequencies.<br />
Level 0–127 Volume of the chorus sound<br />
Feedback 0–127<br />
Delay 0–127<br />
Adjusts the amount of the chorus sound<br />
that is fed back into the effect.<br />
Adjusts the delay time from the direct<br />
sound until the chorus sound is heard.<br />
Rate 0–127 Frequency of modulation<br />
Depth 0–127 Depth of modulation<br />
Send Level To<br />
Reverb<br />
0–127<br />
Adjusts the amount of chorus sound<br />
that will be sent to the reverb.<br />
82
Effects List<br />
Reverb Parameters<br />
These settings allow you to select the desired type of reverb, and its characteristics.<br />
Parameter Value Description<br />
Reverb<br />
Type<br />
01: REVERB<br />
Type<br />
Time 0–127<br />
HF Damp<br />
Delay<br />
Feedback<br />
0 (OFF),<br />
1 (REVERB),<br />
2 (SRV ROOM),<br />
3 (SRV HALL),<br />
4 (SRV PLATE),<br />
5 (GM2 REVERB)<br />
ROOM1,<br />
ROOM2,<br />
STAGE1,<br />
STAGE2, HALL1,<br />
HALL2, DELAY,<br />
PAN-DELAY<br />
200–8000 Hz,<br />
BYPASS<br />
0–127<br />
02: SRV ROOM<br />
03: SRV HALL<br />
04: SRV PLATE<br />
Type of reverb<br />
0 (OFF): Reverb is not used.<br />
1 (REVERB): Normal reverb<br />
2 (SRV ROOM): This simulates typical room<br />
acoustic reflections.<br />
3 (SRV HALL): This simulates typical concert<br />
hall acoustic reflections.<br />
4 (SRV PLATE): This simulates a reverb<br />
plate, a popular type of artificial reverb unit<br />
that derives its sound from the vibration of<br />
a metallic plate.<br />
5 (GM2 REVERB): GM2 Reverb<br />
Type of reverb/delay<br />
ROOM1: short reverb with high density<br />
ROOM2: short reverb with low density<br />
STAGE1: reverb with greater late reverberation<br />
STAGE2: reverb with strong early reflections<br />
HALL1: very clear-sounding reverb<br />
HALL2: rich reverb<br />
DELAY: conventional delay effect<br />
PAN-DELAY: delay effect with echoes that<br />
pan left and right<br />
Time length of reverberation<br />
(Type: ROOM1–HALL2)<br />
Delay time<br />
(Type: DELAY, PAN-DELAY)<br />
Adjusts the frequency above which the high-frequency<br />
content of the reverb sound will be cut,<br />
or “damped.” If you do not want to cut the high<br />
frequencies, set this parameter to BYPASS.<br />
Adjusts the amount of delay feedback when<br />
the Type setting is DELAY or PAN-DELAY.<br />
Amount of delay sound returned to the input<br />
(this setting is valid only if Type is DELAY or<br />
PAN-DELAY)<br />
Parameter Value Description<br />
05: GM2 REVERB<br />
Character 0–7<br />
Pre-LPF 0–7<br />
Type of reverb<br />
0–5: reverb<br />
6, 7: delay<br />
Cuts the high frequency range of the sound<br />
coming into the reverb.<br />
Higher values will cut more of the high frequencies.<br />
Level 0–127 Output level of reverberation<br />
Time 0–127 Time length of reverberation<br />
Delay<br />
Feedback<br />
0–127<br />
Adjusts the amount of the delay sound that is<br />
fed back into the effect when the Reverb Character<br />
setting is 6 or 7.<br />
Pre<br />
Delay<br />
0.0–100.0 ms<br />
Adjusts the delay time from the direct sound until<br />
the reverb sound is heard.<br />
Time 0–127 Time length of reverberation<br />
Size 1–8 Size of the simulated room or hall<br />
High Cut<br />
160 Hz–12.5<br />
kHz, BYPASS<br />
Density 0–127 Density of reverb<br />
Diffusion 0–127<br />
LF Damp<br />
Freq<br />
LF Damp<br />
Gain<br />
HF Damp<br />
Freq<br />
HF Damp<br />
Gain<br />
50–4000 Hz<br />
-36–0 dB<br />
4000 Hz–12.5<br />
kHz<br />
-36–0 dB<br />
Adjusts the frequency above which the highfrequency<br />
content of the reverb will be reduced.<br />
If you do not want to reduce the high<br />
frequencies, set this parameter to BYPASS.<br />
Adjusts the change in the density of the reverb over<br />
time. The higher the value, the more the density increases<br />
with time. (The effect of this setting is most<br />
pronounced with long reverb times.)<br />
Adjusts the frequency below which the low-frequency<br />
content of the reverb sound will be reduced,<br />
or “damped.”<br />
Adjusts the amount of damping applied to the<br />
frequency range selected with LF Damp. With<br />
a setting of “0,” there will be no reduction of<br />
the reverb’s low-frequency content.<br />
Adjusts the frequency above which the highfrequency<br />
content of the reverb sound will be<br />
reduced, or “damped.”<br />
Adjusts the amount of damping applied to the<br />
frequency range selected with HF Damp. With<br />
a setting of “0,” there will be no reduction of<br />
the reverb’s high-frequency content.<br />
83
Tone List<br />
No. Name Category MSB LSB PC<br />
1 Rich Grand AC.PIANO 87 64 1<br />
2 88ConcertPno AC.PIANO 87 64 2<br />
3 UltimatGrand AC.PIANO 87 64 3<br />
4 X Pure Grand AC.PIANO 87 64 4<br />
5 So true... AC.PIANO 87 64 5<br />
6 ConcertPiano AC.PIANO 87 64 6<br />
7 Warm Piano AC.PIANO 87 64 7<br />
8 ConcertGrand AC.PIANO 87 64 8<br />
9 Hall Concert AC.PIANO 87 64 9<br />
10 Bright Tune AC.PIANO 87 64 10<br />
11 Mellow Tune AC.PIANO 87 64 11<br />
12 Studio Grand AC.PIANO 87 64 12<br />
13 DryStudio88 AC.PIANO 87 64 13<br />
14 First Choice AC.PIANO 87 64 14<br />
15 Rokkin' pF AC.PIANO 87 64 15<br />
16 Dark Grand AC.PIANO 87 64 16<br />
17 SC Grand+Pad AC.PIANO 87 64 17<br />
18 Warm Pad Pno AC.PIANO 87 64 18<br />
19 SC Grand+Vox AC.PIANO 87 64 19<br />
20 Cicada Piano AC.PIANO 87 64 20<br />
21 X Piano +Str AC.PIANO 87 64 21<br />
22 Warm Str Pno AC.PIANO 87 64 22<br />
23 Grand Hall AC.PIANO 87 64 23<br />
24 Rapsody AC.PIANO 87 64 24<br />
25 JD-800 Piano AC.PIANO 87 64 25<br />
26 SA Dance Pno AC.PIANO 87 64 26<br />
27 SC E-Grand AC.PIANO 87 64 27<br />
28 Back E-Grand AC.PIANO 87 64 28<br />
29 SC Grand+FM AC.PIANO 87 64 29<br />
30 SC Blend Pno AC.PIANO 87 64 30<br />
31 Piano Oz AC.PIANO 87 64 31<br />
32 FX Piano AC.PIANO 87 64 32<br />
33 AmbientPiano AC.PIANO 87 64 33<br />
34 SC Pure EP EL.PIANO 87 64 34<br />
35 SC Trem EP EL.PIANO 87 64 35<br />
36 SC Phase EP EL.PIANO 87 64 36<br />
37 PhaseEPLayer EL.PIANO 87 64 37<br />
38 SC E.Piano EL.PIANO 87 64 38<br />
39 StageEP Trem EL.PIANO 87 64 39<br />
40 Back2the60s EL.PIANO 87 64 40<br />
41 Stage EP EL.PIANO 87 64 41<br />
42 Stage Phazer EL.PIANO 87 64 42<br />
43 StageCabinet EL.PIANO 87 64 43<br />
44 Tine EP EL.PIANO 87 64 44<br />
45 LEO EP EL.PIANO 87 64 45<br />
46 LonesomeRoad EL.PIANO 87 64 46<br />
47 Age'n'Tines EL.PIANO 87 64 47<br />
48 Brill TremEP EL.PIANO 87 64 48<br />
49 Crystal EP EL.PIANO 87 64 49<br />
50 Vintage Tine EL.PIANO 87 64 50<br />
51 Celestial EP EL.PIANO 87 64 51<br />
52 Psycho EP EL.PIANO 87 64 52<br />
53 Mk2 Stg phsr EL.PIANO 87 64 53<br />
54 Dreaming EP EL.PIANO 87 64 54<br />
55 Balladeer EL.PIANO 87 64 55<br />
56 Remember EL.PIANO 87 64 56<br />
57 Vibe EP EL.PIANO 87 64 57<br />
58 sin(EP) EL.PIANO 87 64 58<br />
59 SC Pure Wuly EL.PIANO 87 64 59<br />
60 SC Trem Wuly EL.PIANO 87 64 60<br />
61 Super Wurly EL.PIANO 87 64 61<br />
62 Wurly Trem EL.PIANO 87 64 62<br />
63 VelSpdWurly EL.PIANO 87 64 63<br />
64 Fonky Fonky EL.PIANO 87 64 64<br />
65 FM EP mix EL.PIANO 87 64 65<br />
66 FM-777 EL.PIANO 87 64 66<br />
67 FM EPad EL.PIANO 87 64 67<br />
68 EP Stack EL.PIANO 87 64 68<br />
69 EP Belle EL.PIANO 87 64 69<br />
70 80s EP EL.PIANO 87 64 70<br />
71 SA EPiano EL.PIANO 87 64 71<br />
72 BrillClav DB KEYBOARDS 87 64 72<br />
73 Cell Clav KEYBOARDS 87 64 73<br />
74 VntgClav KEYBOARDS 87 64 74<br />
75 Cutter Clavi KEYBOARDS 87 64 75<br />
76 Funky D KEYBOARDS 87 64 76<br />
77 Phase Clavi KEYBOARDS 87 64 77<br />
No. Name Category MSB LSB PC<br />
78 BPF Clavi Ph KEYBOARDS 87 64 78<br />
79 Pulse Clavi KEYBOARDS 87 64 79<br />
80 PWM Clav KEYBOARDS 87 64 80<br />
81 Funky Line KEYBOARDS 87 64 81<br />
82 Biting Clav KEYBOARDS 87 64 82<br />
83 Analog Clavi KEYBOARDS 87 64 83<br />
84 Reso Clavi KEYBOARDS 87 64 84<br />
85 Snappy Clav KEYBOARDS 87 64 85<br />
86 Over-D6 KEYBOARDS 87 64 86<br />
87 Harpsy Clavi KEYBOARDS 87 64 87<br />
88 SC Harpsi KEYBOARDS 87 64 88<br />
89 Amadeus KEYBOARDS 87 64 89<br />
90 SC Celesta KEYBOARDS 87 64 90<br />
91 Himalaya Ice BELL 87 64 91<br />
92 FM Syn Bell BELL 87 64 92<br />
93 D-50 Fantsia BELL 87 64 93<br />
94 Wine Glass BELL 87 64 94<br />
95 MuBox Pad BELL 87 64 95<br />
96 SC Bell 1 BELL 87 64 96<br />
97 FM Heaven BELL 87 64 97<br />
98 SC Glocken BELL 87 64 98<br />
99 Music Bells BELL 87 64 99<br />
100 SC Musicbox BELL 87 64 100<br />
101 Music Box 2 BELL 87 64 101<br />
102 Kalimbells BELL 87 64 102<br />
103 Step Ice BELL 87 64 103<br />
104 SC Bell 2 BELL 87 64 104<br />
105 Candy Bell BELL 87 64 105<br />
106 SC Chime BELL 87 64 106<br />
107 Bell Ring BELL 87 64 107<br />
108 Tubular Bell BELL 87 64 108<br />
109 5th Key BELL 87 64 109<br />
110 Bell Monitor BELL 87 64 110<br />
111 TubyRuesday BELL 87 64 111<br />
112 Vibrations MALLET 87 64 112<br />
113 SC Vibe MALLET 87 64 113<br />
114 Ringy Vibes MALLET 87 64 114<br />
115 Airie Vibez MALLET 87 64 115<br />
116 SC Marimba MALLET 87 64 116<br />
117 FM Wood MALLET 87 64 117<br />
118 SC Xylo MALLET 87 64 118<br />
119 Ethno Keys MALLET 87 64 119<br />
120 Synergy MLT MALLET 87 64 120<br />
121 Icy Keys MALLET 87 64 121<br />
122 Steel Drums MALLET 87 64 122<br />
123 50`SteelDrms MALLET 87 64 123<br />
124 Xylosizer MALLET 87 64 124<br />
125 Toy Box MALLET 87 64 125<br />
126 AirPluck MALLET 87 64 126<br />
127 HardRockORG1 ORGAN 87 64 127<br />
128 HardRockORG2 ORGAN 87 64 128<br />
129 SuperDistORG ORGAN 87 65 1<br />
130 SuperDistLd2 ORGAN 87 65 2<br />
131 FullDraw Org ORGAN 87 65 3<br />
132 StakDraw Org ORGAN 87 65 4<br />
133 FullStop Org ORGAN 87 65 5<br />
134 SC Perc Org ORGAN 87 65 6<br />
135 VKHold4Speed ORGAN 87 65 7<br />
136 X Perc Organ ORGAN 87 65 8<br />
137 Rocky Organ ORGAN 87 65 9<br />
138 Euro Organ ORGAN 87 65 10<br />
139 Rhythm'n'B ORGAN 87 65 11<br />
140 Phono Organ ORGAN 87 65 12<br />
141 LoFi PercOrg ORGAN 87 65 13<br />
142 Rochno Org ORGAN 87 65 14<br />
143 R&B Organ 1 ORGAN 87 65 15<br />
144 R&B Organ 2 ORGAN 87 65 16<br />
145 SC Dist Bee ORGAN 87 65 17<br />
146 60's Org 1 ORGAN 87 65 18<br />
147 60's Org 2 ORGAN 87 65 19<br />
148 Smoky Organ ORGAN 87 65 20<br />
149 SC SoapOpera ORGAN 87 65 21<br />
150 Crummy Organ ORGAN 87 65 22<br />
151 Chapel Organ ORGAN 87 65 23<br />
152 Grand Pipe ORGAN 87 65 24<br />
153 Pipe Org/Mod ORGAN 87 65 25<br />
154 Masked Opera ORGAN 87 65 26<br />
84
Tone List<br />
No. Name Category MSB LSB PC<br />
155 Mid Pipe Org ORGAN 87 65 27<br />
156 Vodkakordion ACCRDION 87 65 28<br />
157 Squeeze Me! ACCRDION 87 65 29<br />
158 Guinguette ACCRDION 87 65 30<br />
159 HarWonderca HARMONICA 87 65 31<br />
160 BluesHrp V/S HARMONICA 87 65 32<br />
161 Green Bullet HARMONICA 87 65 33<br />
162 SC Brt Nylon AC.GUITAR 87 65 34<br />
163 SoftNyln Gtr AC.GUITAR 87 65 35<br />
164 SC Nylon Gt AC.GUITAR 87 65 36<br />
165 Wet Nyln Gtr AC.GUITAR 87 65 37<br />
166 Pre Mass Hum AC.GUITAR 87 65 38<br />
167 Thick Steel AC.GUITAR 87 65 39<br />
168 Uncle Martin AC.GUITAR 87 65 40<br />
169 Wide Ac Gtr AC.GUITAR 87 65 41<br />
170 Comp Stl Gtr AC.GUITAR 87 65 42<br />
171 Stl Gtr Duo AC.GUITAR 87 65 43<br />
172 SC 12str Gtr AC.GUITAR 87 65 44<br />
173 So good ! AC.GUITAR 87 65 45<br />
174 StratSeq'nce EL.GUITAR 87 65 46<br />
175 Jazz Guitar EL.GUITAR 87 65 47<br />
176 DynoJazz Gtr EL.GUITAR 87 65 48<br />
177 Clean Gtr EL.GUITAR 87 65 49<br />
178 Crimson Gtr EL.GUITAR 87 65 50<br />
179 Plug n' Gig EL.GUITAR 87 65 51<br />
180 Kinda Kurt EL.GUITAR 87 65 52<br />
181 Nice Oct Gtr EL.GUITAR 87 65 53<br />
182 Strat Gtr EL.GUITAR 87 65 54<br />
183 Touch Drive DIST.GUITAR 87 65 55<br />
184 SC Chunk DIST.GUITAR 87 65 56<br />
185 Trem-o-Vibe DIST.GUITAR 87 65 57<br />
186 LP Dist DIST.GUITAR 87 65 58<br />
187 Hurtling Gtr DIST.GUITAR 87 65 59<br />
188 Searing COSM DIST.GUITAR 87 65 60<br />
189 SC Loud Gtr DIST.GUITAR 87 65 61<br />
190 SC Plugged!! DIST.GUITAR 87 65 62<br />
191 Punker 1 DIST.GUITAR 87 65 63<br />
192 SC PowerChd DIST.GUITAR 87 65 64<br />
193 Punker 2 DIST.GUITAR 87 65 65<br />
194 Larsen /Aft DIST.GUITAR 87 65 66<br />
195 Rockin' Dly DIST.GUITAR 87 65 67<br />
196 Sonic Ac Bs BASS 87 65 68<br />
197 Ulti Ac Bass BASS 87 65 69<br />
198 Downright Bs BASS 87 65 70<br />
199 Cmp'd Fng Bs BASS 87 65 71<br />
200 Sonic Fng Bs BASS 87 65 72<br />
201 Ultimo Bass BASS 87 65 73<br />
202 Roomy Bass BASS 87 65 74<br />
203 FingerMaster BASS 87 65 75<br />
204 All Round Bs BASS 87 65 76<br />
205 R&B Bs/Slide BASS 87 65 77<br />
206 Sonic Pck Bs BASS 87 65 78<br />
207 Thumb Up! BASS 87 65 79<br />
208 Tubby Mute BASS 87 65 80<br />
209 Chicken Bass BASS 87 65 81<br />
210 Snug Bass BASS 87 65 82<br />
211 Return2Base! BASS 87 65 83<br />
212 Chorus Bass BASS 87 65 84<br />
213 A Big Pick BASS 87 65 85<br />
214 Basement BASS 87 65 86<br />
215 SC Fretnot 1 BASS 87 65 87<br />
216 SC Fretnot 2 BASS 87 65 88<br />
217 RichFretless BASS 87 65 89<br />
218 NewAge Frtls BASS 87 65 90<br />
219 SlapBass1 BASS 87 65 91<br />
220 Slap2 w/Fx BASS 87 65 92<br />
221 Got Pop? BASS 87 65 93<br />
222 JBass v/Thmb BASS 87 65 94<br />
223 SC Slap Bass BASS 87 65 95<br />
224 X Slap Bass BASS 87 65 96<br />
225 Low Bass SYNTH BASS 87 65 97<br />
226 Mini Like! SYNTH BASS 87 65 98<br />
227 MC-404 Bass SYNTH BASS 87 65 99<br />
228 SC Rubber Bs SYNTH BASS 87 65 100<br />
229 SH-101 Bs 1 SYNTH BASS 87 65 101<br />
230 SC Syn Bass1 SYNTH BASS 87 65 102<br />
231 Juno-106 Bs SYNTH BASS 87 65 103<br />
No. Name Category MSB LSB PC<br />
232 Smooth Bass SYNTH BASS 87 65 104<br />
233 SC Flat Bs SYNTH BASS 87 65 105<br />
234 Foundation SYNTH BASS 87 65 106<br />
235 Punch MG 2 SYNTH BASS 87 65 107<br />
236 Electro Rubb SYNTH BASS 87 65 108<br />
237 R&B Bass 1 SYNTH BASS 87 65 109<br />
238 Enorjizor SYNTH BASS 87 65 110<br />
239 LowFat Bass SYNTH BASS 87 65 111<br />
240 Doze Bass SYNTH BASS 87 65 112<br />
241 DCO Bass SYNTH BASS 87 65 113<br />
242 Virtual RnBs SYNTH BASS 87 65 114<br />
243 Saw&MG Bass SYNTH BASS 87 65 115<br />
244 MG+SubOsc Bs SYNTH BASS 87 65 116<br />
245 R&B Bass 2 SYNTH BASS 87 65 117<br />
246 R&B Bass 3 SYNTH BASS 87 65 118<br />
247 Not a Bass SYNTH BASS 87 65 119<br />
248 ResoSyn Bs 1 SYNTH BASS 87 65 120<br />
249 SH-1 Bass SYNTH BASS 87 65 121<br />
250 SH-101 Bs 2 SYNTH BASS 87 65 122<br />
251 Punch MG 1 SYNTH BASS 87 65 123<br />
252 MKS-50 SynBs SYNTH BASS 87 65 124<br />
253 Gashed Bass SYNTH BASS 87 65 125<br />
254 Q Bass SYNTH BASS 87 65 126<br />
255 Super-G DX SYNTH BASS 87 65 127<br />
256 Kickin' Bass SYNTH BASS 87 65 128<br />
257 OilDrum Bass SYNTH BASS 87 66 1<br />
258 Dust Bass SYNTH BASS 87 66 2<br />
259 Glide-iator SYNTH BASS 87 66 3<br />
260 SC AcidPunch SYNTH BASS 87 66 4<br />
261 TBasic SYNTH BASS 87 66 5<br />
262 SC Unison Bs SYNTH BASS 87 66 6<br />
263 Detune Bass SYNTH BASS 87 66 7<br />
264 Lo Bass SYNTH BASS 87 66 8<br />
265 SC GarageBs1 SYNTH BASS 87 66 9<br />
266 SC GarageBs2 SYNTH BASS 87 66 10<br />
267 Sub Sonic SYNTH BASS 87 66 11<br />
268 SC Jungle Bs SYNTH BASS 87 66 12<br />
269 R&B Bass 4 SYNTH BASS 87 66 13<br />
270 Simply Basic SYNTH BASS 87 66 14<br />
271 Beepin Bass SYNTH BASS 87 66 15<br />
272 MC-TB Bass SYNTH BASS 87 66 16<br />
273 Acdg Bass SYNTH BASS 87 66 17<br />
274 Loco Voco SYNTH BASS 87 66 18<br />
275 Unplug it! SYNTH BASS 87 66 19<br />
276 S&H Bass SYNTH BASS 87 66 20<br />
277 Destroyed Bs SYNTH BASS 87 66 21<br />
278 SC Acid Bs SYNTH BASS 87 66 22<br />
279 Lo-Fi TB SYNTH BASS 87 66 23<br />
280 Drop Bass SYNTH BASS 87 66 24<br />
281 Big Mini SYNTH BASS 87 66 25<br />
282 Muffled MG SYNTH BASS 87 66 26<br />
283 Intrusive Bs SYNTH BASS 87 66 27<br />
284 Alpha SynBs SYNTH BASS 87 66 28<br />
285 TransistorBs SYNTH BASS 87 66 29<br />
286 Juno-60 Bass SYNTH BASS 87 66 30<br />
287 Storm Bass SYNTH BASS 87 66 31<br />
288 Alpha ResoBs SYNTH BASS 87 66 32<br />
289 SH-101 Vibe SYNTH BASS 87 66 33<br />
290 Fazee Bass SYNTH BASS 87 66 34<br />
291 Hi-Energy Bs SYNTH BASS 87 66 35<br />
292 SC Violin STRINGS 87 66 36<br />
293 Violin STRINGS 87 66 37<br />
294 Viola STRINGS 87 66 38<br />
295 SC Cello STRINGS 87 66 39<br />
296 Cello STRINGS 87 66 40<br />
297 Contrabass STRINGS 87 66 41<br />
298 Dolce Qrt STRINGS 87 66 42<br />
299 Chamber Str STRINGS 87 66 43<br />
300 Small Str STRINGS 87 66 44<br />
301 Marcato STRINGS 87 66 45<br />
302 Bright Str STRINGS 87 66 46<br />
303 String Ens STRINGS 87 66 47<br />
304 SonicStrings STRINGS 87 66 48<br />
305 Stringz 101 STRINGS 87 66 49<br />
306 Crossed Bows STRINGS 87 66 50<br />
307 Warm Strings STRINGS 87 66 51<br />
308 Stacc mp Str STRINGS 87 66 52<br />
85
Tone List<br />
No. Name Category MSB LSB PC<br />
309 Movie Scene STRINGS 87 66 53<br />
310 Hybrid Str 1 STRINGS 87 66 54<br />
311 Gang Strangs STRINGS 87 66 55<br />
312 Clustered!?! STRINGS 87 66 56<br />
313 Full Strings STRINGS 87 66 57<br />
314 X StrSection STRINGS 87 66 58<br />
315 Oct Strings STRINGS 87 66 59<br />
316 Sahara Str STRINGS 87 66 60<br />
317 Random Mood STRINGS 87 66 61<br />
318 X Hall Str STRINGS 87 66 62<br />
319 SC Slow Str STRINGS 87 66 63<br />
320 Hybrid Str 2 STRINGS 87 66 64<br />
321 Biggie Bows STRINGS 87 66 65<br />
322 Staccato VS STRINGS 87 66 66<br />
323 So Staccato STRINGS 87 66 67<br />
324 DelicatePizz STRINGS 87 66 68<br />
325 Vls PizzHall STRINGS 87 66 69<br />
326 Orch Pizz STRINGS 87 66 70<br />
327 Pizz'Stac VS STRINGS 87 66 71<br />
328 Mellow Tron STRINGS 87 66 72<br />
329 Tronic Str STRINGS 87 66 73<br />
330 Tape Memory STRINGS 87 66 74<br />
331 Wind & Str 1 ORCHESTRA 87 66 75<br />
332 Wind & Str 2 ORCHESTRA 87 66 76<br />
333 Farewell ORCHESTRA 87 66 77<br />
334 Orch & Horns ORCHESTRA 87 66 78<br />
335 Soft Orch 1 ORCHESTRA 87 66 79<br />
336 Soft Orch 2 ORCHESTRA 87 66 80<br />
337 Henry IX ORCHESTRA 87 66 81<br />
338 Ending Scene ORCHESTRA 87 66 82<br />
339 Symphonika ORCHESTRA 87 66 83<br />
340 Mix Hit 2 HIT&STAB 87 66 84<br />
341 Cheezy Movie HIT&STAB 87 66 85<br />
342 Philly Hit HIT&STAB 87 66 86<br />
343 Smear Hit 1 HIT&STAB 87 66 87<br />
344 Smear Hit 2 HIT&STAB 87 66 88<br />
345 Good Old Hit HIT&STAB 87 66 89<br />
346 Mix Hit 1 HIT&STAB 87 66 90<br />
347 Lo-Fi Hit HIT&STAB 87 66 91<br />
348 2ble Action HIT&STAB 87 66 92<br />
349 In da Cave HIT&STAB 87 66 93<br />
350 Housechord HIT&STAB 87 66 94<br />
351 Mod Chord HIT&STAB 87 66 95<br />
352 Dance Steam HIT&STAB 87 66 96<br />
353 Good Old Day WIND 87 66 97<br />
354 SC WindWood WIND 87 66 98<br />
355 Clarence.net WIND 87 66 99<br />
356 SC Oboe WIND 87 66 100<br />
357 Hall Oboe WIND 87 66 101<br />
358 English Horn WIND 87 66 102<br />
359 Bassoon WIND 87 66 103<br />
360 SC Flute FLUTE 87 66 104<br />
361 Piccolo FLUTE 87 66 105<br />
362 Andes Mood FLUTE 87 66 106<br />
363 HimalayaPipe FLUTE 87 66 107<br />
364 Solo Tp AC.BRASS 87 66 108<br />
365 Horn Chops AC.BRASS 87 66 109<br />
366 Flugel Horn AC.BRASS 87 66 110<br />
367 Spit Flugel AC.BRASS 87 66 111<br />
368 Mute Tp /Mod AC.BRASS 87 66 112<br />
369 Harmon Mute AC.BRASS 87 66 113<br />
370 Soft Tb AC.BRASS 87 66 114<br />
371 Solo Tb AC.BRASS 87 66 115<br />
372 Solo Bone AC.BRASS 87 66 116<br />
373 XP Horn AC.BRASS 87 66 117<br />
374 Grande Tuba AC.BRASS 87 66 118<br />
375 SC Tuba AC.BRASS 87 66 119<br />
376 StackTp Sect AC.BRASS 87 66 120<br />
377 Tb Section AC.BRASS 87 66 121<br />
378 TpTb Sect. AC.BRASS 87 66 122<br />
379 SC Brt Brass AC.BRASS 87 66 123<br />
380 SC BrsSect 1 AC.BRASS 87 66 124<br />
381 SC BrsSect 2 AC.BRASS 87 66 125<br />
382 Tpts & Tmbs AC.BRASS 87 66 126<br />
383 Brass & Sax AC.BRASS 87 66 127<br />
384 BrassPartOut AC.BRASS 87 66 128<br />
385 Simple Tutti AC.BRASS 87 67 1<br />
No. Name Category MSB LSB PC<br />
386 F.Horns Sect AC.BRASS 87 67 2<br />
387 Full sForza AC.BRASS 87 67 3<br />
388 Stereo Brass AC.BRASS 87 67 4<br />
389 Wide SynBrss SYNTH BRASS 87 67 5<br />
390 DetuneSawBrs SYNTH BRASS 87 67 6<br />
391 J-Pop Brass SYNTH BRASS 87 67 7<br />
392 80s Brass 1 SYNTH BRASS 87 67 8<br />
393 80s Brass 2 SYNTH BRASS 87 67 9<br />
394 Ana Brass SYNTH BRASS 87 67 10<br />
395 Soft Brass SYNTH BRASS 87 67 11<br />
396 JP8000 Brass SYNTH BRASS 87 67 12<br />
397 Sonic Brass SYNTH BRASS 87 67 13<br />
398 Syn Brass SYNTH BRASS 87 67 14<br />
399 Syn Brass 2 SYNTH BRASS 87 67 15<br />
400 Xpand Brass SYNTH BRASS 87 67 16<br />
401 Xpand Brass2 SYNTH BRASS 87 67 17<br />
402 Super Saw SYNTH BRASS 87 67 18<br />
403 SoftSynBrass SYNTH BRASS 87 67 19<br />
404 Silky JP SYNTH BRASS 87 67 20<br />
405 Silk Brs Pad SYNTH BRASS 87 67 21<br />
406 80s Brass 3 SYNTH BRASS 87 67 22<br />
407 X-Saw Brass1 SYNTH BRASS 87 67 23<br />
408 Cheesy Brass SYNTH BRASS 87 67 24<br />
409 Dual Saw Brs SYNTH BRASS 87 67 25<br />
410 Juno-106 Brs SYNTH BRASS 87 67 26<br />
411 Poly Brass SYNTH BRASS 87 67 27<br />
412 Stacked Brs SYNTH BRASS 87 67 28<br />
413 Soprano Sax SAX 87 67 29<br />
414 Solo Sop Sax SAX 87 67 30<br />
415 Alto mp SAX 87 67 31<br />
416 Alto Sax SAX 87 67 32<br />
417 Solo AltoSax SAX 87 67 33<br />
418 AltoLead Sax SAX 87 67 34<br />
419 XP TnrBrethy SAX 87 67 35<br />
420 Tenor Sax SAX 87 67 36<br />
421 Fat TenorSax SAX 87 67 37<br />
422 Baritone Sax SAX 87 67 38<br />
423 Sax Sect. 1 SAX 87 67 39<br />
424 Sax Sect. 2 SAX 87 67 40<br />
425 Horny Sax SAX 87 67 41<br />
426 FXM Alto Sax SAX 87 67 42<br />
427 Porta SoloLd HARD LEAD 87 67 43<br />
428 Porta Lead HARD LEAD 87 67 44<br />
429 Wind Syn Ld HARD LEAD 87 67 45<br />
430 SC Saw Ld 1 HARD LEAD 87 67 46<br />
431 SC Saw Ld 2 HARD LEAD 87 67 47<br />
432 Juno Lead HARD LEAD 87 67 48<br />
433 Follow Me HARD LEAD 87 67 49<br />
434 DC Triangle HARD LEAD 87 67 50<br />
435 Sqr-Seqence HARD LEAD 87 67 51<br />
436 Pure Square HARD LEAD 87 67 52<br />
437 Griggley HARD LEAD 87 67 53<br />
438 SC LegatoSaw HARD LEAD 87 67 54<br />
439 Lone Prophat HARD LEAD 87 67 55<br />
440 Dual Profs HARD LEAD 87 67 56<br />
441 Gwyo Press HARD LEAD 87 67 57<br />
442 Q DualSaws HARD LEAD 87 67 58<br />
443 Mogulator Ld HARD LEAD 87 67 59<br />
444 DirtyVoltage HARD LEAD 87 67 60<br />
445 Clean? HARD LEAD 87 67 61<br />
446 Distortion HARD LEAD 87 67 62<br />
447 SC Syn Ld HARD LEAD 87 67 63<br />
448 SynLead 0322 HARD LEAD 87 67 64<br />
449 X-Sink Delay HARD LEAD 87 67 65<br />
450 Destroyed Ld HARD LEAD 87 67 66<br />
451 Synchro Lead HARD LEAD 87 67 67<br />
452 Sync Ld Mono HARD LEAD 87 67 68<br />
453 SyncModulate HARD LEAD 87 67 69<br />
454 Distorted MG HARD LEAD 87 67 70<br />
455 SonicVampire HARD LEAD 87 67 71<br />
456 Blue Meanie HARD LEAD 87 67 72<br />
457 SC Dist Lead HARD LEAD 87 67 73<br />
458 Ringmod Lead HARD LEAD 87 67 74<br />
459 Stimulation HARD LEAD 87 67 75<br />
460 BodyElectric HARD LEAD 87 67 76<br />
461 Classic Lead HARD LEAD 87 67 77<br />
462 Feat Lead HARD LEAD 87 67 78<br />
86
Tone List<br />
No. Name Category MSB LSB PC<br />
463 Wire Sync HARD LEAD 87 67 79<br />
464 Epic Lead HARD LEAD 87 67 80<br />
465 Bag Lead HARD LEAD 87 67 81<br />
466 Wezcoast HARD LEAD 87 67 82<br />
467 HyperJupiter HARD LEAD 87 67 83<br />
468 Vintagolizer HARD LEAD 87 67 84<br />
469 C64 Lead HARD LEAD 87 67 85<br />
470 303 NRG HARD LEAD 87 67 86<br />
471 Cell SquLead SOFT LEAD 87 67 87<br />
472 SC Sqr Lead SOFT LEAD 87 67 88<br />
473 SH Sqr Lead SOFT LEAD 87 67 89<br />
474 Round SQR SOFT LEAD 87 67 90<br />
475 Windy Synth SOFT LEAD 87 67 91<br />
476 Sqr Diamond SOFT LEAD 87 67 92<br />
477 Sinetific SOFT LEAD 87 67 93<br />
478 PeakArpSine SOFT LEAD 87 67 94<br />
479 Howards Lead SOFT LEAD 87 67 95<br />
480 SoloNzPeaker SOFT LEAD 87 67 96<br />
481 Juno SftLd SOFT LEAD 87 67 97<br />
482 R&B TriLead SOFT LEAD 87 67 98<br />
483 R&B Tri Ld2 SOFT LEAD 87 67 99<br />
484 Jupiter Lead SOFT LEAD 87 67 100<br />
485 Dig-n-Duke SOFT LEAD 87 67 101<br />
486 SC SoftLead SOFT LEAD 87 67 102<br />
487 Mid Saw Ld SOFT LEAD 87 67 103<br />
488 X-Pulse Lead SOFT LEAD 87 67 104<br />
489 Mild 2-SawLd SOFT LEAD 87 67 105<br />
490 Mew Lead SOFT LEAD 87 67 106<br />
491 Shy Soloist SOFT LEAD 87 67 107<br />
492 Theramax SOFT LEAD 87 67 108<br />
493 Therasqu SOFT LEAD 87 67 109<br />
494 GR Lead SOFT LEAD 87 67 110<br />
495 SH-2 Lead SOFT LEAD 87 67 111<br />
496 SC ResoLead SOFT LEAD 87 67 112<br />
497 Modulated Ld SOFT LEAD 87 67 113<br />
498 Synthi Fizz SOFT LEAD 87 67 114<br />
499 Waspy Lead SOFT LEAD 87 67 115<br />
500 Pulstar Ld SOFT LEAD 87 67 116<br />
501 Naked Lead SOFT LEAD 87 67 117<br />
502 Alpha Spit SOFT LEAD 87 67 118<br />
503 Vliolin Lead SOFT LEAD 87 67 119<br />
504 Mod Lead SOFT LEAD 87 67 120<br />
505 JP Saw Lead SOFT LEAD 87 67 121<br />
506 Tristar SOFT LEAD 87 67 122<br />
507 Chubby Lead SOFT LEAD 87 67 123<br />
508 Sneaky Leady SOFT LEAD 87 67 124<br />
509 Shaku Lead SOFT LEAD 87 67 125<br />
510 Legato Tkno SOFT LEAD 87 67 126<br />
511 SCResoSaw Ld SOFT LEAD 87 67 127<br />
512 SliCed Lead SOFT LEAD 87 67 128<br />
513 Mini Growl SOFT LEAD 87 68 1<br />
514 Evangelized SOFT LEAD 87 68 2<br />
515 Air Lead SOFT LEAD 87 68 3<br />
516 Juno-D Maj7 TECHNO SYNTH 87 68 4<br />
517 Sweet House TECHNO SYNTH 87 68 5<br />
518 Periscope TECHNO SYNTH 87 68 6<br />
519 5th Voice TECHNO SYNTH 87 68 7<br />
520 HPF Sweep TECHNO SYNTH 87 68 8<br />
521 BPF Saw TECHNO SYNTH 87 68 9<br />
522 Moon Synth TECHNO SYNTH 87 68 10<br />
523 DelyResoSaws TECHNO SYNTH 87 68 11<br />
524 R-Trance TECHNO SYNTH 87 68 12<br />
525 Braatz... TECHNO SYNTH 87 68 13<br />
526 AllinOneRiff TECHNO SYNTH 87 68 14<br />
527 YZ Again TECHNO SYNTH 87 68 15<br />
528 Flazzy Lead TECHNO SYNTH 87 68 16<br />
529 Coffee Bee TECHNO SYNTH 87 68 17<br />
530 SC-303 TECHNO SYNTH 87 68 18<br />
531 Dance Saws TECHNO SYNTH 87 68 19<br />
532 AluminmWires TECHNO SYNTH 87 68 20<br />
533 Fred&Barney TECHNO SYNTH 87 68 21<br />
534 Electrostars TECHNO SYNTH 87 68 22<br />
535 LoFiSequence TECHNO SYNTH 87 68 23<br />
536 MelodicDrums TECHNO SYNTH 87 68 24<br />
537 TB Wah TECHNO SYNTH 87 68 25<br />
538 Waving TB303 TECHNO SYNTH 87 68 26<br />
539 Digi Seq TECHNO SYNTH 87 68 27<br />
No. Name Category MSB LSB PC<br />
540 Seq Saw TECHNO SYNTH 87 68 28<br />
541 Reso Seq Saw TECHNO SYNTH 87 68 29<br />
542 DetuneSeqSaw TECHNO SYNTH 87 68 30<br />
543 Technotribe TECHNO SYNTH 87 68 31<br />
544 Teethy Grit TECHNO SYNTH 87 68 32<br />
545 Repertition TECHNO SYNTH 87 68 33<br />
546 Killerbeez TECHNO SYNTH 87 68 34<br />
547 Acid Lead TECHNO SYNTH 87 68 35<br />
548 Tranceformer TECHNO SYNTH 87 68 36<br />
549 Anadroid TECHNO SYNTH 87 68 37<br />
550 Shroomy TECHNO SYNTH 87 68 38<br />
551 Noize R us TECHNO SYNTH 87 68 39<br />
552 Beep Melodie TECHNO SYNTH 87 68 40<br />
553 Morpher TECHNO SYNTH 87 68 41<br />
554 Uni-G TECHNO SYNTH 87 68 42<br />
555 Power Synth TECHNO SYNTH 87 68 43<br />
556 Hoover Again TECHNO SYNTH 87 68 44<br />
557 Alpha Said.. TECHNO SYNTH 87 68 45<br />
558 Ravers Awake TECHNO SYNTH 87 68 46<br />
559 Tekno Gargle TECHNO SYNTH 87 68 47<br />
560 Tranceiver TECHNO SYNTH 87 68 48<br />
561 Techno Dream TECHNO SYNTH 87 68 49<br />
562 Techno Pizz TECHNO SYNTH 87 68 50<br />
563 VirtualHuman PULSATING 87 68 51<br />
564 Strobot PULSATING 87 68 52<br />
565 SC Strobe PULSATING 87 68 53<br />
566 Strobe X PULSATING 87 68 54<br />
567 Rhythmic 5th PULSATING 87 68 55<br />
568 Cell Pad PULSATING 87 68 56<br />
569 DarknessSide PULSATING 87 68 57<br />
570 Shape of X PULSATING 87 68 58<br />
571 Sonic Dance PULSATING 87 68 59<br />
572 ShapeURMusic PULSATING 87 68 60<br />
573 Synth Force PULSATING 87 68 61<br />
574 Trance Split PULSATING 87 68 62<br />
575 Step Trance PULSATING 87 68 63<br />
576 Chop Synth PULSATING 87 68 64<br />
577 Euro Teuro PULSATING 87 68 65<br />
578 Auto Trance PULSATING 87 68 66<br />
579 Eureggae PULSATING 87 68 67<br />
580 Sorry4theDLY PULSATING 87 68 68<br />
581 Beat Pad PULSATING 87 68 69<br />
582 TMT Seq Pad PULSATING 87 68 70<br />
583 ForYourBreak PULSATING 87 68 71<br />
584 HPF Slicer PULSATING 87 68 72<br />
585 Sliced Choir PULSATING 87 68 73<br />
586 Digi-Doo PULSATING 87 68 74<br />
587 PanningFrmnt PULSATING 87 68 75<br />
588 Dirty Beat PULSATING 87 68 76<br />
589 Electrons PULSATING 87 68 77<br />
590 Protons PULSATING 87 68 78<br />
591 Brisk Vortex PULSATING 87 68 79<br />
592 SC Throbulax PULSATING 87 68 80<br />
593 SC Lonizer PULSATING 87 68 81<br />
594 diGital Pad PULSATING 87 68 82<br />
595 StepPitShift PULSATING 87 68 83<br />
596 Pad Pulses PULSATING 87 68 84<br />
597 Seq-Pad 2 PULSATING 87 68 85<br />
598 DSP Chaos PULSATING 87 68 86<br />
599 Dancefloor PULSATING 87 68 87<br />
600 Minor Thirds PULSATING 87 68 88<br />
601 FX World PULSATING 87 68 89<br />
602 Mr. Fourier PULSATING 87 68 90<br />
603 Nu Trance X PULSATING 87 68 91<br />
604 Auto 5thSaws PULSATING 87 68 92<br />
605 Cross Talk PULSATING 87 68 93<br />
606 Reanimation PULSATING 87 68 94<br />
607 VoX Chopper PULSATING 87 68 95<br />
608 Trevor's Pad PULSATING 87 68 96<br />
609 Fantomas Pad PULSATING 87 68 97<br />
610 Jazzy Arps PULSATING 87 68 98<br />
611 Keep Running PULSATING 87 68 99<br />
612 Step In PULSATING 87 68 100<br />
613 Echo Echo PULSATING 87 68 101<br />
614 Keep going PULSATING 87 68 102<br />
615 Arposphere PULSATING 87 68 103<br />
616 Voco Riff PULSATING 87 68 104<br />
87
Tone List<br />
No. Name Category MSB LSB PC<br />
617 Pulsator PULSATING 87 68 105<br />
618 Motion Bass PULSATING 87 68 106<br />
619 Sine Magic PULSATING 87 68 107<br />
620 Juno-D Slice PULSATING 87 68 108<br />
621 Pulsatron PULSATING 87 68 109<br />
622 Mega Sync PULSATING 87 68 110<br />
623 Passing by SYNTH FX 87 68 111<br />
624 Lazer Points SYNTH FX 87 68 112<br />
625 Retro Sci-Fi SYNTH FX 87 68 113<br />
626 Magic Chime SYNTH FX 87 68 114<br />
627 SC Try This! SYNTH FX 87 68 115<br />
628 New Planetz SYNTH FX 87 68 116<br />
629 Jet Noise SYNTH FX 87 68 117<br />
630 Chaos 2003 SYNTH FX 87 68 118<br />
631 Control Room SYNTH FX 87 68 119<br />
632 OutOf sortz SYNTH FX 87 68 120<br />
633 Scatter SYNTH FX 87 68 121<br />
634 Low Beat-S SYNTH FX 87 68 122<br />
635 WaitnOutside SYNTH FX 87 68 123<br />
636 Breath Echo SYNTH FX 87 68 124<br />
637 SoundStrange SYNTH FX 87 68 125<br />
638 Cosmic Pulse SYNTH FX 87 68 126<br />
639 Faked Piano SYNTH FX 87 68 127<br />
640 SC Crystal SYNTH FX 87 68 128<br />
641 ResoSweep Dn SYNTH FX 87 69 1<br />
642 Zap B3 & C4 SYNTH FX 87 69 2<br />
643 PolySweep Nz SYNTH FX 87 69 3<br />
644 Strange Land SYNTH FX 87 69 4<br />
645 S&H Voc SYNTH FX 87 69 5<br />
646 12th Planet SYNTH FX 87 69 6<br />
647 Scare SYNTH FX 87 69 7<br />
648 Hillside SYNTH FX 87 69 8<br />
649 Mod Scanner SYNTH FX 87 69 9<br />
650 SoundOnSound SYNTH FX 87 69 10<br />
651 Gasp SYNTH FX 87 69 11<br />
652 ResoSweep Up SYNTH FX 87 69 12<br />
653 Magic Wave SYNTH FX 87 69 13<br />
654 Shangri-La SYNTH FX 87 69 14<br />
655 CerealKiller SYNTH FX 87 69 15<br />
656 Cosmic Drops SYNTH FX 87 69 16<br />
657 Space Echo SYNTH FX 87 69 17<br />
658 Robot Sci-Fi SYNTH FX 87 69 18<br />
659 Stacc Heaven OTHER SYNTH 87 69 19<br />
660 Juno Poly OTHER SYNTH 87 69 20<br />
661 DigitalDream OTHER SYNTH 87 69 21<br />
662 Jucy Saw OTHER SYNTH 87 69 22<br />
663 Cue Tip OTHER SYNTH 87 69 23<br />
664 Waspy Synth OTHER SYNTH 87 69 24<br />
665 TB-Sequence OTHER SYNTH 87 69 25<br />
666 Europe Xpres OTHER SYNTH 87 69 26<br />
667 Squeepy OTHER SYNTH 87 69 27<br />
668 DOC Stack OTHER SYNTH 87 69 28<br />
669 Sweep Lead OTHER SYNTH 87 69 29<br />
670 80s Saws 1 OTHER SYNTH 87 69 30<br />
671 80s Saws 2 OTHER SYNTH 87 69 31<br />
672 80s Saws 3 OTHER SYNTH 87 69 32<br />
673 Digitaless OTHER SYNTH 87 69 33<br />
674 Flip Pad OTHER SYNTH 87 69 34<br />
675 Short Detune OTHER SYNTH 87 69 35<br />
676 forSequence OTHER SYNTH 87 69 36<br />
677 Memory Pluck OTHER SYNTH 87 69 37<br />
678 Metalic Bass OTHER SYNTH 87 69 38<br />
679 Aqua OTHER SYNTH 87 69 39<br />
680 Big Planet OTHER SYNTH 87 69 40<br />
681 Wet Atax OTHER SYNTH 87 69 41<br />
682 Houze Clavi OTHER SYNTH 87 69 42<br />
683 SuperSawSlow OTHER SYNTH 87 69 43<br />
684 Cell Trance OTHER SYNTH 87 69 44<br />
685 Trancy X OTHER SYNTH 87 69 45<br />
686 Trancy Synth OTHER SYNTH 87 69 46<br />
687 Juno Trnce OTHER SYNTH 87 69 47<br />
688 Saw Stack OTHER SYNTH 87 69 48<br />
689 Frgile Saws OTHER SYNTH 87 69 49<br />
690 Steamed Sawz OTHER SYNTH 87 69 50<br />
691 RAVtune OTHER SYNTH 87 69 51<br />
692 Bustranza OTHER SYNTH 87 69 52<br />
693 AftTch Ji-n OTHER SYNTH 87 69 53<br />
No. Name Category MSB LSB PC<br />
694 JP OctAttack OTHER SYNTH 87 69 54<br />
695 Oct Unison OTHER SYNTH 87 69 55<br />
696 Xtatic OTHER SYNTH 87 69 56<br />
697 Dirty Combo OTHER SYNTH 87 69 57<br />
698 FM's Attack OTHER SYNTH 87 69 58<br />
699 Digi-vox Syn OTHER SYNTH 87 69 59<br />
700 Fairy Factor OTHER SYNTH 87 69 60<br />
701 Tempest OTHER SYNTH 87 69 61<br />
702 X-Racer OTHER SYNTH 87 69 62<br />
703 TB Booster OTHER SYNTH 87 69 63<br />
704 Syn-Orch/Mod OTHER SYNTH 87 69 64<br />
705 Pressyn OTHER SYNTH 87 69 65<br />
706 High Five OTHER SYNTH 87 69 66<br />
707 4DaCommonMan OTHER SYNTH 87 69 67<br />
708 Orgaenia OTHER SYNTH 87 69 68<br />
709 Sleeper OTHER SYNTH 87 69 69<br />
710 Sugar Synth OTHER SYNTH 87 69 70<br />
711 Ice Palace OTHER SYNTH 87 69 71<br />
712 Story Harp OTHER SYNTH 87 69 72<br />
713 LostParadise OTHER SYNTH 87 69 73<br />
714 Magnetic 5th OTHER SYNTH 87 69 74<br />
715 DigimaX OTHER SYNTH 87 69 75<br />
716 Exhale OTHER SYNTH 87 69 76<br />
717 X-panda OTHER SYNTH 87 69 77<br />
718 Saw Keystep OTHER SYNTH 87 69 78<br />
719 4mant Cycle OTHER SYNTH 87 69 79<br />
720 Modular OTHER SYNTH 87 69 80<br />
721 Angel Pipes OTHER SYNTH 87 69 81<br />
722 Wired Synth OTHER SYNTH 87 69 82<br />
723 Analog Dream OTHER SYNTH 87 69 83<br />
724 DCO Bell Pad OTHER SYNTH 87 69 84<br />
725 Cell Fanta OTHER SYNTH 87 69 85<br />
726 Juno 5th OTHER SYNTH 87 69 86<br />
727 DoubleBubble OTHER SYNTH 87 69 87<br />
728 Cell Comb BRIGHT PAD 87 69 88<br />
729 Super SynStr BRIGHT PAD 87 69 89<br />
730 80s Str BRIGHT PAD 87 69 90<br />
731 PhaseStrings BRIGHT PAD 87 69 91<br />
732 Voyager BRIGHT PAD 87 69 92<br />
733 Cosmic Rays BRIGHT PAD 87 69 93<br />
734 Stringship BRIGHT PAD 87 69 94<br />
735 Fat Stacks BRIGHT PAD 87 69 95<br />
736 Strings R Us BRIGHT PAD 87 69 96<br />
737 Electric Pad BRIGHT PAD 87 69 97<br />
738 Neo RS-202 BRIGHT PAD 87 69 98<br />
739 OB Rezo Pad BRIGHT PAD 87 69 99<br />
740 Synthi Ens BRIGHT PAD 87 69 100<br />
741 Giant Sweep BRIGHT PAD 87 69 101<br />
742 Mod Dare BRIGHT PAD 87 69 102<br />
743 Cell Space BRIGHT PAD 87 69 103<br />
744 Digi-Swell BRIGHT PAD 87 69 104<br />
745 Sonic Surfer BRIGHT PAD 87 69 105<br />
746 New Year Day BRIGHT PAD 87 69 106<br />
747 Polar Morn BRIGHT PAD 87 69 107<br />
748 Distant Sun BRIGHT PAD 87 69 108<br />
749 PG Chimes BRIGHT PAD 87 69 109<br />
750 Saturn Rings BRIGHT PAD 87 69 110<br />
751 Brusky BRIGHT PAD 87 69 111<br />
752 2 Point 2 BRIGHT PAD 87 69 112<br />
753 2.2 Pad BRIGHT PAD 87 69 113<br />
754 two.two Pad BRIGHT PAD 87 69 114<br />
755 SaturnHolida BRIGHT PAD 87 69 115<br />
756 Neuro-Drone BRIGHT PAD 87 69 116<br />
757 In The Pass BRIGHT PAD 87 69 117<br />
758 Polar Night BRIGHT PAD 87 69 118<br />
759 Cell 5th BRIGHT PAD 87 69 119<br />
760 MistOver5ths BRIGHT PAD 87 69 120<br />
761 Gritty Pad BRIGHT PAD 87 69 121<br />
762 India Garden BRIGHT PAD 87 69 122<br />
763 BillionStars BRIGHT PAD 87 69 123<br />
764 Sand Pad BRIGHT PAD 87 69 124<br />
765 ReverseSweep BRIGHT PAD 87 69 125<br />
766 HugeSoundMod BRIGHT PAD 87 69 126<br />
767 Metal Swell BRIGHT PAD 87 69 127<br />
768 NuSoundtrack BRIGHT PAD 87 69 128<br />
769 Phat Strings BRIGHT PAD 87 70 1<br />
770 Soft OB Pad SOFT PAD 87 70 2<br />
88
Tone List<br />
No. Name Category MSB LSB PC<br />
771 SC Hollow SOFT PAD 87 70 3<br />
772 SC Sqr Pad SOFT PAD 87 70 4<br />
773 Silk Pad SOFT PAD 87 70 5<br />
774 WarmReso Pad SOFT PAD 87 70 6<br />
775 SC Soft Pad SOFT PAD 87 70 7<br />
776 Air Pad SOFT PAD 87 70 8<br />
777 Soft Breeze SOFT PAD 87 70 9<br />
778 JP Strings 1 SOFT PAD 87 70 10<br />
779 JP Strings 2 SOFT PAD 87 70 11<br />
780 DelayStrings SOFT PAD 87 70 12<br />
781 NorthStrings SOFT PAD 87 70 13<br />
782 SC Syn Str SOFT PAD 87 70 14<br />
783 Slow Saw Str SOFT PAD 87 70 15<br />
784 Syn Strings SOFT PAD 87 70 16<br />
785 OB Slow Str SOFT PAD 87 70 17<br />
786 Strings Pad SOFT PAD 87 70 18<br />
787 R&B SoftPad SOFT PAD 87 70 19<br />
788 Reso Pad SOFT PAD 87 70 20<br />
789 Phat Pad SOFT PAD 87 70 21<br />
790 SC PhaserPad SOFT PAD 87 70 22<br />
791 Mystic Str SOFT PAD 87 70 23<br />
792 Glass Organ SOFT PAD 87 70 24<br />
793 Wind Pad SOFT PAD 87 70 25<br />
794 Combination SOFT PAD 87 70 26<br />
795 HumanKindnes SOFT PAD 87 70 27<br />
796 BeautyPad SOFT PAD 87 70 28<br />
797 Atmospherics SOFT PAD 87 70 29<br />
798 Terra Nostra SOFT PAD 87 70 30<br />
799 OB Aaahs SOFT PAD 87 70 31<br />
800 Vulcano Pad SOFT PAD 87 70 32<br />
801 Cloud #9 SOFT PAD 87 70 33<br />
802 Organic Pad SOFT PAD 87 70 34<br />
803 Hum Pad SOFT PAD 87 70 35<br />
804 Vox Pad SOFT PAD 87 70 36<br />
805 Digital Aahs SOFT PAD 87 70 37<br />
806 Tri 5th Pad SOFT PAD 87 70 38<br />
807 SC MovinPad SOFT PAD 87 70 39<br />
808 Seq-Pad 1 SOFT PAD 87 70 40<br />
809 Follow SOFT PAD 87 70 41<br />
810 Consolament SOFT PAD 87 70 42<br />
811 Spacious Pad SOFT PAD 87 70 43<br />
812 JD Pop Pad SOFT PAD 87 70 44<br />
813 JP-8 Phase SOFT PAD 87 70 45<br />
814 Nu Epic Pad SOFT PAD 87 70 46<br />
815 Forever SOFT PAD 87 70 47<br />
816 Flange Dream SOFT PAD 87 70 48<br />
817 Evolution X SOFT PAD 87 70 49<br />
818 Heaven Pad SOFT PAD 87 70 50<br />
819 Angelis Pad SOFT PAD 87 70 51<br />
820 Juno-106 Str SOFT PAD 87 70 52<br />
821 JupiterMoves SOFT PAD 87 70 53<br />
822 Oceanic Pad SOFT PAD 87 70 54<br />
823 Fairy's Song SOFT PAD 87 70 55<br />
824 Borealis SOFT PAD 87 70 56<br />
825 JX Warm Pad SOFT PAD 87 70 57<br />
826 Analog Bgrnd SOFT PAD 87 70 58<br />
827 Choir Aahs 1 VOX 87 70 59<br />
828 Choir Aahs 2 VOX 87 70 60<br />
829 ChoirOoh/Aft VOX 87 70 61<br />
830 Angels Choir VOX 87 70 62<br />
831 Angelique VOX 87 70 63<br />
832 Gospel Oohs VOX 87 70 64<br />
833 Choir&Str VOX 87 70 65<br />
834 Aah Vox VOX 87 70 66<br />
835 Synvox VOX 87 70 67<br />
836 Uhmmm VOX 87 70 68<br />
837 Morning Star VOX 87 70 69<br />
838 Syn Opera VOX 87 70 70<br />
839 BeautifulOne VOX 87 70 71<br />
840 Ooze VOX 87 70 72<br />
841 Aerial Choir VOX 87 70 73<br />
842 3D Vox VOX 87 70 74<br />
843 Film Cue VOX 87 70 75<br />
844 Paradise VOX 87 70 76<br />
845 Sad ceremony VOX 87 70 77<br />
846 Lost Voices VOX 87 70 78<br />
847 Jazz Doos VOX 87 70 79<br />
No. Name Category MSB LSB PC<br />
848 Beat Vox VOX 87 70 80<br />
849 Talk 2 Me VOX 87 70 81<br />
850 FM Vox VOX 87 70 82<br />
851 Let's Talk! VOX 87 70 83<br />
852 Nice Kalimba PLUCKED 87 70 84<br />
853 Quiet River PLUCKED 87 70 85<br />
854 Teky Drop PLUCKED 87 70 86<br />
855 Pat is away PLUCKED 87 70 87<br />
856 SC Sitar 1 PLUCKED 87 70 88<br />
857 SC Sitar 2 PLUCKED 87 70 89<br />
858 Sitar on C PLUCKED 87 70 90<br />
859 Sitar Baby PLUCKED 87 70 91<br />
860 Elec Sitar PLUCKED 87 70 92<br />
861 Neo Sitar PLUCKED 87 70 93<br />
862 SaraswatiRvr PLUCKED 87 70 94<br />
863 Bosporus PLUCKED 87 70 95<br />
864 Santur Stack PLUCKED 87 70 96<br />
865 Aerial Harp PLUCKED 87 70 97<br />
866 Harpiness PLUCKED 87 70 98<br />
867 Skydiver PLUCKED 87 70 99<br />
868 TroubadorEns PLUCKED 87 70 100<br />
869 Jamisen PLUCKED 87 70 101<br />
870 Koto PLUCKED 87 70 102<br />
871 Monsoon PLUCKED 87 70 103<br />
872 Bend Koto PLUCKED 87 70 104<br />
873 LongDistance ETHNIC 87 70 105<br />
874 Ambi Shaku ETHNIC 87 70 106<br />
875 SC Lochscape ETHNIC 87 70 107<br />
876 SC PipeDream ETHNIC 87 70 108<br />
877 SC Far East ETHNIC 87 70 109<br />
878 Banjo FRETTED 87 70 110<br />
879 Timpani+Low PERCUSSION 87 70 111<br />
880 Timpani Roll PERCUSSION 87 70 112<br />
881 Bass Drum PERCUSSION 87 70 113<br />
882 Ambidextrous SOUND FX 87 70 114<br />
883 En-co-re SOUND FX 87 70 115<br />
884 Mobile Phone SOUND FX 87 70 116<br />
885 ElectroDisco BEAT&GROOVE 87 70 117<br />
886 Groove 007 BEAT&GROOVE 87 70 118<br />
887 In Da Groove BEAT&GROOVE 87 70 119<br />
888 Sweet 80s BEAT&GROOVE 87 70 120<br />
889 Autotrance BEAT&GROOVE 87 70 121<br />
890 Juno Pop BEAT&GROOVE 87 70 122<br />
891 Compusonic 1 BEAT&GROOVE 87 70 123<br />
892 Compusonic 2 BEAT&GROOVE 87 70 124<br />
893 80s Combo COMBINATION 87 70 125<br />
894 Analog Days COMBINATION 87 70 126<br />
895 Techno Craft COMBINATION 87 70 127<br />
896 Lounge Kit COMBINATION 87 70 128<br />
897 Piano 1 AC.PIANO 121 0 1<br />
898 Piano 1w AC.PIANO 121 1<br />
899 European Pf AC.PIANO 121 2<br />
900 Piano 2 AC.PIANO 121 0 2<br />
901 Piano 2w AC.PIANO 121 1<br />
902 Piano 3 AC.PIANO 121 0 3<br />
903 Piano 3w AC.PIANO 121 1<br />
904 Honky-tonk AC.PIANO 121 0 4<br />
905 Honky-tonk 2 AC.PIANO 121 4<br />
906 E.Piano 1 EL.PIANO 121 0 5<br />
907 St.Soft EP EL.PIANO 121 1<br />
908 FM+SA EP EL.PIANO 121 2<br />
909 Wurly EL.PIANO 121 3<br />
910 E.Piano 2 EL.PIANO 121 0 6<br />
911 Detuned EP 2 EL.PIANO 121 1<br />
912 St.FM EP EL.PIANO 121 2<br />
913 EP Legend EL.PIANO 121 3<br />
914 EP Phase EL.PIANO 121 4<br />
915 Harpsichord KEYBOARDS 121 0 7<br />
916 Coupled Hps. KEYBOARDS 121 1<br />
917 Harpsi.w KEYBOARDS 121 2<br />
918 Harpsi.o KEYBOARDS 121 3<br />
919 Clav. KEYBOARDS 121 0 8<br />
920 Pulse Clav KEYBOARDS 121 1<br />
921 Celesta KEYBOARDS 121 0 9<br />
922 Glockenspiel BELL 121 0 10<br />
923 Music Box BELL 121 0 11<br />
924 Vibraphone MALLET 121 0 12<br />
89
Tone List<br />
No. Name Category MSB LSB PC<br />
925 Vibraphone w MALLET 121 1<br />
926 Marimba MALLET 121 0 13<br />
927 Marimba w MALLET 121 1<br />
928 Xylophone MALLET 121 0 14<br />
929 Tubular-bell BELL 121 0 15<br />
930 Church Bell BELL 121 1<br />
931 Carillon BELL 121 2<br />
932 Santur PLUCKED 121 0 16<br />
933 Organ 1 ORGAN 121 0 17<br />
934 Trem. Organ ORGAN 121 1<br />
935 60's Organ 1 ORGAN 121 2<br />
936 70's E.Organ ORGAN 121 3<br />
937 Organ 2 ORGAN 121 0 18<br />
938 Chorus Or.2 ORGAN 121 1<br />
939 Perc. Organ ORGAN 121 2<br />
940 Organ 3 ORGAN 121 0 19<br />
941 Church Org.1 ORGAN 121 0 20<br />
942 Church Org.2 ORGAN 121 1<br />
943 Church Org.3 ORGAN 121 2<br />
944 Reed Organ ORGAN 121 0 21<br />
945 Puff Organ ORGAN 121 1<br />
946 Accordion Fr ACCRDION 121 0 22<br />
947 Accordion It ACCRDION 121 1<br />
948 Harmonica HARMONICA 121 0 23<br />
949 Bandoneon ACCRDION 121 0 24<br />
950 Nylon-str.Gt AC.GUITAR 121 0 25<br />
951 Ukulele AC.GUITAR 121 1<br />
952 Nylon Gt.o AC.GUITAR 121 2<br />
953 Nylon Gt.2 AC.GUITAR 121 3<br />
954 Steel-str.Gt AC.GUITAR 121 0 26<br />
955 12-str.Gt AC.GUITAR 121 1<br />
956 Mandolin AC.GUITAR 121 2<br />
957 Steel + Body AC.GUITAR 121 3<br />
958 Jazz Gt. EL.GUITAR 121 0 27<br />
959 Pedal Steel EL.GUITAR 121 1<br />
960 Clean Gt. EL.GUITAR 121 0 28<br />
961 Chorus Gt. EL.GUITAR 121 1<br />
962 Mid Tone GTR EL.GUITAR 121 2<br />
963 Muted Gt. EL.GUITAR 121 0 29<br />
964 Funk Pop EL.GUITAR 121 1<br />
965 Funk Gt.2 EL.GUITAR 121 2<br />
966 Jazz Man EL.GUITAR 121 3<br />
967 Overdrive Gt DIST.GUITAR 121 0 30<br />
968 Guitar Pinch DIST.GUITAR 121 1<br />
969 DistortionGt DIST.GUITAR 121 0 31<br />
970 Feedback Gt. DIST.GUITAR 121 1<br />
971 Dist Rtm GTR DIST.GUITAR 121 2<br />
972 Gt.Harmonics EL.GUITAR 121 0 32<br />
973 Gt. Feedback EL.GUITAR 121 1<br />
974 Acoustic Bs. BASS 121 0 33<br />
975 Fingered Bs. BASS 121 0 34<br />
976 Finger Slap BASS 121 1<br />
977 Picked Bass BASS 121 0 35<br />
978 Fretless Bs. BASS 121 0 36<br />
979 Slap Bass 1 BASS 121 0 37<br />
980 Slap Bass 2 BASS 121 0 38<br />
981 Synth Bass 1 SYNTH BASS 121 0 39<br />
982 SynthBass101 SYNTH BASS 121 1<br />
983 Acid Bass SYNTH BASS 121 2<br />
984 Clavi Bass SYNTH BASS 121 3<br />
985 Hammer SYNTH BASS 121 4<br />
986 Synth Bass 2 SYNTH BASS 121 0 40<br />
987 Beef FM Bass SYNTH BASS 121 1<br />
988 RubberBass 2 SYNTH BASS 121 2<br />
989 Attack Pulse SYNTH BASS 121 3<br />
990 Violin STRINGS 121 0 41<br />
991 Slow Violin STRINGS 121 1<br />
992 Viola STRINGS 121 0 42<br />
993 Cello STRINGS 121 0 43<br />
994 Contrabass STRINGS 121 0 44<br />
995 Tremolo Str STRINGS 121 0 45<br />
996 PizzicatoStr STRINGS 121 0 46<br />
997 Harp PLUCKED 121 0 47<br />
998 Yang Qin PLUCKED 121 1<br />
999 Timpani PERCUSSION 121 0 48<br />
1000 Strings STRINGS 121 0 49<br />
1001 Orchestra ORCHESTRA 121 1<br />
No. Name Category MSB LSB PC<br />
1002 60s Strings STRINGS 121 2<br />
1003 Slow Strings STRINGS 121 0 50<br />
1004 Syn.Strings1 STRINGS 121 0 51<br />
1005 Syn.Strings3 STRINGS 121 1<br />
1006 Syn.Strings2 SOFT PAD 121 0 52<br />
1007 Choir Aahs VOX 121 0 53<br />
1008 Chorus Aahs VOX 121 1<br />
1009 Voice Oohs VOX 121 0 54<br />
1010 Humming VOX 121 1<br />
1011 SynVox VOX 121 0 55<br />
1012 Analog Voice VOX 121 1<br />
1013 OrchestraHit HIT&STAB 121 0 56<br />
1014 Bass Hit HIT&STAB 121 1<br />
1015 6th Hit HIT&STAB 121 2<br />
1016 Euro Hit HIT&STAB 121 3<br />
1017 Trumpet AC.BRASS 121 0 57<br />
1018 Dark Trumpet AC.BRASS 121 1<br />
1019 Trombone AC.BRASS 121 0 58<br />
1020 Trombone 2 AC.BRASS 121 1<br />
1021 Bright Tb AC.BRASS 121 2<br />
1022 Tuba AC.BRASS 121 0 59<br />
1023 MutedTrumpet AC.BRASS 121 0 60<br />
1024 MuteTrumpet2 AC.BRASS 121 1<br />
1025 French Horns AC.BRASS 121 0 61<br />
1026 Fr.Horn 2 AC.BRASS 121 1<br />
1027 Brass 1 AC.BRASS 121 0 62<br />
1028 Brass 2 AC.BRASS 121 1<br />
1029 Synth Brass1 SYNTH BRASS 121 0 63<br />
1030 JP Brass SYNTH BRASS 121 1<br />
1031 Oct SynBrass SYNTH BRASS 121 2<br />
1032 Jump Brass SYNTH BRASS 121 3<br />
1033 Synth Brass2 SYNTH BRASS 121 0 64<br />
1034 SynBrass sfz SYNTH BRASS 121 1<br />
1035 Velo Brass 1 SYNTH BRASS 121 2<br />
1036 Soprano Sax SAX 121 0 65<br />
1037 Alto Sax SAX 121 0 66<br />
1038 Tenor Sax SAX 121 0 67<br />
1039 Baritone Sax SAX 121 0 68<br />
1040 Oboe WIND 121 0 69<br />
1041 English Horn WIND 121 0 70<br />
1042 Bassoon WIND 121 0 71<br />
1043 Clarinet WIND 121 0 72<br />
1044 Piccolo FLUTE 121 0 73<br />
1045 Flute FLUTE 121 0 74<br />
1046 Recorder FLUTE 121 0 75<br />
1047 Pan Flute FLUTE 121 0 76<br />
1048 Bottle Blow FLUTE 121 0 77<br />
1049 Shakuhachi ETHNIC 121 0 78<br />
1050 Whistle FLUTE 121 0 79<br />
1051 Ocarina FLUTE 121 0 80<br />
1052 Square Wave HARD LEAD 121 0 81<br />
1053 MG Square HARD LEAD 121 1<br />
1054 2600 Sine HARD LEAD 121 2<br />
1055 Saw Wave HARD LEAD 121 0 82<br />
1056 OB2 Saw HARD LEAD 121 1<br />
1057 Doctor Solo HARD LEAD 121 2<br />
1058 Natural Lead HARD LEAD 121 3<br />
1059 SequencedSaw HARD LEAD 121 4<br />
1060 Syn.Calliope SOFT LEAD 121 0 83<br />
1061 Chiffer Lead SOFT LEAD 121 0 84<br />
1062 Charang HARD LEAD 121 0 85<br />
1063 Wire Lead HARD LEAD 121 1<br />
1064 Solo Vox SOFT LEAD 121 0 86<br />
1065 5th Saw Wave HARD LEAD 121 0 87<br />
1066 Bass & Lead HARD LEAD 121 0 88<br />
1067 Delayed Lead HARD LEAD 121 1<br />
1068 Fantasia OTHER SYNTH 121 0 89<br />
1069 Warm Pad SOFT PAD 121 0 90<br />
1070 Sine Pad SOFT PAD 121 1<br />
1071 Polysynth OTHER SYNTH 121 0 91<br />
1072 Space Voice VOX 121 0 92<br />
1073 Itopia VOX 121 1<br />
1074 Bowed Glass SOFT PAD 121 0 93<br />
1075 Metal Pad BRIGHT PAD 121 0 94<br />
1076 Halo Pad BRIGHT PAD 121 0 95<br />
1077 Sweep Pad SOFT PAD 121 0 96<br />
1078 Ice Rain OTHER SYNTH 121 0 97<br />
90
Tone List<br />
No. Name Category MSB LSB PC<br />
1079 Soundtrack SOFT PAD 121 0 98<br />
1080 Crystal BELL 121 0 99<br />
1081 Syn Mallet BELL 121 1<br />
1082 Atmosphere AC.GUITAR 121 0 100<br />
1083 Brightness OTHER SYNTH 121 0 101<br />
1084 Goblin PULSATING 121 0 102<br />
1085 Echo Drops BRIGHT PAD 121 0 103<br />
1086 Echo Bell BRIGHT PAD 121 1<br />
1087 Echo Pan BRIGHT PAD 121 2<br />
1088 Star Theme BRIGHT PAD 121 0 104<br />
1089 Sitar PLUCKED 121 0 105<br />
1090 Sitar 2 PLUCKED 121 1<br />
1091 Banjo FRETTED 121 0 106<br />
1092 Shamisen PLUCKED 121 0 107<br />
1093 Koto PLUCKED 121 0 108<br />
1094 Taisho Koto PLUCKED 121 1<br />
1095 Kalimba PLUCKED 121 0 109<br />
1096 Bagpipe ETHNIC 121 0 110<br />
1097 Fiddle STRINGS 121 0 111<br />
1098 Shanai ETHNIC 121 0 112<br />
1099 Tinkle Bell BELL 121 0 113<br />
1100 Agogo PERCUSSION 121 0 114<br />
1101 Steel Drums MALLET 121 0 115<br />
1102 Woodblock PERCUSSION 121 0 116<br />
1103 Castanets PERCUSSION 121 1<br />
1104 Taiko PERCUSSION 121 0 117<br />
1105 Concert BD PERCUSSION 121 1<br />
1106 Melo. Tom 1 PERCUSSION 121 0 118<br />
1107 Melo. Tom 2 PERCUSSION 121 1<br />
1108 Synth Drum PERCUSSION 121 0 119<br />
1109 808 Tom PERCUSSION 121 1<br />
1110 Elec Perc PERCUSSION 121 1<br />
1111 Reverse Cym. PERCUSSION 121 0 120<br />
1112 Gt.FretNoise AC.GUITAR 121 0 121<br />
1113 Gt.Cut Noise AC.GUITAR 121 1<br />
1114 String Slap AC.GUITAR 121 2<br />
1115 Breath Noise SYNTH FX 121 0 122<br />
1116 Fl.Key Click SYNTH FX 121 1<br />
1117 Seashore SOUND FX 121 0 123<br />
1118 Rain SOUND FX 121 1<br />
1119 Thunder SOUND FX 121 2<br />
1120 Wind SOUND FX 121 3<br />
1121 Stream SOUND FX 121 4<br />
1122 Bubble SOUND FX 121 5<br />
1123 Bird SOUND FX 121 0 124<br />
1124 Dog SOUND FX 121 1<br />
1125 Horse-Gallop SOUND FX 121 2<br />
1126 Bird 2 SOUND FX 121 3<br />
1127 Telephone 1 SOUND FX 121 0 125<br />
1128 Telephone 2 SOUND FX 121 1<br />
1129 DoorCreaking SOUND FX 121 2<br />
1130 Door SOUND FX 121 3<br />
1131 Scratch SOUND FX 121 4<br />
1132 Wind Chimes SOUND FX 121 5<br />
1133 Helicopter SOUND FX 121 0 126<br />
1134 Car-Engine SOUND FX 121 1<br />
1135 Car-Stop SOUND FX 121 2<br />
1136 Car-Pass SOUND FX 121 3<br />
1137 Car-Crash SOUND FX 121 4<br />
1138 Siren SOUND FX 121 5<br />
1139 Train SOUND FX 121 6<br />
1140 Jetplane SOUND FX 121 7<br />
1141 Starship SOUND FX 121 8<br />
1142 Burst Noise SOUND FX 121 9<br />
1143 Applause SOUND FX 121 0 127<br />
1144 Laughing SOUND FX 121 1<br />
1145 Screaming SOUND FX 121 2<br />
1146 Punch SOUND FX 121 3<br />
1147 Heart Beat SOUND FX 121 4<br />
1148 Footsteps SOUND FX 121 5<br />
1149 Gun Shot SOUND FX 121 0 128<br />
1150 Machine Gun SOUND FX 121 1<br />
1151 Lasergun SOUND FX 121 2<br />
1152 Explosion SOUND FX 121 3<br />
1153 GW Std Kit RHYTHM 86 64 1<br />
1154 WD Std Kit RHYTHM 86 64 2<br />
1155 LD Std Kit RHYTHM 86 64 3<br />
No. Name Category MSB LSB PC<br />
1156 TY Std Kit RHYTHM 86 64 4<br />
1157 StandardKit1 RHYTHM 86 64 5<br />
1158 StandardKit2 RHYTHM 86 64 6<br />
1159 StandardKit3 RHYTHM 86 64 7<br />
1160 Rock Kit 1 RHYTHM 86 64 8<br />
1161 Rock Kit 2 RHYTHM 86 64 9<br />
1162 Brush Jz Kit RHYTHM 86 64 10<br />
1163 Orch Kit RHYTHM 86 64 11<br />
1164 909 808 Kit RHYTHM 86 64 12<br />
1165 Limiter Kit RHYTHM 86 64 13<br />
1166 HipHop Kit 1 RHYTHM 86 64 14<br />
1167 R&B Kit RHYTHM 86 64 15<br />
1168 HiFi R&B Kit RHYTHM 86 64 16<br />
1169 Machine Kit1 RHYTHM 86 64 17<br />
1170 Kit-Euro:POP RHYTHM 86 64 18<br />
1171 House Kit RHYTHM 86 64 19<br />
1172 Nu Technica RHYTHM 86 64 20<br />
1173 Machine Kit2 RHYTHM 86 64 21<br />
1174 ArtificalKit RHYTHM 86 64 22<br />
1175 Noise Kit RHYTHM 86 64 23<br />
1176 Kick Menu RHYTHM 86 64 24<br />
1177 Snare Menu RHYTHM 86 64 25<br />
1178 Snr/Rim Menu RHYTHM 86 64 26<br />
1179 HiHat Menu RHYTHM 86 64 27<br />
1180 Tom Menu RHYTHM 86 64 28<br />
1181 Clp&Cym&Hit RHYTHM 86 64 29<br />
1182 FX/SFX Menu RHYTHM 86 64 30<br />
1183 Percussion RHYTHM 86 64 31<br />
1184 Scrh&Voi&Wld RHYTHM 86 64 32<br />
1185 GM2 STANDARD RHYTHM 120 0 1<br />
1186 GM2 ROOM RHYTHM 120 0 9<br />
1187 GM2 POWER RHYTHM 120 0 17<br />
1188 GM2 ELECTRIC RHYTHM 120 0 25<br />
1189 GM2 ANALOG RHYTHM 120 0 26<br />
1190 GM2 JAZZ RHYTHM 120 0 33<br />
1191 GM2 BRUSH RHYTHM 120 0 41<br />
1192 GM2 ORCHSTRA RHYTHM 120 0 49<br />
1193 GM2 SFX RHYTHM 120 0 57<br />
91
Rhythm Set List<br />
Preset Group<br />
Tone<br />
No<br />
Name<br />
1153 GW Std Kit<br />
1154 WD Std Kit<br />
1155 LD Std Kit<br />
1156 TY Std Kit<br />
1157 StandardKit1<br />
1158 StandardKit2<br />
1159 StandardKit3<br />
1160 Rock Kit 1<br />
1161 Rock Kit 2<br />
1162 Brush Jz Kit<br />
1163 Orch Kit<br />
1164 909 808 Kit<br />
1165 Limiter Kit<br />
1166 HipHop Kit 1<br />
1167 R&B Kit<br />
1168 HiFi R&B Kit<br />
1169 Machine Kit1<br />
1170 Kit-Euro:POP<br />
1171 House Kit<br />
1172 Nu Technica<br />
1173 Machine Kit2<br />
1174 ArtificalKit<br />
1175 Noise Kit<br />
1176 Kick Menu<br />
1177 Snare Menu<br />
1178 Snr/Rim Menu<br />
1179 HiHat Menu<br />
1180 Tom Menu<br />
1181 Clp&Cym&Hit<br />
1182 FX/SFX Menu<br />
1183 Percussion<br />
1184 Scrh&Voi&Wld<br />
GM Group<br />
Tone<br />
No<br />
Name<br />
1185 GM2 STANDARD<br />
1186 GM2 ROOM<br />
1187 GM2 POWER<br />
1188 GM2 ELECTRIC<br />
1189 GM2 ANALOG<br />
1190 GM2 JAZZ<br />
1191 GM2 BRUSH<br />
1192 GM2 ORCHSTRA<br />
1193 GM2 SFX<br />
92
Rhythm Set List<br />
Preset Group<br />
Preset:<br />
Note No.<br />
28<br />
29<br />
30<br />
31<br />
32<br />
33<br />
34<br />
35<br />
C2 36<br />
37<br />
38<br />
39<br />
40<br />
41<br />
42<br />
43<br />
44<br />
45<br />
46<br />
47<br />
C3 48<br />
49<br />
50<br />
51<br />
52<br />
53<br />
54<br />
55<br />
56<br />
57<br />
58<br />
59<br />
C4 60<br />
61<br />
62<br />
63<br />
64<br />
65<br />
66<br />
67<br />
68<br />
69<br />
70<br />
71<br />
C5 72<br />
73<br />
74<br />
75<br />
76<br />
77<br />
78<br />
79<br />
80<br />
81<br />
82<br />
83<br />
C6 84<br />
85<br />
86<br />
87<br />
88<br />
89<br />
90<br />
91<br />
92<br />
93<br />
94<br />
95<br />
C7 96<br />
97<br />
98<br />
99<br />
100<br />
101<br />
102<br />
103<br />
1153 1154 1155 1156 1157 1158<br />
GW Std Kit WD Std Kit LD Std Kit TY Std Kit StandardKit1 StandardKit2<br />
Dance Kick<br />
Dry Kick 1<br />
Snr Roll<br />
Power Kick<br />
Amb.Snr 2<br />
Power Kick<br />
Reg.PHH<br />
Reg.Kick<br />
SF Kick 1<br />
SF CStk<br />
SF Snr<br />
SF Snr Gst<br />
SF Rim<br />
RR F.Tom<br />
Reg.CHH 1<br />
SF L.Tom<br />
Reg.CHH 2<br />
SF M.Tom<br />
Reg.OHH<br />
SF MT Flm<br />
SF H.Tom<br />
Crash Cym1a<br />
SF HT Flm<br />
Rock Ride 1<br />
China Cymbal<br />
Splash Cym<br />
Tamborine2<br />
Rock Crash 1<br />
Cowbell3<br />
Crash Cym1b<br />
Cowbell2 Lng<br />
Rock Ride 2<br />
Conga 2H Mt<br />
Conga 2L Mt<br />
Conga 2H Slp<br />
Conga 2H Op<br />
Conga 2L Op<br />
Timbare 4<br />
Timbare 3<br />
Agogo 2 Hi<br />
Agogo 2 Low<br />
Cabasa 2<br />
Shaker 2<br />
Whistle Shrt<br />
Whistle Long<br />
Guiro 2 Up<br />
Guiro 2 Down<br />
Claves 2<br />
Wood Block2H<br />
Wood Block2L<br />
Cuica 2 Low<br />
Cuica 2 Hi<br />
Triangle Mt<br />
Triangle Op<br />
Cabasa2 Cut<br />
DigiSpectrum<br />
Wind Chime<br />
Wood Block2M<br />
Cajon 2<br />
ConcertBD<br />
R&B Kick<br />
Dry Kick 2<br />
Old Kick<br />
Jazz Doos<br />
Agogo Noise<br />
Rock OHH<br />
JD Anklungs<br />
Rock OHH<br />
Cajon 3<br />
Cajon 1<br />
Mix Kick 4<br />
Gospel Clap<br />
Bright Clap<br />
Rock Rd Cup<br />
Cowbell<br />
Crash Cym 2<br />
Dance Kick<br />
Dry Kick 1<br />
Snr Roll<br />
Power Kick<br />
Amb.Snr 2<br />
Reg.Kick 2<br />
Reg.PHH<br />
Reg.Kick 1<br />
WD Kick<br />
WD CStk<br />
WD Snr<br />
SF Snr Gst<br />
WD Rim<br />
RR F.Tom<br />
Reg.CHH 1<br />
TY L.Tom<br />
Reg.CHH 2<br />
TY M.Tom<br />
Reg.OHH<br />
TY M.Tom<br />
TY H.Tom<br />
Crash Cym1a<br />
TY H.Tom<br />
Rock Ride 1<br />
China Cymbal<br />
Splash Cym<br />
Tamborine 3<br />
Rock Crash 1<br />
Cowbell3<br />
Crash Cym1b<br />
Cowbell2 Lng<br />
Rock Ride 2<br />
Conga Hi Mt<br />
Conga Lo Mt<br />
Conga Hi Slp<br />
Conga Hi Op<br />
Conga Lo Op<br />
Timbale Hi<br />
Timbale Low<br />
Mild Agogo H<br />
Mild Agogo L<br />
Cabasa Up<br />
Maracas<br />
Whistle Shrt<br />
Whistle Long<br />
Guiro Short<br />
Guiro Long<br />
Claves<br />
Wood Block H<br />
Wood Block L<br />
Cuica Mute<br />
Cuica Open<br />
Triangle Mt<br />
Triangle Op<br />
Cabasa Cut<br />
DigiSpectrum<br />
Wind Chime<br />
Wood Block M<br />
Cajon 2<br />
ConcertBD<br />
R&B Kick<br />
Dry Kick 2<br />
Old Kick<br />
Jazz Doos<br />
Agogo Noise<br />
Rock OHH<br />
JD Anklungs<br />
Rock OHH<br />
Cajon 3<br />
Cajon 1<br />
Mix Clap<br />
Gospel Clap<br />
Bright Clap<br />
Rock Rd Cup<br />
Cowbell<br />
Crash Cym 2<br />
Dance Kick<br />
Dry Kick 1<br />
Snr Roll<br />
Power Kick<br />
Amb.Snr 2<br />
Reg.Kick 2<br />
Reg.PHH<br />
Reg.Kick 1<br />
LD Kick<br />
LD CStk<br />
LD Snr<br />
Reg.Snr Gst<br />
LD Rim<br />
RR F.Tom<br />
Reg.CHH 1<br />
LD L.Tom<br />
Reg.CHH 2<br />
LD M.Tom<br />
Reg.OHH<br />
LD M.Tom<br />
LD H.Tom<br />
Crash Cym1a<br />
LD H.Tom<br />
Rock Ride 1<br />
China Cymbal<br />
Splash Cym<br />
Tamborine 3<br />
Rock Crash 1<br />
Cowbell3<br />
Crash Cym1<br />
Cowbell<br />
Rock Ride 2<br />
Conga 2H Mt<br />
Conga 2L Mt<br />
Conga 2H Slp<br />
Conga 2H Op<br />
Conga Lo Op<br />
Timbale 1<br />
Timbale 2<br />
Agogo 2 Hi<br />
Agogo 2 Low<br />
Cabasa 2<br />
Shaker 2<br />
Whistle Shrt<br />
Whistle<br />
Guiro 2 Up<br />
Guiro Long<br />
Claves 2<br />
Wood Block2H<br />
Wood Block2L<br />
Cuica 2 Low<br />
Cuica 2 Hi<br />
Triangle Mt<br />
Triangle Op<br />
Cabasa2 Cut<br />
DigiSpectrum<br />
Wind Chime<br />
Wood Block2M<br />
Cajon 2<br />
ConcertBD<br />
R&B Kick<br />
Dry Kick 2<br />
Old Kick<br />
Jazz Doos<br />
Agogo Noise<br />
Rock OHH<br />
JD Anklungs<br />
Rock OHH<br />
Cajon 3<br />
Cajon 1<br />
Mix Kick 4<br />
Gospel Clap<br />
Bright Clap<br />
Rock Rd Cup<br />
Cowbell<br />
Crash Cym 2<br />
Dance Kick<br />
Dry Kick 1<br />
Snr Roll<br />
Power Kick<br />
Amb.Snr2 p<br />
Power Kick<br />
Reg.PHH<br />
Reg.Kick<br />
TY Kick<br />
TY CStk<br />
TY Snr<br />
SF SnrGst<br />
TY Rim<br />
RR F.Tom<br />
Reg.CHH 1<br />
TY L.Tom<br />
Reg.CHH 2<br />
TY M.Tom<br />
Reg.OHH<br />
TY M.Tom<br />
TY H.Tom<br />
Crash Cym 2<br />
TY H.Tom<br />
Rock Ride 1<br />
China Cymbal<br />
Splash Cym<br />
Tamborine2<br />
Crash Cym1a<br />
Cowbell3<br />
Crash Cym1b<br />
Cowbell2 Lng<br />
Rock Ride 2<br />
Conga 2H Mt<br />
Conga 2L Mt<br />
Conga 2H Slp<br />
Conga 2H Op<br />
Conga 2L Op<br />
Timbare 4<br />
Timbare 3<br />
Agogo 2 Hi<br />
Agogo 2 Low<br />
Cabasa 2<br />
Shaker 1<br />
Whistle Shrt<br />
Whistle Long<br />
Guiro 2 Up<br />
Guiro 2 Down<br />
Claves 2<br />
Wood Block2H<br />
Wood Block2L<br />
Cuica 2 Low<br />
Cuica 2 Hi<br />
Triangle Mt<br />
Triangle Op<br />
Cabasa2 Cut<br />
DigiSpectrum<br />
Wind Chime<br />
Wood Block2M<br />
Cajon 2<br />
ConcertBD<br />
R&B Kick<br />
Dry Kick 2<br />
Old Kick<br />
Jazz Doos<br />
Agogo Noise<br />
Rock OHH<br />
JD Anklungs<br />
Rock OHH<br />
Cajon 3<br />
Cajon 1<br />
TY Rim f<br />
Gospel Clap<br />
Bright Clap<br />
Rock Rd Cup<br />
Cowbell<br />
Crash Cym 2<br />
MaxLow Kick2<br />
Rk CmpKick<br />
Gospel Clap<br />
Sweep Bass<br />
Sft Snr Gst<br />
HipHop Kick2<br />
Reg.PHH<br />
Reg.Kick 1<br />
Reg.Kick 2<br />
Reg.Stick<br />
Reg.Snr 2<br />
Reg.Snr Gst<br />
Reg.Snr 1<br />
Reg.F.Tom<br />
Reg.CHH 1<br />
Reg.L.Tom<br />
Reg.CHH 2<br />
Reg.M.Tom 1<br />
Reg.OHH<br />
Reg.M.Tom 2<br />
Reg.H.Tom 1<br />
Crash Cym1<br />
Reg.H.Tom 2<br />
Rock Ride<br />
China Cymbal<br />
Ride Edge<br />
Tamborine<br />
Crash Cym2a<br />
Cowbell Low<br />
Crash Cym2b<br />
Cowbell Hi<br />
Ride Bell<br />
Conga Hi Mt<br />
Conga Lo Mt<br />
Conga Lo<br />
Conga Hi Op<br />
Conga Lo Op<br />
Timbale Hi<br />
Timbale Low<br />
Agogo Bell H<br />
Agogo Bell L<br />
Cabasa Up<br />
Maracas<br />
Whistle Shrt<br />
Whistle Long<br />
Guiro Short<br />
Guiro Long<br />
Claves<br />
Wood Block H<br />
Wood Block L<br />
Cuica Mute<br />
Cuica Open<br />
Triangle Mt<br />
Triangle Op<br />
Cabasa Cut<br />
Castanet<br />
Bongo Hi Mt<br />
Bongo Hi Slp<br />
Bongo Lo Slp<br />
Bongo Hi Op<br />
Bongo Lo Op<br />
Cajon 1<br />
Cajon 2<br />
Cajon 3<br />
Vint Snr 2<br />
Shaker 3<br />
WD Rim<br />
Mix Kick 1<br />
Mix Kick 2<br />
Mix Kick 3<br />
Mix Kick 4<br />
Mix Kick 5<br />
Mix Clap 1<br />
Wind Chime<br />
Tibet Cymbal<br />
Crotale<br />
Dance Kick<br />
Dry Kick 1<br />
Snr Roll<br />
Power Kick<br />
Amb.Snr 2p<br />
Power Kick<br />
Reg.PHH<br />
Reg.Kick 1<br />
Reg.Kick 2<br />
Wild Stick<br />
Amb.Snr 1<br />
Reg.Snr Gst<br />
Amb.Snr 2<br />
Reg.F.Tom<br />
Reg.CHH 1<br />
Reg.L.Tom<br />
Reg.CHH 2<br />
Reg.M.Tom<br />
Reg.OHH<br />
Reg.M.TomFlm<br />
Reg.H.Tom<br />
Crash Cym1a<br />
Reg.H.TomFlm<br />
Rock Ride 1<br />
China Cymbal<br />
Splash Cym<br />
Tamborine<br />
Rock Crash 1<br />
Cowbell Hi<br />
Crash Cym1b<br />
Cowbell Low<br />
Rock Ride 2<br />
Conga Hi Mt<br />
Conga Lo Mt<br />
Conga Hi Slp<br />
Conga Hi Op<br />
Conga Lo Op<br />
Timbale Hi<br />
Timbale Low<br />
Mild Agogo H<br />
Mild Agogo L<br />
Cabasa Up<br />
Maracas<br />
Whistle Shrt<br />
Whistle Long<br />
Guiro Short<br />
Guiro Long<br />
Claves<br />
Wood Block H<br />
Wood Block L<br />
Cuica Mute<br />
Cuica Open<br />
Triangle Mt<br />
Triangle Op<br />
Cabasa Cut<br />
DigiSpectrum<br />
Wind Chime<br />
Wood Block M<br />
Cajon 2<br />
ConcertBD<br />
R&B Kick<br />
Dry Kick 2<br />
Old Kick<br />
Jazz Doos<br />
Agogo Noise<br />
Rock OHH<br />
JD Anklungs<br />
Rock OHH<br />
Mix Kick 1<br />
Cajon 1<br />
Mix Kick 2<br />
Gospel Clap<br />
Bright Clap<br />
Rock Rd Cup<br />
Cowbell<br />
Crash Cym 2<br />
93
Rhythm Set List<br />
Preset:<br />
Note No.<br />
28<br />
29<br />
30<br />
31<br />
32<br />
33<br />
34<br />
35<br />
C2 36<br />
37<br />
38<br />
39<br />
40<br />
41<br />
42<br />
43<br />
44<br />
45<br />
46<br />
47<br />
C3 48<br />
49<br />
50<br />
51<br />
52<br />
53<br />
54<br />
55<br />
56<br />
57<br />
58<br />
59<br />
C4 60<br />
61<br />
62<br />
63<br />
64<br />
65<br />
66<br />
67<br />
68<br />
69<br />
70<br />
71<br />
C5 72<br />
73<br />
74<br />
75<br />
76<br />
77<br />
78<br />
79<br />
80<br />
81<br />
82<br />
83<br />
C6 84<br />
85<br />
86<br />
87<br />
88<br />
89<br />
90<br />
91<br />
92<br />
93<br />
94<br />
95<br />
C7 96<br />
97<br />
98<br />
99<br />
100<br />
101<br />
102<br />
103<br />
1159 1160 1161 1162 1163 1164<br />
StandardKit3 Rock Kit 1 Rock Kit 2 Brush Jz Kit Orch Kit 909 808 Kit<br />
HipHop Kick2<br />
Syn Swt Atk1<br />
Lo-Bit Stk 1<br />
TR707 Kick<br />
TR808 Snr 5<br />
Vint Kick 1<br />
Reg.PHH<br />
Vint Kick 2<br />
Old Kick 1<br />
Lo-Bit Stk 4<br />
Reg.Snr 1<br />
Amb Clap<br />
TY Rim<br />
Jazz Lo Tom1<br />
Reg.CHH 1<br />
Jazz Lo Tom2<br />
Reg.CHH 2<br />
Jazz Mid Tom<br />
Reg.OHH<br />
Jazz Mid Tom<br />
Jazz Hi Tom<br />
Crash Cym1<br />
Jazz Hi Tom<br />
Rock Rd Edge<br />
China Cymbal<br />
Rock Rd Cup<br />
Tamborine<br />
Splash Cym<br />
Cowbell<br />
Rock Crash 2<br />
TR808 Cym<br />
Jazz Ride<br />
Bongo Hi<br />
Bongo Lo<br />
Conga Hi Mt<br />
Conga Hi<br />
Conga Lo<br />
Timbale Hi<br />
Timbale Low<br />
Cowbell Hi<br />
Cowbell Low<br />
Cabasa<br />
Shaker<br />
Noise OHH 2<br />
Scratch 5<br />
Syn Low Atk2<br />
MG Zap 3<br />
Syn Swt Atk1<br />
Syn Swt Atk4<br />
Bongo Hi Slp<br />
Noise OHH<br />
Noise CHH<br />
Triangle 1<br />
Triangle 2<br />
Cajon 1<br />
Cajon 3<br />
Wind Chime<br />
SprgDrm Hit<br />
Crotale<br />
R8 Click<br />
Metro Bell<br />
DR202 Beep<br />
Reverse Cym<br />
Xylo Seq.<br />
Vinyl Noise<br />
Mobile Phone<br />
Group Snap<br />
Laser<br />
Siren<br />
AnalogKick 3<br />
Old Kick 2<br />
Reg.Kick<br />
TR909 Snr 4<br />
TR808 Snr 2<br />
Short Snr1<br />
Vint Snr 4<br />
R&B Kick<br />
Rk CmpKick<br />
Sft Snr Gst<br />
Dry Kick 4<br />
Snr Roll<br />
SH32 Kick<br />
Reg.PHH<br />
Reg.Kick 1<br />
Reg.Kick 2<br />
Reg.Stick<br />
Reg.Snr2<br />
Reg.Snr Gst<br />
Reg.Snr1<br />
Reg.F.Tom<br />
Reg.CHH 1<br />
Reg.L.Tom<br />
Reg.CHH 2<br />
Reg.M.Tom<br />
Reg.OHH<br />
Reg.M.TomFlm<br />
Reg.H.Tom<br />
Crash Cym1a<br />
Reg.H.TomFlm<br />
Rock Ride 1<br />
China Cymbal<br />
Splash Cym<br />
Tamborine<br />
Rock Crash 1<br />
Cowbell Hi<br />
Crash Cym1b<br />
Cowbell Low<br />
Rock Ride 2<br />
Conga Hi Mt<br />
Conga Lo Mt<br />
Conga Hi Slp<br />
Conga Hi Op<br />
Conga Lo Op<br />
Timbale Hi<br />
Timbale Low<br />
Agogo Bell H<br />
Agogo Bell L<br />
Cabasa Up<br />
Maracas<br />
Whistle Shrt<br />
Whistle Long<br />
Guiro Short<br />
Guiro Long<br />
Claves<br />
Wood Block H<br />
Wood Block L<br />
Cuica Mute<br />
Cuica Open<br />
Triangle Mt<br />
Triangle Op<br />
Cabasa Cut<br />
DigiSpectrum<br />
Wind Chime<br />
Dist Chord 1<br />
Dist Chord 2<br />
Dist Chord 3<br />
Dist Chord 4<br />
Dist Chord 5<br />
Rock CHH 2<br />
Cowbell 2a<br />
Rock CHH 1<br />
Cowbell 2b<br />
Rock OHH<br />
Fng.EB2 Sld<br />
Cajon 3<br />
Cajon 2<br />
Cajon 1<br />
Gospel Clap<br />
Rock Crash 2<br />
Rock Rd Cup<br />
Club FinSnap<br />
TR909 Snr 6<br />
MaxLow Kick2<br />
MaxLow Kick1<br />
LD Rim mf<br />
Power Kick<br />
Mix Clap 2<br />
Vint Kick<br />
Rock CHH2<br />
Rock Kick<br />
Rk CmpKick<br />
Wild Stick<br />
Maple Snr<br />
Sft Snr Gst<br />
Reg.Snr1<br />
Sharp L.Tom1<br />
Rock CHH 1<br />
Sharp L.Tom2<br />
Reg.PHH<br />
Sharp L.Tom3<br />
Rock OHH<br />
Sharp H.Tom1<br />
Sharp H.Tom2<br />
Crash Cym1<br />
Sharp H.Tom3<br />
Ride Cymbal<br />
China Cymbal<br />
Ride Bell<br />
Tamborine 3<br />
Rock Crash 2<br />
Cowbell Mute<br />
Splash Cym<br />
Cowbell<br />
Rock Rd Cup<br />
Conga Hi Mt<br />
Conga Lo Mt<br />
Conga Slp Op<br />
Conga Hi Op<br />
Conga Lo Op<br />
Timbale Hi<br />
Timbale Low<br />
Agogo Bell H<br />
Agogo Bell L<br />
Cabasa Up<br />
Maracas<br />
Whistle Shrt<br />
Whistle Long<br />
Guiro Short<br />
Guiro Long<br />
Claves<br />
Wood Block H<br />
Wood Block L<br />
Cuica Mute<br />
Cuica Open<br />
Triangle Mt<br />
Triangle Op<br />
Cabasa Cut<br />
Wind Chime<br />
Dist Chord 1<br />
Dist Chord 2<br />
Dist Chord 3<br />
Dist Chord 4<br />
Dist Chord 5<br />
Dist Chord 6<br />
Rock CHH 2<br />
Dist Chord 7<br />
DistGtr Nz 1<br />
DistGtr Nz 2<br />
DistGtr Nz 3<br />
JD Switch<br />
Cajon 3<br />
Cajon 2<br />
Cajon 1<br />
Real Clap<br />
Gospel Clap<br />
Tibet Cymbal<br />
Tamborine 1<br />
Tamborine 2<br />
TR909 Kick1a<br />
TR909 Kick1b<br />
Jazz Snr<br />
Reg.Kick 1<br />
Soft Jz Roll<br />
Reg.Kick 2<br />
Reg.PHH<br />
Jazz Kick 1<br />
Jazz Kick 2<br />
Hard Stick<br />
Jazz Rim<br />
Jz Brsh Swsh<br />
Jazz Snr<br />
Reg.F.Tom 1<br />
Reg.CHH 1<br />
Reg.L.Tom 1<br />
Reg.CHH 2<br />
Reg.M.Tom 1<br />
Reg.OHH<br />
Reg.M.Tom 1<br />
Reg.H.Tom 1<br />
Jazz Crash<br />
Reg.H.Tom 1<br />
Jazz Ride 1<br />
China Cym 1<br />
Ride Edge<br />
Tamborine<br />
Crash Cym<br />
Cowbell Low<br />
Crash Cym<br />
Cowbell Hi<br />
Ride Bell<br />
Conga Hi Mt<br />
Conga Lo Mt<br />
Conga Lo Slp<br />
Conga Hi Op<br />
Conga Lo Op<br />
Timbale Hi<br />
Timbale Low<br />
Agogo Bell H<br />
Agogo Bell L<br />
Cabasa Up<br />
Maracas<br />
Jazz Kick 1<br />
Jazz Kick 2<br />
Hard Stick<br />
Jazz Rim<br />
Sft Snr Gst<br />
Jazz Snr<br />
Reg.F.Tom 2<br />
Reg.CHH 1<br />
Reg.L.Tom 2<br />
Reg.CHH 2<br />
Reg.M.Tom 2<br />
Reg.OHH<br />
Reg.M.TomFlm<br />
Reg.H.Tom 2<br />
Jazz Cymbal<br />
Reg.H.TomFlm<br />
Jazz Ride 2<br />
China Cym 2<br />
Cajon 1<br />
Cajon 2<br />
Cajon 3<br />
Vint Snr 2<br />
Shaker 3<br />
WD Rim f<br />
Mix Kick 1<br />
Mix Kick 2<br />
Mix Kick 3<br />
Mix Kick 4<br />
Mix Kick 5<br />
Mix Clap 1<br />
Wind Chime<br />
Tibet Cymbal<br />
Crotale<br />
Timpani Roll<br />
ConcertBD 2<br />
R8 Shaker 1<br />
Jngl pkt Snr<br />
Reverse Cym<br />
Snr Roll<br />
Jazz Ride<br />
Timpani Roll<br />
ConcertBD 1<br />
Hard Stick<br />
Amb.Snr 2<br />
Gospel Clap<br />
Concert SD<br />
Timpani F<br />
Timpani F#<br />
Timpani G<br />
Timpani G#<br />
Timpani A<br />
Timpani A#<br />
Timpani B<br />
Timpani C<br />
Timpani C#<br />
Timpani D<br />
Timpani D#<br />
Timpani E<br />
Timpani f<br />
Tamborine 3<br />
Concert Cym<br />
Cowbell Mute<br />
Concert Cym2<br />
Ride Cymbal<br />
Crash Cym1<br />
Bongo Hi Op<br />
Bongo Lo Op<br />
Conga Hi Mt<br />
Conga Hi Op<br />
Conga Lo Op<br />
Timbale Hi<br />
Timbale Low<br />
Agogo Bell H<br />
Agogo Bell L<br />
Cabasa Up<br />
Maracas<br />
Whistle Shrt<br />
Whistle Long<br />
Guiro Short<br />
Guiro Long<br />
Claves<br />
Wood Block H<br />
Wood Block L<br />
Cuica Mute<br />
Cuica Open<br />
Triangle Mt<br />
Triangle Op<br />
Cabasa Cut<br />
Finger Snap<br />
Wind Chime<br />
Tibet Cymbal<br />
Vibraslap<br />
Crotale<br />
Applause<br />
TubulrBel F<br />
TubulrBel F#<br />
TubulrBel G<br />
TubulrBel G#<br />
TubulrBel A<br />
TubulrBel A#<br />
TubulrBel B<br />
TubulrBel C<br />
TubulrBel C#<br />
TubulrBel D<br />
TubulrBel D#<br />
TubulrBel E<br />
TubulrBel f<br />
Church Bell1<br />
Church Bell2<br />
TR909 Kick 2<br />
TR909 Kick 4<br />
Urbn Sn Roll<br />
TR909 Kick 5<br />
TR909 Snr 3<br />
TR909 Kick 3<br />
TR909 PHH 2<br />
TR909 Kick 6<br />
TR909 Kick 1<br />
TR909 Rim<br />
TR909 Snr 1<br />
TR909 Clap 1<br />
TR909 Snr 2<br />
TR909 Tom L<br />
TR909 CHH 1<br />
TR909 Tom L<br />
TR909 PHH 1<br />
TR909 Tom M<br />
TR909 OHH 2<br />
TR909 Tom M<br />
TR909 Tom H<br />
TR909 Crash<br />
TR909 Tom H<br />
TR909 Ride 1<br />
TR909 Crash1<br />
TR909 Ride 2<br />
CR78 Tamb 1<br />
TR909 Crash2<br />
JD Sm Metal<br />
TR909 Ride 3<br />
Syn Swt Atk3<br />
TR808 Kick 1<br />
TR808 Kick 2<br />
TR808 Rim<br />
TR808 Snr 2<br />
TR808 Clap 2<br />
TR808 Snr 4<br />
TR808 Tom L<br />
TR808 CHH 1<br />
TR808 Tom L<br />
TR808 CHH 2<br />
TR808 Tom M<br />
TR808 OHH 1<br />
TR808 Tom M<br />
TR808 Tom H<br />
TR808Cowbell<br />
TR808 Tom H<br />
TR606 Cym<br />
TR606 OHH 1<br />
TR606 OHH 2<br />
CR78 Tamb 2<br />
CR78 OHH 1<br />
Cowbell Mute<br />
CR78 OHH 2<br />
Syn Swt Atk5<br />
TR808 OHH 2<br />
808 Maracas<br />
TR808 Claves<br />
Triangle Mt<br />
Triangle Op<br />
Narrow Hit 2<br />
TR808 Cym1<br />
MG Zap 4<br />
Scratch 1<br />
MG Zap 1<br />
TR606 Snr 2<br />
Synth Saw<br />
Digi Breath<br />
TR808 Cym2<br />
TR808 Conga1<br />
TR808 Conga2<br />
Cajon 1<br />
Vint Snr 3<br />
Door Creak<br />
Vint.Phone<br />
Door Creak<br />
94
Rhythm Set List<br />
Preset:<br />
Note No.<br />
28<br />
29<br />
30<br />
31<br />
32<br />
33<br />
34<br />
35<br />
C2 36<br />
37<br />
38<br />
39<br />
40<br />
41<br />
42<br />
43<br />
44<br />
45<br />
46<br />
47<br />
C3 48<br />
49<br />
50<br />
51<br />
52<br />
53<br />
54<br />
55<br />
56<br />
57<br />
58<br />
59<br />
C4 60<br />
61<br />
62<br />
63<br />
64<br />
65<br />
66<br />
67<br />
68<br />
69<br />
70<br />
71<br />
C5 72<br />
73<br />
74<br />
75<br />
76<br />
77<br />
78<br />
79<br />
80<br />
81<br />
82<br />
83<br />
C6 84<br />
85<br />
86<br />
87<br />
88<br />
89<br />
90<br />
91<br />
92<br />
93<br />
94<br />
95<br />
C7 96<br />
97<br />
98<br />
99<br />
100<br />
101<br />
102<br />
103<br />
1165 1166 1167 1168 1169 1170<br />
Limiter Kit HipHop Kit 1 R&B Kit HiFi R&B Kit Machine Kit1 Kit-Euro:POP<br />
Dance Kick 1<br />
HipHop Kick1<br />
WD CStk<br />
R&B Kick 1<br />
Wild Stick<br />
Dance Kick 2<br />
Hip PHH<br />
LD Kick<br />
R&B Kick 2<br />
Lo-Bit Stk 2<br />
Wild Stick<br />
Dist Clap<br />
DR660 Snr<br />
Reg.F.Tom p<br />
Lo-Bit CHH 2<br />
Reg.F.Tom f<br />
Lo-Bit CHH 4<br />
Reg.L.Tom<br />
Lo-Bit OHH 2<br />
Reg.L.TomFlm<br />
Reg.H.Tom<br />
Crash Cym 1<br />
Reg.H.TomFlm<br />
Lo-Bit OHH 1<br />
TR606 Cym 2<br />
Jazz Ride 1<br />
Tamborine 1<br />
TR606 OHH<br />
Vibraslap<br />
Mix Kick 2<br />
Hip PHH<br />
Mix Kick 2<br />
Rough Kick<br />
Dry Stick<br />
GoodOld Snr5<br />
R8 Clap<br />
Jngl pkt Snr<br />
TR808 Tom<br />
Noise CHH 1<br />
TR808 Tom<br />
Noise CHH 2<br />
TR606 Tom L1<br />
Lo-Bit OHH 2<br />
TR606 Tom L2<br />
TR606 Tom H1<br />
Crash Cym 2<br />
TR606 Tom H2<br />
Jazz Ride 2<br />
Splash Cym<br />
Rock Rd Edge<br />
Tamborine 3<br />
Guiro Long<br />
Gospel Clap<br />
Tibet Cymbal<br />
Wind Chime<br />
Mix Kick 1<br />
Mix Kick 2<br />
Mix Kick 4<br />
Vint Snr 1<br />
Vint Snr 2<br />
Vint Snr 3<br />
Vint Snr 4<br />
Noise CHH<br />
CR78 CHH<br />
Noise CHH 3<br />
Noise OHH 2<br />
Noise OHH 1<br />
Heartbeat<br />
Scratch 2<br />
Scratch 5<br />
Scratch 1<br />
Scratch 4<br />
Scratch 6<br />
Mobile Phone<br />
Sweep Bass 1<br />
Sweep Bass 2<br />
PlasticKick2<br />
Group Snap<br />
Snr Roll<br />
AnalogKick 3<br />
GoodOld Snr5<br />
Dist Kick<br />
Noise CHH<br />
TR707 Kick<br />
Dry Kick 4<br />
Jazz Rim<br />
Dirty Snr 2<br />
Old Clap<br />
Vint Snr 4a<br />
TR909 Tom L<br />
HipHop CHH 2<br />
Deep Tom L<br />
Lo-Bit PHH<br />
TR909 Tom M<br />
Lo-Bit OHH 2<br />
Deep Tom M<br />
TR909 Tom H<br />
Crash Cym1 p<br />
Deep Tom H<br />
Rock Crash 1<br />
Rock Rd Edge<br />
China Cymbal<br />
Snap<br />
TR808 Conga2<br />
Vint Snr 4<br />
TR808Cowbell<br />
Guiro Long<br />
Guiro 2<br />
Guiro 1<br />
Shaker 3<br />
Noise CHH<br />
Cabasa 2<br />
Vibraslap<br />
Mix Kick 2<br />
Dist Snr<br />
Sweep Bass<br />
Short Snr1<br />
CR78 CHH<br />
Shaker 2<br />
CR78 Tamb<br />
Noise OHH<br />
Slight Bell<br />
Tibet Cymbal<br />
Wind Chime<br />
Scratch 2<br />
Scratch 1<br />
Scratch 10<br />
Scratch 9<br />
Smear Hit 2<br />
Lofi Min Hit<br />
Thin Beef<br />
Dist Hit<br />
Narrow Hit 2<br />
MG Attack<br />
MG Zap 9<br />
Mix Clap 3<br />
R8 Shaker<br />
Cabasa Down<br />
Cabasa Cut<br />
MaxLow Kick1<br />
MaxLow Kick2<br />
Lo-Bit Snr 1<br />
Dance CHH<br />
Wild Stick<br />
MC500 Beep 1<br />
MC500 Beep 2<br />
Gospel Clap<br />
TR606 Cym<br />
China Cymbal<br />
Rock Crash 2<br />
CR78 OHH<br />
Concert Cym<br />
70's Kick<br />
AnalogKick 6<br />
Urbn Sn Roll<br />
HipHop Kick2<br />
R&B ShrtSnr1<br />
Old Kick<br />
HipHop CHH<br />
EuroHit Kick<br />
TR909 Kick 1<br />
Dry Stick 4<br />
Dirty Snr 2<br />
Maple Snr<br />
Short Snr2<br />
TR808 Tom 1<br />
TR606 CHH 2<br />
Reg.F.Tom<br />
TR909 CHH 2<br />
TR808 Tom 2<br />
Lo-Bit OHH 2<br />
Reg.M.Tom<br />
TR808 Tom 3<br />
Rock Crash 1<br />
Reg.H.Tom<br />
Splash Cym<br />
Rock Rd Edge<br />
Concert Cym<br />
Cheap Clap<br />
Snap<br />
Lo-Bit Snr 2<br />
Wood Block<br />
Shaku Noise<br />
Syn Hrd Atk1<br />
JD MetalWind<br />
Maracas<br />
Cabasa Up<br />
Cabasa Down<br />
Cabasa Cut<br />
Tamborine 1<br />
Tamborine 2<br />
Tamborine 1<br />
Triangle Mt<br />
Triangle Op<br />
Xylo Seq.<br />
Philly Hit<br />
LoFi Min Hit<br />
Vinyl Noise<br />
Cajon 1<br />
Cajon 2<br />
Cajon 3<br />
Conga Hi Mt<br />
Conga Lo Mt<br />
Conga Hi Slp<br />
Conga Lo Slp<br />
Conga Hi Op<br />
Conga Lo Op<br />
Conga Slp Op<br />
Conga Efx<br />
Conga Thumb<br />
Noise OHH<br />
Shaker 3<br />
Castanet<br />
CR78 Beat<br />
CR78 OHH<br />
CR78 CHH<br />
Lite OHH<br />
CR78 Tamb<br />
JD Vox Noise<br />
Guiro 2 Fast<br />
Metro Click<br />
Metro Bell<br />
Wind Chime<br />
Crotale<br />
Crash Cym1 p<br />
TR909 Crash<br />
CR78 OHH<br />
Rev.Lite OHH<br />
MaxLow Kick2<br />
FB Kick<br />
Rough Kick1a<br />
MaxLow Kick1<br />
Rough Kick3<br />
Rk CmpKick<br />
TR909 Kick 5<br />
Rough Kick1b<br />
R&B Kick<br />
Hard Stick<br />
GoodOld Snr3<br />
GoodOld Snr4<br />
GoodOld Snr2<br />
Lo-Bit Snr 1<br />
Noise CHH<br />
Jazz Snr<br />
Hip PHH<br />
Lo-Bit Snr 2<br />
Reg.OHH<br />
Vint Snr 2<br />
WD Snr<br />
TR808 Cym 1<br />
GoodOld Snr6<br />
TR606 Cym 2<br />
White Noise<br />
Bright Form<br />
CR78 Tamb<br />
SBF Hrd Ld 1<br />
JD Sm Metal<br />
TR808 Cym 2<br />
Syn Swt Atk3<br />
TR909 Kick4a<br />
TR909 Kick4b<br />
TR808 Rim<br />
TR808 Snr 2<br />
TR808 Clap 2<br />
TR808 Snr 4<br />
TR808 Tom 4<br />
TR808 CHH 1<br />
TR808 Tom 3<br />
TR808 CHH 2<br />
TR808 Tom 2<br />
TR808 OHH 1<br />
TR808 Tom 1<br />
Scratch 3<br />
Scratch 4<br />
Scratch 5<br />
Scratch 6<br />
Old Clap<br />
Hand Clap<br />
R8 Clap<br />
Cabasa Cut<br />
R8 Shaker<br />
Tamborine 2<br />
Cabasa Down<br />
Cabasa Cut<br />
Tibet Cymbal<br />
Crotale<br />
Slight Bell<br />
Wind Chime<br />
Triangle 1<br />
Mild CanWave<br />
Cheap Clap<br />
JD Plunk<br />
Syn Swt Atk2<br />
DistGtr Nz 2<br />
River<br />
Bubble<br />
Train Pass<br />
LoFi Min Hit<br />
Pink Noise<br />
Agogo Noise<br />
SynVox Nz 1<br />
SynVox Nz 2<br />
R8 Click<br />
Syn Swt Atk1<br />
TR909 Kick 2<br />
TR909 Kick 4<br />
Light Snr<br />
Mix Kick 5<br />
DR660 Snr<br />
Mix Kick 2<br />
TR808 PHH<br />
AnalogKick 6<br />
70's Kick 1<br />
TR808 Rim<br />
Jngl pktSnr1<br />
Funk Clap<br />
Jngl pktSnr2<br />
MG Attack<br />
TR808 CHH 1<br />
MG Attack<br />
TR808 PHH<br />
MG Blip<br />
TR808 OHH 1<br />
MG Blip<br />
Beam HiQ<br />
TR606 Cym 2a<br />
Beam HiQ<br />
Lo-Bit OHH1a<br />
TR606 Cym 2<br />
Lo-Bit OHH1b<br />
CR78 Tamb 1<br />
TR606 Cym 2b<br />
JD Sm Metal1<br />
Lo-Bit OHH1c<br />
Syn Swt Atk3<br />
AnalogKick 6<br />
70's Kick 2<br />
R8 Comp Rim<br />
Pocket Snr<br />
TR909 Clap 2<br />
Vint Snr 4<br />
TR606 Tom L<br />
Dance CHH<br />
TR606 Tom L<br />
Lo-Bit CHH 1<br />
TR606 Tom M<br />
Reg.OHH<br />
TR606 Tom M<br />
TR606 Tom H<br />
TR909 Crash1<br />
TR606 Tom H<br />
Lite OHH 1<br />
TR909 Crash2<br />
Lite OHH 2<br />
CR78 Tamb 2<br />
TR909 Crash<br />
JD Sm Metal2<br />
Lite OHH 3<br />
Syn Swt Atk1<br />
TR808 OHH 2<br />
808 Maracas<br />
TR808 Claves<br />
Triangle Mt<br />
Triangle Op<br />
Narrow Hit 2<br />
Euro Hit<br />
MG Zap 4<br />
Scratch 1<br />
MG Zap 1<br />
TR606 Snr 2<br />
Synth Saw<br />
Digi Breath<br />
DigiSpectrum<br />
Shaker 3<br />
Conga 2H Slp<br />
Cajon 1<br />
Vint Snr 3<br />
Door Creak 1<br />
Vint.Phone<br />
Door Creak 2<br />
TR707 Kick<br />
AnalogKick 1<br />
Dirty Snr 6<br />
FB Kick<br />
BrushRoll<br />
PlasticKick2<br />
Reg.CHH 2<br />
Power Kick<br />
TR909 Kick 6<br />
R&B ShrtRim1<br />
TR909 Snr 3<br />
TR909 Clap 1<br />
TR909 Snr 4a<br />
Sharp L.Tom2<br />
TR909 CHH 1<br />
Sharp L.Tom1<br />
TR909 PHH 1<br />
Sharp M.Tom<br />
TR909 OHH 2<br />
Sharp M.Tom<br />
Sharp H.Tom<br />
TR909 Crash<br />
Sharp H.Tom<br />
TR909 Ride<br />
China Cymbal<br />
Rock Rd Edge<br />
Tamborine 3<br />
Crash Cym1 p<br />
Cowbell<br />
Rock Crash 2<br />
Vibraslap<br />
TR606 Cym 2<br />
Bongo Lo Op<br />
Bongo Hi Op<br />
Conga Hi Mt<br />
Conga Hi Op<br />
Conga Lo Op<br />
Conga Efx<br />
Shaker 3<br />
Shaker 2<br />
CR78 Beat<br />
Cabasa Cut 1<br />
Cabasa Cut 2<br />
Lo-Bit PHH<br />
Scratch 7<br />
Syn Low Atk2<br />
MG Zap 7<br />
Syn Swt Atk1<br />
Syn Swt Atk4<br />
Conga Thumb<br />
Triangle 1<br />
Triangle 2<br />
Euro Hit 1<br />
Tao Hit<br />
Narrow Hit 2<br />
Euro Hit 2<br />
Wind Chime<br />
Timpani Roll<br />
Crotale<br />
R8 Click<br />
Metro Bell<br />
MC500 Beep 1<br />
MC500 Beep 2<br />
Atmosphere<br />
Agogo Noise<br />
Car Slip<br />
Group Snap<br />
Laser<br />
ConcertBD<br />
AnalogKick 3<br />
Old Kick<br />
Reg.Kick<br />
TR909 Snr 4b<br />
TR808 Snr 2<br />
Vint Snr 4<br />
Light Snr<br />
95
Rhythm Set List<br />
Preset:<br />
Note No.<br />
28<br />
29<br />
30<br />
31<br />
32<br />
33<br />
34<br />
35<br />
C2 36<br />
37<br />
38<br />
39<br />
40<br />
41<br />
42<br />
43<br />
44<br />
45<br />
46<br />
47<br />
C3 48<br />
49<br />
50<br />
51<br />
52<br />
53<br />
54<br />
55<br />
56<br />
57<br />
58<br />
59<br />
C4 60<br />
61<br />
62<br />
63<br />
64<br />
65<br />
66<br />
67<br />
68<br />
69<br />
70<br />
71<br />
C5 72<br />
73<br />
74<br />
75<br />
76<br />
77<br />
78<br />
79<br />
80<br />
81<br />
82<br />
83<br />
C6 84<br />
85<br />
86<br />
87<br />
88<br />
89<br />
90<br />
91<br />
92<br />
93<br />
94<br />
95<br />
C7 96<br />
97<br />
98<br />
99<br />
100<br />
101<br />
102<br />
103<br />
1171 1172 1173 1174 1175 1176<br />
House Kit Nu Technica Machine Kit2 ArtificalKit Noise Kit Kick Menu<br />
TR909 Kick 3<br />
SH32 Kick<br />
Urbn Sn Roll<br />
TR909 Kick 2<br />
TR909 Snr 6<br />
TR909 Kick 5<br />
TR909 PHH 2<br />
TR909 Kick4a<br />
TR909 Kick4b<br />
TR909 Rim<br />
TR909 Snr 4<br />
TR909 Clap 2<br />
TR909 Snr 5<br />
TR909 Tom L<br />
TR909 CHH 2<br />
TR909 Tom L<br />
TR909 PHH 2<br />
TR909 Tom M<br />
TR909 OHH 2<br />
TR909 Tom M<br />
TR909 Tom H<br />
TR909 Crash1<br />
TR909 Tom H<br />
TR909 Ride 1<br />
TR909 Crash2<br />
TR909 Ride 2<br />
CR78 Tamb<br />
MG Zap 4<br />
JD Sm Metal<br />
MG Zap 5<br />
Syn Swt Atk3<br />
AnalogKick 2<br />
TR909 Kick 2<br />
TR909 Rim<br />
TR909 Snr 1<br />
TR909 Clap 1<br />
TR909 Snr 2<br />
TR909 D.TomL<br />
TR909 CHH 1<br />
TR909 D.TomL<br />
TR808 CHH 2<br />
TR909 D.TomM<br />
TR909 OHH 1<br />
TR909 D.TomM<br />
TR909 D.TomH<br />
TR909 Crash3<br />
TR909 D.TomH<br />
TR909 Ride 3<br />
TR909 Crash4<br />
TR909 Ride 4<br />
Tamborine 2<br />
MG Zap 2<br />
Cowbell Low<br />
MG Zap 6<br />
Cowbell Hi<br />
MG Zap 7<br />
Conga Hi Mt<br />
Conga Lo Mt<br />
Conga Lo Slp<br />
Conga Hi Op<br />
Conga Lo Op<br />
Timbale Hi<br />
Timbale Low<br />
Agogo Bell H<br />
Agogo Bell L<br />
Cabasa Down<br />
Maracas<br />
Guiro Short<br />
Guiro Long<br />
Claves<br />
Wood Block L<br />
Wood Block H<br />
Triangle Mt<br />
Triangle Op<br />
Castanet<br />
Whistle<br />
SH32 Kick 1<br />
JD EML 5th 1<br />
AnalogKick 6<br />
TR909 Kick 5<br />
Plastic Kc3a<br />
R&B Kick<br />
TR707 Kick<br />
Plastic Kc3b<br />
SH32 Kick 2<br />
TR909 Snr 5<br />
Syn Mtl Atk2<br />
Flange Snr<br />
TR909 Snr 3<br />
Dance CHH<br />
TR606DstCHH1<br />
TR909 PHH 2<br />
TR606 PHH 2a<br />
TR909 OHH 1<br />
Lite OHH<br />
Rock Rd Cup<br />
Syn Hrd Atk4<br />
MG Zap 7a<br />
MG Zap 9<br />
MG Zap 8<br />
MG Zap 10<br />
HipHop CHH 2<br />
Syn Swt Atk3<br />
Reg.PHH<br />
Syn Swt Atk6<br />
HipHop OHH<br />
TR909 OHH 2<br />
TR909 R.Crsh<br />
TR909 Crash<br />
Rock Crash 1<br />
MG Zap 2<br />
MG Zap 9<br />
Smear Hit 2<br />
Low Square<br />
JD WoodCrak1<br />
Piano Atk Nz<br />
JD WoodCrak2<br />
DR202 Beep 1<br />
JD WoodCrak3<br />
Syn Pulse 2<br />
DR202 Beep 2<br />
Narrow Hit2a<br />
E.Gtr Harm<br />
Narrow Hit2b<br />
Euro Hit<br />
Jazz Lo Tom1<br />
TR909 D.TomL<br />
Jazz Lo Tom2<br />
TR909 D.TomM<br />
Jazz Lo Tom3<br />
TR909 D.TomH<br />
AnalogKick 3<br />
AnalogKick 5<br />
Club Clap<br />
TR808 Snr 7<br />
TR808 Snr 3<br />
TR909 Snr 6a<br />
TR909 CHH 2<br />
TR606DstCHH2<br />
Dance CHH<br />
TR606 PHH 2b<br />
TR909 OHH 2<br />
TR606 OHH<br />
CR78 OHH<br />
Juno Sqr HD<br />
TR909 Snr 6b<br />
TR808 Kick<br />
JD EML 5th 2<br />
TR707 Clap<br />
Dist Clap<br />
MG Zap 5<br />
MG Zap 7b<br />
AnalogKick 5<br />
AnalogKick6a<br />
Analog Snr 1<br />
AnalogKick1a<br />
TR808 Snr 4<br />
FB Kick<br />
TR808 PHH<br />
AnalogKick6b<br />
AnalogKick6c<br />
R&B ShrtRim2<br />
TR909 Snr 1<br />
TR707 Clap<br />
Lo-Bit Snr 2<br />
Deep Tom L<br />
TR606 CHH 1<br />
Deep Tom L<br />
TR606 PHH 1<br />
Deep Tom M<br />
TR909 OHH 2<br />
Deep Tom M<br />
Deep Tom H<br />
Lite OHH<br />
Deep Tom H<br />
TR808 OHH 1<br />
TR606 Cym 2a<br />
TR909 Ride 1<br />
CR78 Tamb<br />
TR606 Cym 2b<br />
JD Sm Metal<br />
TR909 Ride 2<br />
Syn Swt Atk3<br />
AnalogKick1b<br />
AnalogKick 4<br />
Urbn SnRoll1<br />
Analog Snr 2<br />
Dist Clap<br />
Analog Snr 3<br />
R8 Shaker<br />
TR909 CHH 2<br />
R8 Shaker<br />
TR909 PHH 2<br />
Syn Hrd Atk1<br />
TR909 OHH 2<br />
SynHrd Atk1a<br />
SynHrd Atk1b<br />
TR909 Crash<br />
SynHrd Atk1c<br />
TR909 Ride 3<br />
TR909 Crash<br />
TR909 Ride 1<br />
CR78 Tamb<br />
MG Zap 2<br />
JD Sm Metal<br />
MG Zap 6<br />
Syn Swt Atk1<br />
MG Zap 7<br />
808 Maracas<br />
TR808 Claves<br />
Triangle Mt<br />
Triangle Op<br />
Euro Hit<br />
Scratch 4<br />
Brt Strat C<br />
Crotale<br />
MG Zap 4<br />
Urbn SnRoll2<br />
Calc.Saw<br />
White Noise<br />
Blow Loop<br />
Shaker 2<br />
Shaker 3<br />
Cajon 1<br />
Euro Hit<br />
Laugh<br />
Office Phone<br />
Door Creak<br />
TR909 Kick 2<br />
AnalogKick 2<br />
TR808 Snr 5<br />
TR909 Kick 3<br />
Vint Snr 3<br />
FB Kick<br />
TR606 Cym 2a<br />
AnalogKick 3<br />
TVF Trigger<br />
TR909 Rim<br />
TR909 Snr 1<br />
Claptail<br />
TR909 Snr 3<br />
TR909 Tom L2<br />
TR909 CHH 1<br />
TR909 Tom L1<br />
TR909 PHH 1<br />
TR909 Tom M2<br />
TR909 OHH 2<br />
TR909 Tom M1<br />
TR909 Tom H2<br />
TR909 Crash<br />
TR909 Tom H1<br />
TR909 Ride<br />
White Noise1<br />
CR78 Beat<br />
Tamborine 3<br />
Atmosphere<br />
Cowbell Mute<br />
Syn Swt Atk1<br />
Cowbell<br />
Reverse Cym<br />
AnalogKick 5<br />
Metal Vox W1<br />
Metal Vox W2<br />
Metal Vox W3<br />
White Noise2<br />
White Noise3<br />
TR606 Cym 2b<br />
MG Blip<br />
MG Blip Rev.<br />
DigiSpectrum<br />
Ice Crash<br />
Metal Vox L2<br />
Thin Beef<br />
LoFi Min Hit<br />
Trance Saw<br />
TB DstSqr<br />
Finger Snap<br />
Conga Slp Op<br />
Conga Lo Op<br />
Conga Hi Op<br />
Triangle Mt<br />
Triangle Op<br />
Cabasa Cut<br />
R8 Shaker<br />
AnalogKick 1<br />
PlasticKick2<br />
PlasticKick3<br />
TR909 Kick 1<br />
AnalogKick 4<br />
AnalogKick 6<br />
TR909 Snr 2<br />
TR909 Snr 4<br />
TR909 Snr 5<br />
TR909 Snr 6<br />
TR808 Snr 1<br />
TR808 Snr 2<br />
TR808 CHH 1<br />
TR808 OHH 1<br />
TR909 CHH 2<br />
TR909 OHH 2<br />
Lite CHH<br />
Lite OHH<br />
TR606 Cym 2c<br />
China Cymbal<br />
TR909 Kick 2<br />
TR909 Kick 4<br />
Urbn SnRoll1<br />
TR909 Kick 5<br />
Door Creak 1<br />
TR909 Kick 1<br />
SynSwt Atk7a<br />
Cajon 3a<br />
Cajon 3b<br />
Laser<br />
Door Creak2a<br />
Train Pass<br />
Door Creak2b<br />
Syn Swt AtkL<br />
SynSwt Atk7b<br />
Syn Swt AtkL<br />
Syn Mtl Atk2<br />
Syn Swt AtkM<br />
White Noise<br />
Syn Swt AtkM<br />
Syn Swt AtkH<br />
Syn Mtl Atk1<br />
Syn Swt AtkH<br />
SynLow Atk1a<br />
Crotale 1<br />
Laser 1<br />
MG Zap 11<br />
Laser 2<br />
MG Zap 4a<br />
Digi Loop 1<br />
MG Zap 6a<br />
SynLow Atk2a<br />
SynLow Atk2b<br />
MG Attack<br />
Syn Hrd Atk4<br />
Train Pass<br />
Syn Mtl Atk1<br />
Syn Swt AtkL<br />
Syn Swt Atk7<br />
Syn Swt AtkL<br />
Syn Mtl Atk2<br />
Syn Swt AtkM<br />
DigiSpectrum<br />
Syn Swt AtkM<br />
Syn Swt AtkH<br />
Digi Loop 1<br />
Syn Swt AtkH<br />
SynLow Atk1b<br />
Crotale 2<br />
Laser 3<br />
MG Zap 11<br />
Laser 4<br />
MG Zap 4b<br />
Crotale 3<br />
MG Zap 6b<br />
Syn Low Atk2<br />
808 Maracas<br />
TR808 Claves<br />
Triangle Mt<br />
Triangle Op<br />
Dry Lo Tom<br />
Conga Thumb<br />
Funk Gtr<br />
Digi Loop 1<br />
MG Zap 4c<br />
Urbn SnRoll2<br />
Sweep Saw<br />
White Noise<br />
Monsoon<br />
Shaker 3<br />
Scream<br />
Cajon 1<br />
Euro Hit<br />
Laugh<br />
ConcertBD<br />
Timpani<br />
-----<br />
-----<br />
-----<br />
-----<br />
-----<br />
-----<br />
-----<br />
Reg.Kick p<br />
Reg.Kick f<br />
Reg.Kick ff<br />
Rock Kick p<br />
Rock Kick f<br />
Jazz Kick p<br />
Jazz Kick mf<br />
Jazz Kick f<br />
Dry Kick 1<br />
Tight Kick<br />
Old Kick<br />
Jz Dry Kick<br />
Dry Kick 2<br />
Dry Kick 3<br />
Power Kick<br />
R&B Kick L<br />
Rk CmpKick<br />
Dance Kick<br />
HipHop Kick1<br />
HipHop Kick2<br />
TR909 Kick 1<br />
TR808 Kick<br />
TR909 Kick 4<br />
WD Kick mf<br />
WD Kick f<br />
WD Kick ff<br />
LD Kick mf<br />
LD Kick f<br />
LD Kick ff<br />
TY Kick mf<br />
TY Kick f<br />
TY Kick ff<br />
SF Kick 1<br />
SF Kick 2<br />
MaxLow Kick1<br />
MaxLow Kick2<br />
Dist Kick<br />
FB Kick<br />
Rough Kick1<br />
Rough Kick2<br />
Rough Kick3<br />
PlasticKick1<br />
70's Kick<br />
AnalogKick 1<br />
PlasticKick2<br />
PlasticKick3<br />
TR909 Kick 2<br />
AnalogKick 2<br />
TR909 Kick 3<br />
AnalogKick 3<br />
AnalogKick 4<br />
AnalogKick 5<br />
AnalogKick 6<br />
TR606DstKick<br />
TR909 Kick 5<br />
SH32 Kick<br />
TR707 Kick<br />
TR909 Kick 6<br />
Mix Kick 1<br />
Mix Kick 2<br />
Mix Kick 3<br />
Mix Kick 4<br />
Mix Kick 5<br />
Dry Kick 4<br />
Sweep Bass<br />
Vint Kick<br />
Small Kick<br />
-----<br />
-----<br />
96
Rhythm Set List<br />
Preset:<br />
Note No.<br />
28<br />
29<br />
30<br />
31<br />
32<br />
33<br />
34<br />
35<br />
C2 36<br />
37<br />
38<br />
39<br />
40<br />
41<br />
42<br />
43<br />
44<br />
45<br />
46<br />
47<br />
C3 48<br />
49<br />
50<br />
51<br />
52<br />
53<br />
54<br />
55<br />
56<br />
57<br />
58<br />
59<br />
C4 60<br />
61<br />
62<br />
63<br />
64<br />
65<br />
66<br />
67<br />
68<br />
69<br />
70<br />
71<br />
C5 72<br />
73<br />
74<br />
75<br />
76<br />
77<br />
78<br />
79<br />
80<br />
81<br />
82<br />
83<br />
C6 84<br />
85<br />
86<br />
87<br />
88<br />
89<br />
90<br />
91<br />
92<br />
93<br />
94<br />
95<br />
C7 96<br />
97<br />
98<br />
99<br />
100<br />
101<br />
102<br />
103<br />
1177 1178 1179 1180 1181 1182<br />
Snare Menu Snr/Rim Menu HiHat Menu Tom Menu Clp&Cym&Hit FX/SFX Menu<br />
-----<br />
-----<br />
-----<br />
-----<br />
-----<br />
-----<br />
-----<br />
Reg.Snr1 p<br />
Reg.Snr1mf<br />
Reg.Snr1 f<br />
Reg.Snr1ff<br />
Reg.Snr2 p<br />
Reg.Snr2 f<br />
Reg.Snr2ff<br />
Amb.Snr1 p<br />
Amb.Snr1 f<br />
Amb.Snr2 p<br />
Amb.Snr2 f<br />
Piccolo Snr<br />
Maple Snr<br />
Reg.Snr Gst<br />
Sft Snr Gst<br />
Jazz Snr p<br />
Jz Brsh Slap<br />
Jz Brsh Swsh<br />
Swish&Turn p<br />
Swish&Turn f<br />
Concert SD<br />
Snr Roll Lp<br />
BrushRoll Lp<br />
WD Snr p<br />
WD Snr mf<br />
WD Snr f<br />
WD Snr ff<br />
WD Rim p<br />
WD Rim mf<br />
WD Rim f<br />
WD Rim ff<br />
LD Snr p<br />
LD Snr mf<br />
LD Snr f<br />
LD Snr ff<br />
LD Rim mf<br />
LD Rim f<br />
LD Rim ff<br />
TY Snr p<br />
TY Snr mf<br />
TY Snr f<br />
TY Snr ff<br />
TY Rim p<br />
TY Rim mf<br />
TY Rim f<br />
TY Rim ff<br />
SF Snr p<br />
SF Snr mf<br />
SF Snr f<br />
SF Snr ff<br />
SF SnrGst1<br />
SF SnrGst2<br />
SF Rim p<br />
SF Rim mf<br />
SF Rim f<br />
SF Rim ff<br />
Light Snr ff<br />
Click Snr p<br />
Click Snr ff<br />
Jazz Snr mf<br />
Jazz Snr f<br />
Jazz Rim p<br />
Soft Jz Roll<br />
-----<br />
-----<br />
-----<br />
-----<br />
-----<br />
-----<br />
-----<br />
-----<br />
-----<br />
-----<br />
-----<br />
-----<br />
-----<br />
GoodOld Snr1<br />
GoodOld Snr2<br />
GoodOld Snr3<br />
GoodOld Snr4<br />
GoodOld Snr5<br />
GoodOld Snr6<br />
Dirty Snr 1<br />
Dirty Snr 2<br />
Dirty Snr 4<br />
Dirty Snr 5<br />
Dirty Snr 6<br />
Dirty Snr 7<br />
Grit Snr 1<br />
Grit Snr 2<br />
Grit Snr 3<br />
LoBit SnrFlm<br />
Lo-Bit Snr 1<br />
Dirty Snr 3<br />
Lo-Bit Snr 2<br />
Analog Snr 1<br />
Tiny Snare<br />
R&B ShrtSnr1<br />
TR808 Snr 1<br />
TR808 Snr 2<br />
TR808 Snr 3<br />
TR606 Snr 1<br />
MrchCmp Snr<br />
Reggae Snr<br />
DR660 Snr<br />
Jngl pkt Snr<br />
Pocket Snr<br />
Flange Snr<br />
Analog Snr 2<br />
Analog Snr 3<br />
TR909 Snr 1<br />
TR909 Snr 2<br />
TR909 Snr 3<br />
TR909 Snr 4<br />
TR909 Snr 5<br />
TR909 Snr 6<br />
TR808 Snr 4<br />
Lite Snare<br />
TR808 Snr 5<br />
TR808 Snr 6<br />
TR606 Snr 2<br />
CR78 Snare<br />
Urbn Sn Roll<br />
Reg.Stick<br />
Soft Stick<br />
Hard Stick<br />
Wild Stick<br />
R&B ShrtRim1<br />
R&B ShrtRim2<br />
WD CStk mf<br />
WD CStk f<br />
LD CStk mf<br />
LD CStk f<br />
TY CStk mf<br />
TY CStk f<br />
SfCrsStk p<br />
SfCrsStk f<br />
Lo-Bit Stk 1<br />
Lo-Bit Stk 2<br />
Dry Stick 1<br />
Dry Stick 2<br />
Dry Stick 3<br />
R8 Comp Rim<br />
TR909 Rim<br />
TR808 Rim<br />
-----<br />
-----<br />
-----<br />
-----<br />
-----<br />
-----<br />
-----<br />
Reg.CHH 1 p<br />
Reg.CHH 1 mf<br />
Reg.CHH 1 f<br />
Reg.CHH 1 ff<br />
Reg.CHH 2 mf<br />
Reg.CHH 2 f<br />
Reg.CHH 2 ff<br />
Reg.PHH mf<br />
Reg.PHH f<br />
Reg.OHH mf<br />
Reg.OHH f<br />
Reg.OHH ff<br />
Rock CHH1 mf<br />
Rock CHH1 f<br />
Rock CHH2 mf<br />
Rock CHH2 f<br />
Rock OHH<br />
Lo-Bit CHH 1<br />
Lo-Bit CHH 2<br />
Lo-Bit CHH 3<br />
Lo-Bit CHH 4<br />
Lo-Bit CHH 5<br />
HipHop CHH<br />
TR909 CHH 1<br />
TR909 CHH 2<br />
TR808 CHH 1<br />
TR808 CHH 2<br />
TR606 CHH 1<br />
TR606 CHH 2<br />
TR606 DstCHH<br />
Noise CHH<br />
Lite CHH<br />
CR78 CHH<br />
Dance CHH<br />
Lo-Bit PHH<br />
Hip PHH<br />
TR909 PHH 1<br />
TR909 PHH 2<br />
TR808 PHH<br />
TR606 PHH 1<br />
TR606 PHH 2<br />
HipHop OHH<br />
TR909 OHH 1<br />
TR909 OHH 2<br />
TR808 OHH 1<br />
TR808 OHH 2<br />
TR606 OHH<br />
Lo-Bit OHH 1<br />
Lo-Bit OHH 2<br />
Lo-Bit OHH 3<br />
Lite OHH<br />
CR78 OHH<br />
Noise OHH 1<br />
Noise OHH 2<br />
-----<br />
-----<br />
-----<br />
-----<br />
-----<br />
-----<br />
-----<br />
-----<br />
-----<br />
-----<br />
-----<br />
-----<br />
-----<br />
-----<br />
-----<br />
-----<br />
-----<br />
-----<br />
-----<br />
-----<br />
-----<br />
-----<br />
Reg.F.Tom p<br />
Reg.F.Tom f<br />
Reg.L.Tom p<br />
Reg.L.Tom f<br />
Reg.M.Tom p<br />
Reg.M.Tom f<br />
Reg.H.Tom p<br />
Reg.H.Tom f<br />
Reg.L.TomFlm<br />
Reg.M.TomFlm<br />
Reg.H.TomFlm<br />
Jazz Lo Tom<br />
Jazz Mid Tom<br />
Jazz Hi Tom<br />
Jazz Lo Flm<br />
Jazz Mid Flm<br />
Jazz Hi Flm<br />
Sharp Lo Tom<br />
Sharp Hi Tom<br />
Dry Lo Tom<br />
TR909 Tom<br />
TR909 DstTom<br />
TR808 Tom<br />
TR606 Tom<br />
Deep Tom<br />
RR F.Tom mp<br />
RR F.Tom f<br />
RR F.Tom ff<br />
LD L.Tom mf<br />
LD L.Tom f<br />
LD L.Tom ff<br />
LD M.Tom mf<br />
LD M.Tom f<br />
LD M.Tom ff<br />
LD H.Tom mf<br />
LD H.Tom f<br />
LD H.Tom ff<br />
TY L.Tom mf<br />
TY L.Tom f<br />
TY L.Tom ff<br />
TY M.Tom mf<br />
TY M.Tom f<br />
TY M.Tom ff<br />
TY H.Tom mf<br />
TY H.Tom f<br />
TY H.Tom ff<br />
SF L.Tom mf<br />
SF L.Tom ff<br />
SF M.Tom mf<br />
SF M.Tom f<br />
SF M.Tom ff<br />
SF H.Tom mf<br />
SF H.Tom f<br />
SF H.Tom ff<br />
RR FT Flm ff<br />
SF LT Flm ff<br />
SF MT Flm f<br />
SF HT Flm p<br />
SF HT Flm f<br />
SF HT Flm ff<br />
-----<br />
-----<br />
-----<br />
-----<br />
-----<br />
-----<br />
-----<br />
-----<br />
-----<br />
-----<br />
-----<br />
-----<br />
-----<br />
-----<br />
-----<br />
-----<br />
Hand Clap<br />
Club Clap<br />
Real Clap<br />
Bright Clap<br />
R8 Clap<br />
Gospel Clap<br />
Amb Clap<br />
TR808 Clap 1<br />
TR808 Clap 2<br />
TR909 Clap 1<br />
TR909 Clap 2<br />
TR707 Clap<br />
Cheap Clap<br />
Mix Clap 1<br />
Mix Clap 2<br />
Mix Clap 3<br />
Mix Clap 4<br />
Dist Clap<br />
Dist Clap 2<br />
Crash Cym1 p<br />
Crash Cym1 f<br />
Crash Cym 2<br />
Rock Crash 1<br />
Rock Crash 2<br />
Splash Cym<br />
Jazz Crash<br />
Ride Cymbal<br />
Ride Bell<br />
Rock Rd Cup<br />
Rock Rd Edge<br />
Jazz Ride p<br />
Jazz Ride mf<br />
China Cymbal<br />
TR909 Crash<br />
TR909 Ride<br />
Concert Cym1<br />
Concert Cym2<br />
TR606 Cym<br />
TR808 Cym<br />
Reverse Cym<br />
ClassicHseHt<br />
Narrow Hit 1<br />
Narrow Hit 2<br />
Euro Hit<br />
Dist Hit<br />
Thin Beef<br />
Tao Hit<br />
Smear Hit 1<br />
Smear Hit 2<br />
LoFi Min Hit<br />
Orch. Hit<br />
Punch Hit<br />
O'Skool Hit<br />
Philly Hit<br />
-----<br />
-----<br />
-----<br />
-----<br />
-----<br />
-----<br />
-----<br />
-----<br />
-----<br />
-----<br />
-----<br />
-----<br />
-----<br />
-----<br />
-----<br />
-----<br />
-----<br />
-----<br />
-----<br />
-----<br />
-----<br />
-----<br />
MG Zap 1<br />
MG Zap 2<br />
MG Zap 3<br />
MG Zap 4<br />
MG Zap 5<br />
MG Zap 6<br />
MG Zap 7<br />
MG Zap 8<br />
MG Zap 9<br />
MG Zap 10<br />
MG Zap 11<br />
MG Blip<br />
Beam HiQ<br />
MG Attack<br />
Syn Low Atk1<br />
Syn Low Atk2<br />
Syn Hrd Atk1<br />
Syn Hrd Atk2<br />
Syn Hrd Atk3<br />
Syn Hrd Atk4<br />
Syn Mtl Atk1<br />
Syn Mtl Atk2<br />
Syn Swt Atk1<br />
Syn Swt Atk2<br />
Syn Swt Atk3<br />
Syn Swt Atk4<br />
Syn Swt Atk5<br />
Syn Swt Atk6<br />
Syn Swt Atk7<br />
R8 Click<br />
MC500 Beep 1<br />
MC500 Beep 2<br />
DR202 Beep<br />
JD Switch<br />
Cutting Nz<br />
Vinyl Noise<br />
Applause<br />
River<br />
Thunder<br />
Monsoon<br />
Stream<br />
Bubble<br />
Bird Song<br />
Dog Bark<br />
Gallop<br />
Vint.Phone<br />
Office Phone<br />
Mobile Phone<br />
Door Creak<br />
Door Slam<br />
Car Engine<br />
Car Slip<br />
Car Pass<br />
Crash Seq.<br />
Gun Shot<br />
Siren<br />
Train Pass<br />
Airplane<br />
Laugh<br />
Scream<br />
Punch<br />
Heartbeat<br />
Footsteps<br />
Machine Gun<br />
Laser<br />
Thunder Lp<br />
Metro Bell<br />
Metro Click<br />
-----<br />
97
Rhythm Set List<br />
Preset:<br />
Note No.<br />
28<br />
29<br />
30<br />
31<br />
32<br />
33<br />
34<br />
35<br />
C2 36<br />
37<br />
38<br />
39<br />
40<br />
41<br />
42<br />
43<br />
44<br />
45<br />
46<br />
47<br />
C3 48<br />
49<br />
50<br />
51<br />
52<br />
53<br />
54<br />
55<br />
56<br />
57<br />
58<br />
59<br />
C4 60<br />
61<br />
62<br />
63<br />
64<br />
65<br />
66<br />
67<br />
68<br />
69<br />
70<br />
71<br />
C5 72<br />
73<br />
74<br />
75<br />
76<br />
77<br />
78<br />
79<br />
80<br />
81<br />
82<br />
83<br />
C6 84<br />
85<br />
86<br />
87<br />
88<br />
89<br />
90<br />
91<br />
92<br />
93<br />
94<br />
95<br />
C7 96<br />
97<br />
98<br />
99<br />
100<br />
101<br />
102<br />
103<br />
1183 1184<br />
Percussion<br />
Scrh&Voi&Wld<br />
Cowbell<br />
Cowbell Mute<br />
Cowbell2 Lng<br />
Cowbell2 Edg<br />
Cowbell3 mf<br />
Cowbell3 f<br />
Wood Block<br />
Wood Block2H<br />
Wood Block2L<br />
Claves<br />
TR808 Claves<br />
Claves 2<br />
CR78 Beat<br />
Castanet<br />
Whistle<br />
Whistle Long<br />
Whistle Shrt<br />
Bongo Hi Mt<br />
Bongo Hi Slp<br />
Bongo Lo Slp<br />
Bongo Hi Op<br />
Bongo Lo Op<br />
Conga Hi Mt<br />
Conga Lo Mt<br />
Conga Hi Slp<br />
Conga Lo Slp<br />
Conga Hi Op<br />
Conga Lo Op<br />
Conga Slp Op<br />
Conga Efx<br />
Conga Thumb<br />
Conga 2H Op<br />
Conga 2H Mt<br />
Conga 2H Slp<br />
Conga 2L Op<br />
Conga 2L Mt<br />
Timbale 1<br />
Timbale 2<br />
Timbare 3<br />
Timbare 4<br />
Cabasa Up<br />
Cabasa Down<br />
Cabasa Cut<br />
Cabasa2<br />
Cabasa2 Cut<br />
Shaker<br />
Maracas<br />
808 Maracas<br />
R8 Shaker<br />
Guiro 1<br />
Guiro 2<br />
Guiro Long<br />
Guiro 2 Up<br />
Guiro 2 Down<br />
Guiro 2 Fast<br />
Vibraslap<br />
Tamborine 1<br />
Tamborine 2<br />
Tamborine 3<br />
Tamborine4 f<br />
Tamborine4 p<br />
CR78 Tamb<br />
Timpani p<br />
Timpani f<br />
Timpani Roll<br />
Timpani Lp<br />
ConcertBD p<br />
ConcertBD f<br />
ConcertBD ff<br />
ConcertBD Lp<br />
Triangle 1Op<br />
Triangle 1Mt<br />
Triangle 2<br />
Tibet Cymbal<br />
Wind Chime<br />
Crotale<br />
-----<br />
-----<br />
-----<br />
-----<br />
-----<br />
-----<br />
-----<br />
Scratch 1<br />
Scratch 2<br />
Scratch 3<br />
Scratch 4<br />
Scratch 5<br />
Scratch 6<br />
Scratch 7<br />
Scratch 9<br />
Scratch 10<br />
Aah Formant<br />
Eeh Formant<br />
Iih Formant<br />
Ooh Formant<br />
Uuh Formant<br />
Metal Vox W1<br />
Metal Vox W2<br />
Metal Vox W3<br />
JD Gamelan 1<br />
JD Gamelan 2<br />
JD Gamelan 3<br />
JD Gamelan 4<br />
JD Gamelan 5<br />
JD Gamelan 6<br />
JD Gamelan 7<br />
JD Gamelan 8<br />
JD Gamelan 9<br />
JD Gamelan10<br />
JD Gamelan11<br />
JD Gamelan12<br />
Cajon 1<br />
Cajon 2<br />
Cajon 3<br />
Cajon 4<br />
SprgDrm Hit<br />
Cuica<br />
Cuica 2 Hi<br />
Cuica 2 Low<br />
-----<br />
-----<br />
-----<br />
-----<br />
-----<br />
-----<br />
-----<br />
-----<br />
-----<br />
-----<br />
-----<br />
-----<br />
-----<br />
-----<br />
-----<br />
-----<br />
-----<br />
-----<br />
-----<br />
-----<br />
-----<br />
-----<br />
-----<br />
-----<br />
-----<br />
-----<br />
-----<br />
-----<br />
-----<br />
-----<br />
-----<br />
-----<br />
98
Rhythm Set List<br />
Note No.<br />
27<br />
28<br />
29<br />
30<br />
31<br />
32<br />
33<br />
34<br />
35<br />
C2 36<br />
37<br />
38<br />
39<br />
40<br />
41<br />
42<br />
43<br />
44<br />
45<br />
46<br />
47<br />
C3 48<br />
49<br />
50<br />
51<br />
52<br />
53<br />
54<br />
55<br />
56<br />
57<br />
58<br />
59<br />
C4 60<br />
61<br />
62<br />
63<br />
64<br />
65<br />
66<br />
67<br />
68<br />
69<br />
70<br />
71<br />
C5 72<br />
73<br />
74<br />
75<br />
76<br />
77<br />
78<br />
79<br />
80<br />
81<br />
82<br />
83<br />
C6 84<br />
85<br />
86<br />
87<br />
88<br />
GM Group<br />
1185 (PC: 1)<br />
GM2 STANDARD<br />
1186 (PC: 9)<br />
GM2 ROOM<br />
1187 (PC: 17)<br />
GM2 POWER<br />
1188 (PC: 25)<br />
GM2 ELECTRIC<br />
1189 (PC: 26)<br />
GM2 ANALOG<br />
1190 (PC: 33)<br />
GM2 JAZZ<br />
High Q<br />
Slap<br />
Scratch Push<br />
Scratch Pull<br />
Sticks<br />
Square Click<br />
Metron Click<br />
Metron Bell<br />
Kick Drum 2<br />
Kick Drum 1<br />
Side Stick<br />
Aco.Snare<br />
Hand Clap<br />
Elec.Snare<br />
Low Tom 2<br />
ClosedHi-hat<br />
Low Tom 1<br />
Pedal Hi-hat<br />
Mid Tom 2<br />
Open Hi-hat<br />
Mid Tom 1<br />
High Tom 2<br />
CrashCymbal1<br />
High Tom 1<br />
Ride Cymbal1<br />
China Cymbal<br />
Ride Bell<br />
Tambourine<br />
SplashCymbal<br />
Cowbell<br />
CrashCymbal2<br />
Vibra-slap<br />
Ride Cymbal2<br />
High Bongo<br />
Low Bongo<br />
MuteHi Conga<br />
OpenHi Conga<br />
Low Conga<br />
High Timbale<br />
Low Timbale<br />
High Agogo<br />
Low Agogo<br />
Cabasa<br />
Maracas<br />
ShortWhistle<br />
Long Whistle<br />
Short Guiro<br />
Long Guiro<br />
Claves<br />
Hi WoodBlock<br />
LowWoodBlock<br />
Mute Cuica<br />
Open Cuica<br />
MuteTriangle<br />
OpenTriangle<br />
Shaker<br />
Jingle Bell<br />
Bell Tree<br />
Castanets<br />
Mute Surdo<br />
Open Surdo<br />
-----<br />
High Q<br />
Slap<br />
Scratch Push<br />
Scratch Pull<br />
Sticks<br />
Square Click<br />
Metron Click<br />
Metron Bell<br />
Kick Drum 2<br />
Kick Drum 1<br />
Side Stick<br />
Aco.Snare<br />
Hand Clap<br />
Elec.Snare<br />
Room LowTom2<br />
ClosedHi-hat<br />
Room LowTom1<br />
Pedal Hi-hat<br />
Room MidTom2<br />
Open Hi-hat<br />
Room MidTom1<br />
Room Hi Tom2<br />
CrashCymbal1<br />
Room Hi Tom1<br />
Ride Cymbal1<br />
China Cymbal<br />
Ride Bell<br />
Tambourine<br />
SplashCymbal<br />
Cowbell<br />
CrashCymbal2<br />
Vibra-slap<br />
Ride Cymbal2<br />
High Bongo<br />
Low Bongo<br />
MuteHi Conga<br />
OpenHi Conga<br />
Low Conga<br />
High Timbale<br />
Low Timbale<br />
High Agogo<br />
Low Agogo<br />
Cabasa<br />
Maracas<br />
ShortWhistle<br />
Long Whistle<br />
Short Guiro<br />
Long Guiro<br />
Claves<br />
Hi WoodBlock<br />
LowWoodBlock<br />
Mute Cuica<br />
Open Cuica<br />
MuteTriangle<br />
OpenTriangle<br />
Shaker<br />
Jingle Bell<br />
Bell Tree<br />
Castanets<br />
Mute Surdo<br />
Open Surdo<br />
-----<br />
High Q<br />
Slap<br />
Scratch Push<br />
Scratch Pull<br />
Sticks<br />
Square Click<br />
Metron Click<br />
Metron Bell<br />
Power Kick 2<br />
Power Kick 1<br />
Side Stick<br />
PowerSnareDr<br />
Hand Clap<br />
Elec.Snare<br />
PowerLowTom2<br />
ClosedHi-hat<br />
PowerLowTom1<br />
Pedal Hi-hat<br />
PowerMidTom2<br />
Open Hi-hat<br />
PowerMidTom1<br />
Power HiTom2<br />
CrashCymbal1<br />
Power HiTom1<br />
Ride Cymbal1<br />
China Cymbal<br />
Ride Bell<br />
Tambourine<br />
SplashCymbal<br />
Cowbell<br />
CrashCymbal2<br />
Vibra-slap<br />
Ride Cymbal2<br />
High Bongo<br />
Low Bongo<br />
MuteHi Conga<br />
OpenHi Conga<br />
Low Conga<br />
High Timbale<br />
Low Timbale<br />
High Agogo<br />
Low Agogo<br />
Cabasa<br />
Maracas<br />
ShortWhistle<br />
Long Whistle<br />
Short Guiro<br />
Long Guiro<br />
Claves<br />
Hi WoodBlock<br />
LowWoodBlock<br />
Mute Cuica<br />
Open Cuica<br />
MuteTriangle<br />
OpenTriangle<br />
Shaker<br />
Jingle Bell<br />
Bell Tree<br />
Castanets<br />
Mute Surdo<br />
Open Surdo<br />
-----<br />
High Q<br />
Slap<br />
Scratch Push<br />
Scratch Pull<br />
Sticks<br />
Square Click<br />
Metron Click<br />
Metron Bell<br />
Kick Drum 2<br />
Elec.Kick 1<br />
Side Stick<br />
E.SnareDrum1<br />
Hand Clap<br />
E.SnareDrum2<br />
E.Low Tom 2<br />
ClosedHi-hat<br />
E.Low Tom 1<br />
Pedal Hi-hat<br />
E.Mid Tom 2<br />
Open Hi-hat<br />
E.Mid Tom 1<br />
E.Hi Tom 2<br />
CrashCymbal1<br />
E.Hi Tom 1<br />
Ride Cymbal1<br />
Reverse Cym.<br />
Ride Bell<br />
Tambourine<br />
SplashCymbal<br />
Cowbell<br />
CrashCymbal2<br />
Vibra-slap<br />
Ride Cymbal2<br />
High Bongo<br />
Low Bongo<br />
MuteHi Conga<br />
OpenHi Conga<br />
Low Conga<br />
High Timbale<br />
Low Timbale<br />
High Agogo<br />
Low Agogo<br />
Cabasa<br />
Maracas<br />
ShortWhistle<br />
Long Whistle<br />
Short Guiro<br />
Long Guiro<br />
Claves<br />
Hi WoodBlock<br />
LowWoodBlock<br />
Mute Cuica<br />
Open Cuica<br />
MuteTriangle<br />
OpenTriangle<br />
Shaker<br />
Jingle Bell<br />
Bell Tree<br />
Castanets<br />
Mute Surdo<br />
Open Surdo<br />
-----<br />
High Q<br />
Slap<br />
Scratch Push<br />
Scratch Pull<br />
Sticks<br />
Square Click<br />
Metron Click<br />
Metron Bell<br />
Kick Drum 2<br />
Ana.Kick 1<br />
Ana.Rim Sho<br />
Ana.Snare 1<br />
Hand Clap<br />
Elec.Snare<br />
Ana.Low Tom2<br />
Ana.ClosedHH<br />
Ana.Low Tom1<br />
Ana.ClosedHH<br />
Ana.Mid Tom2<br />
Ana.Open HH<br />
Ana.Mid Tom1<br />
Ana.Hi Tom2<br />
Ana.Cymbal<br />
Ana.Hi Tom1<br />
Ride Cymbal1<br />
China Cymbal<br />
Ride Bell<br />
Tambourine<br />
SplashCymbal<br />
Ana.Cowbell<br />
CrashCymbal2<br />
Vibra-slap<br />
Ride Cymbal2<br />
High Bongo<br />
Low Bongo<br />
Ana.Hi Conga<br />
Ana.MidConga<br />
Ana.LowConga<br />
High Timbale<br />
Low Timbale<br />
High Agogo<br />
Low Agogo<br />
Cabasa<br />
Ana.Maracas<br />
ShortWhistle<br />
Long Whistle<br />
Short Guiro<br />
Long Guiro<br />
Ana.Claves<br />
Hi WoodBlock<br />
LowWoodBlock<br />
Mute Cuica<br />
Open Cuica<br />
MuteTriangle<br />
OpenTriangle<br />
Shaker<br />
Jingle Bell<br />
Bell Tree<br />
Castanets<br />
Mute Surdo<br />
Open Surdo<br />
-----<br />
High Q<br />
Slap<br />
Scratch Push<br />
Scratch Pull<br />
Sticks<br />
Square Click<br />
Metron Click<br />
Metron Bell<br />
Jazz Kick 2<br />
Jazz Kick 1<br />
Side Stick<br />
Aco.Snare<br />
Hand Clap<br />
Elec.Snare<br />
Low Tom 2<br />
ClosedHi-hat<br />
Low Tom 1<br />
Pedal Hi-hat<br />
Mid Tom 2<br />
Open Hi-hat<br />
Mid Tom 1<br />
High Tom 2<br />
CrashCymbal1<br />
High Tom 1<br />
Ride Cymbal1<br />
China Cymbal<br />
Ride Bell<br />
Tambourine<br />
SplashCymbal<br />
Cowbell<br />
CrashCymbal2<br />
Vibra-slap<br />
Ride Cymbal2<br />
High Bongo<br />
Low Bongo<br />
MuteHi Conga<br />
OpenHi Conga<br />
Low Conga<br />
High Timbale<br />
Low Timbale<br />
High Agogo<br />
Low Agogo<br />
Cabasa<br />
Maracas<br />
ShortWhistle<br />
Long Whistle<br />
Short Guiro<br />
Long Guiro<br />
Claves<br />
Hi WoodBlock<br />
LowWoodBlock<br />
Mute Cuica<br />
Open Cuica<br />
MuteTriangle<br />
OpenTriangle<br />
Shaker<br />
Jingle Bell<br />
Bell Tree<br />
Castanets<br />
Mute Surdo<br />
Open Surdo<br />
-----<br />
99
Rhythm Set List<br />
Note No.<br />
27<br />
28<br />
29<br />
30<br />
31<br />
32<br />
33<br />
34<br />
35<br />
C2 36<br />
37<br />
38<br />
39<br />
40<br />
41<br />
42<br />
43<br />
44<br />
45<br />
46<br />
47<br />
C3 48<br />
49<br />
50<br />
51<br />
52<br />
53<br />
54<br />
55<br />
56<br />
57<br />
58<br />
59<br />
C4 60<br />
61<br />
62<br />
63<br />
64<br />
65<br />
66<br />
67<br />
68<br />
69<br />
70<br />
71<br />
C5 72<br />
73<br />
74<br />
75<br />
76<br />
77<br />
78<br />
79<br />
80<br />
81<br />
82<br />
83<br />
C6 84<br />
85<br />
86<br />
87<br />
88<br />
1191 (PC: 41) 1192 (PC: 49) 1193 (PC: 57)<br />
GM2 BRUSH GM2 ORCHSTRA GM2 SFX<br />
High Q<br />
Slap<br />
Scratch Push<br />
Scratch Pull<br />
Sticks<br />
Square Click<br />
Metron Click<br />
Metron Bell<br />
Jazz Kick 2<br />
Jazz Kick 1<br />
Side Stick<br />
Brush Tap<br />
Brush Slap<br />
Brush Swirl<br />
BrushLowTom2<br />
ClosedHi-hat<br />
BrushLowTom1<br />
Pedal Hi-hat<br />
BrushMidTom2<br />
Open Hi-hat<br />
BrushMidTom1<br />
Brush HiTom2<br />
CrashCymbal1<br />
Brush HiTom1<br />
Ride Cymbal1<br />
China Cymbal<br />
Ride Bell<br />
Tambourine<br />
SplashCymbal<br />
Cowbell<br />
CrashCymbal2<br />
Vibra-slap<br />
Ride Cymbal2<br />
High Bongo<br />
Low Bongo<br />
MuteHi Conga<br />
OpenHi Conga<br />
Low Conga<br />
High Timbale<br />
Low Timbale<br />
High Agogo<br />
Low Agogo<br />
Cabasa<br />
Maracas<br />
ShortWhistle<br />
Long Whistle<br />
Short Guiro<br />
Long Guiro<br />
Claves<br />
Hi WoodBlock<br />
LowWoodBlock<br />
Mute Cuica<br />
Open Cuica<br />
MuteTriangle<br />
OpenTriangle<br />
Shaker<br />
Jingle Bell<br />
Bell Tree<br />
Castanets<br />
Mute Surdo<br />
Open Surdo<br />
-----<br />
ClosedHi-hat<br />
Pedal Hi-hat<br />
Open Hi-hat<br />
Ride Cymbal1<br />
Sticks<br />
Square Click<br />
Metron Click<br />
Metron Bell<br />
Concert BD 2<br />
Concert BD 1<br />
Side Stick<br />
Concert SD<br />
Castanets<br />
Concert SD<br />
Timpani F<br />
Timpani F#<br />
Timpani G<br />
Timpani G#<br />
Timpani A<br />
Timpani A#<br />
Timpani B<br />
Timpani c<br />
Timpani c#<br />
Timpani d<br />
Timpani d#<br />
Timpani e<br />
Timpani f<br />
Tambourine<br />
SplashCymbal<br />
Cowbell<br />
Concert Cym2<br />
Vibra-slap<br />
Concert Cym1<br />
High Bongo<br />
Low Bongo<br />
MuteHi Conga<br />
OpenHi Conga<br />
Low Conga<br />
High Timbale<br />
Low Timbale<br />
High Agogo<br />
Low Agogo<br />
Cabasa<br />
Maracas<br />
ShortWhistle<br />
Long Whistle<br />
Short Guiro<br />
Long Guiro<br />
Claves<br />
Hi WoodBlock<br />
LowWoodBlock<br />
Mute Cuica<br />
Open Cuica<br />
MuteTriangle<br />
OpenTriangle<br />
Shaker<br />
Jingle Bell<br />
Bell Tree<br />
Castanets<br />
Mute Surdo<br />
Open Surdo<br />
Applause<br />
-----<br />
-----<br />
-----<br />
-----<br />
-----<br />
-----<br />
-----<br />
-----<br />
-----<br />
-----<br />
-----<br />
-----<br />
High Q<br />
Slap<br />
Scratch Push<br />
Scratch Pull<br />
Sticks<br />
Square Click<br />
Metron Click<br />
Metron Bell<br />
GtFret Noise<br />
Cut Noise Up<br />
Cut Noise Dw<br />
Slap_St.Bass<br />
Fl.Key Click<br />
Laughing<br />
Scream<br />
Punch<br />
Heart Beat<br />
Footsteps 1<br />
Footsteps 2<br />
Applause<br />
Door Creak<br />
Door<br />
Scratch<br />
Wind Chimes<br />
Car-Engine<br />
Car-Stop<br />
Car-Pass<br />
Car-Crash<br />
Siren<br />
Train<br />
Jetplane<br />
Helicopter<br />
Starship<br />
Gun Shot<br />
Machine Gun<br />
Lasergun<br />
Explosion<br />
Dog<br />
Horse-Gallop<br />
Birds<br />
Rain<br />
Thunder<br />
Wind<br />
Seashore<br />
Stream<br />
Bubble<br />
-----<br />
-----<br />
-----<br />
-----<br />
100
MEMO<br />
101
Chord Intelligence<br />
● = Constituent notes of this chord<br />
★ = Keys you need to press to hear this chord when “Chord Mode” in “Performance Parameters” is set to INTEL (p. 39)<br />
C C# D E E F<br />
CM7 C#M7 DM7 E M7 EM7 FM7<br />
C7 C#7 D7 E 7 E7 F7<br />
Cm C#m Dm E m Em Fm<br />
Cm7 C#m7 Dm7 E m7 Em7 Fm7<br />
CmM7 C#mM7 DmM7 E mM7 EmM7 FmM7<br />
Cdim C#dim Ddim E dim Edim Fdim<br />
Cm7 ( 5 )<br />
C#m7 ( 5 )<br />
Dm7 ( 5 ) E m7 ( 5 ) Em7 ( 5 )<br />
Fm7 ( 5 )<br />
Caug C#aug Daug E aug Eaug Faug<br />
Csus4 C#sus4 Dsus4 E sus4 Esus4 Fsus4<br />
C7sus4 C#7sus4 D7sus4 E 7sus4 E7sus4 F7sus4<br />
102
Chord Intelligence<br />
● = Constituent notes of this chord<br />
★ = Keys you need to press to hear this chord when “Chord Mode” in “Performance Parameters” is set to INTEL (p. 39)<br />
F# G A A B B<br />
F#M7 GM7 A M7 AM7 B M7 BM7<br />
F#7 G7 A 7 A7 B 7 B7<br />
F#m Gm A m Am B m Bm<br />
F#m7 Gm7 A m7 Am7 B m7 Bm7<br />
F#mM7 GmM7 A mM7 AmM7 B mM7 BmM7<br />
F#dim Gdim A dim Adim B dim Bdim<br />
F#m7 ( 5 )<br />
Gm7 ( 5 ) A m7 ( 5 ) Am7 ( 5 ) B m7 ( 5 ) Bm7 ( 5 )<br />
F#aug Gaug A aug Aaug B aug Baug<br />
F#sus4 Gsus4 A sus4 Asus4 B sus4 Bsus4<br />
F#7sus4 G7sus4 A 7sus4 A7sus4 B 7sus4 B7sus4<br />
103
MIDI Implementation Chart<br />
Model: GW-8<br />
Function...<br />
MIDI Implementation Chart<br />
Date : March 1, 2008<br />
Version : 1.00<br />
Transmitted Recognized Remarks<br />
Basic<br />
Channel<br />
Default<br />
Changed<br />
1–16<br />
1–16<br />
1–16<br />
1–16<br />
Mode<br />
Note<br />
Number :<br />
Velocity<br />
Default<br />
Messages<br />
Altered<br />
True Voice<br />
Note ON<br />
Note OFF<br />
Mode 3<br />
Mode 3, 4 (M = 1)<br />
**************<br />
0–127 0–127<br />
**************<br />
0–127<br />
O<br />
O *3<br />
Mode 3<br />
Mode 3, 4 (M = 1)<br />
O<br />
O<br />
* 2<br />
Aftertouch<br />
Key's<br />
Channel's<br />
O *3<br />
O *3<br />
O<br />
O<br />
Pitch Bend<br />
O *1<br />
O *1<br />
Control<br />
Change<br />
0, 32<br />
1245<br />
6, 38<br />
78<br />
10<br />
11<br />
16<br />
17<br />
18<br />
19<br />
64<br />
65<br />
66<br />
67<br />
68<br />
69<br />
70<br />
71<br />
72<br />
73<br />
74<br />
75<br />
76<br />
77<br />
78<br />
80<br />
81<br />
82<br />
83<br />
84<br />
91<br />
92<br />
93<br />
94<br />
95<br />
96, 97<br />
98, 99<br />
100, 101<br />
102–119<br />
O<br />
O<br />
O<br />
O<br />
O<br />
O<br />
O<br />
O<br />
O<br />
O<br />
O<br />
O<br />
O<br />
O<br />
O<br />
O<br />
O<br />
O<br />
O<br />
O<br />
O<br />
O<br />
O<br />
O<br />
O<br />
O<br />
O<br />
O<br />
O<br />
O<br />
O<br />
O<br />
O<br />
O<br />
O<br />
O<br />
O<br />
O<br />
O<br />
O<br />
O<br />
O<br />
O<br />
*1<br />
*1<br />
O<br />
O<br />
X<br />
X<br />
O<br />
O<br />
O<br />
X<br />
O<br />
O<br />
X<br />
X<br />
X<br />
X<br />
O<br />
O<br />
O<br />
O<br />
O<br />
X<br />
X<br />
O<br />
O<br />
O<br />
O<br />
O<br />
O<br />
O<br />
O<br />
O<br />
O<br />
O<br />
O<br />
O<br />
O (Reverb)<br />
X<br />
O (Chorus)<br />
X<br />
X<br />
X<br />
X<br />
O<br />
X<br />
*1<br />
*1<br />
Bank select<br />
Modulation<br />
Breath type<br />
Foot type<br />
Portamento time<br />
Data entry<br />
Volume<br />
Balance<br />
Panpot<br />
Expression<br />
General purpose controller 1<br />
General purpose controller 2<br />
General purpose controller 3<br />
General purpose controller 4<br />
Hold1<br />
Portamento<br />
Sostenuto<br />
Soft<br />
Legato foot switch<br />
Hold2<br />
Sound variation<br />
Resonance<br />
Release time<br />
Attack time<br />
Cutoff<br />
Decay time<br />
Vibrato rate<br />
Vibrato depth<br />
Vibrato delay<br />
General purpose controller 5<br />
General purpose controller 6<br />
General purpose controller 7<br />
General purpose controller 8<br />
Portamento control<br />
General purpose effects 1<br />
Tremoro<br />
General purpose effects 3<br />
Celeste<br />
Phaser<br />
Increment, Decrement<br />
NRPN LSB,MSB<br />
RPN LSB,MSB<br />
Program<br />
Change : True Number<br />
System Exclusive<br />
System<br />
Common<br />
System<br />
Realtime<br />
Aux<br />
Messages<br />
Notes<br />
: Song Position<br />
: Song Select<br />
: Tune<br />
: Clock<br />
: Command<br />
: All Sound Off<br />
: Reset All Controllers<br />
: Local ON/OFF<br />
: All Note Off<br />
: Active Sensing<br />
: System Reset<br />
O *1<br />
**************<br />
O<br />
O *1<br />
X<br />
X<br />
O *1<br />
O *1<br />
O *3<br />
O *3<br />
X<br />
O *3<br />
O<br />
X<br />
* 1 O X is selectable.<br />
* 2 Recognized as M=1 even if M≠1.<br />
* 3 Transmitted from Backing Track.<br />
O *1<br />
0–127<br />
O<br />
O<br />
X<br />
X<br />
O *1<br />
O *1<br />
O<br />
O<br />
X<br />
O (123–127)<br />
O<br />
X<br />
Program Number 1–128<br />
Mode 1 : OMNI ON, POLY<br />
Mode 3 : OMNI OFF, POLY<br />
Mode 2 : OMNI ON, MONO<br />
Mode 4 : OMNI OFF, MONO<br />
O : Yes<br />
X : No<br />
104
Specifications<br />
GW-8: Workstation<br />
(Conforms to General MIDI 2 System)<br />
■ Keyboard<br />
61 keys (with velocity)<br />
■ Sound Generator<br />
Maximum Polyphony<br />
Parts<br />
Wave Memory<br />
128 voices<br />
16 parts + Keyboard part<br />
256 MB (16-bit linear equivalent)<br />
Preset Memory Performances: 128<br />
Tones: 896 + 256 (GM2) + World<br />
Rhythm Sets: 32 + 9 (GM2) + World<br />
User Memory Performances: 128<br />
Favorite Performances: 100<br />
Favorite Tones: 100<br />
Effects<br />
MFX: Upper and Lower, 78 types<br />
Chorus: 3 types<br />
Reverb: 5 types<br />
■ Backing Track<br />
Backing type<br />
Tempo (MIDI) 20 to 250<br />
Style Variations<br />
Song (16-track<br />
Recorder)<br />
USB Memory Player<br />
Preset Memory<br />
User Memory Styles: 100<br />
Songs: 200<br />
■ Others<br />
Style, Song, USB Memory Player<br />
4 Intro, 4 Main, 4 Ending, 4 Fill In<br />
Sync Start, Stop<br />
One Touch Setting<br />
16-track, Rec mode (Mix, Replace),<br />
Count in, Punch In-Out, Input<br />
Quantize<br />
999 songs<br />
SMF: format-0/1<br />
Audio File: WAV, AIFF, MP3<br />
Styles: 130 + World<br />
Controllers D Beam Controller: 1<br />
Pitch Bend/Modulation Lever: 1<br />
Control Knobs: 2<br />
USB (MIDI)<br />
Operating System<br />
Windows: XP Home SP2 or later/<br />
Windows XP Professional SP2 or<br />
later/Windows Vista<br />
Display<br />
* This does not work with the 64-<br />
bit Edition of Windows Vista.<br />
240 x 64 dots white graphic LCD<br />
Connectors Output Jacks (L/MONO, R)<br />
Ext Input jack<br />
Headphones Jack<br />
MIDI Connectors (IN, OUT)<br />
Hold Pedal Jack<br />
Control Pedal Jack<br />
USB Connectors<br />
: COMPUTER (supports USB MIDI)<br />
: MEMORY (supports USB 2.0 Hi-<br />
Speed Flash Memory)<br />
Power Supply DC 9 V (AC Adaptor)<br />
Current Draw 1,000 mA<br />
Dimensions<br />
Weight<br />
Style Converter 3 System Requirements<br />
Operating<br />
System<br />
Accessories<br />
CPU/Clock<br />
RAM<br />
Hard Disk<br />
Display/<br />
Colors<br />
Others<br />
Microsoft® Windows® XP<br />
Playlist Editor System Requirements<br />
Operating<br />
System<br />
CPU/Clock<br />
RAM<br />
Hard Disk<br />
Display/Colors<br />
Others<br />
1,045 (W) x 318 (D) x 102 (H) mm<br />
6.0 kg / 13 lbs 4 oz<br />
(excluding AC adaptor)<br />
Owner’s <strong>Manual</strong><br />
CD-ROM<br />
(Style Converter 3.0, Playlist Editor)<br />
AC Adaptor (PSB-1U)<br />
Music Player Pad<br />
USB Box Protector<br />
Microsoft® Windows Vista®<br />
* This does not work with the 64-bit Edition of<br />
Windows Vista®.<br />
Pentium®/Celeron® processor<br />
1 GHz or higher<br />
512 MB or more<br />
2 MB or more<br />
800 x 600 or higher/<br />
65,536 colors (16 bit High Color) or more<br />
CD-ROM Drive<br />
Microsoft® Windows® XP<br />
Microsoft® Windows Vista®<br />
* This does not work with the 64-bit Edition of<br />
Windows Vista®.<br />
Pentium®/Celeron® processor<br />
1 GHz or higher<br />
512 MB or more<br />
10 MB or more<br />
1024 x 768 or higher/24 bit Full Color or more<br />
CD-ROM Drive<br />
986<br />
* While under most conditions, a computer similar to the above<br />
will permit normal operation of the GW-8 applications, <strong>Roland</strong><br />
cannot guarantee compatibility solely on these factors. This is due<br />
to numerous variables that may influence the processing<br />
environment, such as differences in motherboard design and the<br />
particular combination of other devices involved.<br />
962a<br />
* In the interest of product improvement, the specifications and/or<br />
appearance of this unit are subject to change without prior notice.<br />
962b<br />
* In the interest of product improvement, the specifications and/or<br />
contents of this package are subject to change without prior<br />
notice.<br />
105
Index<br />
A<br />
AC Adaptor ............................................................... 14<br />
Accompaniment .......................................................... 25<br />
ANALOG MODIFY ......................................... 10, 37, 40<br />
ANALOG MODIFY knobs ............................................ 37<br />
ANALOG MODIFY [SELECT] ........................................ 37<br />
Arabic ....................................................................... 21<br />
[ASSIGNABLE 1] .................................................. 34–35<br />
ASSIGNABLE 1/2 buttons ........................................... 10<br />
[ASSIGNABLE 2] .................................................. 34–35<br />
Assignable pedal ........................................................ 38<br />
ATTACK .................................................................... 38<br />
Attack Time ................................................................ 40<br />
Audio File .................................................................. 31<br />
[AUTO FILL-IN] ........................................................... 25<br />
Auto Fill-in .................................................................. 25<br />
B<br />
Backing ..................................................................... 13<br />
Backing Hold ............................................................. 39<br />
BACKING TYPE buttons ............................................... 10<br />
Backing Types ............................................................ 24<br />
Backup ...................................................................... 49<br />
BALANCE [BACKING] ................................................ 24<br />
BALANCE buttons ....................................................... 10<br />
BALANCE [KEYBOARD] .............................................. 24<br />
Bass Inversion ............................................................ 39<br />
Bend Mode ................................................................ 46<br />
C<br />
Center Cancel ...................................................... 17, 32<br />
Chain Play ................................................................. 33<br />
Chord ....................................................................... 25<br />
Chord Intelligence ..................................................... 102<br />
Chord Mode .............................................................. 39<br />
CHORUS ............................................................. 38, 42<br />
Chorus Output Select .................................................. 42<br />
Chorus Parameters ...................................................... 82<br />
Chorus Send Level ...................................................... 40<br />
Computer .................................................................. 45<br />
Connecting<br />
AC Adaptor .......................................................... 14<br />
Computer ............................................................. 45<br />
External equipment ................................................ 15<br />
MIDI .................................................................... 43<br />
Pedal and switch ................................................... 15<br />
Portable audio player ............................................. 15<br />
CONTROL PEDAL jack .................................... 12, 15, 38<br />
Control Pedal Switch ................................................... 41<br />
Cord hook ........................................................... 12, 14<br />
Count In .................................................................... 29<br />
Cursor buttons ...................................................... 10, 17<br />
CUTOFF .................................................................... 38<br />
Cutoff ........................................................................ 40<br />
D<br />
D Beam Assignable 1 Type .......................................... 47<br />
D Beam Assignable 2 Type .......................................... 47<br />
D Beam controller ................................................. 10, 34<br />
D BEAM screen .......................................................... 35<br />
D Beam Sens ............................................................. 47<br />
D BEAM SOLO SYNTH ............................................... 47<br />
D BEAM SOLO SYNTH screen ..................................... 34<br />
Data Structure in USB Memory ..................................... 50<br />
DC IN jack .......................................................... 12, 14<br />
Decay Time ............................................................... 40<br />
Delay ........................................................................ 82<br />
Deleting<br />
Song .................................................................... 30<br />
Song from playlist .................................................. 33<br />
Demo Song ................................................................ 16<br />
Display Contrast ......................................................... 16<br />
[DUAL] ................................................................ 11, 19<br />
Dual mode ................................................................. 19<br />
E<br />
Editing<br />
Performance ......................................................... 39<br />
Playlist ................................................................. 33<br />
Tone .................................................................... 40<br />
EFFECT ...................................................................... 38<br />
EFFECT SEND ............................................................ 42<br />
EFFECT SOURCE ........................................................ 42<br />
[EFFECTS] ............................................................ 11, 42<br />
Effects ....................................................................... 42<br />
Effects List .................................................................. 56<br />
[ENDING] ................................................................. 25<br />
[ENTER] .................................................................... 10<br />
ENVELOPE ................................................................ 38<br />
Equal ........................................................................ 21<br />
Error Messages .......................................................... 55<br />
[EXIT] ........................................................................ 10<br />
Expression pedal ........................................................ 15<br />
EXT INPUT jack .............................................. 12, 15, 17<br />
F<br />
Factory Reset ............................................................. 16<br />
Favorite<br />
List ....................................................................... 21<br />
Performance ......................................................... 20<br />
Tone .................................................................... 20<br />
FAVORITE [BANK] ...................................................... 20<br />
FAVORITE buttons ................................................. 11, 20<br />
FAVORITE [ON/OFF] ................................................. 20<br />
File name ............................................................ 45, 54<br />
Fill-In ......................................................................... 25<br />
FILTER ....................................................................... 38<br />
Format<br />
USB memory ......................................................... 49<br />
H<br />
Harmony ................................................................... 23<br />
Headphones .............................................................. 15<br />
HOLD PEDAL jack ................................................. 12, 15<br />
Hold Pedal Switch ...................................................... 41<br />
Hold Polarity .............................................................. 47<br />
I<br />
INIT .......................................................................... 28<br />
Initializing USB memory .............................................. 49<br />
Input Quantize ........................................................... 29<br />
106
Index<br />
[INTRO] ..................................................................... 25<br />
K<br />
KBD Trans .................................................................. 22<br />
[KEY SCALE] ........................................................ 11, 21<br />
[KEY TOUCH] ...................................................... 11, 22<br />
Keyboard Mode ......................................................... 19<br />
L<br />
[LCD CONTRAST] knob ......................................... 12, 16<br />
Legato Switch ............................................................. 40<br />
Level Adjust ................................................................ 33<br />
Loading User Data ...................................................... 49<br />
Local Switch ......................................................... 43, 46<br />
[LOCK] ................................................................ 11, 16<br />
LOCK ........................................................................ 48<br />
LOWER MFX .............................................................. 42<br />
Lower MFX Chorus Send .............................................. 42<br />
Lower MFX Reverb Send .............................................. 42<br />
Lower MFX Source ...................................................... 42<br />
Lower Tone ................................................................ 19<br />
M<br />
[MAIN] ..................................................................... 25<br />
Main screen ......................................................... 18, 31<br />
MASTER EQ ............................................................... 37<br />
Master Tune ............................................................... 46<br />
[MELODY INTELLIGENCE] ..................................... 11, 23<br />
[MENU] ............................................................... 10, 46<br />
Metronome .................................................... 23–24, 48<br />
Metronome Level ........................................................ 23<br />
Metronome Mode ....................................................... 23<br />
Metronome Switch ...................................................... 23<br />
MFX (Multi effects) ...................................................... 42<br />
MIDI .................................................................... 43, 47<br />
MIDI Channels ........................................................... 43<br />
MIDI Implementation Chart ........................................ 104<br />
MIDI OUT/IN connectors ............................................. 12<br />
MIDI Parameters ......................................................... 43<br />
MIDI Rx Switch ........................................................... 44<br />
MIDI Sound Module .................................................... 44<br />
MIDI Tx Switch ........................................................... 44<br />
Minus One ................................................................. 32<br />
Minus One function ..................................................... 30<br />
[MINUS ONE/CENTER CANCEL] .......................... 30, 32<br />
Mix recording ............................................................ 28<br />
Modulation ................................................................ 37<br />
Mono/Poly ................................................................ 40<br />
Multi-Effects Parameters ............................................... 56<br />
Music Style (Style) ................................................. 13, 26<br />
MUTE ........................................................................ 26<br />
Mute ................................................................... 28, 30<br />
N<br />
[NUMERIC] .......................................................... 11, 17<br />
O<br />
OCTAVE buttons ................................................... 11, 22<br />
Octave Lower ............................................................. 39<br />
Octave Shift ............................................................... 22<br />
Octave Upper ............................................................ 39<br />
[ONE TOUCH] .................................................... 11, 27<br />
One Touch function ..................................................... 27<br />
OUTPUT R, L/MONO jacks ......................................... 12<br />
P<br />
Pan ........................................................................... 40<br />
Part 1–16 Level .......................................................... 33<br />
Part Balance .............................................................. 25<br />
[PART VIEW] ............................................ 10, 25, 28–29<br />
Pedal .................................................................. 15, 38<br />
Pedal Assign .............................................................. 46<br />
Pedal Polarity ............................................................. 47<br />
Pedal switch ............................................................... 15<br />
[PERFORM] .......................................................... 11, 38<br />
PERFORM MIXER screen .............................................. 25<br />
Performance ........................................................ 13, 38<br />
Favorite ................................................................ 20<br />
List ....................................................................... 39<br />
Name .................................................................. 41<br />
Parameters ........................................................... 39<br />
PHONES jack ............................................................ 12<br />
Piano setting .............................................................. 19<br />
Pitch Bend ................................................................. 37<br />
Pitch Bend Range ....................................................... 41<br />
Pitch Bend/Modulation lever .................................. 12, 37<br />
Playback mode .......................................................... 33<br />
Playing<br />
SMF/Audio Files ................................................... 31<br />
Song .............................................................. 30, 32<br />
Playlist ................................................................ 31–33<br />
PLAYLIST SELECT screen .............................................. 31<br />
Portamento Switch ...................................................... 41<br />
Portamento Time ......................................................... 41<br />
Power On/Off ........................................................... 15<br />
[POWER] switch ................................................... 12, 15<br />
Preset memory ............................................................ 14<br />
Punch In/Out ....................................................... 28–29<br />
R<br />
Rec Mode .................................................................. 29<br />
Recording .................................................................. 27<br />
Specified Part ....................................................... 28<br />
RELEASE .................................................................... 38<br />
Release Time .............................................................. 40<br />
Repeat All .................................................................. 33<br />
Replace recording ...................................................... 28<br />
Re-recording .............................................................. 28<br />
RESONANCE ............................................................ 38<br />
Resonance ................................................................. 40<br />
REVERB ............................................................... 38, 42<br />
Reverb Parameters ...................................................... 83<br />
Reverb Send Level ...................................................... 40<br />
Rhythm Set List ........................................................... 92<br />
Rx Channel ................................................................ 44<br />
Rx Modulation ............................................................ 44<br />
Rx Pitch Bend ............................................................. 44<br />
Rx Program Change .................................................... 44<br />
Rx Sync ..................................................................... 44<br />
107
Index<br />
S<br />
Saving<br />
Performance .......................................................... 41<br />
Playlist settings ...................................................... 33<br />
Song .................................................................... 29<br />
User Data to USB Memory ...................................... 49<br />
Screen Saver Time ...................................................... 46<br />
[SELECT] .............................................................. 10, 37<br />
Single mode ............................................................... 19<br />
SMF .......................................................................... 31<br />
SMF/Audio files that can be played .............................. 31<br />
SOLO ........................................................................ 26<br />
Solo .......................................................................... 28<br />
[SOLO SYNTH] .................................................... 10, 34<br />
Solo Synth ................................................................. 34<br />
[SONG] .............................................................. 24, 30<br />
Song ................................................................... 13, 27<br />
SONG INFO (LEVEL) screen ......................................... 33<br />
Song Initialize window ................................................ 28<br />
Song name ................................................................ 29<br />
Song order ................................................................ 33<br />
[SONG REC] ................................................. 10, 27–29<br />
Song Rec Standby screen ............................................ 29<br />
SONG SELECT screen ................................................. 32<br />
SONG TRACK ........................................................... 28<br />
Song Trans ................................................................ 22<br />
SONG/USB MEMORY PLAYER CONTROL buttons 10, 30, 32<br />
Songlist ............................................................... 31–32<br />
[SPLIT] ................................................................. 11, 19<br />
Split mode ................................................................. 19<br />
Split Point ...................................................... 19, 25, 39<br />
[START/STOP] ............................................................ 25<br />
[STYLE] ................................................................ 24–25<br />
Style (Music Style) ....................................................... 25<br />
STYLE CONTROL buttons ....................................... 10, 25<br />
Style List .................................................................... 26<br />
STYLE SELECT buttons ............................................ 10, 26<br />
SYNC buttons ............................................................ 10<br />
SYNC [START] ........................................................... 26<br />
SYNC [STOP] ............................................................. 26<br />
System memory .......................................................... 13<br />
System Parameters ...................................................... 46<br />
System Settings ........................................................... 46<br />
System settings that are not stored ................................. 48<br />
System Transpose ....................................................... 46<br />
System Version Info screens ......................................... 48<br />
T<br />
[TAP TEMPO] ....................................................... 10, 24<br />
Temperament ............................................................. 21<br />
Tempo ....................................................................... 24<br />
Temporary area .......................................................... 13<br />
[TONE] ............................................................... 11, 20<br />
Tone ............................................................. 13, 20, 38<br />
Editing ................................................................. 40<br />
Favorite ................................................................ 20<br />
List ....................................................................... 20<br />
Parameters ............................................................ 40<br />
Tone List .................................................................... 84<br />
TONE SELECT buttons ........................................... 11, 20<br />
[TRANSPOSE] ...................................................... 11, 22<br />
Transpose .................................................................. 22<br />
Tx Channel ................................................................ 44<br />
Tx Clock .................................................................... 44<br />
Tx Modulation ............................................................ 44<br />
Tx Pitch Bend ............................................................. 44<br />
Tx Program Change .................................................... 44<br />
Tx Song Position ......................................................... 44<br />
Tx StartStop ............................................................... 44<br />
U<br />
UPPER MFX ................................................................ 42<br />
Upper MFX Chorus Send ............................................. 42<br />
Upper MFX Reverb Send ............................................. 42<br />
Upper MFX Source ..................................................... 42<br />
Upper Tone ............................................................... 19<br />
USB Driver ........................................................... 45–46<br />
[USB IMPORT] ...................................................... 11, 50<br />
USB memory .............................................................. 49<br />
USB MEMORY connector ............................................ 10<br />
USB Memory Format ................................................... 49<br />
[USB MEMORY PLAYER] ....................................... 24, 32<br />
USB Memory Player .............................................. 13, 31<br />
USB MIDI connector .............................................. 12, 45<br />
User Data .................................................................. 49<br />
User memory ............................................................. 13<br />
User Style<br />
Adding ................................................................ 26<br />
Deleting ............................................................... 26<br />
V<br />
VALUE dial ................................................................ 10<br />
VARIATION buttons .................................................... 25<br />
Variations .................................................................. 25<br />
Velocity ..................................................................... 22<br />
Velocity Sensitivity ...................................................... 22<br />
Version ..................................................................... 48<br />
Vibrato Delay ............................................................. 40<br />
Vibrato Depth ............................................................ 40<br />
Vibrato Rate ............................................................... 40<br />
[V-LINK] ............................................................... 11, 51<br />
V-LINK ....................................................................... 51<br />
V-LINK SETUP ............................................................. 51<br />
Volume<br />
Each song ............................................................ 33<br />
Metronome ........................................................... 23<br />
Overall ................................................................ 15<br />
Part ..................................................................... 25<br />
Volume balance<br />
between Backing and Keyboard ............................. 24<br />
[VOLUME] knob ................................................... 10, 15<br />
W<br />
Window .................................................................... 18<br />
[WRITE] ................................................... 11, 29, 33, 41<br />
108
Information<br />
When you need repair service, call your nearest <strong>Roland</strong> Service Center or authorized <strong>Roland</strong><br />
distributor in your country as shown below.<br />
AFRICA<br />
EGYPT<br />
Al Fanny Trading Office<br />
9, EBN Hagar Al Askalany<br />
Street,<br />
ARD E1 Golf, Heliopolis,<br />
Cairo 11341, EGYPT<br />
TEL: (022)-418-5531<br />
REUNION<br />
Maison FO - YAM Marcel<br />
25 Rue Jules Hermann,<br />
Chaudron - BP79 97 491<br />
Ste Clotilde Cedex,<br />
REUNION ISLAND<br />
TEL: (0262) 218-429<br />
SOUTH AFRICA<br />
T.O.M.S. Sound & Music<br />
(Pty)Ltd.<br />
2 ASTRON ROAD DENVER<br />
JOHANNESBURG ZA 2195,<br />
SOUTH AFRICA<br />
TEL: (011)417 3400<br />
Paul Bothner(PTY)Ltd.<br />
Royal Cape Park, Unit 24<br />
Londonderry Road, Ottery 7800<br />
Cape Town, SOUTH AFRICA<br />
TEL: (021) 799 4900<br />
ASIA<br />
CHINA<br />
<strong>Roland</strong> Shanghai Electronics<br />
Co.,Ltd.<br />
5F. No.1500 Pingliang Road<br />
Shanghai 200090, CHINA<br />
TEL: (021) 5580-0800<br />
<strong>Roland</strong> Shanghai Electronics<br />
Co.,Ltd.<br />
(BEIJING OFFICE)<br />
10F. No.18 3 Section Anhuaxili<br />
Chaoyang District Beijing<br />
100011 CHINA<br />
TEL: (010) 6426-5050<br />
HONG KONG<br />
Tom Lee Music Co., Ltd.<br />
Service Division<br />
22-32 Pun Shan Street, Tsuen<br />
Wan, New Territories,<br />
HONG KONG<br />
TEL: 2415 0911<br />
Parsons Music Ltd.<br />
8th Floor, Railway Plaza, 39<br />
Chatham Road South, T.S.T,<br />
Kowloon, HONG KONG<br />
TEL: 2333 1863<br />
INDIA<br />
Rivera Digitec (India) Pvt. Ltd.<br />
411, Nirman Kendra<br />
Mahalaxmi Flats Compound<br />
Off. Dr. Edwin Moses Road,<br />
Mumbai-400011, INDIA<br />
TEL: (022) 2493 9051<br />
INDONESIA<br />
PT Citra IntiRama<br />
Jl. Cideng Timur No. 15J-15O<br />
Jakarta Pusat<br />
INDONESIA<br />
TEL: (021) 6324170<br />
KOREA<br />
Cosmos Corporation<br />
1461-9, Seocho-Dong,<br />
Seocho Ku, Seoul, KOREA<br />
TEL: (02) 3486-8855<br />
MALAYSIA<br />
<strong>Roland</strong> Asia Pacific Sdn. Bhd.<br />
45-1, Block C2, Jalan PJU 1/39,<br />
Dataran Prima, 47301 Petaling<br />
Jaya, Selangor, MALAYSIA<br />
TEL: (03) 7805-3263<br />
VIET NAM<br />
Suoi Nhac Company, Ltd<br />
370 Cach Mang Thang Tam St.<br />
Dist.3, Ho Chi Minh City,<br />
VIET NAM<br />
TEL: 9316540<br />
PHILIPPINES<br />
G.A. Yupangco & Co. Inc.<br />
339 Gil J. Puyat Avenue<br />
Makati, Metro Manila 1200,<br />
PHILIPPINES<br />
TEL: (02) 899 9801<br />
SINGAPORE<br />
SWEE LEE MUSIC<br />
COMPANY PTE. LTD.<br />
150 Sims Drive,<br />
SINGAPORE 387381<br />
TEL: 6846-3676<br />
TAIWAN<br />
ROLAND TAIWAN<br />
ENTERPRISE CO., LTD.<br />
Room 5, 9fl. No. 112 Chung<br />
Shan N.Road Sec.2, Taipei,<br />
TAIWAN, R.O.C.<br />
TEL: (02) 2561 3339<br />
THAILAND<br />
Theera Music Co. , Ltd.<br />
100-108 Soi Verng<br />
Nakornkasem, New<br />
Road,Sumpantawongse,<br />
Bangkok 10100 THAILAND<br />
TEL: (02) 224-8821<br />
AUSTRALIA/<br />
NEW ZEALAND<br />
AUSTRALIA/<br />
NEW ZEALAND<br />
<strong>Roland</strong> Corporation<br />
Australia Pty.,Ltd.<br />
38 Campbell Avenue<br />
Dee Why West. NSW 2099<br />
AUSTRALIA<br />
For Australia<br />
Tel: (02) 9982 8266<br />
For New Zealand<br />
Tel: (09) 3098 715<br />
CENTRAL/LATIN<br />
AMERICA<br />
ARGENTINA<br />
Instrumentos Musicales S.A.<br />
Av.Santa Fe 2055<br />
(1123) Buenos Aires<br />
ARGENTINA<br />
TEL: (011) 4508-2700<br />
BARBADOS<br />
A&B Music Supplies LTD<br />
12 Webster Industrial Park<br />
Wildey, St.Michael, Barbados<br />
TEL: (246)430-1100<br />
BRAZIL<br />
<strong>Roland</strong> Brasil Ltda.<br />
Rua San Jose, 780 Sala B<br />
Parque Industrial San Jose<br />
Cotia - Sao Paulo - SP, BRAZIL<br />
TEL: (011) 4615 5666<br />
CHILE<br />
Comercial Fancy II S.A.<br />
Rut.: 96.919.420-1<br />
Nataniel Cox #739, 4th Floor<br />
Santiago - Centro, CHILE<br />
TEL: (02) 688-9540<br />
COLOMBIA<br />
Centro Musical Ltda.<br />
Cra 43 B No 25 A 41 Bododega 9<br />
Medellin, Colombia<br />
TEL: (574)3812529<br />
COSTA RICA<br />
JUAN Bansbach Instrumentos<br />
Musicales<br />
Ave.1. Calle 11, Apartado<br />
10237,<br />
San Jose, COSTA RICA<br />
TEL: 258-0211<br />
CURACAO<br />
Zeelandia Music Center Inc.<br />
Orionweg 30<br />
Curacao, Netherland Antilles<br />
TEL:(305)5926866<br />
DOMINICAN REPUBLIC<br />
Instrumentos Fernando Giraldez<br />
Calle Proyecto Central No.3<br />
Ens.La Esperilla<br />
Santo Domingo,<br />
Dominican Republic<br />
TEL:(809) 683 0305<br />
ECUADOR<br />
Mas Musika<br />
Rumichaca 822 y Zaruma<br />
Guayaquil - Ecuador<br />
TEL:(593-4)2302364<br />
EL SALVADOR<br />
OMNI MUSIC<br />
75 Avenida Norte y Final<br />
Alameda Juan Pablo II,<br />
Edificio No.4010 San Salvador,<br />
EL SALVADOR<br />
TEL: 262-0788<br />
GUATEMALA<br />
Casa Instrumental<br />
Calzada Roosevelt 34-01,zona 11<br />
Ciudad de Guatemala<br />
Guatemala<br />
TEL:(502) 599-2888<br />
HONDURAS<br />
Almacen Pajaro Azul S.A. de C.V.<br />
BO.Paz Barahona<br />
3 Ave.11 Calle S.O<br />
San Pedro Sula, Honduras<br />
TEL: (504) 553-2029<br />
MARTINIQUE<br />
Musique & Son<br />
Z.I.Les Mangle<br />
97232 Le Lamantin<br />
Martinique F.W.I.<br />
TEL: 596 596 426860<br />
Gigamusic SARL<br />
10 Rte De La Folie<br />
97200 Fort De France<br />
Martinique F.W.I.<br />
TEL: 596 596 715222<br />
MEXICO<br />
Casa Veerkamp, s.a. de c.v.<br />
Av. Toluca No. 323, Col. Olivar<br />
de los Padres 01780 Mexico<br />
D.F. MEXICO<br />
TEL: (55) 5668-6699<br />
NICARAGUA<br />
Bansbach Instrumentos<br />
Musicales Nicaragua<br />
Altamira D'Este Calle Principal<br />
de la Farmacia 5ta.Avenida<br />
1 Cuadra al Lago.#503<br />
Managua, Nicaragua<br />
TEL: (505)277-2557<br />
PANAMA<br />
SUPRO MUNDIAL, S.A.<br />
Boulevard Andrews, Albrook,<br />
Panama City, REP. DE<br />
PANAMA<br />
TEL: 315-0101<br />
PARAGUAY<br />
Distribuidora De<br />
Instrumentos Musicales<br />
J.E. Olear y ESQ. Manduvira<br />
Asuncion PARAGUAY<br />
TEL: (595) 21 492147<br />
PERU<br />
Audionet<br />
Distribuciones Musicales SAC<br />
Juan Fanning 530<br />
Miraflores<br />
Lima - Peru<br />
TEL: (511) 4461388<br />
TRINIDAD<br />
AMR Ltd<br />
Ground Floor<br />
Maritime Plaza<br />
Barataria Trinidad W.I.<br />
TEL: (868) 638 6385<br />
URUGUAY<br />
Todo Musica S.A.<br />
Francisco Acuna de Figueroa<br />
1771<br />
C.P.: 11.800<br />
Montevideo, URUGUAY<br />
TEL: (02) 924-2335<br />
VENEZUELA<br />
Instrumentos Musicales<br />
Allegro,C.A.<br />
Av.las industrias edf.Guitar<br />
import<br />
#7 zona Industrial de Turumo<br />
Caracas, Venezuela<br />
TEL: (212) 244-1122<br />
EUROPE<br />
AUSTRIA<br />
<strong>Roland</strong> Elektronische<br />
Musikinstrumente HmbH.<br />
Austrian Office<br />
Eduard-Bodem-Gasse 8,<br />
A-6020 Innsbruck, AUSTRIA<br />
TEL: (0512) 26 44 260<br />
BELGIUM/FRANCE/<br />
HOLLAND/<br />
LUXEMBOURG<br />
<strong>Roland</strong> Central Europe N.V.<br />
Houtstraat 3, B-2260, Oevel<br />
(Westerlo) BELGIUM<br />
TEL: (014) 575811<br />
CROATIA<br />
ART-CENTAR<br />
Degenova 3.<br />
HR - 10000 Zagreb<br />
TEL: (1) 466 8493<br />
CZECH REP.<br />
CZECH REPUBLIC<br />
DISTRIBUTOR s.r.o<br />
Voctárova 247/16<br />
CZ - 180 00 PRAHA 8,<br />
CZECH REP.<br />
TEL: (2) 830 20270<br />
DENMARK<br />
<strong>Roland</strong> Scandinavia A/S<br />
Nordhavnsvej 7, Postbox 880,<br />
DK-2100 Copenhagen<br />
DENMARK<br />
TEL: 3916 6200<br />
FINLAND<br />
<strong>Roland</strong> Scandinavia As, Filial<br />
Finland<br />
Elannontie 5<br />
FIN-01510 Vantaa, FINLAND<br />
TEL: (0)9 68 24 020<br />
GERMANY<br />
<strong>Roland</strong> Elektronische<br />
Musikinstrumente HmbH.<br />
Oststrasse 96, 22844<br />
Norderstedt, GERMANY<br />
TEL: (040) 52 60090<br />
GREECE/CYPRUS<br />
STOLLAS S.A.<br />
Music Sound Light<br />
155, New National Road<br />
Patras 26442, GREECE<br />
TEL: 2610 435400<br />
HUNGARY<br />
<strong>Roland</strong> East Europe Ltd.<br />
Warehouse Area ‘DEPO’ Pf.83<br />
H-2046 Torokbalint,<br />
HUNGARY<br />
TEL: (23) 511011<br />
IRELAND<br />
<strong>Roland</strong> Ireland<br />
G2 Calmount Park, Calmount<br />
Avenue, Dublin 12<br />
Republic of IRELAND<br />
TEL: (01) 4294444<br />
ITALY<br />
<strong>Roland</strong> Italy S. p. A.<br />
Viale delle Industrie 8,<br />
20020 Arese, Milano, ITALY<br />
TEL: (02) 937-78300<br />
NORWAY<br />
<strong>Roland</strong> Scandinavia Avd.<br />
Kontor Norge<br />
Lilleakerveien 2 Postboks 95<br />
Lilleaker N-0216 Oslo<br />
NORWAY<br />
TEL: 2273 0074<br />
POLAND<br />
ROLAND POLSKA SP. Z O.O.<br />
UL. Gibraltarska 4.<br />
PL-03 664 Warszawa<br />
POLAND<br />
TEL: (022) 679 4419<br />
PORTUGAL<br />
<strong>Roland</strong> Iberia, S.L.<br />
Portugal Office<br />
Cais das Pedras, 8/9-1 Dto<br />
4050-465, Porto, PORTUGAL<br />
TEL: 22 608 00 60<br />
ROMANIA<br />
FBS LINES<br />
Piata Libertatii 1,<br />
535500 Gheorgheni,<br />
ROMANIA<br />
TEL: (266) 364 609<br />
RUSSIA<br />
MuTek<br />
Dorozhnaya ul.3,korp.6<br />
117 545 Moscow, RUSSIA<br />
TEL: (095) 981-4967<br />
SLOVAKIA<br />
DAN Acoustic s.r.o.<br />
Povazská 18.<br />
SK - 940 01 Nové Zámky<br />
TEL: (035) 6424 330<br />
SPAIN<br />
<strong>Roland</strong> Iberia, S.L.<br />
Paseo García Faria, 33-35<br />
08005 Barcelona SPAIN<br />
TEL: 93 493 91 00<br />
SWEDEN<br />
<strong>Roland</strong> Scandinavia A/S<br />
SWEDISH SALES OFFICE<br />
Danvik Center 28, 2 tr.<br />
S-131 30 Nacka SWEDEN<br />
TEL: (0)8 702 00 20<br />
SWITZERLAND<br />
<strong>Roland</strong> (Switzerland) AG<br />
Landstrasse 5, Postfach,<br />
CH-4452 Itingen,<br />
SWITZERLAND<br />
TEL: (061) 927-8383<br />
UKRAINE<br />
EURHYTHMICS Ltd.<br />
P.O.Box: 37-a.<br />
Nedecey Str. 30<br />
UA - 89600 Mukachevo,<br />
UKRAINE<br />
TEL: (03131) 414-40<br />
UNITED KINGDOM<br />
<strong>Roland</strong> (U.K.) Ltd.<br />
Atlantic Close, Swansea<br />
Enterprise Park, SWANSEA<br />
SA7 9FJ,<br />
UNITED KINGDOM<br />
TEL: (01792) 702701<br />
MIDDLE EAST<br />
BAHRAIN<br />
Moon Stores<br />
No.1231&1249 Rumaytha<br />
Building Road 3931, Manama<br />
339 BAHRAIN<br />
TEL: 17 813 942<br />
IRAN<br />
MOCO INC.<br />
No.41 Nike St., Dr.Shariyati Ave.,<br />
Roberoye Cerahe Mirdamad<br />
Tehran, IRAN<br />
TEL: (021)-2285-4169<br />
ISRAEL<br />
Halilit P. Greenspoon & Sons<br />
Ltd.<br />
8 Retzif Ha'alia Hashnia St.<br />
Tel-Aviv-Yafo ISRAEL<br />
TEL: (03) 6823666<br />
JORDAN<br />
MUSIC HOUSE CO. LTD.<br />
FREDDY FOR MUSIC<br />
P. O. Box 922846<br />
Amman 11192 JORDAN<br />
TEL: (06) 5692696<br />
KUWAIT<br />
EASA HUSAIN AL-YOUSIFI<br />
& SONS CO.<br />
Al-Yousifi Service Center<br />
P.O.Box 126 (Safat) 13002<br />
KUWAIT<br />
TEL: 00 965 802929<br />
LEBANON<br />
Chahine S.A.L.<br />
George Zeidan St., Chahine<br />
Bldg., Achrafieh, P.O.Box: 16-<br />
5857<br />
Beirut, LEBANON<br />
TEL: (01) 20-1441<br />
OMAN<br />
TALENTZ CENTRE L.L.C.<br />
Malatan House No.1<br />
Al Noor Street, Ruwi<br />
SULTANATE OF OMAN<br />
TEL: 2478 3443<br />
QATAR<br />
Al Emadi Co. (Badie Studio &<br />
Stores)<br />
P.O. Box 62, Doha, QATAR<br />
TEL: 4423-554<br />
SAUDI ARABIA<br />
aDawliah Universal<br />
Electronics APL<br />
Behind Pizza Inn<br />
Prince Turkey Street<br />
aDawliah Building,<br />
PO BOX 2154,<br />
Alkhobar 31952<br />
SAUDI ARABIA<br />
TEL: (03) 8643601<br />
SYRIA<br />
Technical Light & Sound<br />
Center<br />
Rawda, Abdul Qader Jazairi St.<br />
Bldg. No. 21, P.O.BOX 13520,<br />
Damascus, SYRIA<br />
TEL: (011) 223-5384<br />
TURKEY<br />
ZUHAL DIS TICARET A.S.<br />
Galip Dede Cad. No.37<br />
Beyoglu - Istanbul / TURKEY<br />
TEL: (0212) 249 85 10<br />
U.A.E.<br />
Zak Electronics & Musical<br />
Instruments Co. L.L.C.<br />
Zabeel Road, Al Sherooq Bldg.,<br />
No. 14, Ground Floor, Dubai,<br />
U.A.E.<br />
TEL: (04) 3360715<br />
NORTH AMERICA<br />
CANADA<br />
<strong>Roland</strong> Canada Ltd.<br />
(Head Office)<br />
5480 Parkwood Way<br />
Richmond B. C., V6V 2M4<br />
CANADA<br />
TEL: (604) 270 6626<br />
<strong>Roland</strong> Canada Ltd.<br />
(Toronto Office)<br />
170 Admiral Boulevard<br />
Mississauga On L5T 2N6<br />
CANADA<br />
TEL: (905) 362 9707<br />
U. S. A.<br />
<strong>Roland</strong> Corporation U.S.<br />
5100 S. Eastern Avenue<br />
Los Angeles, CA 90040-2938,<br />
U. S. A.<br />
TEL: (323) 890 3700<br />
As of Oct. 1, 2007 (ROLAND)<br />
109
For EU Countries<br />
For China<br />
110
For EU Countries<br />
This product complies with the requirements of EMC Directive 2004/108/EC.<br />
FEDERAL COMMUNICATIONS COMMISSION<br />
RADIO FREQUENCY INTERFERENCE STATEMENT<br />
For the USA<br />
This equipment has been tested and found to comply with the limits for a Class B digital device, pursuant to Part 15 of the<br />
FCC Rules. These limits are designed to provide reasonable protection against harmful interference in a residential<br />
installation. This equipment generates, uses, and can radiate radio frequency energy and, if not installed and used in<br />
accordance with the instructions, may cause harmful interference to radio communications. However, there is no guarantee<br />
that interference will not occur in a particular installation. If this equipment does cause harmful interference to radio or<br />
television reception, which can be determined by turning the equipment off and on, the user is encouraged to try to correct the<br />
interference by one or more of the following measures:<br />
– Reorient or relocate the receiving antenna.<br />
– Increase the separation between the equipment and receiver.<br />
– Connect the equipment into an outlet on a circuit different from that to which the receiver is connected.<br />
– Consult the dealer or an experienced radio/TV technician for help.<br />
This device complies with Part 15 of the FCC Rules. Operation is subject to the following two conditions:<br />
(1) this device may not cause harmful interference, and<br />
(2) this device must accept any interference received, including interference that may cause undesired operation.<br />
Unauthorized changes or modification to this system can void the users authority to operate this equipment.<br />
This equipment requires shielded interface cables in order to meet FCC class B Limit.<br />
NOTICE<br />
This Class B digital apparatus meets all requirements of the Canadian Interference-Causing Equipment Regulations.<br />
AVIS<br />
For Canada<br />
Cet appareil numérique de la classe B respecte toutes les exigences du Règlement sur le matériel brouilleur du Canada.<br />
Model Name :<br />
Type of Equipment :<br />
Responsible Party :<br />
Address :<br />
Telephone :<br />
DECLARATION OF CONFORMITY<br />
Compliance Information Statement<br />
GW-8<br />
Workstation<br />
<strong>Roland</strong> Corporation U.S.<br />
5100 S. Eastern Avenue, Los Angeles, CA 90040-2938<br />
(323) 890-3700<br />
For the USA
* 0 5 1 2 0 0 5 6 - 0 1 *<br />
05120056 1MP