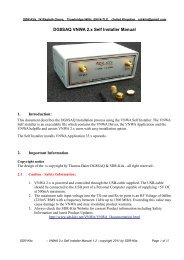
Software and driver installation - SDR-Kits
Software and driver installation - SDR-Kits
Software and driver installation - SDR-Kits

Create successful ePaper yourself
Turn your PDF publications into a flip-book with our unique Google optimized e-Paper software.
<strong>Software</strong> <strong>and</strong> <strong>driver</strong> <strong>installation</strong><br />
Note: It is good practice to make regular backups of your data on your PC, particularly before installing <strong>driver</strong>s.<br />
Installing the VNWA software <strong>and</strong> <strong>driver</strong>s is by no means any more dangerous than installing any other Windows<br />
software. <strong>SDR</strong><strong>Kits</strong> <strong>and</strong> the author (DG8SAQ) will not be responsible for any damage or data loss, though.<br />
Todate the USB-version of the VNWA is supported by all Windows versions from Windows 98 to the latest Windows<br />
7 64 bit. If the VNWA is to be controlled via an LPT port instead of USB, generally only 32 bit Windows systems are<br />
supported.<br />
Please consult the "Driver Compatibility Table <strong>and</strong> Driver Installation".<br />
The latest <strong>driver</strong> files <strong>and</strong> software updates are always available from the VNWA Yahoo Newsgroup<br />
If you want to use the VNWA application without VNWA hardware, you may go straight on to installing the VNWA<br />
application.<br />
Page 10
Driver Compatibility Table <strong>and</strong> Driver Installation<br />
USB support<br />
Thanks to Fred PE0FKO there is a unified signed LibUSB <strong>driver</strong> available for all Windows versions from<br />
Windows98 to Windows7 64bit.<br />
Note, that you must use VNWA V33.0 or newer <strong>and</strong> firmware v4.6 or newer to use this signed <strong>driver</strong>. For earlier<br />
firmware versions use the unsigned LibUSB <strong>driver</strong> (only installable on 32 bit systems).<br />
Important for Vista / Windows 7 64 bit users: Only VNWA firmware v4.6 or newer <strong>and</strong> VNWA software v33.0<br />
or newer are supported.<br />
If you have received your VNWA after April 2010, you have already received firmware v4.6 or higher. If you have a<br />
working VNWA <strong>installation</strong>, you can also check your firmware version with the VNWA software in "setup-USB<br />
settings" by pressing "Test USB". After the test is performed successfully, the firmware version is being displayed in<br />
the bottom status line. Consult chapter "Upgrading VNWA firmware to v4.6" for details..<br />
Installation examples:<br />
Example 1: Installing the LibUSB <strong>driver</strong> on Windows XP (English screenshots)<br />
Example 2: Installing the LibUSB <strong>driver</strong> on Windows 7 (mostly English screenshots)<br />
Example 3: Installing the LibUSB <strong>driver</strong> on Windows XP (German screenshots)<br />
Example 4: Installing the LibUSB <strong>driver</strong> on Windows 7 (German screenshots)<br />
LPT support<br />
Note: In order to enable LPT support, you must copy the <strong>driver</strong> file zlportio.sys into your VNWA program<br />
directory.<br />
Note: If you do not use the VNWA USB interface <strong>and</strong> you do not intend to install the LibUSB <strong>driver</strong>, you must<br />
manually provide the file libusb0.dll. You must copy the libusb0.dll version from the LibUSB <strong>driver</strong> package into your<br />
VNWA program directory in this case.<br />
Note: Since the parallel printer interface (LPT) is subject to extinction, LPT support for 64 bit OSes will not be<br />
implemented.<br />
If you do not intend to install USB <strong>driver</strong>s, you can go straight on to installing the VNWA application software.<br />
Page 11
Example 1: Installing the LibUSB <strong>driver</strong> on Windows XP (English screenshots)<br />
Note: This step is only required if the DG8SAQ USB_VNWA Interface is used. Skip this step if you control your<br />
VNWA via the parallel printer port.<br />
a) Download <strong>and</strong> unpack the LibUSB <strong>driver</strong> files to any empty directory:<br />
b) Connect the DG8SAQ USB_VNWA Interface with your PC. The VNWA board doesn't need to be connected to the<br />
interface board. Windows will notify "Found New Hardware" <strong>and</strong> will ask to install a <strong>driver</strong>.<br />
Hint: In case Windows does not detect your USB_VNWA interface, continue with the USB troubleshooting<br />
guide. In case Windows does not start <strong>driver</strong> <strong>installation</strong> automatically, proceed with manual <strong>driver</strong> <strong>installation</strong> via<br />
the Windows device manager as is described in Example 2: Installing the LibUSB <strong>driver</strong> on Windows 7 (mostly<br />
English screenshots).<br />
c) Click on "no, not this time" <strong>and</strong> press continue to prevent <strong>driver</strong> search on the web.<br />
Page 12
d) Click on "install from a list or specific location (Advanced)" <strong>and</strong> press continue to install the <strong>driver</strong> from your hard<br />
disk.<br />
e) Browse for the path to your <strong>driver</strong> files ...<br />
Page 13
...<br />
confirm path with ok ... <strong>and</strong> press >Next on the previous window.<br />
f) The <strong>driver</strong> will be installed...<br />
Page 14
Finally you will be notified about the successful <strong>installation</strong>. Press "Finish" <strong>and</strong> you can use the USB_VNWA<br />
interface on your computer.<br />
Now you are all set to install the VNWA application software.<br />
Page 15
Example 2: Installing the LibUSB <strong>driver</strong> on Windows 7 (mostly English<br />
screenshots)<br />
Note: This step is only required if the DG8SAQ USB_VNWA Interface is used. Skip this step if you control your<br />
VNWA via the parallel printer port.<br />
Note: You need VNWA software version V33.0 or higher <strong>and</strong> firmware version v4.6 or newer to work with<br />
the signed LibUSB <strong>driver</strong>.<br />
See chapter "Upgrading VNWA firmware to v4.6" on how to upgrade your firmware.<br />
Note The following describes a step by step <strong>installation</strong> procedure on a Windows 7 / Windows Vista machine,<br />
where no previous attempt has been made to install a VNWA <strong>driver</strong>. If you previously have tried to install different<br />
USB <strong>driver</strong>s for the VNWA make sure to completely remove all previously installed <strong>driver</strong> relicts from your<br />
system.<br />
0. Download <strong>and</strong> unpack the LibUSB <strong>driver</strong> files to any empty directory your hard disk.<br />
1. Connect your VNWA to a USB port of your computer<br />
Windows 7 will attempt to install USB <strong>driver</strong>s for the VNWA ...<br />
... but it will fail as it can't find any <strong>driver</strong>s.<br />
Page 16
2. Open your device manager<br />
You will see the VNWA as up to now non functional DG8SAQ-VNWA device under "other devices":<br />
3. Right-click DG8SAQ-VNWA <strong>and</strong> select "update <strong>driver</strong> software"<br />
Page 17
Windows 7 will ask you how you would like to search for <strong>driver</strong> files.<br />
4. Select "Browse my computer for <strong>driver</strong> software"<br />
Page 18
5. Select the unzipped directory which contains the <strong>driver</strong>s...<br />
Page 19
... <strong>and</strong> press Next.<br />
Windows 7 will issue a security warning "publisher of <strong>driver</strong> software could not be verified".<br />
Even though the USB <strong>driver</strong> is signed, Windows 7 will issue a security warning "publisher of <strong>driver</strong> software could<br />
not be verified". This is ok <strong>and</strong> no problem.<br />
If you desire, the warning can be avoided by installing the root certificate prior to <strong>driver</strong> <strong>installation</strong>, but this is not<br />
required for installing <strong>and</strong> running the <strong>driver</strong>.<br />
Page 20
6. Select "install this <strong>driver</strong> software anyway ..."<br />
... <strong>and</strong> Windows 7 will start installing the <strong>driver</strong> software. This might take a couple of minutes until done:<br />
7. Press the close button<br />
Page 21
The USB <strong>driver</strong> is now installed <strong>and</strong> the VNWA device is operational as can be seen in the device manager, where<br />
the VNWA will show as AVR USB device:<br />
Now you are all set to install the VNWA application software.<br />
Page 22
Example 3: Installing the LibUSB <strong>driver</strong> on Windows XP (German screenshots)<br />
Note: This step is only required if the DG8SAQ USB_VNWA Interface is used. Skip this step if you control your<br />
VNWA via the parallel printer port.<br />
a) Download <strong>and</strong> unpack the LibUSB <strong>driver</strong> files to any empty directory:<br />
b) Connect the DG8SAQ USB_VNWA Interface with your PC. The VNWA board doesn't need to be connected to the<br />
interface board. Windows will notify "new hardware found" <strong>and</strong> will ask to install a <strong>driver</strong>.<br />
Hint: In case Windows does not detect your USB_VNWA interface, continue with the USB troubleshooting<br />
guide. In case Windows does not start <strong>driver</strong> <strong>installation</strong> automatically, proceed with manual <strong>driver</strong> <strong>installation</strong> via<br />
Windows device manager as is described in Example 4: Installing the LibUSB <strong>driver</strong> on Windows 7 (German<br />
screenshots).<br />
c) Click on "no, not this time" <strong>and</strong> press continue to prevent <strong>driver</strong> search on the web.<br />
Page 23
d) Click on "install from list..." <strong>and</strong> press continue to install the <strong>driver</strong> from your hard disk.<br />
e) Enter the path to your <strong>driver</strong> files <strong>and</strong> press continue.<br />
Page 24
f) The <strong>driver</strong> will be installed. Finally you will be notified about the successful <strong>installation</strong>. Press "finish" <strong>and</strong> you can<br />
use the USB_VNWA interface on your computer.<br />
Now you are all set to install the VNWA application software.<br />
Page 25
Example 4: Installing the LibUSB <strong>driver</strong> on Windows 7 (German screenshots)<br />
Note: This step is only required if the DG8SAQ USB_VNWA Interface is used. Skip this step if you control your<br />
VNWA via the parallel printer port.<br />
Note: You need VNWA software version V33.0 or higher <strong>and</strong> firmware version v4.6 or newer to work with<br />
the signed LibUSB <strong>driver</strong>.<br />
See chapter "Upgrading VNWA firmware to v4.6" on how to upgrade your firmware.<br />
Note The following describes a step by step <strong>installation</strong> procedure on a Windows 7 / Windows Vista machine,<br />
where no previous attempt has been made to install a VNWA <strong>driver</strong>. If you previously have tried to install different<br />
USB <strong>driver</strong>s for the VNWA make sure to completely remove all previously installed <strong>driver</strong> relicts from your<br />
system.<br />
0. Download <strong>and</strong> unpack the LibUSB <strong>driver</strong> files to any empty directory your hard disk.<br />
1. Connect your VNWA to a USB port of your computer<br />
Windows 7 will attempt to install USB <strong>driver</strong>s for the VNWA ...<br />
... but it will fail as it can't find any <strong>driver</strong>s.<br />
Page 26
2. Open your hardware manager<br />
You will see the VNWA as up to now non functional DG8SAQ-VNWA device under "other devices":<br />
3. Right-click DG8SAQ-VNWA <strong>and</strong> select "update <strong>driver</strong> software"<br />
Windows 7 will ask you how you would like to search for <strong>driver</strong> files.<br />
4. Select "search on computer for <strong>driver</strong> files"<br />
Page 27
5. Select the unzipped directory which contains the <strong>driver</strong>s...<br />
... <strong>and</strong> press continue.<br />
Even though the USB <strong>driver</strong> is signed, Windows 7 will issue a security warning "publisher of <strong>driver</strong> software could<br />
not be verified". This is ok <strong>and</strong> no problem.<br />
If you desire, the warning can be avoided by installing the root certificate prior to <strong>driver</strong> <strong>installation</strong>, but this is not<br />
required for installing <strong>and</strong> running the <strong>driver</strong>.<br />
Page 28
6. Select "install anyway ..."<br />
... <strong>and</strong> Windows 7 will start installing the <strong>driver</strong> software.<br />
This might take a couple of minutes until done:<br />
Page 29
7. Press the close button<br />
The USB <strong>driver</strong> is now installed <strong>and</strong> the VNWA device is operational as can be seen in the hardware manager,<br />
where the VNWA will show as AVR USB device:<br />
Now you are all set to install the VNWA application software.<br />
Page 30
Installing the VNWA application<br />
The VNWA hardware is controlled by the VNWA application software. Installing the software is a means of simply<br />
copying the file VNWA.exe to any directory you wish to use as program directory.<br />
You can even install the VNWA application onto a memory stick which may remain attached to the extra VNWA USB<br />
port of your VNWA2. The advantage of doing so is that when moving the VNWA from one computer to another you<br />
also move all your settings <strong>and</strong> calibration files along.<br />
Windows Vista / Windows 7 note: On Windows Vista / Windows 7 the "program files" directory on the system<br />
partition is particularly write protected. Since the VNWA application writes many files (ini-files, calibration files,...) into<br />
the program folder, it is recommended to NOT install the VNWA application into any system folder like "program<br />
files" in order to avoid conflicts. Use any folder where you have normal write access instead.<br />
Installation<br />
You should start out with an empty program folder into which you unzip the VNWA application VNWA.exe, the LPT<br />
<strong>driver</strong> file zlportio.sys if LPT support is desired <strong>and</strong> the help file system "VNWA.HLP" <strong>and</strong> "VNWA.cnt". No special<br />
software <strong>installation</strong> procedure is required as the files are ready to run. The VNWA application does not make use of<br />
the Windows registry.<br />
Note: If you have not installed a USB <strong>driver</strong> for the VNWA, then you must copy the file libusb0.dll from the<br />
LibUSB package into this directory.<br />
Note: You need to have administrator privileges in order to run the application in LPT mode. If you attempt to<br />
run it with lower privileges, the LPT <strong>driver</strong> will fail to load. The <strong>driver</strong> will also fail to load on systems that do not<br />
support the LPT <strong>driver</strong> zlportio.sys (e.g. Win98 <strong>and</strong> all 64 bit Windows versions).<br />
Note: You can add an icon to your desktop by right-clicking onto VNWA.exe <strong>and</strong> selecting copy. Then right-click<br />
onto your Windows desktop <strong>and</strong> select add link.<br />
Windows Vista / Windows 7 note: Please consult "Configuring <strong>and</strong> running the VNWA application under<br />
Windows Vista or Windows7" for special Vista / Windows 7 issues. Note, that Windows Vista <strong>and</strong> Windows 7<br />
require that you set the VNWA audio device inside Windows to stereo operation <strong>and</strong> that you manually adjust the<br />
recording level.<br />
Now you're ready to control your DG8SAQ VNWA. See the configuration guide for details<br />
If you want to control an N2PK VNA with the VNWA application, then you need to create an additional file named<br />
N2PK.ini with arbitrary contents in the program folder. You can do so by e.g. typing echo > n2pk.ini on the console<br />
prompt. If you want to control your N2PK VNA via Dave Robert's G8KBB USB interface, you must provide the files<br />
delphivna.dll <strong>and</strong> vnadll.dll in your VNWA program directory. Configuration instructions for controling an N2PK VNA<br />
can be found here.<br />
Page 31
Upgrading VNWA firmware to v4.6<br />
Generally, upgrading from one firmware version to another is very straight forward, see here for a detailed<br />
description.<br />
Transition from firmware version v4.2 to v4.6 is a bit more complicated, as some sections of the firmware need to be<br />
reprogrammed, that are by default write-protected. Therefore, several codes need to be uploaded in the correct<br />
order that make the MCU reprogram protected sections AFTER code upload. This not quite straight forward<br />
upgrade procedure is described in the following.<br />
Note: All calibration files will remain valid also after the firmware update! There is no reason not to do this<br />
firmware update.<br />
First, a summary of the necessary steps:<br />
- flash v4.3<br />
- powercycle USB interface<br />
- rescan USB bus<br />
- flash v4.5<br />
- close VNWA application<br />
- powercycle USB interface<br />
- install new USB <strong>driver</strong><br />
- flash v4.6<br />
- powercycle USB interface<br />
- rescan USB bus<br />
Note, that flashing of v4.4 may be skipped. We go straight from v4.3 to v4.5.<br />
DETAILED DESCRIPTION, READ CAREFULLY:<br />
Note: You need a working VNWA <strong>installation</strong> in order to do this firmware upgrade!<br />
Note: You need VNWA software version V33.0 or higher to perform this upgrade <strong>and</strong> to use firmware v4.5<br />
or newer.<br />
Note: The upgrade from v4.2 to v4.6 cannot be undone with the USB flashing utility of VNWA. Nevertheless<br />
we recommend this upgrade for all 32 bit OS users, too, because ...<br />
Note: ... future firmware upgrades will require v4.6 in order to be loadable via USB.<br />
Note: Firmware V4.5 will require a re<strong>installation</strong> of the USB <strong>driver</strong>.<br />
1. Check what firmware version you are currently running.<br />
You do this by using the "Test USB" feature in Setup-USB Settings. The result will be displayed in the bottom status<br />
line:<br />
Page 32
It can be seen in the bottom status line (see mouse pointer above), that firmware version v4.2 is running. If your<br />
firmware version is newer, then move on to the appropriate step.<br />
2. Flash firmware v4.3.<br />
Press the "Flash Firmware" button <strong>and</strong> load firmware v4.3:<br />
Page 33
After pressing the "Open" button, you can observe flashing progress in the bottom status line of the setup window.<br />
After the flashing process is over, you will see further instructions on the screen:<br />
Page 34
a) Powercycle the USB interface in order to generate a reset condition for the AVR controller. This is necessary to<br />
trigger some further internal reprogramming action of v4.3.<br />
b) Rescan USB Bus. This is necessary to reestablish contact between the VNWA application <strong>and</strong> the USB interface<br />
after the hardware reset in a).<br />
Note: When you do "Verify Firmware" after powercycling <strong>and</strong> rescanning the USB bus, you will see an error<br />
message:<br />
This is perfectly ok <strong>and</strong> proves that the firmware has modified itself after the power reset. Now it is time to<br />
3. Flash firmware v4.5<br />
This is done like described in step 2. Note, that we are skipping v4.4.<br />
Note: v4.5 will again modify some parts of the USB core routines after power reset. Therefore ...<br />
4. Completely close the VNWA application <strong>and</strong> powercycle the USB interface e.g. by unplugging <strong>and</strong><br />
replugging your VNWA.<br />
This done, Windows will recognize the VNWA as a new device <strong>and</strong> will ask for a new <strong>driver</strong> to be installed.<br />
As you are NOT doing this firmware upgrade on a Windows 7 64bit machine, you should reinstall the LibUSB <strong>driver</strong><br />
now.<br />
Consult the <strong>driver</strong> compatibility tables in order to gather information on how to install the LibUSB-<strong>driver</strong> on your<br />
system.<br />
After successful <strong>driver</strong> <strong>installation</strong>, start VNWA again.<br />
Note: You need VNWA software version V33.0 or higher to use firmware v4.5 or higher.<br />
Go to "Setup-USB Settings". If you try to verify firmware v4.5, it will result in an error message like for v4.3. Again, this<br />
is perfectly ok <strong>and</strong> proves that the firmware has again modified itself after the last power reset. Now you are set to ...<br />
5. Finally flash firmware v4.6<br />
This is the final firmware version that will no longer reprogram itself <strong>and</strong> allows the full VNWA functionality. This is<br />
also the minimum firmware requirement to use your VNWA on the 64 bit versions of Windows Vista or Windows<br />
7.<br />
Page 35
General firmware upgrade procedure<br />
Note: The flashing procedure is very safe. Nevertheless avoid power failures during flashing!<br />
Note: All calibration files will remain valid also after the firmware update! There is no reason not to do a<br />
firmware update if a new firmware is available.<br />
1. Check the firmware version you are running:<br />
You do this by using the "Test USB" feature in Setup-USB Settings. The result will be displayed in the bottom status<br />
line:<br />
It can be seen in the bottom status line (see mouse pointer above), that firmware version v4.2 is running.<br />
Note: Not all firmware versions are compatible with each other, i.e. not every firmware version can be<br />
overwritten with any other firmware version. Basically, you have to do the upgrades in the order of the firmware<br />
version numbering. If you attempt to flash an incompatible firmware, you cannot damage anything, but you will see<br />
the following error message:<br />
2. Flash new firmware:<br />
Page 36
Press the "Flash Firmware" button <strong>and</strong> select the desired firmware version:<br />
After pressing the "Open" button, you can observe flashing progress in the bottom status line of the setup window:<br />
Page 37
After the flashing process is over, you will see further instructions on the screen:<br />
a) Powercycle the USB interface in order to generate a reset condition for the AVR controller. This is necessary to<br />
grant stability. Some firmware versions (v4.3, v4.5) also need this hardware reset to trigger some further internal<br />
reprogramming action.<br />
b) Rescan USB Bus. This is necessary to reestablish contact between the VNWA application <strong>and</strong> the USB interface<br />
after the hardware reset in a). Closing <strong>and</strong> reopening the VNWA application will do the same job but can be avoided<br />
by rescanning the USB bus.<br />
c) Optionally, you can verify the firmware update by pressing the "Verify Firmware" button <strong>and</strong> selecting the file that<br />
is to be compared to the firmware residing in the VNWA interface.<br />
Successful verify will produce this output:<br />
Note: Some firmware versions cannot be verified after flashing (they will produce a compare error), because<br />
they will reprogramm themselves after power cycling. Todate these are v4.3 <strong>and</strong> v4.5.<br />
Note: Firmeware version v4.5 requires <strong>installation</strong> of a new USB <strong>driver</strong>.<br />
Page 38
Page 39