Create successful ePaper yourself
Turn your PDF publications into a flip-book with our unique Google optimized e-Paper software.
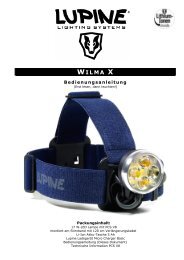
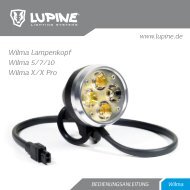
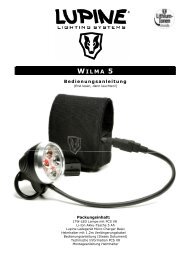
W ILMA U PGRADE<br />
W<strong>ilma</strong> U<strong>pgrade</strong> Kit Art. No. 653<br />
Yellow LED board 1200 Lumens, 4 x lens array 22°,<br />
allen key, manual<br />
Make sure your working place is well-lit and reasonably quiet before you start upgrading your<br />
W<strong>ilma</strong>.<br />
In addition to the u<strong>pgrade</strong> kit and the allen key included, you will need a small flat-nose pliers;<br />
otherwise, you will not be able to remove the old circuit board.
Step 1:<br />
Make sure that your W<strong>ilma</strong> is not connected to the battery. Open the lamp by turning the<br />
cap anti-clockwise. The cap may be stuck fast to the casing; try to twist it off the housing without<br />
bending the cap.<br />
Step 2:<br />
Undo all four inner-hex bolts with the allen key and carefully draw them out of the housing. Pick<br />
the old lens and put it away to prevent mixing it up with the new lens.<br />
The two lenses are very difficult to distinguish from one another.<br />
W ILMA U PGRADE<br />
2
Step 3:<br />
You will now need the flat pliers to pull the circuit board out of the housing.<br />
Grap the two center pins on the board with the pliers. A gentle pull, and the LED board will slide<br />
out of its socket.<br />
Step 4:<br />
NOTE: Avoid touching the LEDs as you remove the new LED board from the packaging. Soiling will<br />
reduce the lighting power of the LED; to remove dirt only use compressed air. Only touch the lens<br />
board at the edge. Fingerprints inside the lens will be very difficult to remove.<br />
W ILMA U PGRADE<br />
3
Step 5:<br />
NOTE: Make sure you insert the new LED board the right way into the socket. The contact pins are<br />
asymmetrically arranged, so if you insert the LED circuit board incorrectly, it is basically impossible<br />
to assemble it the wrong way.<br />
Step 6:<br />
Always make sure avoid touching the LED surfaces. The four holes on the yellow board should be<br />
roughly aligned to the housings holes.<br />
Make sure that the four holes on the board are in alignment over the threaded holes in the<br />
housing, otherwise you will not be able to mount the lens, or insert and tighten the bolts to the<br />
housing. You may need to<br />
turn the yellow board by a<br />
few degrees to reach<br />
alignment.<br />
Step 7:<br />
W ILMA U PGRADE<br />
4
Insert the four inner hex bolts into their respective holes. Gently move and jiggle them backwards<br />
and forwards until they find<br />
their way through to the holes<br />
in the housing.<br />
Step 8:<br />
The whole unit should now lie completely on the<br />
inner edge without you tightening the bolts.<br />
Gently turn the unit to check that everything is<br />
positioned correctly.<br />
Step 9:<br />
W ILMA U PGRADE<br />
5
Step 10:<br />
W ILMA U PGRADE<br />
7<br />
The new lens array is slightly thicker<br />
than before, in case there is an O-ring<br />
inside your cap remove it from the cap.<br />
Remove the O-ring gently with a small<br />
knife or screwdriver – it is not fastened<br />
to the cap, and should be easy to<br />
remove. Make sure you avoid soiling the<br />
lens from the inside.<br />
You will only be able to tighten the cap<br />
completely without the O-ring.
Step 11:<br />
Now screw the cap back on. Make sure you avoid cross-threading – the cap should easily and<br />
smoothly turn onto the housing; if not, immediately screw it back and try again.<br />
Now completely tighten the cap; you should not be able to see any gap between the cap and the<br />
housing. Check that the light works, and your u<strong>pgrade</strong> is completed – and your W<strong>ilma</strong> is ready to<br />
face new challenges.<br />
<strong>Lupine</strong> Lighting Systems GmbH<br />
Winnberger Weg 11<br />
D-92318 Neumarkt<br />
Fon: 0049 91 81 509490<br />
Fax: 0049 91 81 5094915<br />
e-mail: info@lupine.de<br />
net: www.lupine.de<br />
W ILMA U PGRADE<br />
8