Create successful ePaper yourself
Turn your PDF publications into a flip-book with our unique Google optimized e-Paper software.
<strong>GX9000</strong> User Manual Rev 2.1 Working with Media<br />
Mirror Mode and Drive Backup<br />
<br />
SCSI <br />
<br />
.Mirror<br />
- - 2 - - - - I<br />
The <strong>GX9000</strong> can record to two storage devices simultaneously. This allows<br />
you to make an identical copy of your recording live and can save a great<br />
deal of backup time normally required after a recording.<br />
There is no limit to the number of channels that can be mirrored, for example<br />
you can simultaneously record 48 channels of DSD data to two drives if<br />
required,<br />
Mirror mode also provides a quick technique for copying a Drive to another<br />
Drive or Tape.<br />
• To allocate a drive as a Mirror Drive press the Setup button.<br />
• Use the Rotary Wheel to select the SCSI menu.<br />
• Press the Parameter Down button and use the Rotary Wheel to display<br />
the .Mirror menu heading.<br />
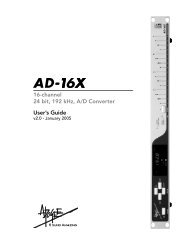
• The display shows all drives connected to the SCSI bus. Each character<br />
position on the lower display represents one possible SCSI ID. ID 0 is the<br />
leftmost character; ID 7 is the rightmost character. If a drive is detected,<br />
its ID will be displayed in the relevant position. The currently active drive<br />
is shown as a flashing character. The initiator ID is represented by the<br />
character ‘I’. Normally the initiator has an ID of 7; in this case the<br />
character ‘I’ will appear in the rightmost character of the lower display.<br />
• Use the Value Up and Value Down buttons to select an alternative SCSI<br />
device. Note that the cursor is shown as a blinking character which can<br />
be confusing as the currently selected drive is also shown as a blinking<br />
character. Occasionally you may have to use the Value buttons to move<br />
the cursor over a dash (unavailable SCSI ID) to determine which ID is the<br />
currently selected Mirror Drive.<br />
• Press the Enter button to log the drive as a Mirror Drive. The <strong>GX9000</strong><br />
first asks if you wish to Sync the Mirror Drive with the Primary Drive. This<br />
means any data currently on the Primary Drive will be copied to the<br />
Mirror Drive. As you can see this provides a simple method of Backing up<br />
Drives from the front panel without the need for the GXR Control<br />
Software.<br />
EITHER<br />
• Press the Value Down button to choose to skip the Sync process.<br />
‘Skip’ will flash. Press the Enter button to log the Mirror Drive and<br />
select Mirror mode.<br />
OR<br />
• Press the Value Up button to select the Sync process. ‘Sync’ will flash.<br />
Press the Enter button to start the copy.<br />
• The following messages will be displayed as the copy progresses.<br />
Note that the Sync process also supports Tape Devices, such as AIT, LTO<br />
and DLT. To make a Backup from Hard Drive to Tape select the Hard Drive<br />
as the Primary Drive and select the Tape Drive as the Mirror Drive. To restore<br />
a previous Tape backup, log the Tape as the Primary Drive and select the<br />
Hard Drive as the Mirror.<br />
• Deselect Insurance mode and free the Drive by pressing Enter again.<br />
<strong>Genex</strong> Audio Inc Page 20