Otto 8 - Lupine
Otto 8 - Lupine
Otto 8 - Lupine

You also want an ePaper? Increase the reach of your titles
YUMPU automatically turns print PDFs into web optimized ePapers that Google loves.
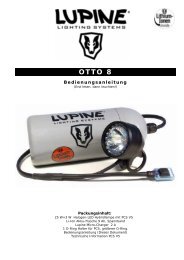
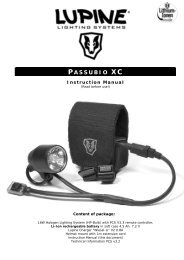
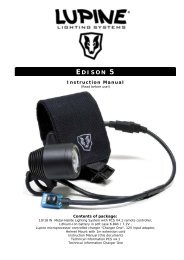
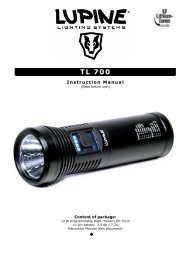
OTTO 8<br />
Instruction Manual<br />
(Read before use!)<br />
Content of package:<br />
25 W+3 W Halogen-LED Hybrid Lamp with PCS V5<br />
Li-Ion bottle battery 9 Ah / 7.2V,<br />
<strong>Lupine</strong> Charger Micro-Charger V1 2A<br />
Velcro straps, O - ring for handlebars with 22mm diameter<br />
Helmet Mount with 1 m extension cord<br />
Instruction Manual (this document)<br />
Technical Information PCS V5<br />
Instruction Manual Helmet Mount
1.) READ BEFORE USE!<br />
General:<br />
Congratulations! You have just bought the one and only <strong>Lupine</strong> LED Hybrid Lamp – no other<br />
will give you more light!<br />
The light and charger are ready to use immediately. Please read this instruction manual<br />
carefully and completely to familiarise yourself with all the functions. efore hitting the trails, try<br />
the system at home first to prevent any surprises while riding. For further details about<br />
individual settings of the OTTO 8 please read "Technical Informations PCS V5".<br />
As with any other electrical device, there is a slight chance of failure at any time. Please be<br />
aware and use with caution.<br />
<strong>Lupine</strong> accepts no liability for any injuries or other damages arising from the use of this<br />
product.<br />
Rechargeable Battery:<br />
The battery is supplied with a very small amount of charge. Before use it must be fully<br />
charged (see chapter 4 "Charging"). The rechargeable Li-Ion battery will reach its full power<br />
after 1 charge cycle.<br />
It might become hot!<br />
The OTTO 8 is not a simple torch. The lamp housing can become very hot if used without<br />
airflow. Do not touch the lamp during or immediately after use.<br />
If lamp is used without any airflow temperature control will reduce light power to<br />
9 W after some minutes automatically. This mode is indicated with fast red LED flashing.<br />
If lamp gets colder red flashing dissapeares and high beam could be activated by switching the<br />
PCS again.<br />
Dazzling:<br />
The OTTO 8 is a powerful lighting system. Always use it with care and with respect for others<br />
(especially when mounted to a helmet). Do not look directly into the light.<br />
Waterproof?<br />
All components of the OTTO 8 are waterproof and will withstand even the most extreme<br />
conditions. However, it is not a diving lamp and therefore not suitable for use under water.<br />
Warranty:<br />
The two year warranty covers defects in materials or workmanship only. Bulbs and batteries<br />
are not covered by this warranty. Modifications to the light or improper use also voids this<br />
warranty.<br />
OTTO 8<br />
2
2.) MOUNTING<br />
Lamp:<br />
Mounting the lamp with the O - ring :<br />
If you are feeling strong, use the finger hook method (see fig.1). For others, who prefer the<br />
less strenuous method, hold the O-ring with one finger, and push the lamp back until the Oring<br />
can be secured on the hook of the lamp. (fig.2)<br />
fig.1<br />
fig.2<br />
PCS V5 switch :<br />
The PCS V5 is designed for use on the right hand side of the lamp (see fig.3). Before attaching<br />
the velcro strip to the handle bar, ensure that the surface is free of dirt and oil. The velcro strip<br />
should be applied at room temperature, colder temperatures will cause the adhesive not to<br />
work.<br />
For applying the O-Ring to fix the switch to the handlebar see the separate information sheet<br />
"Technical Information PCS V5".<br />
An optional upgrade mounting bracket for the switch is also available (Peppi V3).<br />
Battery:<br />
Put the battery bottle into the cage and loop the velcro strap around the cage and bottle. Make<br />
sure the battery cables are routed in such a way that they will not become tangled in any<br />
moving parts.<br />
Now connect the rechargeable battery to the lamp and your OTTO 8 is ready to go.<br />
Adjusting the cable length:<br />
Some spare length of cable is retained into the top of the battery bottle. Open the bottle (see<br />
"Opening the bottle" in chapter "Care and storage"), unscrew the cable inlet and adjust the<br />
cable length. Close the bottle and tighten the cable screw again.<br />
Caution! Adjusting the length of the cable with the bottle closed might damage the cable<br />
connections of the battery!<br />
OTTO 8<br />
3<br />
fig.3
3.) USING THE LIGHT<br />
Initialising:<br />
After connecting the lamp to the rechargeable battery, the software will start a self-<br />
test (the three LEDs of the PCS will flash twice) The LEDs will flash once. Now the<br />
OTTO 8 is ready for use. (Please read also "Technical Information PCS V5")<br />
Switch on:<br />
By pressing the PCS switch for the first time, the beam starts running on maximum power. The<br />
blue and green LED will glow.<br />
Halogen Low Power Mode:<br />
By pressing the switch again briefly, you can choose between maximum power mode and low<br />
power mode of the halogen bulb. When on low power mode, only the green LED will glow.<br />
LED Mode:<br />
By pressing the switch longer than two seconds, you can switch to LED mode. Here, you can as<br />
well choose between maximum power mode and low power mode by pressing the switch<br />
briefly.<br />
Switch off:<br />
You can switch off the OTTO 8 by pressing the PCS button longer than four seconds.<br />
Controlling the remaining light time:<br />
The electronics of the PCS V5 not only control the high and low beam; they also protect the<br />
rechargeable battery against over-discharge and include a low battery indicator.<br />
Low battery is signalled by the yellow and the red LEDs.<br />
When the yellow LED lights: Significant amount of the capacity is gone!<br />
Red and yellow LEDs lights: Light will automatically switch off<br />
in a few minutes!<br />
It is a matter of experience to interpret exactly how much time is left after the LEDs light up.<br />
Remaining burn time depends on the battery's age and capacity, the operating temperature<br />
and the capacity gauge program (Low, Middle, High; see "Technical Information PCS V5").<br />
Hint: When the yellow and the red LEDs light up you can increase the remaining burn time<br />
with economical use of the high beam.<br />
Reserve tank:<br />
When the battery is almost empty (yellow and red LEDs have been lit for several minutes<br />
already) the lamp switches off automatically. By double clicking the switch the reserve tank is<br />
activated, which provides some additonal hours of emergency light in LED modus. A flashing<br />
red LED indicates the reserve tank has been activated. The performance of the reserve tank<br />
also depends on the battery condition.<br />
When the reserve tank is empty, the light will switch off and must not be restarted.<br />
Caution! Switching on is not possible at this point. If you unplug the battery and then reattach<br />
it, you will damage the battery by over-discharging it! The same is true for storing a<br />
discharged battery. Recharge your battery as soon as possible!<br />
OTTO 8<br />
4
Explanation of the LEDs:<br />
Blue LED lights: High beam (Maximum Power)<br />
Blue LED blinks: Low beam LED<br />
Green LED lights: Low beam (Econo mode)<br />
Green LED glows weakly: Ready to switch on again<br />
Yellow LED lights: Significant amount of burn time consumed<br />
Yellow + Red LED light: Rechargeable battery almost empty<br />
Caution! Halogen- Light will switch off very soon without<br />
further notice – Stop!<br />
Red LED flashes: Reserve tank activated<br />
Red LED flashes fast: Temperature is too high, light output is reduced<br />
Programming :<br />
You can adapt the PCS of the switch to your needs. This programming is explained in detail in the<br />
"Technical Information PCS v3.3" and is done exclusively using the switch and LEDs.<br />
4.) CHARGING THE RECHARGEABLE BATTERY<br />
Components:<br />
The charging system of the <strong>Otto</strong> 8 consists of two components:<br />
- AC/DC adaptor<br />
- Micro-Charger<br />
The Micro-Charger was developed for use with <strong>Lupine</strong>’s high current Li-Ion rechargeable<br />
batteries from AC/DC adaptor or with additional available 12 V car adaptor.<br />
Connection:<br />
Plug the AC/DC adaptor into the mains. Plug the adaptor into the socket of the Micro-Charger.<br />
After a short green flash the Micro-Charger flashes orange and will be now ready to charge.<br />
Charging:<br />
Plug the rechargeable battery into the Micro-Charger’s connector and charging will start<br />
automatically. The orange LED and the blue LED light.<br />
Keep the rechargeable battery plugged into the Micro-Charger until the green LED<br />
lights.<br />
Charging is now complete; the battery is full and is now ready for use.<br />
Reading the charged capacity:<br />
After disconnecting the battery the Micro-Charger will indicate the charged capacity as<br />
follows:<br />
First, the orange LED will blink 1 time per complete ampere hour,<br />
then the green LED will blink 1 time per 1/10 ampere hour.<br />
Example: The orange LED blinks 3 times and the green LED 5 times = the charged capacity is<br />
around 3,5 Ah. This information will help you to judge the actual condition of your<br />
rechargeable battery before use.<br />
Hint: You don’t have to wait for the whole voltage information to be shown in order to use<br />
your charger again. You can stop the charge information at any time by connecting the<br />
battery.<br />
Open the bottle!:<br />
OTTO 8<br />
5
We strongly recommend to open the battery bottle while charging (or even remove the battery<br />
from the hard foam if used in heavy rain) to allow all moisture to be removed during the<br />
charging process. This is to help prevent corrosion.<br />
Caution!!<br />
Micro-Charger is designed to charge only Li-Ion batteries!<br />
You must not use this charger with Ni-MH batteries or unrechargeable batteries!!<br />
They will explode!!<br />
Micro-Charger should not be opened by the user as this will invalidate the warranty.<br />
Explanation of the LEDs:<br />
Orange: Charging<br />
Green: Rechargeable battery full<br />
5.) CARE AND STORAGE<br />
Lamp:<br />
All components should be cleaned with warm soapy water, but do not use a high pressure<br />
spray or hose to clean the system. To get all water out of the housing etc. turn the light on for<br />
a few minutes.<br />
The bottle battery is water resistant. Unlike other lighting systems, it is easy to open. If used<br />
in very wet conditions, please open the bottle over night by squeezing and turning the top cap<br />
( snap mount ).<br />
If necessary, pull the battery out of the foam to remove all water. If you want to adjust the<br />
cable length, please open the bottle first.<br />
Exchanging the Halogen Bulb:<br />
Open the casing. Please open the screw-on lid on the front of the casing: Hold the back part of<br />
the casing with one hand, with the other hand, turn the srew-on lid counter-clockwise. Having<br />
removed the lid, you can see the halogen bulb surrounded by the LED-ring. Both are kept in<br />
place by the blue silicone ring in between the two. Hold the LED-ring in its position when<br />
removing the halogen bulb from the holder. When doing so, use your finger nail or a small<br />
screwdriver as a lever.<br />
Inserting the new bulb: Caution! Before inserting the new bulb, please make sure the blue<br />
silicone ring is in the right position: if viewed from the side, the ring must be on the same level<br />
as the LED-ring. Now cautiously insert the new bulb into the holder. You may need a little<br />
pressure to position the bulb as deep as possible in the silicone sealing of the holder. Hint:<br />
Moisturizing the silicone sealing just a little will reduce friction between glas and silicone and<br />
the bulb will slip into place more easily.<br />
Re-sealing the casing: Please make sure the O-ring of the back part of the casing is in its<br />
correct position. Otherwise the casing will not be waterproof. Then, screw the lid onto the<br />
thread. Important: The lid must be screwed onto the thread in the correct position. If<br />
the thread runs smooth, the lid is in the right position. Otherwise, please stop, rescrew<br />
the lid and try again or you might damage the thread. Please be cautious! Seal<br />
the lid completely (you might feel more friction towards the end of the thread; this is normal).<br />
If you cannot close the lid fully, stop, open the lid again and re-check the position of the bulb<br />
and the silicone sealing. Since the front glass is pressed on the bulb and then turned around,<br />
scatches in the front glass cannot be avoided. They are, however, not visible and do not impair<br />
the light performance.<br />
Connectors:<br />
In normal conditions, the connectors do not need special attention. However if you use the<br />
light in very humid and/or corrosive conditions they should be greased with the included Dutch<br />
grease. Do not use contact-sprays or contact-greases! They contain corrosive ingredients that<br />
will damage the connectors.<br />
Transport:<br />
OTTO 8<br />
6
In case you transport your light in a bag or a box so that the PCS button might accidentally be<br />
pressed: Always unplug the battery from the lamp unit.<br />
Storage:<br />
For short periods of time, store the battery fully charged. Disconnect it from the lamp unit.<br />
Before using the system again, re-charge the battery fully. If you intend not to use it for a<br />
longer period (over 3 months), we strongly recommend to store the battery in a cold<br />
place. This will prevent the battery from over-discharging. It will need just 2-3 charge/<br />
discharge cycles to reach full power again!<br />
6.) TROUBLESHOOTING<br />
Failure Caused by Solution<br />
Halogen Lamp does not light and<br />
the LEDs on the PCS do not flash<br />
during initialisation.<br />
.<br />
Over discharged battery.<br />
Battery is not or not<br />
correctly plugged into<br />
the light.<br />
Charge!<br />
Check all connections<br />
Lamp does not light, LEDs of the<br />
PCS do flash during initialisation.<br />
Bulb has blown Replace bulb<br />
Burn times are too short.<br />
7.) TECHNICAL DATA<br />
Battery was not in use<br />
for a long time and has<br />
become "lazy"<br />
Battery is new.<br />
After 2-3 cycles the battery<br />
will operate correctly<br />
Battery is very old Replace with new battery<br />
Cold temperatures Keep the battery warm<br />
Charger is defective Replace charger<br />
Lamp:<br />
Weight complete with rechargeable battery: 600g<br />
Capacity of rechargeable battery / Voltage: 9 Ah 7.2 V Li-Ion<br />
Burn time 25 W: 2 hours 30 Minutes<br />
Burn time 9 W: 5 hours 10 Minutes<br />
Burn time 3 W: 30 hours<br />
Burn time 1 W: 70 hours<br />
Temperature range: - 25°C - +70°C<br />
Beam angle Halogen: 18°<br />
Beam angle LED: 15°<br />
Burn times may vary depending on battery's age, condition and temperature.<br />
Charger:<br />
Input: 100 – 240 V~, 50-60 Hz<br />
Charging current: 2 A max.<br />
Suitable batteries: Li-Ion 2 cells 7,2 V<br />
Display: Control of charging by green and orange LED<br />
Charge Time: 5 h<br />
OTTO 8<br />
7
IMPORTANT NOTES:<br />
Use of this lighting system might be limited differently from country to country depending on<br />
the purpose you use it for. Please do inform yourself about possible restrictions in your<br />
country.The mounting device and the design of the <strong>Otto</strong> 8 as well as of the PCS are protected<br />
by worldwide patents.<br />
<strong>Lupine</strong> Lighting Systems<br />
Altdorfer Str. 17<br />
D-90559 Burgthann<br />
Fon: 0049 91 83 902310<br />
Fax: 0049 91 83 902315<br />
e-mail: info@lupine.de<br />
net: www.lupine.de<br />
OTTO 8<br />
8