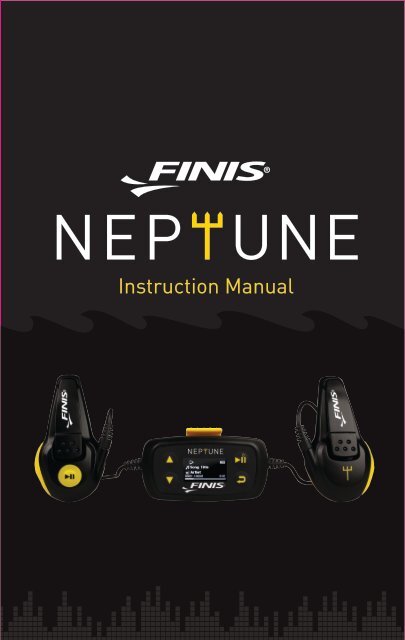
Neptune Instruction Manual (PDF, 16MB) - Finis
Neptune Instruction Manual (PDF, 16MB) - Finis
Neptune Instruction Manual (PDF, 16MB) - Finis

You also want an ePaper? Increase the reach of your titles
YUMPU automatically turns print PDFs into web optimized ePapers that Google loves.
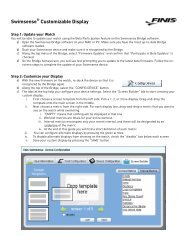
<strong>Instruction</strong> <strong>Manual</strong>
Technical Support<br />
Customer Care<br />
USA Toll Free: 800.388.7404<br />
Europe: 359.2.936. 86.36<br />
Web: www.finisinc.com/support<br />
Facebook: www.facebook.com/FINISinc<br />
Twitter: www.twitter.com/FINISswim<br />
You Tube: www.youtube.com/FINISswim<br />
Download Multilingual <strong>Instruction</strong> <strong>Manual</strong>s:<br />
www.finisinc.com/support/
Table of Contents<br />
01<br />
02<br />
02<br />
03<br />
04<br />
05<br />
06<br />
07<br />
08<br />
09<br />
10<br />
10<br />
10<br />
Included in the Box<br />
General Controls<br />
Playback Features<br />
Care<br />
Charging<br />
Uploading Songs<br />
Supported Audio Files<br />
<strong>Manual</strong> Drag and Drop<br />
iTunes ®<br />
Converting Songs<br />
Windows Media Player ®<br />
Deleting Songs<br />
Safe Removal<br />
Resetting <strong>Neptune</strong><br />
16<br />
17<br />
18<br />
19<br />
Technical Support<br />
System Requirements<br />
Safety Information<br />
Warranty<br />
Compliance Information<br />
Display<br />
11<br />
11<br />
12<br />
13<br />
Turning <strong>Neptune</strong> On/Off<br />
Music Menu<br />
Song Options Menu<br />
Settings Menu<br />
Favorites<br />
14<br />
14<br />
15<br />
Creating a Favorites Playlist<br />
Listening to the Favorites Playlist<br />
Removing Files from the Favorites
Included in the Box<br />
1.<br />
2.<br />
3.<br />
4.<br />
<strong>Instruction</strong> <strong>Manual</strong><br />
1. <strong>Neptune</strong> Mp3 Player<br />
2. Charging Cable<br />
3. Mesh Storage Bag<br />
4. <strong>Instruction</strong> <strong>Manual</strong><br />
1.
General Controls<br />
Scroll Up<br />
Increase Volume<br />
(hold)<br />
Power On/Off (hold)<br />
Play/Pause<br />
Select Option<br />
Scroll Down<br />
Decrease Volume<br />
(hold)<br />
Previous Menu<br />
Playback Features<br />
Shuffle Indicator<br />
Repeat Indicator<br />
Play Status<br />
Battery Indicator<br />
Title<br />
Artist<br />
Current Song<br />
Swim Swim Swim<br />
<strong>Finis</strong><br />
00002/000042<br />
0:44<br />
Play Time<br />
Total Number of Songs<br />
2.
Care<br />
Fitting Guide<br />
Open the clips on the side unit and slide up onto your goggle straps.<br />
Make sure the unit is flush against your head.<br />
It is recommended that the bone conduction speakers be placed in front<br />
of the ear and not over your ear, resting against your temple bone for<br />
ideal clarity.<br />
<strong>Neptune</strong> is best heard underwater where no air is present. Wearing ear<br />
plugs will not only block noise you hear above the water, but it will also<br />
enhance the music quality while swimming.<br />
<strong>Neptune</strong> Care<br />
Rinse <strong>Neptune</strong> with fresh water after every use.<br />
Pat dry and store in safe, cool, dry environment.<br />
Do not place <strong>Neptune</strong> in direct sunlight to dry. This may cause damage<br />
to the casing, battery and charging pins.<br />
Take care to NOT depress buttons with sharp edges such as a<br />
fingernail. Sharp edges may puncture the button surface and cause<br />
water damage.<br />
<strong>Neptune</strong> device is waterproof to 10ft or 3m and can be safely used in<br />
swimming pools, lakes, oceans or any fresh/salt water bodies of<br />
water.<br />
3.
Charging<br />
You can charge and upload songs to <strong>Neptune</strong> using the included<br />
charging cable.<br />
Plug the charging cable directly into the bottom of the back unit.<br />
Plug the USB directly in to the computer’s USB port. The computer<br />
automatically recognizes the device.<br />
The display will read ‘USB Connected’ when the device is charging.<br />
The battery icon will also show a progression to show the device is<br />
charging.<br />
Total charge time is 3 hours. When the device is charged the display<br />
will read ‘Battery Full’.<br />
The rechargaeble Lithium-Ion battery lasts up to 8 hours.<br />
Don’t have a computer? The <strong>Neptune</strong> is compatible with a USB wall<br />
charger (sold separately).<br />
Charging Icons<br />
USB Connected<br />
Battery Full<br />
‘USB Connected’ and the device is charging<br />
The device is now fully charged<br />
Battery Full<br />
The device is charging via a USB wall charger<br />
4.
Uploading Songs<br />
The storage capacity of <strong>Neptune</strong> is 4GB or around 1000 songs.<br />
Supported Audio Files<br />
The <strong>Neptune</strong> allows for non protected MP3, AAC and WMA files to be<br />
directly dragged and dropped onto the “FINIS” drive. Purchased AAC<br />
files must be converted to MP3 files in iTunes ® before they can be<br />
transferred to the “FINIS” drive. Please see the below table for<br />
supported audio files and how to upload the songs to the <strong>Neptune</strong>.<br />
SONG TYPE<br />
HOW TO UPLOAD SONGS<br />
Non Protected MP3, AAC and WMA<br />
Drag and Drop directly onto the<br />
drive<br />
Convert to MP3 files in iTunes<br />
Purchased AAC Files from iTunes ® ® ,<br />
then drag and drop directly on the<br />
drive<br />
Protected MP3, AAC and WMA<br />
Not Compatible<br />
*View song properties to check if song is protected<br />
Tip: If the <strong>Neptune</strong> is freezing or running slow, there may be<br />
non-compatible songs on the device. With the <strong>Neptune</strong> plugged into<br />
the computer, open up the “FINIS” drive and make sure the ‘Type’<br />
column is visible to view the song types. Delete any non-compatible<br />
songs off of the “FINIS” Drive.<br />
5.
Uploading Songs<br />
<strong>Manual</strong> Drag and Drop<br />
The easiest way to upload songs to your device is to drag and drop MP3,<br />
AAC or WMA music directly from your music library onto the “FINIS”<br />
drive.<br />
As soon as you plug <strong>Neptune</strong> into your computer’s USB port, the<br />
computer will automatically recognize the device as a new “FINIS”<br />
drive.<br />
For PC Users: The new removable disc drive will appear in the ‘My<br />
Computer’ menu. For Mac Users: The new removable disc drive will<br />
appear on your desktop as “FINIS.”<br />
Find the music library on your computer that includes the desired<br />
MP3, AAC or WMA song formats.<br />
Drag the desired songs or folders of songs onto the “FINIS” drive.<br />
As soon as you drop the desired songs onto the new “FINIS” drive,<br />
the transfer will automatically start and a status bar will appear<br />
showing the current progress.<br />
While transferring, the display will show ‘Transferring’ on the<br />
<strong>Neptune</strong> display. To confirm that your songs have been successfully<br />
copied to <strong>Neptune</strong>, open up the new “FINIS” disc drive and check<br />
that all of the intended songs were transferred.<br />
Tip: If you need the songs to play in order (while in play all mode),<br />
ensure that you copy a folder of songs and not each song individually<br />
onto the FINIS drive.<br />
6.
Uploading Songs<br />
iTunes ®<br />
You can choose to load audio files to <strong>Neptune</strong> through iTunes ® on a PC<br />
or Mac. Simply drag and drop MP3, AAC or WMA music directly from<br />
iTunes ® onto the “FINIS” drive.<br />
As soon as you plug <strong>Neptune</strong> into your computer’s USB port, the<br />
computer will automatically recognize the device as a new “FINIS”<br />
disc drive.<br />
For PC Users: The new removable disc drive will appear in the ‘My<br />
Computer’ menu.<br />
For Mac Users: The new removable disc drive will appear on your<br />
desktop as “FINIS.”<br />
Find iTunes ® on your computer that includes the desired MP3, AAC<br />
or WMA song formats.<br />
Drag the desired songs onto the “FINIS” disk drive.<br />
As soon as you drop the desired songs onto the new disc drive, the<br />
transfer will automatically start and a status bar will appear<br />
showing the current progress.<br />
While transferring, the display will show ‘Transferring’ on the<br />
<strong>Neptune</strong> display. To confirm that your songs have been successfully<br />
copied to <strong>Neptune</strong>, open up the new “FINIS” disc drive and check<br />
that all the intended songs were transferred.<br />
Tip: Playlist folders cannot be dragged and dropped from iTunes ®<br />
Tip: Make sure the ‘Kind’ column is showing so you can easily identify<br />
the song types which are compatible with the <strong>Neptune</strong>. This is located<br />
in the ‘View’ tab. Select ‘View Options’ and make sure the ‘Kind’ option<br />
is checked.<br />
7.
Uploading Songs<br />
Converting Songs in iTunes ® - PC<br />
With the iTunes ® program open, left click your Main Music Library<br />
so it is highlighted.<br />
Once highlighted, go to your ‘Edit’ tab (located at the top left of the<br />
screen) and select ‘Preferences’.<br />
Under the ‘General’ tab select the ‘Import Settings’ button.<br />
Change your ‘Import Using’ options from AAC encoder to MP3<br />
encoder.<br />
Left click OK to exit ‘Import Settings’ and another OK to exit<br />
‘Preferences’.<br />
To convert the desired track, right click and select ‘Create MP3<br />
Version’.<br />
You will notice that a second copy of that song will be created as a<br />
MPEG audio file. You can now drag the MPEG files to the “FINIS”<br />
drive.<br />
Converting Songs in iTunes ® - Mac<br />
With the iTunes program open, click your Main Music Library<br />
so it is highlighted.<br />
Once highlighted, go to your ‘iTunes’ tab (located at the top left of the<br />
screen) and select ‘Preferences’.<br />
Under the ‘General’ tab select the ‘Import Settings’ button.<br />
Change your ‘Import Using’ options from AAC encoder to MP3<br />
encoder.<br />
Click OK to exit ‘Import Settings’ and another OK to exit ‘Preferences’<br />
Click the desired track you wish to convert. Once highlighted go to<br />
the ‘Advanced’ Menu and select ‘Create MP3 Version’.<br />
You will notice that a second copy of that song will be created as a<br />
MPEG audio file. You can now drag the MPEG files to the “FINIS”<br />
drive.<br />
8.
Uploading Songs<br />
Windows Media Player ® for PC<br />
You can choose to load audio files to <strong>Neptune</strong> through the Windows<br />
Media Player program on a PC. With <strong>Neptune</strong> plugged into your<br />
computer, the new disk drive will automatically recognize in the<br />
Windows Media Player menu.<br />
Open the Windows Media Player music library.<br />
Plug in <strong>Neptune</strong>, the new “FINIS” disc drive will automatically be<br />
recognized in the ‘Sync’ tab.<br />
Select the desired songs or playlists you want to upload to the device.<br />
Drag them onto the new “FINIS” disk drive.<br />
Press the ‘Start Sync’ button as soon as all the songs are setup for<br />
transfer.<br />
You will be able to watch the progress of the transfer and be notified<br />
upon completion.<br />
Please note: After loading songs using Window Media Player, an<br />
automated .xml document will appear on “FINIS” disk drive. Do not<br />
delete the .xml document unless removing all of the songs from the<br />
player.<br />
Uploading Song Icons<br />
USB Connected<br />
‘USB Connected’<br />
Transferring<br />
Transferring songs to the device<br />
9.
Uploading Songs<br />
Deleting Songs<br />
To delete songs from the player, open up the “FINIS” disk drive and<br />
delete the desired songs and folders.<br />
If you are using a Mac please also ensure to empty out your trash after<br />
deleting songs to free up the deleted space on your <strong>Neptune</strong>. This<br />
needs to be done while your <strong>Neptune</strong> is plugged into your computer.<br />
Safe Removal<br />
When all of your song files are completely transferred over to <strong>Neptune</strong>,<br />
it is highly recommended that you ‘safely remove’ the device from your<br />
computer.<br />
Mac ®<br />
Simply grab the FINIS disc drive icon that appeared on your desktop and<br />
drag it to the trash can.<br />
Empty the trash can.<br />
This will eject the drive, making <strong>Neptune</strong> safe to unplug.<br />
Windows ®<br />
Right click the ‘Remove Hardware’ icon loacted in the system tray at the<br />
bottom right of your screen.<br />
A window containing a list of USB devices will appear. Left click on the<br />
‘Safely Remove Mass Storage Device’ line that matches the FINIS disk<br />
drive.<br />
<strong>Neptune</strong> can now be safely unplugged from the USB port.<br />
Resetting <strong>Neptune</strong><br />
To reset <strong>Neptune</strong>, press and hold the ‘Back’ button for 12 seconds. The<br />
device will power off after the unit has been reset.<br />
10.
Display<br />
Turning the <strong>Neptune</strong> Player On/Off<br />
To power <strong>Neptune</strong> on, press and hold the power button for 3-4 seconds.<br />
The FINIS logo will appear with a progress bar. Once powered on, the<br />
device will take you to the main menu.<br />
To turn off <strong>Neptune</strong> press and hold the power button for 3-4 seconds<br />
until you see the FINIS logo.<br />
Please Wait ...<br />
Music<br />
Music Menu<br />
In the main menu, press the play/pause button to access the music<br />
menu.<br />
Press the up or down arrow to highlight an option and press play/pause<br />
to confirm the selection or change the setting.<br />
Choose between:<br />
Play all songs<br />
Play by Artist<br />
Play by Favorites<br />
Music<br />
Play All Songs<br />
Artists<br />
Favorites<br />
Swim Swim Swim<br />
<strong>Finis</strong><br />
00002/000042<br />
0:44<br />
11.
Display<br />
Song Options Menu<br />
Press and hold the ‘Back’ button while on the song playback screen to<br />
show the song options menu.<br />
Press the up or down arrow to highlight an option and press play/pause<br />
to confirm the selection or change the setting.<br />
Choose from the following menu options:<br />
Add to favorites: Add the current song in the favorites playlist<br />
Repeat: Select repeat off, repeat all or repeat one<br />
Shuffle: Turn Shuffle on or off<br />
Equalizer: Change the equalizer mode (flat, bass, pop, rock or jazz)<br />
Delete: Remove the current song from the device<br />
Swim Swim Swim<br />
<strong>Finis</strong><br />
00002/000042<br />
0:44<br />
Add to Favorites<br />
Repeat Off<br />
Shuffle Off<br />
12.
Display<br />
Settings Menu<br />
In the main menu press the ‘Up’ or ‘Down’ button to access the settings<br />
menu. Press the play/pause button to select the settings menu.<br />
Press the up or down arrow to highlight an option and press play/pause<br />
to confirm the selection or change the setting.<br />
Choose from the following menu options:<br />
Shuffle: Select shuffle on or shuffle off<br />
Repeat: Select repeat off, repeat all or repeat one<br />
Equalizer: Change the equalizer mode (flat, bass, pop, rock or jazz)<br />
Screen Saver: Change the screen saver timer (10s, 20s, 30s, 1 min)<br />
If no key is pressed the screen saver will activate to save power after the selected time interval<br />
Power Save: Change the power save timer-Off,1min,2min,5min,10min<br />
If no key is pressed and the device is not in playback mode, <strong>Neptune</strong> will turn off after the<br />
selected time interval<br />
System Info: View the firmware version and available storage space<br />
Restore Defaults: Return the device to factory settings<br />
Languages: Select desired language (English, French, Spanish,<br />
German, Italian, Portuguese)<br />
Shuffle Off<br />
Repeat Off<br />
Settings Equalizer Flat<br />
Tip: To optimize battery life, change the Screen Saver to 10 seconds<br />
and the Power Save to 1 minute.<br />
Tip: To download multilingual instruction manuals, please visit<br />
www.finisinc.com/support<br />
13.
Favorites<br />
Creating a Favorites Playlist<br />
You can create a playlist of your favorite music by adding new files to the<br />
playlist as you listen to them.<br />
To add the current playing song to the favorites playlist:<br />
At the playback screen, press and hold the return button to display<br />
the options menu.<br />
Press the up/down arrow to highlight add to favorites.<br />
Press the play/pause to add the current song to the favorites playlist.<br />
Display will read ‘Added to Favorites Successfully’.<br />
Repeat the above steps to add more songs.<br />
Swim Swim Swim<br />
<strong>Finis</strong><br />
00002/000042<br />
0:44<br />
Add to Favorites<br />
Repeat Off<br />
Shuffle Off<br />
Added to<br />
Favorites<br />
Successfully<br />
Listening to the Favorites Playlist<br />
To listen to the favorites playlist:<br />
Navigate to the high-level music menu.<br />
Press the up/down arrow to highlight favorites. Press play/pause to<br />
select the favorites menu option.<br />
To playback all songs use the up/down arrow to highlight ‘play all<br />
songs’ and press the play/pause to select.<br />
To playback a particular song use the up/down arrow to highlight the<br />
particular song you wish to play and press the play/pause to select.<br />
Play All Songs<br />
Artists<br />
Favorites<br />
Play All Songs<br />
<strong>Finis</strong>- Open Water<br />
<strong>Finis</strong>- Swim Swim<br />
Open Water<br />
<strong>Finis</strong><br />
00001/000012<br />
14.
Favorites<br />
Removing Files From the Favorites Playlist<br />
To remove the current playing song from the favorites playlist:<br />
At the playback screen press and hold the return button to display<br />
the options menu.<br />
Press the up/down arrow to highlight ‘Clear from favorites’.<br />
Press the play/pause, a ‘Clear from favorites’ screen will appear.<br />
Use the up/down arrow to highlight ’yes’ selection.<br />
Press play/pause to remove current song from the favorites playlist.<br />
Swim Swim Swim<br />
<strong>Finis</strong><br />
00001/000012<br />
Clear from Favorites<br />
Repeat Off<br />
Shuffle Off<br />
No<br />
Clear from<br />
Favorites<br />
Yes<br />
Clear from<br />
Favorites<br />
successfully<br />
No<br />
Clear from<br />
Favorites<br />
Yes<br />
Tip: ‘Clear from favorites’ will only show if you are playing the song<br />
from the favorites menu.<br />
Tip: If a song is deleted from the favorites playlist, the song will not<br />
be deleted from the device.<br />
15.
Technical Support<br />
Customer Care<br />
USA Toll Free: 800.388.7404<br />
Europe: 359.2.936. 86.36<br />
Web: www.finisinc.com/support/<br />
Facebook: www.facebook.com/FINISinc<br />
Twitter: www.twitter.com/FINISswim<br />
You Tube: www.youtube.com/FINISswim<br />
Download Multilingual <strong>Instruction</strong> <strong>Manual</strong>s:<br />
www.finisinc.com/support/<br />
System Requirements<br />
Pentium ® III 500 Mhz or higher recommended<br />
Windows XP ® (service pack 1 or higher) or<br />
Windows Vista ® , Windows 7 ®, Windows 8 ®,<br />
Mac ® O.S.9 x or higher<br />
250MB available hard drive space<br />
128MB RAM (256 recommended)<br />
USB Port (2.0 recommended)<br />
Internet access (recommended)<br />
Sound Card (recommended)<br />
16.
Safety Information<br />
Failure to follow these safety instructions could result in hearing<br />
damage, electric shock or other injury or damage.<br />
Permanent hearing loss may occur if <strong>Neptune</strong> is used at a high volume.<br />
Set the volume to a safe level.<br />
Do not attempt to replace the <strong>Neptune</strong> battery, it is built in and not<br />
replaceable.<br />
Charge the battery in accordance with the instructions supplied with<br />
this guide.<br />
Use only the charger supplied by the <strong>Neptune</strong>’s original manufacturer to<br />
charge the battery.<br />
Only use attachments and accessories specified by the manufacturer.<br />
<strong>Neptune</strong> is safe to use in and around the water. It is waterproof to<br />
approximately 3 meters or 10 feet and can be used safely in swimming<br />
pool, lakes, oceans, or any body of fresh or salt water. It should not be<br />
used for any type of scuba, free or skin diving and may malfunction or<br />
fail beyond the maximum depth of 3m/10ft.<br />
Keep <strong>Neptune</strong> out of reach of children, certain parts may create choking<br />
hazards<br />
All users of this product assume risk resulting from its user. Whether<br />
proximate or remote, there are may be a risk of injury. Neither<br />
manufacturer or seller assumes any liability.<br />
If new to an exercise program, consult a physician for precautions<br />
before using.<br />
17.
Warranty<br />
One Year Limited Warranty<br />
<strong>Neptune</strong> is warranted by FINIS to be free of defects in materials of<br />
workmanship, under normal use, for 1 year from the purchase date.<br />
The limited warranty excludes damage resulting from improper care of<br />
handling, accidents, modifications, unauthorized repairs, normal wear<br />
or other causes which are not defects in materials and workmanship. If<br />
there is a covered defect, we will repair or replace the product free of<br />
charge or issue a refund at FINIS’ discretion.<br />
Please visit www.finisinc.com for more information.<br />
18.
Compliance Information<br />
FCC Information<br />
United States<br />
This device complies with part 15 of the FCC rules. Operation is subject<br />
to the following two conditions (1) this device may not cause harmful<br />
interference, and (2) this device must accept any interference received<br />
including interference that may cause undesired operation.<br />
FCC WARNING: any changes or modifications not expressly approved by<br />
the party responsible for compliance could void the user’s authority to<br />
operate this equipment under FCC regulations.<br />
Note: This equipment has been tested and found to comply with the<br />
limits for a Class B digital device, pursuant to part 15 of the FCC Rules.<br />
These limits are designed to provide reasonable protection against<br />
harmful interference in a residential installation. This equipment<br />
generates, uses and can radiate radio frequency energy and, if not<br />
installed and used in accordance with the instructions, may cause<br />
harmful interference to radio communications. However, there is no<br />
guarantee that interference will not occur in a particular installation. If<br />
this equipment does cause harmful interference to radio or television<br />
reception, which can be determined by turning the equipment off and<br />
on, the user is encouraged to try to correct the interference by one or<br />
more of the following measures:<br />
Reorient or relocate the receiving antenna.<br />
Increase the separation between the equipment and receiver.<br />
Connect the equipment into an outlet on a circuit different from that to<br />
which the receiver is connected.<br />
Consult the dealer or an experienced radio/TV technician for help.<br />
19.
Compliance Information<br />
Industry Canada Statement<br />
This device complies with Industry Canada license- exempt RSS<br />
standard(s). Operation is subject to the following two conditions: (1) this<br />
device may not cause interference, and (2) this device must accept any<br />
interference, including interference that may cause undesired operation<br />
of the device.This Class B digital apparatus complies with Canadian<br />
ICES-003.<br />
EU (European Union): Declaration of Conformity with Regard to the EU<br />
Directive 1995/5/EC.<br />
This symbol means that according to local laws and regulations your<br />
product should be disposed of separately from household waste. When<br />
this product reaches its end of life, take it to a collection point<br />
designated by local authorities. Some collection points accept products<br />
for free. The separate collection and recycling of your product at the<br />
time of disposal will help conserve natural resources and ensure that it<br />
is recycled in a manner that protects human health and the<br />
environment.<br />
20.
www.finisinc.com