ALSE UART Igloo nano Starter Kit Tutorial
ALSE UART Igloo nano Starter Kit Tutorial
ALSE UART Igloo nano Starter Kit Tutorial

Create successful ePaper yourself
Turn your PDF publications into a flip-book with our unique Google optimized e-Paper software.
Author : Bertrand Cuzeau – A.L.S.E.<br />
Version : 2.1i – May 2009 - for Libero 8.5<br />
Contact : <strong>ALSE</strong> – http://www.alse-fr.com<br />
E-mail : info@alse-fr.com<br />
Address : 166 bd Montparnasse<br />
: 75014 PARIS - France<br />
Tel. : +33 1 4279 5138<br />
© 2009 - <strong>ALSE</strong> - Bert Cuzeau<br />
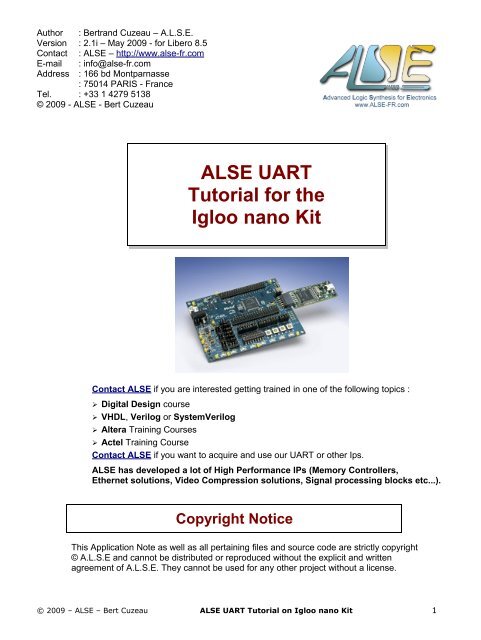
<strong>ALSE</strong> <strong>UART</strong><br />
<strong>Tutorial</strong> for the<br />
<strong>Igloo</strong> <strong>nano</strong> <strong>Kit</strong><br />
Contact <strong>ALSE</strong> if you are interested getting trained in one of the following topics :<br />
➢ Digital Design course<br />
➢ VHDL, Verilog or SystemVerilog<br />
➢ Altera Training Courses<br />
➢ Actel Training Course<br />
Contact <strong>ALSE</strong> if you want to acquire and use our <strong>UART</strong> or other Ips.<br />
<strong>ALSE</strong> has developed a lot of High Performance IPs (Memory Controllers,<br />
Ethernet solutions, Video Compression solutions, Signal processing blocks etc...).<br />
Copyright Notice<br />
This Application Note as well as all pertaining files and source code are strictly copyright<br />
© A.L.S.E and cannot be distributed or reproduced without the explicit and written<br />
agreement of A.L.S.E. They cannot be used for any other project without a license.<br />
© 2009 – <strong>ALSE</strong> – Bert Cuzeau <strong>ALSE</strong> <strong>UART</strong> <strong>Tutorial</strong> on <strong>Igloo</strong> <strong>nano</strong> <strong>Kit</strong> 1
Introduction<br />
This Application Note describes how to get and install the Actel tools, the <strong>Igloo</strong> <strong>nano</strong> Board, and how to<br />
implement and test a small FPGA VHDL project on the <strong>Igloo</strong> <strong>nano</strong> <strong>Kit</strong>, using Actel Libero.<br />
This project includes a simple version of the <strong>ALSE</strong> <strong>UART</strong>, to be used in this <strong>Tutorial</strong> only.<br />
All the source files are provided ready to be used and you do not have to code anything.<br />
The steps to install the tools and the hardware, to build the FPGA project, synthesize, Place and Route,<br />
program the <strong>Igloo</strong> device, and run the tests on the board are all detailed here.<br />
This entire <strong>Tutorial</strong> can be performed in less than one hour.<br />
Pre-requisite<br />
You must have a PC under Windows (XP) with Libero Gold 8.5 (free) properly installed and licensed.<br />
We detail all this installation in this <strong>Tutorial</strong>.<br />
You must have an <strong>Igloo</strong> <strong>nano</strong> <strong>Kit</strong> (< 50 US $). This <strong>Kit</strong> can be purchased for example at :<br />
http://www.mouser.com/Search/Refine.aspx?Keyword=AGLN-Z-NANO-KIT<br />
So, with a PC and for less than 50 $, you can follow this <strong>Tutorial</strong> completely.<br />
Read this document if you want an introduction to RS232 and <strong>UART</strong>s.<br />
Beware: Rights of use<br />
Beware that the <strong>UART</strong> provided here by <strong>ALSE</strong> is not free !<br />
If you want to use it in any real project for any other purpose than education, you must purchase the<br />
license at <strong>ALSE</strong>.<br />
Installing the <strong>Tutorial</strong> Files<br />
If you received an auto-extractible archive, just run it and select C:\ as the installation directory.<br />
Otherwise, create the sub-directory structure and copy these files :<br />
C:\<strong>ALSE</strong><br />
C:\<strong>ALSE</strong>\<strong>Igloo</strong>_<strong>nano</strong><br />
C:\<strong>ALSE</strong>\<strong>Igloo</strong>_<strong>nano</strong>\Src<br />
Use this location.<br />
<strong>Igloo</strong> <strong>nano</strong> <strong>Kit</strong> demo sub-directory, contains this document.<br />
copy here : uart2400.vhd, applic.vhd, top_uart.vhd<br />
Also : make sure the <strong>Igloo</strong> <strong>nano</strong> <strong>Kit</strong> & Flashpro drivers are installed, and verify that jumpers are seated<br />
on JP13-14-15. All this is explained in details in the next pages.<br />
© 2009 – <strong>ALSE</strong> – Bert Cuzeau <strong>ALSE</strong> <strong>UART</strong> <strong>Tutorial</strong> on <strong>Igloo</strong> <strong>nano</strong> <strong>Kit</strong> 2
Installing Actel Libero IDE<br />
Prerequisite<br />
The computer on which Actel Libero will run must have the following characteristics :<br />
powerful PC with Pentium processor or compatible, Windows XP (or Vista), at least 512 Mb of Ram<br />
(XP) and preferably 1G Ram or more, approximately 3 GBytes of free Hard Disk space, display:<br />
1024 X 768 or higher, DVD-ROM (if Libero installed from a DVD).<br />
Beware: you must have administration rights on the computer to install the software, the license<br />
(environment variable) and the USB drivers.<br />
A valid Libero Gold license is necessary for this <strong>Tutorial</strong>. For a lot of Actel devices, the free « Gold »<br />
version is sufficient and can be obtained (for free and very quickly) by contacting Actel on the Web (see<br />
below). This free license is valid for 12 months and can be renewed.<br />
Important : the « Evaluation » license does NOT allow the generation of programming files (bitstreams)<br />
and, by consequence, will not be suitable for this <strong>Tutorial</strong>.<br />
For this <strong>Tutorial</strong>, you must install, license and use Libero Gold Free version 8.5.<br />
Obtaining the Libero Software<br />
During our Training courses, you may use the DVD that <strong>ALSE</strong> has created specifically.<br />
For this tutorial, you might be able to use the DVD that came with the <strong>Kit</strong> if version 8.5, but it is also<br />
possible to download the latest version directly from the Actel Web site :<br />
http://www.actel.com/download/software/libero/default.aspx.<br />
To date, Libero is version 8.5 SP1 (as of March 2009). Be prepared to download a couple Gigabytes...<br />
For this <strong>Tutorial</strong>, you can use either version 8.5 or 8.5 SP1.<br />
Note that there is also a version of Libero suitable for Linux.<br />
Obtaining a License<br />
To use Libero, you need a valid license. To obtain a free one-year Libero Gold license :<br />
➢ Go to : http://register.actel.com/RegSerial.asp and select « Free license» .<br />
➢<br />
➢<br />
➢<br />
➢<br />
Select : « Libero Gold Node Locked for Windows » for the free version.<br />
Select the Operating System (this selection has no consequence).<br />
Enter your Disk Id (use the “vol c:” command for example).<br />
Submit your request. You should receive quickly the license by e-mail.<br />
Note : during the process above, you may be asked to create an account. Proceed as suggested until<br />
you have a valid Actel account which is necessary to receive the license. Carefully remember your<br />
account information for later use.<br />
Beware : As previously mentioned, an « Evaluation » license does NOT permit the generation of<br />
programming files, thus preventing you from using the Actel Board during the <strong>Tutorial</strong> ! Make sure you<br />
install a free Gold license which also covers ModelSim-OEM (not used in this <strong>Tutorial</strong>).<br />
© 2009 – <strong>ALSE</strong> – Bert Cuzeau <strong>ALSE</strong> <strong>UART</strong> <strong>Tutorial</strong> on <strong>Igloo</strong> <strong>nano</strong> <strong>Kit</strong> 3
Installing the License<br />
The E-Mail you receive from Actel (with the license) also contains information about how to proceed.<br />
➢ Create a directory named C: \ FlexLM<br />
➢ Save the license as C: \ FlexLM \ Actel.dat<br />
➢ Add C: \ FlexLM \ Actel.dat in your LM_LICENSE_FILE<br />
Environment Variable.<br />
(Windows key / Pause, Advanced tab, Environment<br />
Variables, System Variables)<br />
NB : you can add this path to an existing contents by prepending<br />
it and using a semi-column as separator : add<br />
« C: \ FlexLM \ Actel.dat; » in front of the current variable's<br />
contents.<br />
NB : we have added spaces for readability, do not use spaces in the actual paths !<br />
Installing Libero<br />
MAKE SURE you are installing the Version that matches your Operating System !<br />
➢<br />
➢<br />
➢<br />
➢<br />
➢<br />
➢<br />
If you received a DVD from <strong>ALSE</strong>, run setup.exe located in the “\Libero” subdirectory.<br />
The 8.5 version on the <strong>ALSE</strong> DVD is for Windows XP/Vista.<br />
Note: if you quickly see an error window with no meaningful message, just acknowledge it: the installation may<br />
continue and be successful.<br />
If you downloaded from Internet, run LiberoIDE85.exe, (as of Feb 2009), select a temporary<br />
location on your hard disk with lots of room available -more than 2GB is currently required-) that will<br />
be used for uncompressing the installation files ! The installation itself then will consume another<br />
~3 GigaBytes. These uncompressed installation files will not necessarily be cleaned up automatically<br />
after the installation, in which case you should remove them manually at the end of the installation.<br />
This explains why you may need more than 3 Gb or free hard disk space during the installation.<br />
License type : select Libero Gold.<br />
Accept the copyright panels and confirm the installation path where you want Libero to reside in.<br />
It is strongly recommended to accept the proposed path. Changing the drive is fine.<br />
It is absolutely necessary to avoid paths that include special characters or spaces.<br />
Select among the list of supported devices and families. If you want to optimize the disk space, you<br />
can keep only some device families (keep at least the <strong>Igloo</strong>s for this <strong>Tutorial</strong> !).<br />
Confirm and be patient while the installation process runs (this may take a while, especially if an antivirus<br />
program is active). You will see some other tools being installed automatically.<br />
You will probably have to restart the computer when the installation is complete.<br />
At this point, you may install the latest Libero Service Pack, if applicable to your version.<br />
As of March 2009, the Service Pack 1 for v8.5 is available.<br />
The installation of Libero is now complete.<br />
➢<br />
➢<br />
Launch Libero, for example with : Start ► Programs ► Actel Libero IDE 8.5 ► Project Manager<br />
Alternatively, you can use the Libero icon on the desktop.<br />
If the license is not correctly installed and valid, the software will complain.<br />
If all seems correct, you should now erase the temporary installation files that may have been left.<br />
If you installed from the DVD provided by <strong>ALSE</strong>, this step may not be necessary.<br />
© 2009 – <strong>ALSE</strong> – Bert Cuzeau <strong>ALSE</strong> <strong>UART</strong> <strong>Tutorial</strong> on <strong>Igloo</strong> <strong>nano</strong> <strong>Kit</strong> 4
Installing & Setting up<br />
the Actel <strong>Igloo</strong> <strong>nano</strong> <strong>Kit</strong><br />
You must have already installed and licensed the Libero 8.5 Gold software, and you must have an active<br />
Internet connection or the CP2102 driver.<br />
<strong>Igloo</strong> <strong>nano</strong> Board<br />
➢<br />
➢<br />
➢<br />
➢<br />
➢<br />
Unpack carefully the <strong>Igloo</strong> <strong>nano</strong> Board.<br />
Install the four spacers and screws. If necessary, remove the protective sticker on the DIP Switches.<br />
Install 20 jumpers (total) on JP14, JP13 and JP15.<br />
Connect the Actel <strong>Igloo</strong> <strong>nano</strong> Board to the PC using one of the provided USB cables.<br />
Windows should detect a New USB device : “CP210x USB to <strong>UART</strong> Bridge”<br />
If it does ask you to install the driver :<br />
- If you have an active Internet connection, you can try an automatic installation.<br />
- If this above fails, you can install the driver manually using the driver archive that you can download<br />
from https://www.silabs.com/products/interface/usbtouart/Pages/default.aspx<br />
Low Cost Programming Stick<br />
➢<br />
➢<br />
➢<br />
➢<br />
Unpack the LCPS programming stick. Do not plug it into the <strong>Igloo</strong> <strong>nano</strong> board yet.<br />
Connect the LCPS to your PC with one of the provided USB cables.<br />
Windows should discover a new USB Peripheral.<br />
Select “Not this time...”, then “Install manually from a list...”, then select the proper installation path for<br />
the FlashPro drivers which could be for example :<br />
C:\Actel\Libero_v8.5\FlashPro\Drivers\auto<br />
Windows should install the driver (you may have to confirm).<br />
Normally, Windows will discover again a new device ! This is normal...<br />
Proceed again exactly as above (manual install, same location for the drivers).<br />
Connecting the Programmer<br />
and the FPGA Board<br />
➢<br />
Un-connect the <strong>Igloo</strong> <strong>nano</strong> Board and the LCPS from the PC.<br />
➢ Attach the LCPS to the <strong>Igloo</strong> <strong>nano</strong> Board matching pins 1.<br />
The LCPS should have the 24 MHz Quartz (and the USB plug) up on the visible side.<br />
➢<br />
Connect again the Board and the LCPS to the PC.<br />
You're set !<br />
© 2009 – <strong>ALSE</strong> – Bert Cuzeau <strong>ALSE</strong> <strong>UART</strong> <strong>Tutorial</strong> on <strong>Igloo</strong> <strong>nano</strong> <strong>Kit</strong> 5
Implementing the<br />
<strong>ALSE</strong> <strong>UART</strong> Project with Libero<br />
Creating the Project<br />
➢<br />
Launch Libero : Start Menu ► Programs ► Actel Libero IDE 8.5 ► Project Manager<br />
or use the icon on the Desktop (if installed).<br />
➢<br />
Project ► New Project.<br />
Project location = C:\<strong>ALSE</strong>\<strong>Igloo</strong>_<strong>nano</strong> :<br />
Project name = top_uart<br />
Select (activate) the VHDL box<br />
click Next ><br />
➢ Select the proper Actel Device :<br />
<strong>Igloo</strong> AGL250V2 - 100VQFP<br />
Click Next > twice.<br />
From the last window, we will add links to the design VHDL files.<br />
➢<br />
Right click on HDL Source Files , select Add Links.<br />
➢ Browse to c:\<strong>ALSE</strong>\<strong>Igloo</strong>_<strong>nano</strong>\Src and select :<br />
uart2400.vhd, applic.vhd, and top_uart.vhd<br />
then Add.<br />
Important In general, you should avoid using the Add Files option :<br />
this option creates a copy of the original source files under top_uart\hdl !<br />
If you modify an original file, Libero will NOT see the change.<br />
If you modify a copy, the original won't be updated.<br />
Since Libero Version 8, we can Create a Link towards an original file instead, which is<br />
usually a better option.<br />
➢ Finish : the project is now created.<br />
© 2009 – <strong>ALSE</strong> – Bert Cuzeau <strong>ALSE</strong> <strong>UART</strong> <strong>Tutorial</strong> on <strong>Igloo</strong> <strong>nano</strong> <strong>Kit</strong> 6
At this stage, we may need to tell Libero that our top level is top_uart :<br />
➢<br />
In the Design Explorer window, Right-click on TOP_<strong>UART</strong>, and Set as Root.<br />
The root (top level of the design) is displayed in bold characters.<br />
➢<br />
Project > Save project.<br />
Logic Synthesis with Synplify<br />
We are now going to use the OEM (Actel) version of Synplify (from Synplicity / Synopsys).<br />
➢ From within the « Design Flow » view, click on :<br />
This opens the Synplify Graphical User Interface.<br />
➢<br />
Enter 20 MHz in the Frequency box (which may not be visible, being located on the far right side)<br />
➢<br />
➢<br />
➢<br />
Click on the (big !) RUN button.<br />
The synthesis must occur without error (the four warnings are normal).<br />
The proper netlist is created for Actel Designer and you will see some post-processing that creates<br />
the post-synthesis model.<br />
The usual FPGA design flow doesn't really require to perform post-synthesis pre-layout simulation.<br />
Close Synplify (you can save -or not- the Synplify project).<br />
© 2009 – <strong>ALSE</strong> – Bert Cuzeau <strong>ALSE</strong> <strong>UART</strong> <strong>Tutorial</strong> on <strong>Igloo</strong> <strong>nano</strong> <strong>Kit</strong> 7
Place & Route with Actel Designer<br />
This step will start from the netlist generated by Synplify to Map, Place and Route the logic in the FPGA.<br />
It is often referred to as “Layout”, “Place & Route” or also “Fitting”.<br />
➢ Click on :<br />
➢<br />
You must select the exact device used on the hardware platform : type, reference, package, supply,<br />
speed grade, default I/O format etc... If needed, check with the board you are using.<br />
For the <strong>Igloo</strong> <strong>nano</strong> <strong>Kit</strong> : AGL250V2-100 VQFP, STD 1.2V, I/O LVCMOS 3.3V, Range COM.<br />
This brings the following pane :<br />
© 2009 – <strong>ALSE</strong> – Bert Cuzeau <strong>ALSE</strong> <strong>UART</strong> <strong>Tutorial</strong> on <strong>Igloo</strong> <strong>nano</strong> <strong>Kit</strong> 8
The next step is to let Actel Designer analyze (“compile”) the design in order to discover and check the<br />
contents (from the netlist file).<br />
➢ Click on the Compile button.<br />
On the next pane, click on OK to accept the default compilation<br />
settings. The compilation should succeed and the Compile<br />
button turns Green.<br />
Pin Name<br />
Clk<br />
RS232_RX<br />
Location<br />
15<br />
16<br />
We are now going to Assign the Pins.<br />
The table on the right sums up all the assignments to perform.<br />
RS232_TX<br />
LEDS(0)<br />
19<br />
35<br />
Note that the DIP Switches pins (not used in this project) are :<br />
26 - 28 - 29 - 30 - 31 - 32 - 33 - 34<br />
Push buttons pins are : 20 – 21 – 22 - 23<br />
➢<br />
Click on Pin Editor.<br />
➢ This should to bring up this view :<br />
LEDS(1) 36<br />
LEDS(2) 40<br />
LEDS(3) 41<br />
LEDS(4) 42<br />
LEDS(5) 43<br />
LEDS(6) 34<br />
LEDS(7) 45<br />
Use zooming and scrolling commands to display the desired pins.<br />
© 2009 – <strong>ALSE</strong> – Bert Cuzeau <strong>ALSE</strong> <strong>UART</strong> <strong>Tutorial</strong> on <strong>Igloo</strong> <strong>nano</strong> <strong>Kit</strong> 9
➢ Do not forget to activate this tab : in order to restrict the display to I/Os only.<br />
➢<br />
➢<br />
➢<br />
Using the mouse, drag the Clk pin from the left window and drop it on the desired rectangle in the<br />
component view (<strong>Igloo</strong> <strong>nano</strong> : pin 15).<br />
Use the same method to assign all the other I/Os according to the table on the previous page.<br />
When done, quickly check again the assignment of all the pins.<br />
➢ When all pins are correctly assigned :<br />
Click on the “Commit and Check” button to record these assignments.<br />
➢<br />
Close this view.<br />
It's now time to launch the actual implementation (layout) of the design for the selected FPGA..<br />
➢ Under Designer, click on : and accept the default options.<br />
Wait until Layout (Place & Route) has finished (the Layout button turns green too).<br />
Static Timing Analysis<br />
It is important to display and check the Static Timing Analysis results.<br />
This will give us the true Fmax reached after Place & Route (aka Layout).<br />
➢ Click on the button : to launch SmartTime.<br />
➢<br />
➢<br />
➢<br />
Verify that the design will easily work at 20 MHz.<br />
Click on : Clk – Register to Register to display the Tsu (slack) histogram.<br />
You can identify the critical (longest) path (ie smallest slack).<br />
Close SmartTime.<br />
© 2009 – <strong>ALSE</strong> – Bert Cuzeau <strong>ALSE</strong> <strong>UART</strong> <strong>Tutorial</strong> on <strong>Igloo</strong> <strong>nano</strong> <strong>Kit</strong> 10
Generating the Programming file<br />
We just have to click on :<br />
, verify that “FPGA Array” is checked,<br />
then Finish, and Generate.<br />
The programming file extension is “.pdb“ for the <strong>Igloo</strong> devices.<br />
➢<br />
Close Designer once the Programming file is generated (save the database when asked to).<br />
Programming the Device<br />
➢<br />
➢<br />
➢<br />
From within Libero, click on the button labeled FlashPro.<br />
Note that you could create a specific « Flashpro » project, but the default project will do.<br />
Make sure the LCPS (Programmer device) is plugged in, recognized, and enabled.<br />
If necessary, click on “Refresh/Rescan for Programmers” until you see the FlashPro3 programmer.<br />
➢ Click on « PROGRAM ».<br />
Important : the Erase + Program + Verify operations take some time to complete ! This duration<br />
depends on several factors, including the device batch, the wear out, etc. For the <strong>Igloo</strong> <strong>nano</strong> <strong>Kit</strong>, the<br />
whole process (Erase/Program/Verify) should typically take a bit more than one minute.<br />
If all went well, the LEDs should now display a pattern (Off-On-Off-On-Off-On-Off-On).<br />
➢<br />
➢<br />
You can close FlashPro.<br />
You can also close Libero IDE : our FPGA board is now programmed and ready.<br />
© 2009 – <strong>ALSE</strong> – Bert Cuzeau <strong>ALSE</strong> <strong>UART</strong> <strong>Tutorial</strong> on <strong>Igloo</strong> <strong>nano</strong> <strong>Kit</strong> 11
Testing on the <strong>Igloo</strong> <strong>nano</strong> <strong>Kit</strong><br />
➢<br />
➢<br />
Open HyperTerminal.<br />
If you don't have HyperTerminal (Vista), download the free utility : PuTTY.exe version 0.60 or later.<br />
http://the.earth.li/~sgtatham/putty/latest/x86/putty.exe<br />
Select the proper COM port (USB Silicon Labs), which may be COM3 (it may be a different port).<br />
Select 2400 bauds, 8 data bits, 1 stop bit, No Parity, no hardware handshaking protocol (none).<br />
➢ In the Serial Communication Terminal window type a question mark “?”.<br />
You should see the <strong>ALSE</strong> prompt returned by the <strong>Igloo</strong> board.<br />
➢<br />
➢<br />
➢<br />
Type in characters, they should be echoed.<br />
Type the number “1” : a dot “.” is echoed.<br />
Then if you type a string, each character echoed will be offset by 1.<br />
Type “0” : the offset is removed.<br />
You should also see the LEDs display the ASCII code of the characters that you type.<br />
Note that the <strong>ALSE</strong>'s stand-alone 2400 Bauds <strong>UART</strong> used in this example project uses only 237 Core<br />
Cells (less than 4% of the <strong>Igloo</strong> device which could then hold 25 such <strong>UART</strong>s !). This <strong>UART</strong> module is<br />
provided here under the form of an <strong>Igloo</strong> netlist but should not be used in another context.<br />
Contact <strong>ALSE</strong> if you want to purchase one of the source code versions.<br />
Appendix<br />
Useful Pins Assignments<br />
Pin Name Location<br />
Clk 15<br />
Reset_n 10<br />
RS232_RX 16<br />
RS232_TX 19<br />
LEDS(0) 35<br />
LEDS(1) 36<br />
LEDS(2) 40<br />
LEDS(3) 41<br />
LEDS(4) 42<br />
LEDS(5) 43<br />
LEDS(6) 44<br />
LEDS(7) 45<br />
Pin Name Location<br />
SW1 20<br />
SW2 21<br />
SW3 22<br />
SW4 23<br />
DIP-SW5(1) 26<br />
DIP-SW5(2) 28<br />
DIP-SW5(3) 29<br />
DIP-SW5(4) 30<br />
DIP-SW5(5) 31<br />
DIP-SW5(6) 32<br />
DIP-SW5(7) 33<br />
DIP-SW5(8) 34<br />
© 2009 – <strong>ALSE</strong> – Bert Cuzeau <strong>ALSE</strong> <strong>UART</strong> <strong>Tutorial</strong> on <strong>Igloo</strong> <strong>nano</strong> <strong>Kit</strong> 12
The End<br />
With this small <strong>Tutorial</strong>, apart from verification (HDL simulation), we've walked through most of the steps<br />
in the FPGA Design Flow to implement an HDL Design in an Actel FPGA. You should be able now to<br />
start using your own design files and test them in the <strong>Igloo</strong> <strong>nano</strong> <strong>Kit</strong>.<br />
Keep in mind that you do not have any right to use the files provided in your own design, so we do not<br />
have to warn you about the legal limitation on suitability etc...<br />
If you have questions, suggestions, ideas,<br />
or if you want to Contact <strong>ALSE</strong> for any reason,<br />
please fell free to do so :<br />
Bertrand Cuzeau<br />
Technical Manager <strong>ALSE</strong><br />
info@alse-fr.com<br />
Tel +33 1 42 79 51 38<br />
Please : do not contact us for Technical Support of free demos, free IPs and free <strong>Tutorial</strong>s !<br />
Only paying IPs and customers are entitled to receive our Technical support and Assistance.<br />
© 2009 – <strong>ALSE</strong> – Bert Cuzeau <strong>ALSE</strong> <strong>UART</strong> <strong>Tutorial</strong> on <strong>Igloo</strong> <strong>nano</strong> <strong>Kit</strong> 13